1. Champagne linen runner with a 12-inch 'photo edge'
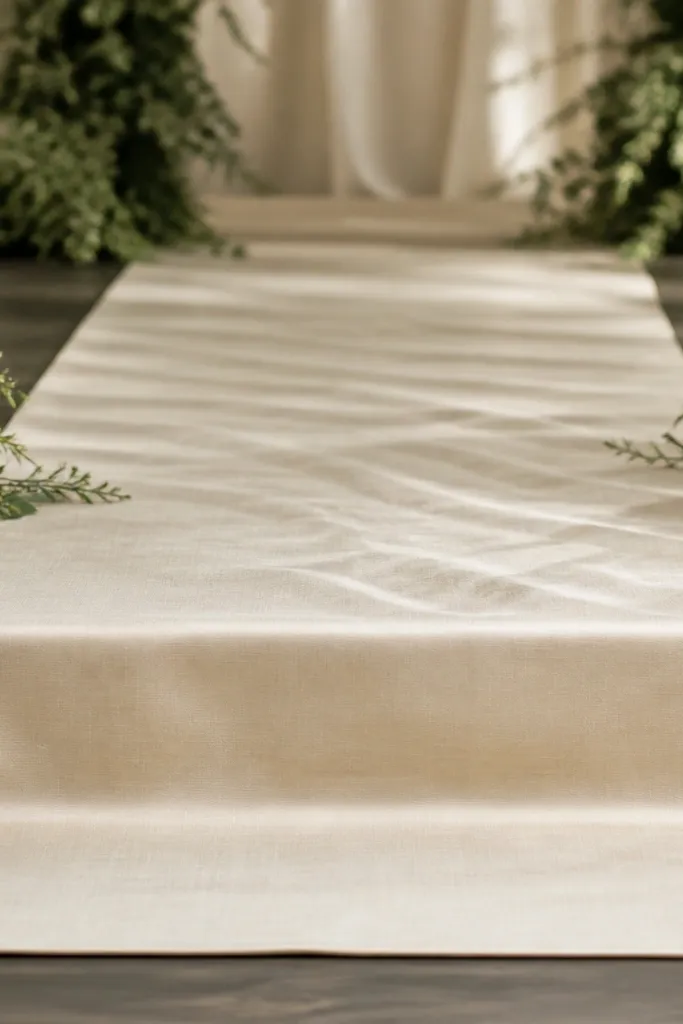
I use a champagne linen runner when the stage floor is dark or patterned, because it gives the camera a clean anchor without looking like a tablecloth. The warm tone flatters most skin undertones - especially if the couple is in ivory or warm white outfits. The slight sheen catches overhead lights without looking glossy like cheap polyester. The key is the front edge - that 12-inch band becomes the "photo edge" where your couple stands, so the stage reads intentional instead of messy.
Start by measuring the stage width and leaving 6-10 inches of space on both sides for airflow and greenery. Drape the runner so the front edge sits where you want the couple's feet to land, then fold or tuck the front edge to create that 12-inch highlight band. Smooth only the top layer; leave gentle natural wrinkles so it doesn't look stretched. Place two small greenery clusters 18-24 inches from each side seam, then repeat a single ribbon color in a bow at each end of the runner.
Try thisUse fabric clips under the fold so the edge stays sharp during walk-throughs and rehearsal.
Common mistakeAvoid a runner that's too narrow - it makes the stage look like a strip instead of a designed base.
2. Two-tier pedestal mix with mirrored tops
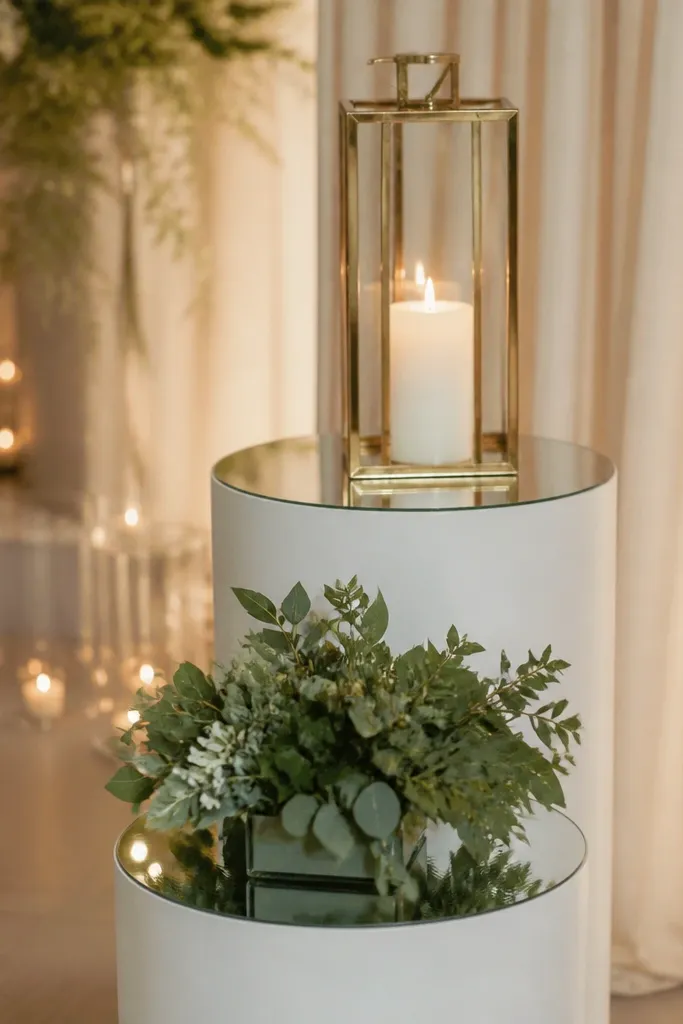
Mirrored tops are my go-to when the venue lighting is flat and warm photos turn out dull. The reflection bounces light back into the faces, which makes skin tones look healthier on camera. Matte pedestals keep it classy and prevent the mirror from dominating the frame. This setup flatters taller couples too because the mirrored circles give vertical balance without needing a huge arch.
Choose two pedestal heights that differ by about 12-18 inches so the candle reads clearly above the couple's shoulders. Set the mirror tops slightly off-center - around 2-3 inches - so they catch light as people move. Put a tall lantern or slim vase on the upper tier and keep the lower tier tighter, about 10-12 inches wide. Tie a ribbon wrap around the pedestal base at one level only, then anchor with a small greenery ring so it doesn't look like separate items.
Try thisBring a small LED flashlight and test where the reflection lands before the ceremony starts.
Common mistakeAvoid high-gloss mirror finishes directly under spotlights that cause harsh glare in photos.
3. Backdrop drape with 'tension seams' instead of full sag
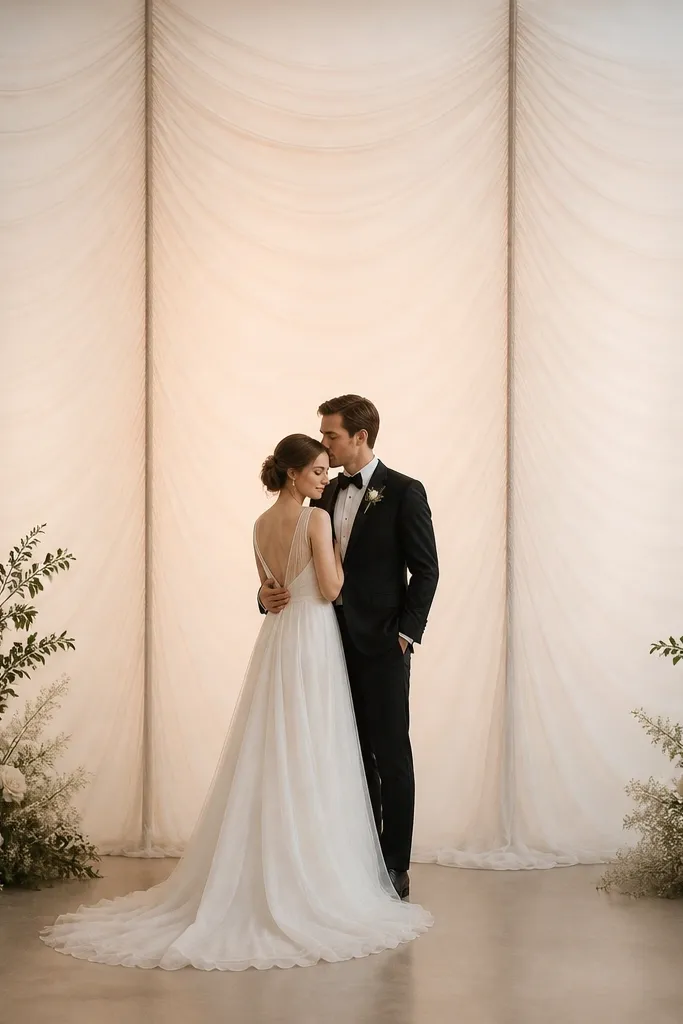
Full-sag draping looks romantic up close, but from the back row it turns into one big blur. Tension seams fix that by giving the camera vertical structure. I prefer a sheer outer layer over a heavier inner panel, because the outer layer moves while the inner layer holds shape. This works well for all body types because the backdrop lines pull the eye upward toward faces, not down toward the floor.
Hang your heavier inner panels first, spaced about 2.5-3 feet apart to create three columns. Add the sheer layer over the top, then pull it tight at the seam points using zip ties or drapery clips behind the frame. Leave 8-10 inches of softness in the middle between seams so it still looks natural. Center the strongest vertical seam behind where the couple's heads will be, then hide hardware with a thin strip of matching fabric.
Try thisPin a small test section to the back of the stage frame and take a quick phone photo from the last row.
Common mistakeAvoid letting the drape pool at shoulder height - it makes the couple look lost in the fabric.
4. Greenery 'ladder' on the left and right sightlines
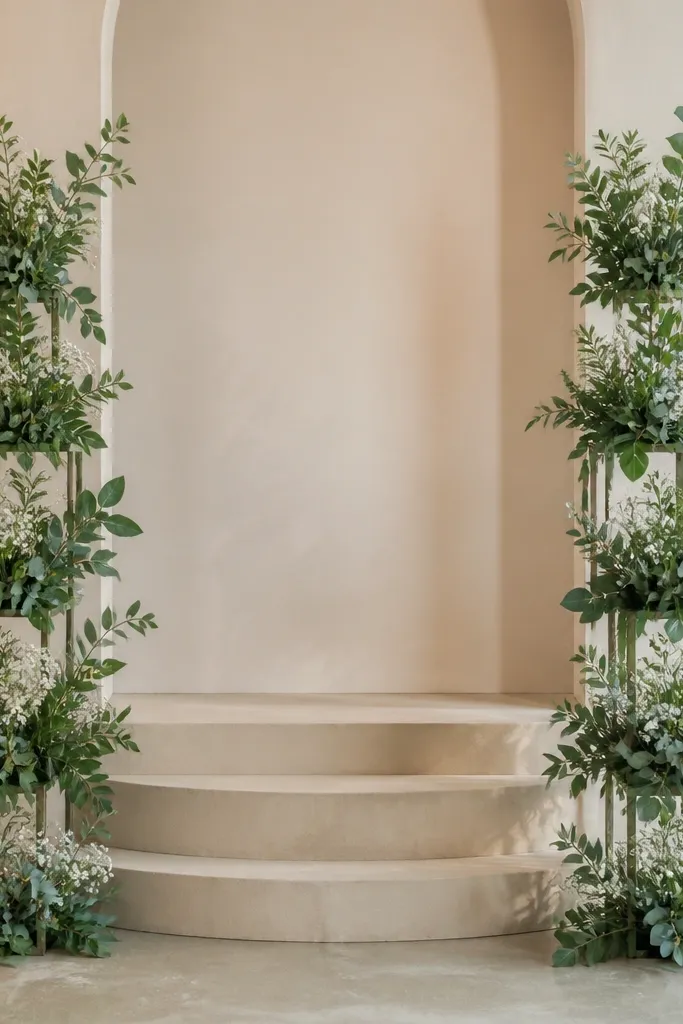
This is how you make greenery look designed instead of accidental. A ladder layout creates height variation without blocking the couple, and it keeps the stage edges from looking empty in wide photos. I use matte eucalyptus or olive greens because they read clean under overhead lighting. The filler flowers are small and tight - think mini white blooms - so they don't compete with the main bouquet.
Start by building a foam or chicken-wire base at each stage edge, about 10-12 inches deep. Arrange greenery in three levels: 18 inches, 30 inches, and 42 inches from the base, spacing each level 6-8 inches apart. Tuck mini white blooms only at the top level and one side of the middle level. Finish by tying a narrow ribbon strip around the base of the ladder so the greens look anchored, not floating.
Try thisKeep the ladder angled slightly inward by 5-10 degrees so it frames the couple rather than hugging the side walls.
Common mistakeAvoid thick, bushy clusters at the bottom - they swallow the ladder shape and look heavy.
5. Tall candle lantern trio with warm white bulbs
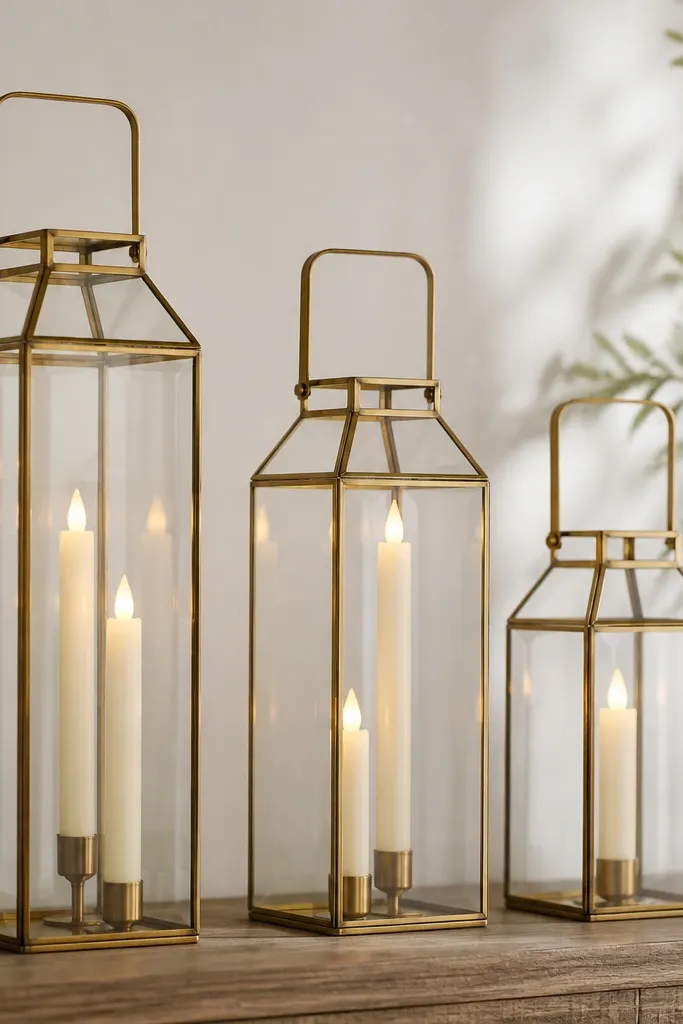
Lantern light instantly makes a stage look more intimate, and the warm bulbs are the difference between "pretty" and "photogenic." I keep the lantern glass clear or lightly smoked so it doesn't turn the light blue on camera. A trio reads balanced without taking up too much floor space. This works for both men and women outfits because it adds warm highlights that flatter skin and soften shadows.
Pick three lanterns with height differences of about 6-10 inches, then place them in a straight line 24-30 inches apart. Use LED tapers with warm white settings (2700K if you can find it) and test for flicker behavior - steady looks better in video. Add greenery around the base of each lantern, not inside the glass, so the light stays clean. Finish with a narrow satin ribbon in blush or ivory tied around the lantern handle area.
Try thisTurn the lanterns on during rehearsal and watch how they look in the camera app, not just in your eyes.
Common mistakeAvoid cool white LEDs - they make glass reflections look bluish and cheap.
6. Low floral row on the stage front with 18-inch spacing
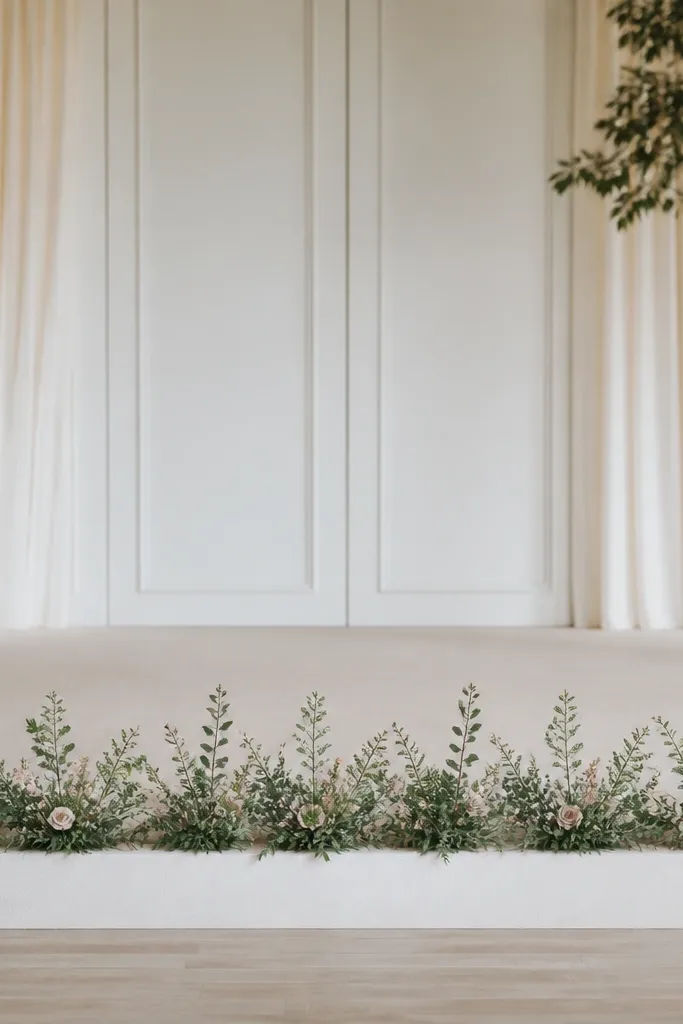
Low floral rows are the secret weapon for ceremony photos because they sit in the foreground without hiding the couple. Even spacing makes the stage feel designed and gives the camera a rhythmic pattern. I use mixed greenery with small, tight blossoms so the arrangement stays readable at a distance. This flatters shorter couples because the flowers don't pull attention away from faces - they frame the lower half.
Measure the stage front and mark positions every 18 inches, then build each segment as a small base cluster. Keep each cluster under 10 inches tall so it stays below waist level. Choose one main accent color (blush or dusty rose) and limit it to about 30% of the visible blooms. Lay the row starting 6-8 inches from each side edge, then tie a matching ribbon loop at the center cluster only.
Try thisUse zip ties to attach stems to the base so nothing shifts when people walk past.
Common mistakeAvoid one long tangled garland - it looks uneven and collapses in photos.
7. Seating aisle markers that match your stage fabric
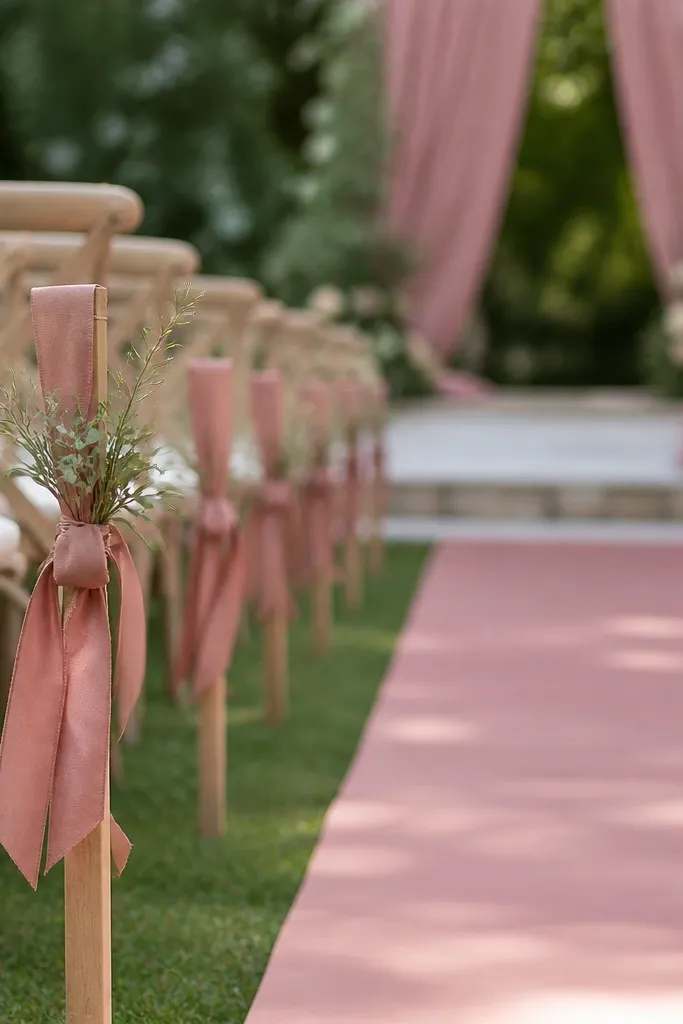
Most people decorate the stage and forget the path that leads to it. When the aisle markers echo your stage fabric color, the whole wedding looks cohesive in pictures. I've used this with both men and women guests in mind because it also helps people visually orient toward the ceremony spot. The markers work best when they're small enough to avoid crowding the aisle but bright enough to read in wide shots.
Pick one fabric tone from your stage - champagne, ivory, or a warm blush - and buy ribbon in the same color family. Wrap ribbon around simple stakes or weighted bases and add a 4-6 inch greenery tie near the top. Place markers in pairs at 6-8 feet intervals along the aisle, starting at the first row so wide shots catch them. Finish each marker with a tiny bow tail length of about 6 inches so it doesn't look messy.
Try thisBring a scrap of your stage fabric and compare it under the venue lights at setup time.
Common mistakeAvoid mixing random ribbon shades - mismatched undertones show up hard under warm lighting.
8. Acrylic welcome sign with vinyl lettering for clean edges
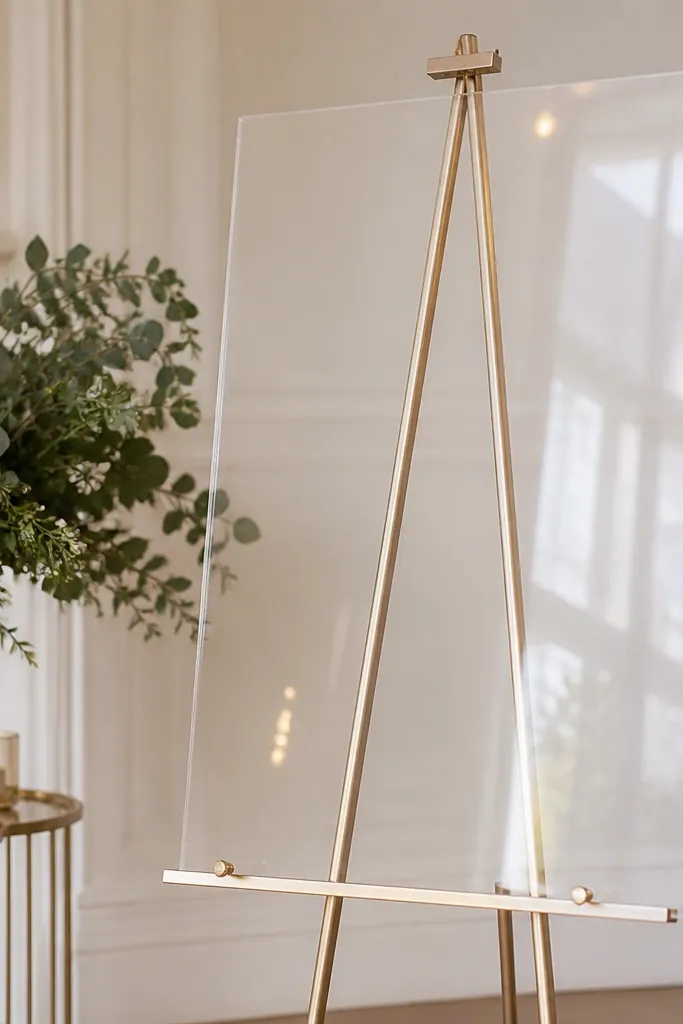
Clear acrylic with vinyl lettering looks crisp even in harsh indoor lighting. The edges stay sharp, so your sign doesn't blur into the background like printed cardstock. I like it for weddings where the stage has lots of texture, because the sign adds a clean graphic element. This is flattering in photos for both lighter and deeper skin tones because the dark vinyl sits high-contrast against the glass reflections.
Choose acrylic that's at least 12x18 inches so it reads from the back row. Draft your text in all caps and keep letter height around 2.5-3 inches for legibility. Apply vinyl lettering directly to the acrylic with transfer tape to prevent crooked edges. Add a weighted acrylic stand base and pair it with a small greenery cluster (under 8 inches tall) so it doesn't compete with the main backdrop.
Try thisDo a test photo from the last row and adjust letter size before you commit.
Common mistakeAvoid thin serif fonts - they look elegant up close but disappear in wide shots.
9. Stage arch with a 'negative space' center
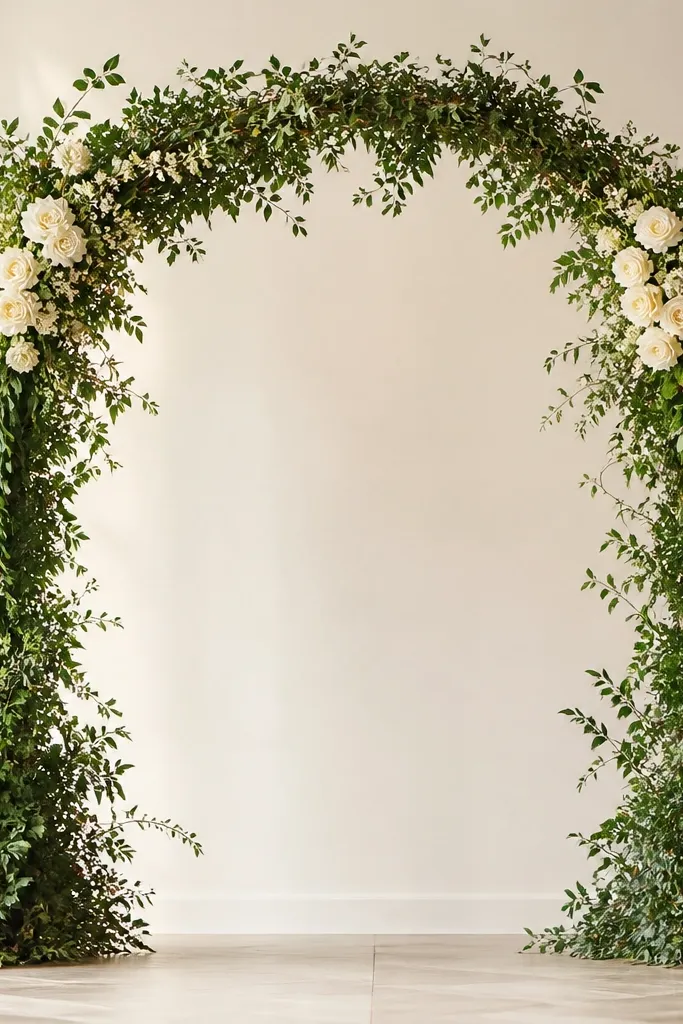
A full, dense arch can swallow the couple in photos. Leaving a negative space center makes the arch read as a frame instead of a wall. I build arches with two dense outer columns and a lighter center, then add flowers only near the top to keep the center airy. This flatters all heights because the framing naturally pushes attention to faces and posture.
Start with a lightweight arch frame and wrap it in greenery at the outer edges first. Build two thicker columns, each about 10-12 inches wide, then leave the middle open or sparsely filled. Add mini white blooms at the top corners and one small cluster at eye level on each column. Cover the base with a flat floral foam or a weighted base plate and hide it with a short greenery skirt that stays under 10 inches tall.
Try thisHold your phone at chest height and check that the couple's heads fall inside the open center before you secure everything.
Common mistakeAvoid adding flowers all the way down the center - it kills the frame effect.
10. Ribbon cascade on the aisle rail with 24-inch tails
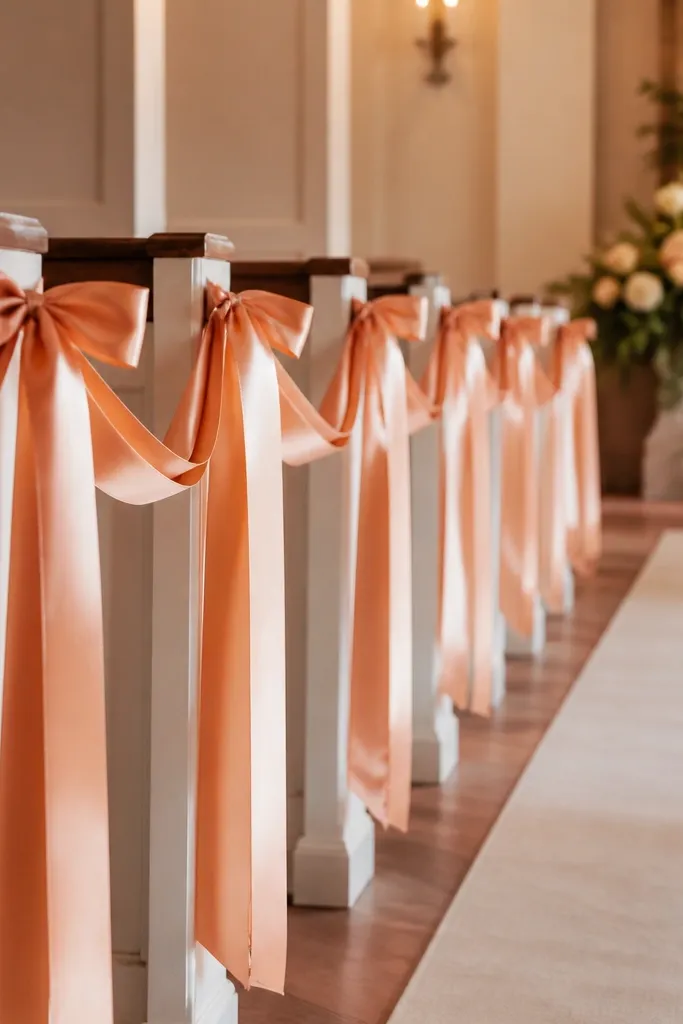
Ribbon cascades look expensive when the tails are the right length and the loops are consistent. The 24-inch tail length gives movement without tangling and looks good in both video and still photos. I choose a warm accent ribbon like dusty rose, then anchor it with greenery ties so the aisle doesn't look bare. This works for all guest heights because the ribbon creates a guiding line toward the stage.
Tie ribbon loops every 16-20 inches along the rail, using a simple double-knot so the loop doesn't slip. Cut tails to 24 inches from the knot point, then steam or lightly press for clean edges. Add a small greenery tie at every third loop so the ribbon doesn't look like it's floating. Keep the ribbon color limited to two tones max - one main and one thin accent strip.
Try thisIf the aisle is windy or fans are used, shorten tails to 18-20 inches and add a tiny fabric weight at the end.
Common mistakeAvoid uneven tail lengths - it reads messy in wide shots.
11. Fabric-wrapped columns with hidden weight blocks
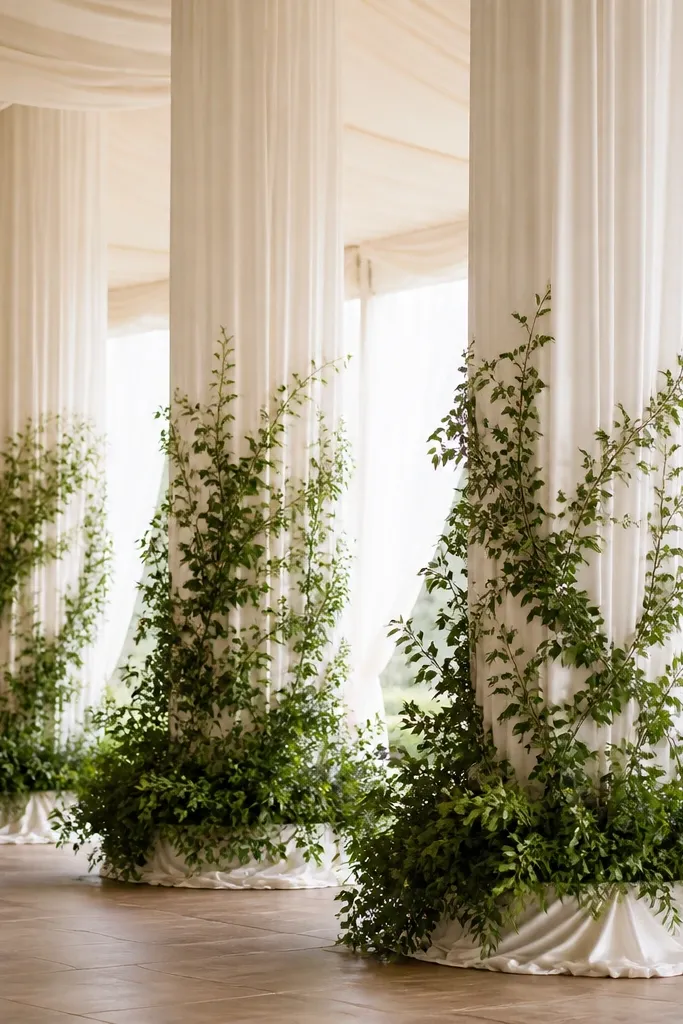
Wrapped columns give you height without an obvious prop vibe. The vertical folds make the column look taller and cleaner in photos, especially when the stage has plain walls behind. I use ivory fabric over a slightly thicker base so it hangs with weight - thin fabric looks wrinkled in a bad way. Columns flatter petite couples because they add frame height without crowding the couple's center.
Use foam or weighted base blocks so the column doesn't wobble, then wrap with ivory fabric cut to cover fully without seams showing. Secure fabric at the top and bottom with hidden pins or zip ties through the frame. Leave vertical folds by tugging fabric gently while wrapping, then press lightly at the end for a crisp look. Hide the base with a 12-inch greenery skirt and add one ribbon wrap at mid-height.
Try thisSet columns 3-4 feet apart so they frame the couple and don't collide with bouquets in photos.
Common mistakeAvoid fabric that's too thin - it shows bumps and makes the column look like a cheap sleeve.
12. Floor lantern clusters with mirrored trays
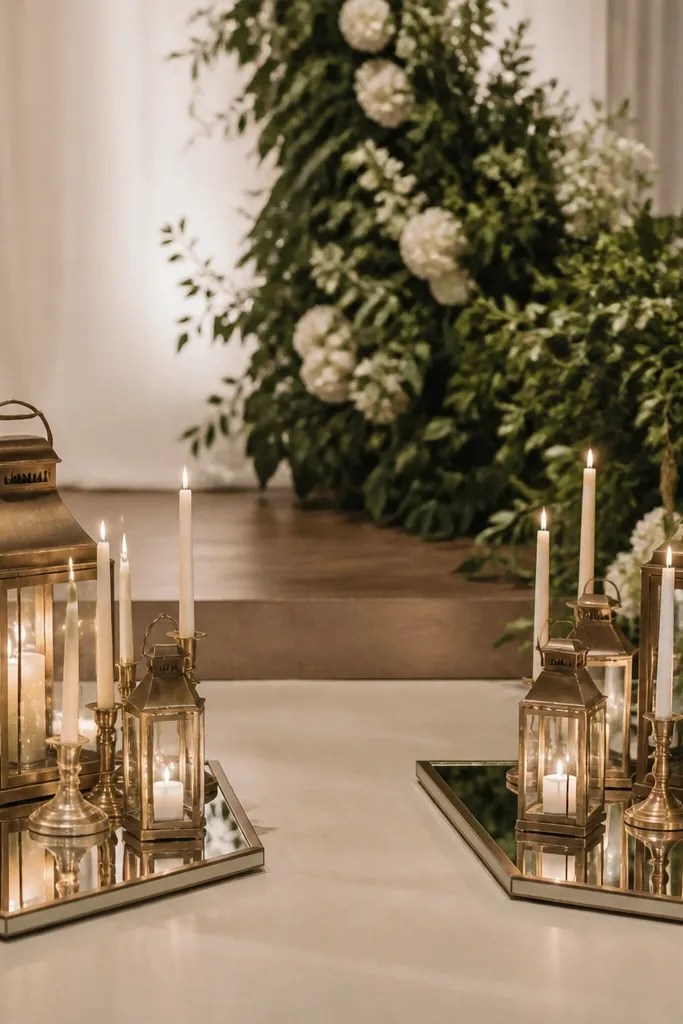
I love mirrored trays on the floor because they create depth when the stage floor is plain. The mirror also makes the candle light look brighter without adding more candles. Keep the cluster tight and symmetrical so it looks intentional rather than cluttered. This works especially well for evening ceremonies because the warm light reflections fill the lower frame area.
Choose mirrored trays about 18-24 inches wide and place them 4-6 feet apart on the stage floor. Build a cluster inside each tray with 3-5 small lanterns, plus one taller taper candle in the center. Add greenery at the tray edge only so the candles stay clean. Tie a ribbon around the tray handle if it has one, or wrap a thin ribbon strip around the front edge for continuity with your stage decor.
Try thisWipe mirror surfaces right before the ceremony to remove dust - it shows up as grey haze in photos.
Common mistakeAvoid overcrowding the tray - dense clusters create a dark blob under overhead lights.
13. Matte greenery swag on a simple metal frame
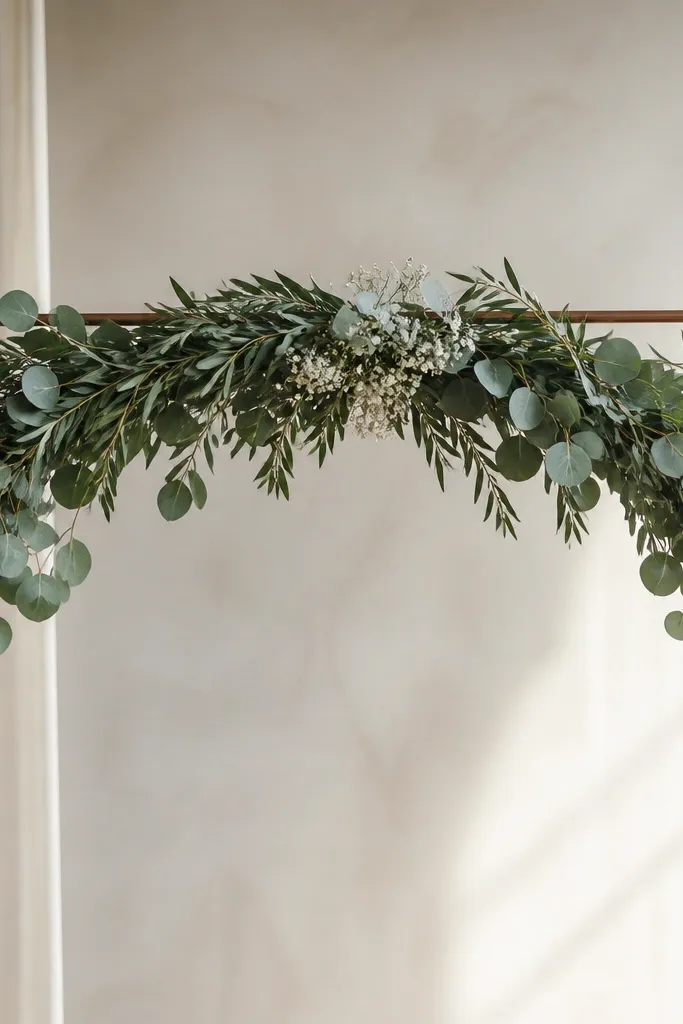
A matte greenery swag looks clean and expensive because it avoids the "glossy plastic" vibe that some faux greens get. The smooth arc gives the stage a soft shape even when you have a busy backdrop. I keep the filler flowers minimal so the greens do the work, and the white accents brighten faces in photos. This is flattering for both men and women because it doesn't have busy patterns that compete with outfits.
Start with a metal frame sized to your stage width, then attach greenery from the center outward. Build a smooth arc so the center dips slightly lower than the ends, about 4-6 inches. Tuck white filler flowers only at the center third so the eye lands there. Secure with floral wire, then add a thin fabric strip at each side to hide attachment points.
Try thisPress a small amount of greenery into the frame with your palm so it holds shape when the venue is warm.
Common mistakeAvoid shiny accents on greens - they reflect harshly and look cheap under spotlighting.
14. Curtain-style balloon clusters behind the couple
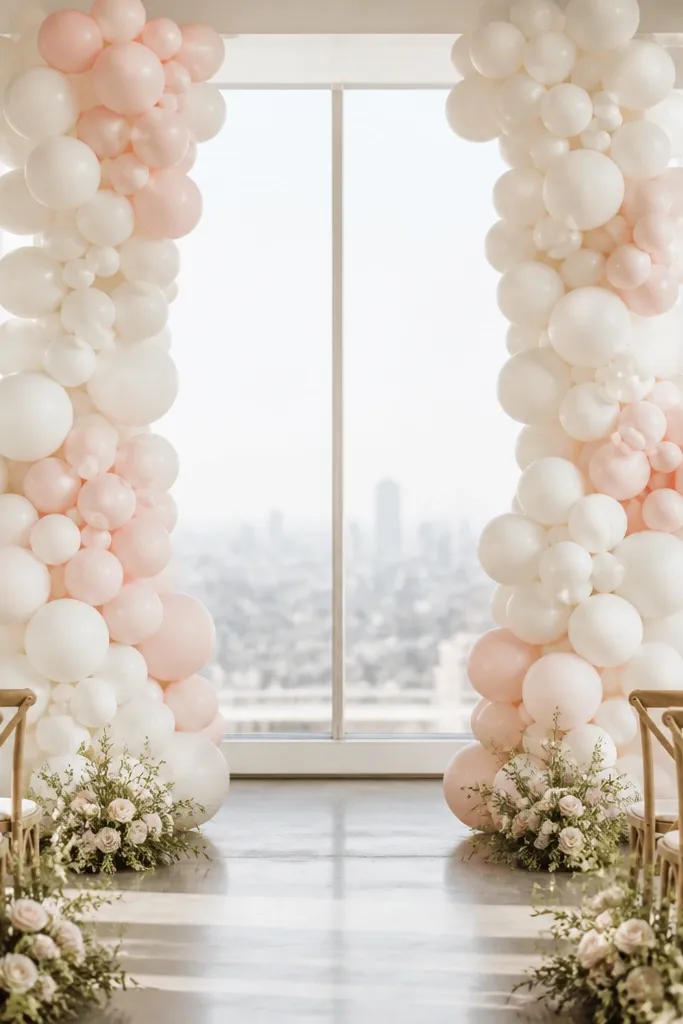
Balloon decor can look childish if it's all one color and one size. I use balloon clusters arranged in two columns with a clear center gap, so the couple stays the focal point. Matte finishes reduce glare, and the blush/ivory mix warms up skin tones. This is especially good when you don't have time to build a full arch and still want depth behind the couple.
Use matte latex or matte balloon latex in two tones: ivory and blush. Build two vertical columns of clusters, leaving a 2-3 foot gap in the center where the couple stands. Mix sizes - include a few larger 18-inch balloons for structure and smaller 12-inch balloons for texture. Tie clusters to a hidden line or frame behind the stage, then anchor with weights at floor level so they don't drift.
Try thisChoose balloons with less shine and do a quick test photo under overhead lights before final placement.
Common mistakeAvoid placing balloons too close to faces - they can create distracting reflections and block sightlines.
15. Stage front garland with ribbon ties every 10 inches
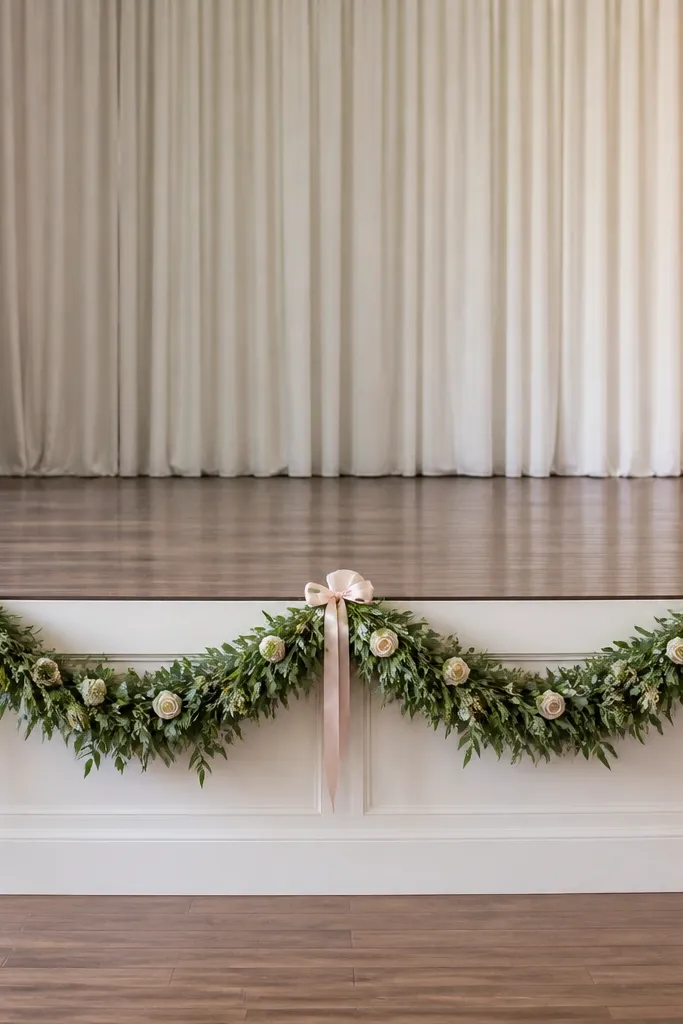
Most stage garlands look uneven because they're attached in one spot and then settle. Ribbon ties every 10 inches control the wave so it stays consistent from the audience angle. I like a garland that mixes matte greenery with light blush filler so it doesn't look heavy. The even rhythm makes it flattering in photos because it creates a tidy border around the couple's lower frame.
Lay your garland across the stage front and mark where it naturally wants to sag. Attach the garland to the front edge with floral wire at the first anchor point, then add ribbon ties at 10-inch intervals to keep the wave shape. Use thin satin ribbon in ivory or blush and tie in the same direction each time so the tails don't flip. Keep the blush accents to one side of the garland so it looks like a planned gradient instead of random dots.
Try thisTake one photo from the back seat while someone holds the garland in place; adjust sag before you secure fully.
Common mistakeAvoid leaving it untied - even one loose section makes the whole front look sloppy.
16. White taper candle heights matched to microphone height
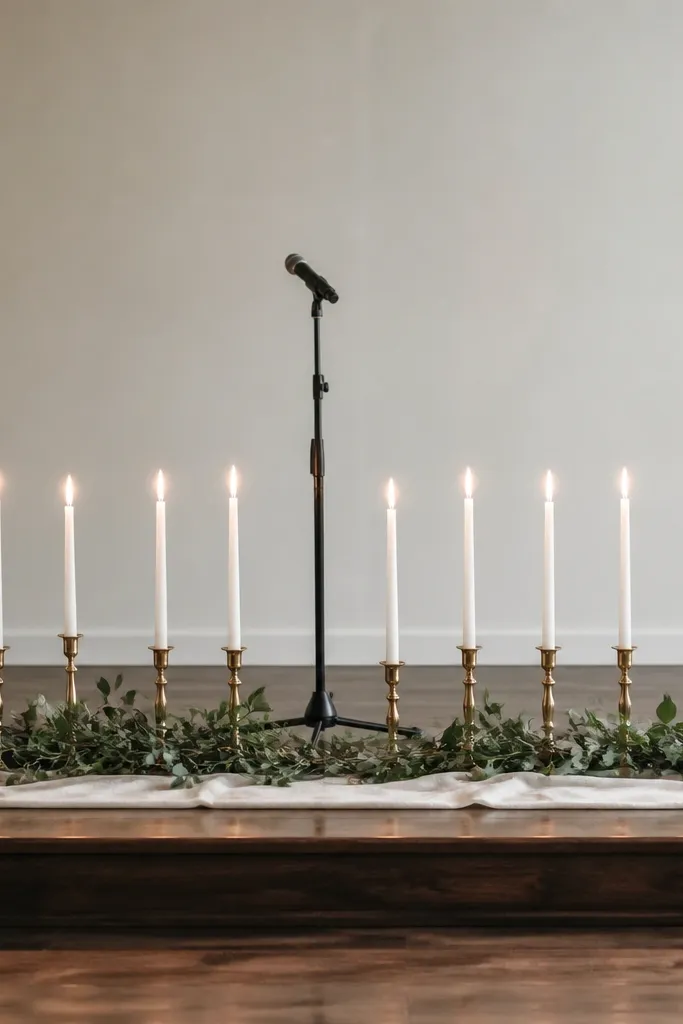
Candles look best when their height matches the visual level of the microphone and greeting area. If candles are too short, they get ignored; if they're too tall, they block faces and make the stage feel top-heavy. I use white tapers because they read crisp in both daylight and evening, and the holders keep everything uniform. This styling flatters people at different heights because the candle line creates a stable reference point across the frame.
Measure the microphone stand height from the stage floor, then choose candle heights that land within 2-3 inches of that level. Place candles in evenly spaced holders, 18-24 inches apart, along the side edges of the stage where they won't block the couple. Use a runner or matte fabric base so wax drips don't stain the stage. Add greenery only at the candle base so the candles stay the tallest element in that corner.
Try thisUse LED tapers for rehearsal and photos so you can see the effect consistently without flame flicker.
Common mistakeAvoid mixing candle heights randomly - it looks like leftover rentals.
17. Two-color floral foam blocks for consistent centerpieces
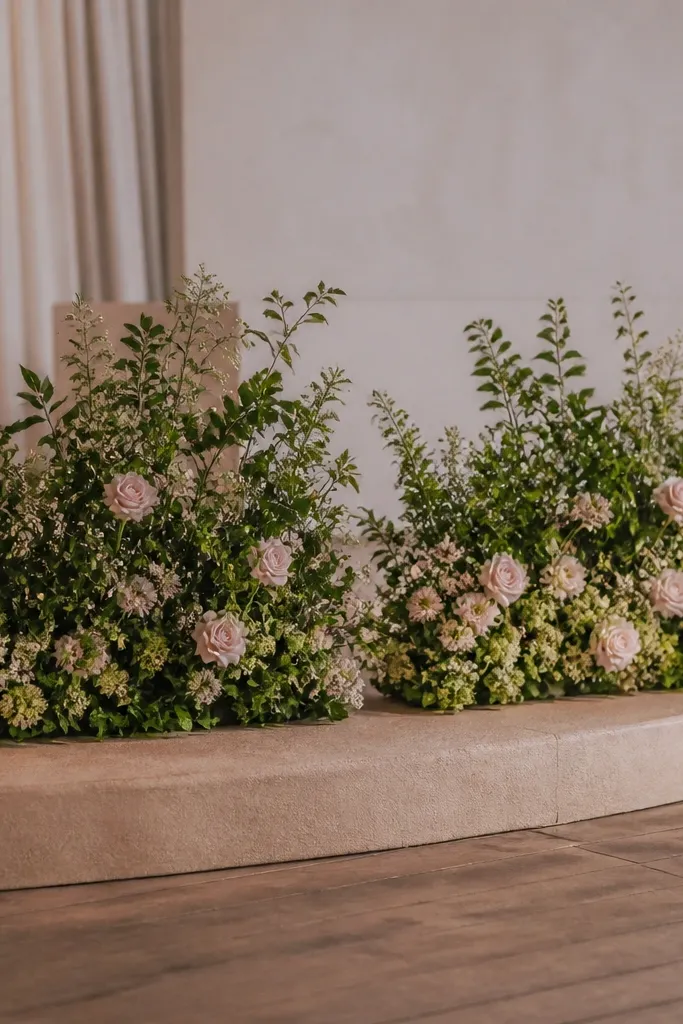
This is the trick for centerpieces that stay camera-ready all night. Foam blocks let you control the shape so flowers don't droop or spread unevenly. I use two-color zoning - mostly olive greens with a blush accent layer - so the stage doesn't become one muddy mass. It flatters couples in neutral outfits because the blush pops against ivory or champagne fabric without looking loud.
Cut floral foam into rectangular blocks about 10x6 inches each and soak if using real flowers. Cover the foam with greenery first, pressing stems in tight so you don't see base. Add blush flowers on only the top and outer edge, keeping the underside mostly green for a clean look from the audience angle. Place blocks on a mirrored tray or matte fabric base and keep spacing between the two blocks around 8-12 inches.
Try thisLabel your foam blocks with a marker under the base so setup stays fast and you don't flip them the wrong way.
Common mistakeAvoid fully covering every surface with flowers - it turns into a flat carpet with no height.
18. WedQuix ribbon knots at stage edges for quick cohesion
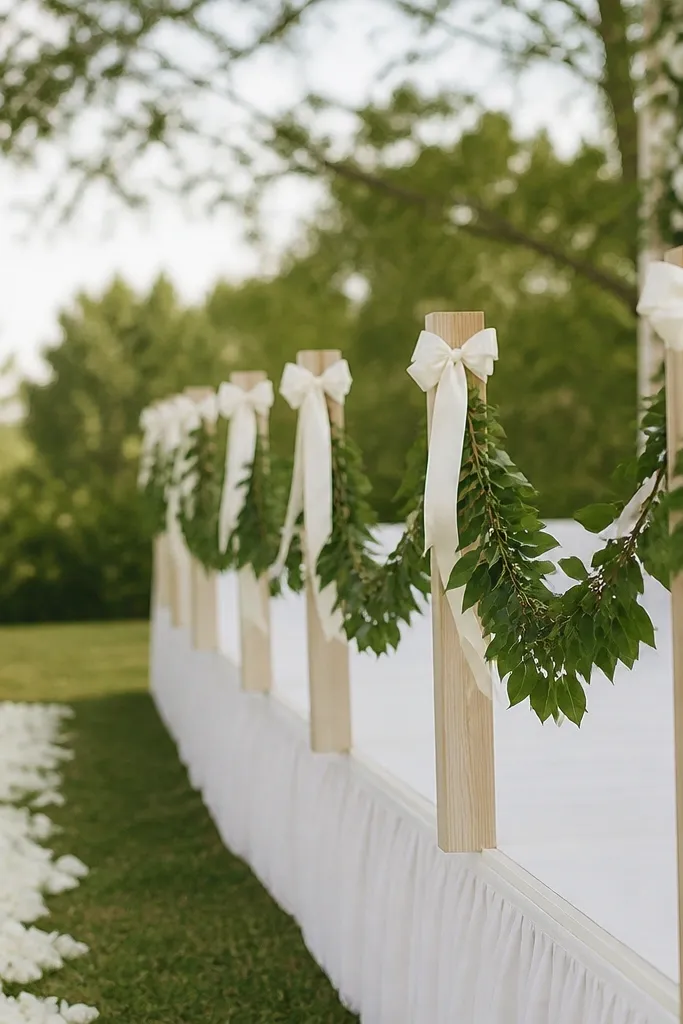
Ribbon knots are small, but they stop the stage from looking like separate rentals. When you tie identical knots along the edges, your eye reads the stage border as one design. I keep the ribbon in a single satin finish so it catches light gently, not like shiny plastic. This is great when the couple's outfits have details in the same color family; the ribbon echoes that without competing with bouquets.
Pick one ribbon width - 1.5 to 2 inches works best on stage edges. Tie a double-knot around the edge post or base point, then trim tails to 6-8 inches so they sit neatly. Add a short greenery tie right below each knot, then repeat the same placement on both sides for symmetry. If your stage has a runner, match the ribbon to the runner tone and keep the knots aligned vertically.
Try thisMake a knot template by tying one perfect knot on a piece of dowel, then replicate the tension on every tie.
Common mistakeAvoid loose knots - they look sloppy in close-up venue photos.
19. Backlit 'glass' vases with LED strips inside
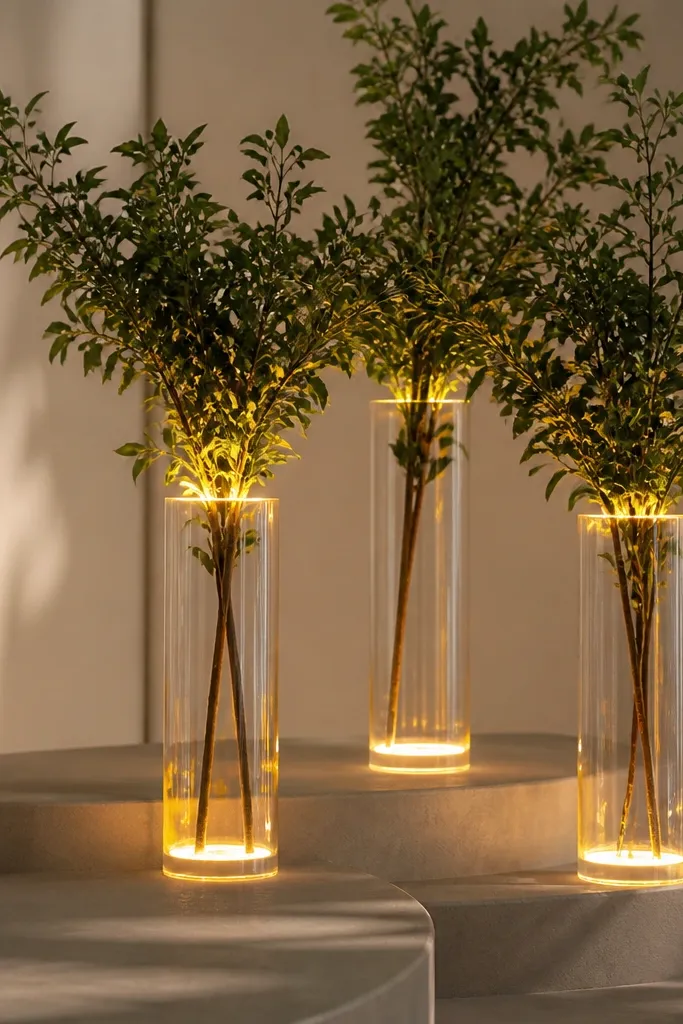
When a venue has dark walls or a plain backdrop, backlighting makes your stage look layered and intentional. Clear glass vases with LED strips create a gentle glow around greenery without needing extra florals. I use warm LEDs so the glow looks like candlelight, not a tech product. This flatters both men and women by adding warm highlights to the lower face area in photos.
Choose clear glass vases in two heights, about 10-12 inches and 16-18 inches. Insert battery LED strips or small puck lights inside the vase and secure with ribbon or a hidden zip tie so they don't shift. Add greenery stems only at the top so the light shows through the glass body. Place vases in pairs at the stage corners, 2-3 feet apart, and keep the glow level consistent by using the same LED brightness setting.
Try thisTest glow intensity with your phone camera in the same lighting - phone exposure changes what you see.
Common mistakeAvoid blue or multi-color LEDs - they turn the whole stage into a party vibe.
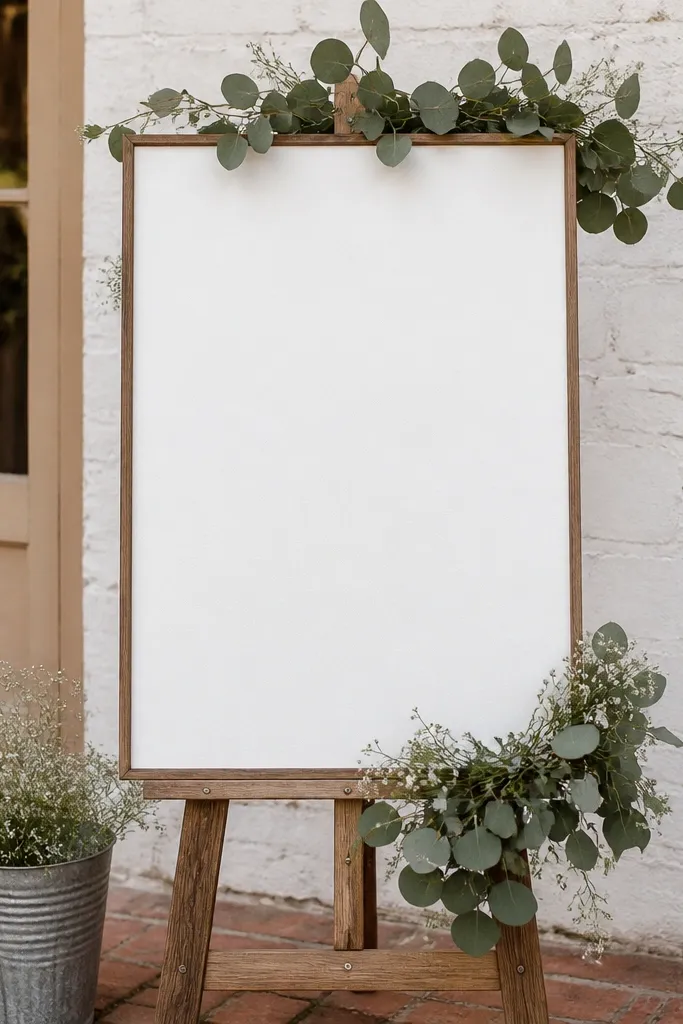
20. Seating chart stand with a 'frame within a frame' look
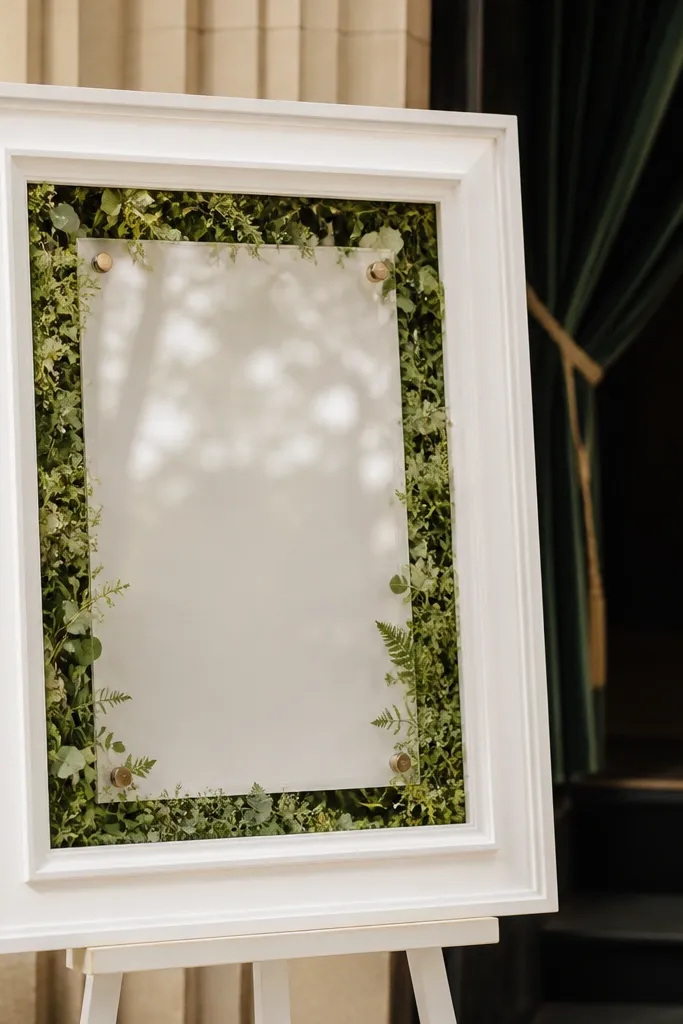
A seating chart stand placed near the stage entrance needs to look clean, because people photograph it while walking in. A frame-within-a-frame design makes the panel readable and keeps the background from looking chaotic. I use white borders and greenery accents so it matches ivory stage fabrics. This works for everyone because the stand is easy to read and doesn't steal attention from the ceremony moment.
Use a glass or acrylic panel for the seating chart so it stays crisp under lighting. Add a flat white border frame around it, then tuck thin greenery behind the border so it doesn't block text. Set the stand at chest height for readability, usually around 54-60 inches from the floor to the top of the text area. Place it on a matte base so it doesn't reflect too much, and tie a small ribbon strip at the bottom center of the frame.
Try thisPrint your chart in high contrast black on off-white, and proof it by taking a photo from 10 feet away.
Common mistakeAvoid glossy printed charts - glare makes the text look washed out.