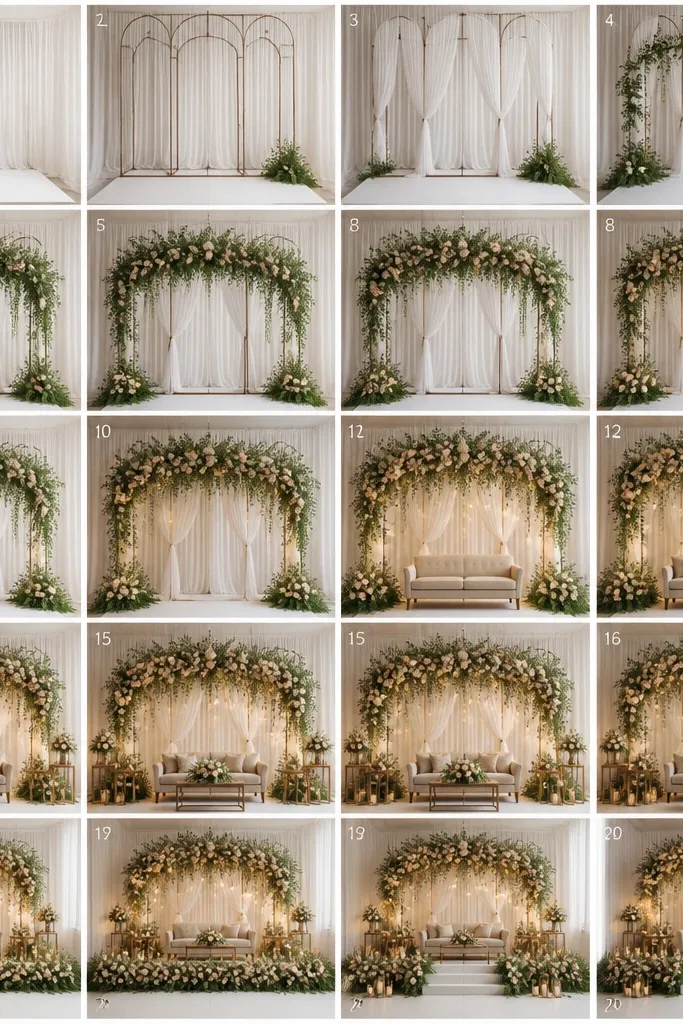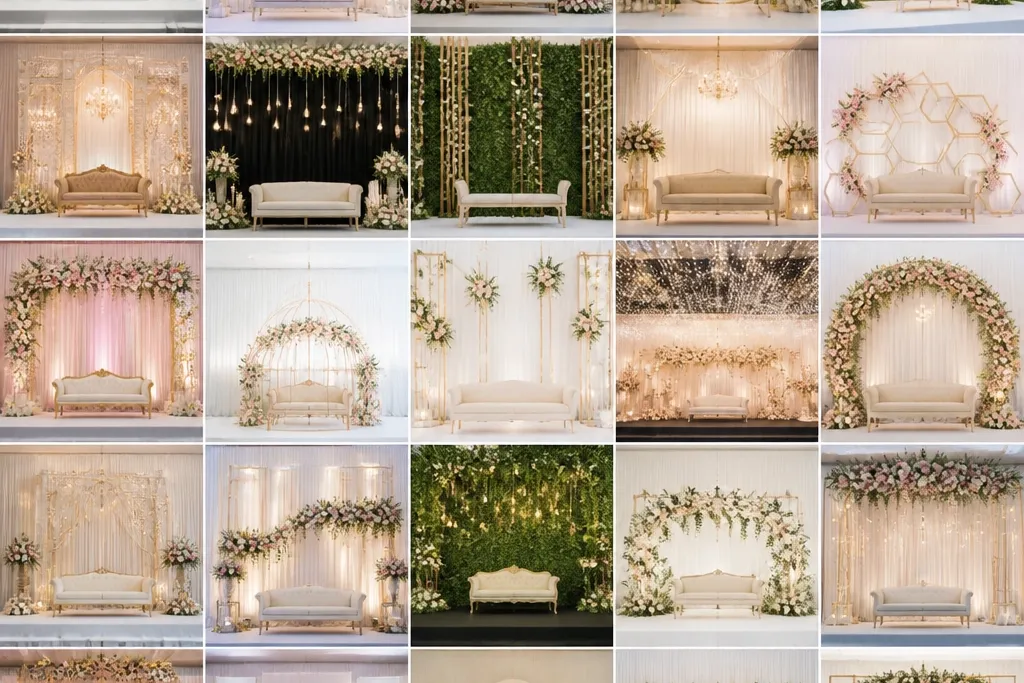

1. Chiffon Curtain Backdrop with Champagne Satin Tiebacks
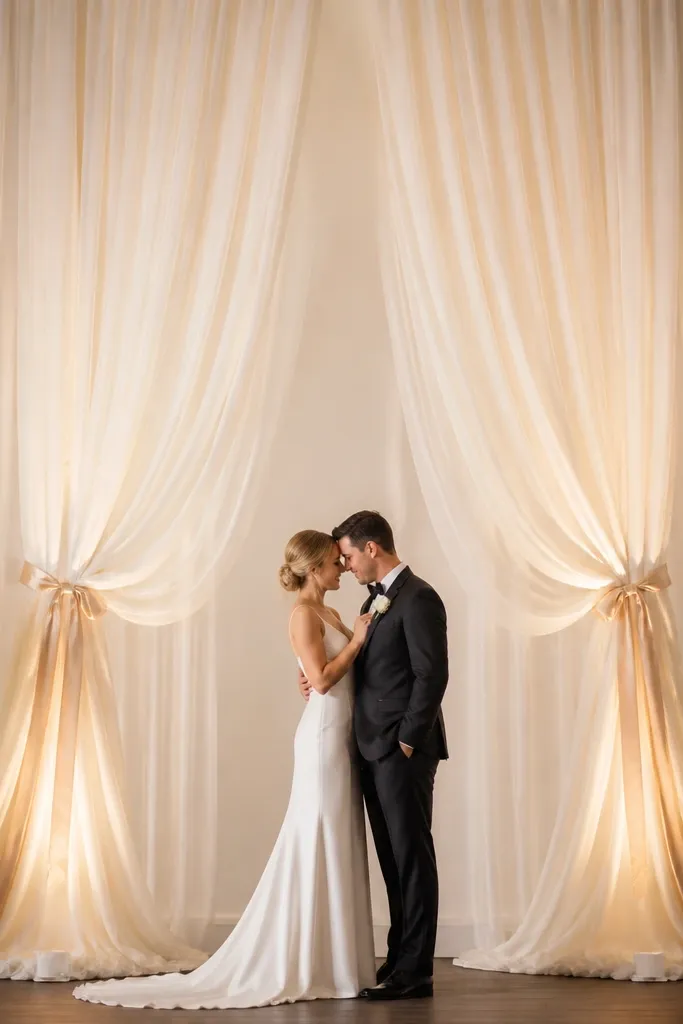
This setup looks elegant because chiffon creates movement and hides uneven stage walls. I use ivory chiffon with a slight shimmer and tie it back with 2-inch champagne satin ribbons so the fold lines catch light without looking glossy. The center stays clean, which flatters both tall and shorter couples because faces sit against lighter fabric. If your venue has warm lighting, chiffon helps avoid the "yellow wall" problem because ivory stays bright but not neon. The satin tiebacks add structure so the whole backdrop doesn't look like a loose curtain from a rental store.
Start by installing two vertical support poles or a backdrop frame at the back of the stage, then hang chiffon panels so the top edge reaches about 9 feet. Let each panel overlap by 10 to 14 inches in the center so you don't see seams. Tie back the left and right panels with champagne satin ribbons at about chest height, making a loose bow with tails 14 to 18 inches long. Add two uplights on the floor aimed upward at a 30 to 45 degree angle so the fabric glow looks even across the center.
Try thisChoose chiffon that drapes quietly - if it crinkles easily, it will look cheap in close-up photos.
Common mistakeAvoid using thin organza that looks see-through and wrinkly when lit from behind.
2. Archless Fabric Portal with Two Vertical Greenery Lines
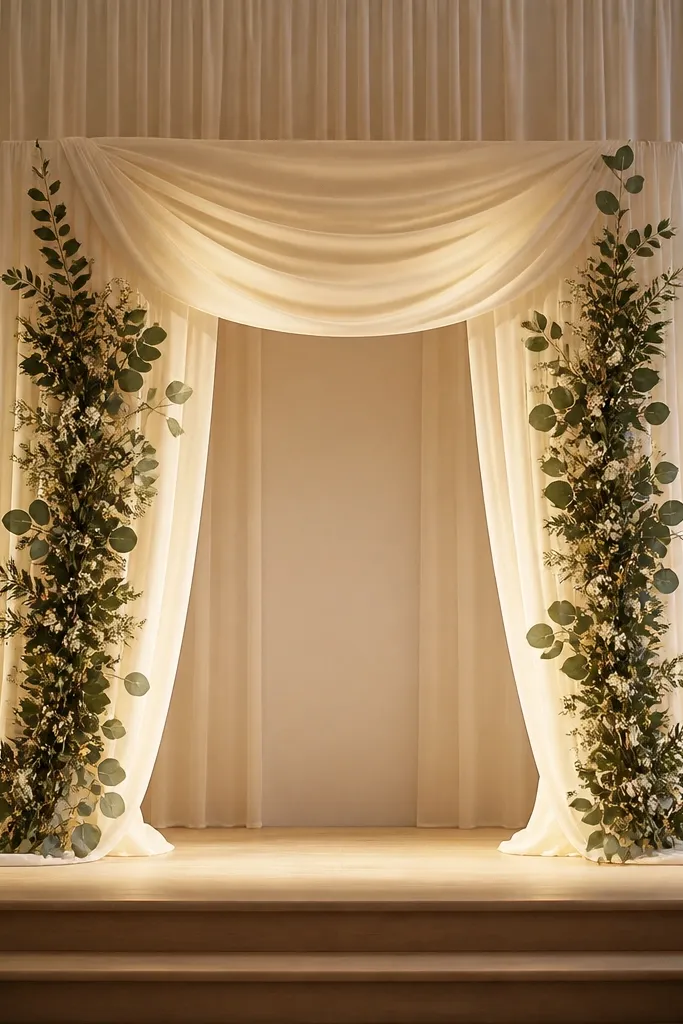
I love this for stages that feel too busy because it creates a clear frame without building a big arch that blocks photos. The fabric portal uses layered cream tulle and a heavier matte fabric behind it, so you get depth instead of a flat curtain. The vertical greenery lines pull the eye upward and make the couple look taller, especially helpful for shorter brides or grooms. White blooms sprinkled sparingly keep it airy and prevent the look from turning into a full floral wall. This also works with both cool-toned and warm-toned palettes because cream fabric sits in the middle.
Start by hanging a wide fabric panel behind the couple, then add two narrower tulle panels inside so the center reads like a doorway. Create the portal shape by pinning the sides inward about 8 to 10 inches at mid-height, then smooth the top so the opening stays symmetrical. Place two thin greenery strips down each side using garden twine and floral wire, keeping them 12 to 18 inches apart. Finish by adding three small clusters of white flowers along each side at heights around 3.5, 4.5, and 5.5 feet, then aim one spotlight at the portal center.
Try thisUse floral wire to tension the greenery - loose stems sag and make the portal look tired.
Common mistakeSkip full horizontal garlands across the center; they crowd the couple and flatten the shape.
3. Mirrored Gold Frame Panel with Soft White Florals
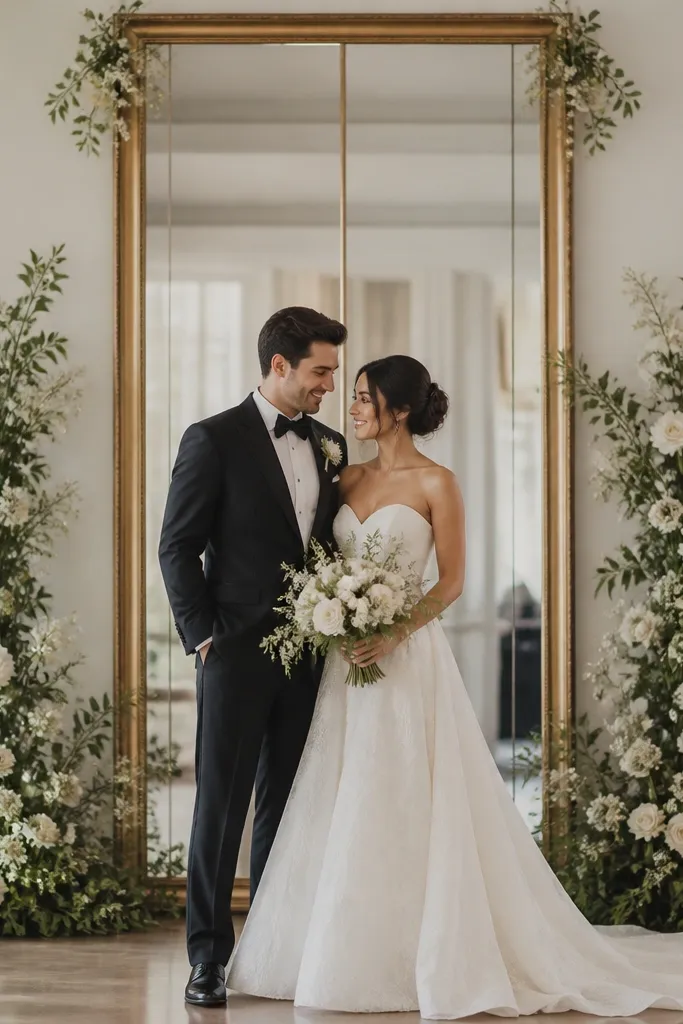
A framed reflective panel makes stage photos look polished because it adds light without heavy floral mass. I use a slim gold frame (around 1.5 to 2 inches wide) and a reflective surface that doesn't look like a cheap mirror - it should be more soft shine than harsh glare. White florals against the reflective center create contrast that flatters most skin tones, especially fair and medium tones where warm gold looks flattering in photos. The frame also gives you a built-in "picture border," so the couple looks centered even when people are moving. This idea is especially good if you want a modern stage but still want flowers to feel romantic.
Start by positioning the frame panel so the bottom sits about 2.5 feet above the stage floor, letting it align with head-and-shoulder height. Add a thin backing fabric behind the reflective panel if your venue lighting is harsh, using white or pale champagne. Build two side floral clusters about 14 inches from the center line, then add a small top-corner spray at roughly 7.5 feet. Place a pair of gold taper candle holders on the left and right front corners, keeping candles unlit for ceremony and lit only for portraits if allowed.
Try thisIf the reflective surface shows ceiling lights, cover them with a thin white diffusion sheet so reflections look soft.
Common mistakeAvoid mirror tiles that create sharp highlights - they make faces look overexposed.
4. Sunset Ombré Draped Backdrop with Warm Uplighting
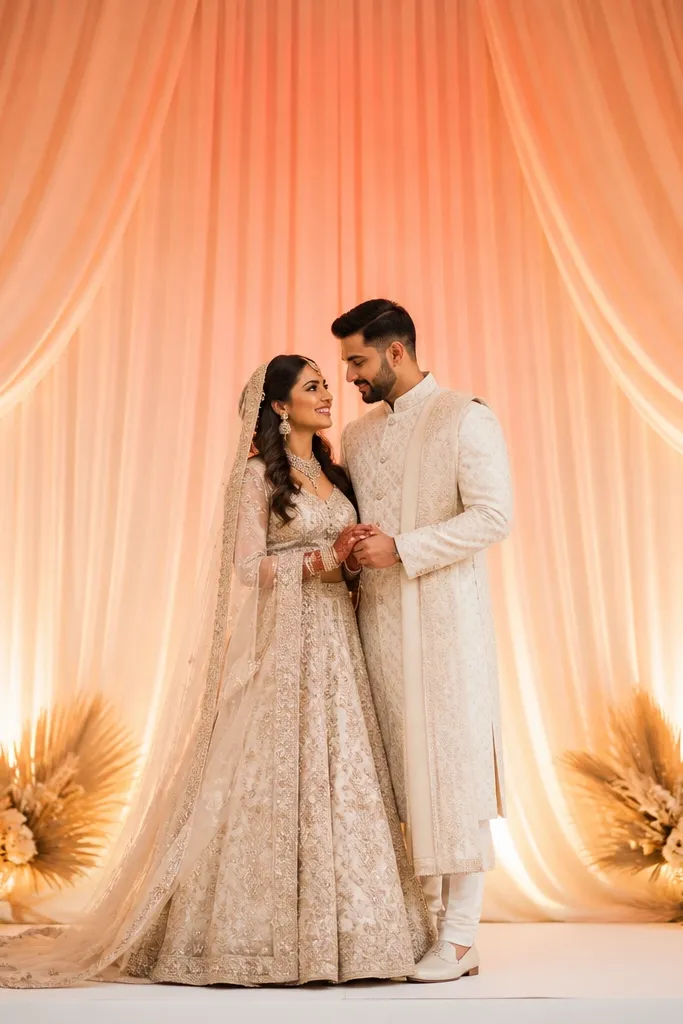
Ombré fabric looks elegant because it creates a smooth color story that doesn't demand heavy decor. I use fabric in a gradient from peach to blush to cream, then keep florals minimal - a few ivory blooms and textured dried greenery at the base. This flatters almost everyone because the warm tones look natural under golden wedding lighting and don't fight with makeup. It also makes skin tones look healthy on camera, especially in venues with warm color temperatures. The key is letting the fabric do the "design," not adding too many competing elements.
Start by hanging three fabric lengths so the colors overlap by 6 to 8 inches where each shade meets. Keep the fabric taut at the top and slightly looser at the bottom so it drapes in a gentle V shape toward the center. Add warm uplights using amber gels or warm LED heads so the light matches the fabric palette. Place two small base arrangements at the front corners, each about 18 inches wide, so the bottom doesn't look empty in wide shots. Finish with one slim runner of fabric or ribbon at the front edge so the stage reads cohesive.
Try thisBring a swatch to your venue lighting test - some blush fabrics go pink under cool LEDs.
Common mistakeAvoid mixing ombré fabric with bright neon flowers; the palette will clash instantly.
5. White Rose Waterfall Garland Down the Center Line
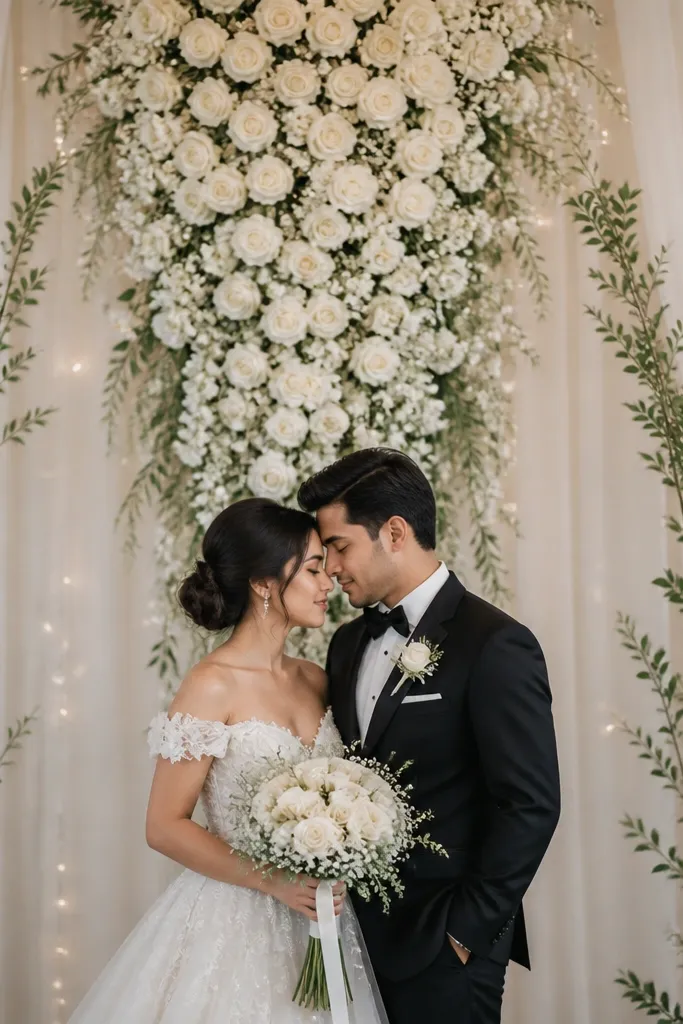
A center waterfall reads elegant because it creates one strong vertical focal point. I hang the garland so it starts about 10 inches below the top beam, then it falls to just above the couple's waist level. White roses with baby's breath look classic and flattering because they brighten photos without turning into a heavy wall of color. This also works for couples who want a minimal look but still want the stage to feel "wedding." If you pick this, keep side decor simple so the center cascade stays the hero.
Start by marking the center line on the backdrop frame so the garland stays perfectly straight. Use floral wire and zip ties to attach the top of the waterfall to the frame, then adjust the length so the cascade ends around 2 feet above the stage floor. Add two thin greenery lines on the left and right using the same eucalyptus and ruscus base, but keep them at half the height of the waterfall. Place two matching white candle holders or glass lanterns at the front corners for balance. Add one overhead soft light or two side lights to keep the flowers bright and not shadowy.
Try thisUse a longer garland than you think - you can trim, but you can't easily add height back without redoing the hang.
Common mistakeAvoid chunky garlands that look like they were taped on; wire structure makes it look natural.
6. Neutral Pampas Feathers with Ivory Ribbon Swags
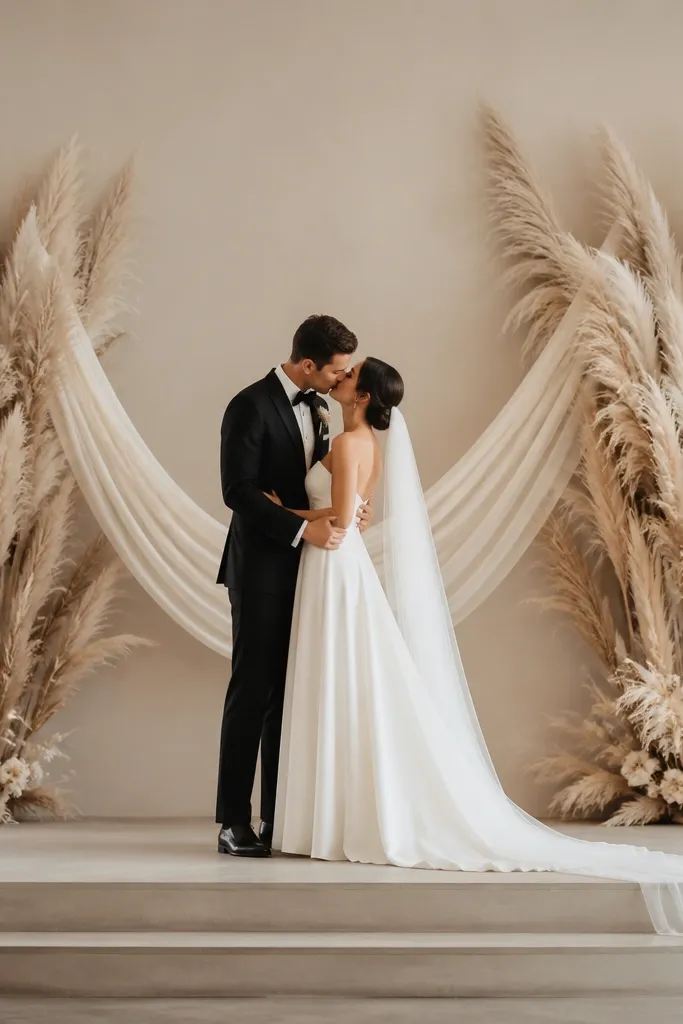
Pampas feathers look elegant when you keep the scale big and the styling clean. I use neutral pampas in sand and oat tones, then tie ivory ribbon into gentle arcs so the movement feels intentional. This palette flatters most skin tones because it's neutral and doesn't pull attention away from faces. It also works well for outdoor receptions because feathers handle natural light better than glossy florals. The trick is spacing - too many small bunches look messy, but two large clusters look designed.
Start by choosing two oversized pampas bunches that are at least 30 inches tall each. Place them at the back corners of the stage, about 30 to 36 inches from the center line. Add ribbon swags by attaching ribbon ends to the frame at the top and letting the ribbon curve down to about shoulder height. Add a thin base layer of greenery only if your stage looks bare, using a small strip behind each pampas cluster. Finish with warm uplights so the feathers cast soft shadows instead of flat light.
Try thisFluff pampas right before the ceremony; feathers look dull after they sit compressed.
Common mistakeAvoid placing pampas too close to the center - it blocks the couple's legs in photos.
7. Brushed Brass and Candle Glass Horizon Line
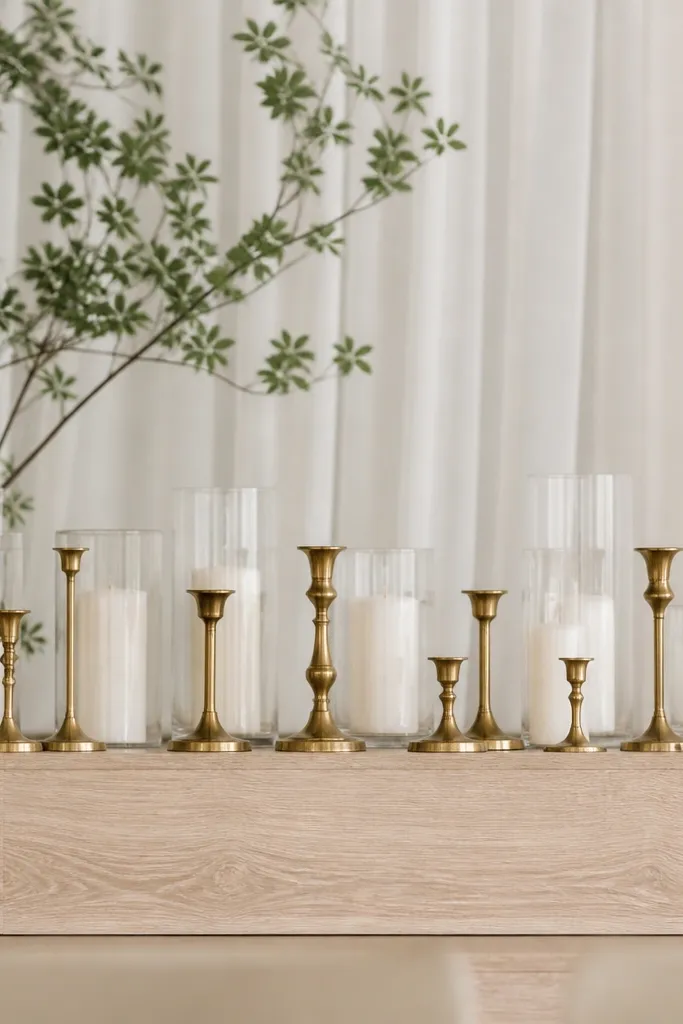
This is one of my favorite "elegant without a huge build" stage looks. The brushed brass and clear candle glass create a horizon line that makes the stage feel finished even when you skip a floral wall. I use candle holders with a matte brushed finish so they don't glare under venue lights. The candle glass adds depth and makes the stage look layered, which photographs well from the aisle. It's especially flattering when the couple wears satin or lace, because the metallic line echoes those textures.
Start by laying a white or pale champagne fabric runner across the front edge so the candle row doesn't look like it's sitting on bare wood. Place three to five brass taper holders evenly across the center, then add hurricane glass containers behind them in a second line. Keep the total height of the front row around 10 to 14 inches so it doesn't block chair legs. Add a simple backdrop drape behind the couple, then place two small greenery stems in the left and right corners to frame the candle line. If lighting is allowed, light only when you're ready for portraits so the glow looks intentional.
Try thisWipe glass containers with a microfiber cloth - smudges show up as ugly streaks on camera.
Common mistakeSkip plastic candle holders; they reflect light differently and look cheap fast.
8. Two-Side Balloon Arch Columns with Fabric Center Gap
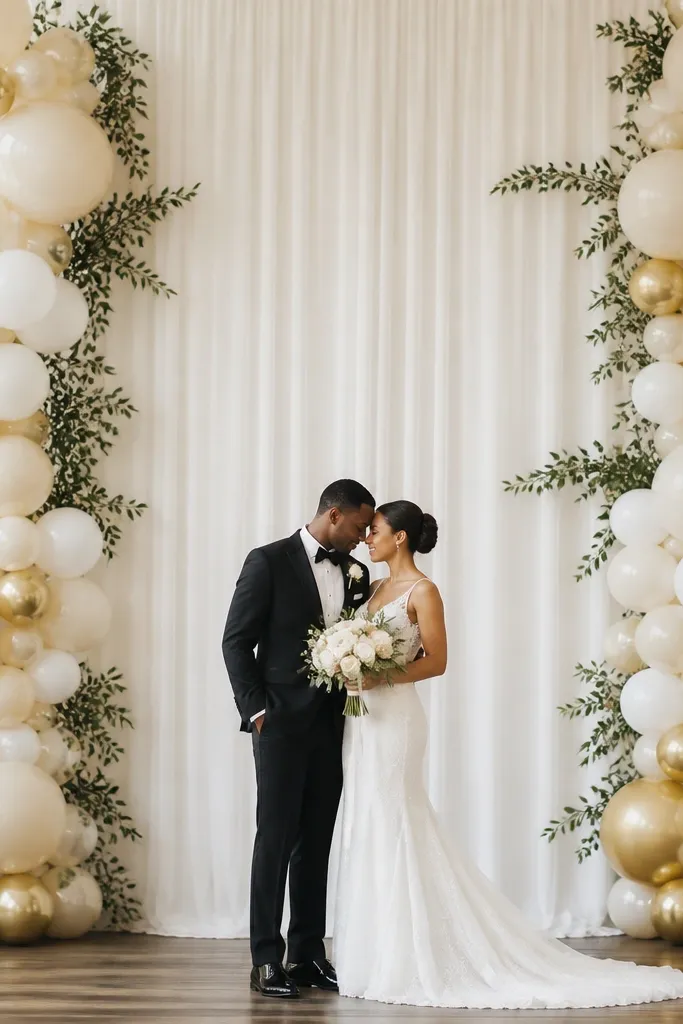
Balloon columns can look elegant if you treat them like architecture, not party decor. I use cream and pale gold balloons with a matte finish, then leave the center gap open so the couple stands against clean fabric. The balloon columns provide height and symmetry, while the fabric center keeps photos flattering and avoids visual clutter near faces. This works well for couples who want something lighter and less floral, especially in summer venues where heavier arrangements wilt. Finish with a few greenery accents so the balloons look grounded.
Start by building two columns each about 6 feet tall and 18 to 24 inches wide, placing them at equal distance from the center line. Use matte balloons in cream, then add a few pale gold balloons every 2 to 3 rows for shimmer. Attach the columns to the stage frame or weighted bases so they don't sway. Add a vertical fabric panel behind the couple in ivory satin or matte polyester, then connect it with small greenery ties at waist height. Keep the center gap at least 30 inches wide so the couple is fully visible.
Try thisUse a matte balloon finish - glossy balloons create harsh highlights on skin.
Common mistakeAvoid mixing shiny balloons with warm uplights; it makes the whole stage look like a birthday theme.
9. Hanging Floral Chandeliers with Clear Fishing Line
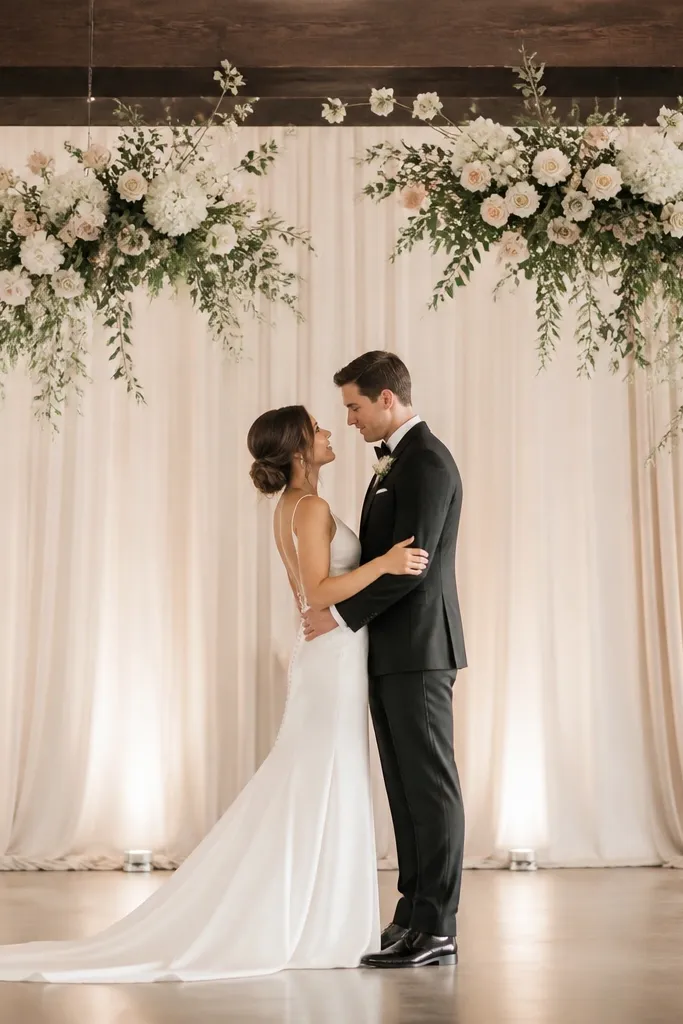
Hanging floral clusters make the stage feel layered because the decor fills the space above, not just the wall behind. I use clear fishing line to suspend small chandelier-like clusters, each about 20 to 24 inches wide. White and blush flowers look romantic without overpowering the ceremony space. This setup flatters everyone because it draws attention upward toward faces and keeps the lower stage clean for shoe shots and seating. It's also a lifesaver if you can't build a heavy arch or if the venue has limited floor space.
Start by measuring the ceiling height and deciding the hang distance so flowers sit about 2 to 3 feet above the couple's heads, not low enough to swing. Attach the cluster top loops to fishing line, then tie the line to a secure ceiling point or approved rig. Hang two clusters symmetrically, spaced roughly 4 feet apart, so they frame the couple. Add a neutral drape behind them and keep floor decor minimal, using two small lanterns or candle holders at the front corners. Test the hang height by standing where the couple will stand and checking from the aisle.
Try thisIf the clusters swing, add a second tie point so the line is taut at both sides of the cluster.
Common mistakeAvoid heavy wet florals overhead - they sag and can look messy in wind.
10. Satin Ribbon Curtain with Matching Shoe-Color Accent
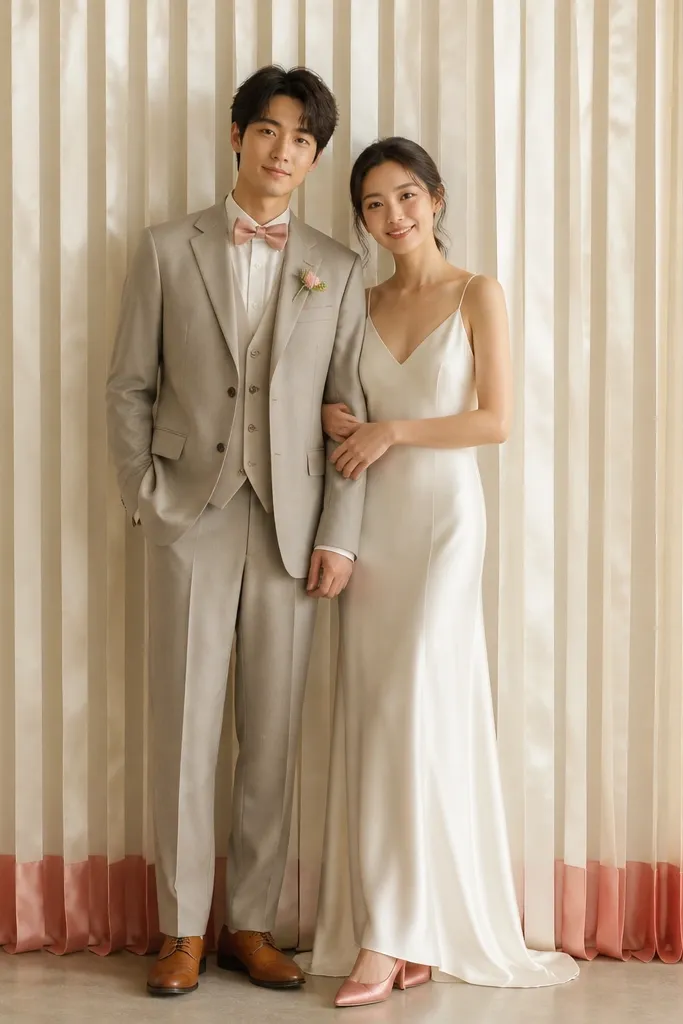
This is the look I use when the wedding party has standout shoe color, like deep emerald or soft blush suede. Satin ribbon curtains create clean vertical lines that look expensive and keep the stage from looking flat. The matching accent color, repeated in small amounts, ties the shoe photos to the stage so it feels intentional. It also flatters because vertical lines elongate the frame, especially in close-up portraits. Keep the accent subtle - one repeated color beats five different colors.
Start by hanging a cream satin ribbon curtain in 10 to 12 strips, each about 4 inches wide, from a top frame down to about mid-thigh height. Secure strips with clips so they hang straight and don't twist. Choose one accent color that matches the shoe tone - for example, deep emerald - and add two accent ribbon bands at about waist height on both sides. Add a small greenery line behind the couple to soften edges. Place the couple so their shoes sit centered under the ribbon curtain, then keep front decor low so the matching color shows in photos.
Try thisPress satin ribbons with a steamer before install - wrinkles show up as dull bands under stage lights.
Common mistakeAvoid using too many accent colors; it makes the stage look like a craft table.
11. Monogram Initials on Acrylic with Floral Corner Sprays
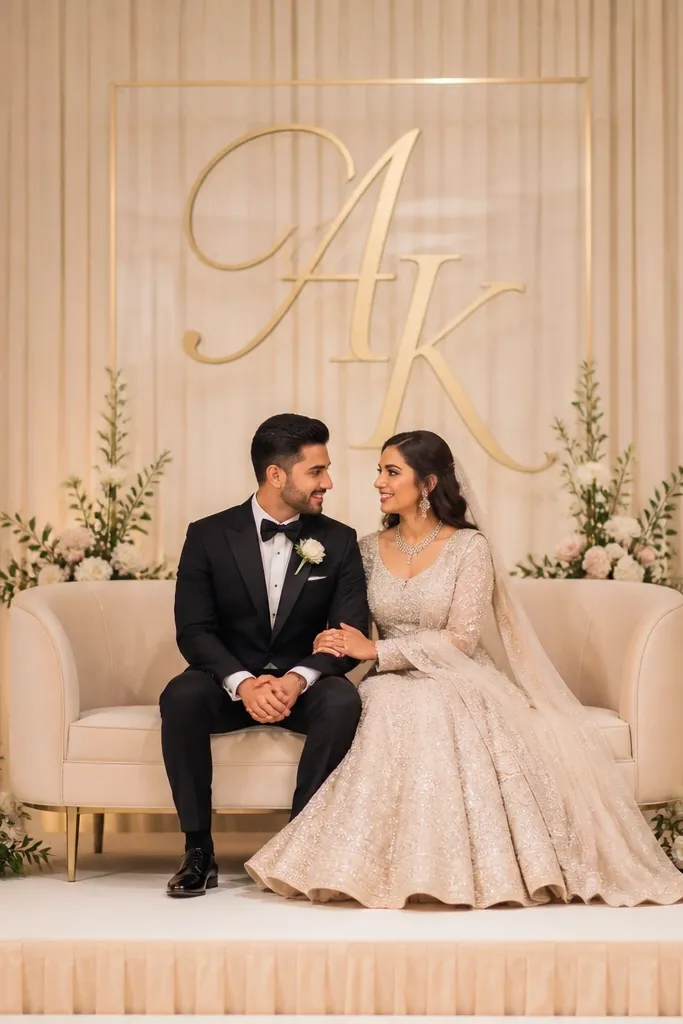
Monogram initials on acrylic look elegant because the material is transparent and doesn't block the couple. I use clear acrylic with a subtle frosted edge or a printed gold monogram so it reads cleanly on camera. Corner floral sprays keep the stage from looking heavy and give the initials room to be the focal point. This styling is great for couples who want a personal touch without building a full floral wall. It also pairs well with minimalist outfits because the decor doesn't compete with clothing texture.
Start by placing a clear acrylic sheet behind the couple, centered so the initials sit at face height. Choose monograms about 24 to 30 inches tall depending on your stage width. Attach the floral corner sprays at the bottom left and bottom right, each about 10 to 12 inches wide, so they frame the acrylic without covering the initials. Add two small warm lights aimed upward at the acrylic so the monogram glows and stays readable. Keep the rest of the backdrop simple - one drape color is enough.
Try thisUse matte greenery and avoid wet-looking florals on acrylic; gloss can create glare spots.
Common mistakeAvoid placing initials too low; if they sit near waist level, photos look like a sign rather than stage decor.
12. Macramé Wall Hanging with Pampas and White Candles
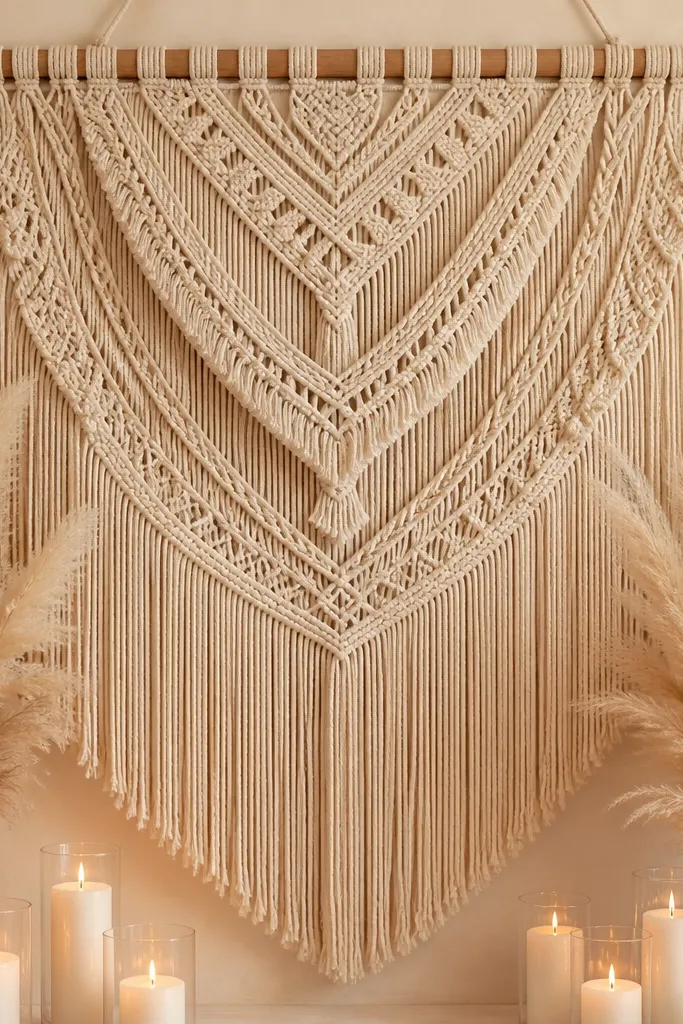
Macramé looks elegant when you let the fibers be the texture and keep florals light. I use a large cream macramé wall hanging that covers the whole backdrop area, then add two pampas bunches at the bottom corners for height variation. White pillar candles in clear glass create a clean, classic line across the front. This setup flatters because the neutral fibers soften hard lighting and make skin tones look less stark. It's also forgiving for DIY because macramé hides small installation imperfections.
Start by hanging the macramé from a sturdy top bar so the bottom edge sits around 2.5 feet above the stage floor. Place pampas bunches at the lower corners, leaving 18 inches of space from the center so the couple stays framed. Add 3 to 5 candle glasses along the front edge, spaced evenly and kept at 10 to 12 inches tall. If you want a little greenery, add only a thin eucalyptus sprig at each candle base. Use warm uplights to bring out the fiber texture instead of cool overhead lights.
Try thisTreat macramé like clothing - steam it lightly so it hangs straight and doesn't curl at the knots.
Common mistakeAvoid chunky faux stones or glitter on macramé; it reads costume-like under venue lights.
13. Olive Branch and White Dahlia Low Profile Stage Frame
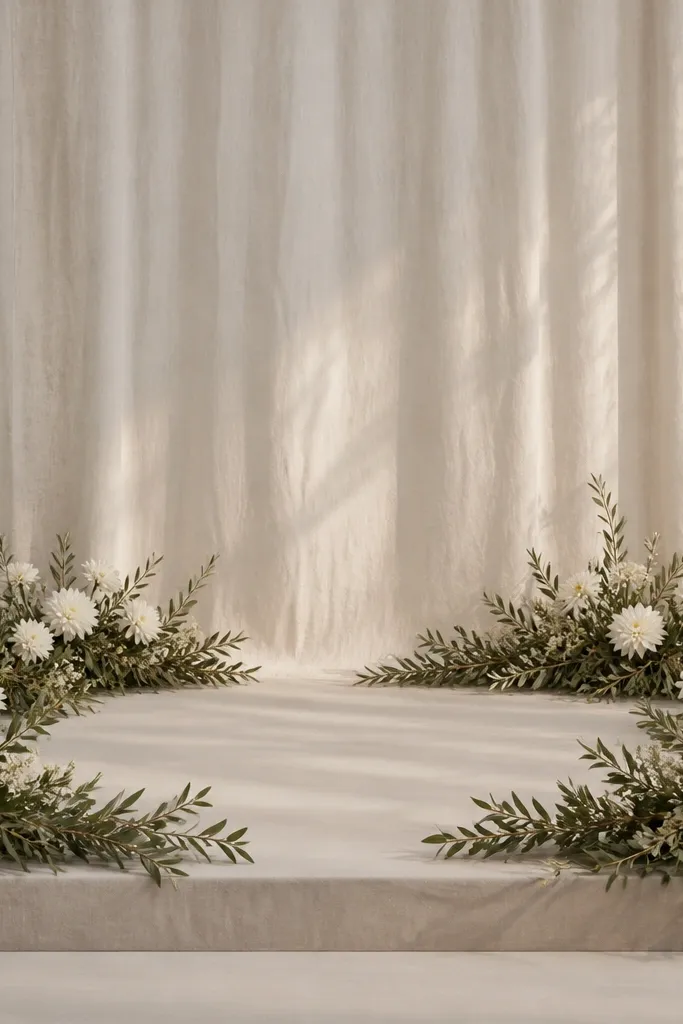
Low profile decor looks elegant when you want the couple and their attire to stay the focus. Olive branches add a soft, natural curve, and white dahlias bring a crisp focal bloom without filling the whole wall. This works for couples who want a garden feel but don't want heavy overhead builds. It also flatters in wide shots because it doesn't block faces and keeps the couple's height prominent. The key is keeping the frame low and letting the background fabric stay clean.
Start by draping a neutral matte fabric behind the couple, stopping at about waist height so it doesn't look like a tablecloth. Build a low olive branch frame around the front corners and back edges using floral wire, keeping the curves smooth and about 10 to 14 inches tall. Place white dahlias inside the frame at the back corners, each about 6 to 8 inches wide. Add small greenery clusters between the dahlias to fill gaps without making it dense. Finish with two matching low lanterns at the center front, about 18 inches apart.
Try thisUse real olive-like branches that are flexible - rigid stems make the frame look like a cage.
Common mistakeAvoid making the frame too tall; tall low-profile decor looks like it's blocking the couple instead of framing them.
14. Tall Feather Fans with Ivory Linens and Gold Flatware Look
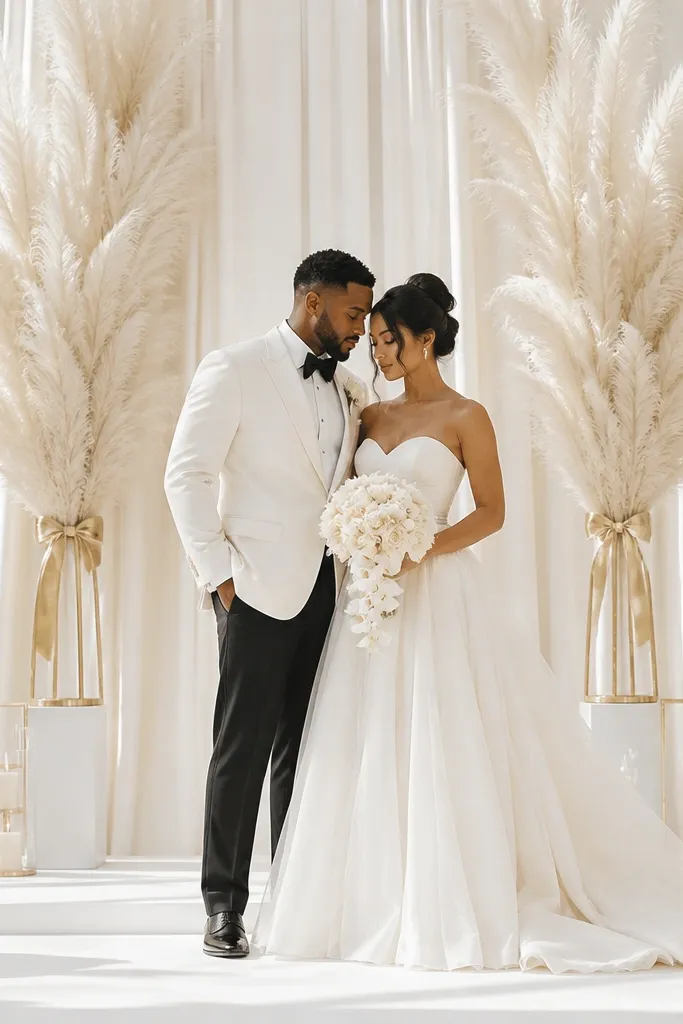
This look feels elegant because feather fans create strong vertical shape without heavy weight. I use neutral feather fans in cream and light taupe, then anchor them with ivory linens that drape in soft folds. The gold accents are small and hardware-like, like brushed gold candle stands or thin gold ribbon bands, which keeps it classy instead of party-like. It flatters because vertical fans elongate the silhouette and add movement behind the couple. It also works for modern ceremonies where the couple wants a clean stage but still wants "wow."
Start by placing two feather fans behind the couple, each about 6 to 7 feet tall, on weighted stands or weighted base planters. Drape ivory linen panels behind them so the fans look layered, not stuck on a wall. Add a thin gold ribbon band across the top of the fabric panels, keeping it centered and straight. Keep any floral additions minimal - one small sprig per side is enough. Style the front with gold-toned candle hardware or a single gold tray to connect to the stage's metallic finish.
Try thisFan spacing matters - keep at least 3 feet between the outer edges so the couple stays centered in photos.
Common mistakeAvoid mixing feather colors that are too close to each other; the fans should read as sand and oat, not random speckled shades.
15. Velvet Rose Cluster Wall with Blush Draped Base
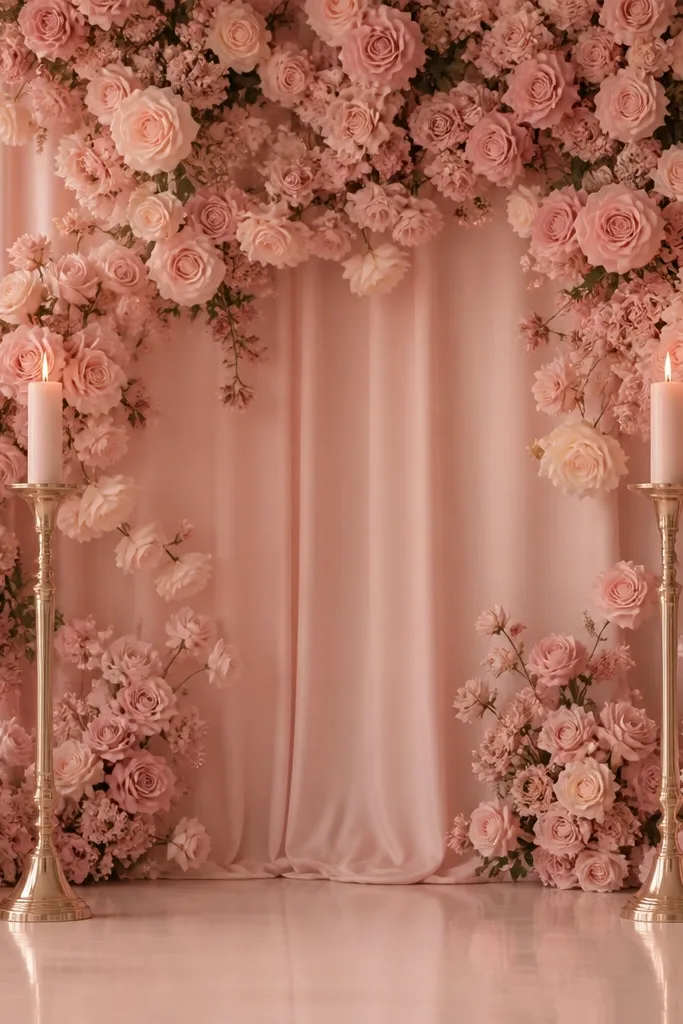
Velvet rose clusters look luxurious because velvet absorbs light instead of reflecting it, which makes photos feel smooth and flattering. I use blush velvet blooms with a dense arrangement in the center third of the backdrop, then stop the clusters before the edges so it doesn't look like a wall of stuffed fabric. The blush draped base adds depth and keeps the roses from floating. This style flatters fair to medium skin tones because blush velvet looks natural and romantic. It also pairs well with satin gowns and tailored suits because the textures match the way fabric looks under warm lights.
Start by hanging a blush draped base fabric behind the couple, keeping it matte and slightly gathered. Create a rose cluster zone in the middle, about 5 feet wide and 6 feet tall, using velvet roses on floral mesh or a back panel. Attach roses with zip ties so they stay secure and don't sag. Flank the center with two tall candle stands on the left and right, about 3 feet apart. Finish with a small ribbon bow at the base center to anchor the look visually.
Try thisIf your roses look flat, mist the backdrop fabric with a light steamer so it hangs with natural folds.
Common mistakeAvoid using shiny satin roses; they reflect harshly and look plastic in close-ups.
16. Matte Black Minimal Backdrop with White Taper Candle Trio
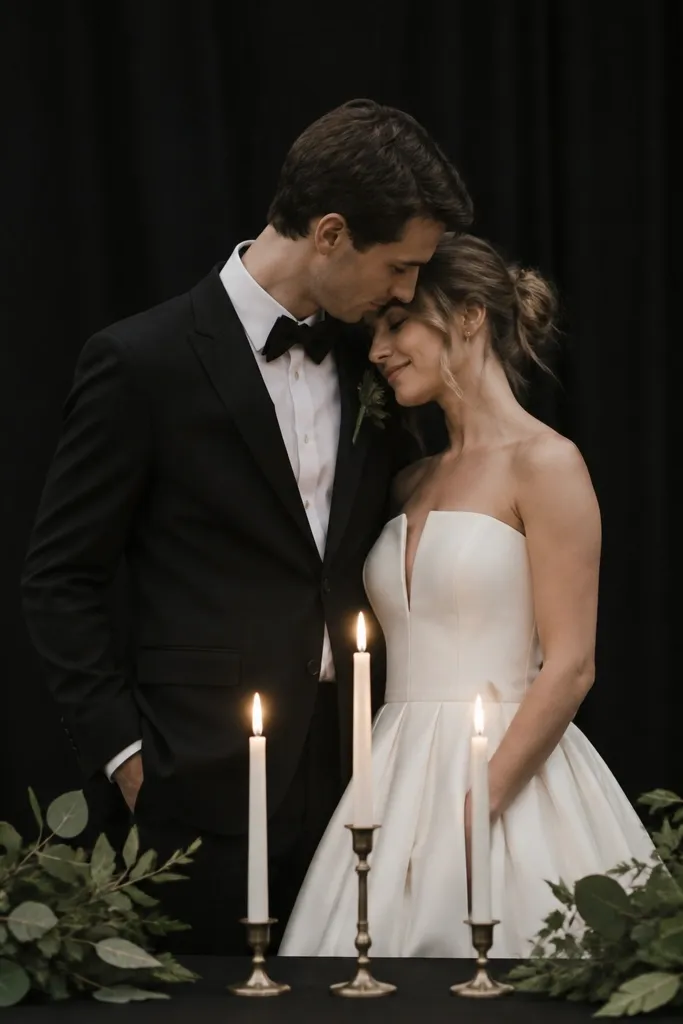
Black backdrops look elegant when you keep everything else clean and limited. I use matte black fabric so it doesn't glare, then add a trio of white taper candles for bright contrast. The candles and greenery create a simple frame that makes skin tones look warm under candle-colored lighting. This is a strong option for evening ceremonies and for couples who want a modern, fashion-forward stage. It also works well for wedding parties because the contrast makes shoes and accessories pop in photos.
Start by covering the backdrop area with matte black fabric, stretched tight so wrinkles don't catch light. Place three candle holders at the front center, spaced about 10 to 12 inches apart, with the middle candle slightly taller if you have different heights. Add two small greenery sprigs at the left and right corners behind the candle line to soften the black. Keep side decor minimal - no big bouquets. Light the candles for portraits and use a warm uplight behind the couple to avoid harsh shadows.
Try thisTest your lighting angle - black shows shadows fast, so aim lights slightly upward and away from faces.
Common mistakeAvoid glossy black sequins or satin; it looks like a photo booth backdrop instead of wedding decor.
17. Champagne Sequin Runner Backdrop with Sheer Overlay
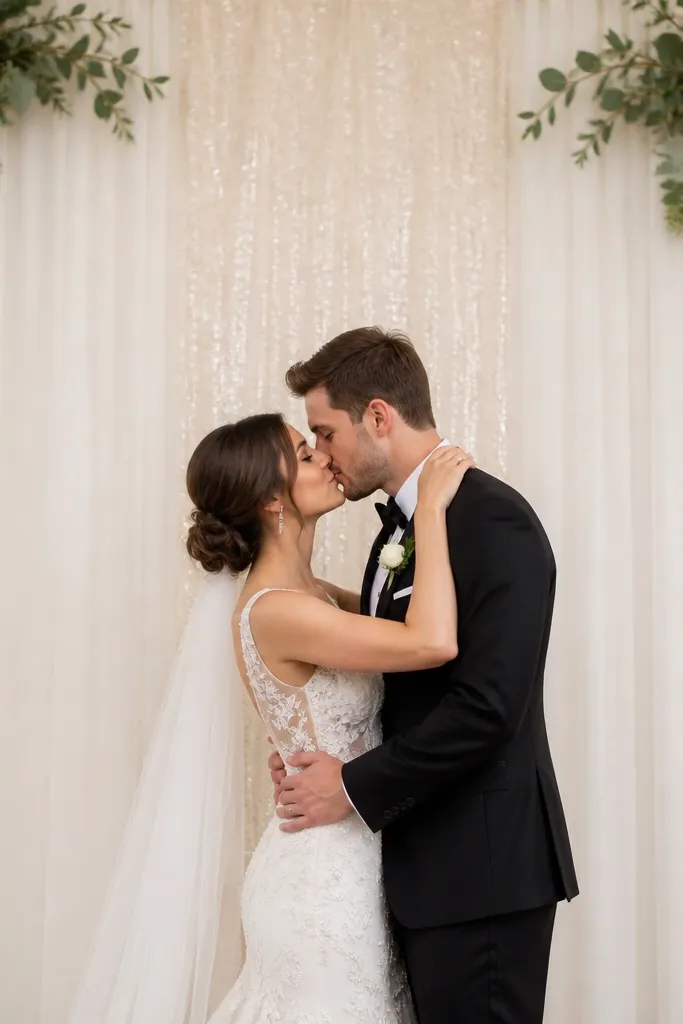
This is the stage trick I use when I want sparkle without a full glitter wall. A champagne sequin panel in the center gives you a strong focal line, and the sheer overlay turns harsh sparkle into a soft shimmer. It flatters because the shimmer sits behind faces and doesn't reflect directly into guests' eyes. Works for both men and women outfits because it matches metallic details like gold jewelry and satin shoes. Keep the side decor minimal so the center sparkle stays intentional.
Start by placing a champagne sequin panel vertically centered behind the couple, about 3.5 to 4 feet wide. Drape a sheer ivory overlay over the sequins, leaving the center visible but softened. Secure the sheer with clear clips at the top and sides so it doesn't slip. Add two small greenery sprigs near the top corners of the sheer overlay, each with a single white bloom for balance. For the front, place two champagne-toned glass candle holders at the stage corners.
Try thisUse sequins that are dense enough to read from the aisle; sparse sequins look random and cheap in wide shots.
Common mistakeAvoid layering multiple sparkly materials (sequins plus glitter florals); it turns into noise on camera.
18. White Hydrangea Pom-Pom Clusters on a Grid Frame
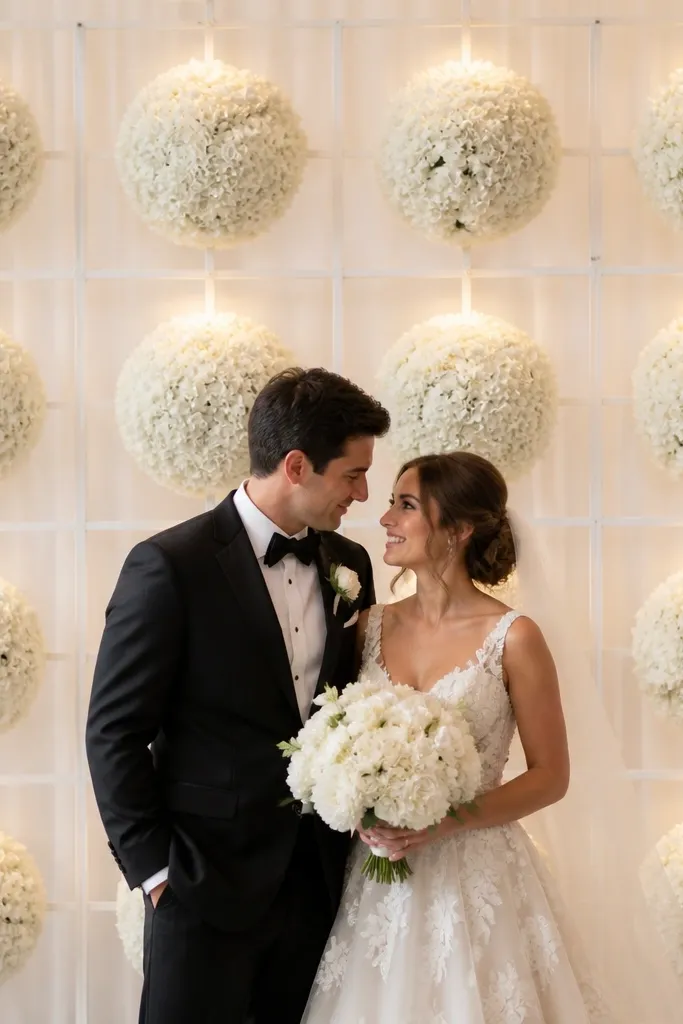
Pom-pom clusters look elegant because they create a clean, graphic pattern. I use white hydrangea-style poms, but the real magic is spacing on a grid frame - you get a uniform look instead of a messy floral wall. This flatters because the round shapes echo wedding bouquets and soften sharp lines in suits and dresses. It also photographs well from different angles because the pattern stays consistent. If you want a stage that looks designed even when people are seated close, this is the one.
Start by building a simple grid frame behind the couple using thin metal rods or a lightweight backdrop frame, sized to the stage width. Attach pom clusters in a staggered pattern, with the largest clusters at mid-height and smaller ones toward the top. Keep the center area clear enough for faces - aim to leave a 20 to 24 inch breathing space in the exact center. Add pale fabric behind the grid so the frame doesn't show. Light from below with two warm uplights aimed at a slight angle so each pom shape catches glow.
Try thisUse the same flower head size across the stage; mixed sizes make the pattern look accidental.
Common mistakeAvoid attaching clusters directly to fabric without a frame; they sag and break the pattern fast.
19. Pastel Silk Scarves Swirl Backdrop with Minimal Florals
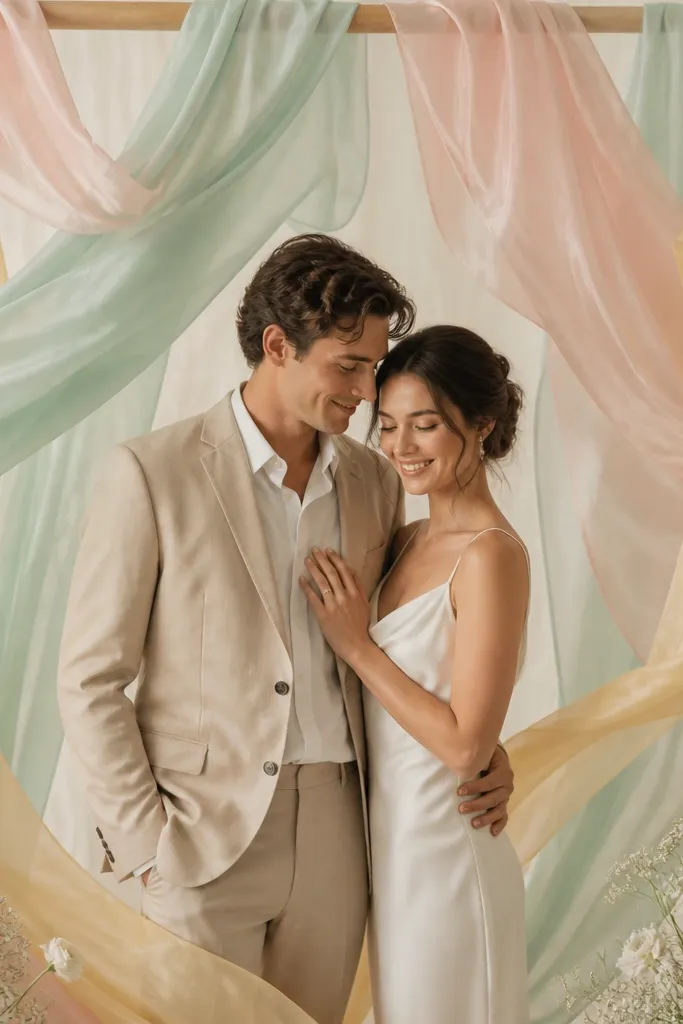
Silk scarves look elegant because they add color movement without heavy bulk. I use three pastel shades only - mint, blush, and pale yellow - and overlap them so the fabric creates a soft swirl effect. This flatters most skin tones because pastels stay gentle and don't overpower makeup. It also works for daytime ceremonies where you want decor that feels light and airy. The minimal florals keep the look from turning into a craft project.
Start by cutting silk scarves into long panels about 6 to 8 feet each, depending on your ceiling height. Hang them from a top bar in a way that they overlap by 8 to 12 inches, then twist each scarf slightly at mid-height so the swirl reads on camera. Leave a center opening about 30 inches wide. Add one small floral cluster at each bottom corner - white flowers with a bit of greenery - so the stage feels anchored. Finish with soft daylight balanced lighting or warm LEDs if the venue is dim, aiming lights to avoid harsh highlights.
Try thisUse a steamer before install; silk wrinkles show up as gray lines in photos.
Common mistakeAvoid adding too many scarf colors; five or more shades turns the stage into a rainbow.
20. Ivory Linen Panel with Tie-Back Knots and Brass Hooks
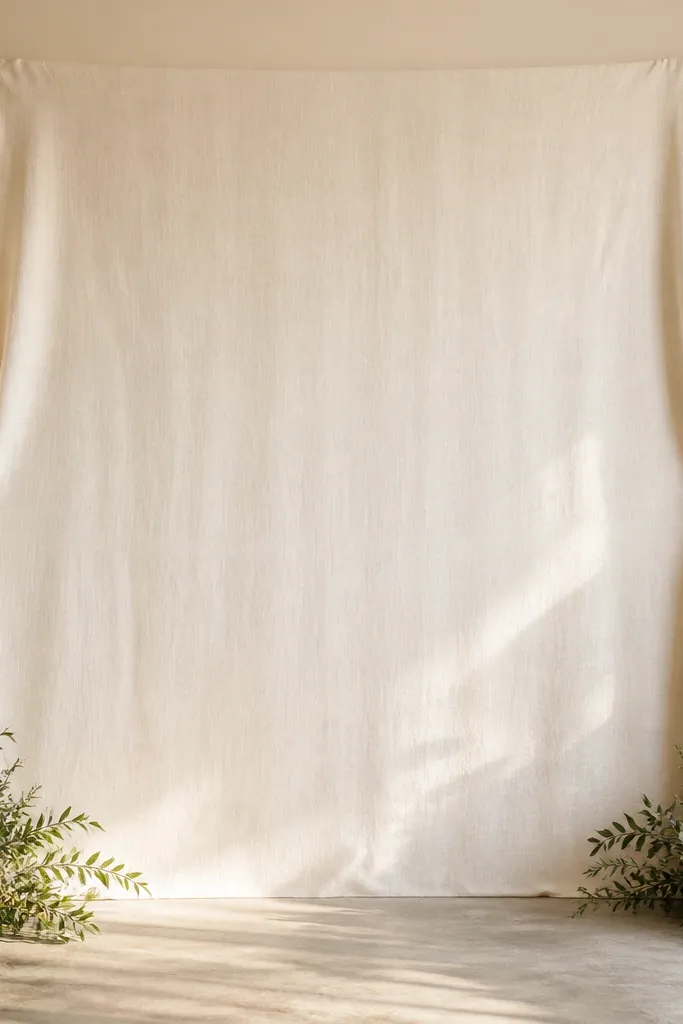
This is a clean, tailored stage look that still reads romantic. Linen has a matte texture that looks expensive in person because it doesn't shine like satin. Tie-back knots add structure and make the backdrop look intentional instead of draped by accident. Brass hooks tie into common wedding metals like gold jewelry and champagne accents, which helps photos feel coordinated. It flatters because the linen panel keeps the center bright and the side folds create a gentle frame around the couple.
Start with a wide ivory linen panel sized to cover the backdrop area, then hang it so it reaches roughly 9 feet high. Install brass hooks on both sides at about 5.5 feet height and tie the linen to those points with matching linen ties. Create knots that sit neatly, with tails trimmed to around 10 inches so they don't look messy. Add front corner greenery and brass candle holders on both sides, keeping heights under 18 inches. Use warm uplights so linen texture reads without looking flat.
Try thisIron or steam linen twice - once before hanging and once after you knot it, so the folds stay crisp.
Common mistakeAvoid stretchy polyester linen look fabric; it clings and wrinkles differently under stage lights.
21. Soft Grey Eucalyptus Swag with White Ribbon Bows
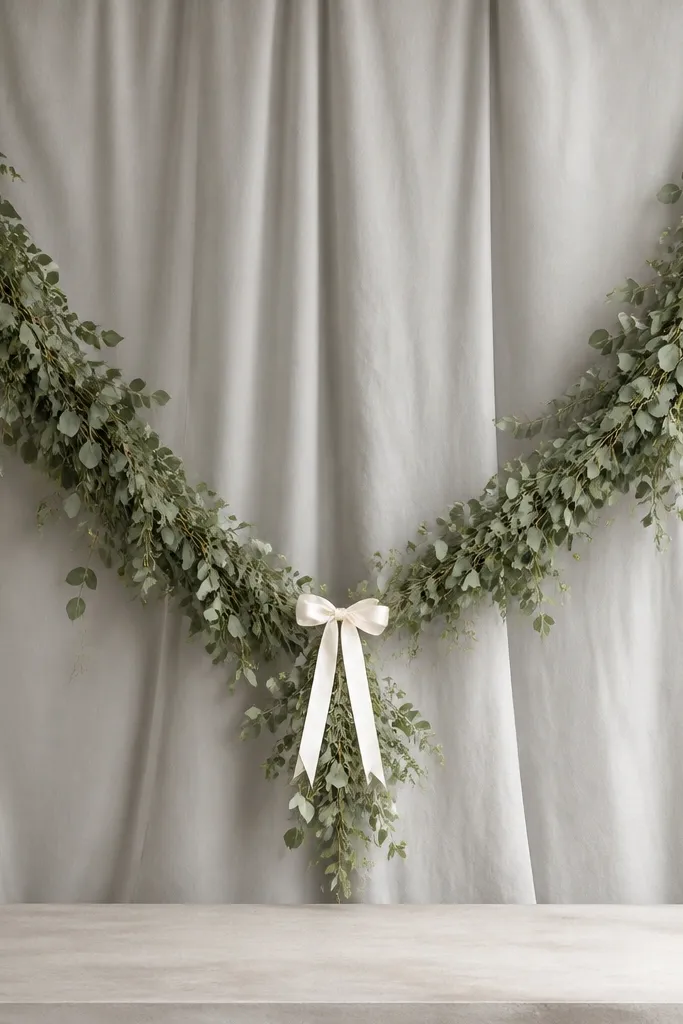
Neutral eucalyptus swags look elegant because they create gentle diagonal lines that feel soft and modern. I use grey-toned eucalyptus because it photographs cleanly and doesn't fight with blush or cream outfits. White ribbon bows add a classic wedding cue without adding heavy florals. The diagonal swags also help with symmetry - even if your stage is a little uneven, the diagonal line makes it feel designed. This works for both men and women wardrobes because the palette stays calm and lets clothing and faces be the focus.
Start by hanging a pale grey backdrop fabric behind the couple, stopping at about 8 feet high. Attach eucalyptus swags from top corners so they angle inward, meeting near the center at about 6 feet height. Secure the eucalyptus with floral wire to a top frame so it doesn't sag. Tie white ribbon bows at the meeting points, trimming tails to 12 to 16 inches. Add two small white candle holders at the front center corners to balance the swags.
Try thisUse ribbon with a firm edge so bows hold their shape for the full ceremony.
Common mistakeAvoid mixing too many greenery types; it makes the swags look like a random pile.
22. Champagne Tulle Skirt Backdrop with Two Front Lantern Trees
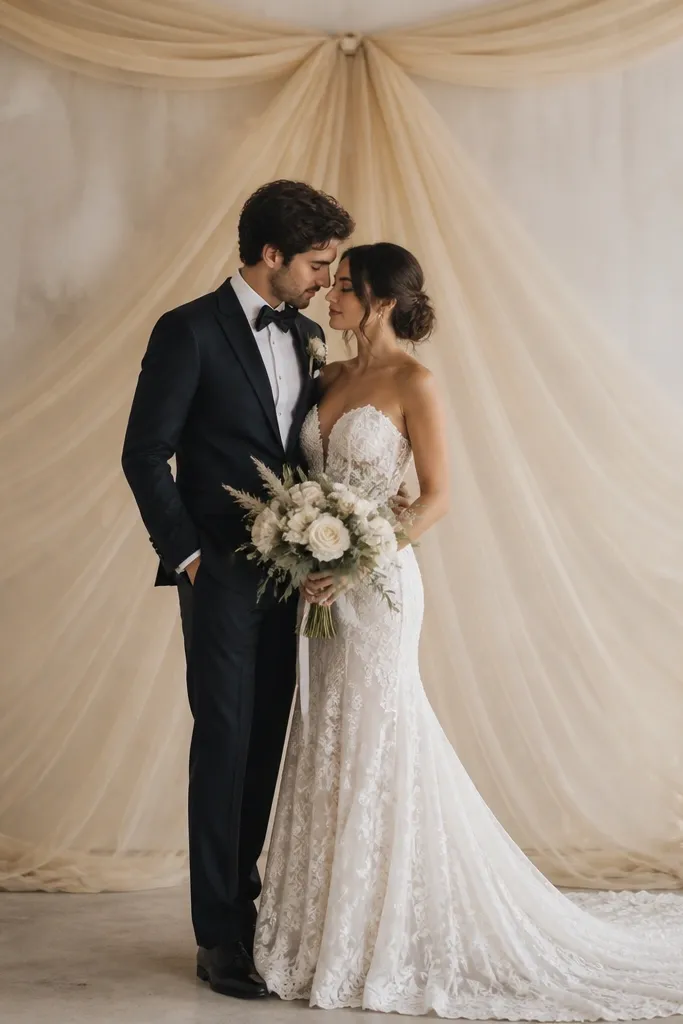
Tulle skirts look elegant because they create a soft, full shape without needing a wall of flowers. I use champagne tulle gathered at the top so it forms a gentle skirt effect, which flatters the couple by adding volume behind them. Lantern trees at the front corners add height and warmth without crowding the center. This setup works for indoor venues with dim lighting because tulle reflects light softly and keeps skin tones flattering. It also pairs well with both classic and boho wedding themes because champagne tone sits in the middle.
Start by installing a top gather rod or using a backdrop frame with hooks, then hang champagne tulle in multiple layers so it looks full. Gather the tulle at the top into even pleats, then let it fall to about mid-thigh level behind the couple. Place two lantern stands at the front corners, about 4 feet from the center line, ensuring lantern height is under 6 feet so it doesn't block heads. Add one small greenery sprig behind each lantern to connect to the backdrop. Turn on warm lighting inside the lanterns only for portraits if the venue allows it.
Try thisLayer at least three tulle pieces; one thin layer looks see-through and cheap in photos.
Common mistakeAvoid tulle that's too pale white; it can look washed out against bright venue lighting.
23. Taper Candle Ladder with Greenery Steps on Each Side
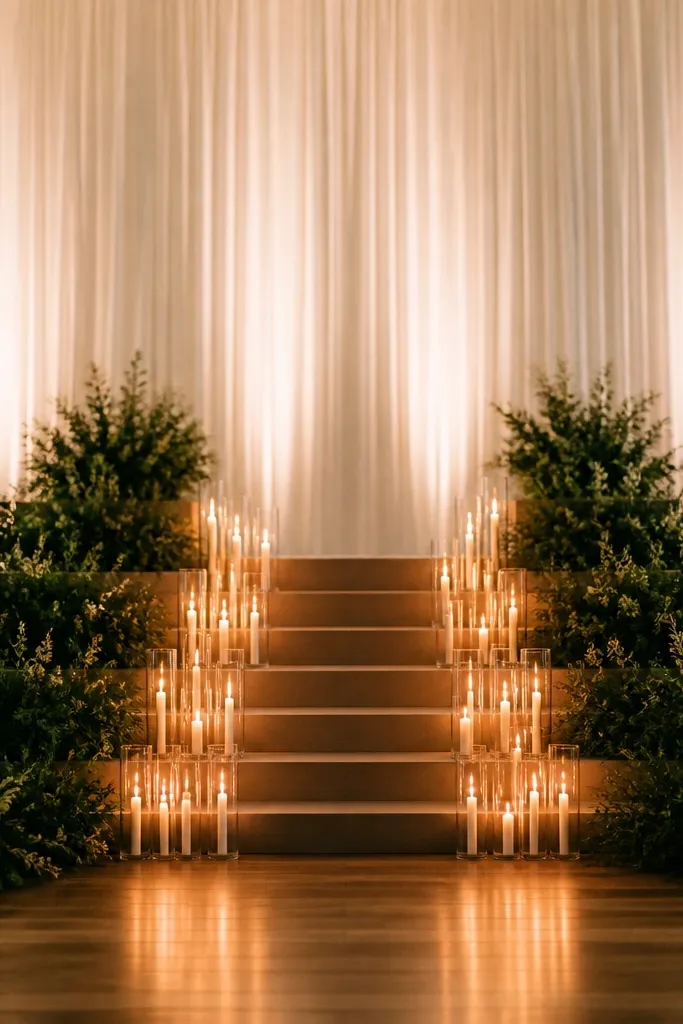
A candle ladder looks elegant because it creates vertical rhythm and a sense of ceremony. I use taper candles in graduated heights so the tallest sits at the center, which draws the eye straight to the couple. Greenery steps on both sides keep the stage from looking bare and add texture that balances the candles. This setup flatters in photos because the candle glow adds warmth and the shape is symmetrical. It's great for small stages where you can't build a huge backdrop but still want a "designed" feel.
Start by placing white drape behind the couple, then build a candle ladder at the front center. Use 7 to 9 taper candles arranged in three steps, with the middle step tallest and the outer steps shorter. Place greenery step clusters on the left and right, each cluster about 10 to 12 inches wide and matched in height to the candle steps. Use a non-flammable base tray or thick board so candles stay stable. Add warm uplights aimed at the candles from behind so the glow looks cinematic instead of flat.
Try thisKeep candle holders identical - mismatched bases look like a hasty rental lot.
Common mistakeAvoid placing candles too close together; it creates a hot, cluttered block on camera.
24. Neutral Monochrome Floral Corner Frames with Clean Center
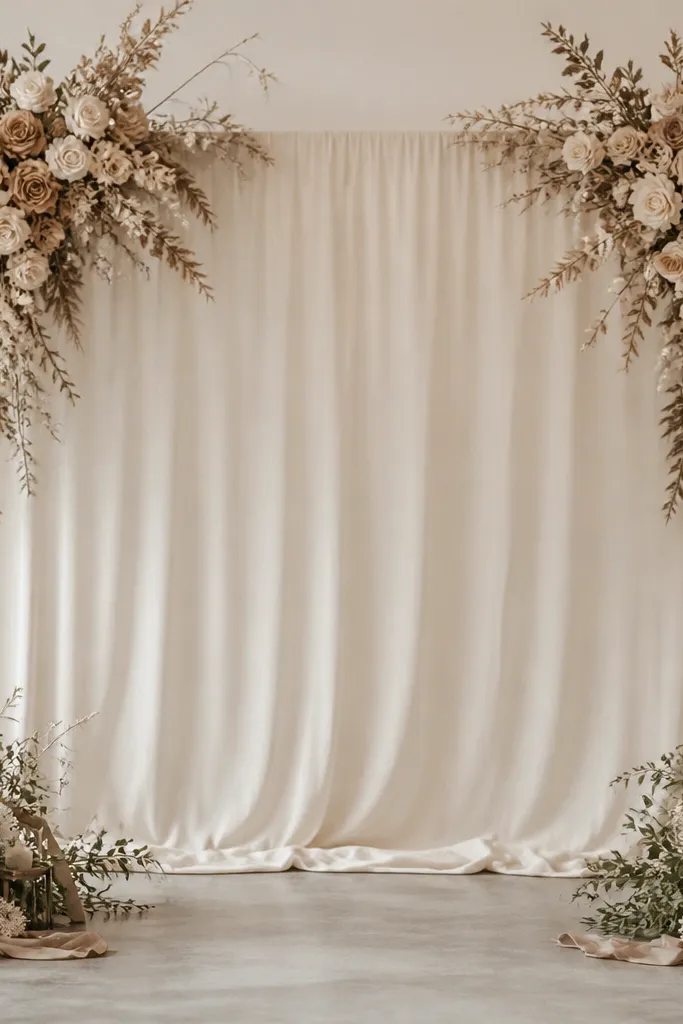
Corner frames look elegant because they give the stage structure without filling the center. I use neutral monochrome florals in taupe, cream, and soft brown, then place them only at the top corners so the couple stands against a clean background. This flatters because it keeps the visual focus on faces and doesn't create a busy wall behind. It also works when you have a strong dress or suit detail since the decor stays quiet. The monochrome palette makes it easier to match wedding party accessories and shoes without guessing.
Start by hanging a clean fabric backdrop in cream or light taupe, with no extra patterns. Build two corner floral frames at the top corners, each about 18 to 24 inches wide, using the same floral types in both corners. Place small greenery clusters at the front corners, keeping them low at about 12 inches tall. Add one thin ribbon band across the top of the backdrop at the center so the corners feel connected. Keep everything centered and symmetrical - measure from the center line to each corner arrangement so it matches in photos.
Try thisIf your florals have mixed textures, pull them together with one ribbon color so the corners look intentional.
Common mistakeAvoid placing florals in the center "just a little" - that usually ruins the clean framing effect.
25. Two-Tone Balloon and Fabric Column with Gold Confetti Accent
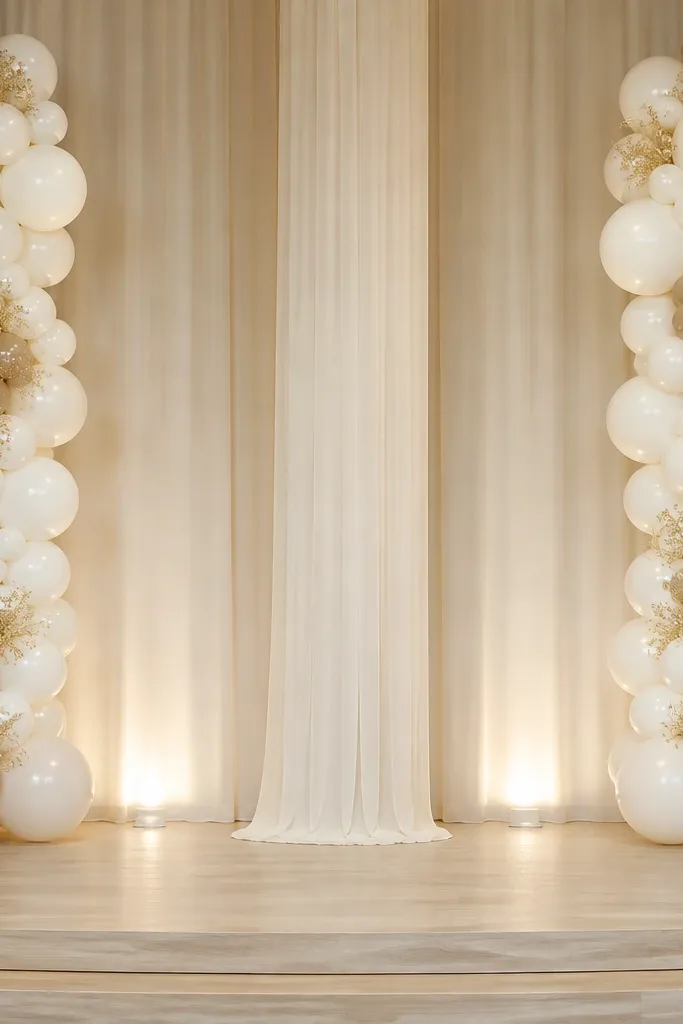
This looks elegant because the balloons are only part of the design and the fabric column keeps the stage from feeling like a balloon wall. I use two-tone balloons in off-white and pale champagne with a matte finish, then add a light gold confetti accent sparingly at the edges. The center fabric column gives the couple a clean backdrop that makes faces pop. This works well for couples who want a celebratory feel but still want an upscale look. The key is keeping balloon color count low and using fabric to anchor the composition.
Start by building two side balloon columns about 6.5 feet tall, using off-white as the base and pale champagne as the highlight. Add gold confetti accents only in clusters - 6 to 10 balloons worth - so it doesn't look like a party backdrop. Install a tall off-white fabric column at the center, about 4 feet wide, hanging straight so it looks architectural. Place the couple centered in front of the fabric column, then add two small greenery sprigs at the base corners for softness. Use warm uplights behind the fabric column so the balloons glow without glare.
Try thisUse balloon weights that are hidden under fabric drape so the columns look stable and tidy.
Common mistakeAvoid using glossy balloons with gold confetti; the glare makes the whole stage look messy.