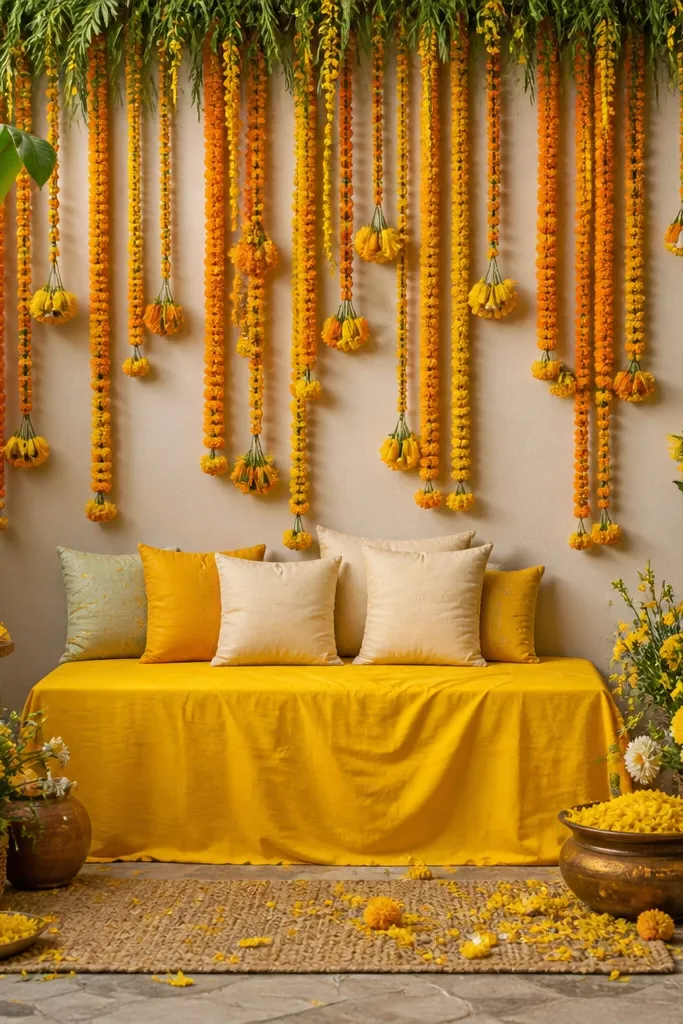
1. Mango-yellow drape curtain behind the haldi chair
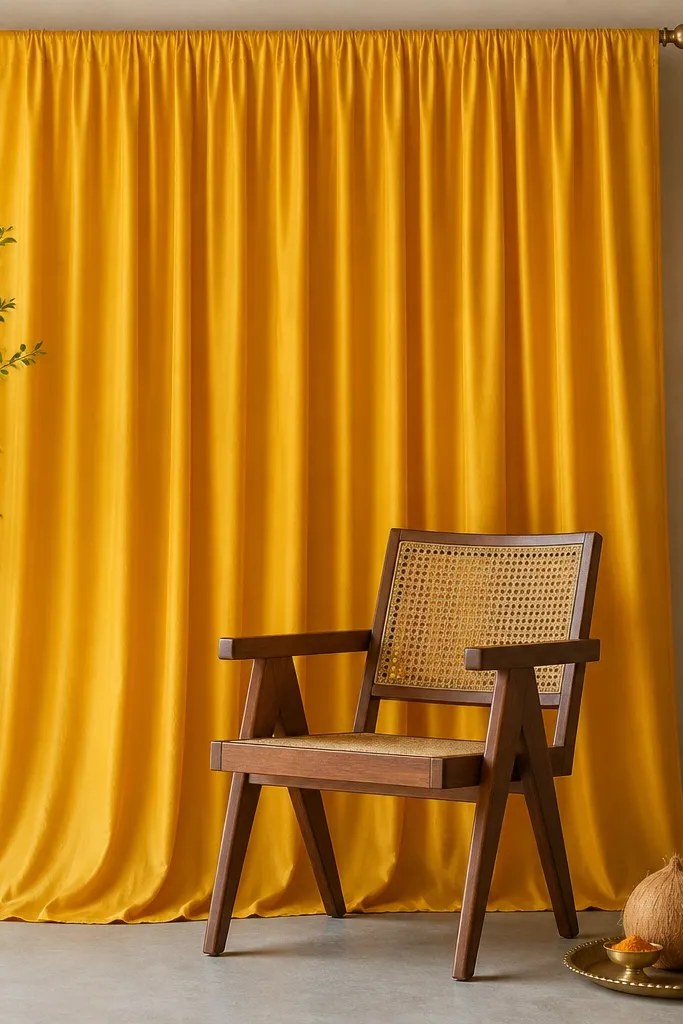
Use mango-yellow satin or art-silk because it catches daylight without looking flat. Hang it centered behind the chair so the bride's head and shoulders sit in the middle of a clean rectangle. This works best for people who want a classy look without heavy decor - the satin folds create depth even with minimal items. I've seen this look great on both warm and cool skin tones because the yellow is bright but not neon. Keep the chair in front and use one focal prop so the background stays the hero.
Start by measuring your space and cutting a drape width that covers at least 6 feet across (or use two 3-foot panels and overlap). Hang it using a rod pocket or two hooks so the top edge sits at shoulder height of the person sitting for haldi. Add one gold element on the floor - a small marigold garland loop or a single brass pot - so it anchors the base. Finish by placing a brass tray (or steel tray) with a coconut and two small turmeric bowls in the front third of the frame.
Try thisIf you're worried about wrinkles, steam the fabric and press the folds with your hands before hanging.
Common mistakeAvoid mixing bright neon yellow with multiple other bright colors - it reads messy in photos.
2. Marigold ring garland halo around a brass tray
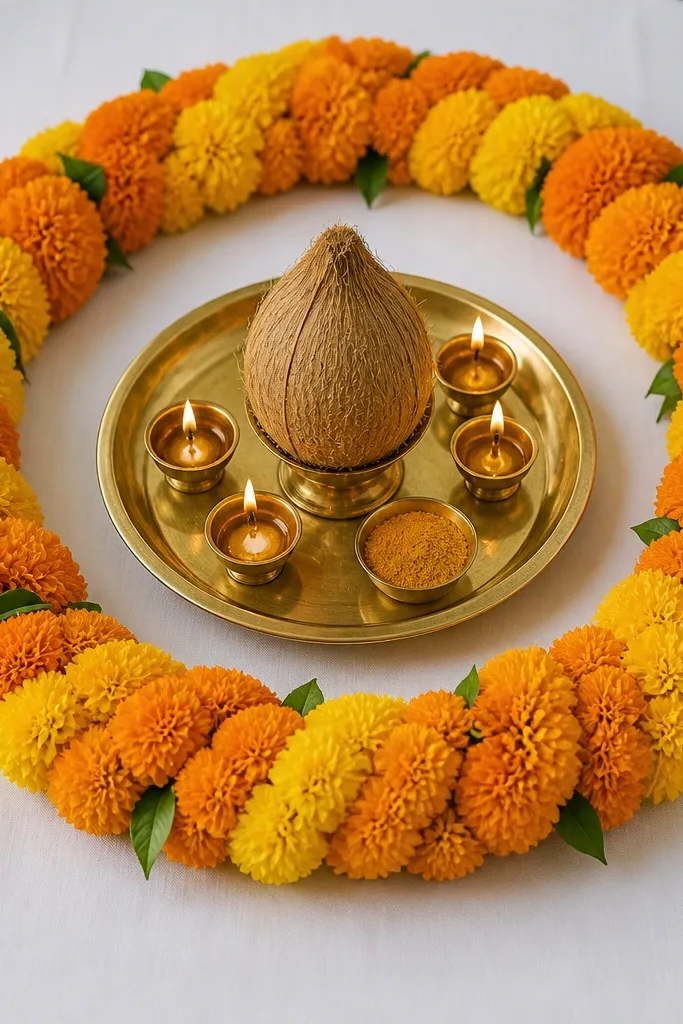
A ring garland gives you a "halo" effect that looks intentional from every angle. I like marigolds because their orange-gold tones match turmeric and make skin look warmer in daylight. This setup flatters people who want a traditional feel but still want modern photo framing. If you're fair-skinned, the orange ring adds warmth; if you're deeper skin tone, the gold highlights keep it bright. The brass tray adds shine so your photos don't look dull even when the background is plain.
Start with a sturdy base: lay a white or ivory cloth on the table and smooth it flat. Make a ring using a thick marigold garland and secure the ends with florist tape or thin wire so it holds its circle. Place the ring center stage, then set the brass tray inside so it doesn't wobble. Add 2-3 diyas or small tea lights around the coconut for height - keep them inside the ring so it stays clean.
Try thisUse florist tape on the back of the garland ends so the join doesn't show in photos.
Common mistakeDon't place the tray outside the ring - the halo effect breaks and the center looks empty.
3. Ivory sheer + gold fairy lights on a balcony rail
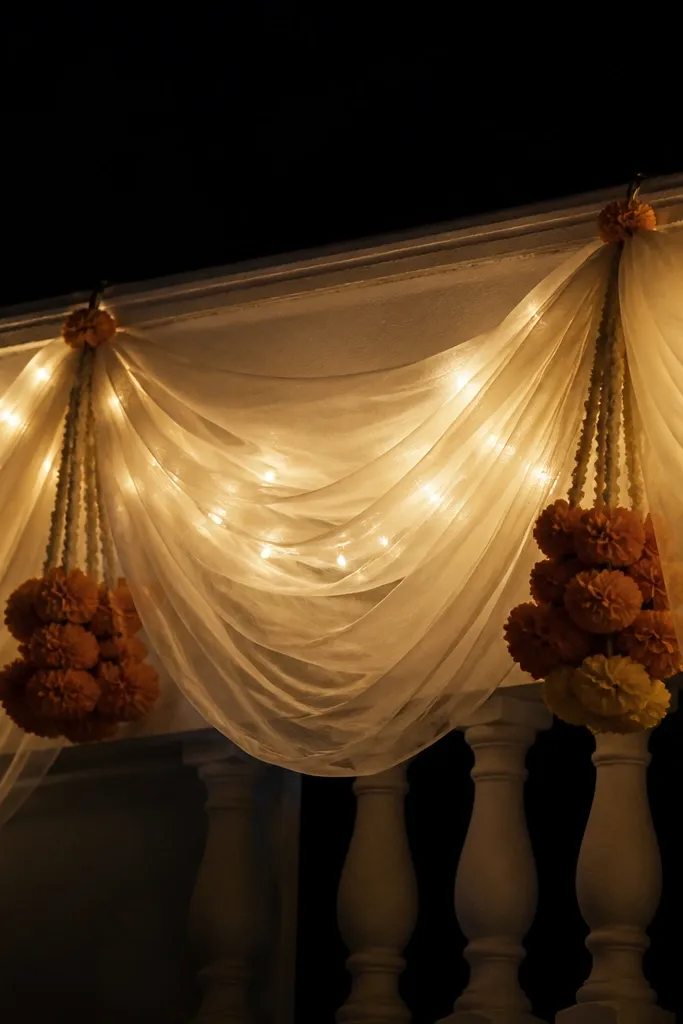
For evening haldi, ivory sheer with warm gold fairy lights looks magical without needing expensive lanterns. The sheer blurs harsh shadows and gives a soft glow around the haldi area. This is a strong choice if your space is narrow because it uses vertical lines on the rail. It flatters all skin tones because the light is warm and gentle, not blue-white. I've used this on small balconies and it still reads "event-level" in phone photos.
Start by hanging sheer panels along the rail - keep them in two vertical sections so they don't bunch. Weave warm gold fairy lights behind the sheer so the bulbs glow through the fabric. Tie two small marigold clusters at eye level on both sides to create symmetry. Finally, place the haldi setup on a small table directly beneath the brightest light point so the glow frames the action.
Try thisUse warm white (2700K) fairy lights, not cool white, or the gold tones won't match turmeric.
Common mistakeAvoid bright blue LEDs - they make yellow fabric look sickly on camera.
4. Paper pom-pom cluster backdrop on a frame
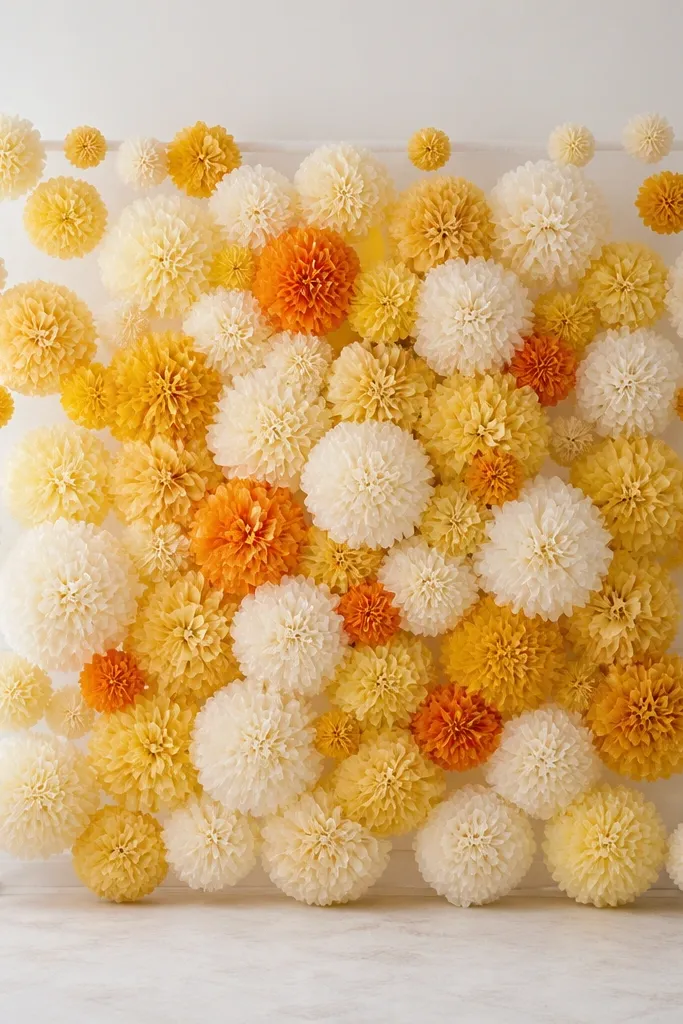
Paper pom-poms are the fastest way to get a full backdrop that looks like you hired someone. I like layering ivory, mustard, and a touch of marigold orange because it keeps the palette warm and camera-friendly. This setup is great for beginners because the shapes hide small unevenness. It also flatters people who want a clean, modern haldi without lots of fresh flowers. If your home is small, the backdrop creates depth without taking extra floor space.
Start by making or buying pom-poms in three sizes: small (6-8 inch), medium (10-12 inch), and large (14-16 inch). Mount them to a lightweight frame or even a folded clothes-hanger stand covered with a sheet. Place the largest pom-poms in a center column, then fill left and right with medium, and use small ones to cover gaps. Hang the backdrop behind the haldi chair so the pom-poms sit at shoulder height and don't cover the head.
Try thisUse a hot glue gun to attach the thicker base points only - it keeps the pom-poms from falling apart later.
Common mistakeDon't go all one size - flat, uniform pom-poms look like a party wall, not a haldi backdrop.
5. Turmeric-stained banana leaf runner + flower bowls
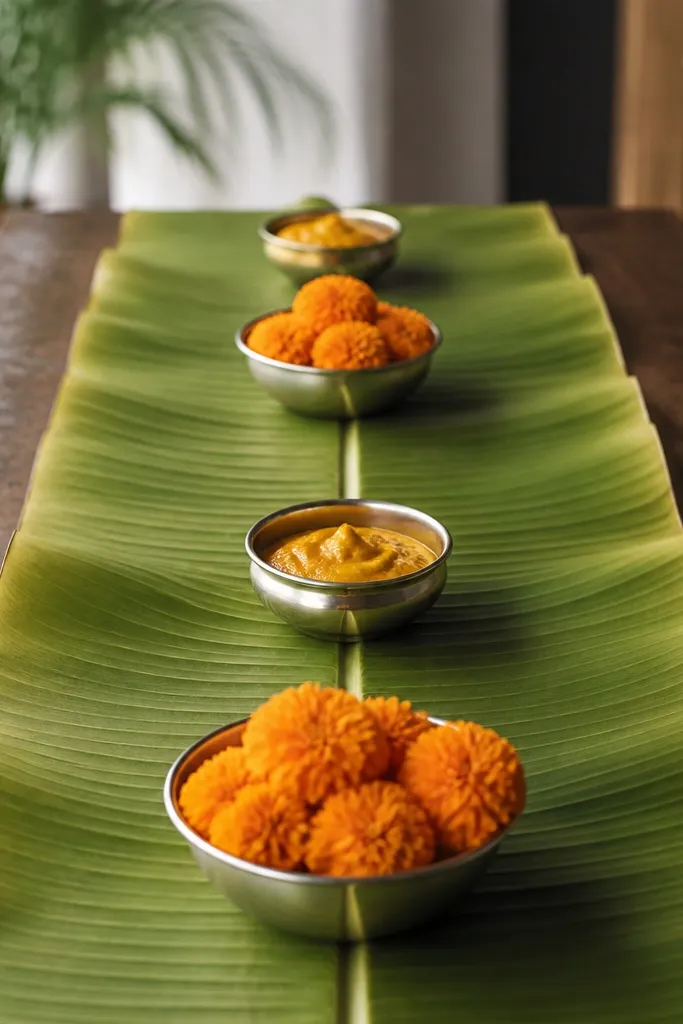
Banana leaf gives you an earthy base that looks authentic and photo-ready. It also makes your haldi setup feel grounded because the material texture is obvious even in close-up shots. This works especially well if your home decor is minimal, because the leaf texture adds interest without more clutter. For most skin tones, the green-yellow palette keeps things natural and not overly artificial. I've used banana leaves when I wanted the decor to feel traditional but still clean and organized.
Start by wiping banana leaves and laying a runner down the table length. If leaves curl, weigh them gently with a clean plate for 10 minutes. Place two or three steel bowls along the centerline - keep spacing about 6-8 inches so it doesn't look crowded. Add marigolds and a small stack of turmeric bowls in the front third. Finish by setting a brass diya stand at one end so the table has a focal corner.
Try thisRinse leaves lightly and pat dry so they don't smell strong in warm rooms.
Common mistakeSkip wet leaves - they make the table slippery and the bowls look unstable.
6. Two-side garland poles using bamboo sticks
Bamboo-stick garland poles add height and frame the haldi spot without building a full backdrop. I like this when your wall space is blank and you want a clear "stage." The spiral wrap looks neat and intentional, and it reads well even from the side in group photos. This flatters people because it creates vertical lines that draw attention upward toward the bride. It's also beginner-friendly because you're just repeating the same wrap pattern.
Start by placing two bamboo sticks at equal distances from your haldi setup, about 2.5-3 feet apart. Wrap a marigold garland around each stick in a spiral, securing with thin wire at the back. Add a small cluster at the top so the poles look finished, not like garlands hanging randomly. Drape a thin ivory cloth strip between the two sticks at the front so the center looks connected.
Try thisTie the wire behind the stick, not in front, so the join never shows in photos.
Common mistakeAvoid wrapping too tight - garlands can tear and look stretched.
7. Gold foil balloon cluster with marigold accents
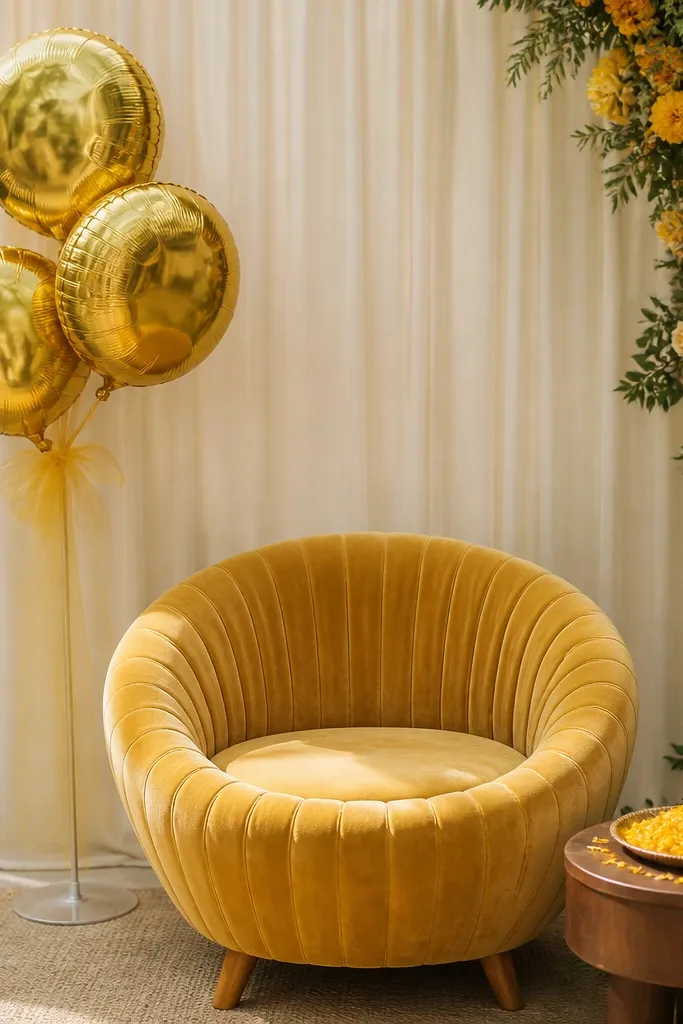
Gold foil balloons look surprisingly good for haldi because they add shine that matches jewelry and brass tones. I like using them behind the chair so the bride's face stays clear while balloons give background glamour. This works best for people who want an aesthetic, less traditional look but still want haldi color cues. It flatters in photos because the gold reflects light and brightens the frame. Keep the cluster small - two to four balloons - so it doesn't look like a birthday.
Start by inflating gold foil balloons and tying them with ribbon to a stable stand behind the chair. Place the stand so balloons sit slightly above head level, about 3-5 inches higher than the hairline. Add one small marigold bunch at the base of the stand, not on the chair, so it doesn't block the view. Finish by scattering a few marigold petals on a nearby tray or placing one marigold garland loop on the side table.
Try thisUse balloon ribbon in ivory or champagne, not bright green, so the palette stays warm.
Common mistakeDon't add helium too close to the face - balloons can block flash and make the image darker.
8. Mirror frame with turmeric garland border
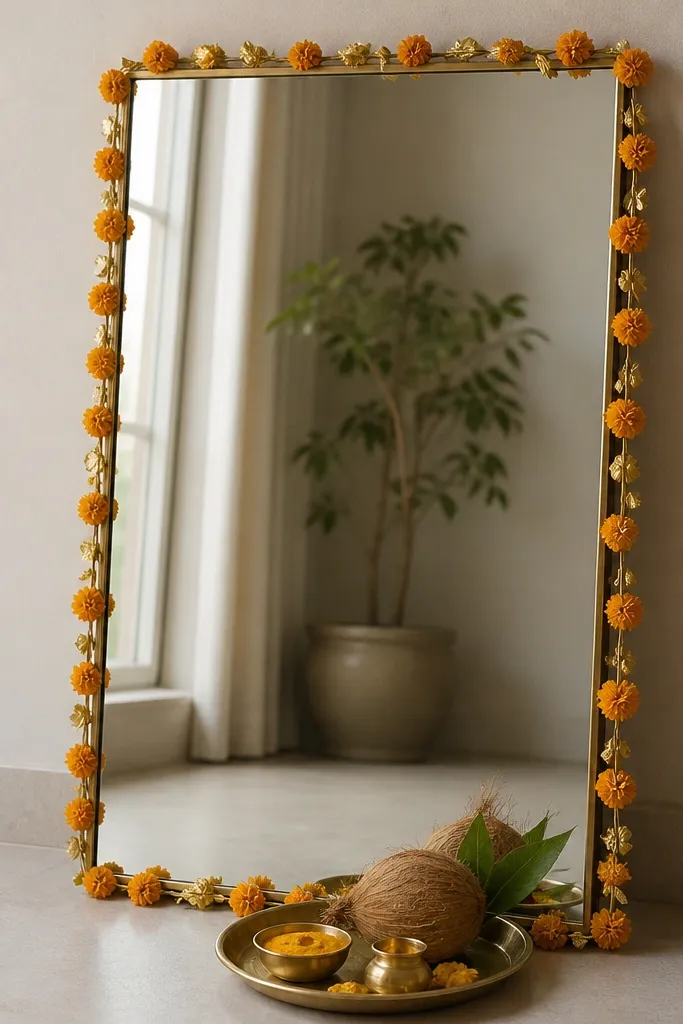
A mirror frame instantly makes a plain room look like a styled setup. When you border the mirror with marigold and small golden leaves, the reflection doubles your decor and makes the corner look bigger. This is great for homes with limited wall space because mirrors add depth. It flatters by bringing light back into the frame, especially in small living rooms. I've seen this work for both daytime and evening haldi when paired with warm yellow tones.
Start by choosing a mirror size that matches your chair width - roughly 2 feet wide for a standard living room setup. Lean it against the wall or hang it so the top aligns with the bride's shoulder height. Create a border using a thin garland loop around the edges - keep it 2-3 inches thick so it looks like trim. Place the haldi tray in front of the mirror so the coconut sits near the mirror's center in reflection.
Try thisWipe the mirror and avoid fingerprints - the shine shows up in every phone photo.
Common mistakeAvoid covering the mirror with too much floral - it becomes a wall of clutter and reflection gets messy.
9. Handheld rangoli-style turmeric powder border on the floor
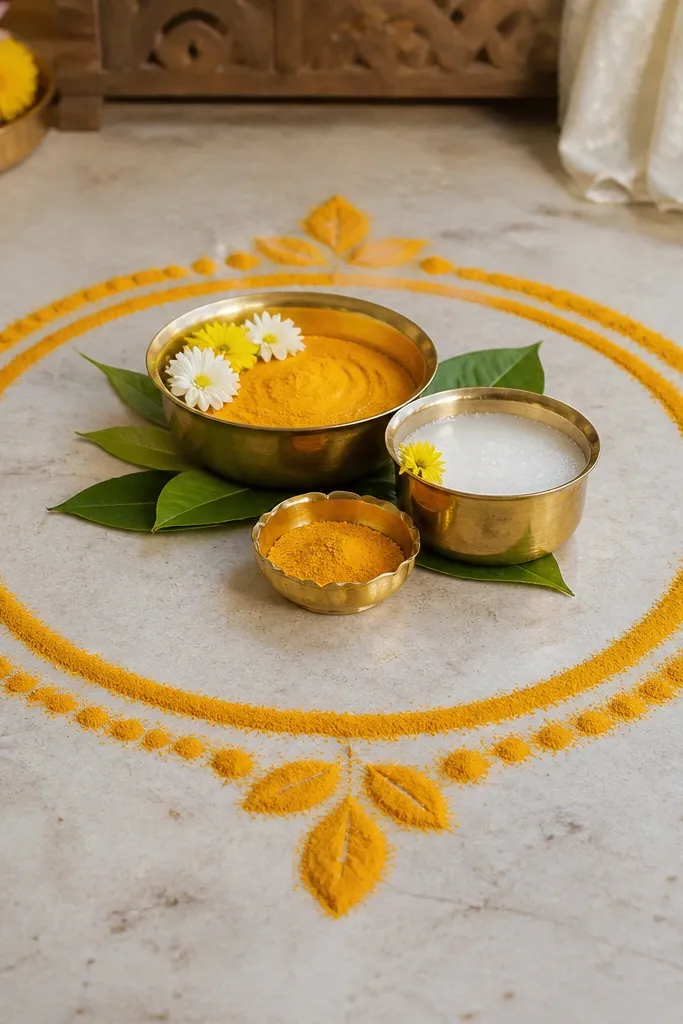
A floor border gives you a clean "stage" without hanging anything. I use turmeric powder borders because they match the event and look authentic in close-ups. This setup is great if you have neighbors, tenants, or landlords who don't allow heavy hanging decor. It also works for beginners because simple geometric shapes look good and don't require drawing skills. It flatters because it focuses attention on the bride's feet area and the haldi tray.
Start by sweeping the floor and drawing a rough circle using chalk or flour lightly. Sprinkle turmeric powder inside the border, then add concentric rings with a small spoon. Place brass bowls and a small diya stand within the inner circle, leaving a 4-6 inch gap from the border. Add two leaf motifs on opposite sides using colored rice flour or a thin line of turmeric paste. Keep the rest of the floor clear so the design reads crisp.
Try thisSeal the powder border with a tiny mist of water from a spray bottle held far away - it reduces dust.
Common mistakeAvoid thick, uneven powder piles - they look smudged in flash photos.
10. Terracotta planters with marigold and mango leaves
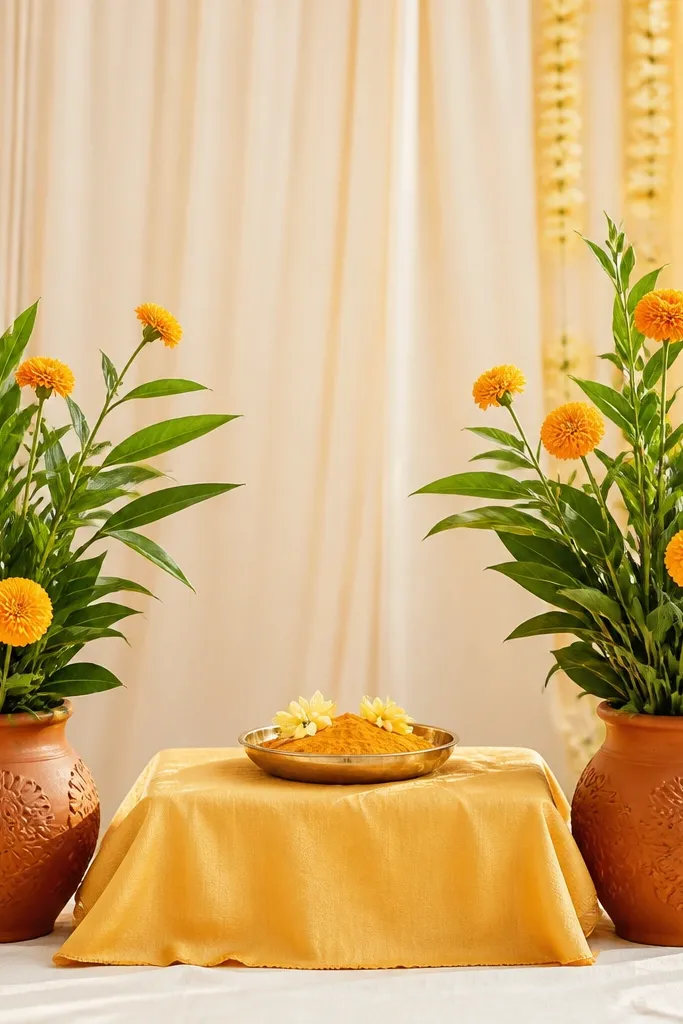
Terracotta planters make haldi decor look grounded and not overly synthetic. Mango leaves add a fresh green contrast that keeps yellow from dominating. This works well for people who like a traditional vibe but want it tidy and photo-stable. The warm brown of terracotta flatters all skin tones because it's neutral and earthy. I've used this arrangement in homes where the background wall is plain and I needed structure on both sides.
Start by placing two planters at equal distances on either side of the haldi table, about 1-1.5 feet away. Fill with wet floral foam or damp soil to hold stems - keep it stable. Insert marigold stems and tuck mango leaves around the edges, aiming leaves upward so the height looks intentional. Cover the top foam with a thin layer of marigold petals or extra leaves. Finish by placing one brass diya at the center front to tie it to the main setup.
Try thisWater the foam lightly and keep it covered with leaves so it doesn't look like exposed foam.
Common mistakeSkip plastic filler that shows through - it looks cheap next to fresh leaves.
11. Yellow and ivory layered fabric canopy over the table
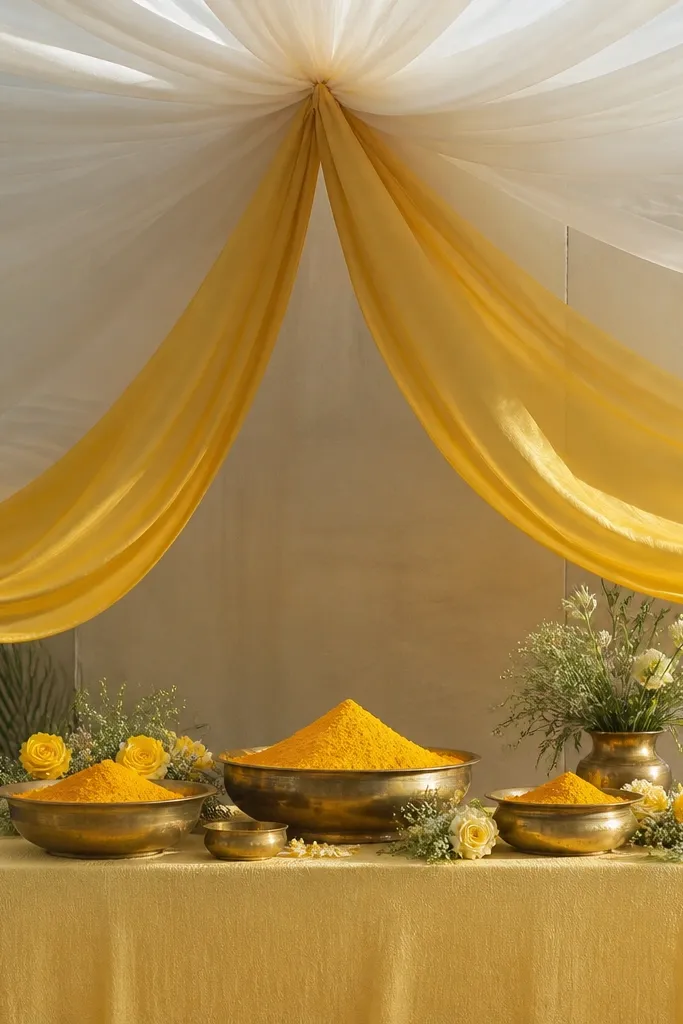
A canopy creates a "set" feeling even in a regular living room. Layering sheer ivory on top of yellow satin softens the look and makes the yellow look richer without going too bright. This flatters the bride because it frames her and the tray in one focal zone. It also works for both men and women haldi setups because the canopy doesn't depend on body shape. I use this when the room has bland walls and the table needs a visual roof.
Start by tying two points above your table - ceiling hook or strong stand - about 3 feet apart. Hang sheer ivory as the top layer, letting it fall in soft folds. Add yellow satin underneath in a gathered center, using a long satin strip and tying it at the midpoint. Place haldi bowls and a coconut tray in the center under the canopy, leaving 8-10 inches of space between the bowl edges and the fabric. Add a small marigold garland line along the front edge of the table.
Try thisUse safety pins to keep fabric layers from slipping on the table side.
Common mistakeDon't make the canopy too low - it blocks overhead light and looks messy in photos.
12. Coconut + marigold cluster on a height stand
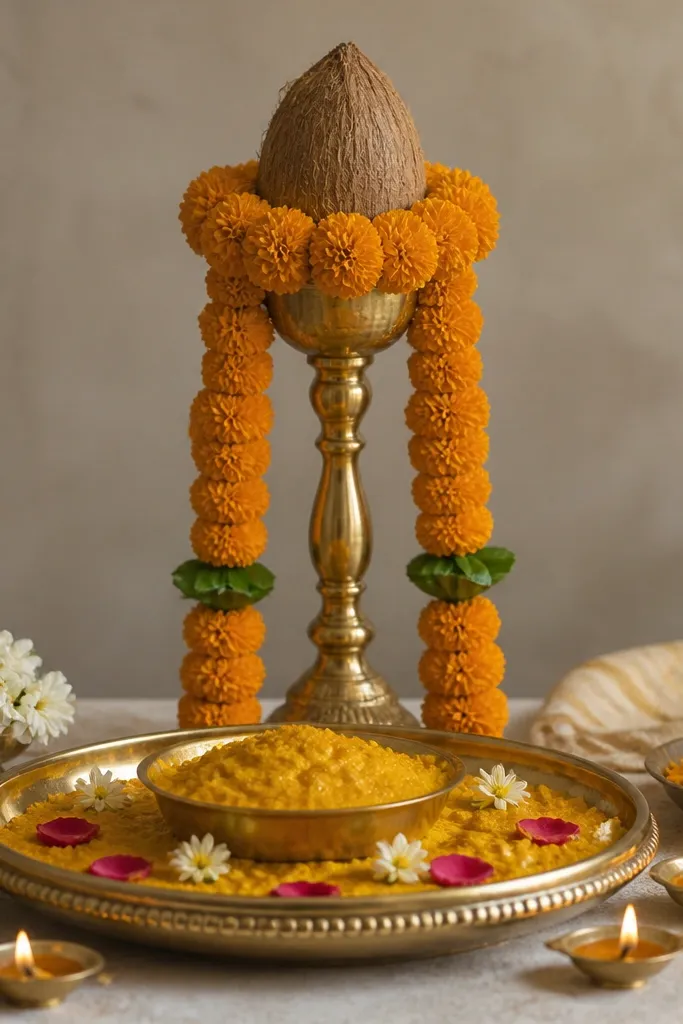
A height stand gives you vertical drama without building a full stage. I like coconut clusters because they feel traditional and they read clearly in close-ups. This is a great pick if your haldi setup has mostly flat items and you want something that adds height. It flatters because the eye moves upward, which looks good in group photos. For beginners, it's also easy - you're anchoring one strong focal piece.
Start by placing a sturdy stand or inverted stool covered with a cloth behind the haldi tray, centered. Wrap the coconut with a marigold garland and secure it with thin twine so it stays snug. Add two small diyas or small flower bowls at the base of the stand for a balanced look. Keep the cluster height about 2-3 feet above the tray so it doesn't crowd the bride's face. Finish by adding one small garland loop on the table front to connect the focal piece to the base.
Try thisTie the twine behind the garland so it doesn't show through the petals.
Common mistakeAvoid a wobbly stand - a slight shake shows in videos and looks unsafe.
13. Turmeric-themed photo corner using a plain wall + gold tape stripes
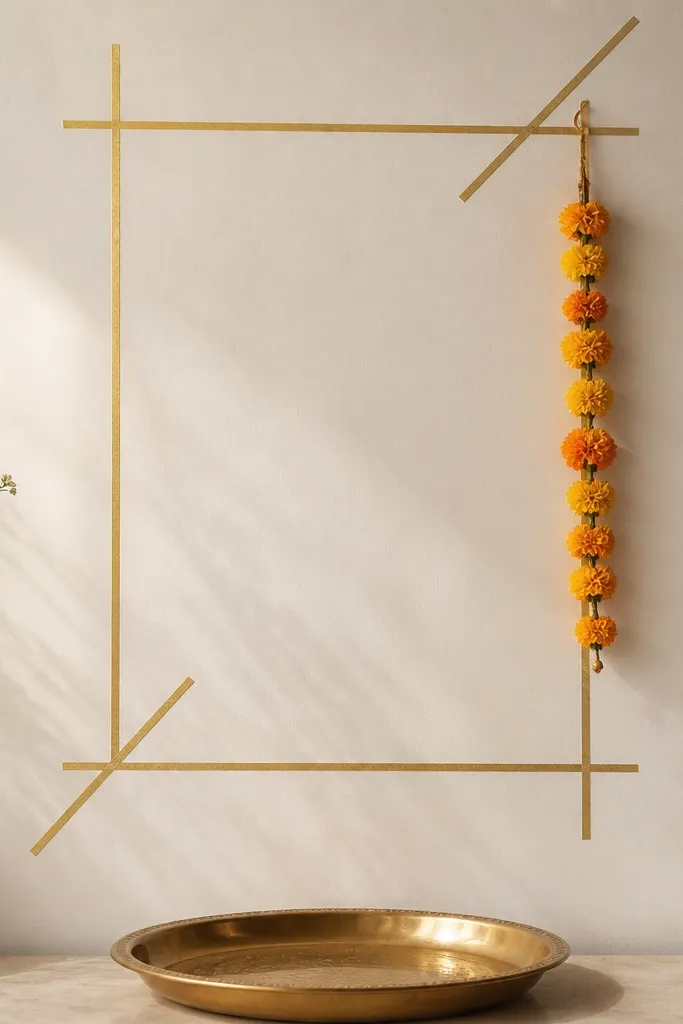
This idea is for people who want a clean, modern haldi photo corner without hanging heavy decor. Thin gold tape stripes create structure and guide the eye toward the haldi tray. It flatters by keeping the background uncluttered, so the bride and jewelry stand out. I've used it in rented apartments where drilling hooks is not possible. The gold tape also matches bangles and brass trays, so everything looks coordinated.
Start with a plain wall and clean it so tape sticks well. Use painter's tape to create a simple diagonal frame - one stripe from upper left to mid right, then another parallel line, leaving a small gap. Place a small marigold garland along the lower stripe edge. Set the haldi tray directly under the frame center so it lines up with the tape. Add two small yellow candles or diyas on the sides of the tray for symmetry.
Try thisUse painter's tape, not permanent tape, so you can remove it cleanly after the function.
Common mistakeAvoid thick tape blocks - they look like masking tape and don't read as intentional.
14. Golden lanterns and marigold garland on a doorway
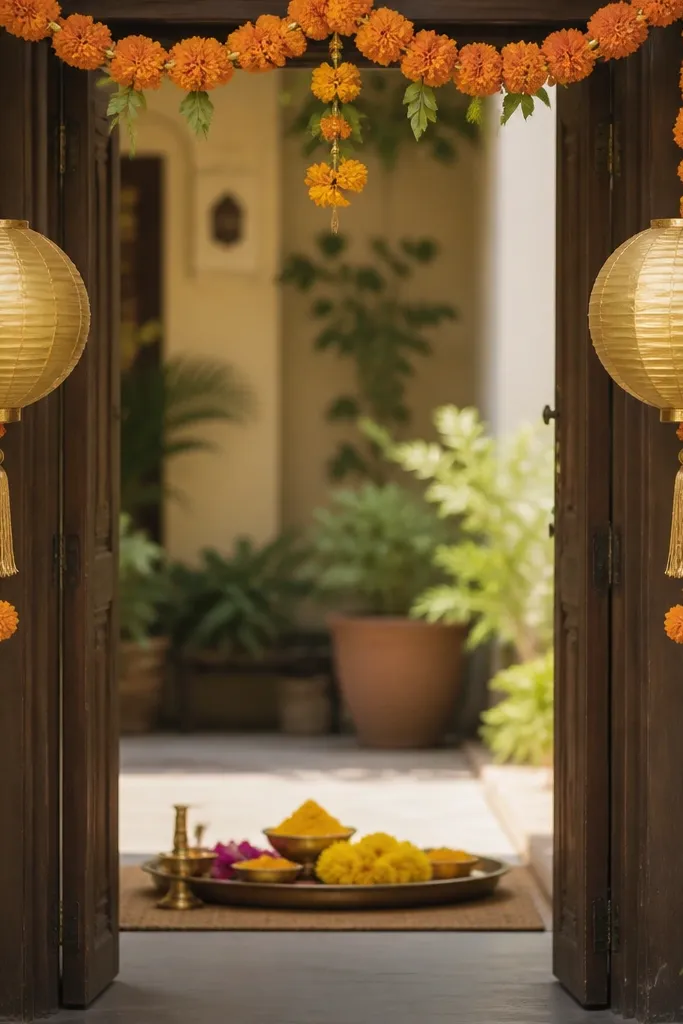
Doorway framing makes haldi photos look like a real event because it creates a natural border. Gold lanterns bring a warm glow and the marigold garland adds turmeric color. This is a strong option if your haldi happens near the entry and you want guests to gather in that spot. It flatters everyone because the doorway shape pulls attention toward the center. I've found it works even when the room inside is messy - the doorway frame hides a lot.
Start by hanging two lanterns with string at equal height on both sides of the doorway. Tie a marigold garland along the top edge so it sits at chest to eye level. Place the haldi tray just inside the doorway so it aligns between the lanterns. Add a small runner cloth on the floor leading to the tray - even 2 feet is enough. Finish with one brass diya stand on the left and one small flower bowl on the right.
Try thisHang lanterns slightly higher than eye level so they don't block faces in selfies.
Common mistakeAvoid lanterns too low - they make the frame feel cramped and shadows get harsh.
15. Yellow tea-light pathway with marigold petals around the tray
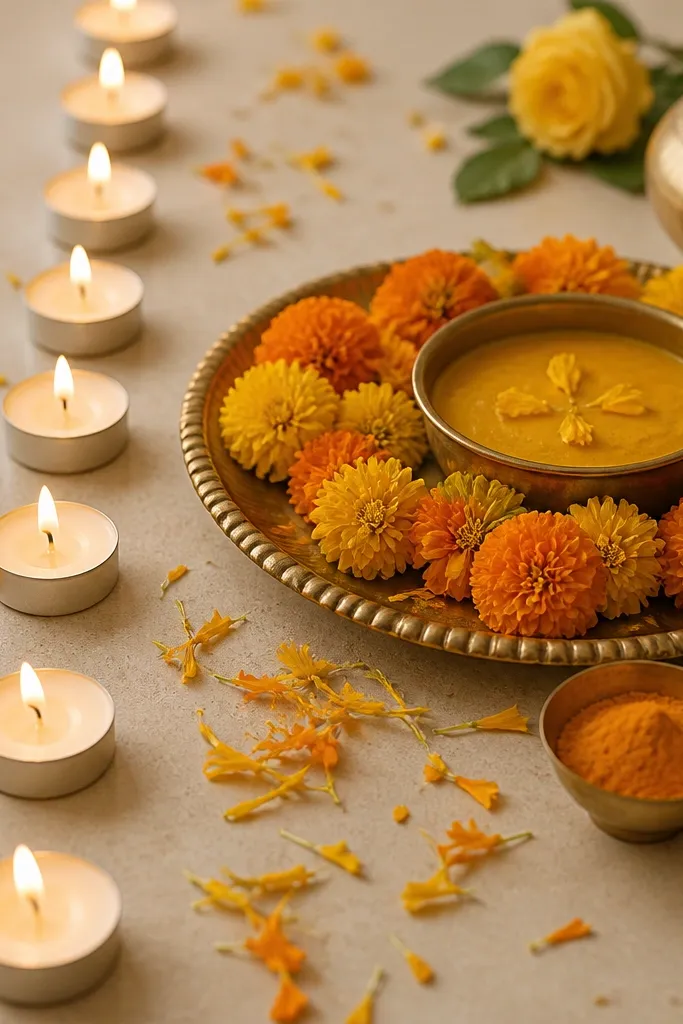
A pathway of tea lights gives your haldi setup a guided flow, which looks great in both photos and videos. The warm glow brings out yellow tones and makes skin look softer. This is best when you're filming on a phone because the line creates depth. It flatters because it frames the bride's hands and the tray in the brightest area. I use this when the rest of the room is neutral and needs a focal light trail.
Start by clearing a straight path on the floor toward the haldi tray - measure so it's about 4-6 feet long. Place tea lights in a line and keep them spaced 6-8 inches apart. Scatter marigold petals in a gentle curve around the tray instead of random chaos. Put turmeric bowls and a coconut in the center of the tray, and keep the brightest tea light closest to the tray, not far away. Add one small brass item at the end so the pathway doesn't look like it ends in empty space.
Try thisUse LED tea lights if you want this look during daytime or if kids are around.
Common mistakeDon't overcrowd petals - too many petals stick to shoes and look messy later.
16. Mustard and ivory flower wall using artificial garlands
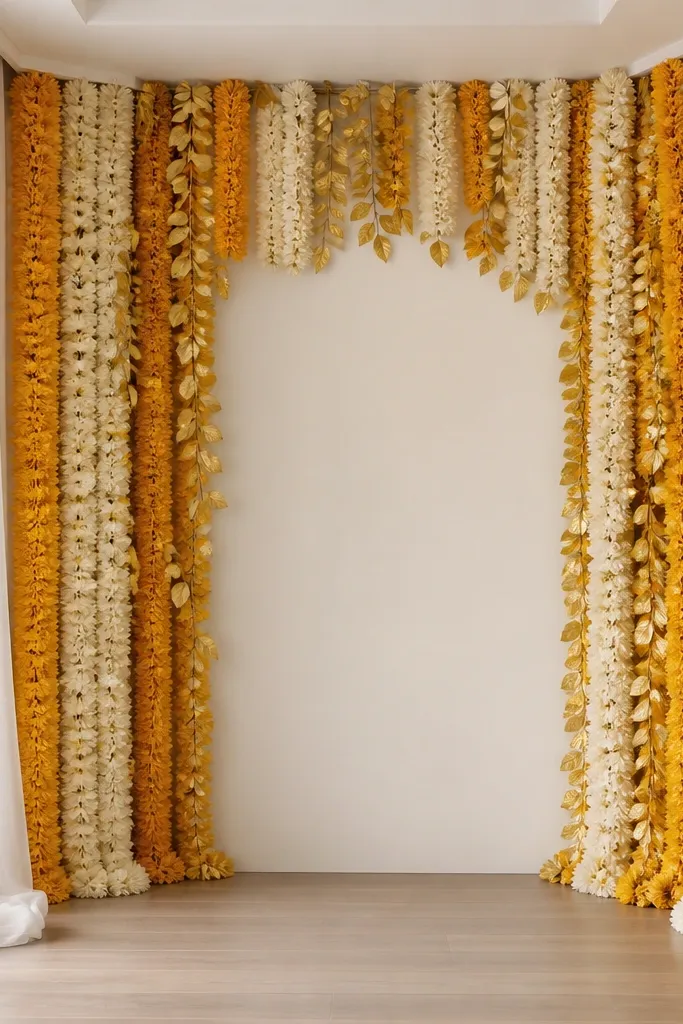
Artificial garlands are a lifesaver when fresh flowers wilt fast in heat. This mustard and ivory mix looks rich without needing multiple flower types. I like it for beginners because it's repeatable and you don't have to manage petals falling. This setup flatters by giving a smooth, consistent background that makes skin tones look even. If you want a setup you can reuse for mehendi or reception later, this is the most practical style.
Start by selecting garlands in two tones: mustard and ivory, plus a few gold leaf strands. Arrange them in vertical sections - leave a narrow central gap for the bride chair so the face stays clear. Tie the garlands to a stand, or use wall hooks with fishing line for a tight look. Add a small cluster of gold leaves near the center top to give a finished feel. Place the haldi tray in front of the center gap and keep table decor minimal so the background stays the main feature.
Try thisCut garland ties and re-tie at the top so the strands hang straight, not droopy.
Common mistakeAvoid mixing too many flower shades - it looks like leftovers from different events.
17. Saffron and gold rangoli stencil on a cloth panel
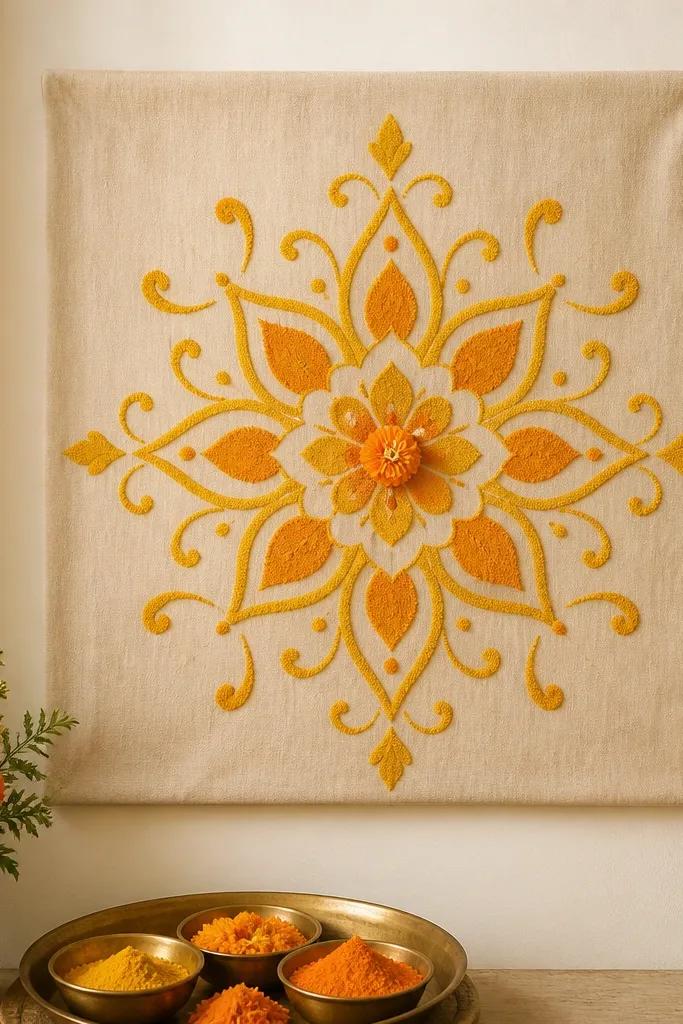
Using a cloth panel as a rangoli backdrop keeps the design clean and photo-friendly. Stencil shapes look crisp and beginner-safe, and you avoid the mess of floor rangoli. I like saffron and gold powder lines because they read warm and match turmeric. This is great for people who want a traditional motif but don't want to sweep powder after. It also flatters because the backdrop is a single plane, so portraits look sharp.
Start by stretching a light cotton cloth on a frame or using a backing board. Place a rangoli stencil at the center and lightly trace the pattern with chalk. Apply saffron-colored powder or turmeric paste through the stencil using a small spoon. Add a few gold highlights by mixing edible gold dust or metallic paint with a tiny amount of water and dabbing carefully. Hang the panel behind the haldi chair and place the tray directly under the center motif.
Try thisUse painter's tape to keep the stencil from slipping - it keeps the lines sharp.
Common mistakeAvoid watery paste - it bleeds through cloth and looks smudged.
18. Turmeric-yellow balloon garland arch with mini marigolds
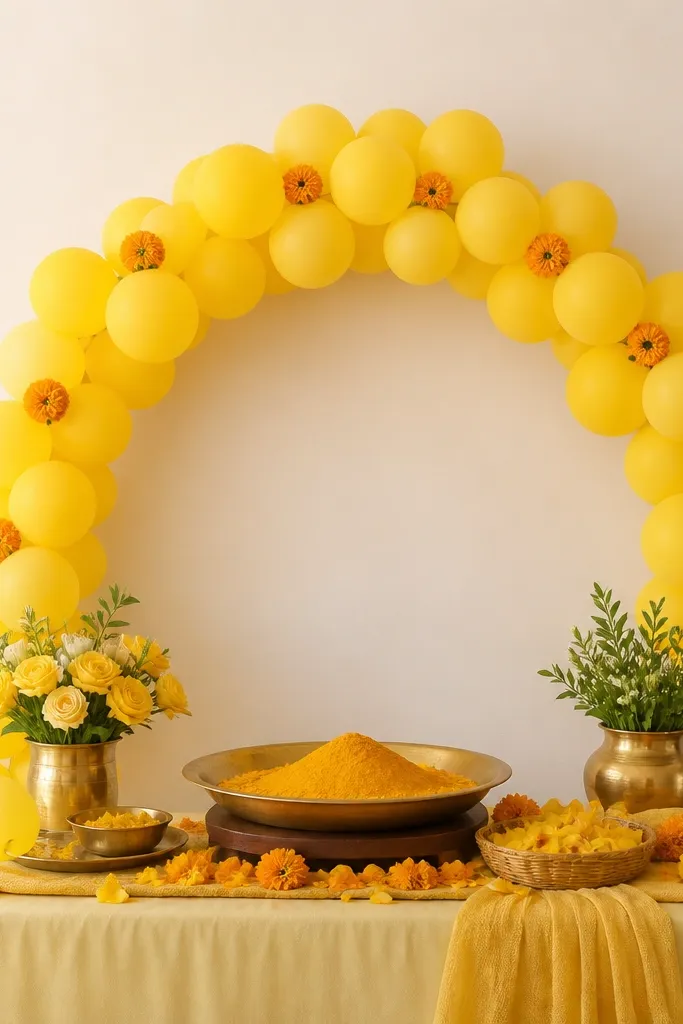
A mini balloon arch is a shortcut to an A-to-Z photo frame. The turmeric-yellow balloons echo haldi color without needing fabric drapes. I like adding mini marigolds because it keeps the look from feeling like a party. This setup works well for compact spaces where you still want a defined focal point. It flatters because the arch frames the face and makes the center look taller. It also keeps your hands free since balloons do the job of "decoration structure."
Start by creating a small arch width of about 4 feet and height of about 3 feet using a balloon arch kit or two poles. Use turmeric-yellow balloons as the base and add 1-2 lighter ivory balloons for contrast. Clip mini marigolds into the arch every 8-10 inches so the accents look evenly spaced. Place the haldi table directly under the arch center. Add one brass tray in the middle and keep side decor minimal so the arch remains the frame.
Try thisSpray a tiny amount of anti-static on balloons so they don't cling to fabric and look messy.
Common mistakeAvoid mixing too many balloon colors - it makes the arch look like a generic celebration.
19. Gold tulle swag with marigold knots on a clothesline
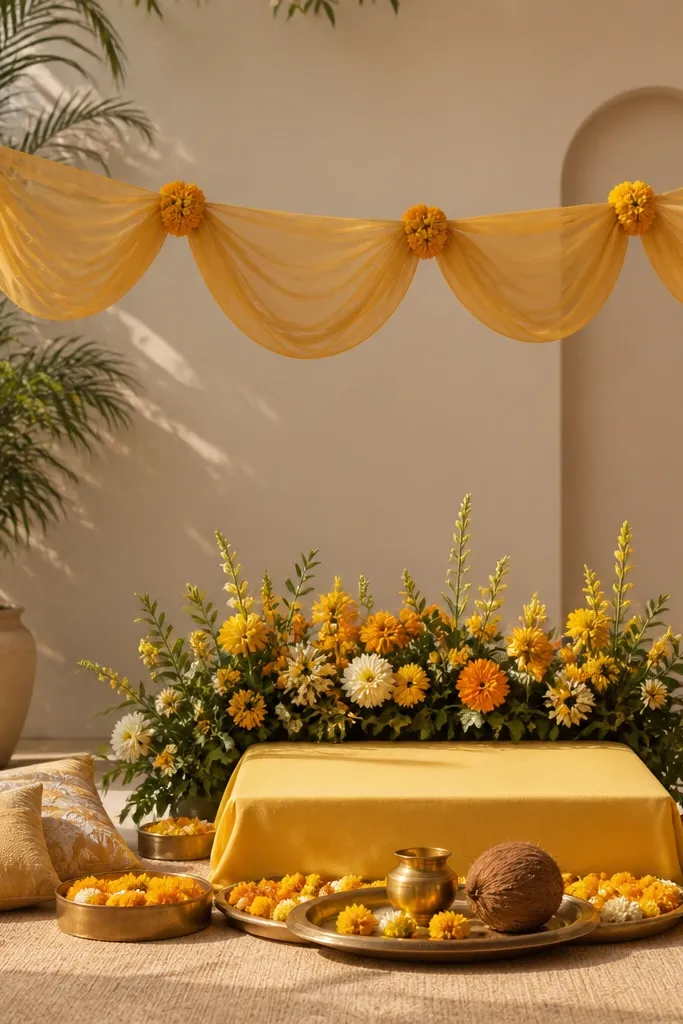
Tulle swags are forgiving and look polished even if you're not a craft person. Gold tulle gives a soft shimmer that matches jewelry and brass. Marigold knots add the haldi identity so it doesn't look like generic party decor. This works best when you have a horizontal space like a living room corner where you can hang a line across. It flatters because the swag sits above the action and creates a clean top frame for photos.
Start by stretching a clothesline or strong thread between two points above the haldi table - keep it about 6 feet high. Cut gold tulle strips and tie them in small swags across the line, about 10-12 inches between knots. Tie a marigold cluster at every second swag point so the pattern repeats. Hang the haldi tray under the center of the line so it aligns with the swag midpoint. Add a small yellow runner cloth on the table to connect the floor to the top decor.
Try thisUse double knots on the tulle so the swags don't loosen when people move around.
Common mistakeAvoid loose thread lines - sagging makes the whole decor look uneven.
20. Turmeric paste calligraphy on a white cloth banner
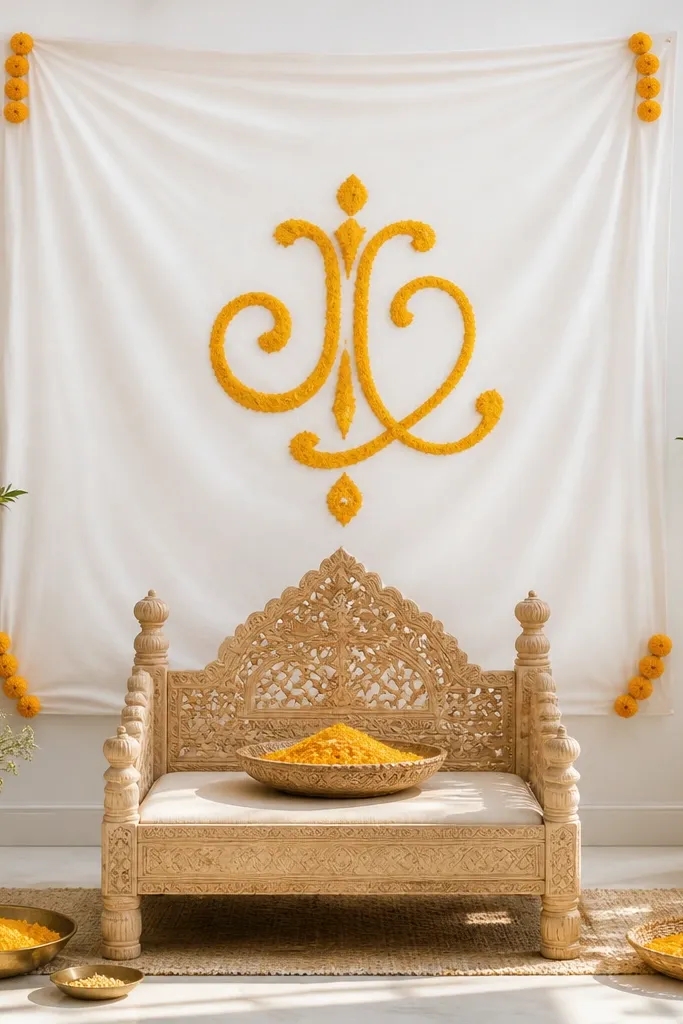
A simple banner with turmeric paste calligraphy gives you a personal, traditional touch without filling the whole space with objects. I've done this with plain white cotton because it absorbs paste well and looks bright in photos. It flatters because your eyes read the text first, then the face, so the composition stays focused. This is ideal if you want aesthetic decor that still feels like haldi and not like a generic backdrop. It also works for both men and women because it doesn't depend on floral volume around the body.
Start by washing and ironing a white cotton cloth so it's flat. Stretch it on a frame or hang it with cloth clips so it stays taut. Write your phrase using a stencil and turmeric paste mixed to a thick, scoopable texture. Let it dry fully in the open air, then hang it behind the haldi chair. Keep side decor minimal - one marigold garland loop on the chair or one brass tray at the front - so the banner remains the focal point.
Try thisLet it dry for 6-8 hours before the function so it doesn't smear when touched.
Common mistakeAvoid writing freehand on the first try - stencils keep the look clean.
21. Two-tier tray stand with marigold and mango leaves
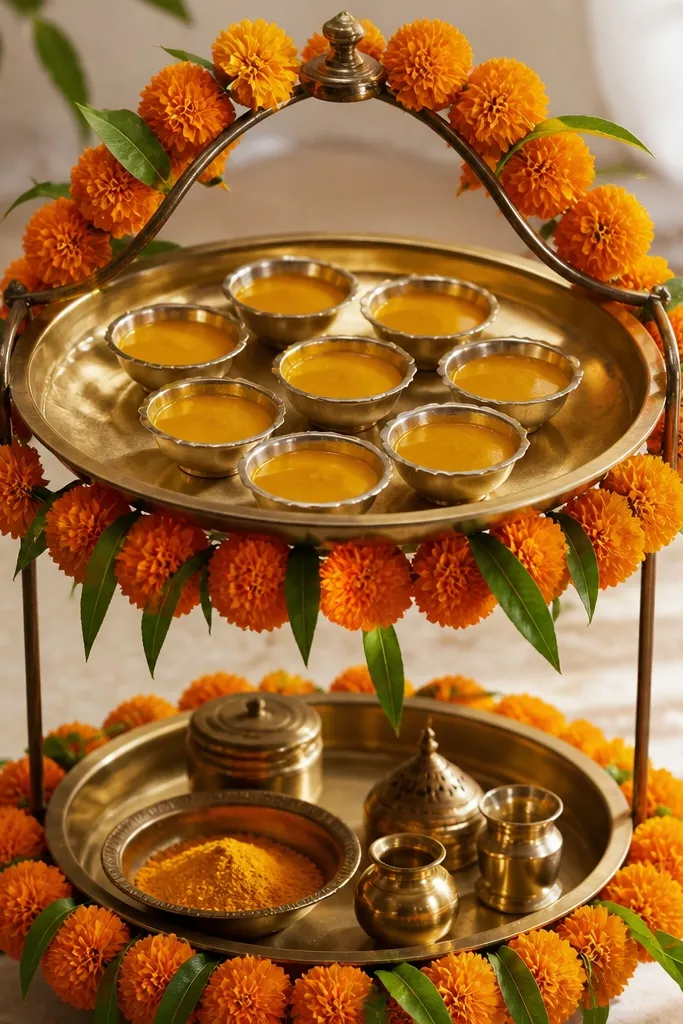
A two-tier stand makes your haldi setup look layered and expensive without needing a huge decor budget. The top tier is where you place the coconut and turmeric bowls, and the lower tier holds diyas or extra marigold clusters. This flatters because it adds height and keeps everything visible in group photos. I like mango leaves here because they add green color and a fresh texture that stands out against yellow. It's also great for homes where you want decor that stays organized and doesn't spill across the table.
Start by placing the stand on a cloth-covered table so it doesn't slip. Layer the top tier with a brass tray in the center, then add turmeric bowls around the coconut with equal spacing. Wrap marigold garland loosely around the stand edges so it doesn't cover the bowls. Fill the gaps between flowers with mango leaves, tucking them inward for a tidy look. On the bottom tier, place 3-4 diyas or small steel bowls, keeping the brightest items centered.
Try thisUse thin wire to hold garlands in place around the stand so they don't slide down.
Common mistakeAvoid overcrowding the top tray - too many items make the arrangement look chaotic.
22. Turmeric-yellow table runner with scattered petals and brass mini pots
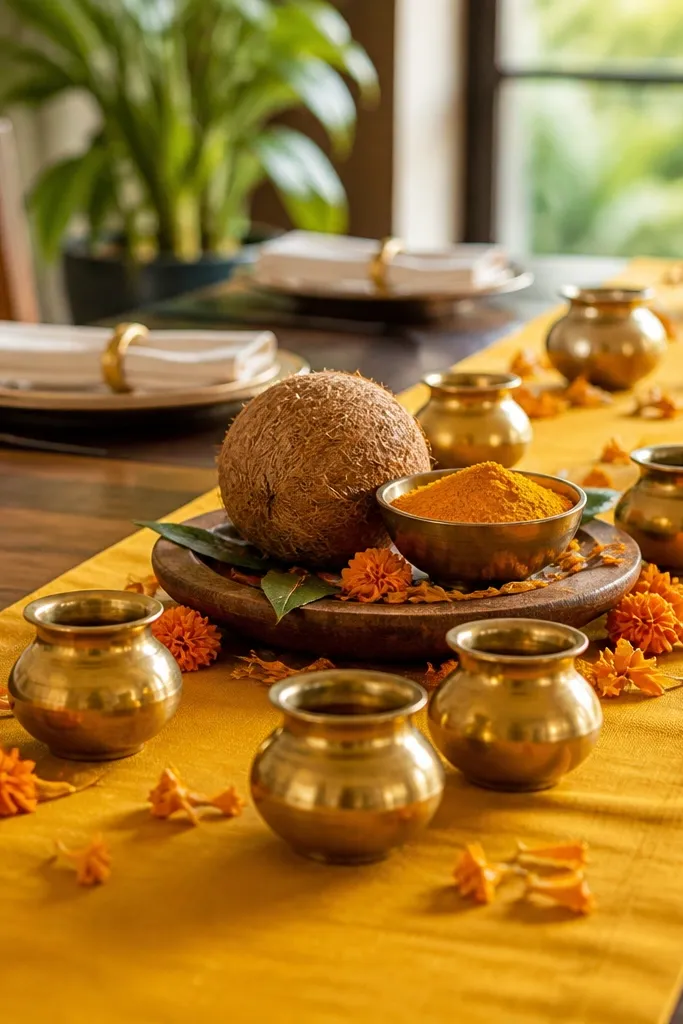
A strong table runner is the quickest way to make a normal table look styled. Turmeric-yellow fabric reads like haldi and gives a warm base for brass and steel items. I like using brass mini pots because they add height and shine in close-ups. This setup works well for beginners who want a neat, centered look without building a backdrop. It flatters because the warm runner pulls attention to the center and makes jewelry look bright. It also helps with cleanup since petals are contained on fabric.
Start by laying a turmeric-yellow satin or cotton runner across the table and smoothing it flat. Place the coconut and turmeric bowls in the center, then line 3 brass mini pots along both sides at equal spacing. Scatter marigold petals in two or three small clusters near the pots, not all over. Add one brass diya stand at the front edge so the setup looks complete from the camera side. Keep the rest of the table clear - no extra random trays.
Try thisChoose a runner width of at least 20 inches so it frames the items in photos.
Common mistakeAvoid using a too-sheer fabric runner - it looks see-through and makes the table look messy.
23. White chair back drape with marigold fringe
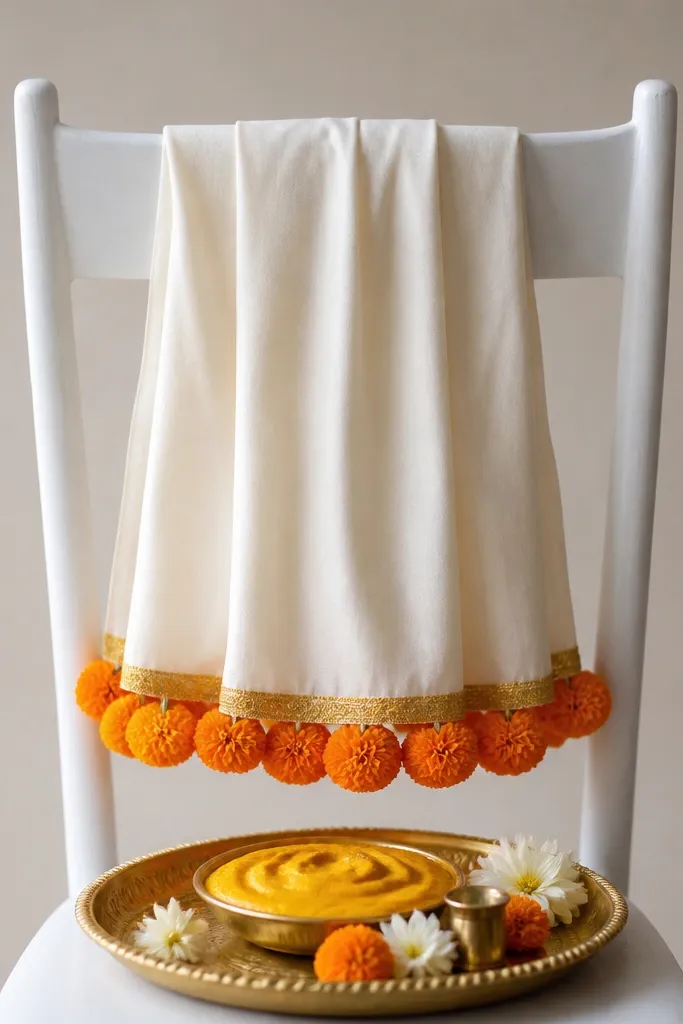
If you're using a chair for haldi, dressing the chair back is one of the smartest photo hacks. The drape creates a clean backdrop right where people look first, and the marigold fringe adds a traditional edge. This flatters because it frames the shoulders and keeps the head area brighter. It works for both men and women since chair back styling is neutral and consistent. I've used this in homes where the wall behind the chair was cluttered - the chair becomes the decor point instead.
Start by draping ivory cloth over the chair back so it covers the top half and falls down to just above the seat. Tie it with two hidden safety pins or ribbon at the sides. Create a marigold fringe using a short garland strip cut into smaller segments, then tie the segments along the bottom edge of the drape. Place the haldi tray directly in front of the chair so the fringe sits behind the tray in photos. Add one small brass bowl on the tray to match the marigold warmth.
Try thisUse double-sided tape on the chair back for the first 10 minutes of setup so the cloth doesn't slide during movement.
Common mistakeAvoid tying the fringe too high - it should frame the drape bottom, not cover the chair entirely.
24. Gold and ivory paper fan backdrop for a clean modern look
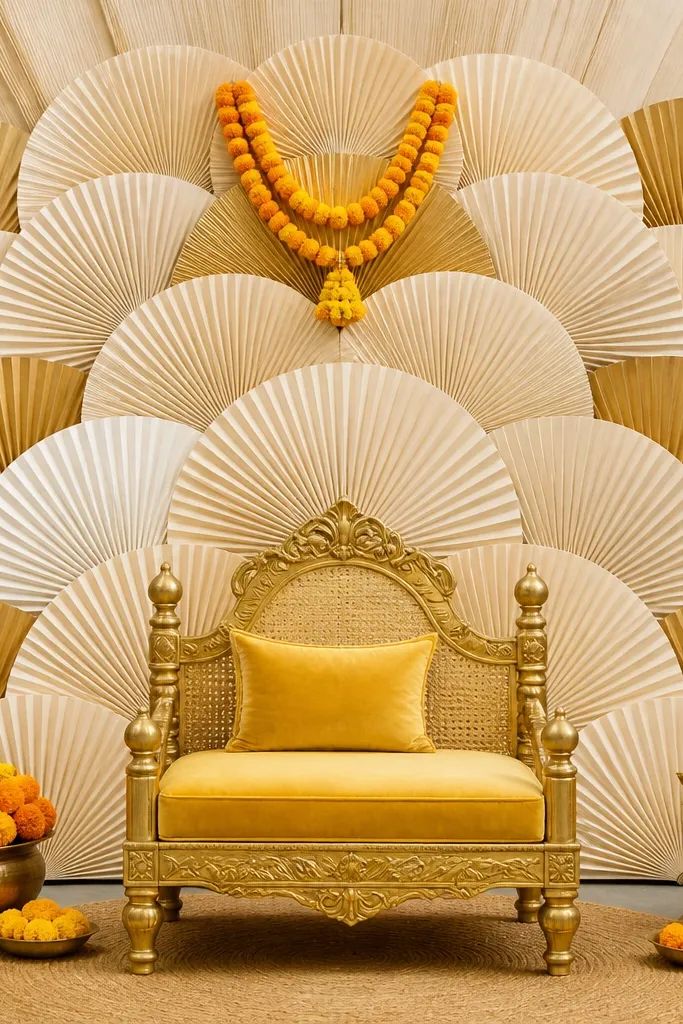
Paper fan backdrops look modern and crisp, and they photograph well because they create strong shape lines. I like ivory plus gold because it stays elegant while still matching turmeric warmth. This setup is flattering for portraits because it adds a halo-like semicircle behind the face without blocking it. It works best if your haldi is in a brighter room - the paper fans catch light and look dimensional. It's also a great option when you want decor that is easy to remove after the event.
Start by folding or buying paper fans in two tones: ivory and metallic gold. Arrange them in a semicircle behind the chair, with the largest fans in the center and smaller ones toward the sides. Secure fans to a backing board or directly to a wall using removable hooks and fishing line. Add a small marigold garland at the top center to connect the theme to haldi. Place the haldi tray centered in front so the semicircle frames the action.
Try thisUse a light touch with removable hooks so you don't damage paint on the wall.
Common mistakeAvoid too many colors - gold and ivory alone looks clean, extra shades look busy.
25. Turmeric bowl styling with varying heights on a single tray

If your decor budget is tight, you can still make it look styled by building height on one tray. I do this by stacking bowls and adding one taller element like a small stand for the coconut or a larger diya. This flatters because it gives depth without needing a full backdrop. It also reads well in close-up photos where people focus on hands and bowls. The yellow tones stay consistent, and brass adds shine so it doesn't look dull.
Start with a large steel or brass tray and cover it with a thin ivory cloth so the turmeric color pops. Arrange the coconut at the back center and place marigold garland behind it like a soft fence. Put the largest turmeric bowl in the center front, then add smaller bowls to the left and right. Lift one bowl on a small stand or folded cloth so you create a height difference. Finish by placing a diya stand at the tray front edge and keeping the rest of the table empty.
Try thisKeep at least one item lower than the coconut - it prevents the whole tray from looking like a pile.
Common mistakeAvoid placing all bowls at the same height - it makes the tray look flat and unfinished.