1. Satin Dupatta Curtain Wall with Marigold Edge
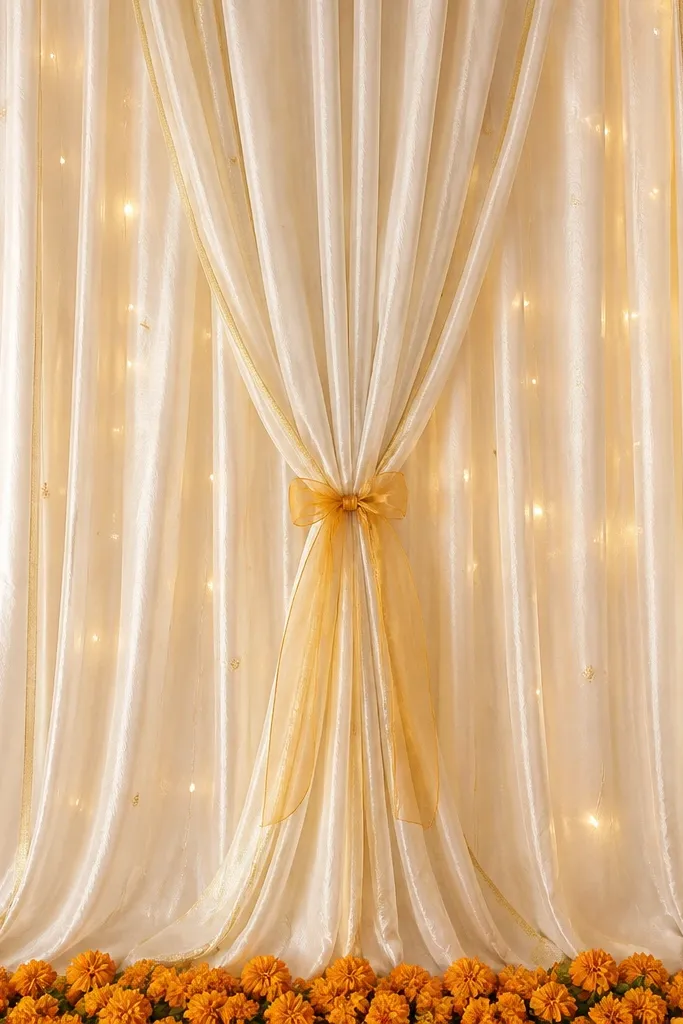
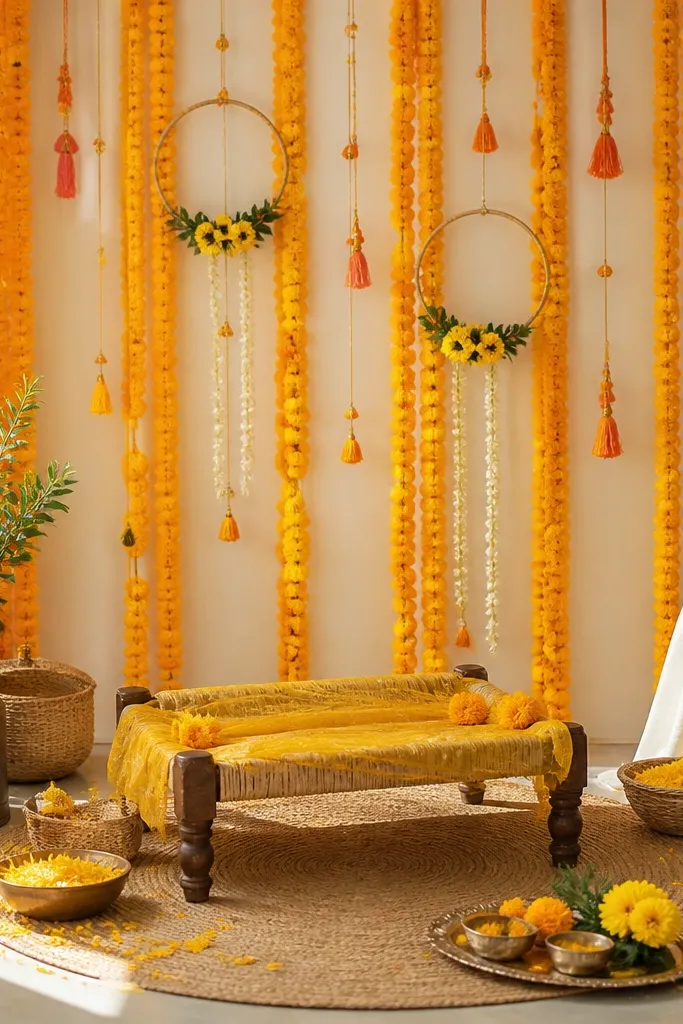
This one looks "soft and expensive" in photos because satin catches light in a gentle way instead of looking flat. Start with a cream or ivory satin base so your skin tones stay warm but not yellow. Add a marigold-orange edge garland only on the lower third - that's where eyes naturally rest in portraits. I've used this for both haldi and pre-ceremony portraits for people with deep and medium skin tones; the cream base keeps contrast clean. The styling principle is simple: one glossy fill + one warm accent band.
Start by hanging two parallel curtain rods or a single rod with strong hooks at head height, then drape cream satin dupatta panels so they overlap by 6 to 8 inches. Add a second layer by tucking a thinner dupatta (butter yellow or pale gold) into the center seam for a subtle gradient. Then create the edge by wiring a marigold garland and placing it along the bottom line of the backdrop, keeping it 3 feet behind where people will stand. Finish with 6-10 warm white fairy light loops tucked behind the folds so the glow looks like it's coming from the fabric, not the floor.
Try thisPin the dupatta ends with small safety pins to stop slipping during movement.
Common mistakeAvoid using shiny polyester bedsheets as the main backdrop - they crinkle on camera and look cheap fast.
2. Jute + Muslin Combo for a Cozy Farmhouse Haldi
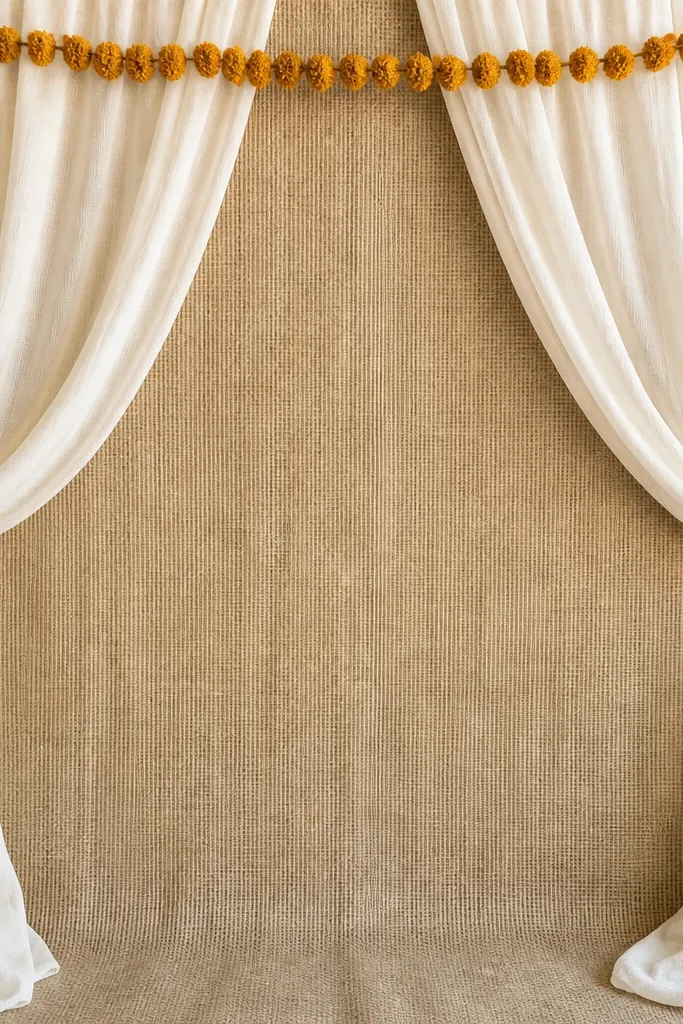
If you want cozy haldi decoration ideas at home that don't scream "party," jute and muslin give you that warm, grounded look. Jute has visible texture that makes pictures feel tactile, while muslin softens it so the background doesn't look harsh. Choose off-white muslin for the overlay to keep the palette light and flattering. This setup works especially well for people with medium to wheatish skin tones because the warm fibers enhance undertones without turning everything yellow. The principle is contrast: rough texture behind + soft translucent layer in front.
Start by pinning or stapling a wide piece of jute cloth to a clothes rack or a simple wooden frame, keeping it taut with no big wrinkles. Drape off-white muslin across the front in two vertical falls, overlapping slightly and letting the ends hang 10-12 inches below the jute line. Add small dried marigold heads on a thin twine line across the top so it frames faces without crowding them. Finally, hang turmeric-yellow tassels at the two top corners using leftover sari tassels or craft pom-poms tied to string.
Try thisMist the muslin lightly with water before hanging so it falls smoothly instead of sticking out flat.
Common mistakeDon't use thick burlap in a small room - it swallows light and makes your photos look dim.
3. Curtain Rod Drapes with Tulle Clouds and Gold Confetti Dots
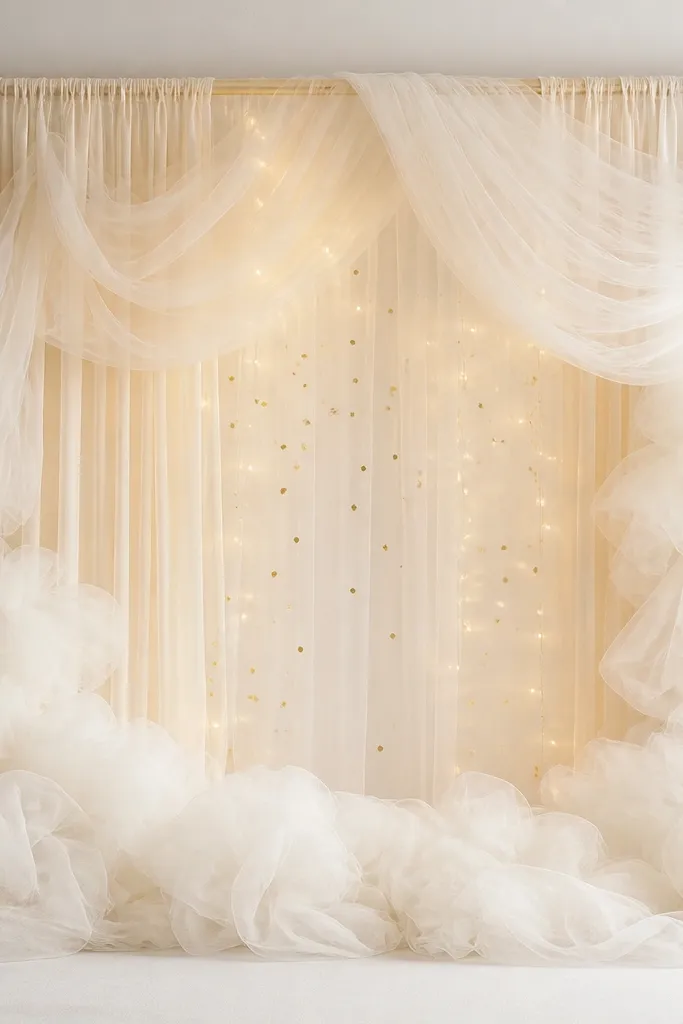
Tulle "floats" on camera, so this is a great choice if you want airy cozy haldi decoration ideas at home. Use cream tulle as the main layer and pale gold tulle only in the center for a gentle highlight. The effect is flattering for everyone because it softens edges - especially helpful if your room lighting is a bit harsh. I used this in a living room with white walls and it still looked dimensional. The principle is cloud layering: lots of soft volume without heavy clutter.
Start by hanging a cream curtain rod backdrop and drape two long cream tulle strips, overlapping by half their width so you get full coverage. Add a smaller pale-gold tulle "center cloud" by tying it in gathered folds at the midpoint, then let it fall to mid-torso height. Tuck warm fairy lights behind the tulle so the light diffuses through the fabric. For the gold accents, place small gold confetti dots (or gold paper circles) on the wall or backing paper behind the center cloud, keeping them at least 2 feet behind the person.
Try thisUse matte gold dots instead of glitter - glitter migrates and ends up on skin and clothes.
Common mistakeAvoid placing tulle too low - haldi hands will grab it and the whole look turns messy.
4. Window Frame Haldi Backdrop with Mango Leaf Garland
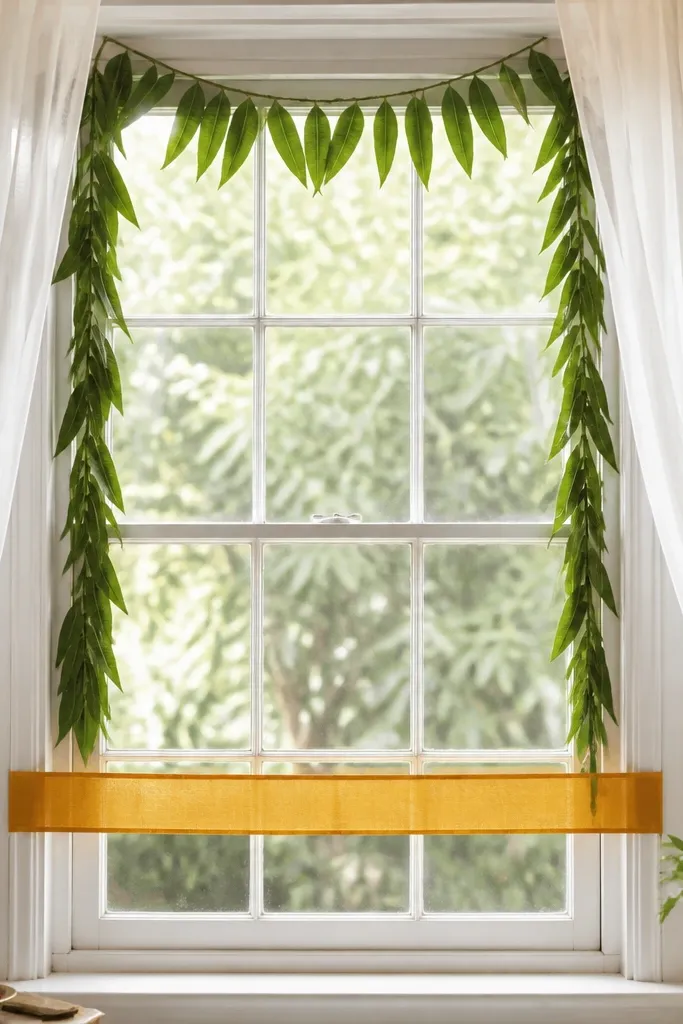
Using your window as the backdrop makes the whole setup look intentional because daylight does the heavy lifting. Mango leaf garlands add a fresh green frame, which balances haldi gold so your photos don't go too yellow. I like pairing this with sheer white curtains because they blur the outside view and keep attention on the people. This setup looks best with medium to deep skin tones because the green makes skin tones look lively. The principle is framing: greenery outlines the edges while the warm ribbon gives haldi color.
Start by measuring your window width and cut two sheer white curtain panels to hang from the top corners, leaving 2-3 inches gap from the glass. Add mango leaf garlands in a U-shape around the inner window frame, securing with small ties to hooks. Then tie a turmeric-gold ribbon or a narrow gold satin strip across the lower third of the window so it forms a warm horizontal band. Place two small votive holders or diy lanterns at the bottom corners for extra warmth if you're shooting near evening.
Try thisIf mango leaves wilt fast, use artificial leaves and still mist them with water for a more natural look.
Common mistakeAvoid taping garlands directly to painted walls - the residue is a pain to remove after haldi.
5. Baby's Breath + Marigold Cluster Corner Wall
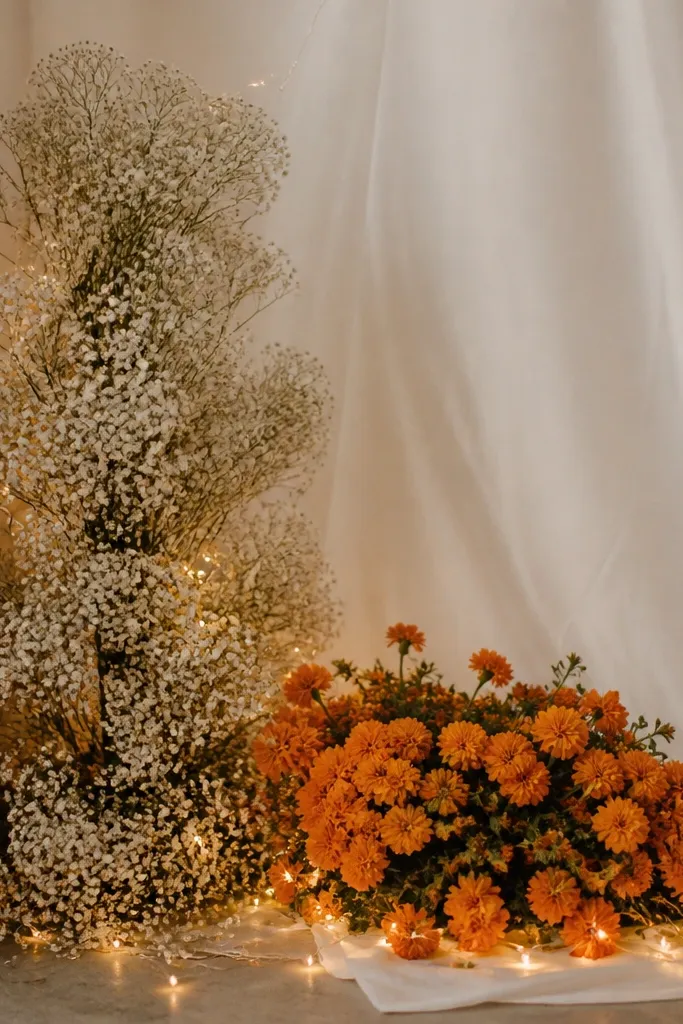
This is the most flattering "soft and romantic" option for people who don't want heavy yellow everywhere. Baby's breath stays white and light, which makes your haldi gold look brighter without flooding the whole background in turmeric. Marigold clusters at one corner act like a visual anchor so the photo composition looks clean. It's great for lighter and medium skin tones because the white flowers brighten the face area. The principle here is asymmetry: one tall cluster + one smaller warm cluster gives depth.
Start by placing a white bedsheet or foam board behind the corner and drape it so it curves slightly, not a sharp fold. Build a tall cluster using a bouquet of baby's breath (real or artificial) tied to a thin bamboo stick, then secure it in a weighted vase or stand on the floor. Add a second mound of marigolds on the opposite side using a wire ring base and fill with flowers. Weave warm fairy lights around both clusters, keeping the lights behind the flowers so they don't look like a random string.
Try thisShoot with the camera slightly angled so the corner cluster fills the frame instead of the empty wall.
Common mistakeAvoid placing clusters too close to the person - haldi smears petals and makes the photo look dirty.
6. Terracotta Clay Pot Backdrop with Yellow Ribbon Lines
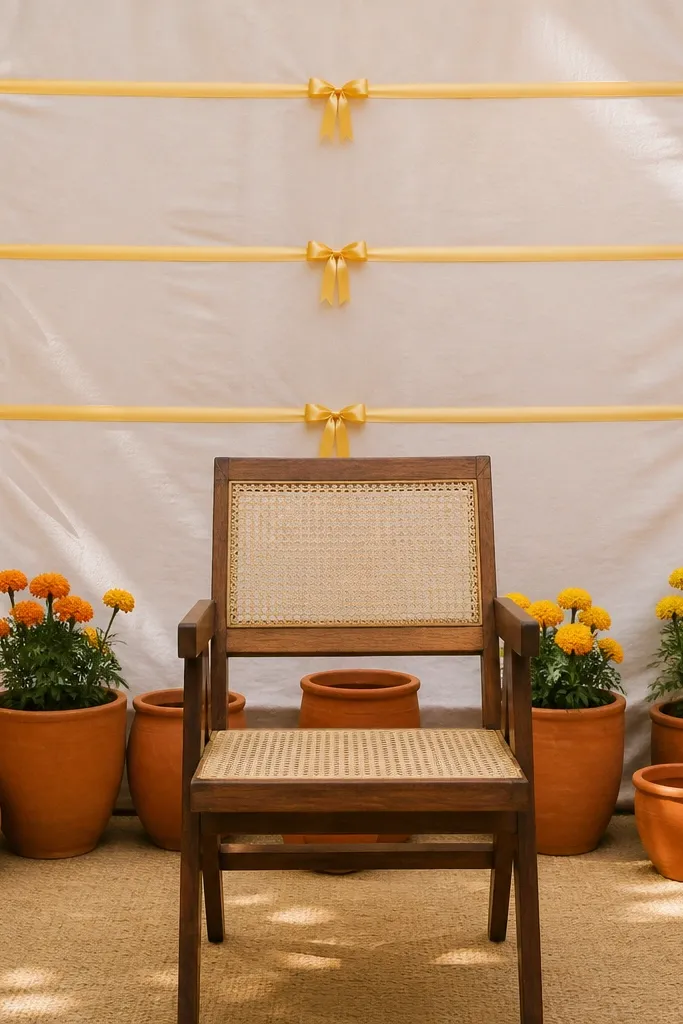
Terracotta + yellow looks cozy because it feels like home décor, not festival decoration. Use terracotta pots in the back to create depth; the warm clay color works with haldi gold and doesn't overpower skin. Add thin yellow satin ribbons stretched across the background in straight lines so the photo has structure. This setup flatters most skin tones because it gives warm midtones without turning everything neon. The principle is geometry: straight ribbon lines make the background look intentional and tidy.
Start by placing a plain cream backdrop sheet behind your seating spot, then set terracotta pots in a staggered row at different heights. Stretch thin yellow satin ribbons horizontally from pot to pot using small hooks or wire ties, spacing them about 8-10 inches apart. Tie small bows at the midpoint of each ribbon for a neat finish. Fill the top two pots with marigold stems so the ribbon lines feel connected to flowers rather than floating.
Try thisWrap the ribbon ends with clear tape on the underside so they don't fray in the air.
Common mistakeDon't choose bright neon yellow ribbons - they look harsh in daylight and can make skin look orange.
7. Cream Wallpaper Sheet Backdrop with Haldi Gold Balloon Halo
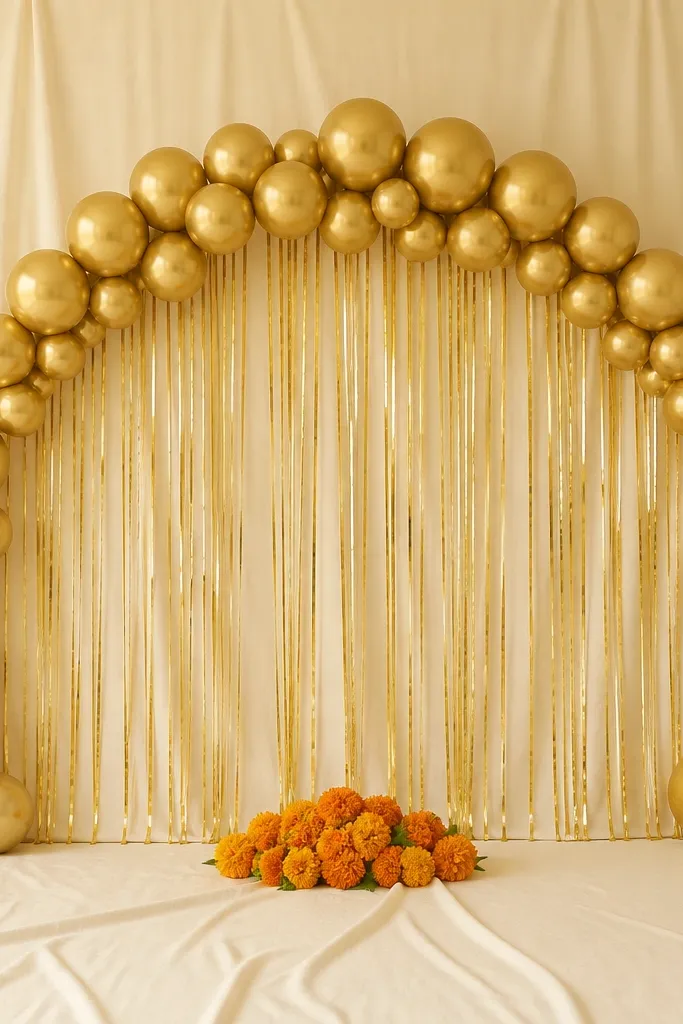
Balloon halos photograph better than you'd think because they create a soft circular glow behind faces. I've used this for haldi sessions at home where the room background is ugly - you cover it with one sheet and the balloons do the rest. Choose matte gold balloons for a cozy look, not glossy chrome. Add marigolds at the bottom center so the gold doesn't feel random. The principle is focal framing: the halo sits behind the person's head level to create instant composition.
Start by pinning a large cream wallpaper sheet or thick craft paper to a wall, leaving it smooth and wrinkle-free. Inflate matte gold balloons and tie them in a semi-circle around a lightweight balloon arch frame or even a string loop secured to two points. Place the halo so it sits 6-12 inches above head height of the person standing/sitting. Add a marigold cluster in a small vase or pot at the bottom center, then drape a thin gold ribbon down from the center of the halo to the marigold area.
Try thisSpray a tiny bit of anti-static on the wallpaper sheet so balloons don't cling and pull it.
Common mistakeAvoid placing balloons too low - they block faces and look cluttered in close shots.
8. Sari Border Saree Backdrop with Mustard and Olive Mix
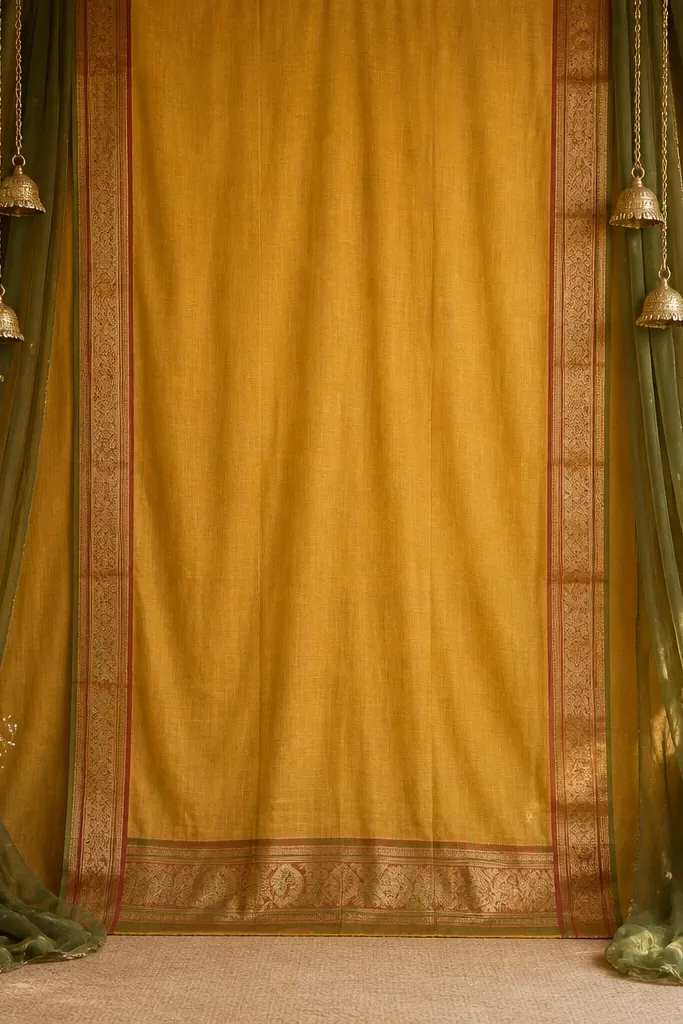
If you have an old sari border, this is the best way to use it without spending money. The border pattern adds texture and visual interest while mustard keeps the haldi color warm. Olive green on the sides calms the palette and makes the mustard look deeper instead of flat. I like this for people with fair to medium skin tones because the olive adds contrast without washing anyone out. The principle is using one statement fabric and supporting it with soft color blocks.
Start by draping the mustard sari border fabric as the main panel, smoothing it so the border line stays straight at eye level. Add two olive dupatta side drapes, letting them hang slightly shorter than the mustard so the center stays dominant. Hang 3 small brass-toned jhumka ornaments or bead clusters at the top corners using thin thread so they don't swing into faces. Place a small brass bowl or diy lamp at the bottom center for a traditional warm note.
Try thisSteam the fabric with a handheld steamer so the border sits crisp and doesn't wrinkle into odd shapes.
Common mistakeAvoid mixing too many prints - keep the border as the only busy pattern.
9. Color-Blocked Dupatta Steps Behind the Chair
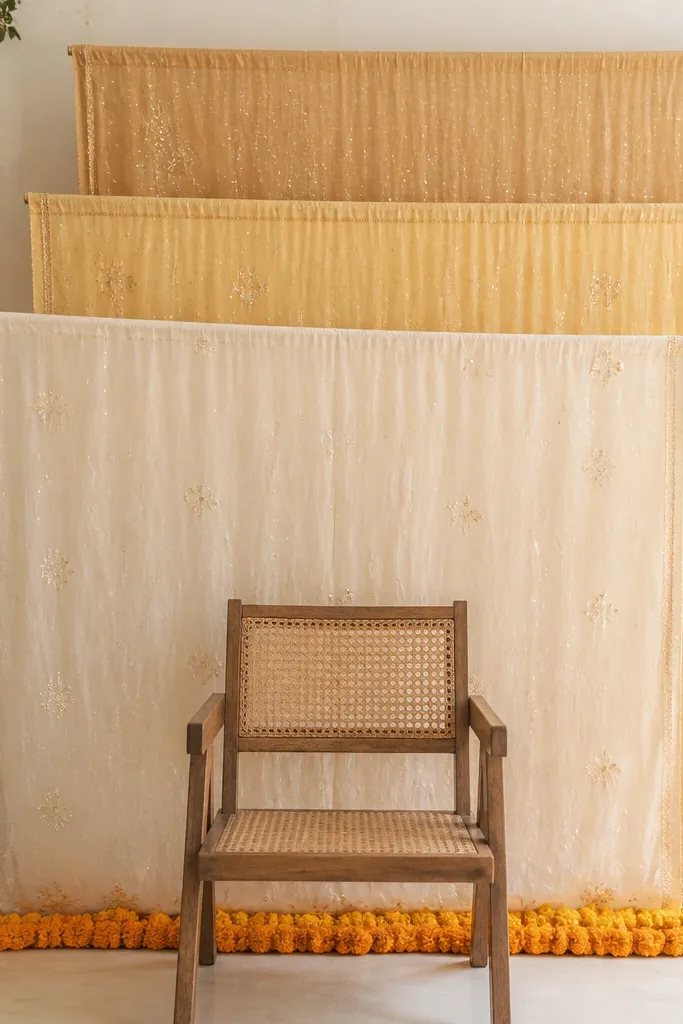
This one makes your haldi background look styled even if you only have one chair and a corner. The step effect creates depth without needing a full wall setup. Cream acts as the base, butter yellow adds warmth, and pale gold gives a soft highlight. It flatters most body types because it creates a clean vertical frame behind the person, which helps photos look balanced. The principle is controlled layering: each layer is offset just enough to show edges clearly.
Start by placing the chair in front of a wall and setting up three dupatta layers behind it, each 10-12 inches taller than the one in front. Use cream dupatta first, then butter yellow in the middle, then pale gold as the top layer. Offset them so the edges show as steps, not as a flat stack. Add a marigold garland along the bottom edge of the middle layer, keeping it centered behind the chair back. Tie small knots or pins at the top to hold the layers in place.
Try thisUse the chair back as a measurement - align the top edge of the pale gold layer to the top of the chair for a neat frame.
Common mistakeAvoid letting layers overlap randomly - messy overlap looks like clutter, not design.
10. Round Rattan Mat Backdrop with Haldi Gold Ring Light Effect
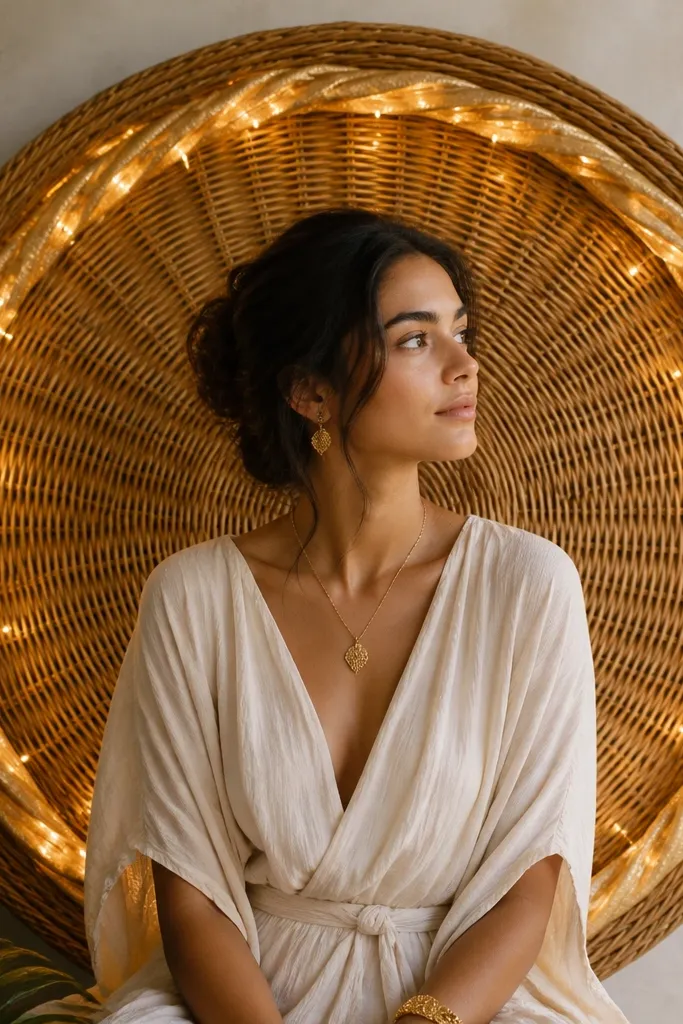
Rattan texture gives a cozy, homey feel that works beautifully with haldi because it adds warmth without being loud. If you hang a round mat behind the person, it creates a natural circular frame that makes faces look centered. Add gold fabric wrap around the mat to mimic a ring light glow, then weave warm string lights sparingly. This looks especially good for people who want a neutral background that still feels festive. The principle is framing with texture: circle shape + warm accent band.
Start by placing a large round rattan mat on a wall hook or tripod stand, centered behind where people will stand. Wrap a strip of gold satin or gold organza around the mat at mid-height, securing with clothespins or thin ties so it doesn't slide. Weave warm fairy lights through two or three rattan spokes only - don't cover the whole mat or it looks busy. Place a small vase of marigold stems at the bottom center of the mat. For balance, add one extra marigold stem on each side at the mat's lower edge.
Try thisShoot from waist height with the mat centered - it makes the round frame look intentional instead of decorative clutter.
Common mistakeAvoid cool white LED lights - they clash with haldi gold and make the whole setup look off-color.
11. White Sheet Backdrop with Turmeric Tie-Dye Sash Lines
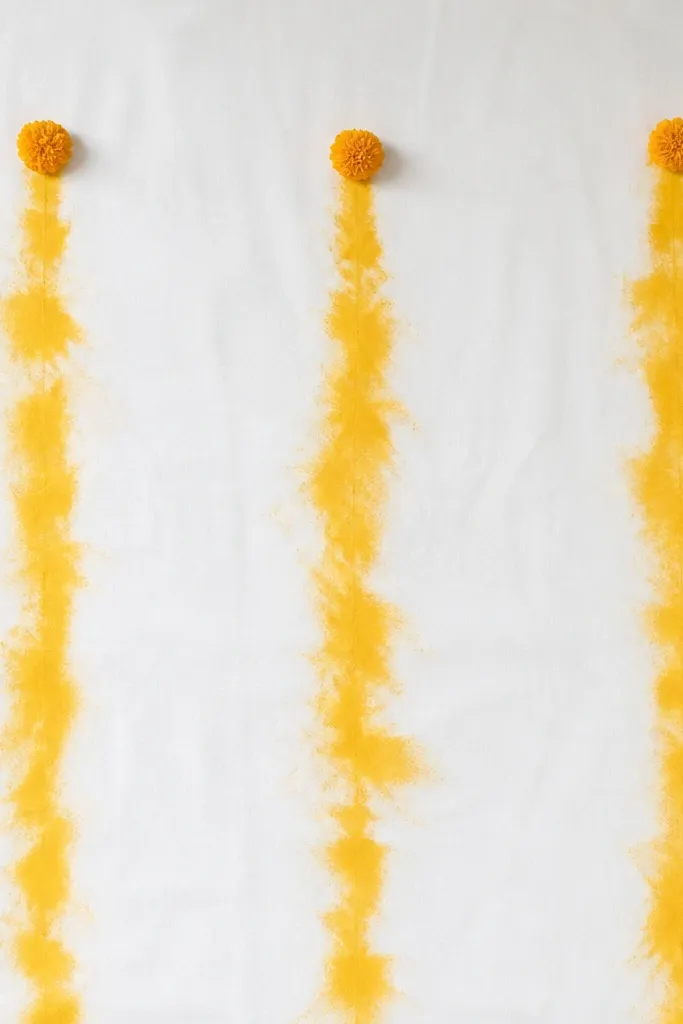
This idea is for when you want cozy haldi decoration ideas at home that look artistic, not store-bought. The white sheet keeps photos clean, and the turmeric sash lines add movement and warmth. I've done this with fabric dye on old cotton - the result looks like soft watercolor streaks, which read well in both daylight and indoor lighting. It flatters everyone because the background stays bright while the accents are controlled. The principle is "one color, multiple strokes" so the background has texture without becoming messy.
Start with a large white cotton bedsheet or thick white fabric panel, hung flat with clips so there are no wrinkles. Cut three long strips of plain white cotton, then dye them with turmeric or fabric dye diluted to a light yellow, creating a tie-dye style by blotting with a sponge. Let the strips dry fully, then pin them vertically on the sheet using clothespins at the top and a few pins at the bottom. Tie tiny marigold buds or small flower heads at the top of each strip so they look intentional. Place the subject 2-3 feet in front so the dyed strips stay in focus behind them.
Try thisTest dye strength on a scrap first - you want soft pastel yellow, not stained bright orange.
Common mistakeAvoid using permanent marker lines on fabric - it looks flat and cheap under camera flash.
12. Gold Foil Curtains with Cream Drapes and Candle Corners
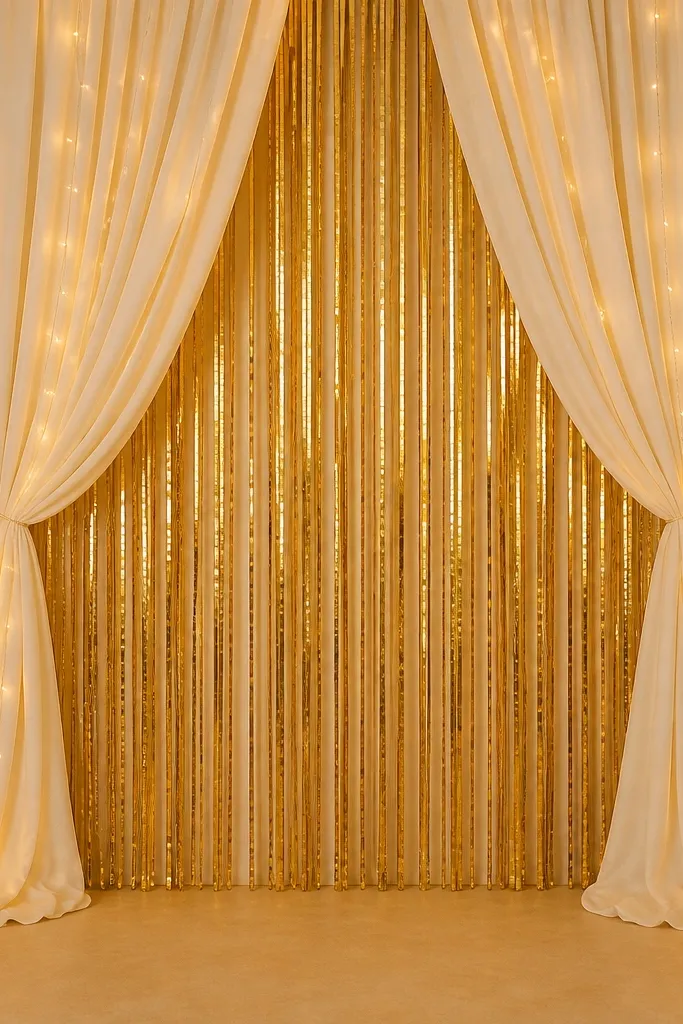
Gold foil curtains give that celebratory sparkle without needing a huge floral wall. I keep the gold only in the middle so it doesn't overpower faces or make the photos too shiny. Cream drapes around it soften the look and keep it cozy. This works well for fair to medium skin tones because gold adds warmth without washing out highlights. The principle is controlled shimmer: one reflective zone + soft surrounding fabric.
Start by draping cream fabric panels on either side, then hang gold foil curtain strips behind the center area only. Let the foil hang from a rod or from hook points so it's vertical and aligned. Tuck warm fairy lights into the cream folds so the glow looks layered rather than like a separate string. Place two diyas or candle holders at the floor corners, but keep them at least 3 feet away from haldi hands and secure with a tray. Finish by adding a small marigold garland across the bottom edge of the cream panels.
Try thisTurn off overhead lights and use only warm lights - foil looks best without harsh ceiling glare.
Common mistakeAvoid placing foil curtain on the floor level - the reflective mess shows in photos.
13. Pastel Balloon Garland with Butter Yellow Ribbon Bow
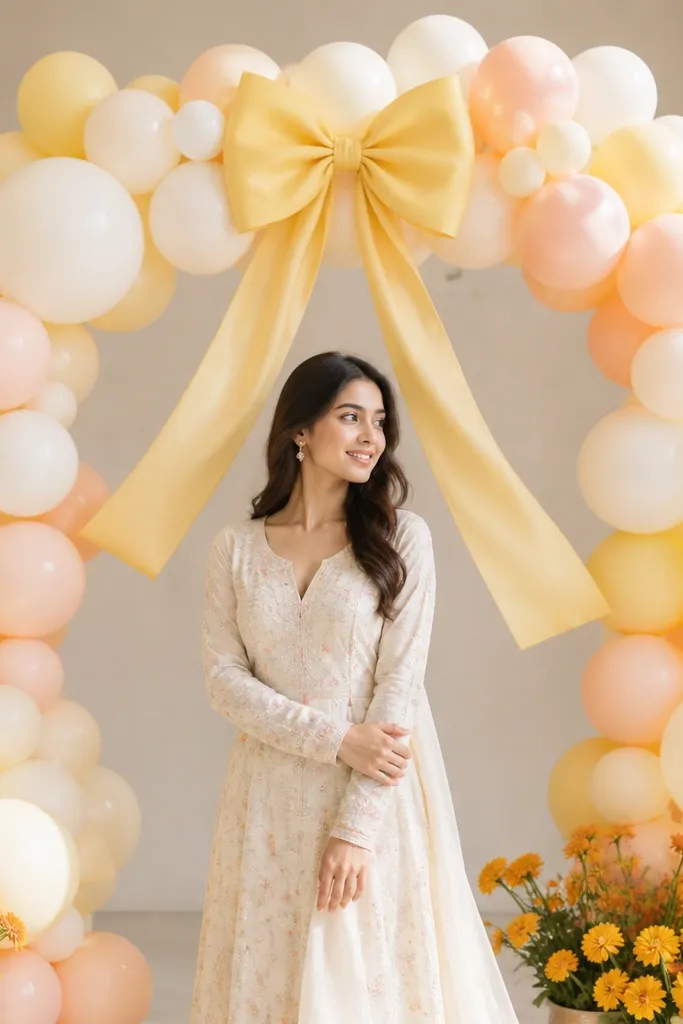
This setup reads cozy because the palette is soft and the balloons are not the shiny party kind. I like cream and pale peach with butter yellow because it looks warm but not neon. The big ribbon bow gives you a clear focal point, so photos feel styled even when your room is plain. It's flattering for most skin tones because the background stays light and doesn't fight with haldi color. The principle is a gentle color gradient with one clear center anchor.
Start by buying a balloon garland kit or inflating balloons in cream, butter yellow, and pale peach, mixing sizes (5-inch and 11-inch) for depth. Arrange them into an arch and secure to two points at about shoulder height behind the person. Tie a butter-yellow ribbon bow at the center of the arch using thick satin ribbon, then add a small marigold bunch at the base in a vase. If you're shooting at night, tuck a warm white LED strip behind the arch so the balloons glow softly. Keep the bow and base items 2-3 feet behind the standing spot to avoid smears.
Try thisUse matte balloons if you can - glossy ones reflect the room lights and look uneven in photos.
Common mistakeAvoid mixing too many colors like blue or bright green - it turns haldi into a random birthday vibe.
14. Macramé Wall Hanging with Marigold Strands
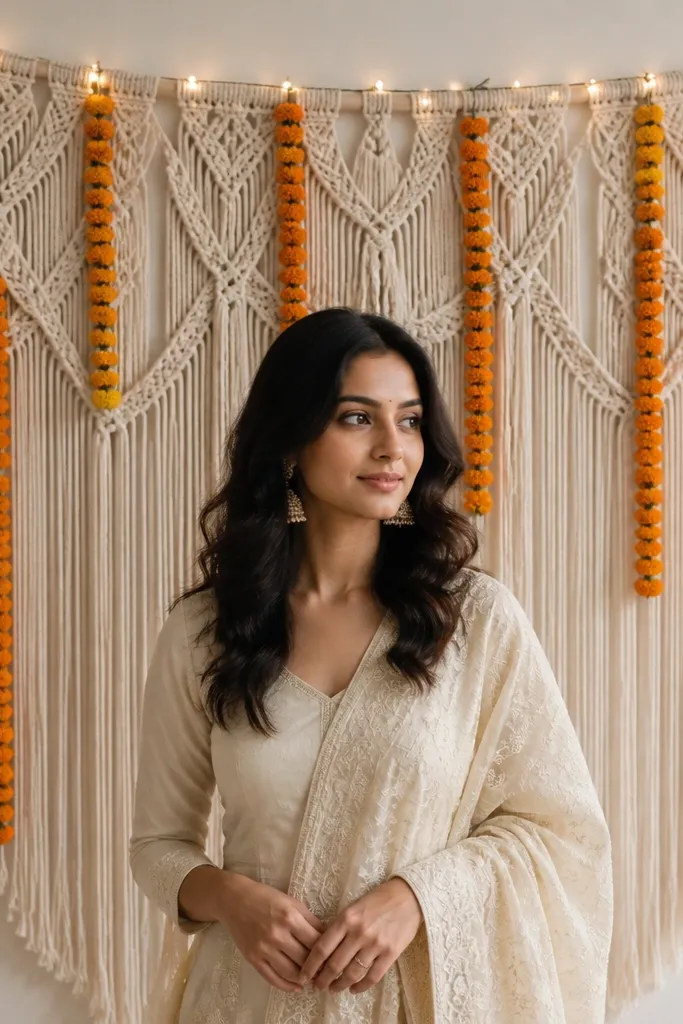
Macramé gives a homespun cozy look that makes haldi feel like a family moment, not a staged event. The knots create natural shadow texture, which looks good even in average lighting. Use off-white macramé and add marigold strands in vertical lines so the flower color sits where faces need warmth. I've used this for both women and men photos - the texture frames shoulders nicely. The principle is texture-first: let the hanging pattern do the visual work, then add small haldi accents.
Start by hanging the macramé at head height behind your subject, making sure it's centered and not sagging. Drape marigold strands over 3 to 5 sections across the hanging, keeping them vertical and spacing them like columns. Add warm fairy lights along the top edge of the macramé, tucked behind the knots so the light doesn't look like a separate string. Place a simple cream cloth or small runner at the floor so the bottom doesn't look empty. For a clean photo, keep any extra props to the sides and avoid placing tall items directly behind the head.
Try thisPin the marigold strands with small clothespins so they keep their lines during movement.
Common mistakeAvoid heavy wet flower garlands on macramé - they stretch the fibers and sag the whole piece.
15. Terracotta + Sunflower Table Backdrop with Haldi Bowl Center
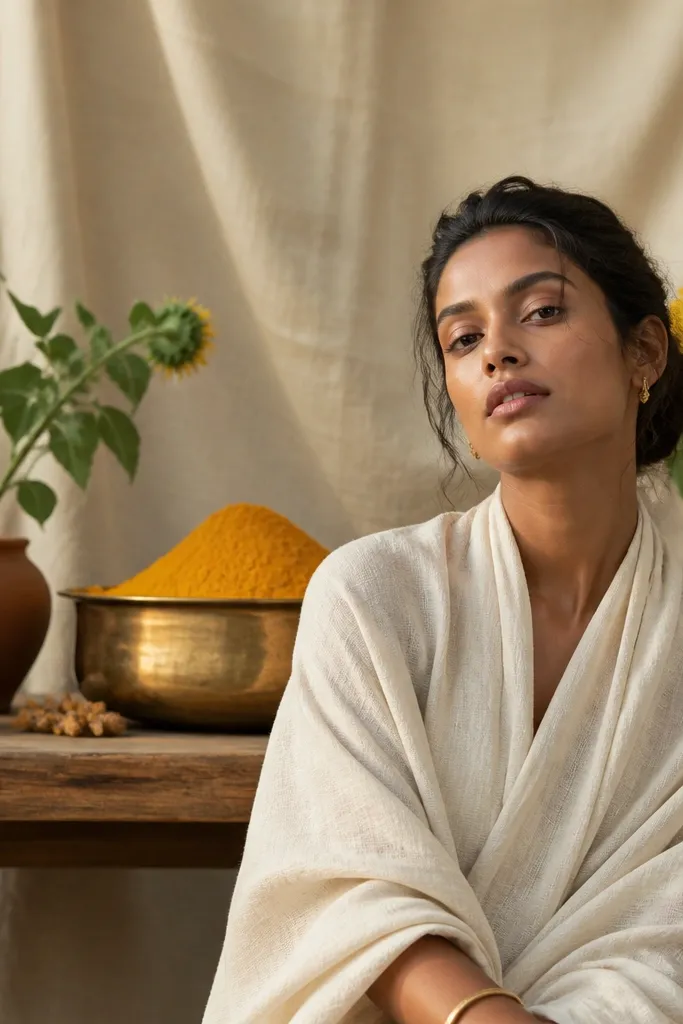
This is a practical cozy haldi decoration idea at home because it uses a table as your background layer. Sunflowers and terracotta feel warm and sunny, and the brass bowl adds a traditional, photo-ready center point. Cream cloth underneath keeps everything from looking too busy. This setup works well when you want the decoration to be functional - guests can place items on the table without breaking the backdrop. The principle is a "center story": one bowl or tray anchors the scene, with flowers framing it.
Start by hanging or draping a cream cloth behind the table so it fills the entire background height you'll photograph. Place terracotta planters and small vases on the table in a staggered arrangement, leaving a clear center space for a brass bowl. Add sunflowers or sunflower stems around the bowl, using 2 on the left, 2 on the right, and one slightly behind for depth. Put a brass bowl with turmeric powder (dry, not wet paste) in the center, and surround it with a few marigold petals. Keep the table 2 feet away from where people stand so haldi hands don't smear flowers.
Try thisUse dry turmeric in the bowl for photos - wet paste looks messy and stains.
Common mistakeAvoid tall vases that block faces in close shots; keep the highest stems below eye level.
16. Fabric Garland Curtain with Butter Yellow Pom-Pom Drops
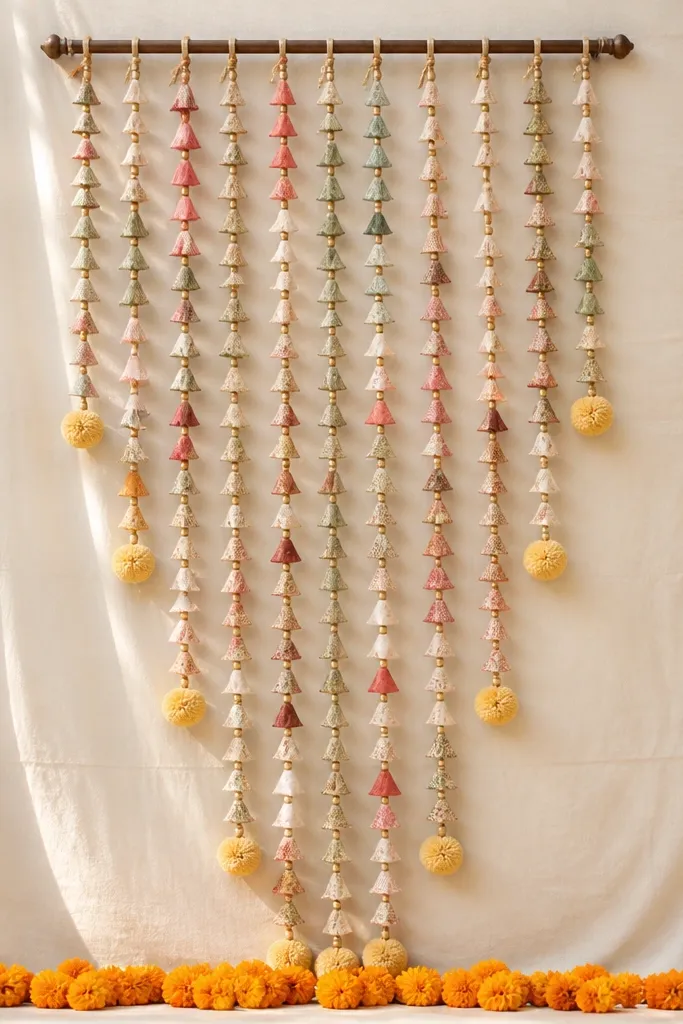
This looks cozy because it's playful and soft, but it still reads clean in photos. Fabric garlands create a layered curtain effect without needing large flowers. Butter yellow pom-pom drops add a cute haldi-gold note, and the beige sheet keeps the palette calm. I like this for both indoor and outdoor haldi because the garland moves slightly in breeze, adding life to the background. The principle is "lightweight texture": small repeating elements fill space without looking heavy.
Start by draping a light beige sheet on the wall, then hang a rod in front of it about 18-24 inches from the wall. Create a fabric garland curtain by tying small fabric rectangles or leftover dupatta strips to a twine line, then hang it from the rod so it forms a curtain. Add butter yellow pom-poms at 6-8 inch intervals along the garland using thread ties. Place a thin marigold line along the bottom edge of the beige sheet so the curtain looks grounded. Keep all elements behind the person by at least 2 feet to avoid contact with haldi paste.
Try thisChoose fabric strips that are at least 8 inches long so they don't curl and look messy.
Common mistakeAvoid using thin paper garlands near haldi - moisture and touch ruin them fast.
17. Rose Gold Satin Bows on Cream Dupatta Backdrop
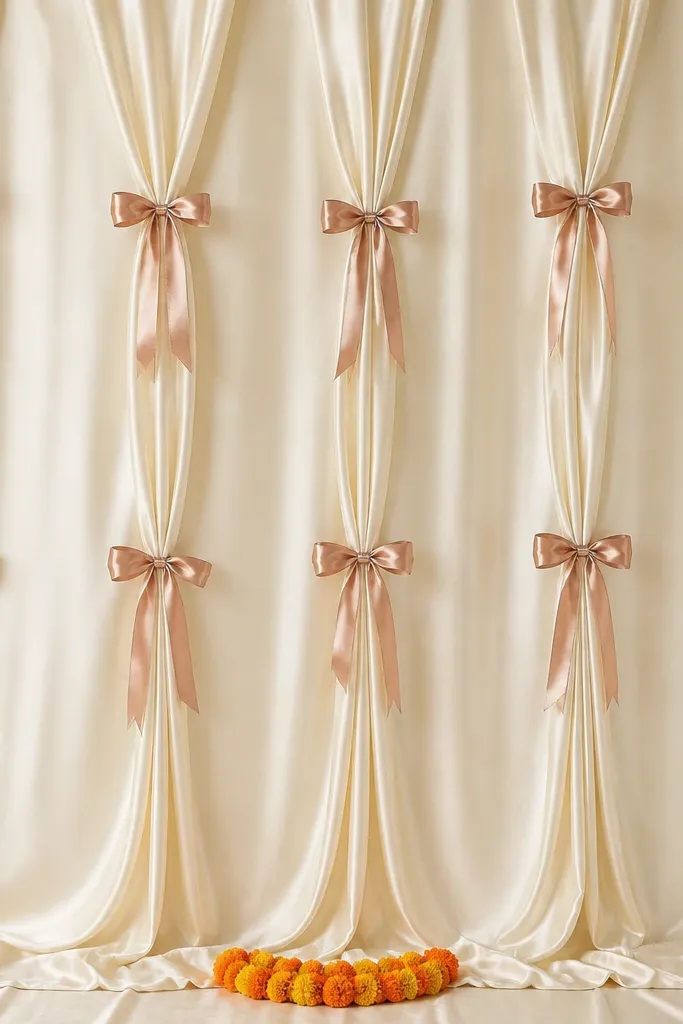
If you want cozy haldi decoration ideas at home that feel classy, satin bows are your shortcut. Cream satin gives a clean, warm base, and rose gold bows add a soft metallic note without looking like a birthday theme. This works especially well for fair to medium skin tones because the metallic color brings warmth to the face area. I've used this for women's haldi photos where the outfit is already embellished - the background doesn't steal attention, but it still looks styled. The principle is symmetry with variation: bows aligned in a grid, but sizes differ slightly.
Start by hanging cream satin dupattas as a single smooth backdrop panel, using clips to keep it wrinkle-free. Tie rose gold satin bows onto the front of the dupatta at heights around 20-30 inches apart, with the center bow slightly larger. Use ribbon tails about 10-12 inches long so the bow shape stays visible in photos. Add a marigold garland at the bottom center of the backdrop, not all across, so the base stays clean. Place the subject 2-3 feet in front and use warm light from one side to make satin shine without glare.
Try thisUse double-sided tape on the back of the bow knots so they don't shift during movement.
Common mistakeAvoid too many bows close together - it looks crowded and messy in close portraits.
18. Organic Banana Leaf Corners with String Lights
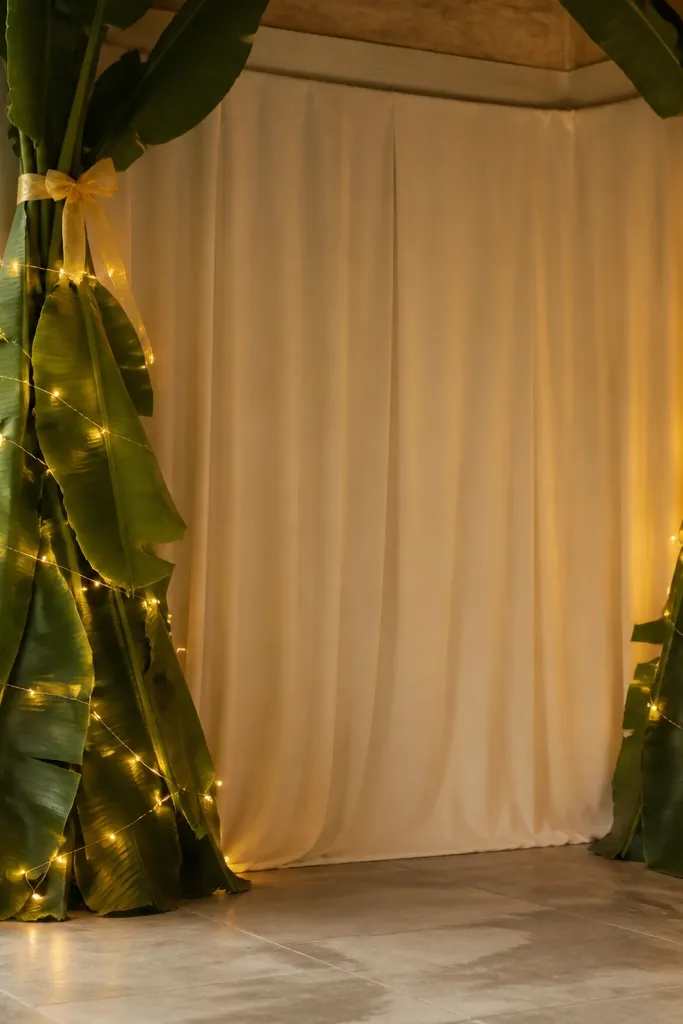
Banana leaves give you a fresh, traditional look that still feels cozy when you keep the rest simple. The leaves sit at the corners, so the center stays open for portraits. I pair banana leaf corners with a cream cloth panel so the background doesn't turn green-heavy in photos. This setup flatters medium to deep skin tones because the leaf green adds contrast and makes faces look brighter. The principle is corner framing: leaves at edges, clean center for focus.
Start by draping a cream cloth panel across the wall center, then build banana leaf bundles for the two corners. Tie the leaf bundles at the top with a gold ribbon so they look neat and not messy. Wrap warm string lights around the bundles lightly so the light glows through gaps in the leaves. Keep the cloth panel smooth and wrinkle-free so the center doesn't look distracted. Add a small marigold line at the bottom center of the cloth panel to bring haldi color into the frame.
Try thisIf leaves are drying, mist them with water right before decoration so they look fresh on camera.
Common mistakeAvoid placing leaves too close to where people will stand - haldi paste ruins leaves quickly.
19. Pastel Fabric Tassel Curtain Behind the Sofa
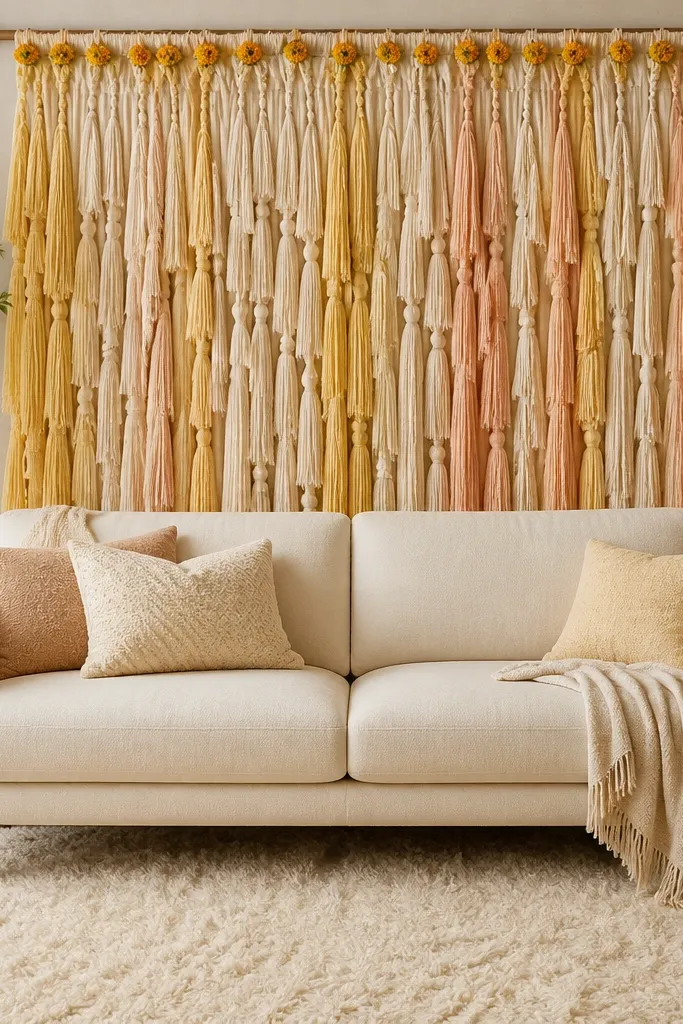
This is a cozy haldi decoration idea at home for anyone who wants movement and softness without heavy flowers. Tassels create a fringe texture that looks great in photos because it catches light and adds depth. Keep the palette to cream, pale yellow, and light peach so haldi gold blends in rather than competing. I've seen this look amazing in living rooms because it uses existing furniture height - your sofa becomes part of the stage. The principle is fringe fill: tassels cover space and hide plain walls.
Start by placing the sofa against a wall and hanging a rod behind it at about shoulder height. Tie tassels made from cotton or chiffon strips in three colors, mixing lengths so the curtain looks layered. Attach tassels so they hang down to mid-torso height behind the person, then tuck a few marigold buds into the top seam. Add a cream rug or folded blanket at the bottom so the lower part of photos stays clean. Keep the curtain at least 2 feet behind the standing spot so tassels don't get pulled in haldi.
Try thisUse chiffon tassels for a softer look and less bulk around the rod.
Common mistakeAvoid plastic fringe - it looks shiny and cheap under indoor lighting.
20. Haldi Gold Flower Petal Scatter on Cream Backdrop
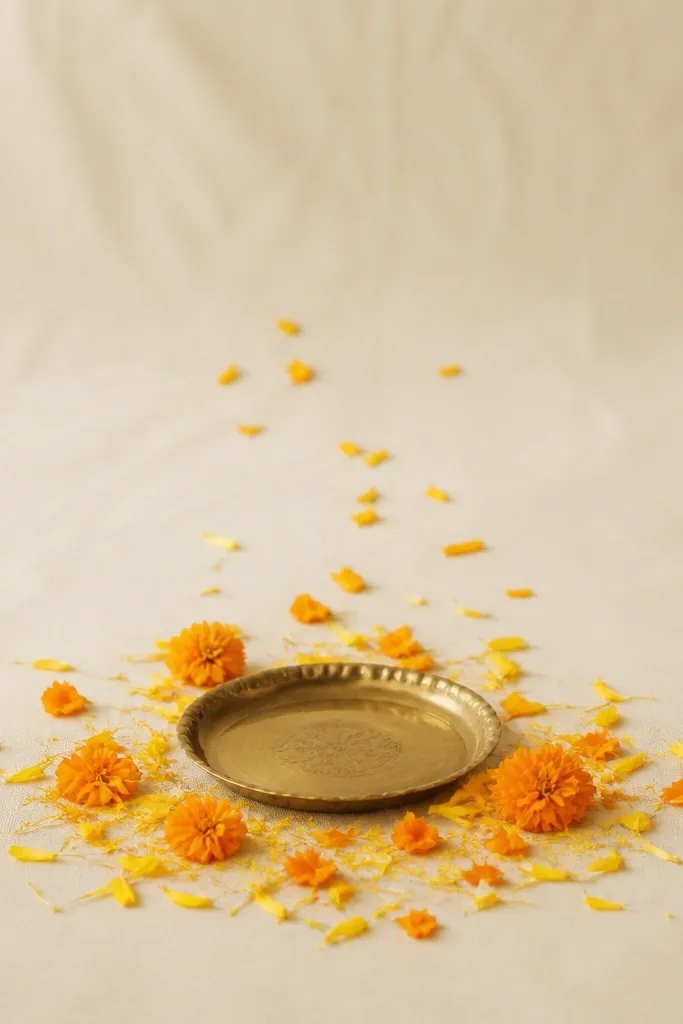
When you want a background that looks artsy but stays clean, petal scatter does it. The trick is concentration: petals in a small arc around the bottom center look intentional, while scattered petals everywhere look like a mess. Use cream as the base so the yellow petals show up clearly without turning the photo too bright. I love this for haldi moments because petals add warmth without adding height that can block faces. The principle is gradient placement - heavy near the base, lighter toward the edges.
Start with a large cream backdrop sheet pinned flat, then place a small brass tray or plate at the bottom center where the arc will "begin." Collect marigold petals and small yellow flower petals, then scatter them in a curved line about 12-18 inches wide, keeping most petals within 6 inches of the brass tray. Add a few petals at the sides as lighter accents, but stop before the corners. For extra photo glow, place one warm light source angled from the side so petals show texture. Clean rule: keep petals away from where people will kneel and touch during haldi.
Try thisUse dry petals for photos - wet petals stick and clump under warm light.
Common mistakeAvoid using loose glitter or confetti - it sticks to skin and clothes and ruins the cozy look.