1. Cream-and-sage linen table runner with uneven edges
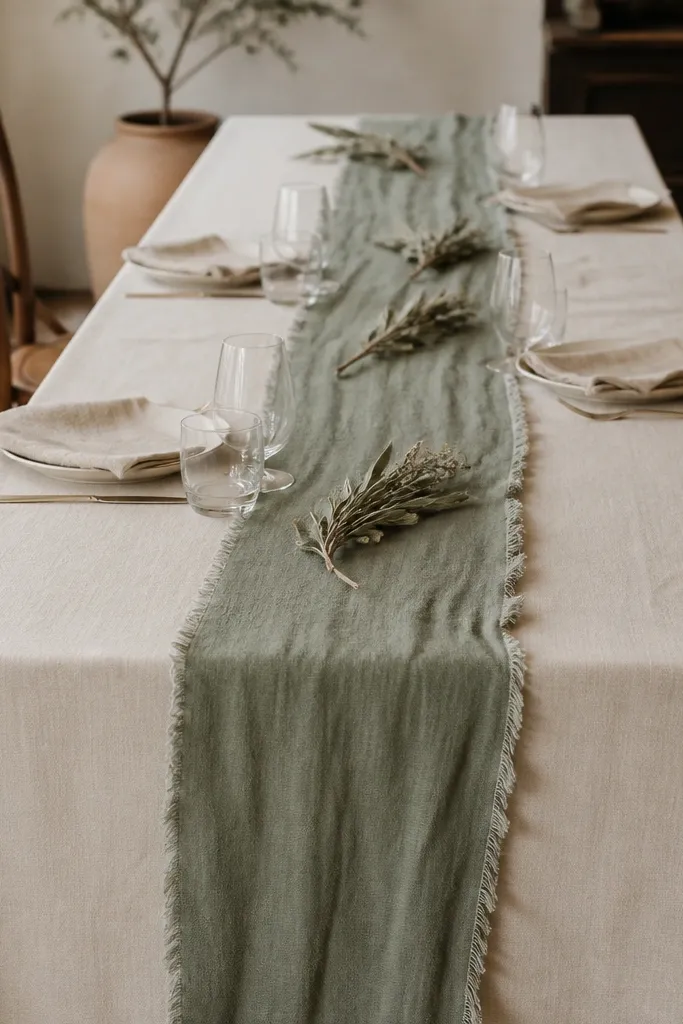
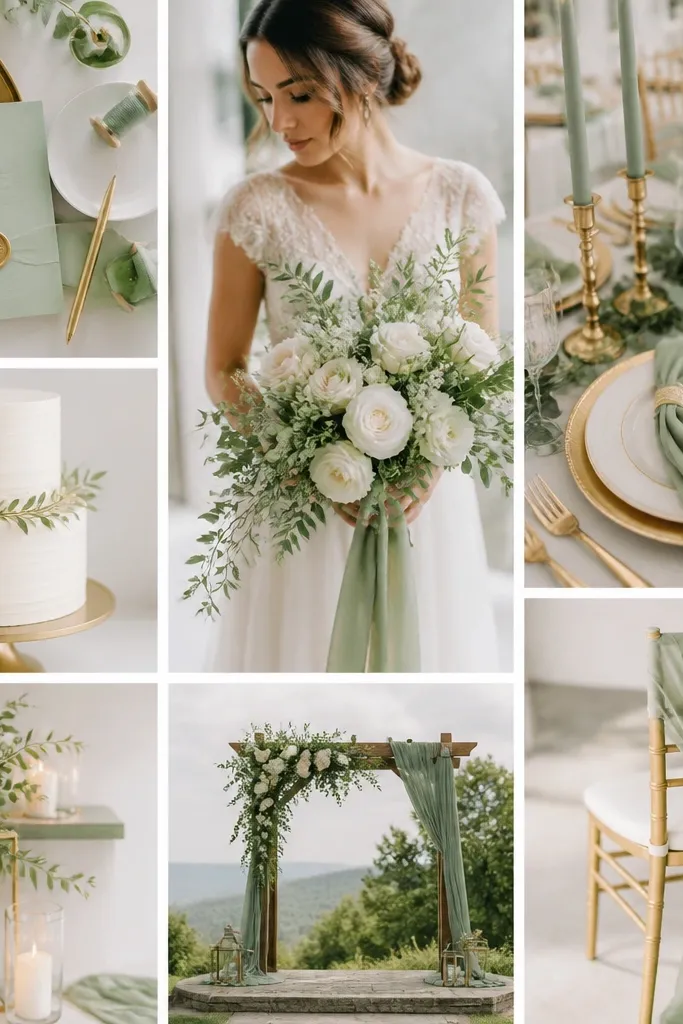
This look is the fastest way to make rustic sage green wedding decor ideas feel intentional without turning into a themed party. I use a sage linen runner with visible weave and soft drape, because matte fabric looks right under string lights and window light. The cream base keeps skin tones flattering in photos, especially for guests sitting near the table. Sage green here reads calm and grown-up, not "holiday green," because the fabric is dusty and textured. It works best on long banquet tables, and it also works on farmhouse tables where you want the grain to still show around the runner.
Start by laying your table in warm cream (cotton or linen blend), then center the runner so it runs the full length with 10-15 cm of cream showing on both sides. Choose a sage runner that has a slightly uneven hem or hand-frayed edge so it looks placed, not measured to death. Set your runner height by adjusting how far it drapes toward the floor - aim for 3-5 cm of overhang for a rustic finish. Place your centerpiece vessels on top of the runner, not on the bare table, so the sage color stays consistent across the whole table. Finish with small sage sprigs tucked into the centerpiece and between candle bases.
Try thisIron linen lightly, then twist the runner once by hand before placing it. That one move keeps it from looking stiff in photos.
Common mistakeAvoid shiny satin runners - they catch light hard and make sage look cold.
2. Sage bud vases in a staggered cluster on a kraft paper runner
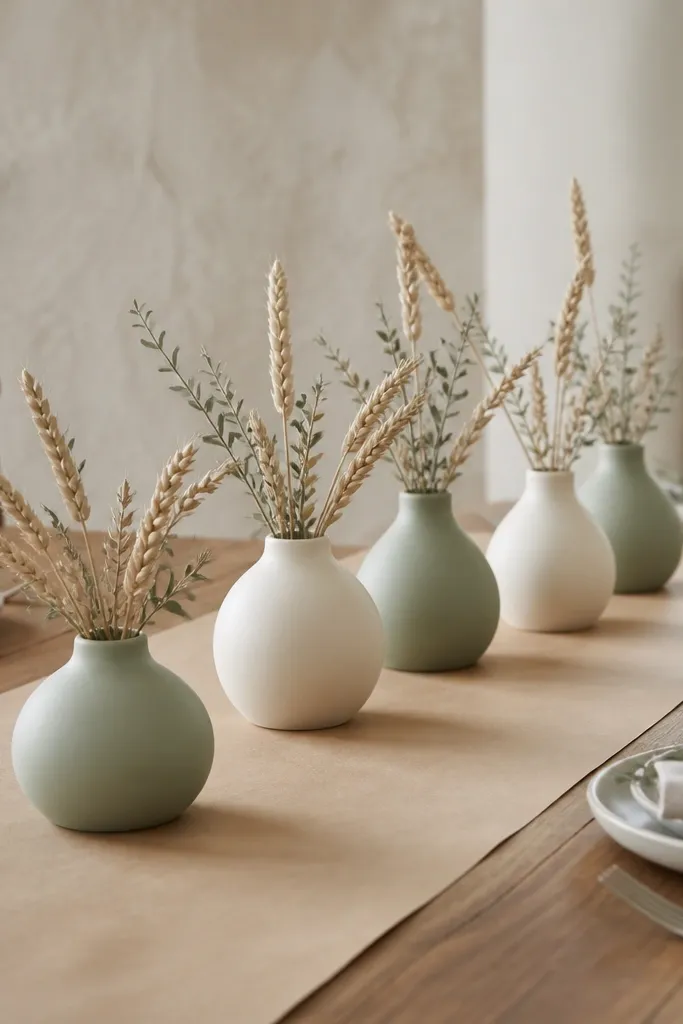
This is a rustic sage setup that doesn't need a huge floral budget. Bud vases create repetition, and the staggered spacing keeps it from looking like a store display. I like matte vases in off-white and glazed sage because they look soft next to kraft paper, which has that slightly rough, handmade feel. Sage stays the theme through the greenery and the vase color, while wheat adds warmth so the palette doesn't look like a paint swatch. It flatters everyone at the table because there's height variation without blocking faces - guests can actually talk.
Start by laying a kraft paper runner on the table, then tape it down lightly at the corners so wind and movement don't curl it. Arrange five to seven bud vases in a staggered row, spacing them 20-30 cm apart so each vase has breathing room. Fill each vase with a short amount of greenery first, then add wheat stems last so the ends look slightly uneven. Keep the tallest vase around 18-22 cm tall so sightlines stay open. Add tiny sage sprigs around the base of the vases to tie the cluster together.
Try thisWrap the vase bases with thin jute twine once, then trim the ends unevenly. It makes the kraft paper look deliberate.
Common mistakeDon't pack stems too tightly. Crowded vases look messy instead of rustic.
3. Wood slice place cards with sage ink and dried herb seals
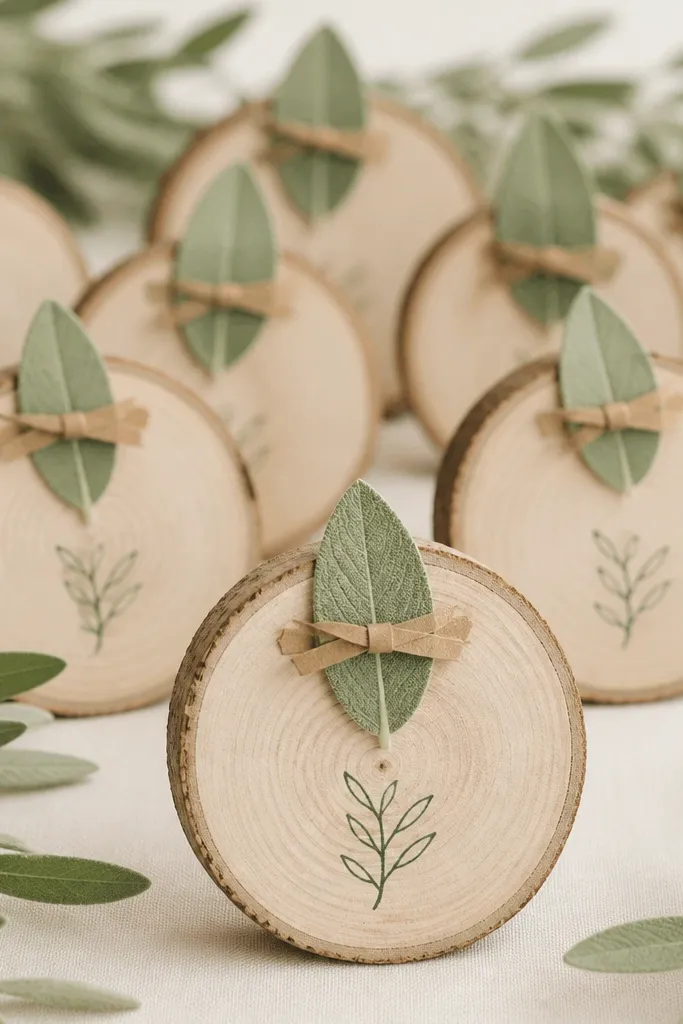
Place cards are where rustic sage green wedding decor ideas go from "pretty" to "people felt the details." Wood slices match the barn-and-wood vibe, and sage ink keeps it cohesive with the rest of your palette. I've used this at weddings where guests were seated close to the tables, and the place cards were one of the first things people photographed. The dried herb seal adds a real texture that reads on camera and in hand. This works for any skin tone and any table setting because the cards are neutral, not bright, and they don't fight with floral colors.
Start by buying wood slices with a flat face, then sand the writing surface lightly so ink doesn't snag. Use sage green ink (not neon, choose a muted tone) and write names with a fine brush pen or calligraphy marker. Punch a small hole near the top of each slice, then attach a short piece of kraft string. Seal a single dried sage leaf on the string knot using a tiny dot of clear craft glue. Place cards at each setting with the wood slice leaning slightly toward the plate for a natural angle.
Try thisWrite two name styles: one for first names and one for last names. It makes the cards look custom without extra effort.
Common mistakeSkip glossy varnish on the wood. It reflects harsh light and makes the card look plastic.
4. Sage and rust aisle markers with linen ribbon bows
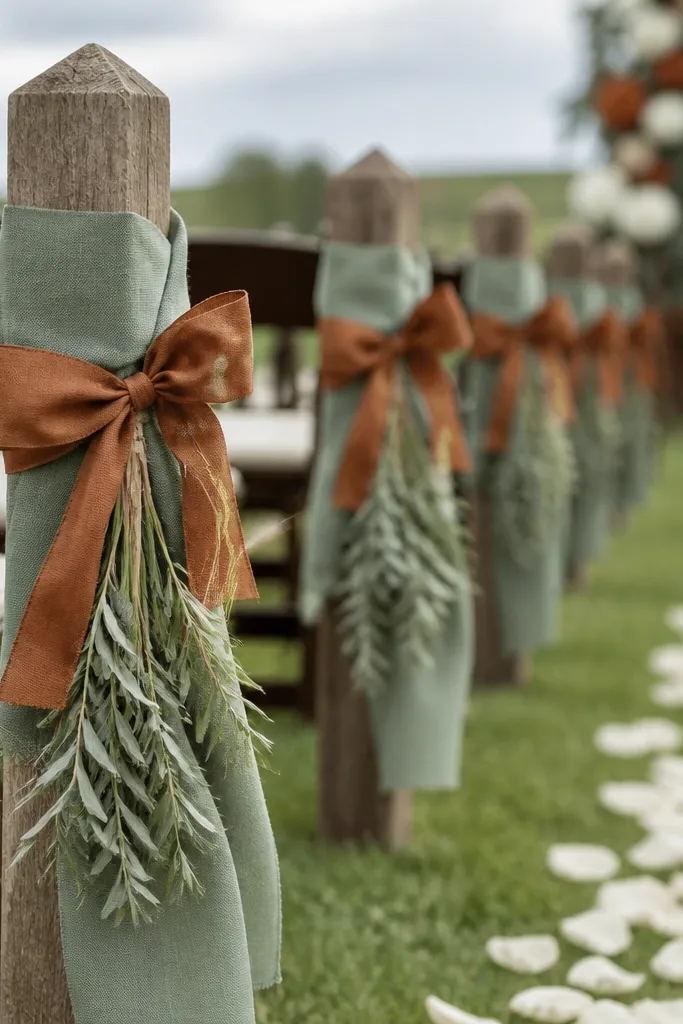
If you want a rustic aisle that looks styled from the back row, these are the markers to copy. The linen ribbon looks soft and tactile, while the rust accent keeps sage from looking too muted in daylight. I've seen sage-only aisles turn pale in late afternoon photos, but adding a warm rust bow brings back contrast. The stakes also create a repeating pattern that reads clearly down the aisle. For guests, it frames the ceremony path and makes the walk feel "planned," not accidental.
Start by spacing stakes evenly - I use 1.2 m apart for a typical aisle and adjust closer for narrower spaces. Wrap each stake with sage linen ribbon first, leaving 15-20 cm of ribbon tails for movement. Tie a rust ribbon bow on top, keeping it smaller than the sage tails so sage stays the main theme. Add one dried sage sprig at the stake base using jute twine. Step back and check the line from the center aisle before you commit - you want them aligned, not drifting.
Try thisMist the dried sprigs with a tiny bit of water before tying. They settle flatter and look fuller the next day.
Common mistakeDon't use stiff plastic ribbon. It makes the whole aisle look like party decor.
5. A sage green arch draped with cream linen and dried wheat garlands
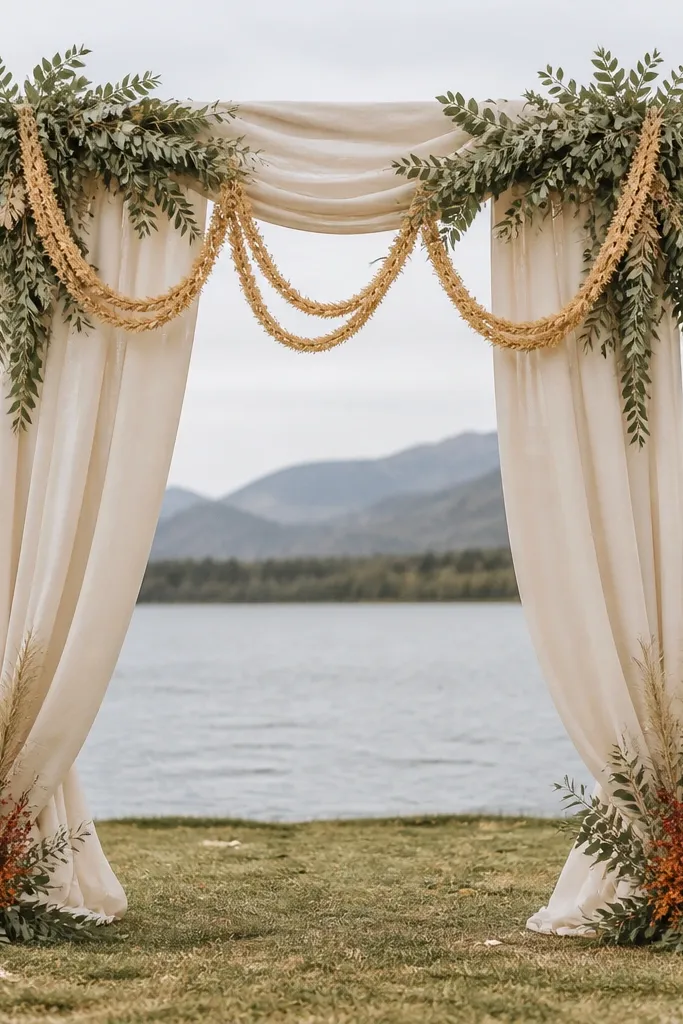
This arch style photographs like a magazine spread because the texture is doing the work. Cream linen drapes create movement and soften the arch shape, while sage greenery gives you the color story without a heavy floral wall. Dried wheat adds height and that rustic "field" feeling, and the rust accents bring warmth when the sky is overcast. I like it for outdoor ceremonies and barn ceremonies because it doesn't look too formal. It also flatters the couple in photos since the background stays warm and not overly saturated.
Start with a basic metal or wood arch frame, then drape cream linen in panels that overlap by 5-10 cm. Add sage greenery at the top bar first, then tuck it into the linen folds so it looks integrated. Hang dried wheat garlands in two or three loops per side, cutting lengths so the lowest loop sits around waist height when the couple stands center. Add small rust dried accents near the base corners, not across the front. Secure everything with zip ties hidden under linen folds so nothing shifts during wind.
Try thisDo a quick photo test from the ceremony spot before final tying. Wind shifts drape fast and you want it right early.
Common mistakeAvoid a full dense floral wall if you're going rustic. It reads too lush and loses the wheat-and-linen vibe.
6. Sage mason jar candle group with varying heights
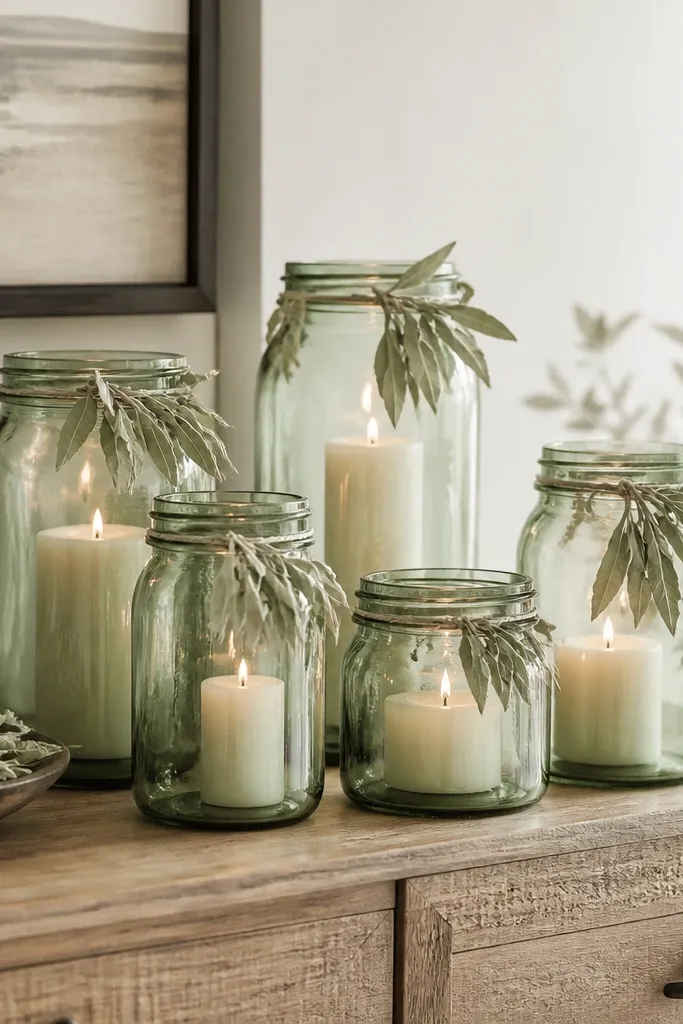
Candle clusters are where rustic sage green wedding decor ideas feel cozy instead of decorative. Mason jars give you that classic countryside look, and sage-tinted glass keeps the palette cohesive without adding extra colors. Varying candle heights creates depth - the cluster looks full even when you're only using a few jars. This works especially well for evening receptions because the warm candle glow makes sage look more flattering and less gray. It also makes your space feel cared for even before guests sit down.
Start by choosing three to five jars and setting them on a tray or directly on a wooden surface. Put the tallest candle in the center jar, then place two medium jars flanking it and a shorter jar at each end. Tuck dried sage leaves around the jar rim, keeping them away from flames. Use flameless candles if your venue has rules, but keep the jar openings the same so the heights match. Finish by wrapping a thin strip of burlap or kraft ribbon around the tray, leaving the knot off-center.
Try thisUse painter's tape to mark jar positions before you fill them. Candle clusters shift while you work.
Common mistakeDon't use scented candles that are too strong. The room can smell like a craft store instead of a wedding.
7. Sage and cream dried floral table centerpiece in a low ceramic bowl
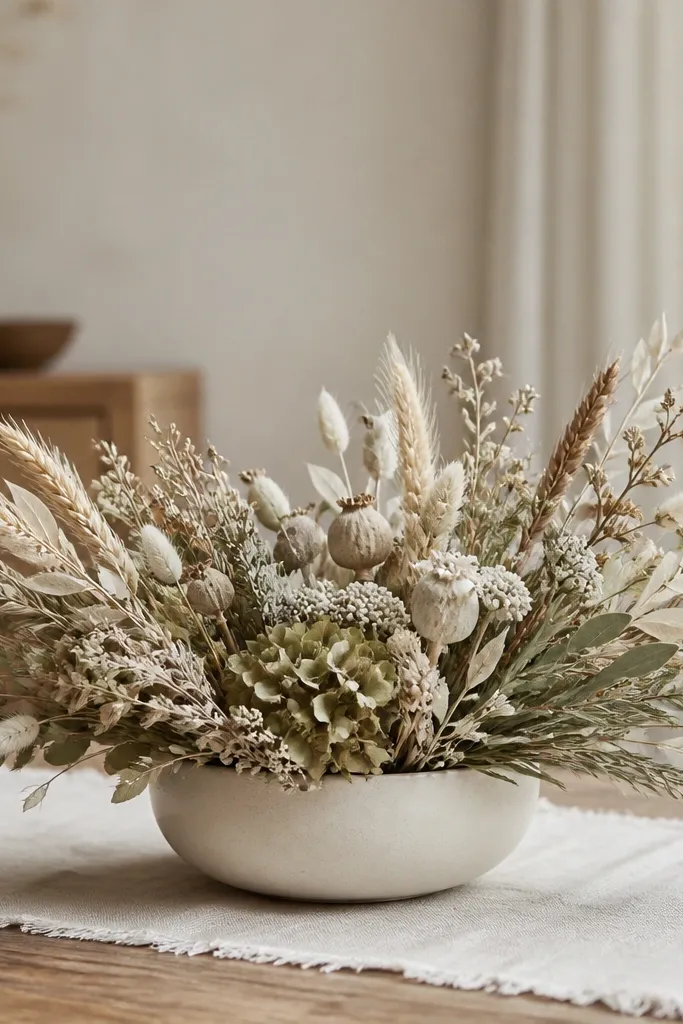
Low ceramic bowls are a personal favorite because they keep conversation easy and still look lush. The matte cream ceramic keeps everything soft, while the dried sage-toned florals add that rustic color without fresh-flower fuss. I like this centerpiece for couples who want an "abundant" look without tall obstructions. Guests can see each other, and the bowl shape makes the table feel grounded. It also works well for both light and deep skin tones because the palette stays warm and neutral.
Start by placing the bowl directly at the center of the table runner. Arrange dried wheat and long greenery first, then add volume with smaller dried blooms around the edges so it looks full from the side. Keep the tallest stems under 20 cm from the table so faces stay visible. Lightly mist the greenery with water before placing it so stems settle into a natural spread. Add one or two rust-toned dried accents near the back edge of the bowl to create depth.
Try thisUse floral foam only inside the bowl if you're reusing the arrangement. Otherwise, tie stems with twine and tuck ends under the bowl edge.
Common mistakeAvoid tall centerpieces on head tables. They make photos awkward and block smiles.
8. Sage green napkins folded into a simple "fan" for place settings
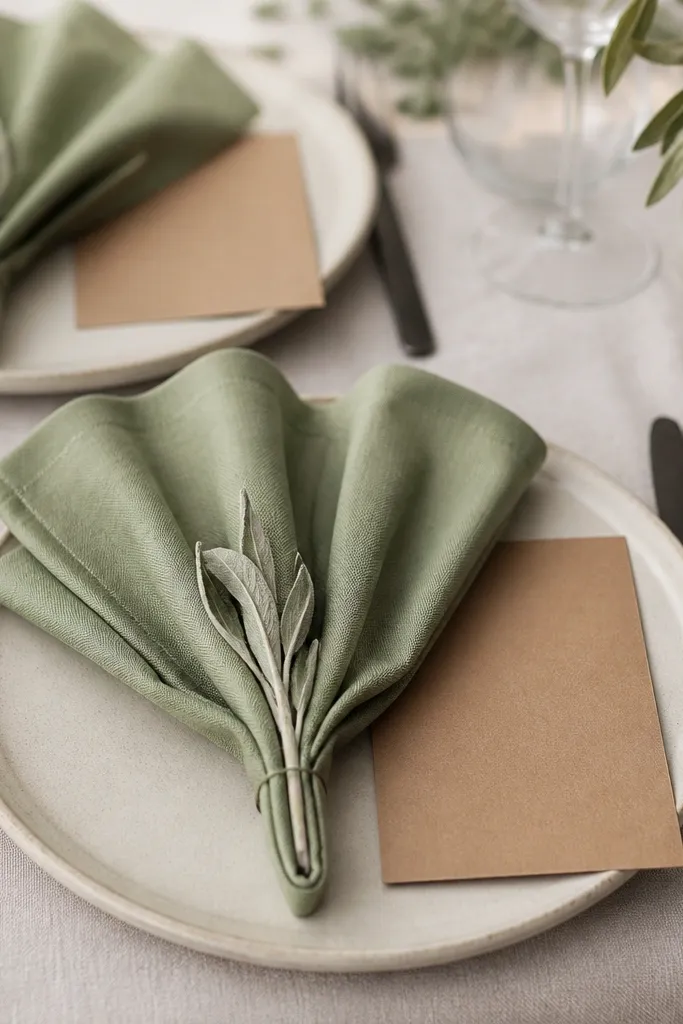
Napkin folds are cheap, fast, and they make rustic sage green wedding decor ideas look styled even if your flowers are minimal. A fan fold looks neat from a distance and still feels handmade up close. Sage napkins read warm against cream plates, and the matte fabric keeps the color soft in photos. This style flatters tables where you want a little structure without going formal. It also works for both men and women because the place setting stays the focus, not the cutlery.
Start with a medium-weight sage linen or cotton napkin that holds shape. Fold it in half, then accordion-fold in 2-3 cm pleats toward the open edge. Fan the pleats out on the plate so the widest part sits at the top, then secure with a tiny piece of sage-colored twine or a napkin ring. Place a dried sage sprig at the center fold so it doesn't wander. Add a kraft menu card next to the napkin, aligned with the plate edge.
Try thisPractice the fold on one napkin and then repeat the same direction for every place setting. Consistency reads expensive.
Common mistakeDon't use thin paper napkins. They crease unevenly and look off against linen.
9. Kraft wedding menus with sage letterheads and pressed leaf corners
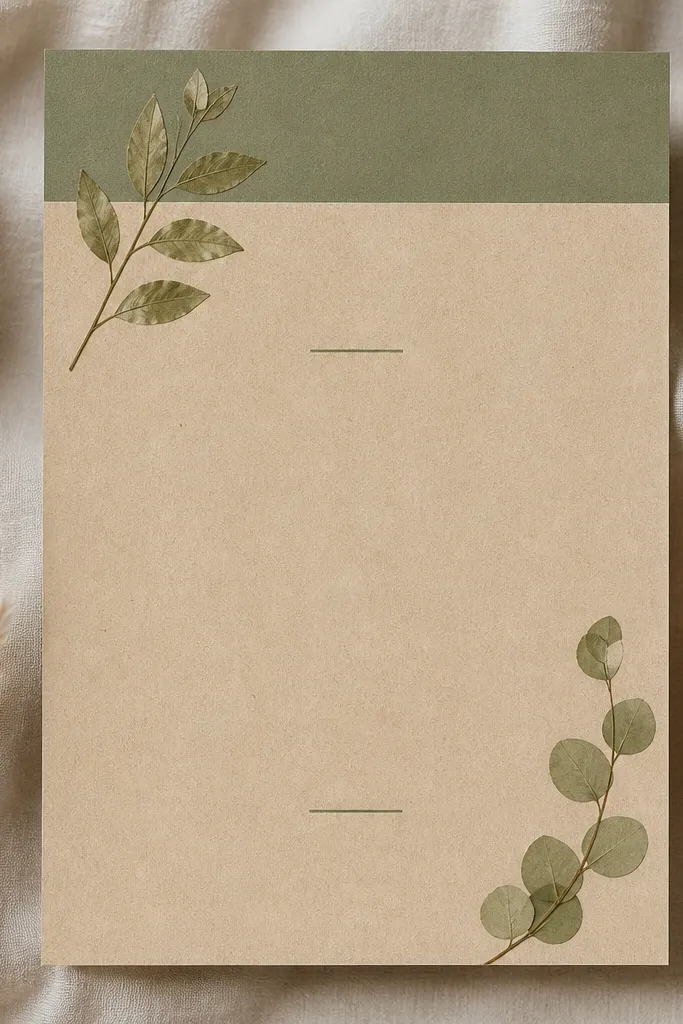
Menus are one of the few decor items guests hold, so they need to look good in hand. Kraft paper plus a sage letterhead band makes the palette feel cohesive without adding more color. Pressed leaf corners bring genuine texture and make the menu look like it came from a local print shop. I've used this when we had limited time for full table florals, and guests still commented on the paper details. The warm brown of kraft flatters skin tones and keeps photos from looking too green.
Start with kraft paper menus cut to a size that fits in one hand, like 10 x 7 cm folded or 20 x 14 cm open. Add a sage green header band across the top, then leave plenty of negative space for readability. Press a small dried leaf and place it into the top corners, securing with clear double-sided adhesive. Type the menu text in dark ink and add a thin sage line divider between sections. Tie the menu with a short piece of twine or place it flat under a napkin or beside the charger.
Try thisChoose leaves that are flat and dry, not crumbly. Curled edges look sloppy after a few hours.
Common mistakeAvoid heavy glitter accents. They catch light and ruin the rustic paper vibe.
10. Sage green and cream balloon-free photo backdrop with dried wheat and linen ties
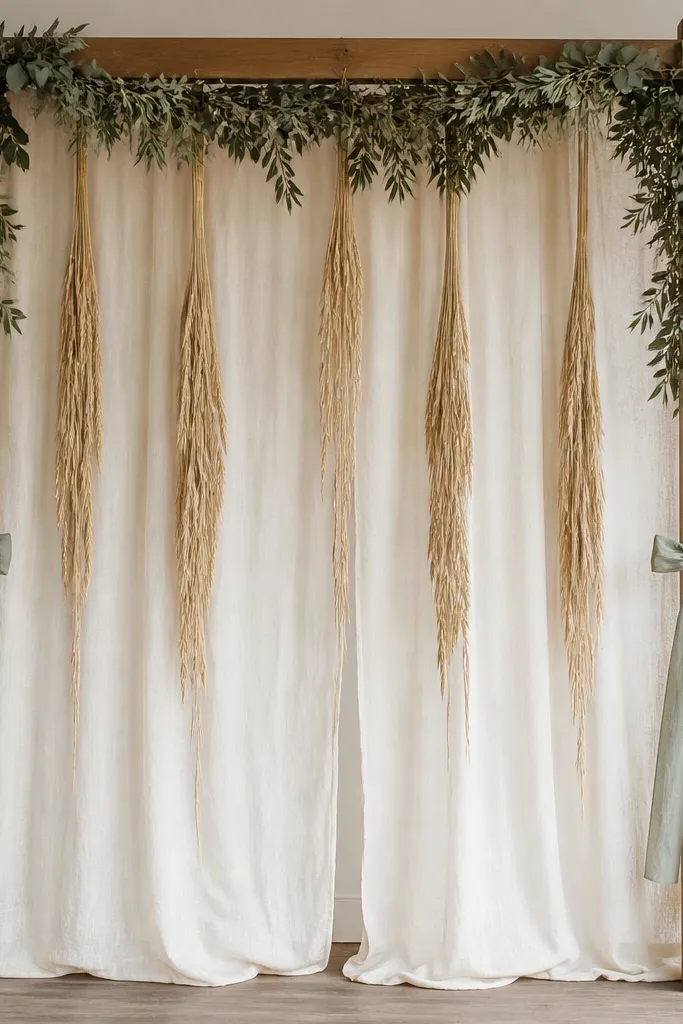
If you hate the look of balloon arches, this backdrop gives you the same "wow" without the balloon clutter. Cream linen panels soften the whole scene, and sage greenery provides the color anchor. Dried wheat adds height and a rustic texture that looks great in close-up portraits. I've used this in both barns and outdoor courtyards, and it stays photogenic even when the lighting gets moody. It also flatters the couple because the backdrop doesn't compete with clothing colors like it can with glossy decor.
Start by building or renting a simple rectangular frame and draping cream linen from top to bottom with overlap. Tuck sage greenery along the top edge and down the left and right corners, securing with hidden zip ties. Tie dried wheat stalk bundles vertically using thin sage linen strips, spacing them 10-15 cm apart. Add 4-6 linen ties across the bottom rail so the backdrop looks finished from every angle. Use a neutral ground cover behind the frame if you're photographing outdoors so the background stays clean.
Try thisCut wheat lengths so the ends land at two different heights. That variation looks natural, not staged.
Common mistakeDon't hang wheat too tight. It looks like a bundle, not a garland.
11. Sage green welcome sign on a reclaimed wood board with painted edges
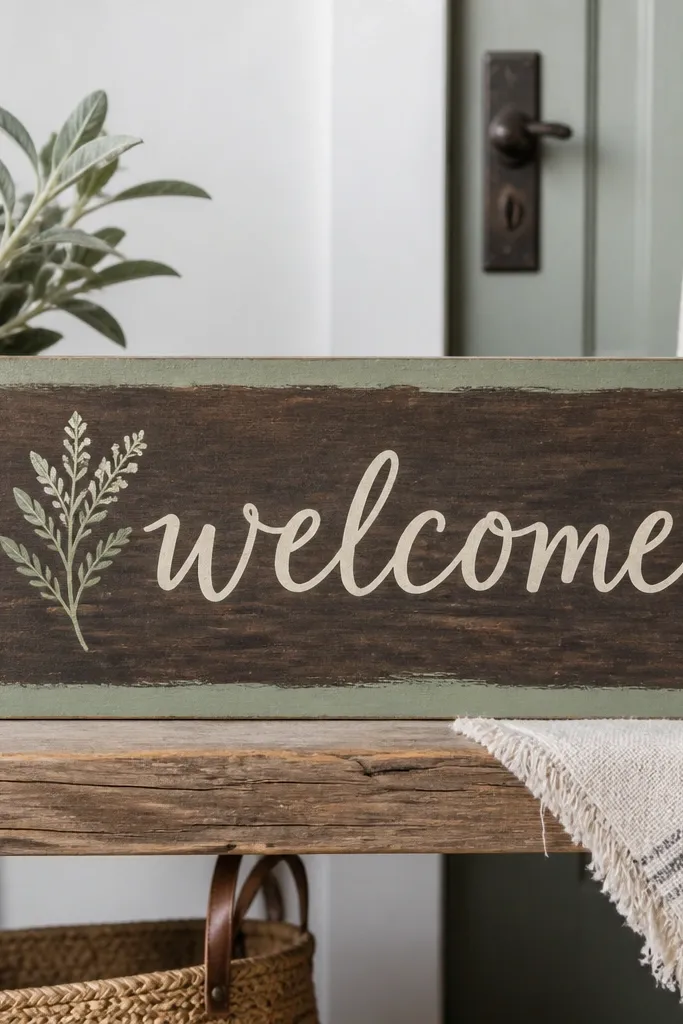
A reclaimed wood welcome sign looks better than printed foam board, and sage green edges keep it tied to your theme. The trick is painting only the edges or a header band - you keep the rustic grain visible. Hand-painted cream lettering on dark wood reads clearly from the parking lot and still looks warm up close. This style works in barns, outdoor gardens, and even church courtyards where you need something sturdy. It also makes your arrival path feel finished without adding clutter.
Start with a reclaimed wood board and sand the surface so the paint doesn't patch. Paint a thin sage green border along the edges (about 2-3 cm wide) or a top band only. Use cream paint or paint marker for the main text, keeping letter sizes large enough to read from 6-8 meters away. Add a small dried sage sprig sketch or a real pressed leaf sealed with clear matte mod podge. Place the sign on two sawhorse-style stands or mount it on an easel so it sits at chest height for guests walking in.
Try thisUse painter's tape for the border - freehand edges look uneven in photos.
Common mistakeAvoid bright neon sage. It looks cheap against reclaimed wood.
12. Sage and terracotta hanging lanterns with jute knots
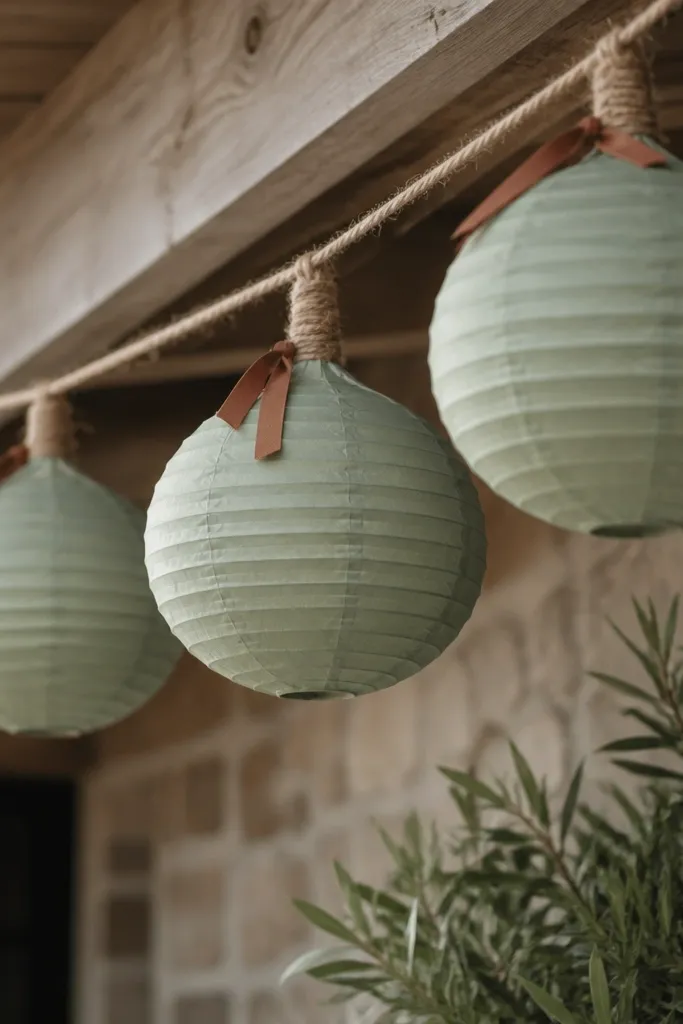
Hanging lanterns turn a rustic venue into a warm, storybook space without covering every surface. Muted sage lanterns keep the palette consistent, and terracotta ribbon adds that earthy warmth that sage sometimes lacks in daylight. I like hanging them at two heights - one set near 2 meters and another near 1.4 meters - because it creates depth when guests look around. This looks great for evening receptions and outdoor patios where you have overhead beams. It also flatters photos because the lanterns create soft light around faces instead of harsh overhead lighting.
Start by tying jute cord to ceiling beams at two different heights, leaving enough slack for lantern movement. Hang muted sage lanterns from the cord using small hooks or zip ties hidden above the lantern tops. Add terracotta ribbon accents at the knot - keep them short so they don't tangle into the lantern. If using real candles, use lanterns rated for flame and keep distance from fabric. For safety, I prefer LED lanterns with warm bulbs and test the glow direction before guests arrive.
Try thisHang lanterns in odd numbers. Even counts can look too symmetrical and less rustic.
Common mistakeDon't crowd lanterns together. Tight spacing makes the light look flat.
13. Sage green tablecloth overlay with textured burlap runner under candles
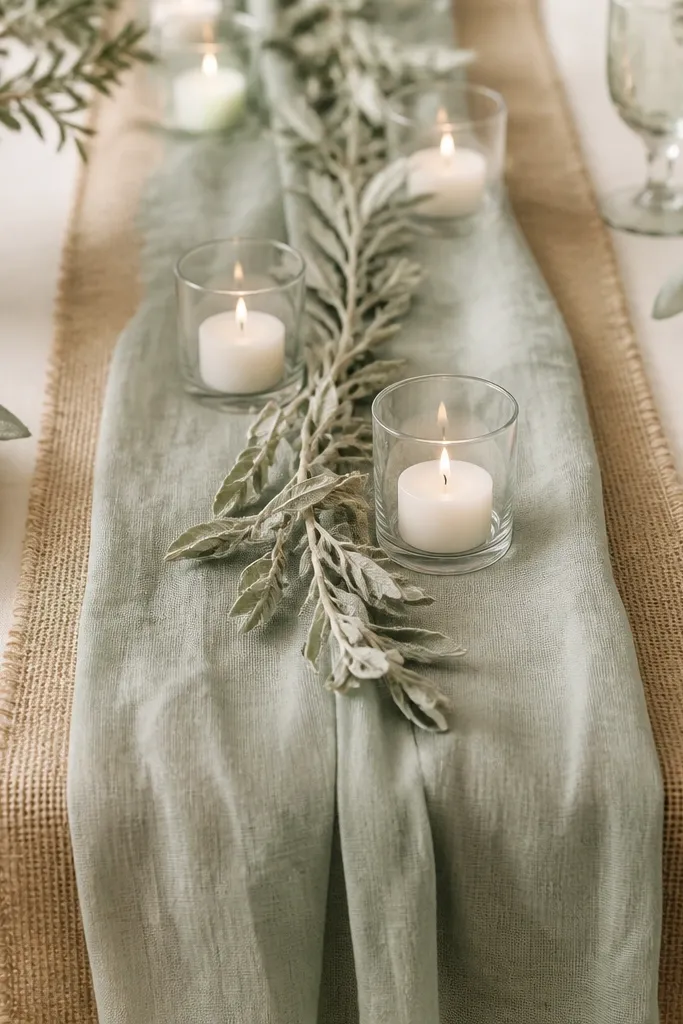
This is the "rugged but still pretty" version of rustic sage green wedding decor ideas. The burlap underlayer adds that coarse texture you can see in close photos, while the sage overlay keeps the look polished. I like this when your venue has a lot of dark wood, because burlap brightens the area and sage keeps it from going too brown. Glass candle holders on top prevent wax mess and add a little shine without going glossy. It flatters the whole table because the base stays neutral and the sage overlay draws attention to the center.
Start with a full cream tablecloth, then add a textured burlap strip down the center. Place a sage overlay runner on top of the burlap so the burlap peeks out 2-4 cm on each side. Set candle holders on the sage runner, spacing them 20-25 cm apart. Tuck dried sage sprigs in the gap between the runner and burlap so the color repeats. Keep the rest of the table simple - a few plates and one centerpiece vessel - so the texture doesn't overwhelm.
Try thisSteam the sage runner before laying it. Burlap hides wrinkles, but the sage layer still needs to fall smoothly.
Common mistakeAvoid too much burlap. If burlap is the main color, it turns the room into a fall festival.
14. Sage green and cream flower wall made from potted herbs for a living backdrop
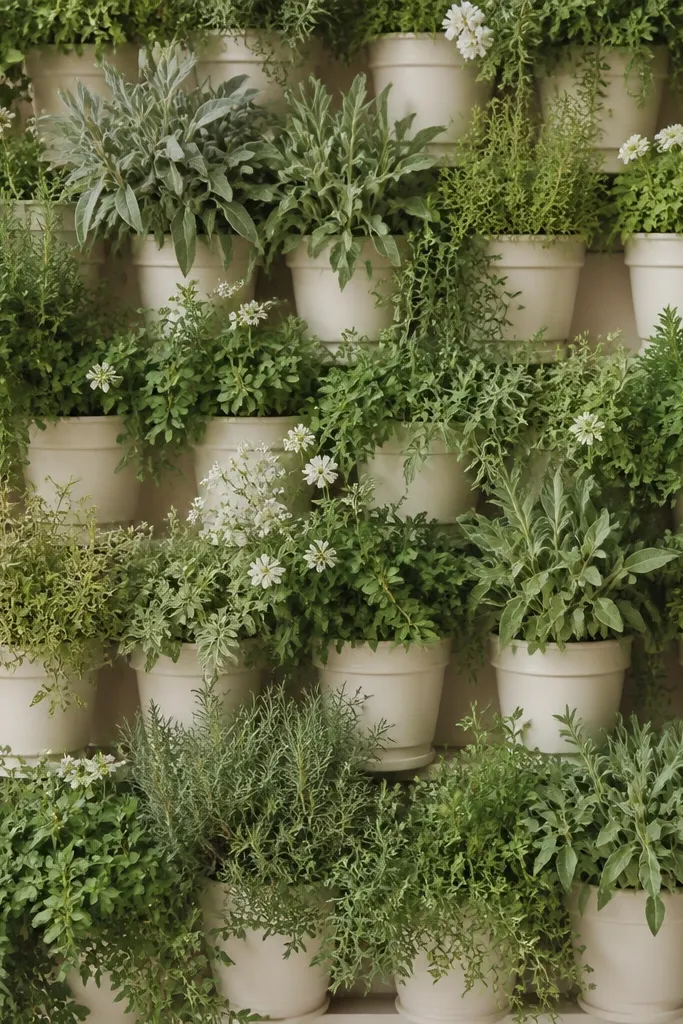
A living herb wall is one of the few rustic sage green wedding decor ideas that feels interactive and practical. Instead of cutting everything and throwing it away, you can use potted herbs as the backdrop and send them home after. The sage green reads naturally because it's real plant material, and the cream pots keep the look soft. This works best for outdoor ceremonies or venues with easy access to water and drainage. It also flatters people because it's green but not heavy - the gaps between pots keep the background airy for photos.
Start by choosing a backing system like a pallet frame or grid panel secured to a stand. Place cream pots in a staggered pattern, leaving 5-10 cm gaps so the greenery breathes. Fill pots with sage-toned greenery first, then tuck in small cream flowers or dried accents for contrast. Water the plants the morning of so leaves look full and not dusty. Add sage ribbon around pot handles or ties to unify the look across different pot sizes. Secure the base with sandbags or weights so the wall stays steady.
Try thisLabel the herbs with small tags so guests know what to take home. It turns a backdrop into a keepsake.
Common mistakeSkip mixed pot colors if you can. Too many colors makes the wall look like a plant store shelf.
15. Sage green and wheat runner on the bar cart for a cohesive reception vibe
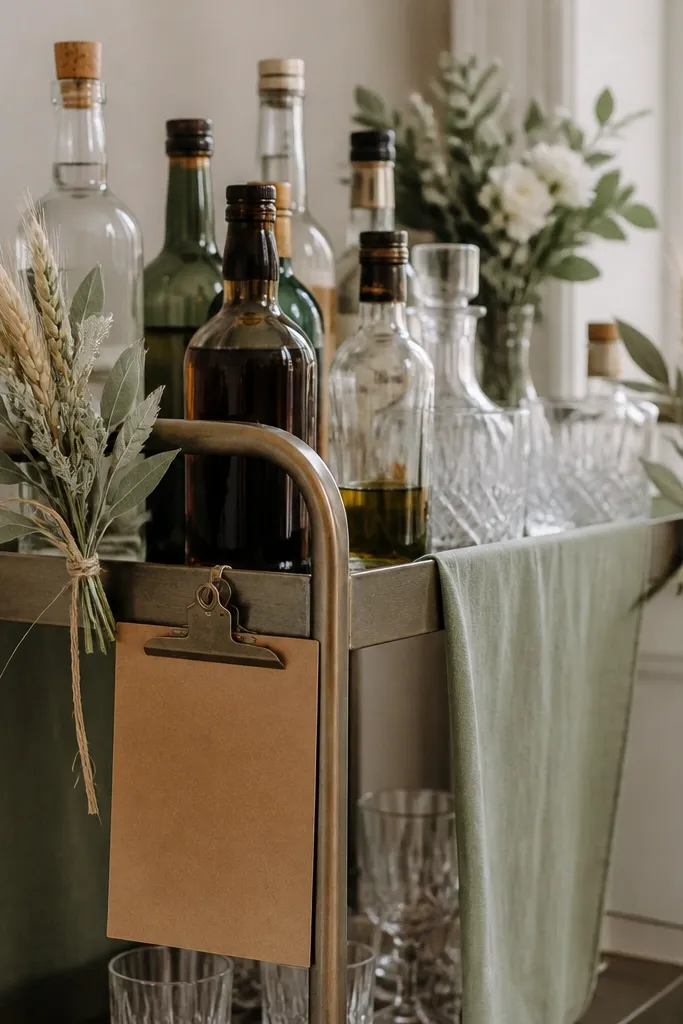
Bar decor is where guests linger, so it needs to look styled even if it's not in the ceremony photos. A sage green runner on the cart ties your rustic palette together, while wheat and dried sprigs add that countryside texture. I've set this up for receptions where the main table had big florals, and the bar still needed to look cohesive. Sage keeps the cart from looking cluttered, especially when you have lots of bottle labels and different drink colors. It also looks good in candid photos because the runner gives a clean color base behind the hands reaching for drinks.
Start by wiping the cart shelves so the runner sits flat and doesn't catch dust. Lay a sage runner across the middle shelf, then tuck small wheat stems under the edges so they peek out. Add a small kraft menu or drink list clipped to a board so the text stays readable. Tie dried sage sprigs to bottle necks with thin twine, using only one sprig per bottle to avoid a tangled look. Place a small candle or LED light in a matte holder near the front so the bar looks warm at night.
Try thisUse one consistent twine color across the whole cart - I stick with natural jute for this.
Common mistakeDon't overload every bottle. Two or three styled bottles look intentional; ten looks chaotic.
16. Sage green ring pillow cover with linen texture and dried herb trim
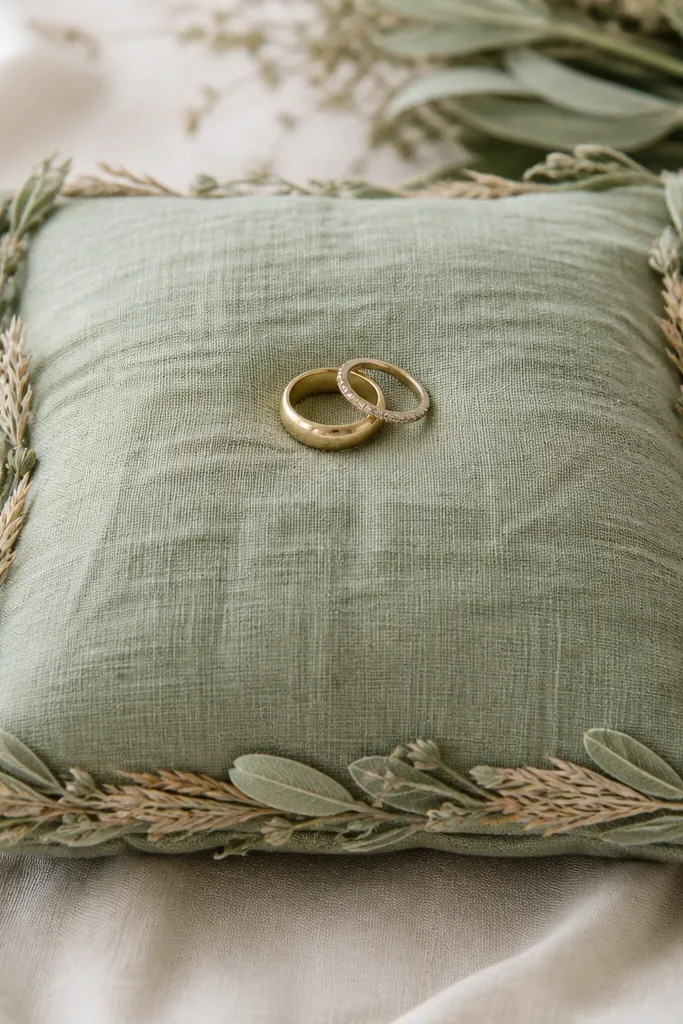
This is a small detail, but it matters because the ring pillow is photographed close. A sage green linen cover looks soft and expensive, and linen texture makes it read rustic without looking messy. Dried herb trim ties the pillow to your bouquets and table greens, which keeps the story consistent. I've used this in outdoor ceremonies where the pillow gets handled by multiple people - linen holds up better than satin. It also photographs well next to cream dresses and neutral suits because sage doesn't fight skin tones.
Start with a sage linen pillow cover and keep the pillow itself firm so the rings sit flat. Add a thin band of dried sage and wheat trim around one edge using small stitches or fabric-safe glue. Place the rings slightly off-center so they don't look like a flat sticker in photos. If you're using a ribbon tie, use a cream ribbon so the sage doesn't look like it's swallowing the rings. Bring a lint roller on the day of - linen shows fuzz more than you'd think.
Try thisWash and dry linen before you sew or glue anything. It shrinks a little and you want it to stay true.
Common mistakeAvoid shiny ribbon trims. They throw highlights onto the rings.
17. Sage green and cream signage set with layered frames and kraft backing
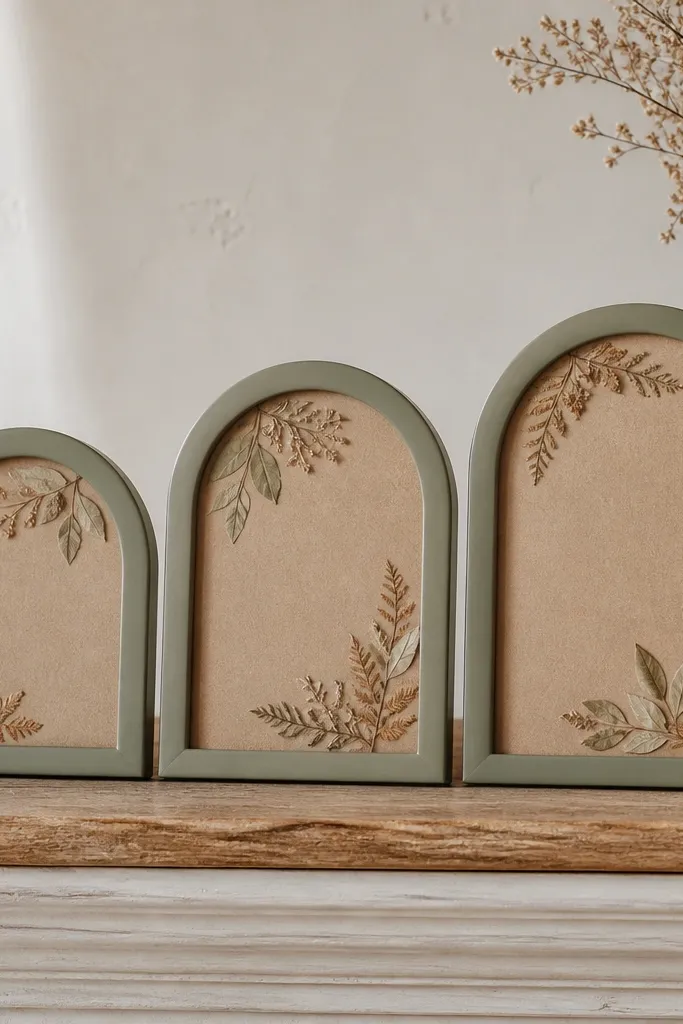
Signage is where guests decide where to walk next, and it needs to look cohesive, not random. Layered frames with sage borders create structure, and kraft backing keeps the vibe rustic. I like handwritten text because it feels human, and sage ink keeps it tied to the wedding palette. This set works well for directional signs, menu boards, and welcome messages - you can reuse the same design language across multiple spots. It also reads well for photos because the frames add depth and make the signs stand out without loud colors.
Start by choosing frame shapes you can repeat, like rounded-top frames or simple rectangles. Add sage green borders either by painting the frame edge or using pre-made sage mats. Back each sign with kraft paper and write text in dark ink with a consistent font size. Place one dried leaf in each corner using clear matte adhesive so it doesn't shift. Hang signs at eye level around 1.4-1.6 m from the floor, or place on easels if you're using them on a table.
Try thisMake one master sign and copy the spacing with a paper grid. It keeps all the signs looking like a set.
Common mistakeAvoid mixing too many font styles. It reads sloppy, even when the colors are right.
18. Rustic sage green sweetheart table with sage drape and cream upholstered chairs
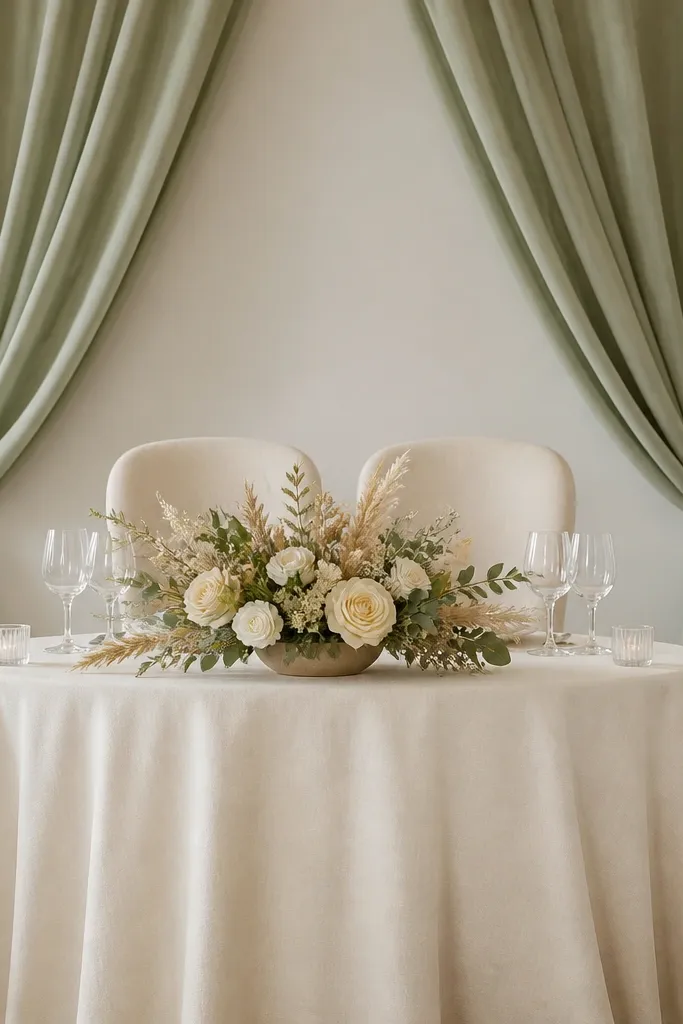
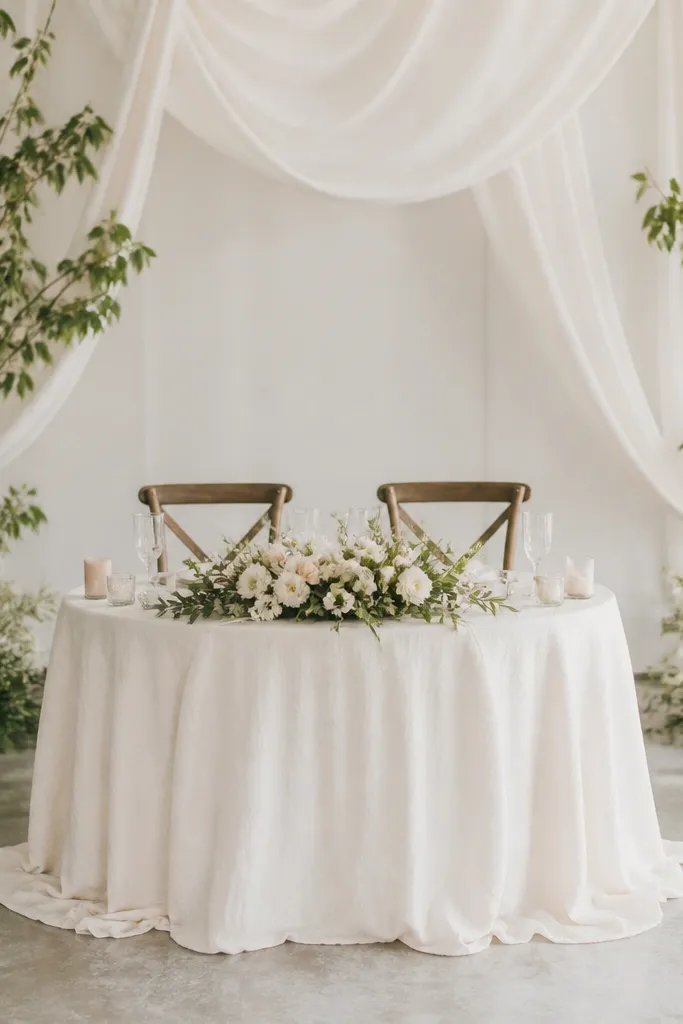
The head table is the biggest photo magnet, so it needs a clear color story. Cream upholstered chairs keep the couple looking bright and flattering, while sage drape adds that rustic green without covering everything in greenery. I like low floral bowls here so the couple's faces stay visible and centered. This setup works well for both formal and casual venues because the chairs bring polish and the drape brings rustic softness. Sage in the drape looks great behind brides and grooms because it frames them without turning into a wall.
Start by covering the table in cream cloth, then add a sage drape behind the couple with fabric that has weight (linen blend or cotton). Drape the fabric in two layers so it falls with a natural fold, and anchor it with hidden ties at the back. Place a low centerpiece bowl at the center line and keep the tallest stems under 22 cm. Add two matching candle holders on either side of the bowl, then add a small place card stand or menu card at each setting. Finish with sage napkins or sage ribbon accents on the table so the color repeats in the frame.
Try thisHang the sage drape slightly wider than the table. It makes the photo look fuller without adding more items.
Common mistakeAvoid tall floral arrangements behind the couple. They block faces and make the drape look unnecessary.
19. Sage green and cream welcome lanterns along the entry walkway
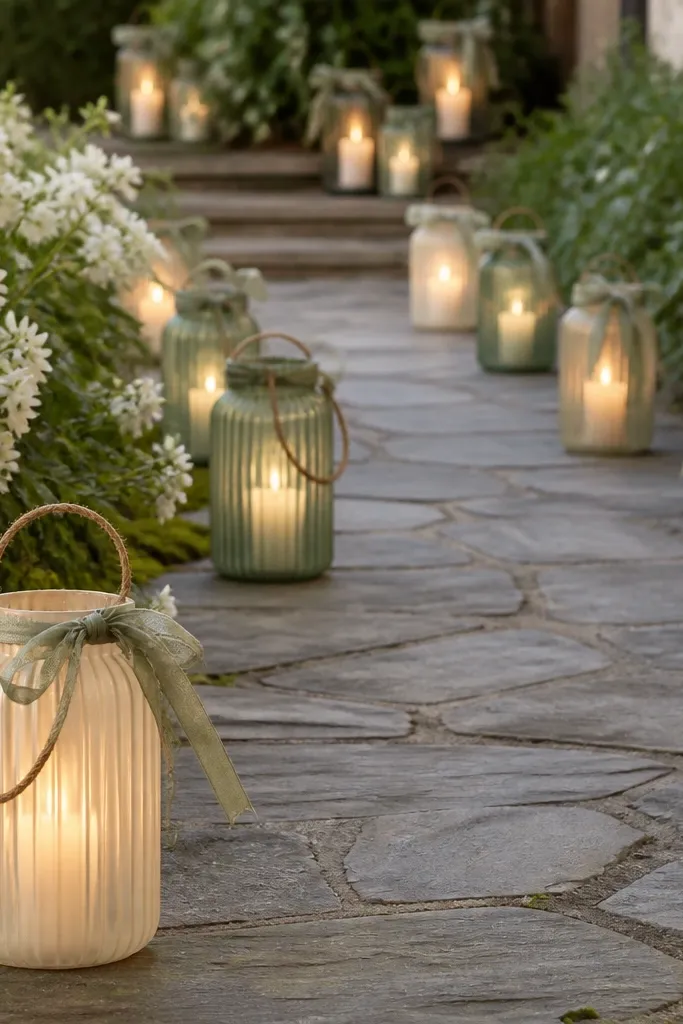
Entry lighting changes the whole feel of rustic sage green wedding decor ideas. Lanterns create a guided path and make the venue feel cared for when guests arrive. Using cream and sage-toned lantern glass keeps the palette consistent without needing big floral pieces. I've found this works especially well when the venue has poor natural lighting, because the warm LED glow makes skin tones look better. It also helps guests feel oriented - they see where to go even if the ceremony is tucked away.
Start by placing lanterns at consistent intervals, about 1-1.5 m apart along the walkway. Tie a short jute wrap with a sage ribbon around each lantern handle, keeping tails around 8-10 cm. Use warm LED candles inside so the glow looks like real candlelight. If the walkway is gravel, set lantern bases on flat boards or trays so they don't tip. Add one larger lantern near the welcome sign so the entry has a clear focal point.
Try thisTurn the lanterns on during your final setup walk-through. Adjust placement based on what looks too bright in camera.
Common mistakeAvoid cool white bulbs. They make sage look gray and unflattering.
20. Sage green and kraft candy table with small herb bundles
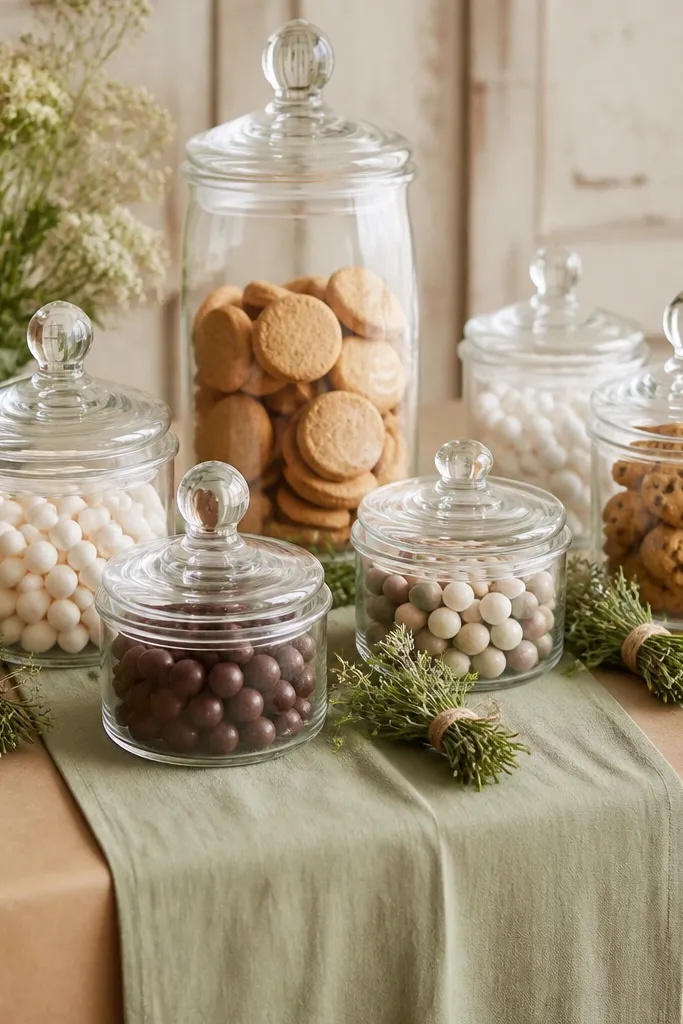
Candy tables look fun, but they also look messy fast. Sage green and kraft keep it grounded and rustic, and small herb bundles add real texture without turning the table into a florist shop. I like glass jars because they show labels and colors, and the sage runner makes the whole setup feel intentional. This is great for receptions with kids or lots of mingling time. It also photographs well because the glass catches warm light and the sage runner gives a clean color base behind hands.
Start by laying a sage runner on the table and covering the sides with kraft paper so edges look finished. Use three to four glass jars of different heights, then label each with kraft tags and dark writing. Tie small herb bundles with jute twine and tuck them between jars, not directly on top of them. Keep candy containers within the center third of the table so the edges stay clean. Add a small sign in sage ink that matches your welcome signage so the set feels cohesive.
Try thisUse kraft paper to line the table corners. It hides scuffs and gives a tidy border in photos.
Common mistakeDon't use bright neon candy wrappers near sage. The colors fight the palette.
21. Sage green and cream serving utensils wrapped in linen ribbon
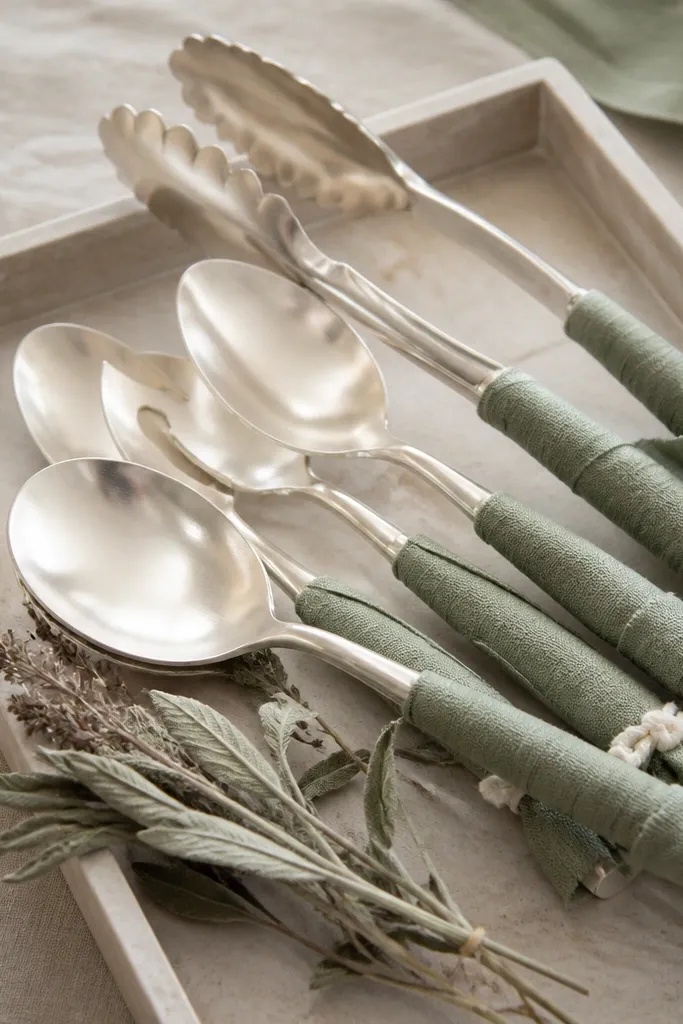
Serving utensils are one of those overlooked details that still show up in photos when guests are cutting cake or passing food. Wrapping handles in linen ribbon makes the rustic sage green wedding decor ideas feel cohesive without adding extra decor. Linen looks soft and natural, and sage ribbon ties the utensil moment to your table story. I like this when you have a buffet line or a cake table where the utensils sit out in the open. It also works for any wedding size because you can do it for every set in a few minutes.
Start by choosing serving utensils with comfortable handles, then cut sage linen ribbon strips wide enough to wrap once or twice. Wrap the handle tightly enough that it doesn't slide, then tie a small cream knot at the end. Place utensils on a tray covered in cream cloth or a kraft liner so the ribbon stands out. Add one dried sage sprig tucked under the ribbon tail so it looks like it belongs. Keep ribbon tails short, around 5-7 cm, so they don't snag on plates.
Try thisUse a small dab of fabric-safe glue inside the last wrap if you're doing outdoor weather. It stops ribbon drift.
Common mistakeAvoid slippery satin ribbon. It slides and looks messy fast.
22. Sage green and rust escort card board with fabric pockets
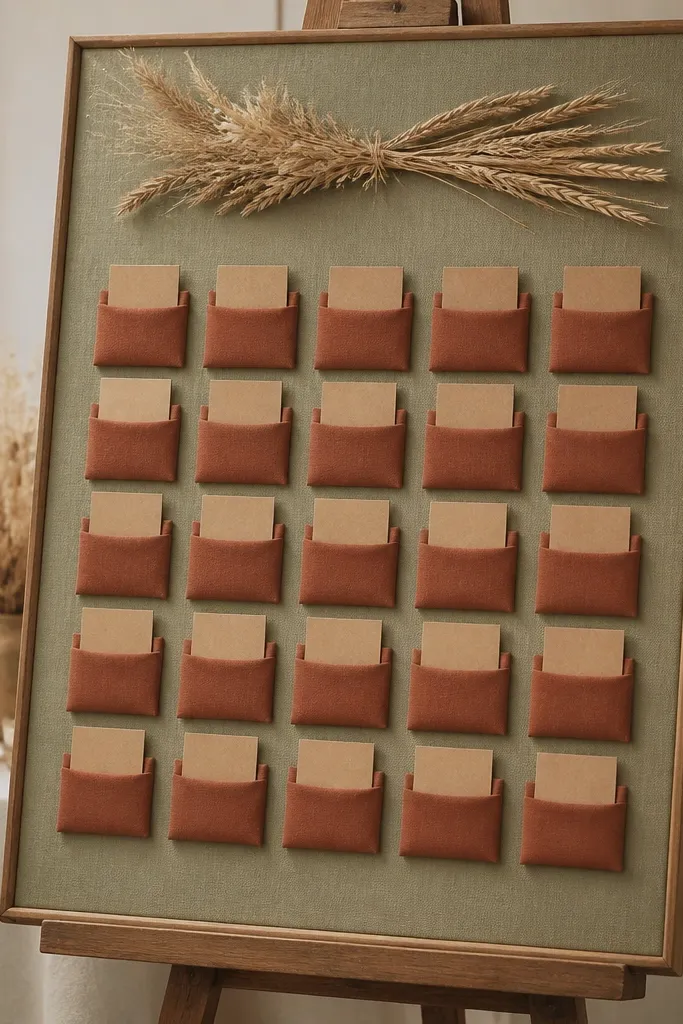
Escort cards are functional, so they should also look designed. Fabric pockets in sage create a soft, rustic texture, and rust pockets add warmth without overpowering the green. I've used this layout at weddings where the room was crowded, and guests still found their names quickly because pockets keep cards upright and easy to scan. It also photographs better than a plain paper sign because the fabric adds dimension. This setup works for both indoor and outdoor receptions, as long as you keep the board stable and protected from wind.
Start by mounting a board with sage fabric stretched tight and stapled on the back. Add pockets made from rust fabric - I use simple rectangles stitched along the sides and bottom, leaving the top open. Insert kraft cards into each pocket with names printed or written in dark ink. Arrange cards in alphabetical order by pocket row, and add a small key or heading at the top in sage ink. Decorate the top edge with a dried wheat sprig secured with twine so it looks like part of the structure.
Try thisLabel rows with numbers or letters in a bigger font. It reduces time guests spend searching.
Common mistakeDon't use flimsy paper pockets. They sag and make cards fall out.
23. Sage green and cream cake table with linen skirting and wheat garland edge
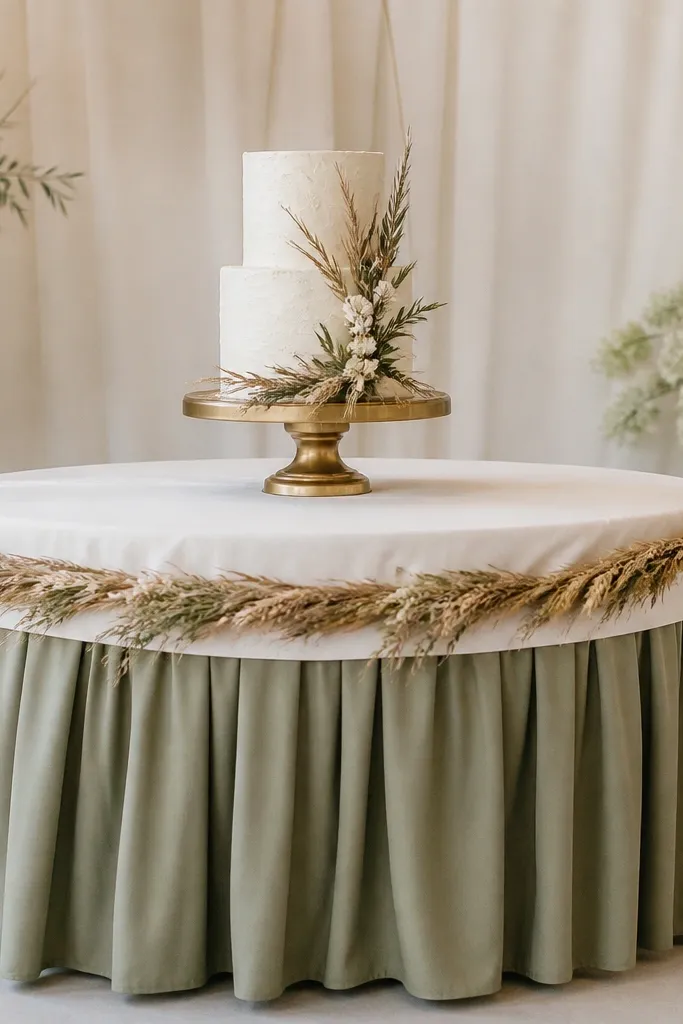
Cake tables need height control and a clean base so the cake looks like the star. Linen skirting in sage adds movement and hides table legs, and the wheat garland at the edge gives a rustic frame without blocking the cake. I like pairing sage with cream here because it keeps the cake color from looking greenish under lighting. The wheat edge is also a great trick when you're using a gold stand - it adds warmth near the metal. This setup flatters the couple because the background stays soft while the cake remains centered and readable in photos.
Start by covering the table in cream cloth, then add a sage linen skirting that drapes to just above the floor. Tie the skirting to the table corners so it doesn't twist. Place a wheat garland along the front edge, using short pieces so it stays even across the width. Center the cake stand, then add a couple of small sage sprigs around the cake base, not on top of the cake. Finish with a small cake knife display wrapped in cream ribbon so it matches your table palette.
Try thisUse a lint roller on the skirting. Linen picks up dust from setup quickly.
Common mistakeAvoid heavy floral sprays directly on the cake stand. They crowd the cake and look messy.
24. Sage green drink labels on kraft tags tied to bottles with jute
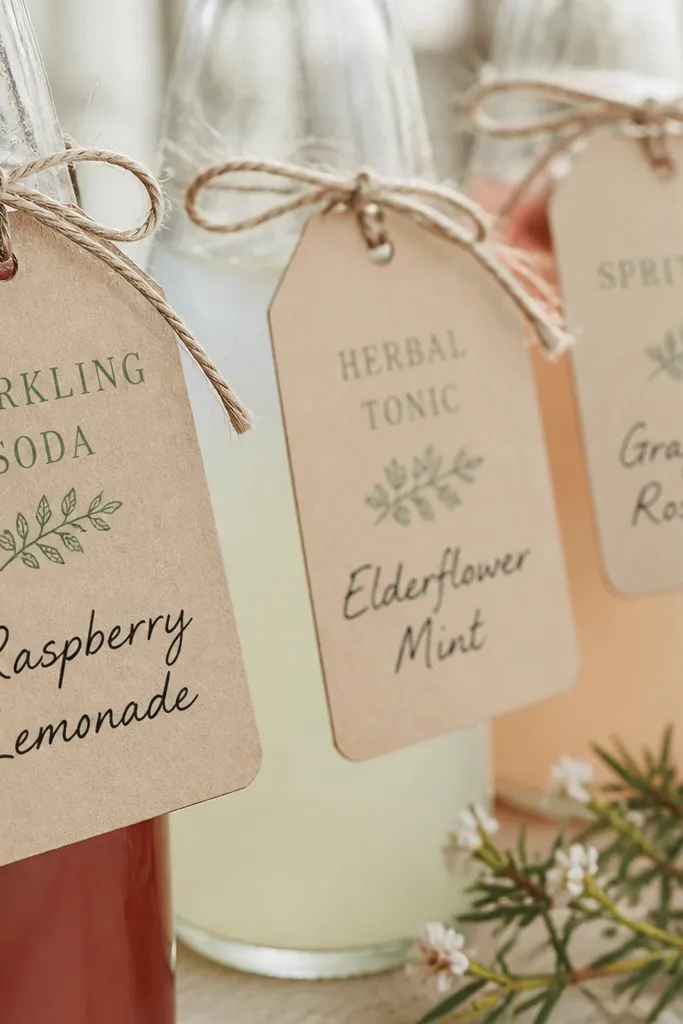
Drink labels are small, but they make your rustic sage green wedding decor ideas feel finished. Kraft tags keep the look grounded, and sage headings tie the labels to your palette without turning them into a color block. Tying labels with jute looks handmade and matches the rest of the rustic materials like linen and wood. I've noticed guests actually read these, especially when there are signature drinks with similar colors. It also photographs well because the tags sit near the bottle labels, creating a clear focal point.
Start by printing or writing drink names in dark ink and adding a sage green header bar at the top of each tag. Cut tags from kraft paper, punch a hole near the top, and tie to bottle necks with jute twine. Keep tag size consistent - around 5 x 7 cm - so everything lines up visually. Place bottles in a row so labels all face forward. Add one small sage sprig near the first bottle in the row to connect the labels to the decor theme.
Try thisWrite the drink name in a slightly larger font than the description. It stays readable in photos and from a distance.
Common mistakeAvoid stapled labels on bottles. They look temporary and cheap.
25. Sage green and cream chair sashes with linen bows and a single wheat stem
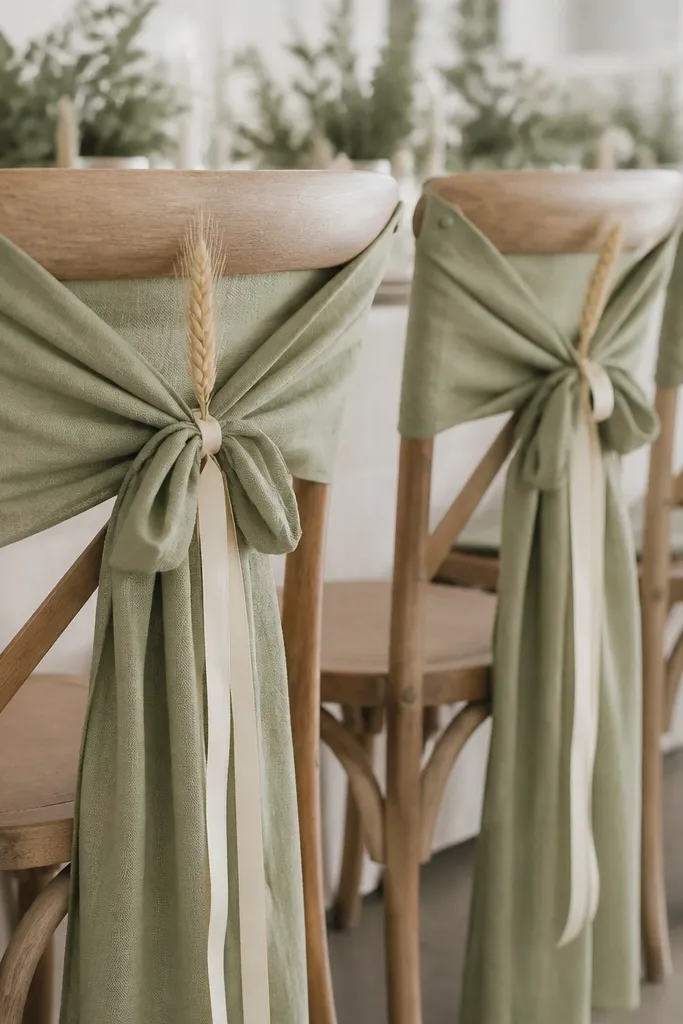
Chair sashes make a rustic ceremony look like it belongs to your couple, not the venue. Linen bows are soft and flattering, and sage green stays calm in photos while still reading as "wedding." Adding a single wheat stem at the center gives a rustic field feel without clutter. I like one stem only because it looks intentional and doesn't tangle with hair or sleeves. This works for both indoor and outdoor seating, especially when you use chairs with simple backs that can take a bow.
Start by choosing sage linen sashes wide enough to tie neatly, around 7-10 cm wide. Tie each sash into a bow at the back of the chair, keeping the bow centered. Tuck one wheat stem into the middle of the bow, then secure it with a tiny piece of twine hidden behind the loops. Add cream ribbon tails if you want extra contrast, but keep tails short so they don't drag. Step back to check alignment - you want bows facing the same direction across the aisle.
Try thisTie sashes right after hair and makeup is done. The fabric settles and looks better than rushed morning ties.
Common mistakeDon't use too many wheat stems. The chair looks overcrowded and loses the clean rustic line.