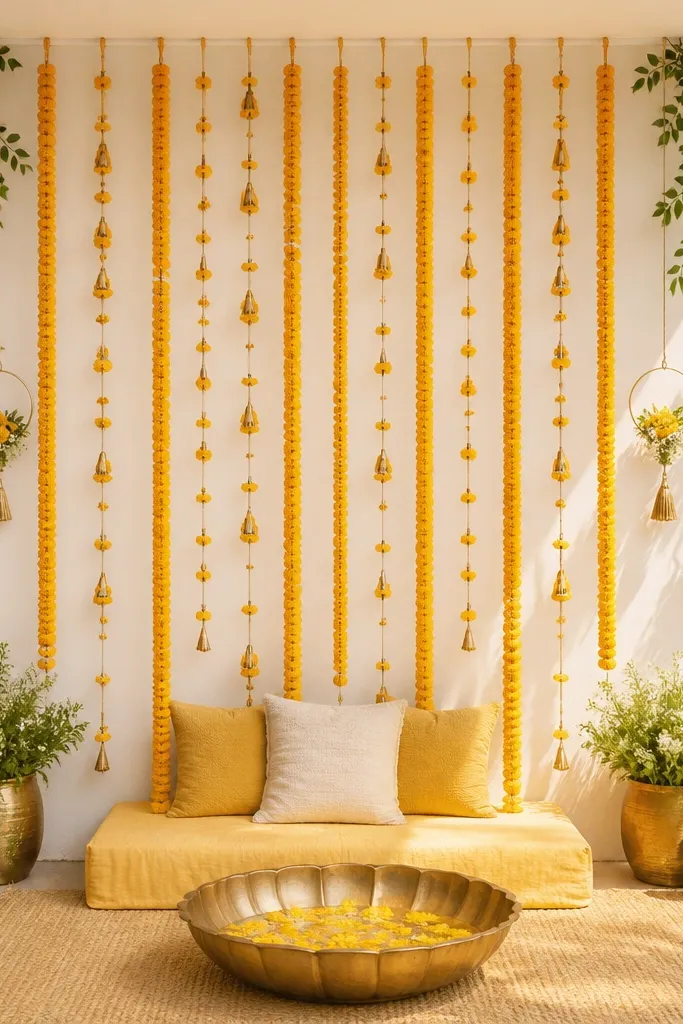
1. Satin Yellow Door Drapes with Velcro Backing

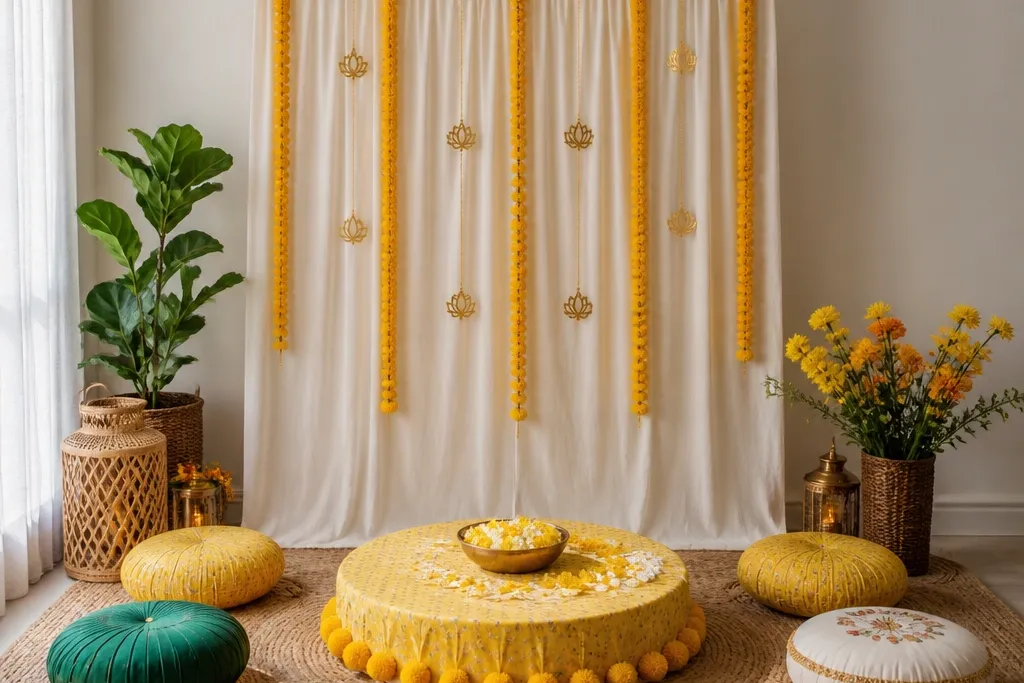
I use this when the venue has a plain entry and you want instant "function" energy without touching the walls. The satin catches warm indoor lighting and looks expensive in photos because the folds throw light in different directions. Choose two shades: marigold satin on the outer panels and pale butter satin on the inner edge for a subtle depth effect. This looks great on most skin tones because yellow sits well against both warm and cool undertones, especially when people wear gold, ivory, or deep green outfits. Keep the drape length about 8-10 inches below the top trim so it reads full from six feet away.
Start by buying two lengths of satin fabric about 3 feet wide each and 7-8 feet long, then hem the side edges so they don't curl. Cut hook-and-loop tape into 12-inch sections and stick the loops to the fabric back, then place the hooks on the door frame using Command damage-free hooks or a removable tape strip. Hang the panels with a slight overlap in the center so there are no gaps, then adjust the fold spacing by hand until the drape looks even. Finally, tie the bottom corners with thin gold ribbon to stop flapping and pack it by rolling each panel separately.
Try thisIf your doorway is dusty, wipe it with a dry microfiber cloth before applying any tape so the adhesive sticks the first time.
Common mistakeDon't use heavy tulle as the main fabric - it tangles and makes the entry look messy instead of polished.
2. Marigold Pom-Pom Garland on a Freestanding Backdrop Stand
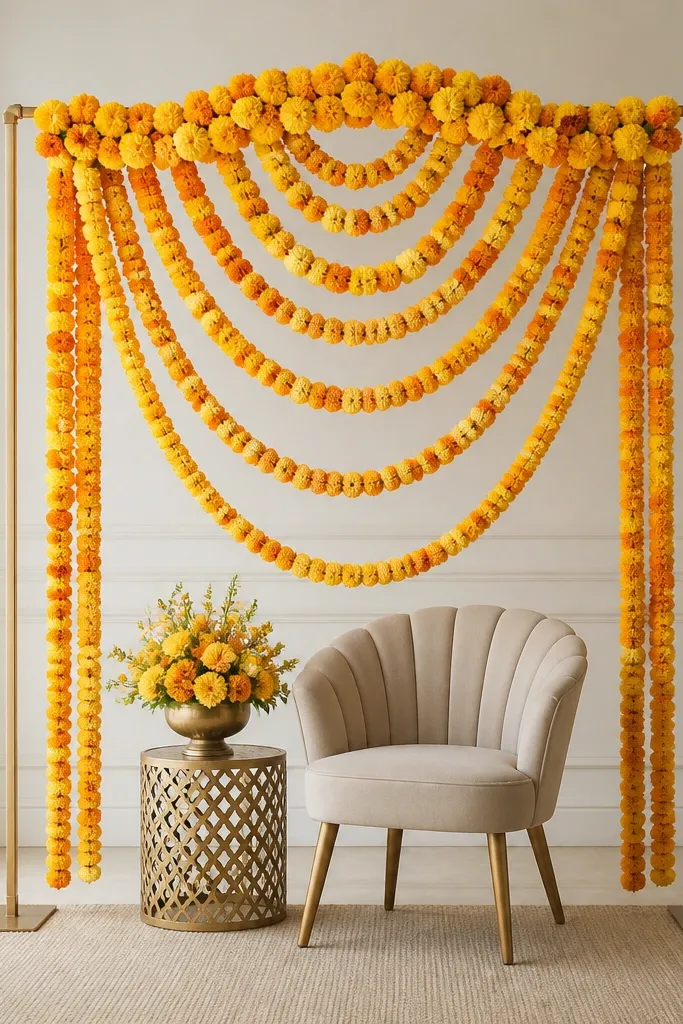
This is my go-to for renters because it looks lush without needing wall mounting. Pom-pom garlands create a full texture that reads well even if the venue lighting is dim. Use artificial marigold pom-poms in marigold orange and turmeric yellow, mixed 2:1 so the arch looks intentional. The warm tones flatter people in cream, navy, and emerald outfits, and the rounded texture hides small stand imperfections. Build it as an arch so the background pulls attention toward the photo area.
Start with a lightweight freestanding backdrop stand or a tripod arch, then measure the width so you can loop garland with 6-8 inches of overlap. Tie the top center garland first with zip ties wrapped in fabric so they don't scratch, then work outward in symmetrical loops. Add a second layer by placing larger pom-poms behind the first layer for depth. Finish by trimming the bottom ends so they hang about knee-height when standing, then store it flat in a garment bag.
Try thisUse zip ties only on the stand, not directly on the garland string - the ties can snap the fibers later.
Common mistakeAvoid hanging a straight line garland across a photo corner - it looks thin and you'll see the stand.
3. Turmeric-Gold Balloon Clusters with Removable Base Weights

Balloon clusters are the fastest "wow" for haldi, and you can keep them fully renter-safe. I like turmeric-gold balloons because they match the haldi palette better than bright primary yellow. The weighted bases keep them stable even when people pass close, and clusters look fuller than a single balloon arch. This setup looks good behind both men and women because the warm yellow frames the face without pulling attention away from outfits. Place them at two corners and one near the photo spot so the room feels designed from multiple angles.
Inflate balloons with helium only if you can manage a stable area; otherwise use regular air and rely on weights. Tie 10-14 balloons per cluster, mixing two shades of yellow plus 2-3 metallic gold balloons in each. Use removable round weights or water-filled plastic bases covered with gold wrapping paper so they look clean. Set the clusters on non-slip mats on the floor, then adjust height by trimming strings and regrouping the front balloons.
Try thisIf the venue has AC vents, place balloons away from direct airflow so they don't drift and separate.
Common mistakeDon't attach balloon strings to chair backs or railings - it leaves dents and looks chaotic.
4. Layered Muslin Table Runner with Haldi Bowl Rings
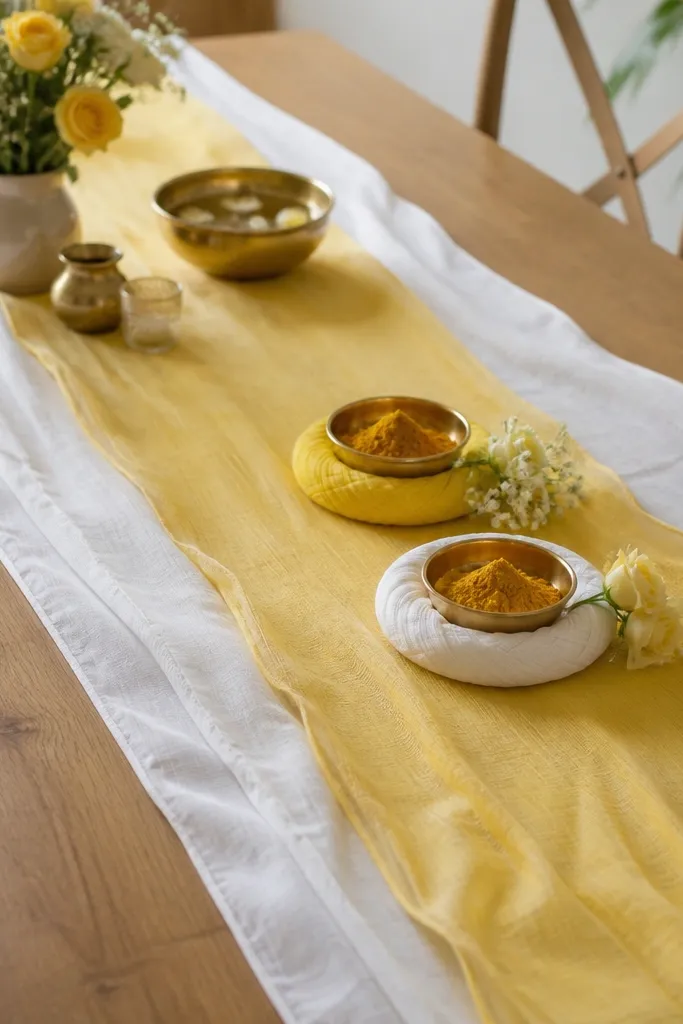
This is the decor that makes haldi setups look intentional instead of like a snack table. Muslin is light, drapes naturally, and hides spills better than glossy fabric. I use a pale butter muslin base and a second thin layer in bright turmeric so the color looks layered. The fabric texture softens the bright yellow of haldi bowls and looks flattering in photos with warm skin tones. If your outfits are colorful, muslin keeps the table from competing with clothing.
Start by cutting muslin into a runner width that covers the center of the table and hangs 4-6 inches on each side. Add a second runner layer on top, offset by 2-3 inches so you see both tones. Place a thin gold satin ribbon ring under each haldi bowl so the bowl looks "framed" and doesn't sit directly on fabric. Finally, secure the runners with double-sided fabric tape on the underside only, so you remove it easily after.
Try thisPress muslin with a steam iron before setup so it looks airy, not wrinkled from packing.
Common mistakeAvoid using slippery satin as the only runner - bowls slide and the whole table looks off.
5. Command-Strip Fringe Wall Backdrop in Two Yellow Shades
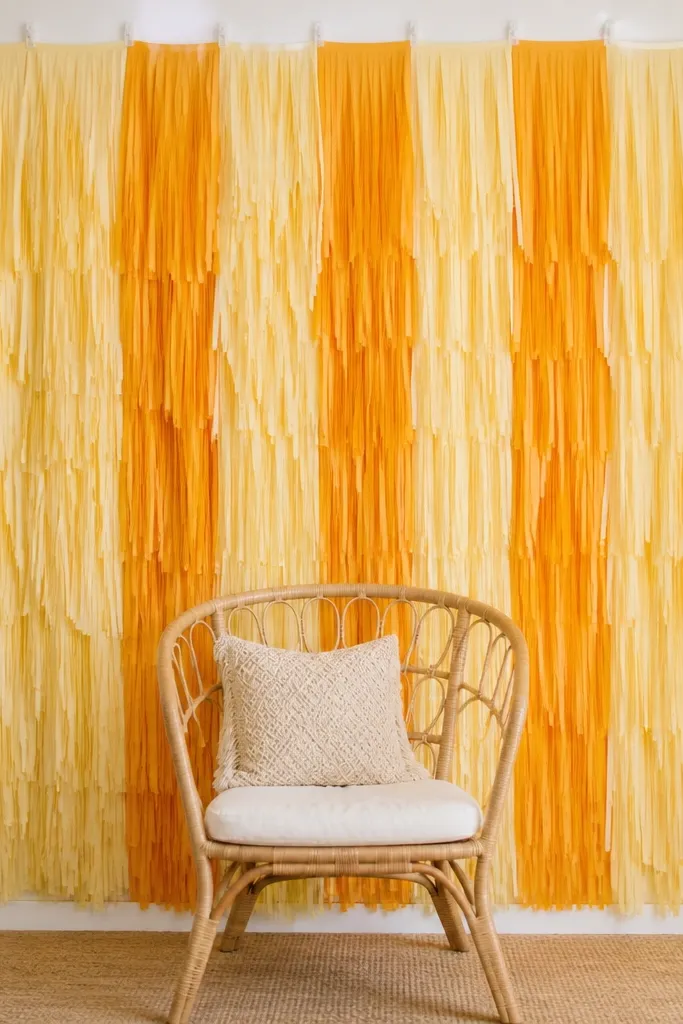
Fringe backdrops are a renter's cheat code because they create motion and depth without requiring a full wall covering. I've used two yellow shades so the backdrop looks designed, not like a single flat color. The fringe also masks uneven wall textures because the strips break up the surface. It flatters everyone because it adds a warm glow behind faces and doesn't steal attention from jewelry. Keep the fringe length around 36 inches so it sits above chair backs but fills the photo frame.
Start by measuring your photo corner width and cut or buy fringe strips in widths that hang with gaps, not clumps. Mount clear Command strips along a top line, then attach the fringe by tying each strip's top to the hook area using thin thread. Alternate pale yellow and marigold strips in a repeating pattern so you don't get a random patch. Step back and adjust density - you want it to look full from six feet, with visible wall only at the edges.
Try thisUse a level app on your phone to place the top line straight; it matters in photos.
Common mistakeDon't use permanent hooks - you'll spend your last hour scraping and patching.
6. Weighted Gold Fabric Swag on Portable Stanchions

If your venue allows stanchions or you're using a small stage perimeter, fabric swags look expensive and stay renter-friendly. I like gold fabric with a slight sheen - dupioni or satin blend - because it catches haldi sunlight and indoor warm bulbs. Swags create a "ceiling line" that makes the area feel taller, which is great when your ceiling is low. This setup works well for haldi because it frames the mandap area and makes the entry look connected to the main action. It also looks good for both men and women since it doesn't clutter the face like too many small props.
Start by choosing two stanchions and wrapping their bases with gold fabric or a fitted cover so the floor looks clean. Drape 2-3 fabric panels between the stanchions, gathering the fabric in the center and leaving 10-12 inches of free fall at the ends. Use fabric clips or removable zip ties wrapped in ribbon to hold the gather points. Then adjust the swag so it sits at about shoulder height for the people standing in front, usually 5-6 feet depending on the space.
Try thisBring 10 extra fabric clips. You'll need them when the fabric shifts after people pass.
Common mistakeDon't let swags touch the floor - it drags, picks up dust, and looks tired by the afternoon.
7. Glass Candle Jars with Floating Marigold Petals
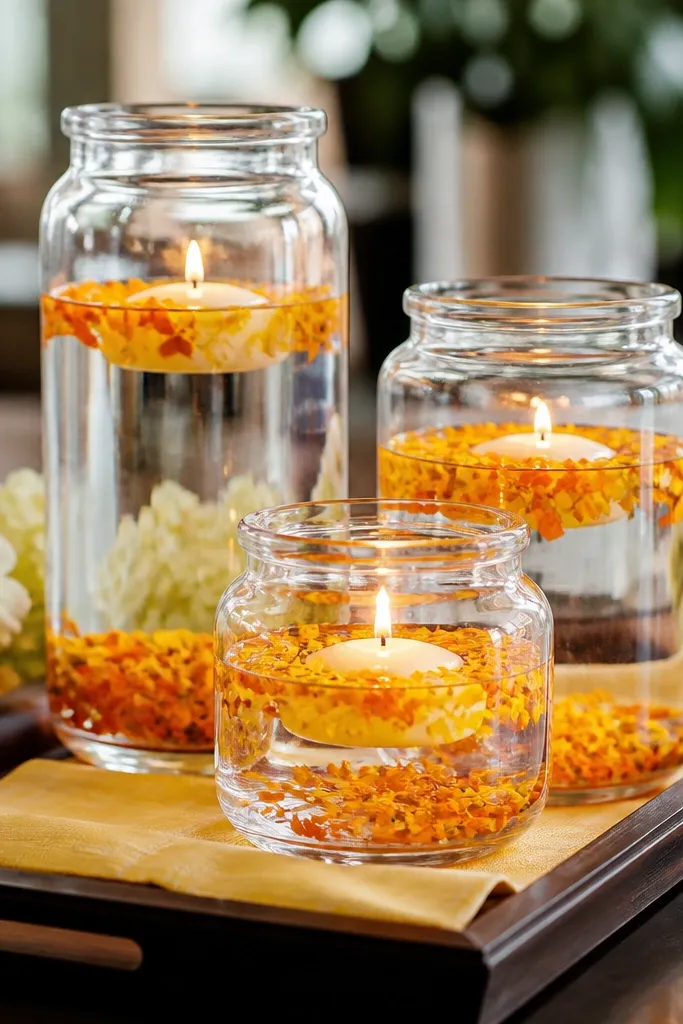
This is calm, pretty decor that looks like a styled editorial without using wall space. Floating petals give you movement and color depth, and LED candles keep it safe for renters and venues. I use clear glass jars because they look clean even in harsh overhead lights. The orange-yellow petals make skin look warm on camera, especially for people wearing ivory, black, and muted greens. Place them on a table near the haldi bowls so guests naturally photograph the action.
Start by filling each jar with a shallow layer of water, then add 10-15 marigold petals so they float but don't clump. Put an LED tea light or a small flameless candle in the center and keep the water level below the candle unit. Arrange jars on a tray covered with pale yellow satin or a smooth cotton cloth. Finish by spacing jars 6-8 inches apart so they don't look like one block of color.
Try thisSpritz petals lightly with a tiny mist of water before placing so they float evenly.
Common mistakeAvoid real candles with open flame unless the venue explicitly allows it - one small worry ruins the vibe.
8. Turmeric-Tone Flowerless Rangoli Sticker Sheets for Floor Corners
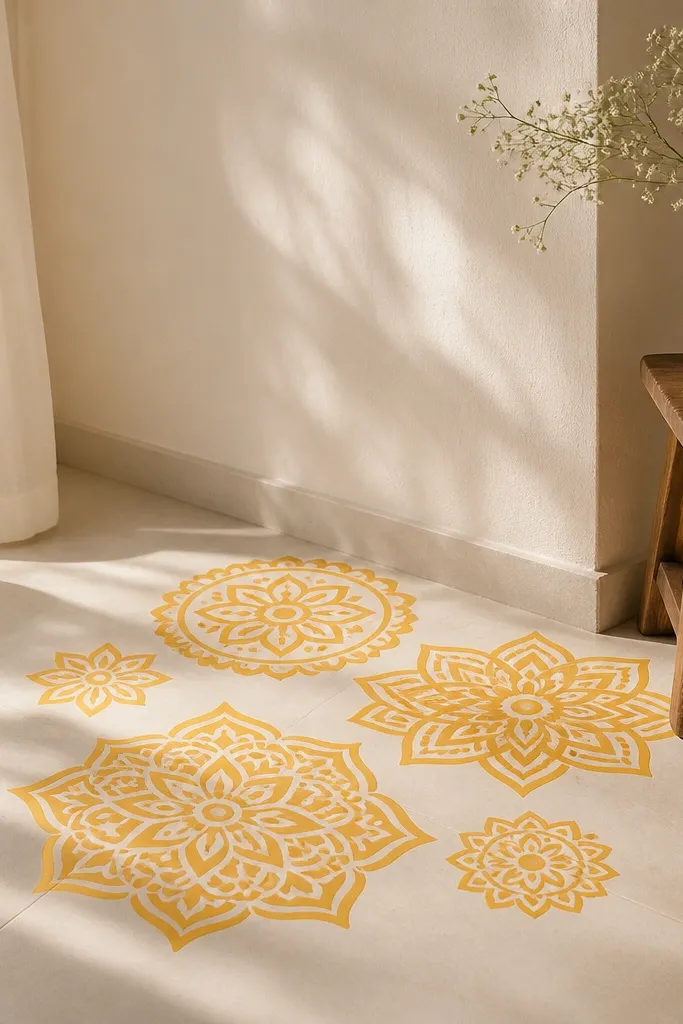
Floor decor is where renters win, because you don't need to touch walls at all. These rangoli-style sticker sheets create a clean border for your photo area and they photograph well because the pattern frames feet and legs. I prefer turmeric and soft gold lines instead of neon yellows because they look classy next to haldi outfits. This also helps guests find the "correct" photo spot. Use it when the venue floor is plain tiles or dull concrete that eats light.
Start by cleaning the floor with a dry microfiber cloth, then press the sticker sheet down from the center outward to prevent bubbles. Place the main sheet 2-3 feet in front of the photo backdrop, leaving space for people to stand without blocking the pattern. Use smaller corner sheets on both sides so the design looks intentional, not random. After the function, peel slowly at a 45-degree angle and store in the original flat packaging.
Try thisTest one corner on a hidden spot for 10 minutes if the venue floor is polished and slippery.
Common mistakeDon't use thick fabric rangoli mats - they curl and look uneven during photos.
9. Velcro-Hung Fabric Torans on a Removable Curtain Rod
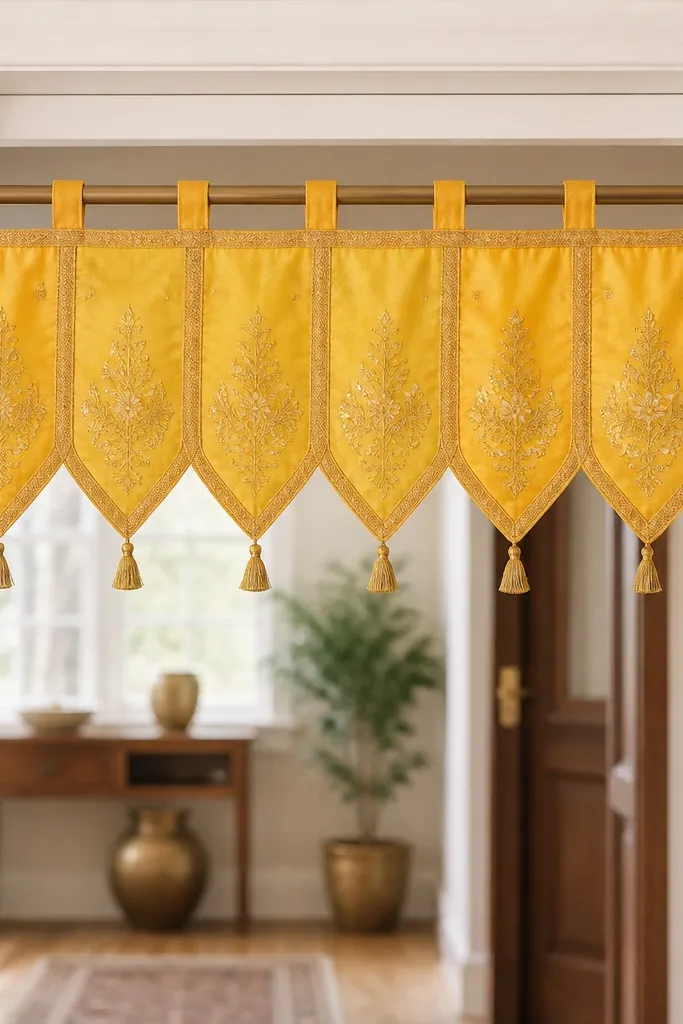
Fabric torans instantly make a space feel like a haldi function, and a removable curtain rod keeps everything renter-safe. I like thick cotton-silk blend torans because they hold shape and don't twist like thin chiffon. Velcro tabs let you adjust spacing quickly and replace pieces if something gets stained. The gold and turmeric combo looks good with both warm and cool outfits, especially when people wear pastel saris or cream kurtas. Put it where guests enter so it becomes a natural photo line.
Start by measuring the doorway width, then rent or buy a tension curtain rod that fits without drilling. Attach velcro dots to the back of each toran panel and stick matching velcro on the rod's hanging strip. Hang panels with a slight overlap so there's no see-through gap. Finish by steaming the fabric lightly so the folds sit crisp, not rumpled.
Try thisKeep a small lint roller in your setup kit. Torans pick up dust fast in party venues.
Common mistakeAvoid torans made only of lightweight net - they flap and look sloppy when guests move.
10. Yellow and Green Balloon Garland on a Weighted Stand
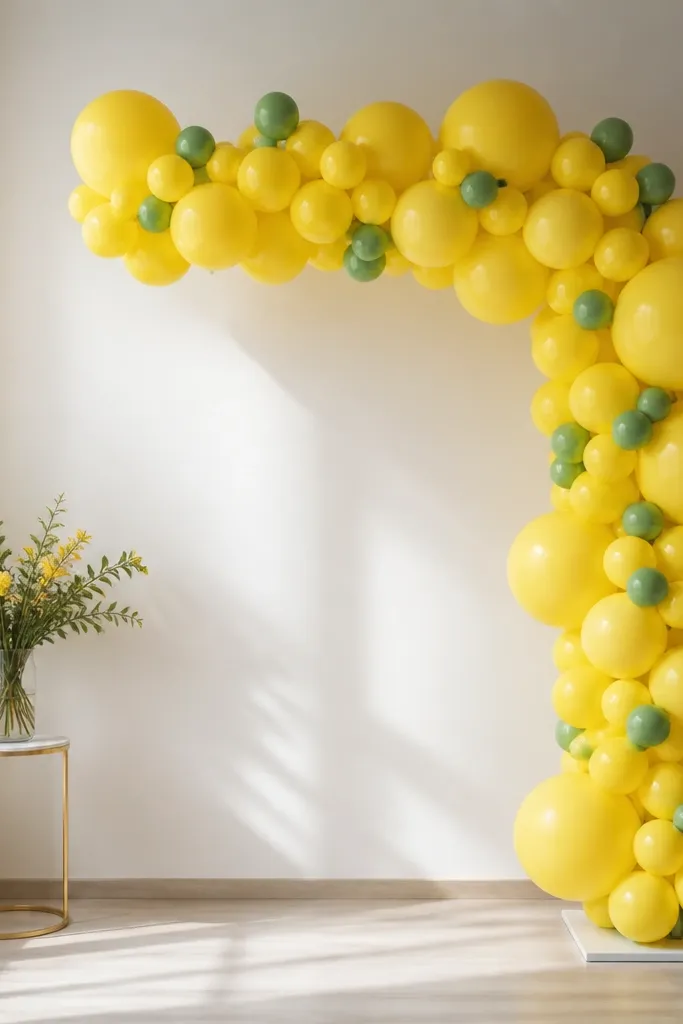
This is for when you want a structured photo frame without drilling. The weighted stand keeps the garland steady, and the green accents make yellow feel fresh instead of flat. I've used this at a venue where the wall was too textured for tape, and it still looked clean because everything was freestanding. The contrast of green also flatters skin tones by adding a cool counterpoint to warm haldi colors. It works especially well for couples photos and group pictures because it creates a clear boundary.
Start with a weighted floor stand or a U-shaped frame, then build a balloon cluster pattern: 70% yellow and 30% green. Attach balloons using balloon glue dots or twist ties to a balloon strip, then mount the strip to the frame. Keep the garland height around 4.5-5 feet so faces sit in the top third of the photo. Add 2-3 larger balloons at the outer edges so the frame reads even from a distance.
Try thisUse matte yellow balloons if your venue lighting is too harsh. Glossy balloons glare in overhead lights.
Common mistakeDon't make the garland too tall - it blocks heads and makes photos look crowded.
11. Reusable Gold Mirror Trays with Marigold Ring Candles
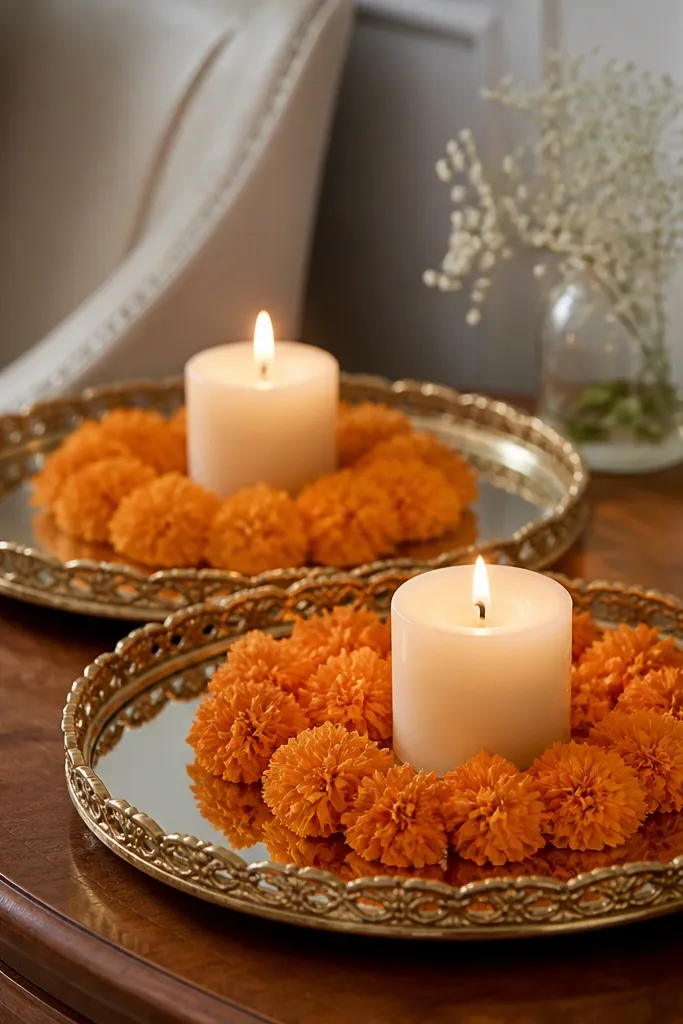
Mirror trays are the fastest way to make a small table look like a full styling job. The gold finish matches haldi's warm palette, and the reflection makes the area look brighter even when the room lighting is weak. I like a ring of marigold petals around a LED candle because it looks intentional instead of scattered. This setup flatters people wearing gold jewelry because the tray reflection adds sparkle without needing extra props. It also looks great next to haldi bowls because it ties the table color story together.
Start by placing the mirror tray on a non-slip mat, then set an LED candle in the center. Scatter petals to form a ring about 3-4 inches from the candle, using 2-3 shades of marigold orange and yellow for a natural gradient. Add one small gold element like a miniature brass bowl or a gold bead garland loop. Finish by wiping the tray with a dry cloth so fingerprints don't show in photos.
Try thisKeep a microfiber towel in your tote. One smudge on a mirror tray ruins the look in flash photos.
Common mistakeAvoid placing loose petals directly on a bare table - they shift and look messy by the time guests arrive.
12. Hanging Yellow Paper Lanterns with Clip-On Strings
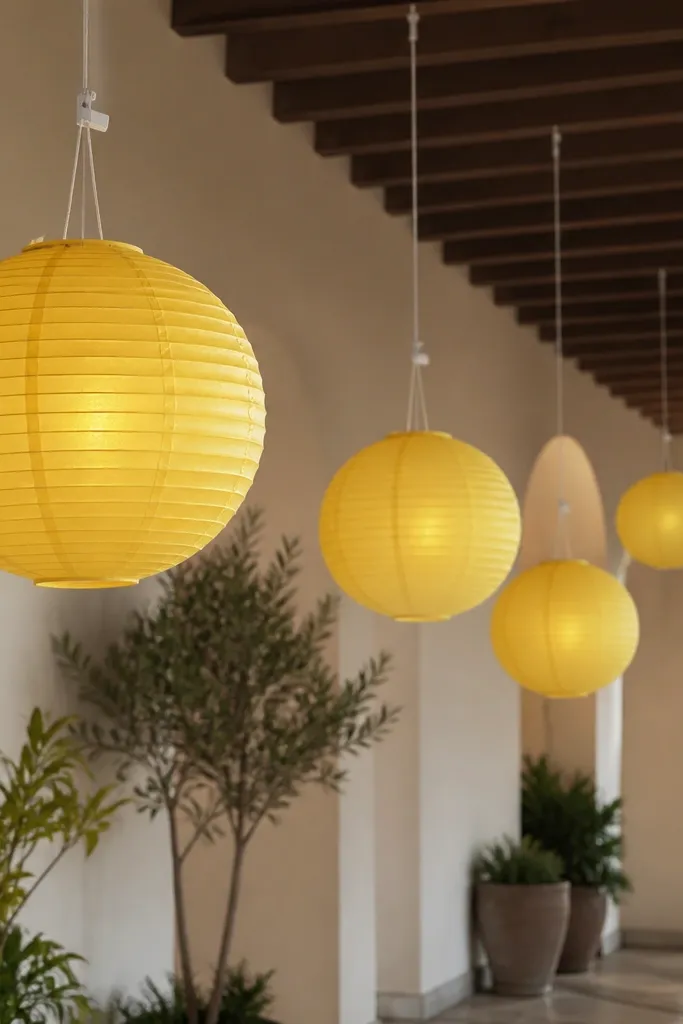
Paper lanterns look playful and festive, and you can install them without wall damage if the venue provides safe ceiling points. Clip-on string systems keep the lanterns removable and reduce the risk of tearing. I use two lantern sizes - 10-inch and 14-inch - so the arrangement has rhythm. The yellow tone reads warm and welcoming, and it looks flattering behind people in darker outfits because it brightens the background. Hang them above walkways leading to the photo corner so guests move through the "decor zone."
Start by choosing lanterns with openable seams or removable tops so you can pack them flat. Use clip-on hooks or removable ceiling clips attached to the venue's approved points, then attach lanterns with string ties. Arrange in a diagonal from one corner to the center, with larger lanterns at eye level and smaller ones higher up. Keep at least 3 feet clearance from people's heads and adjust so lanterns don't collide when someone walks under.
Try thisIf you're unsure about ceiling points, stick to floor and stand decor. It's not worth the stress.
Common mistakeDon't hang lanterns too close together - tight clusters look like a cheap ceiling party instead of a styled look.
13. Turmeric Marigold Photo Corner with Foam Board Panels
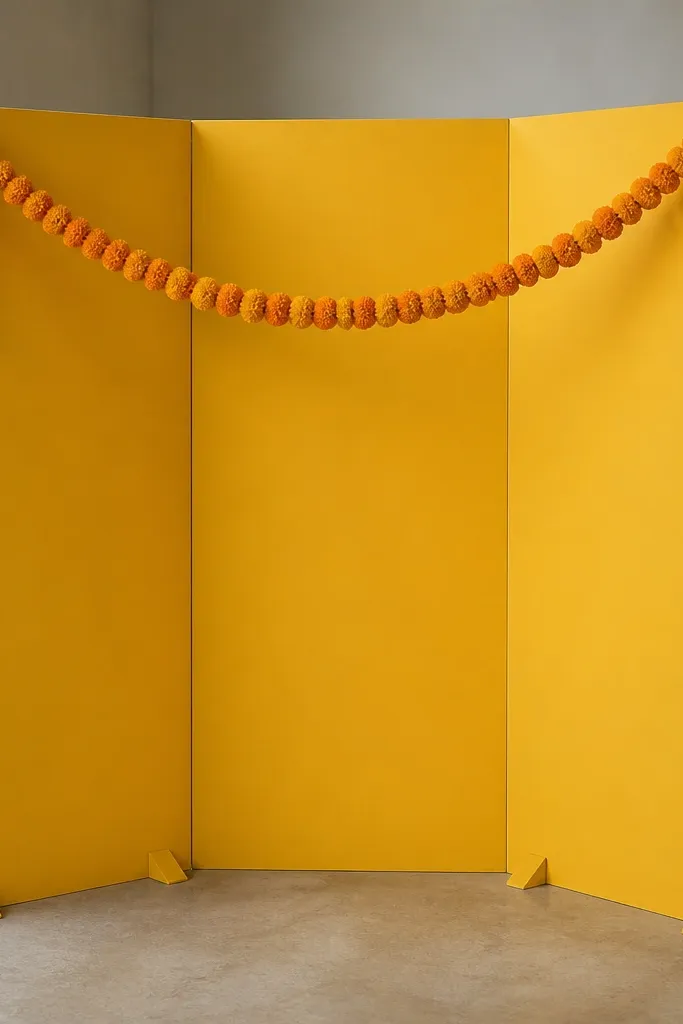
Foam board panels are a renter's best friend because they are light, cheap, and paint-free if you use removable covering. I wrap the panels in matte yellow craft paper or fabric so the surface doesn't glare in flash. Then I add a garland across the top edge and one vertical line of greenery so the corner looks designed, not like a poster wall. This is great for turmeric-toned outfits because the background doesn't overpower them. It also works for both men and women because the background stays neutral enough for face shots.
Start by cutting foam board into three panels: one center panel about 4 feet wide and two side panels about 2.5 feet wide each. Wrap each panel in matte yellow fabric or craft paper and tape the seams on the back. Stand the panels using freestanding legs or heavy bases, then attach a marigold garland across the top with zip ties through pre-punched holes. Add a thin greenery ribbon down one side using fabric glue dots on the back only, then remove later with no mess.
Try thisUse matte yellow, not shiny - shiny backgrounds blow out skin tones in camera flash.
Common mistakeAvoid thin poster paper - it creases and makes the corner look flimsy.
14. Haldi Bowl Plinths with Removable Fabric Covers
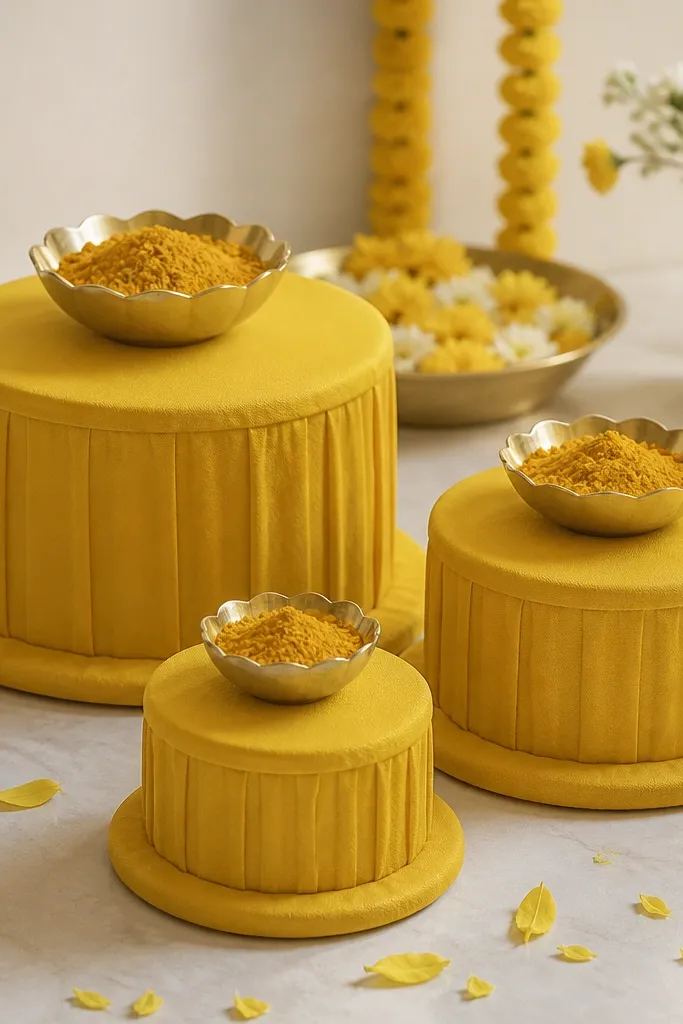
If your haldi bowls sit directly on a table, they look like props. Plinths fix that by giving height and making the bowls look like part of the decor plan. I wrap plinths with stretchy fabric in turmeric yellow so the surface looks smooth and consistent across the set. The extra height helps the bowls show up clearly in photos and keeps them from blending into table linens. This works for all body types because it changes the visual focus to hands and bowls, not the table surface. Choose a fabric with a slight stretch so it wraps without wrinkles.
Start with stackable round plinths or sturdy cake stands, then measure the height so the bowl rim sits around chest level for seated guests. Wrap each plinth with yellow fabric and secure on the underside with removable pins or Velcro strips. Place haldi bowls on top and add a gold tray liner underneath to catch powder. Arrange plinths in a line of three, with the center plinth slightly taller for a focal point. Pack by folding fabric covers separately so they don't gather stains on the plinth.
Try thisUse a lint roller after wrapping. Fabric fuzz shows up under warm lights.
Common mistakeDon't use loose fabric covers - they sag and look like last-minute DIY.
15. Reversible Yellow-Gold Table Skirting with Elastic Hem
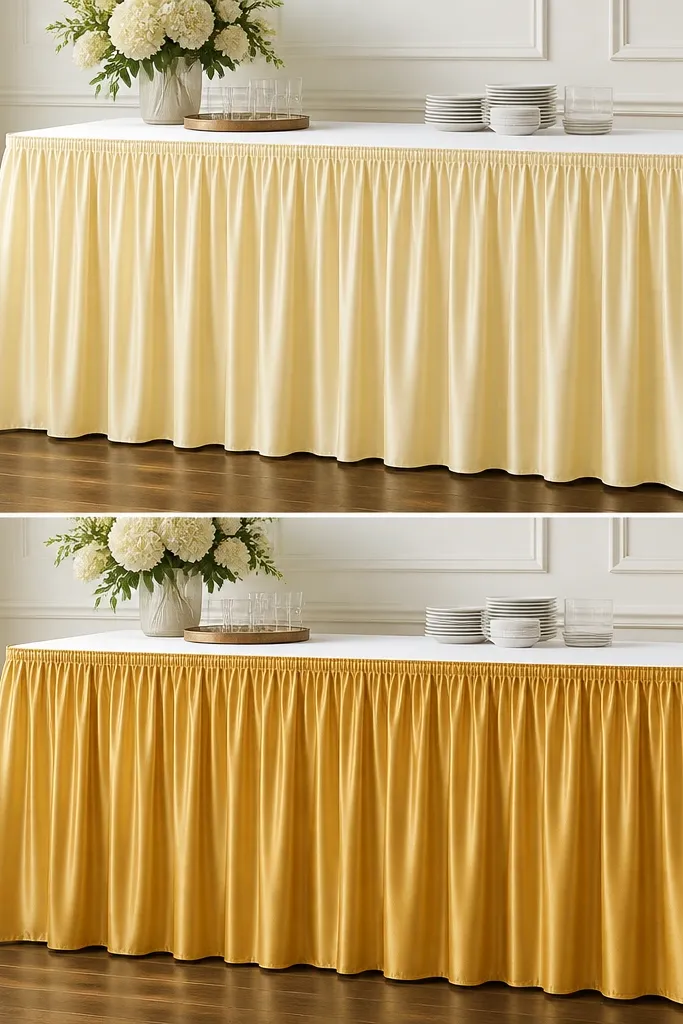
A skirting is the difference between "table" and "set." I use reversible skirting because it lets you match the room palette without buying multiple sets. The elastic hem makes the fabric sit tight and smooth, which is what you see in better wedding rentals. For haldi, I pick pale butter on the outside because it looks soft and flattering next to skin and traditional outfits. Then I keep the inside gold ready in case the venue lighting makes the yellow too dull. This is great for renters because it fits over existing tablecloths and removes quickly.
Start by measuring table height and adding 6-8 inches for the skirting fall, then cut fabric panels or buy elastic-bottom skirting. If you're making it, sew a channel for elastic at the hem so it snaps snugly. Drape the skirting over the table, smooth the folds by pulling the fabric from each corner, and lock the hem under the table. If it's reversible, keep the seam hidden at the back edge. Finish by placing a non-slip liner under the skirting so it doesn't slide when plates are moved.
Try thisBring two garment pins per table. They keep the skirting from shifting during rush setup.
Common mistakeAvoid thin polyester with no weight - it clings, wrinkles, and shows table edges.
16. Removable Gold Foil Curtain Strips for the Mandap Edge
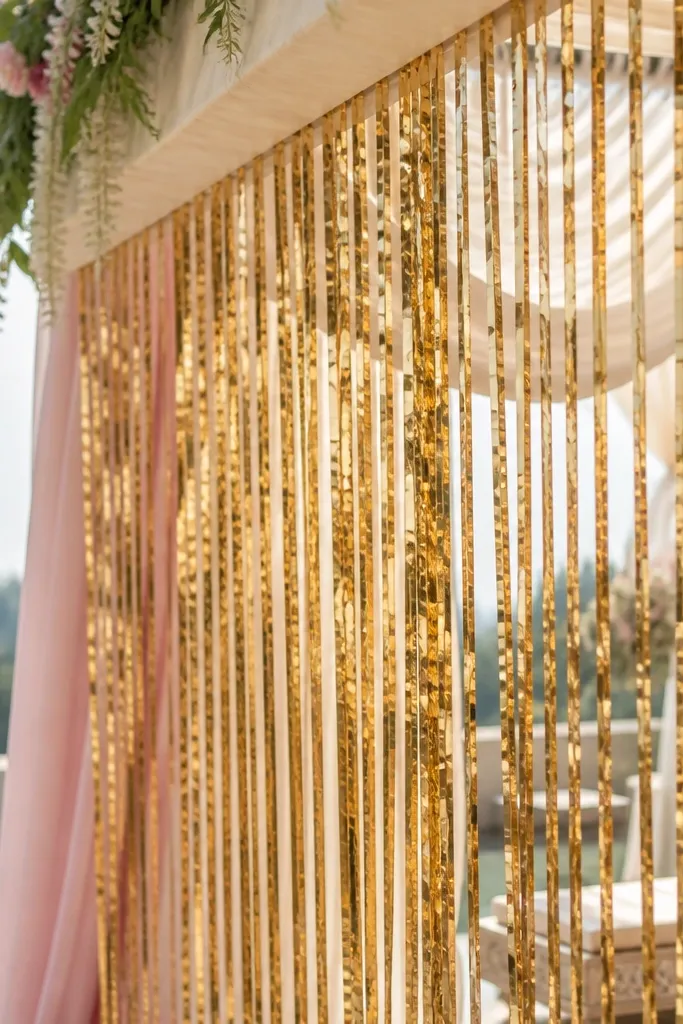
Foil curtain strips give you sparkle without adding clutter, which matters during haldi when you already have bowls, flowers, and people moving. I like gold foil over yellow foil because gold reads more "festive" and less like party streamers. The strips also create a soft blur background, which helps photos look smoother. This works well for both men and women outfits - especially when someone wears a plain kurta or simple sari - because the edge decor adds visual interest. Keep it limited to the mandap edge or photo corner so it doesn't overpower the main setup.
Start by cutting foil strips into consistent lengths, around 5-6 feet if you're hanging from a beam, or shorter for a photo corner. Attach a removable top line using painter's tape or a removable rod, then tie each strip to the top line using thin string. Space strips about 1-2 inches apart so you get shimmer but still see through. Adjust the bottom so strips end around shoulder height. When you pack, roll strips gently so they don't crease sharply.
Try thisUse matte black or dark green fabric behind the foil edge if the venue wall is too bright - it makes the gold pop.
Common mistakeAvoid tying foil strips directly to rough hooks - they tear and shed pieces by evening.
17. Yellow Silk Ribbon Backdrop Border with Clip Hooks
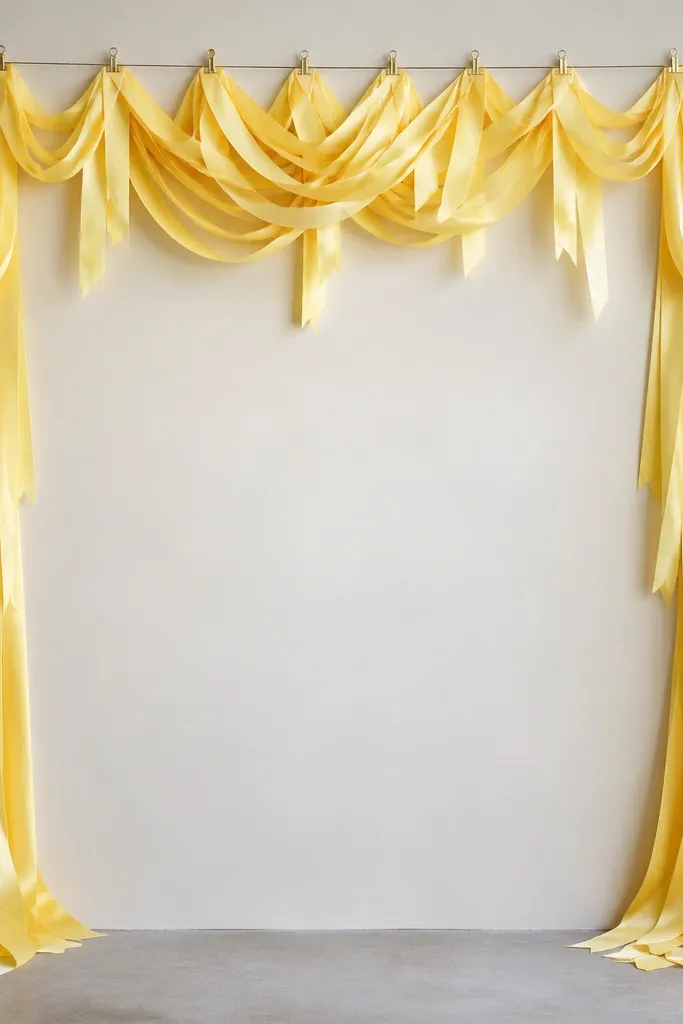
This border method looks clean and styled, even when you keep the center simple. I use silk ribbons with a satin sheen because they catch light and create a "frame" behind guests. The clip hooks let you remove it fast, and the layered ribbon ends hide uneven top tape lines. Yellow silk ribbon also flatters faces by adding warm highlights without becoming a full-wall takeover. It's perfect for renters who want impact but don't want to deal with fringe or heavy garlands.
Start by choosing 2 ribbon widths, about 1-inch and 2-inch, in pale butter and marigold tones. Cut ribbon lengths so the ends hang about 18-24 inches from the top border line. Clip ribbon loops onto a top line using binder clips attached to a removable curtain rod or command strip line. Arrange the ribbon so the thicker ribbon sits in the center and thinner ribbons on the sides for depth. Finish by trimming ends so all ribbons fall to the same height.
Try thisPre-cut ribbon lengths at home. Setup time goes down a lot.
Common mistakeDon't use wrinkled ribbon. Creases show up in photos and make the border look cheap.
18. Potted Turmeric Marigold Look-Alike Décor in Renter-Safe Planters
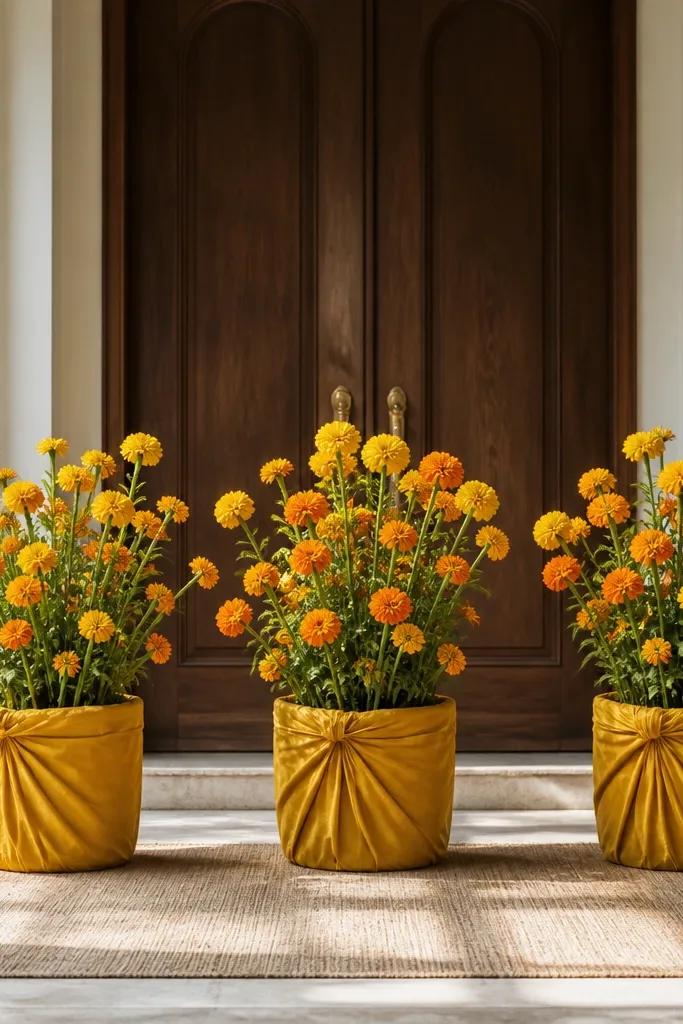
Real plants can be messy, but potted "look-alikes" give you height and greenery without the maintenance. I pick planters wrapped in matte fabric so they don't look plastic under venue lights. The stems in marigold orange and turmeric yellow create a natural color gradient that flatters outfits, especially when people wear green, cream, or navy. Put them near the entry and photo corner so the space feels grounded, not floating. This decor also hides cable lines and marks where the photo area starts.
Start by buying or reusing 10-12 inch planters with removable liners. Wrap each planter with yellow fabric and secure at the underside with Velcro or safety pins. Add artificial marigold stems and a few green filler stems, then fluff the top so the shape looks full. Place three planters in an L shape around the photo corner, with the tallest in the center. Put a folded floor runner under them so the planters don't slide.
Try thisUse a non-slip mat under each planter. Even lightweight planters shift on smooth floors.
Common mistakeAvoid shiny plastic planters. They reflect harsh overhead light and look cheap.
19. Renter-Friendly Haldi Scatter with Weighted Fabric Petals
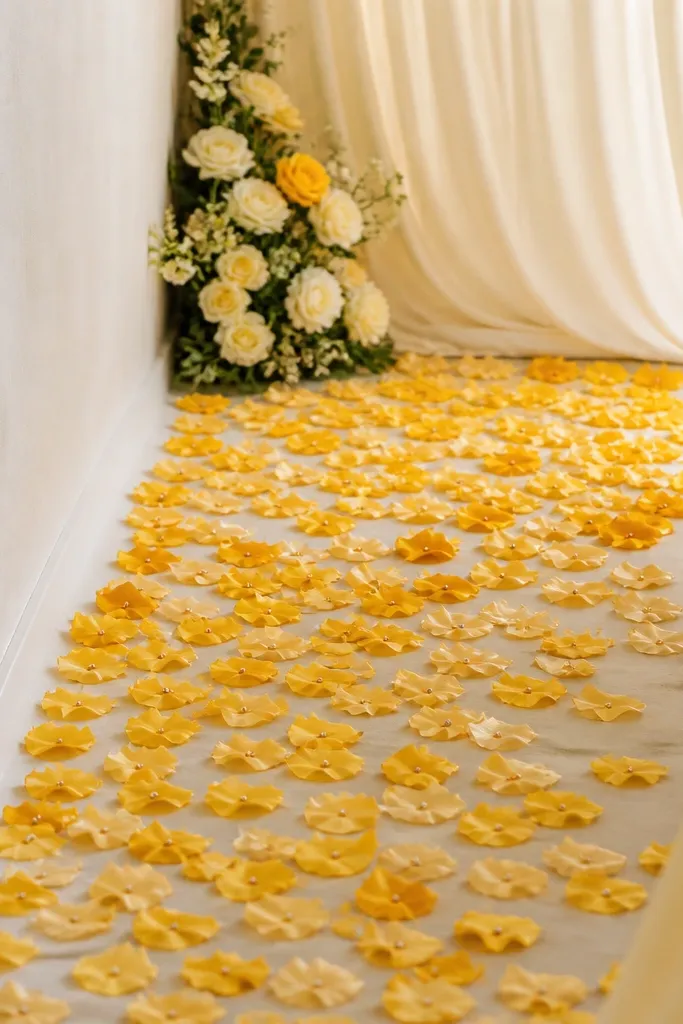
Scatter decor is tricky because loose petals fly, and haldi powder can stain things. Fabric petals with tiny weights stay put and look neat, even when guests walk around. I use yellow and gold fabric petals in two sizes - small teardrops and slightly larger ovals - so it looks like a designed pattern. This works best on a controlled walkway area or just in front of the photo corner. It frames feet and hand positions in photos, and it adds a soft texture that makes the scene feel warmer.
Start by cutting fabric petals from felt or satin blend, then stitch a tiny bead or washer into the center of each petal using a hidden pocket. Place a non-slip runner strip on the floor where you want the petals, then press petals into the runner surface. Arrange in a gentle curve toward the backdrop so it leads the eye. Keep the scatter area limited to a 3-4 foot wide zone so it doesn't look like random confetti. After the function, collect and store in a zip pouch by color.
Try thisPick felt petals if the venue has a lot of dust - they resist powder better than satin.
Common mistakeAvoid paper petals. They tear, get crushed under shoes, and look sad fast.
20. Magnetic Haldi Photo Wall with Removable Marigold Frames
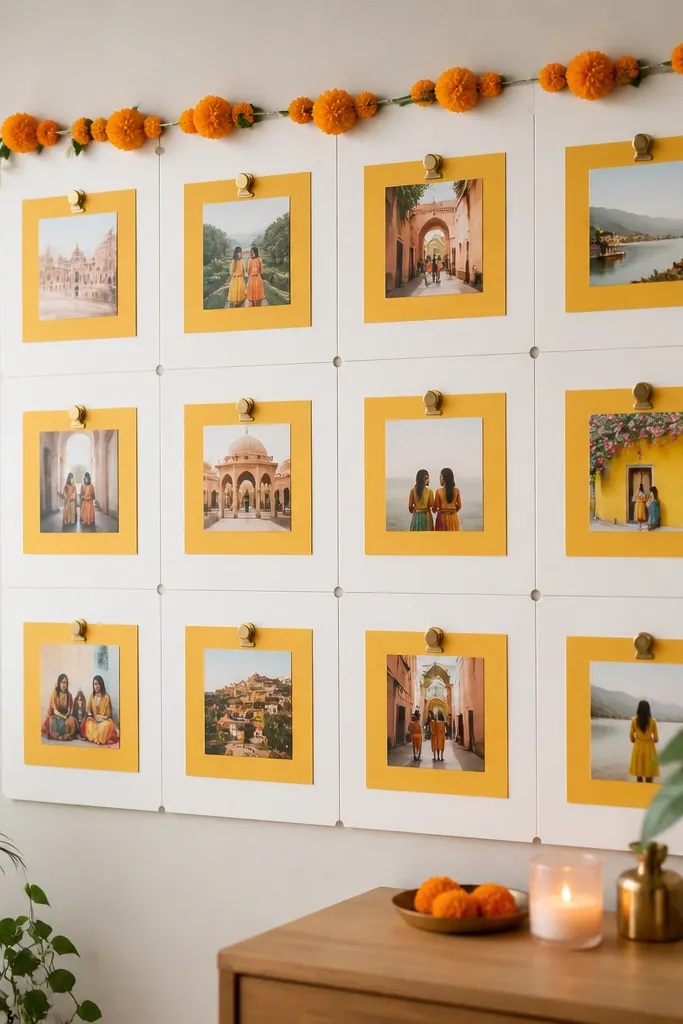
This decor turns your haldi photos into the main event without drilling or heavy adhesives. I've used it at a friend's function where the venue had strict rules about wall tape, and the whole wall came down in minutes. The trick is using magnets on foam board frames and magnetic clips for photos, so nothing has to stick to paint. It also looks intentional because the frames line up like a gallery wall instead of random hanging strings.
Step 1: Buy 6mm foam board and cut 10-12 square frames about 12x12 inches each. Cover the edges with yellow cardstock or matte craft paper so the foam doesn't show, then glue a thin strip of faux marigold garland along the top edge of each frame. Step 2: Hot glue 4 small neodymium magnets (about 10mm) to the back corners of each foam board frame, keeping them away from the photo area. Step 3: Place matching magnets on the wall using a removable metal sheet or a magnetic backing plate - I use a thin sheet of galvanized steel cut to fit behind the frames so you don't smear anything on the wall. Step 4: For photos, attach small magnetic clips to the back of each print and hang them inside the foam frames. Step 5: When you pack up, pull the frames off by the edges and wipe the metal backing once with a dry cloth.
Try thisUse matte photo paper for the prints so the magnets don't show glare under indoor lights, and keep all frames the same size so the wall reads crisp from across the room.
Common mistakeAvoid using strong tape directly on paint - it peels unevenly and ruins the wall finish when you remove it.