1. Cream Tulle Curtain with Turmeric Ribbon Lines
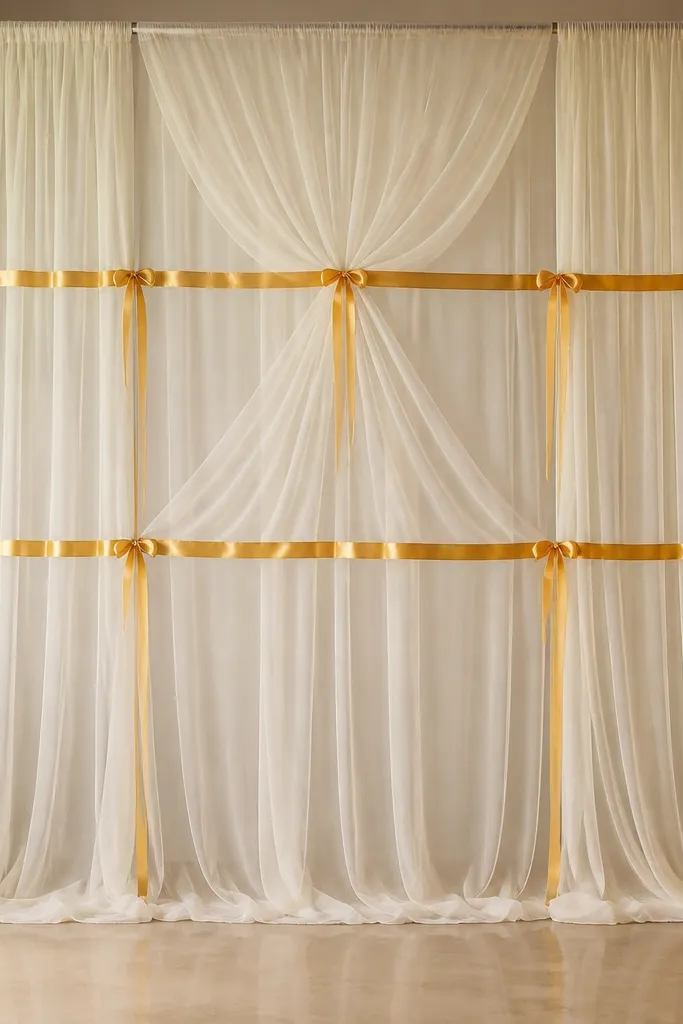
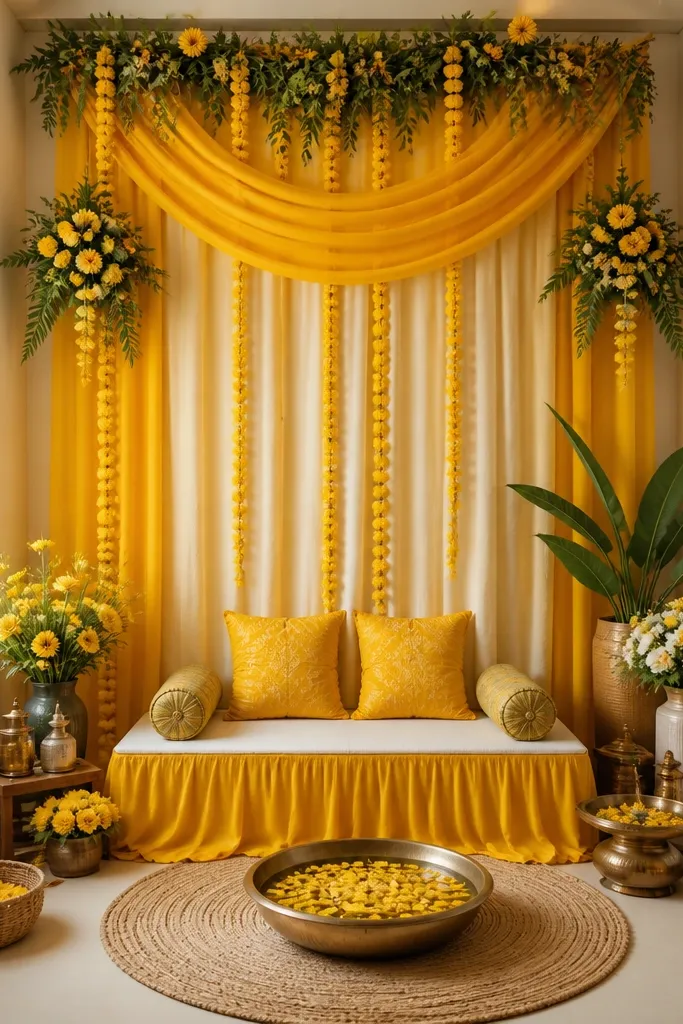
This is the fastest modern haldi stage decoration that still looks styled. The sheer cream tulle makes yellow haldi decor glow without turning the whole setup into one flat shade. I've used this for both small home stages and wider hall backdrops - it works because the tulle creates depth even when you only have a few props. Turmeric satin lines give structure, so the background doesn't look like plain curtains. It flatters most skin tones on camera because the cream base is neutral and the yellow stays warm, not neon.
Start by hanging cream tulle in 2-3 wide panels, leaving 6-8 inches of extra length so it drapes. Then add three satin ribbon lines across the panels: one at chest height for photos, one slightly above, and one near the bottom edge; tie them with small knots so they sit flat. Finally, gather the center 10-12 inches lightly with a hidden safety pin or zip tie, so you get a soft "U" shape in the middle. Use 1.5-2 inch wide satin ribbon in turmeric yellow. Keep the tulle matte (no shiny organza) so the camera doesn't overexpose the background.
Try thisIf your room lights are warm, add a single strand of warm white fairy lights behind the tulle for a gentle glow.
Common mistakeAvoid using very thin glitter ribbon - it looks messy and sparkly in a cheap way on camera.
2. Marigold + Baby's Breath Balloon Halo
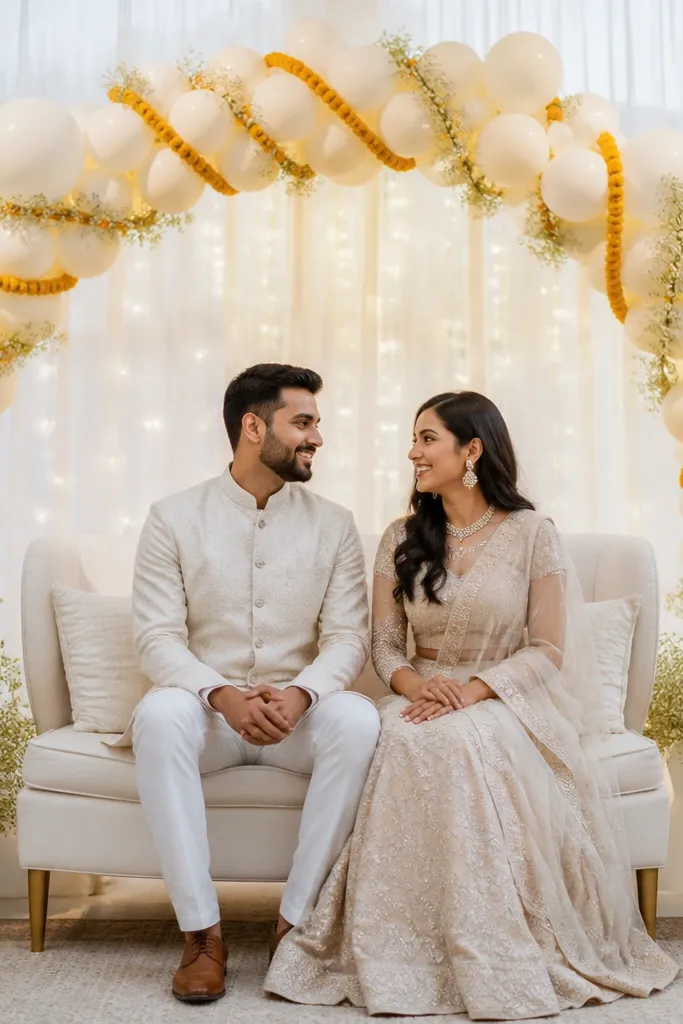
A balloon halo is the "wow" background that still feels modern when you keep it airy. Marigold adds classic haldi warmth, while baby's breath gives the clean, delicate texture that makes the yellow look intentional. This works best when you want height without a bulky floral wall. I've seen it flatter everyone in photos because the halo frames faces and pulls attention upward instead of down. It also helps if your stage platform is small - the background does the heavy lifting.
Start by making a semi-circle frame using flexible wire or a PVC half-arch, sized to your backdrop width. Then inflate balloons in 3 sizes: 11-inch marigold yellow, 10-inch ivory, and 5-inch clear/transparent balloons; cluster them tightly but leave small gaps for the garland to show. Wrap the halo with a thin marigold garland and tuck baby's breath sprigs at the top and sides using floral tape. Add warm white fairy lights inside the arch and secure with zip ties so you don't see wires. Place the halo 6-10 inches behind the main seating so it has depth.
Try thisUse matte balloons (not glossy) if you're decorating in bright daylight - glossy balloons glare on camera.
Common mistakeDon't overstuff with too many flower sprays; it turns into a thick yellow wall instead of a halo.
3. Paper Flower Fan Backdrop in Saffron and Ivory
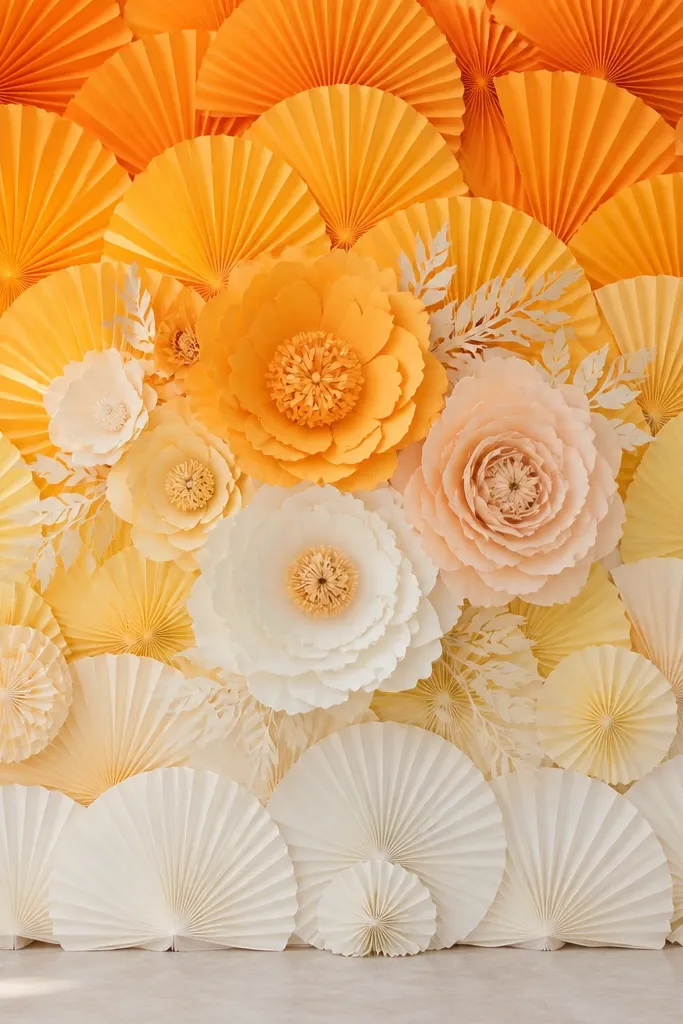
Paper flower fans look crisp and modern because the shapes are graphic, not messy. Saffron and ivory create contrast without needing heavy gold ornaments. I like this when you want something reusable and budget-friendly, especially if you're doing multiple functions. It flatters the stage because it creates a clean "poster" feel - your photos look like a planned backdrop. The paper texture also reads well under both indoor warm lights and outdoor sun.
Start by installing a simple backdrop on a frame or even a wall using a light cloth base. Then create 3-4 vertical columns of paper fans: alternate ivory fans and saffron fans, each fan about 12-14 inches wide and 18-20 inches tall. Add oversized rosettes (10-12 inches) in the center column, spaced 10 inches apart. Finally, glue or tape the bottom edges first, then press the top edges so everything sits flat and doesn't curl. Keep the gradient smooth - don't jump from ivory to deep orange in the same row.
Try thisUse a foam board behind the paper fans if your wall is rough; it keeps the paper from snagging and warping.
Common mistakeSkip cheap thin paper that wrinkles - it shows creases and looks unfinished.
4. Sage Green + Mustard Garland Staircase
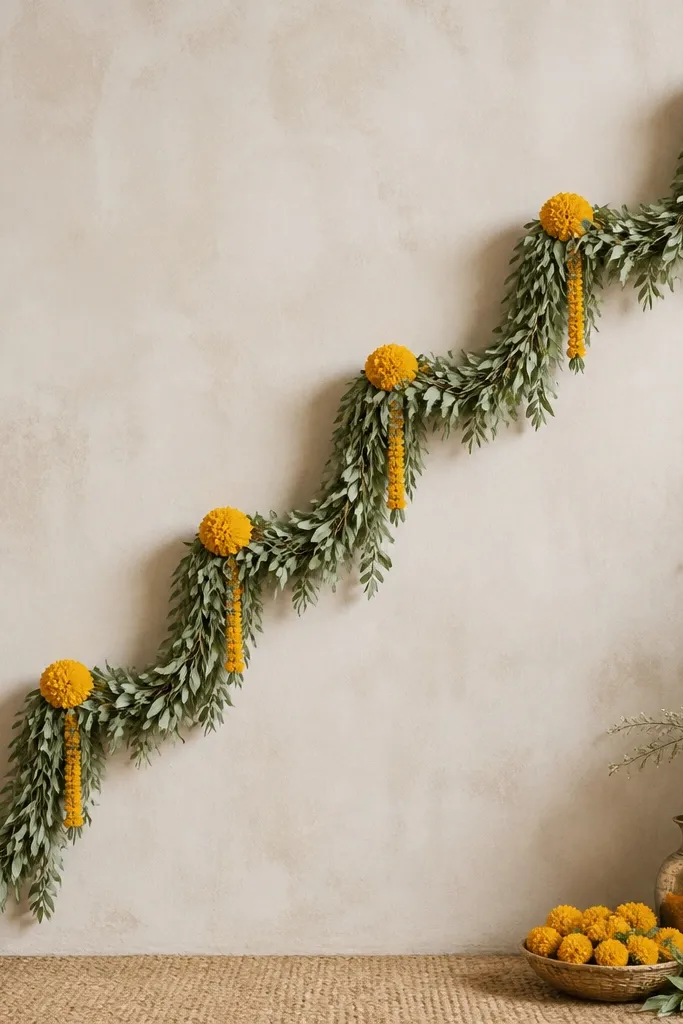
This arrangement looks modern because it breaks the "straight line garland" habit. The diagonal staircase pulls the eye across the frame, and the sage green keeps the haldi yellow from taking over. I've used this style for stages where the backdrop is a plain wall - it adds movement without needing a full curtain. It's also great for couples because it frames the center seating and leaves negative space for the couple to stand out. The sage works particularly well for medium to deep skin tones because it adds a cool contrast.
Start by marking a diagonal line on the backdrop with a light pencil or painter's tape from bottom left to top right. Then create 4-5 "steps" along that line: each step has a small garland segment about 14-16 inches long, with sage leaves on the sides and mustard pom-poms or mini marigold clusters in the middle. Attach each segment with zip ties to a net backing or with strong double-sided tape to a cloth base. Finally, add a small vertical tuft of leaves at the end of the top step so it feels intentional. Keep spacing 6-8 inches between steps so it reads as a pattern on camera.
Try thisTie your garland segments with the same length of twine each time so the staircase looks uniform.
Common mistakeAvoid loose, sagging garlands - they look like they're falling instead of designed.
5. Pastel Haldi Ombre Tassel Fringe Wall
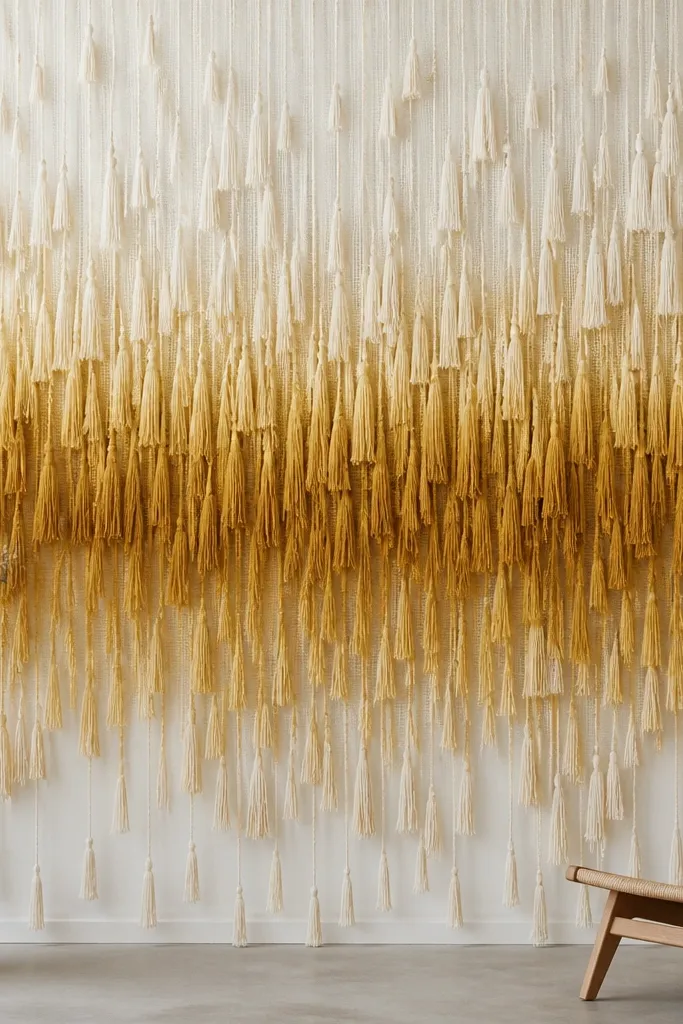
A tassel fringe wall is one of the cleanest ways to get a modern haldi stage decoration look. The ombre effect makes the background feel soft and expensive, even when it's just paper or fabric tassels. I like this for daytime functions because tassels catch light and create subtle motion in videos. It also photographs well because the texture is concentrated, not scattered. If you have fair or wheatish skin tones, the pale yellow tones look flattering and gentle; if you have deeper skin tones, the mustard end adds contrast without looking harsh.
Start by buying or making tassels in 3 shades: ivory, pale yellow, and mustard; each tassel should be 10-12 inches long. Attach them to a white mesh/net or a light backdrop cloth using hot glue or thread, starting from the bottom row upward. Make the center column densest and taper the sides slightly so it doesn't look flat. Leave 2-3 inches of blank space at the very top so the tassels don't cover the entire height. Hang the fringe wall 4-6 inches behind the seating so it has depth and doesn't touch props.
Try thisUse matte tassels, not shiny ones, or the camera will pick up glare spots.
Common mistakeDon't make every row equally dense - it turns into a uniform curtain and loses the modern ombre effect.
6. Kumkum Corner with Wooden Frame + Golden Net
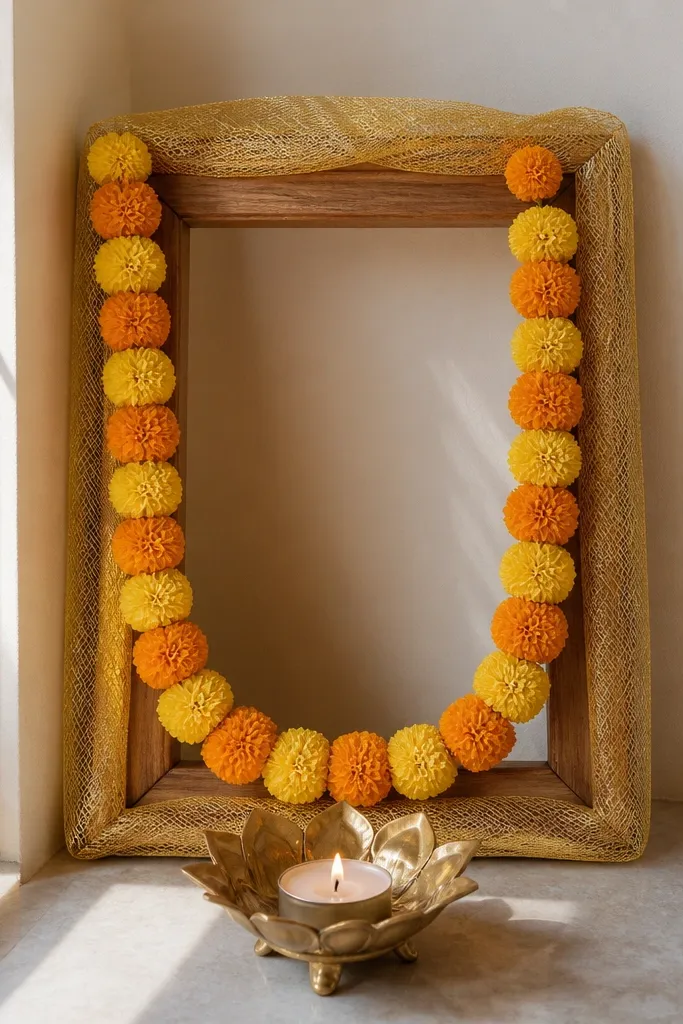
This is a smaller idea that still looks high-end when you place it right. A wooden frame gives structure and clean lines, while golden mesh net adds a subtle sparkle that feels festive without looking like plastic. I use this when the main stage is already busy and you want a "detail spot" for photos - like the couple's hands near the haldi bowl. It works for both men and women because the warm gold and marigold tones look good next to jewelry. The best part is you can reuse the frame for other events.
Start by getting a basic rectangular wooden frame or building one from 1x2 inch wood strips. Wrap it with golden mesh net (like decorative netting) and secure edges with a staple gun or glue. Add a thin marigold garland along the outer border - keep it to the sides, not across the center. Place a small diya holder and a haldi bowl on a low tray in front of the frame, aligned with the center. Add one ribbon bow in mustard or saffron on the top corner and keep the rest clean.
Try thisPaint the frame in matte ivory before wrapping - it hides gaps and makes the gold look smoother.
Common mistakeAvoid loose netting - wrinkles show and make the whole corner look unfinished.
7. Haldi Bowl Stand with Rattan Ball Garland
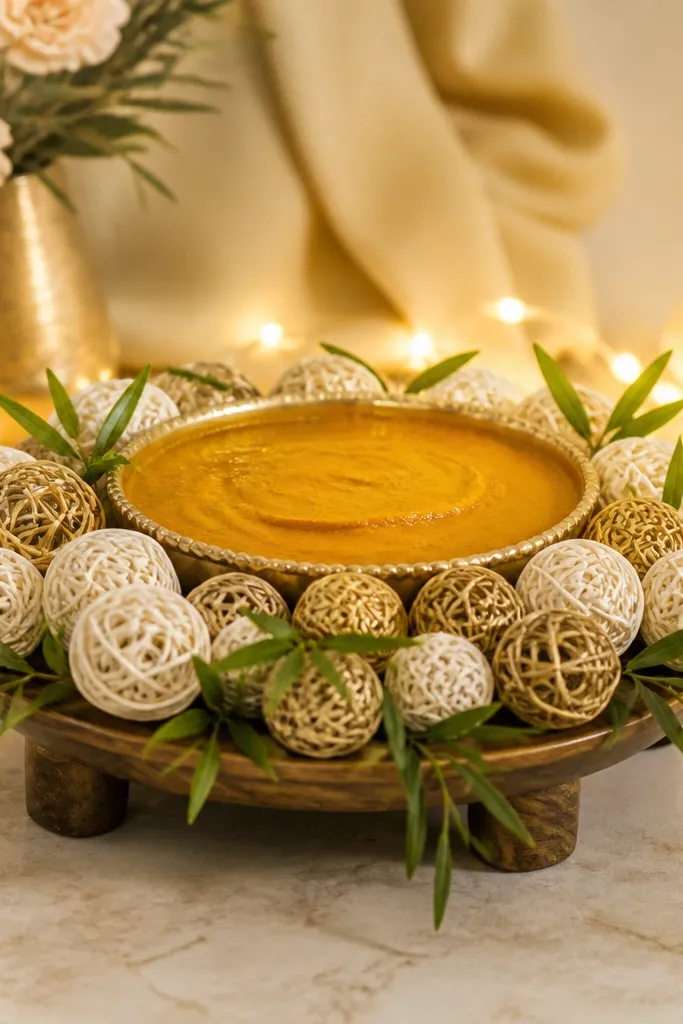
If you're tired of plain haldi bowl pics, this makes the bowl look styled. Rattan balls create a modern, handcrafted texture that doesn't clash with yellow - they stay neutral and warm. I've used it at home because it's easy to move around and still looks good from a close angle. It also flatters hands and jewelry because the neutral tones don't compete with rings and bangles. This setup works especially well for smaller stages where every inch matters.
Start by placing a low wooden or bamboo tray on the stage, then center the haldi bowl. Create a garland using rattan balls in 2 sizes, stringing them on jute twine about 2-3 feet long. Arrange the garland in a half-circle around the bowl so the balls frame the bowl top. Tuck 3-4 thin green stems (artificial or real, if you're using fresh make sure they're stable) into the garland at even intervals. Add warm white LED tea lights behind the stand and hide the battery pack under the tray.
Try thisUse a tray with raised edges so the garland doesn't slide when people move the props.
Common mistakeSkip plastic fake leaves that look too shiny; they stand out against rattan.
8. Fabric Draped Arch with Mustard Border Tape
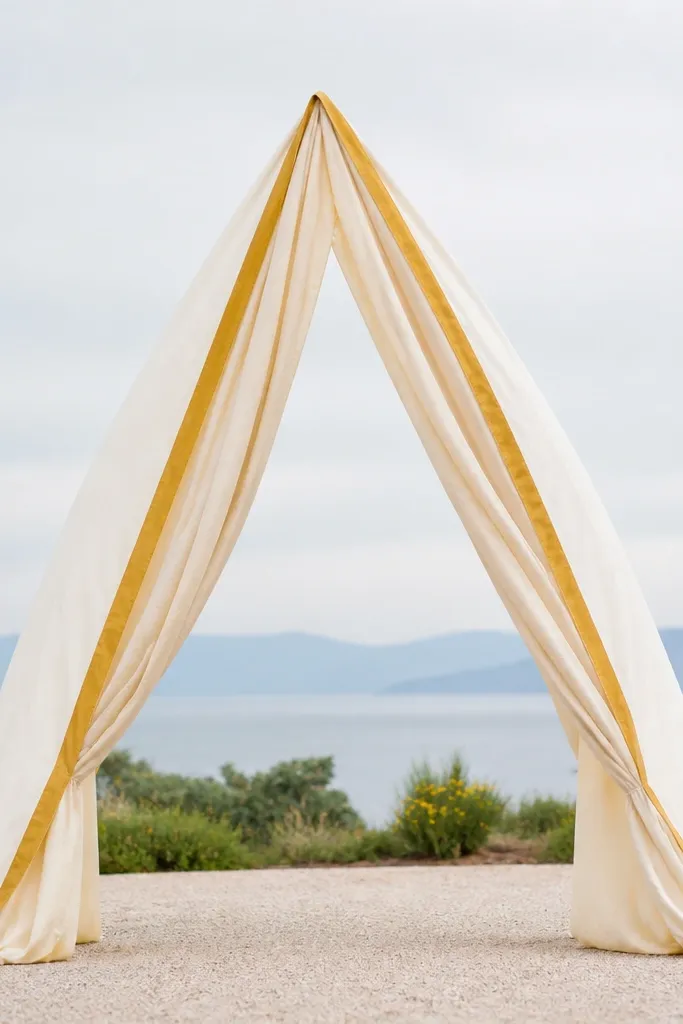
A draped arch is a modern haldi stage decoration that looks good even with minimal flowers. Ivory fabric gives a soft background for marigold, and mustard border tape creates a crisp frame so it looks intentional. I've built this for home stages by using an existing metal frame and wrapping it - no complicated carpentry. It flatters photos because it gives a clear "window" behind the couple. People with darker outfits also look great here because the border tape adds warmth and definition.
Start by covering your arch frame with a base fabric layer, like plain ivory satin or polyester drape, using zip ties at the top and sides. Then add mustard border tape along the outer seam lines - pin it in place first so it stays straight. Create soft folds by pulling fabric gently at the center and securing with hidden pins. Finally, add a small cluster of marigolds at the top point and one garland strand on each side, keeping it under the border tape line. Make sure the arch fabric doesn't cover the stage floor area; leave 10-12 inches clear for a clean look.
Try thisIron the border tape lightly before you attach it - straight tape looks instantly more premium.
Common mistakeAvoid stretchy fabric that sags after an hour; it makes the arch look droopy.
9. Gold and Ivory Lantern Row Behind Seating
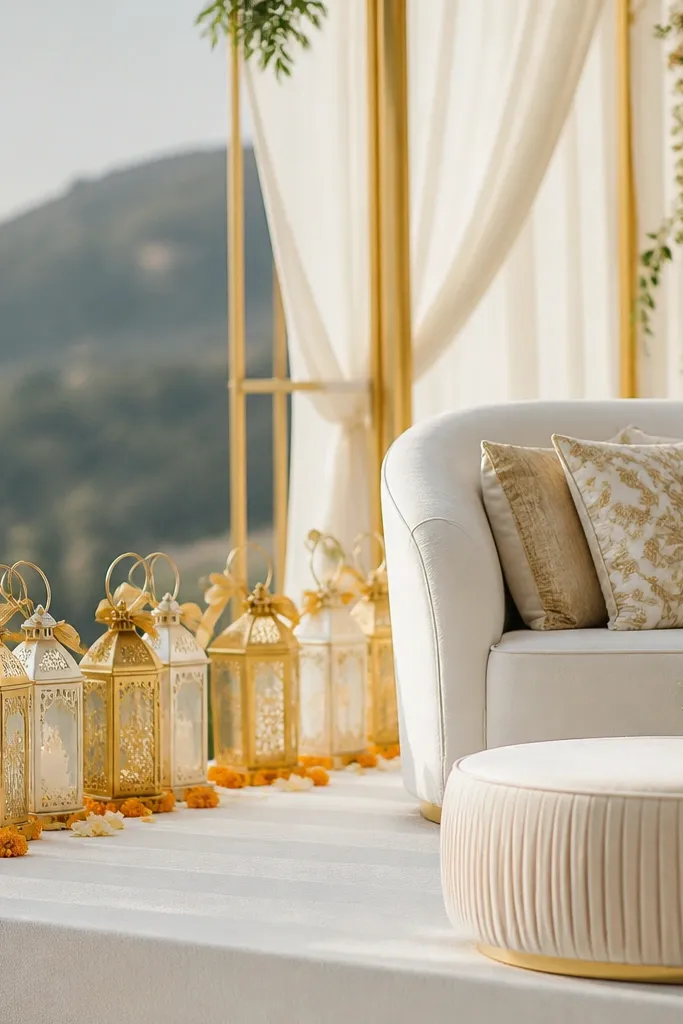
Lantern rows create a modern, warm glow without needing a full floral wall. Gold lanterns add sparkle in a controlled way, while ivory lanterns keep the brightness from feeling harsh. I've used this for indoor haldi functions where overhead lighting is bright and unflattering - lanterns balance the light behind the couple. It flatters all skin tones because it adds warm light from behind rather than overhead. The best part is how it photographs: faces look softer and the yellow haldi scene feels cozy.
Start by placing a long tray or a thin wooden plank behind the seating, at least 8 inches off the floor so lanterns don't look cramped. Then set lanterns in a staggered line: 3 gold lanterns in the center and 2 ivory lanterns on each side. Tie thin gold ribbon loops around handles and keep the loops facing the camera. Scatter a light layer of marigold petals at the base, then add a small garland strand across the top of the lantern row. Use warm white LED lanterns so you avoid wax mess and keep the setup safe.
Try thisKeep lantern heights within 2-3 inches of each other for a clean line in photos.
Common mistakeDon't use too many lanterns - overcrowding makes the background look busy and messy.
10. Turmeric Paper Pom-Pom Border on White Backdrop
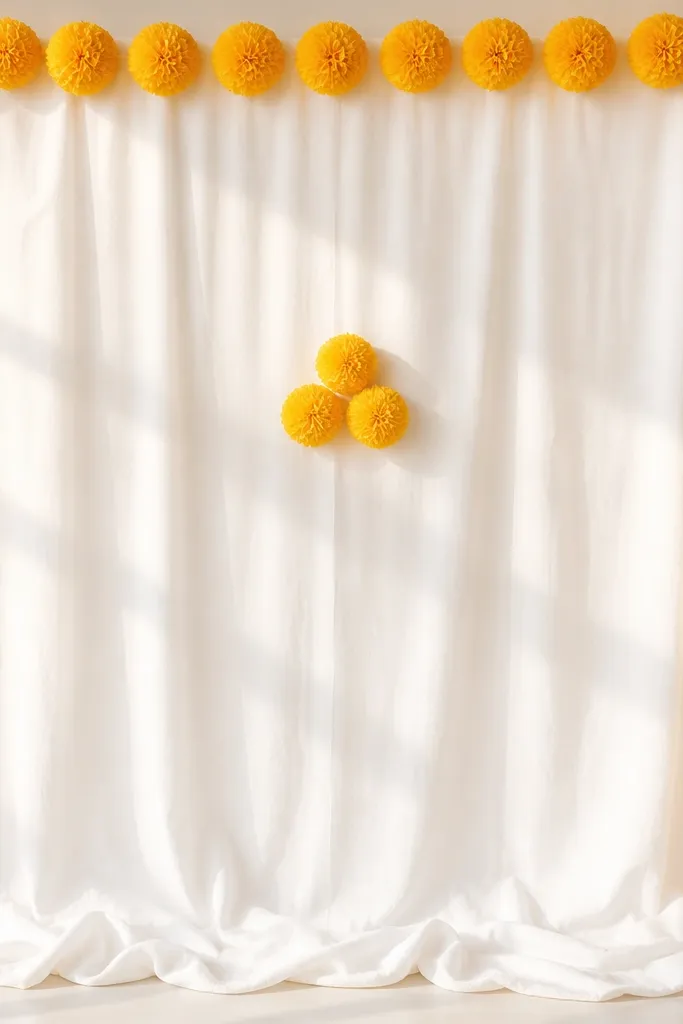
This is my go-to when you want modern haldi stage decoration with zero heavy lifting. The white backdrop stays clean, and the pom-pom border gives a playful texture that still looks neat. I like it for smaller stages because it frames the couple without covering them. The turmeric color reads warm on camera and works with gold jewelry and traditional outfits. If you're worried about matching, this style is forgiving because the border is one color group.
Start by hanging a wrinkle-free white cloth backdrop, then smooth it with a steamer if you have one. Make or buy 6-8 inch turmeric paper pom-poms and plan placement using painter's tape marks. Attach pom-poms with thread to a top string or directly to the cloth using double-sided tape for small spots. Add a center pom-pom cluster that's slightly larger (9-10 inches) to draw focus. Keep the border spacing consistent - about 10-12 inches between pom-poms on the sides.
Try thisIf your backdrop has creases, press the cloth under a fan for 20 minutes before photos.
Common mistakeSkip mixed pom-pom sizes everywhere - random sizes look like a craft table.
11. Satin Ribbon Knot Ceiling Swag
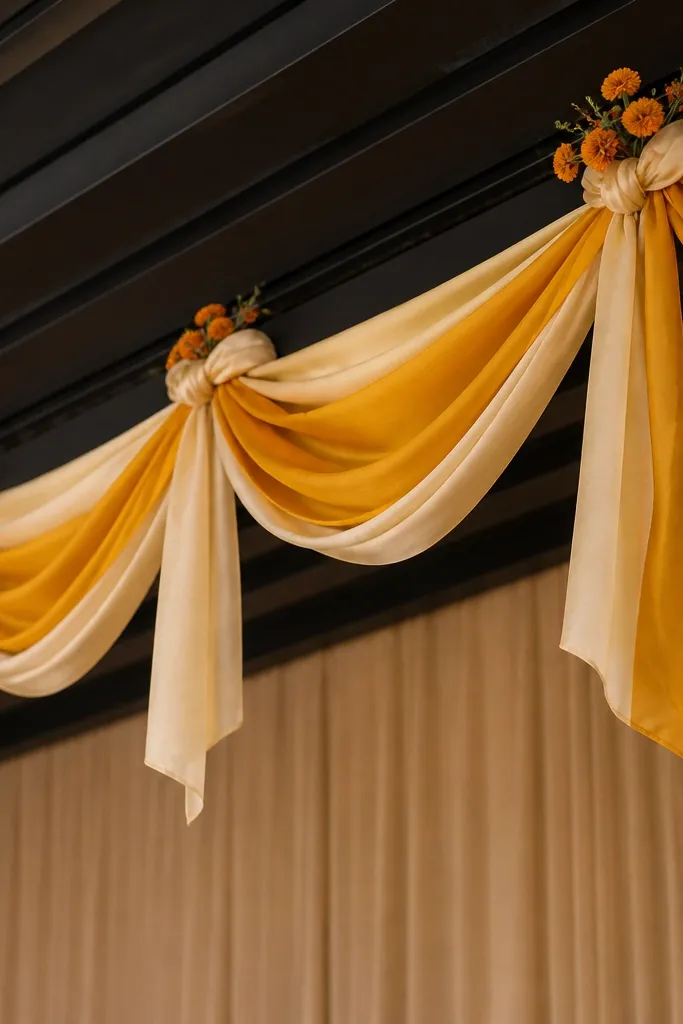
Ceiling swag is a modern trick because it adds drama without cluttering the wall behind you. Satin ribbons look smooth and intentional, and knot points give the eye a rhythm. I use this when the stage wall is blank or when there's a ceiling light that you don't want to block with a tall backdrop. It flatters the whole setup because it creates a frame above the couple - people notice it in photos. The mustard satin stays warm next to yellow haldi, and cream keeps it classy.
Start by tying a thin rope or strong fishing line across the stage width, about 6-8 feet from the floor. Then attach satin ribbon strips to the rope at 12-14 inch intervals; alternate cream and mustard strips so the color pattern repeats. Make each ribbon length about 3.5-4.5 feet so it drapes down in a soft curve. Tie simple knots at the attachment points and tuck tiny marigold sprigs into 2-3 knots for a natural touch. Arrange the swag so the center knots are slightly lower than the side knots - it creates a gentle V shape.
Try thisUse fabric glue to seal cut ribbon ends so they don't fray and look messy on camera.
Common mistakeDon't use long loose ribbon tails everywhere; they tangle when people walk under.
12. Matte Gold Leaf Vines on White Net
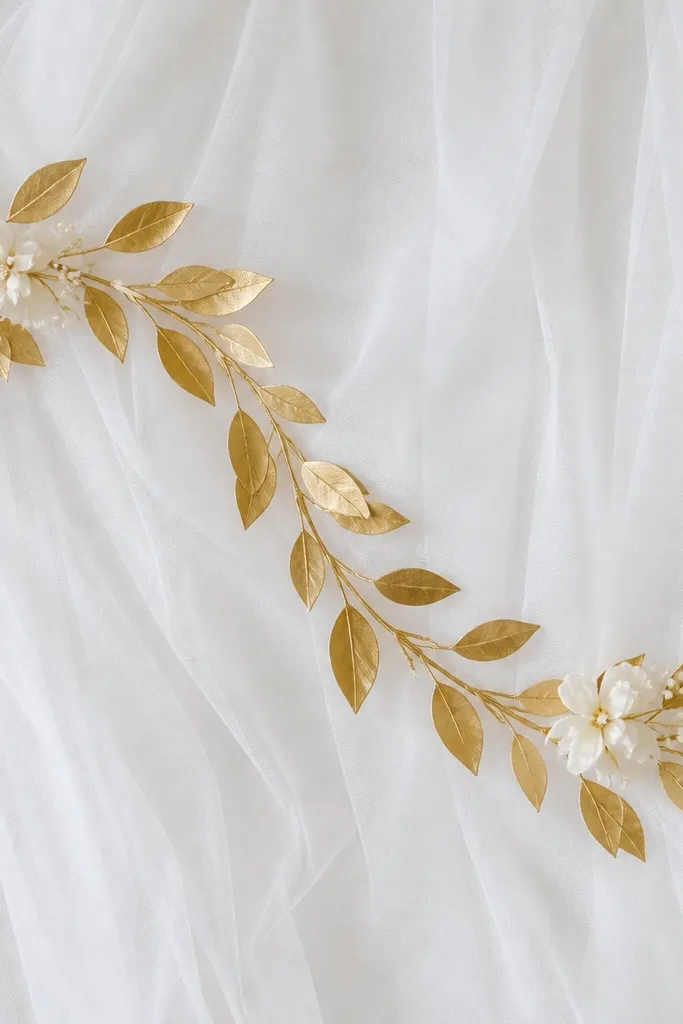
Matte gold leaf vines are how you get "modern" without going full theme. The white net gives a light, breathable look and matte gold adds texture that doesn't glare like shiny foil. I've used this in homes where walls are plain and you want something that still feels premium. It flatters outfits because the background stays light and doesn't fight bright embroidery. The open space also makes it easier for guests to stand in front without looking blocked by thick decor.
Start by stretching white net fabric across a frame or attaching it to a wall with hooks. Then position matte gold vine strips in a curved S pattern: one vine starts at mid-left and flows to the center, another mirrors it on the right. Secure vines with floral wire or zip ties so they hold shape. Add two small ivory flower clusters at the ends of the S curve to balance the composition. Keep the vines 10-12 inches apart so the net pattern still shows through.
Try thisLightly mist the net with water before sticking vines if you want them to sit flatter; it reduces static.
Common mistakeAvoid shiny metallic foil vines - they create hot spots under lights.
13. Mini Marigold Step Planters on Stage Edges
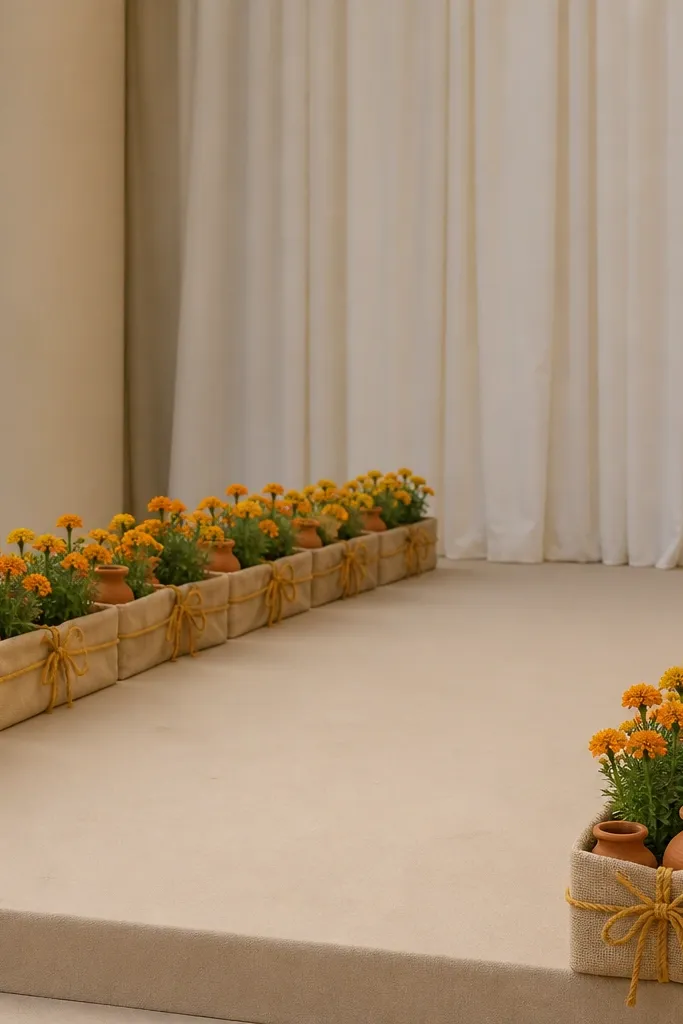
Planters along the stage edges make your decor look grounded and intentional. Mini marigolds bring classic haldi color, and burlap wrapping keeps the style modern and not too "wedding hall floral wall." This idea is great when you have a raised stage platform and you want the sides to look finished. It also helps with photos because the frame around the couple becomes symmetrical. For deeper outfits and darker skin tones, terracotta and mustard twine add warmth without looking overpowering.
Start by placing 5-7 low planters along each edge, spaced about 10 inches apart. Wrap each planter with cream burlap and tie with mustard twine in a neat bow. Insert mini marigold stems and add 1-2 green leaves per planter so the color doesn't look flat. If you're using fresh flowers, keep them hydrated and change petals after the first hour of function. Position the planters so the tallest stems sit around knee-to-waist height for people standing in front.
Try thisUse saucers under each planter so water doesn't stain the stage floor or your fabric base.
Common mistakeDon't use tall flowers that reach chest level; they block faces in photos.
14. Turmeric + White Cloth Rosette Wall Clusters
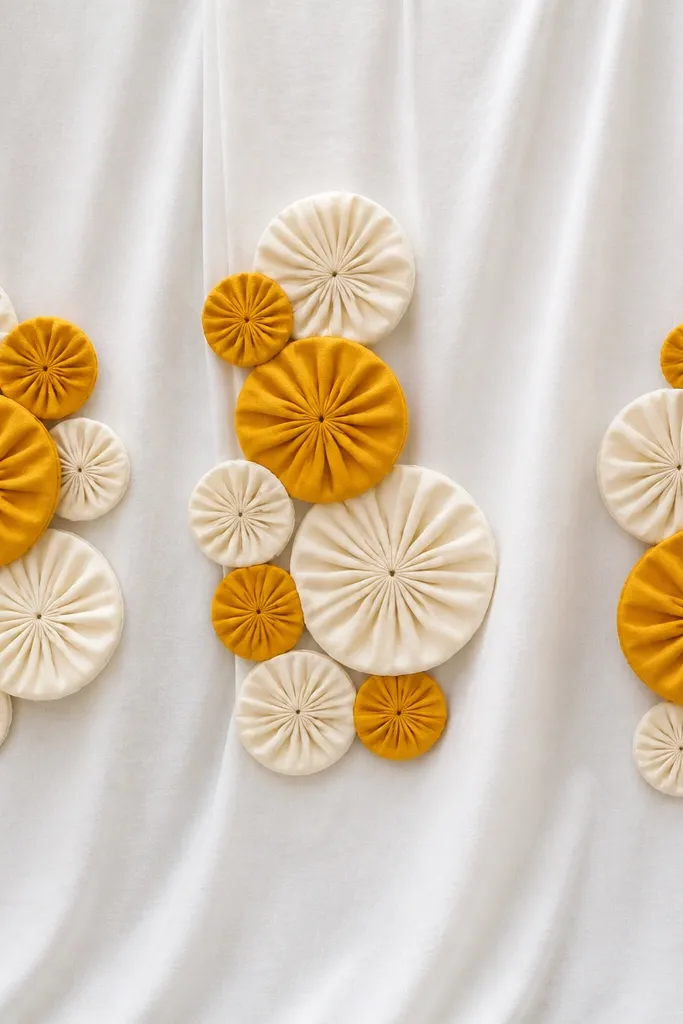
Fabric rosettes look modern because they create shape and depth like a wall art piece. Turmeric rosettes bring the haldi identity, while white rosettes keep the backdrop airy. I've used this when I want the stage to look like a design wall, not a bunch of hanging garlands. It's flattering because the rosettes sit behind the couple and create a soft, structured background for faces and clothing. This style also hides uneven wall textures because the rosettes cover problem spots.
Start by hanging a smooth white backdrop cloth. Make or buy rosettes in two sizes: 10 inches and 6 inches, with turmeric and white fabric. Place three main clusters: one large center cluster and two smaller side clusters, spacing them about 18 inches from center to center. Attach rosettes with double-sided tape plus a hidden pin at the back if the cloth is light. Keep the highest cluster at about head height in the photo frame, so the composition feels balanced.
Try thisUse matte fabric like cotton or polyester dupatta material so the rosettes don't look shiny and cheap.
Common mistakeAvoid placing rosettes too close together; it looks like a stuck-on craft wall.
15. Gold Foil Balloon Strings with Marigold Knots
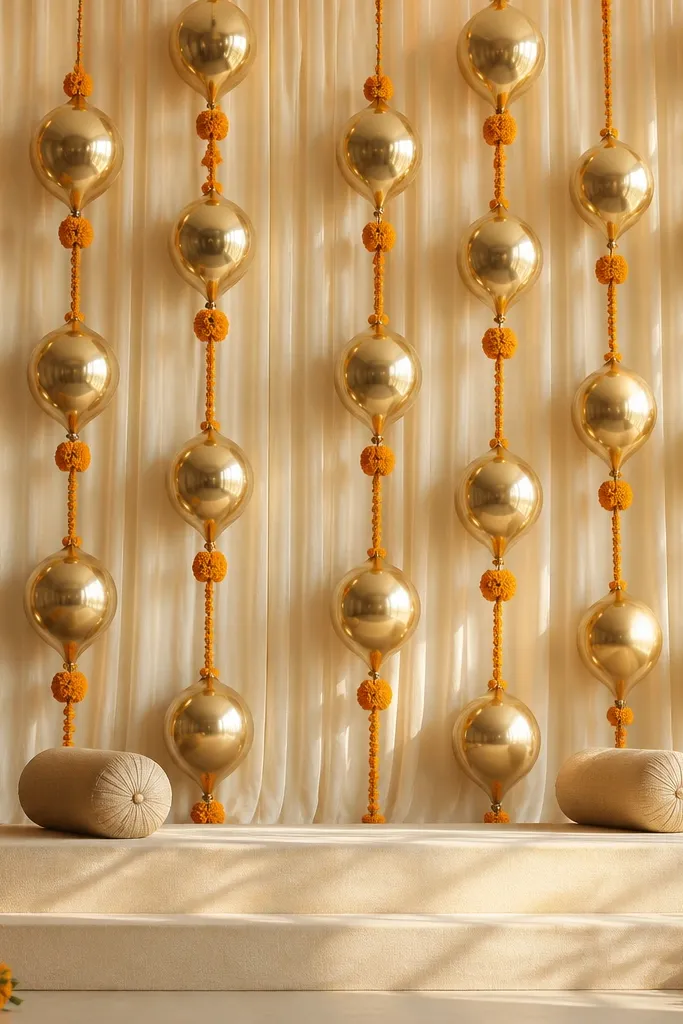
Vertical balloon strings make the stage look taller and more modern without adding a big structure. Gold foil balloons give a clean metallic accent, and marigold knots keep the haldi connection strong. I use this when I don't want to build arches or frames - it's quick and still looks designed. It flatters both men and women because the vertical lines pull attention upward and make outfits look longer. If you're doing a haldi at home with limited space, this is one of the easiest "camera lift" tricks.
Start with a cream cloth backdrop so the gold doesn't look harsh. Inflate gold foil balloons in 9-12 inch sizes and tie each balloon to a string using a small knot. Create 4-6 vertical strings and anchor them at the top of the backdrop frame, spacing them 10-12 inches apart. Wrap a thin marigold garland around the knot point on each string so the gold balloon has a haldi finish. Keep the balloon bottoms around shoulder height for photos so they frame the couple without covering faces.
Try thisIf you want less glare, choose gold balloons with a matte finish or keep them angled slightly away from direct flash.
Common mistakeDon't use too many balloons - the background becomes cluttered and loses the clean vertical look.