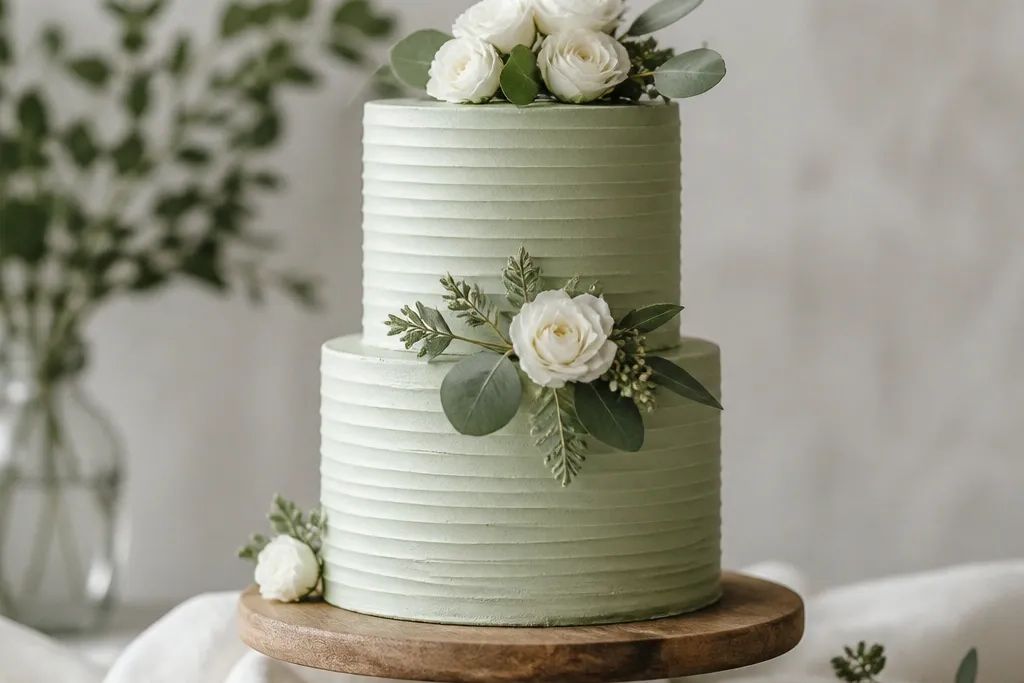
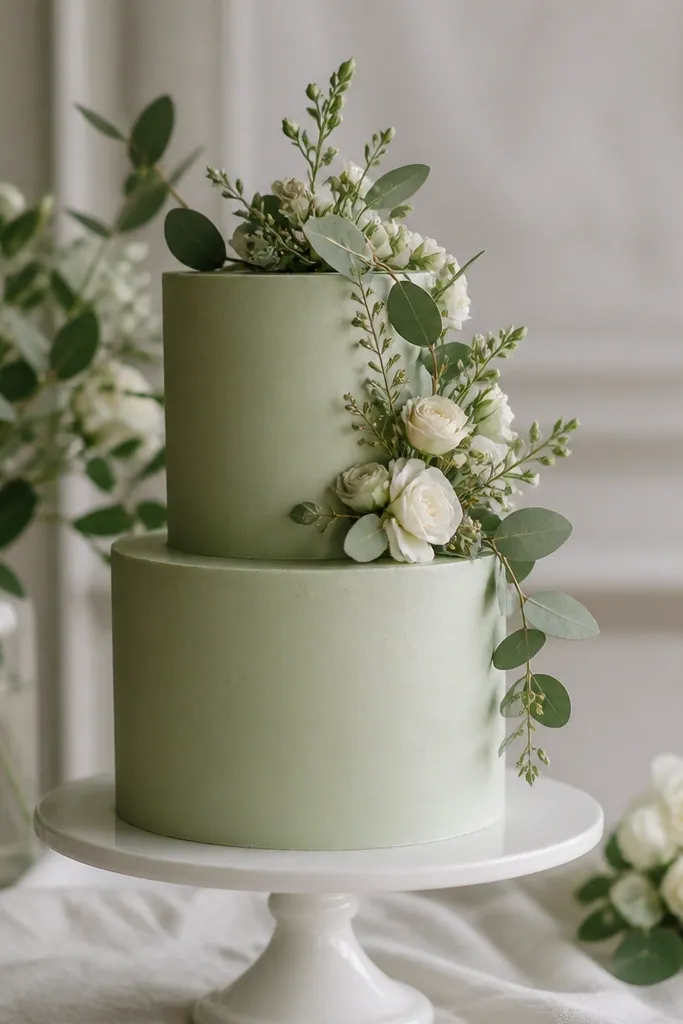
1. Sage ribbon border on an ivory buttercream cake
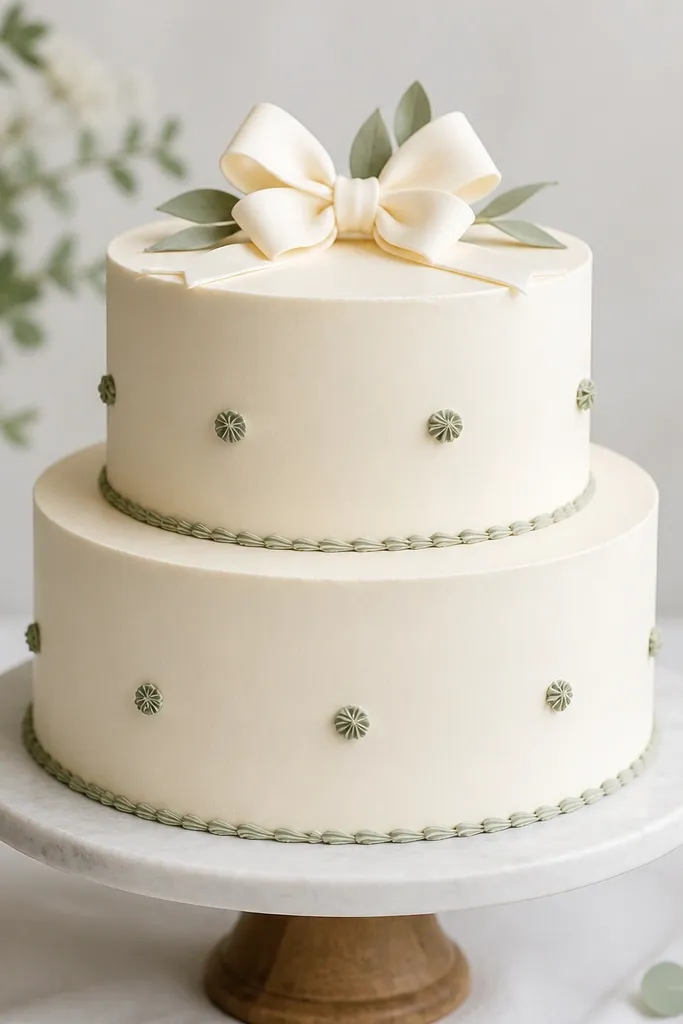
I love this one because it gives you "styled" without needing to dye a whole cake. The base is plain ivory buttercream, which reads clean and expensive. The sage shows up as a narrow ribbon-like band, so the color looks intentional and not like you tried to match a paint sample. This works especially well if your skin tones and florals are warm - ivory balances blush and peach flowers, while sage keeps it fresh instead of dusty. It also looks great on slim, taller cakes because the border frames the shape.
Start by frosting your cake in ivory buttercream and chill it 20 minutes so the surface firms up. Fit a piping bag with a small round tip (like a #2) and pipe two thin sage lines close together around each tier - leave a tiny gap between them so it reads like ribbon folds. Fill the gap with small sage rosette dots using the same tip, spacing them about 1 inch apart. Finish with a fondant bow on top (ivory or pale cream) and add 3-5 sage sugar leaves tucked around the base of the bow. For styling, keep the top topper minimal so the ribbon is the star.
Try thisRoll your fondant bow very thin and let it air-dry for 30 minutes before placing so it holds crisp edges.
Common mistakeAvoid coloring the entire cake sage and then trying to "fix" it with extra sprinkles - that reads chalky and cheap.
2. Semi-naked sage drip with ivory crumbs
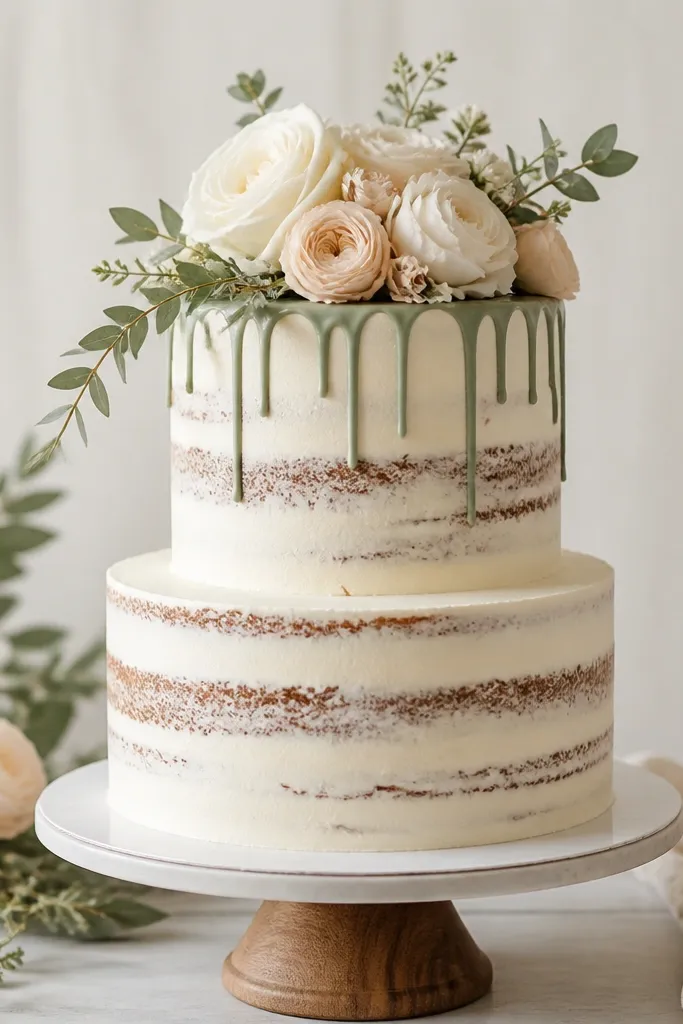
This is my go-to when I want a wedding cake look but don't want the pressure of perfect smooth icing. The semi-naked sides create texture and hide minor tool marks. Sage drip is the color moment, but because it's only on the top edge, it stays classy and doesn't overwhelm the cream base. The ivory crumb coat makes the sage look softer, like it belongs in a spring garden. It flatters most wedding palettes because it doesn't compete with florals; it frames them. If your venue is outdoors or has natural light, the matte crumbs look especially good in photos.
Start with a leveled, stacked cake and apply a thin crumb coat of ivory buttercream. Chill 30 minutes, then add another thin layer so you still see some crumb peeking through. Mix a sage glaze for the drip using powdered sugar and a few drops of water or milk, then tint it dusty sage with gel color. Spoon the glaze onto the center and nudge it outward so it spreads, then tap the spoon near the edge to create short drips. Chill the cake again for 10-15 minutes so the drip sets, then place your flower cluster on top right above the drip line.
Try thisMake your drip thicker than you think - runnier glaze melts into the crumb coat and looks sloppy.
Common mistakeDon't let the drip go too far down the sides or it turns into a messy dye streak.
3. Sage watercolor buttercream swirls
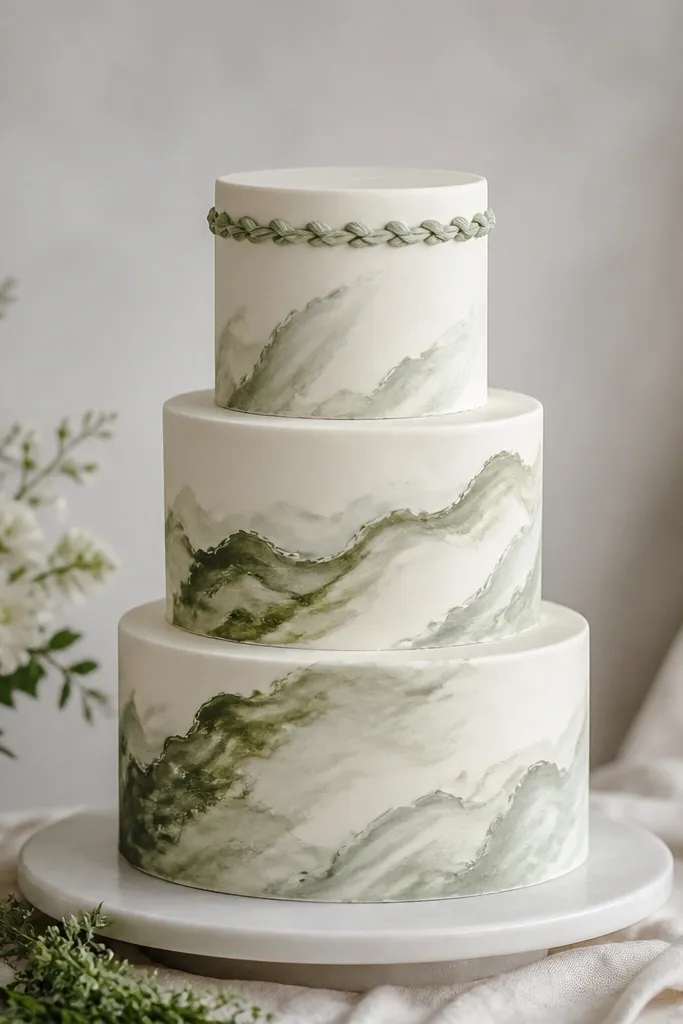
Watercolor-style swirls look expensive because the color transitions hide frosting imperfections. You're not painting a flat block of sage; you're creating movement with a blended edge. The ivory base keeps it wedding-appropriate and lets the sage read as gentle, not harsh. This design flatters a range of skin tones in photos because the palette is neutral and airy. It also works well for couples who want a modern, artsy vibe without going full fondant. If you're using real flowers, this cake gives them space to stand out.
Start by smoothing ivory buttercream on your tiers, then chill until firm. Mix a sage buttercream that's slightly darker than your target, then thin it with a tiny bit of milk or cream to make it spreadable. Dip a small offset spatula lightly into the sage and drag it in loose arcs over the ivory, then blend the edges with a clean spatula. Rotate the cake as you work so each tier gets a different swirl direction. Finish the top with a small, clean sage piped accent or a single sage-green sugar leaf cluster.
Try thisBlend in small sections - about 2-3 inches at a time - so the transitions stay soft.
Common mistakeDon't overwork the swirls for 10 minutes; repeated smoothing turns watercolor effects into muddy streaks.
4. Sage shell border with ivory rosette top
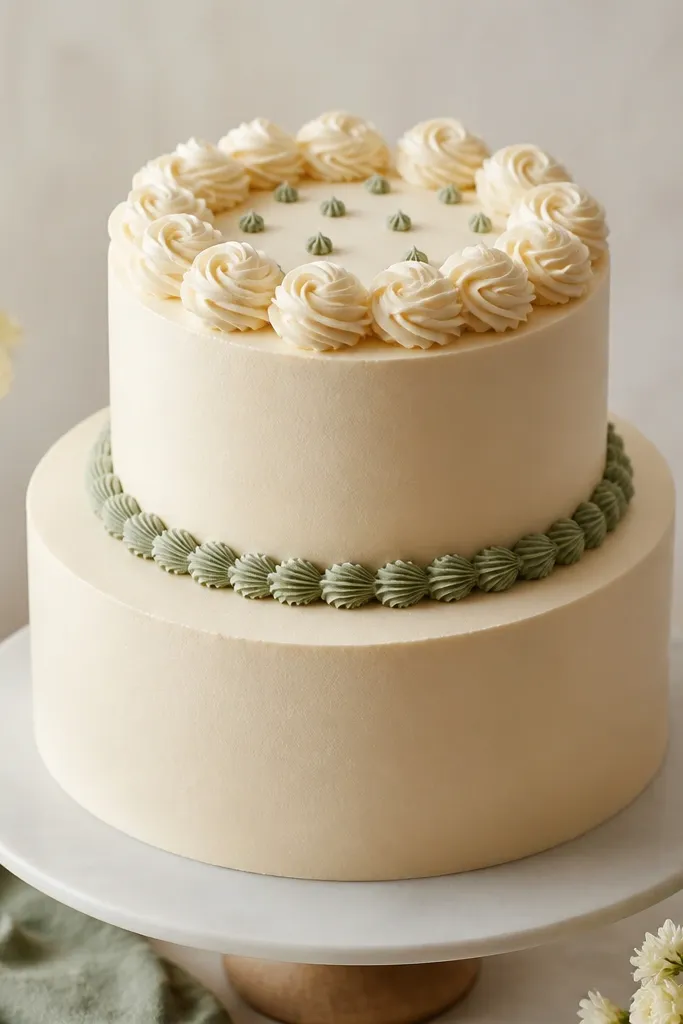
Shell borders read classic and clean, which is exactly what you want if you're aiming for "wedding cake" instead of "birthday cake." The sage border is concentrated at the tier edge, so it looks intentional and not like you forgot to stop coloring. Ivory rosettes on top add a soft, romantic finish without needing fondant work. This design is flattering for people who like minimal decoration - it looks tidy and photo-friendly even from a distance. It also plays well with pastel or neutral flower arrangements. If you're nervous about piping, this is one of the easiest looks to nail.
Start by smoothing ivory buttercream and chilling the cake. Fit a piping bag with a shell tip (like a #21 or similar) and pipe a sage shell border around the top tier bottom edge. Keep consistent pressure so each shell has the same height; rotate the cake every few shells. For the top, pipe ivory rosettes in a tight ring about 1 inch from the center. Add 6-10 small sage dots with a round tip in the spaces between rosettes. Finish by setting a simple topper in the middle - a mini bouquet or a thin acrylic monogram.
Try thisPractice the shell height on parchment first; it saves you from redoing a whole tier edge.
Common mistakeAvoid giant shells - if the border is too thick, it looks like a frosting gimmick.
5. Sage sugar leaf garland on a plain white cake
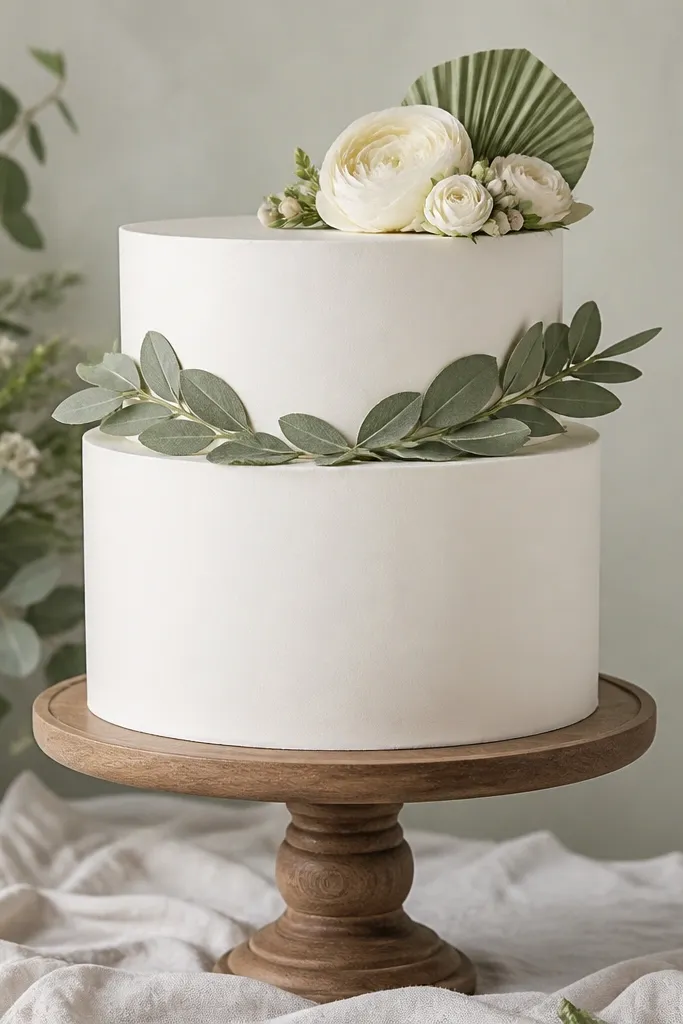
This look is budget-friendly because sugar leaves can be made ahead and placed quickly. You get a "garden" feel without needing fresh stems on the cake. The plain white base keeps the focus on the sage leaf line, so the color reads premium. It's especially flattering for weddings with lots of greenery in the ceremony area, because it matches the theme instead of competing with it. I've used this style when I needed the cake to look good in both close-up and wide shots. It also works if you don't want a heavy floral topper.
Start with a smooth white buttercream finish and chill it until firm. Make or buy sage sugar leaves in two sizes, then arrange them dry on parchment to plan your curve. Use a small amount of royal icing or buttercream as "glue" to attach the largest leaves first, then tuck smaller leaves between them. Create a gentle arc around the top tier so the garland looks like it's flowing, not taped on straight. Place a small ivory flower cluster on top and fan one sage leaf outward for a focal point. Keep the rest of the cake blank so the leaf line stays crisp.
Try thisIf you're using homemade sugar leaves, dust them lightly with edible shimmer powder - it looks like real leaf texture under venue lighting.
Common mistakeAvoid chunky leaf clusters on a smooth cake; they look pasted on instead of arranged.
6. Two-tone sage and ivory ruffle tiers
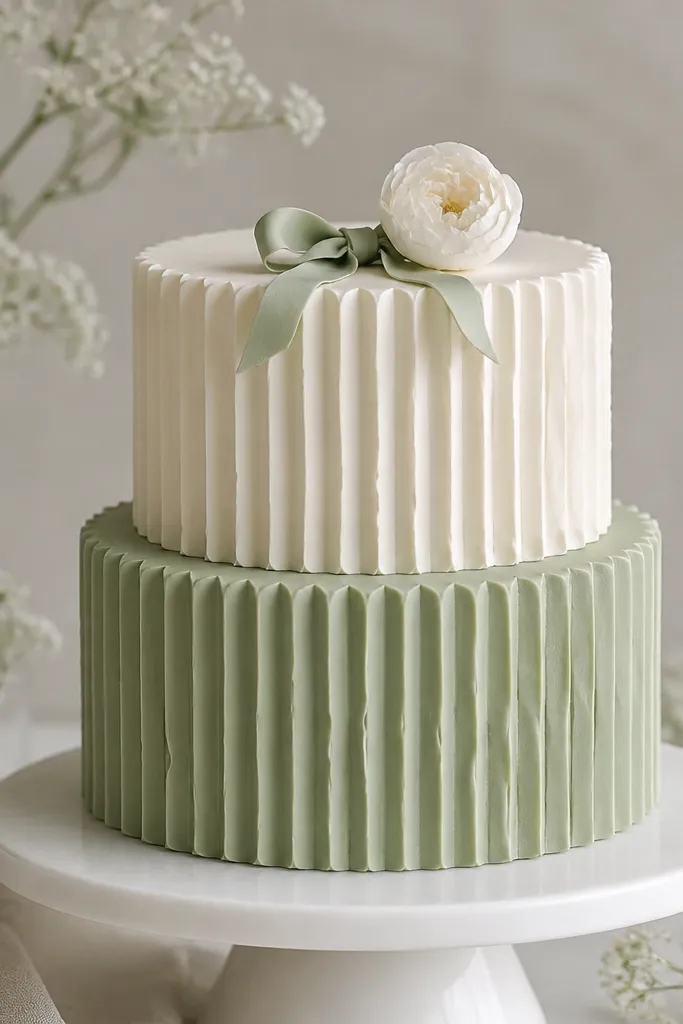
Ruffles create dimension, and dimension is the secret weapon for inexpensive sage green wedding cake ideas. You don't need fancy fondant to get that "designed" look - piped ruffles do it. The two-tone split keeps the palette balanced: sage feels fresh and modern on the bottom, while ivory on top keeps things airy. This flatters brides who want a romantic look but don't love heavy buttercream sculpting. It also looks good on round cakes because the ruffle vertical lines make the cake read taller. If your wedding color palette is sage plus blush, the ivory top gives the blush flowers room to pop.
Start by frosting both tiers - sage on the bottom tier, ivory on the top tier. Chill the cake 20 minutes so the surface is firm. Use a petal or ruffle piping tip with a thick sage buttercream for the bottom tier ruffles, piping from bottom edge upward in straight vertical lines, overlapping slightly. Repeat with ivory buttercream on the top tier using the same pattern. Keep ruffle spacing consistent so it looks intentional, not handmade-chaotic. Add a small sage bow on top and place one ivory flower in the center for a clean focal point.
Try thisUse thicker buttercream for ruffles; runny frosting collapses and makes the ruffles look flat.
Common mistakeAvoid thin, airy ruffles - they look see-through and cheap in photos.
7. Sage marble fondant panel with ivory base
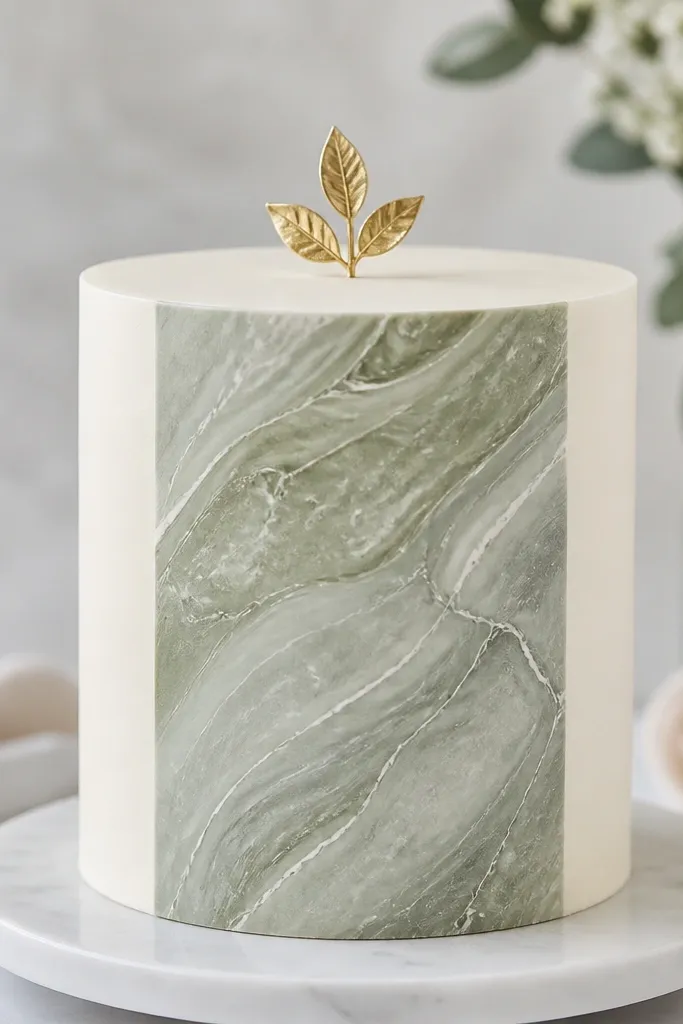
Marble panels look high-end because they mimic stone veining, and you can do it with a small amount of fondant. The trick is keeping it to one panel so you don't need to marble the whole cake. The ivory base makes the sage marble look crisp instead of muddy. This style flatters modern weddings and couples who like clean lines. It's also great if you want the cake to match a printed invitation suite with a similar "stone" vibe. The gold leaf topper adds warmth without making the cake feel overly fancy.
Roll white fondant thin and cut a rectangle panel for the front of your cake. Knead small amounts of sage and gray-green fondant together lightly, then pull and fold to create marble streaks - you want swirls, not fully mixed color. Roll the marble fondant into a thin sheet, lay it over the white panel base, and press gently so the veins show. Drape or adhere the panel to the cake with a thin layer of buttercream or edible glue, smoothing the edges. Finish the top with a simple ivory buttercream cap and place a single gold leaf topper in the center. Keep the rest of the cake blank so the panel is the hero.
Try thisDust your marble panel lightly with edible pearl powder only on the raised veining areas for a stone-like highlight.
Common mistakeDon't make the marble too dark; deep green marble reads heavy and dated.
8. Sage piped basketweave band
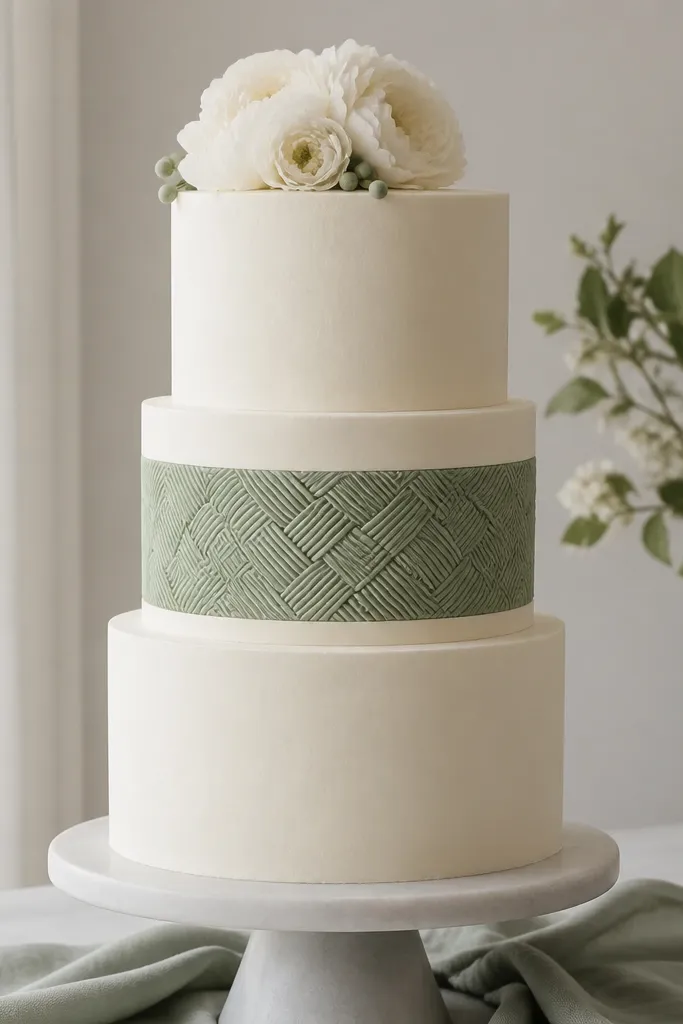
Basketweave looks like you spent hours, but it's mostly about consistency. The band placement makes it look intentional, and the rest of the cake can stay plain and smooth. Sage on a single horizontal band gives a structured, tailored feel that works with both rustic and modern weddings. I like it for couples who want a "handmade" look without going full rustic. It also photographs well because the pattern catches light across the tier. If your venue lighting is warm, sage looks slightly muted and flattering instead of neon.
Start with an ivory base frosting that's smooth and chilled. Pipe a sage guide line around the cake with a thin round tip so you have a straight band. Use a basketweave technique by piping vertical lines with a thicker round tip, then go back with horizontal lines alternating over-under. Keep the pattern tight - aim for about 1/2 inch squares so it reads woven, not like scribbles. Fill any gaps by touching up with the piping bag tip, then add a few sage dots around the top flower cluster. Place an ivory flower cluster on top and keep it small so the band stays the focus.
Try thisLightly mark your band width with a ruler before piping so both sides match the same thickness.
Common mistakeAvoid wide basketweave bands; they crowd the cake and make it look like a decorative border from a craft store.
9. Sage and blush buttercream rosette cascade
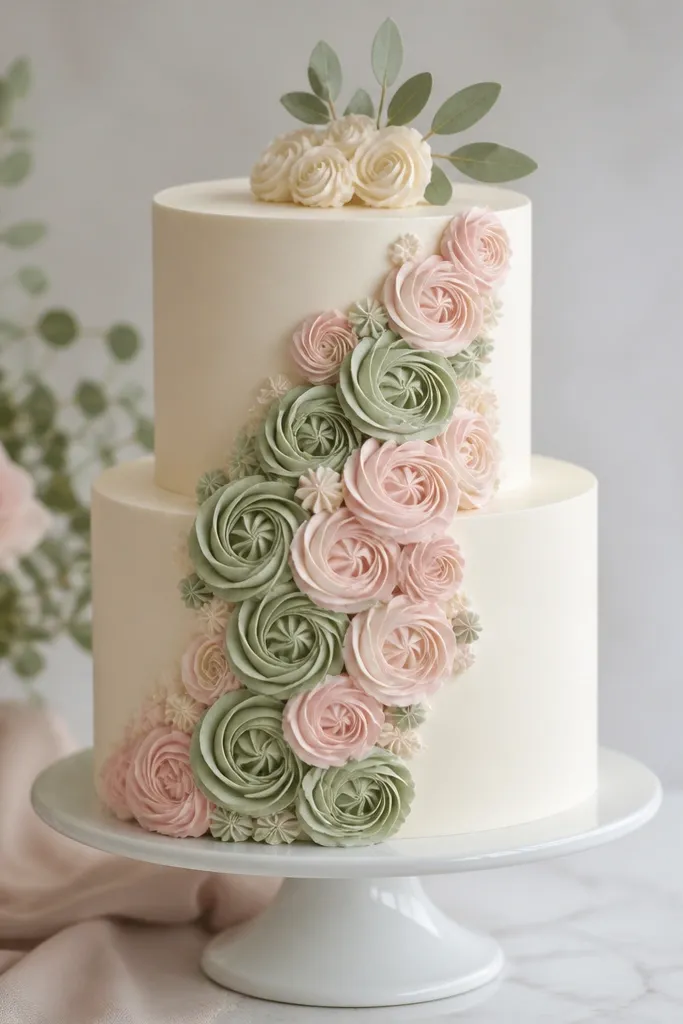
This one is pretty in a way that's hard to fake: the color mix looks soft and layered when the rosettes are evenly sized. The cascade placement creates motion, so even a smaller cake feels full. Sage and blush together read romantic and not overly themed. This is flattering for most skin tones in photos because the palette is light and cool-warm balanced. It also works for brides who want a fuller look without adding heavy fondant. The rosettes create texture, which hides minor piping unevenness.
Start with a smooth ivory base and chill it. Pipe a thin sage line around the top tier edge as a starting guide for the cascade. Use two piping bags - one filled with sage buttercream and one with blush buttercream - and pipe rosettes in a diagonal flow from the top tier down the side. Keep each rosette about the same size and overlap slightly so there are no gaps. Stop the cascade about 1 inch above the bottom tier base so the lower tier stays clean. Finish the top with a small ivory rosette cluster and 2-3 sage sugar leaves for a natural touch.
Try thisMake rosettes consistent by using the same squeeze time and rotating your wrist at the same speed.
Common mistakeDon't mix too many shades of green; stick to one sage tone and one blush tone so it stays cohesive.
10. Sage ombre buttercream top edge
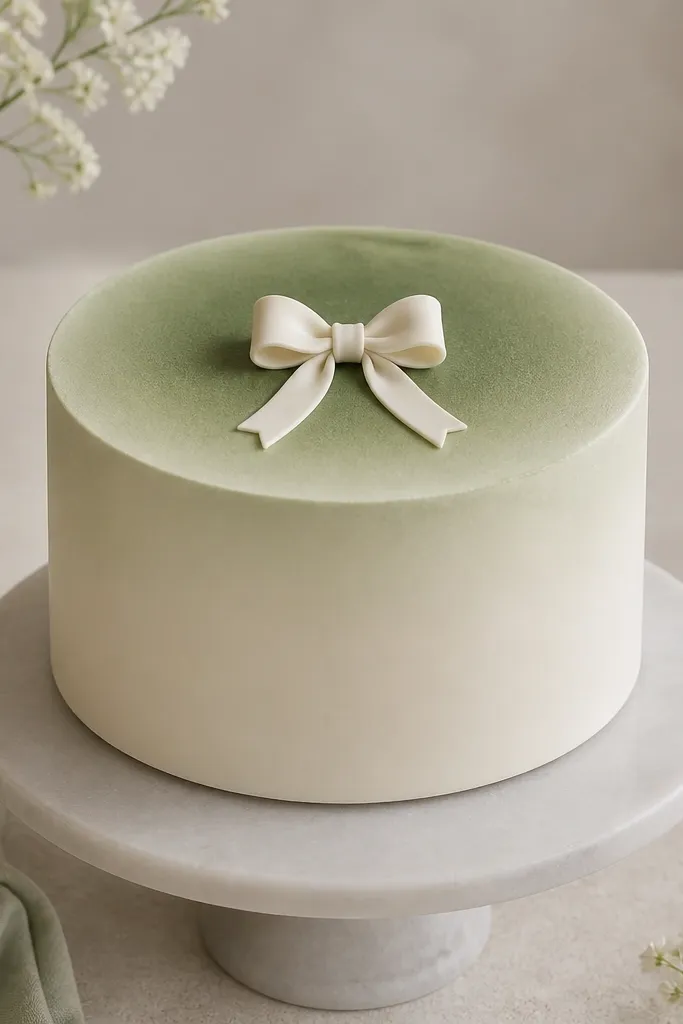
Ombre is one of the easiest ways to look expensive because it creates a gradient that feels artistic. Here, the ombre is confined to the top edge, so you don't need to color the entire cake. The gradient reads soft and modern, especially with a smooth ivory base. It flatters clean, minimalist wedding styles and also matches paper goods that have a gentle color wash. If your flowers are pale, ombre gives the cake its own color interest. I used this at a small backyard wedding and it photographed beautifully from every angle.
Start by smoothing ivory buttercream on the cake and chill it. Prepare three shades: dark sage, medium sage, and light sage by adjusting your tint in separate bowls. Use a piping bag with a large star tip and fill it with the medium sage first, then layer a dark sage portion into one side and a light sage portion into the other (you can create a gradient effect when you pipe). Pipe a band along the top edge by squeezing and moving slowly so the color transitions across the band. Smooth any harsh lines with a clean spatula lightly touched to the surface. Add a small ivory bow topper in the center so the ombre frames it.
Try thisChill between color tests; gradients look different when cold.
Common mistakeAvoid a hard stripe ombre - if the transition is sharp, it reads like paint bands instead of a fade.
11. Sage leaf fondant topper with naked sides
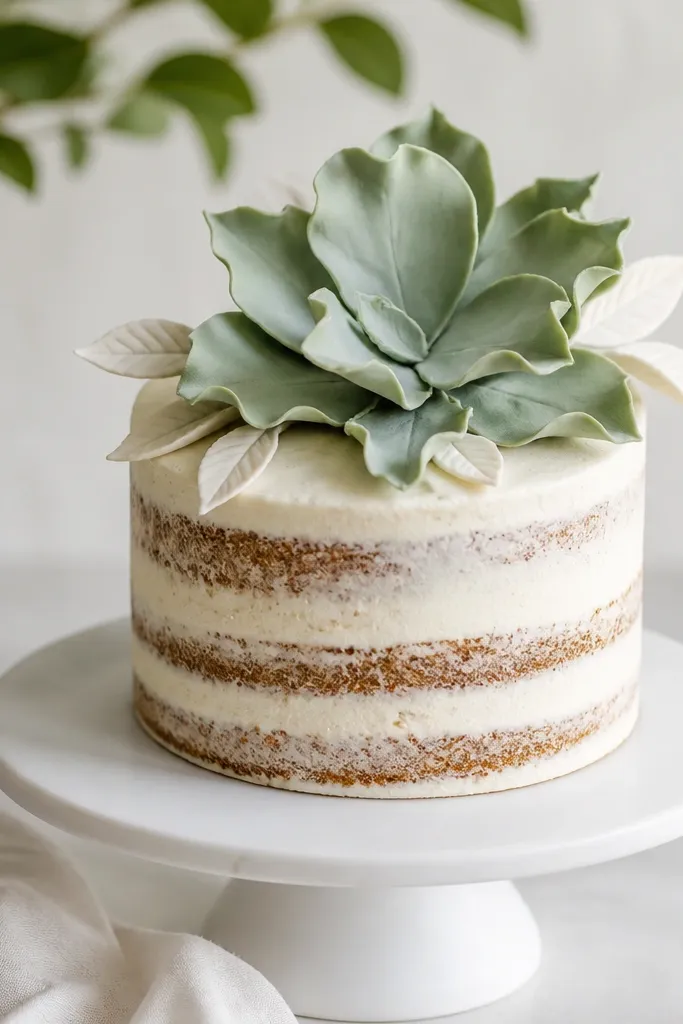
A big leaf topper makes the whole cake look styled even if the sides are simple. Semi-naked sides are forgiving and let the cake texture do the work, while the sage leaf gives you that signature wedding color. This is perfect when you want a "modern garden" vibe without spending on edible flowers. It flatters brides who like clean, sculptural details. In photos, the leaf creates a strong focal point and gives height. It also pairs well with minimal table settings because the cake becomes the statement.
Start with a crumb-coated, semi-naked cake and chill it until the surface feels firm. Roll sage fondant and cut one large leaf shape, then score gentle veins with a veining tool or the back of a small knife. Add a slight curl by draping the leaf over a rolling pin and letting it set for 10 minutes. Place the leaf on top using a small buttercream mound so it stays centered. Add 4-6 smaller ivory leaves around the base of the sage leaf. Finish with a tiny dusting of edible luster dust on the leaf edges so it catches light.
Try thisMake the leaf topper the day before so it dries and doesn't sag on cake day.
Common mistakeAvoid thick fondant leaves; they look heavy and can slide when the cake is moved.
12. Sage and ivory braided fondant rope around the tier
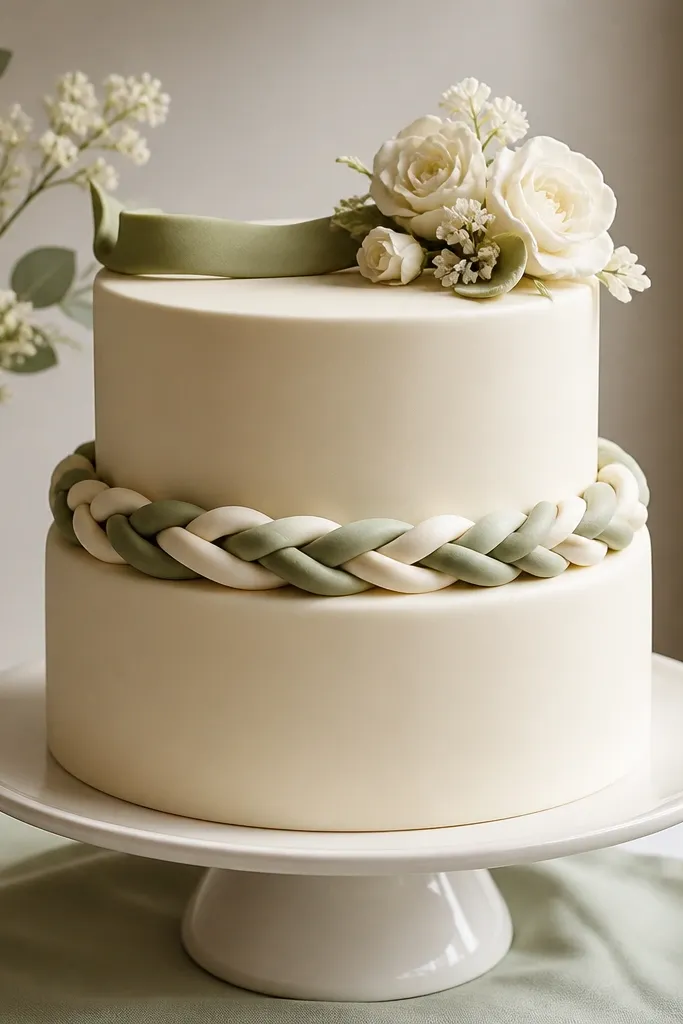
Braided borders look like you're using a professional decorating method, but you can do it with simple fondant ropes. The alternating sage and ivory strands create a rhythm that reads neat and premium. I like this for couples who want a structured, traditional look without spending on extra flowers. It also works well for smaller cakes because the braid creates a visual frame around the center. The raised rope catches light and makes the cake look more dimensional than flat buttercream alone. It flatters classic wedding palettes and looks great with gold accents.
Roll two fondant ropes - one ivory and one sage - each about 1/4 inch thick. Cut them into equal lengths so the braid looks consistent all the way around. For the braid, twist the ropes together in a simple 3-strand pattern, then pinch the ends closed. Press the braid gently onto a thin strip of buttercream around the tier so it adheres without slipping. Smooth the join where the braid meets itself and hide it with a tiny sage ribbon strip on the front. Add a small ivory flower cluster on top and place a gold leaf pick if you want extra warmth.
Try thisDust your hands with cornstarch before rolling fondant ropes so they don't stick and tear.
Common mistakeAvoid braids that are too thick; chunky ropes make the cake feel bulky and less wedding-like.
13. Sage watercolor wafer paper circles
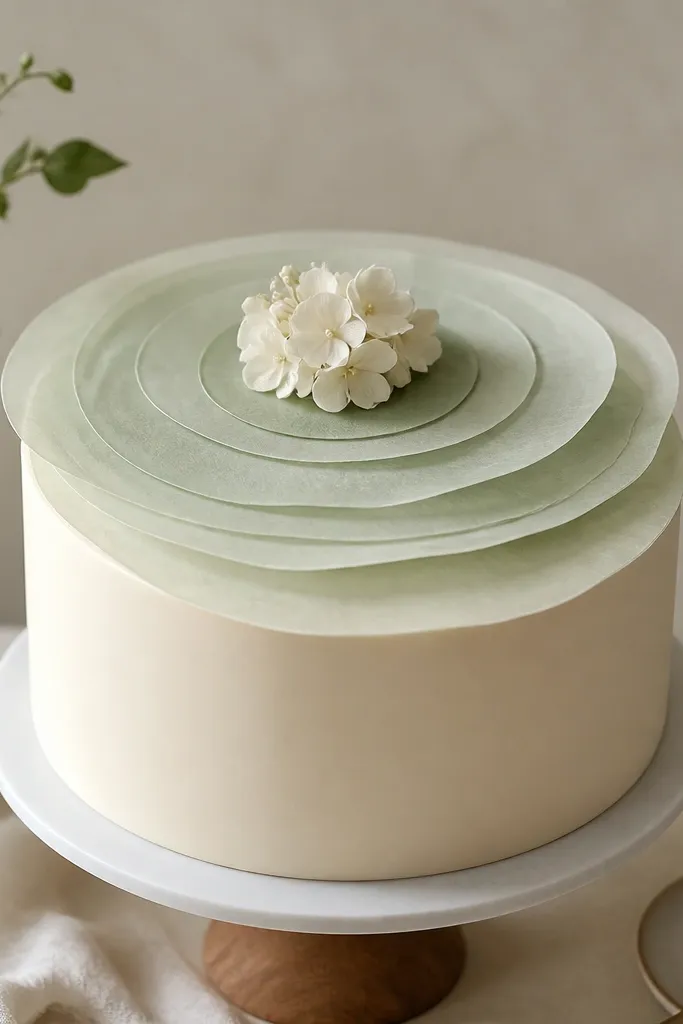
If you want a cake topper that looks airy and artsy without spending on fresh flowers, wafer paper is the move. The sage watercolor tint stays light and photo-friendly, especially under overhead warm venue lighting. This style looks best on clean, smooth cakes because the topper is delicate. It flatters modern weddings and also works for smaller budgets because wafer paper is cheap and easy to layer. I've used this when the flower budget was tight and the cake still needed a "wow" top. The rings create motion without adding weight.
Start with a smooth ivory buttercream cake and chill it. Cut wafer paper circles in three sizes, then tint them lightly with watered-down sage gel or food coloring using a soft brush. Let the circles dry flat for 15-20 minutes so they don't warp. Layer the circles on top by stacking from largest to smallest with a thin brush of edible glue or buttercream between layers. Offset each layer slightly so you see the ring edges. Finish by adding a small ivory flower cluster at the base of the top stack and keep the sides plain.
Try thisUse a fan to dry wafer paper faster; humidity makes it curl.
Common mistakeAvoid heavy coloring - deep sage on wafer paper looks opaque and loses the delicate watercolor effect.
14. Sage and ivory fondant bow with pearl dots
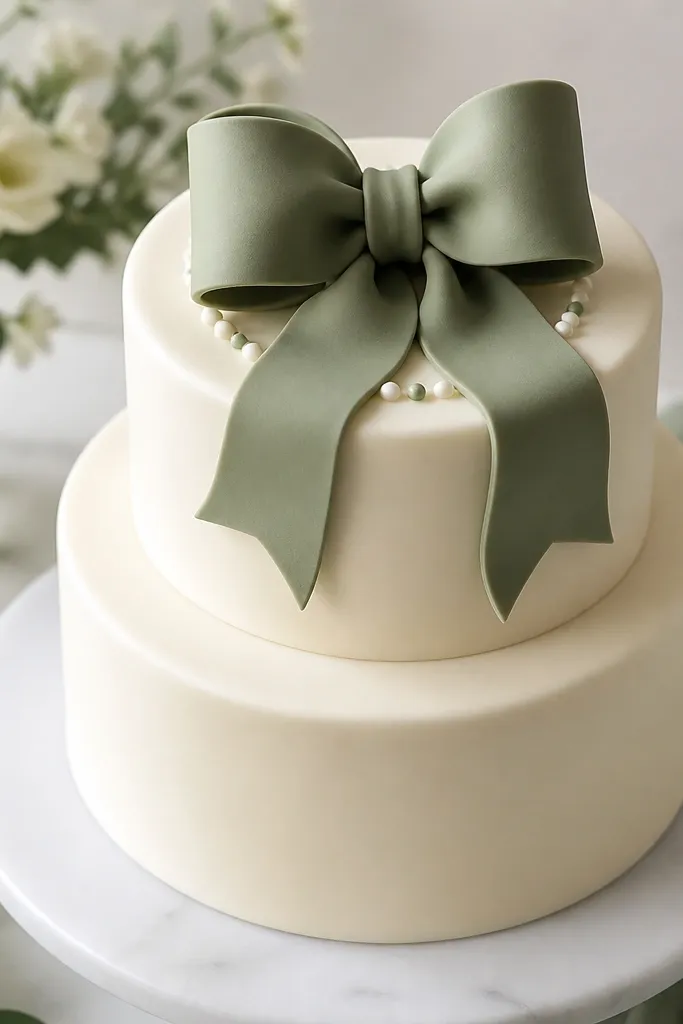
A bow is one of the fastest ways to make a cake look like it belongs at a wedding, not a party. When the bow is sage, it ties into your palette without needing a full-color cake. The pearl dots add a bridal sparkle that looks expensive even when you're using cheap sugar pearls or DIY pearl accents. This design flatters brides who like clean, classic styling with a single statement. It also works for both modern and traditional venues because the bow reads universally elegant. In photos, the bow gives you a clear focal point at the top.
Start with a smooth ivory buttercream cake and chill it. Roll sage fondant and cut a bow template: two large loops and two smaller tails. Shape the loops by pressing them gently over a spoon handle so they curve naturally, then let them firm up for 10 minutes. Attach the bow to the top center with a small mound of buttercream. Pipe a ring of tiny sage dots around the bow base using a round tip, then place white pearl sugar dots in between the sage dots. Add a small ivory flower bud or a single sugar leaf at the bow center seam for a finished look.
Try thisDust the pearl dots lightly with edible shimmer so they catch light without looking glittery.
Common mistakeAvoid oversized pearls - large beads can make the cake look costume-y.
15. Sage buttercream lattice panels
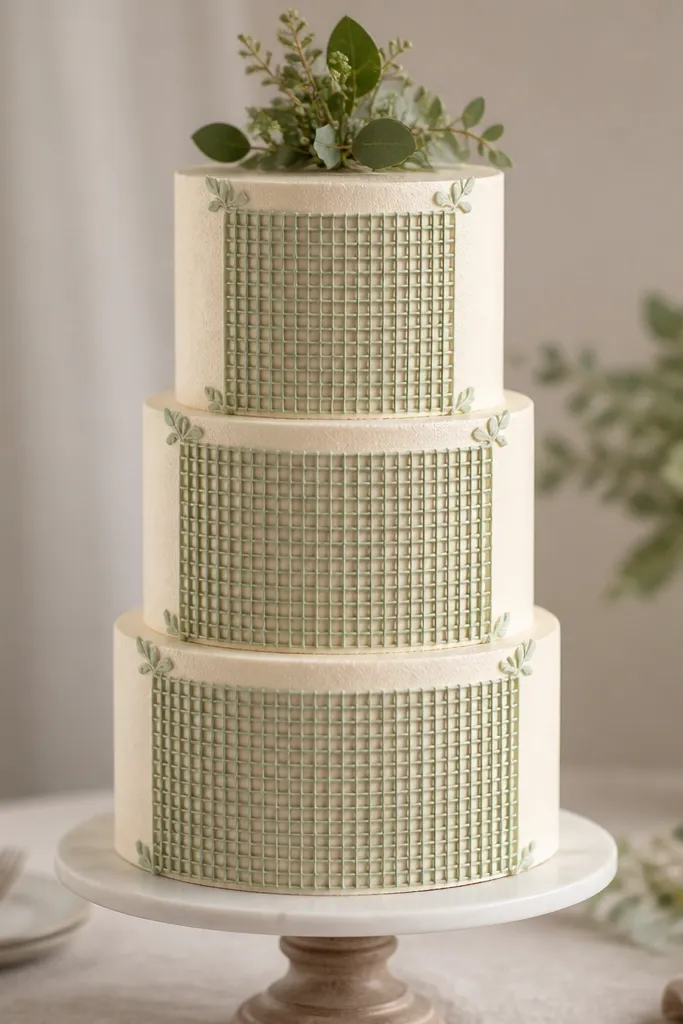
Lattice panels look detailed, but they're mostly straight lines - and straight lines are easier than you think with the right tip. The ivory background keeps it clean, while sage lattice adds structure and a subtle color pop. This design is flattering for weddings with invitations that have geometric patterns or for couples who want a modern twist on garden styling. It also helps hide minor imperfections because the lattice breaks up the frosting surface. I like it for medium-height cakes because the pattern reads clearly at a distance. It pairs well with greenery, especially if you're using dried herbs as decor.
Start by frosting the cake in ivory buttercream and chill it until firm. Fit a piping bag with a small round tip and pipe vertical sage lines on one tier first, spacing them about 1 inch apart. Then pipe horizontal sage lines across to form squares, keeping the grid aligned by rotating the cake slowly. If you want a cleaner look, pipe the lattice first, then use a tiny offset spatula to gently press the line intersections so they look crisp. Repeat on the next tier with the same spacing but slightly smaller squares if the tier is smaller. Finish the top with a small greenery topper or a few piped sage corner accents.
Try thisMark the grid spacing lightly with a toothpick on the chilled frosting before piping so you stay straight.
Common mistakeAvoid thick lattice lines; they look heavy and make the cake feel like it's wrapped in frosting rope.