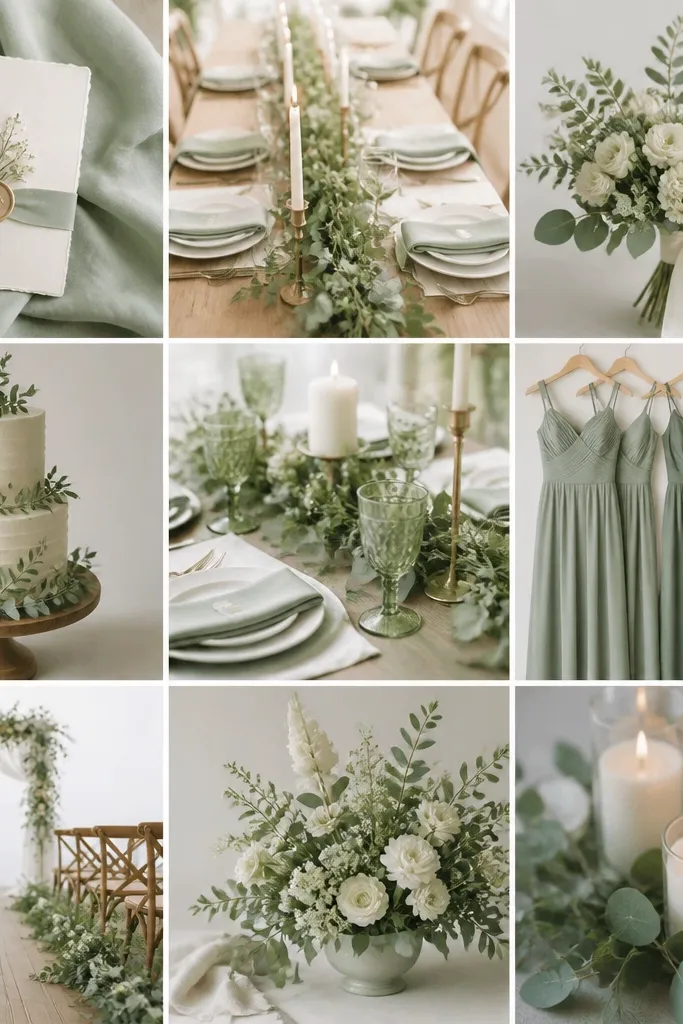
1. Sage crepe bridesmaid dresses with ivory satin ribbon ties
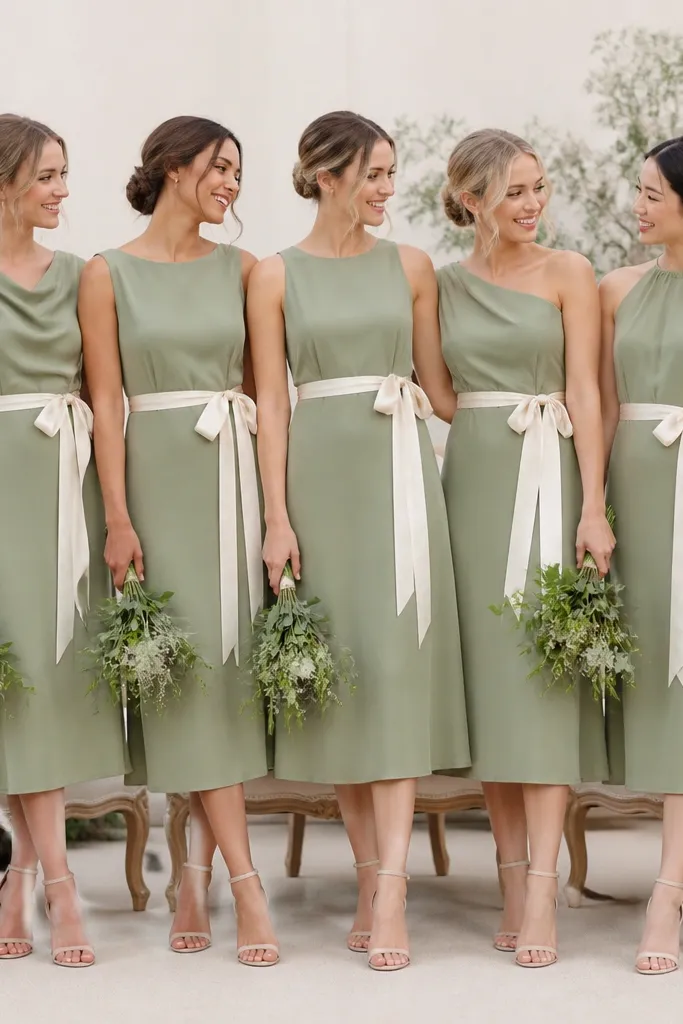
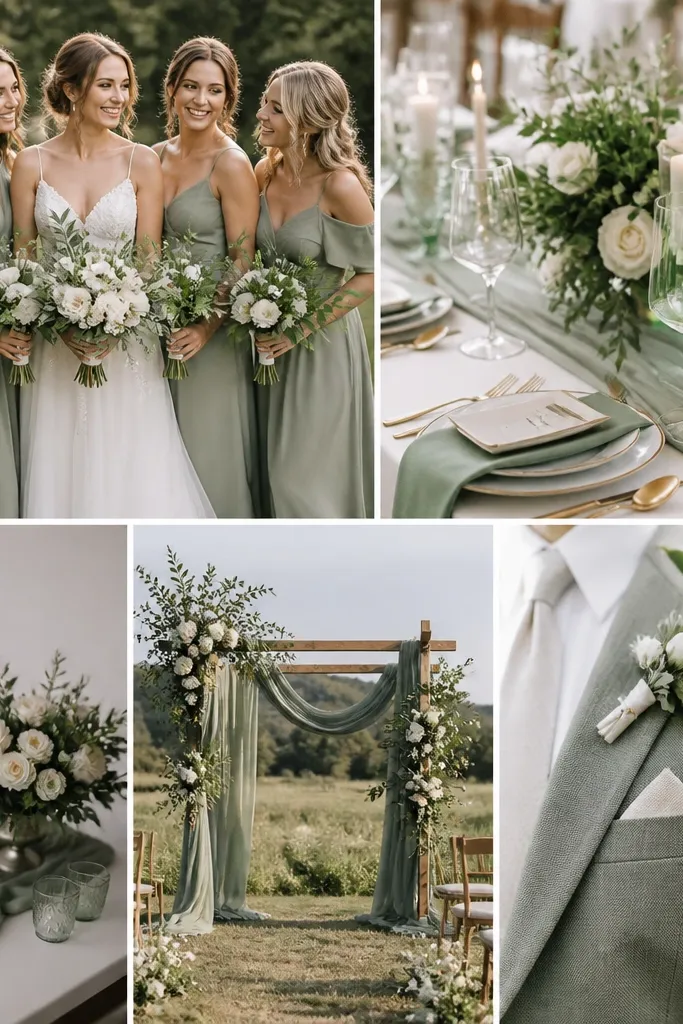
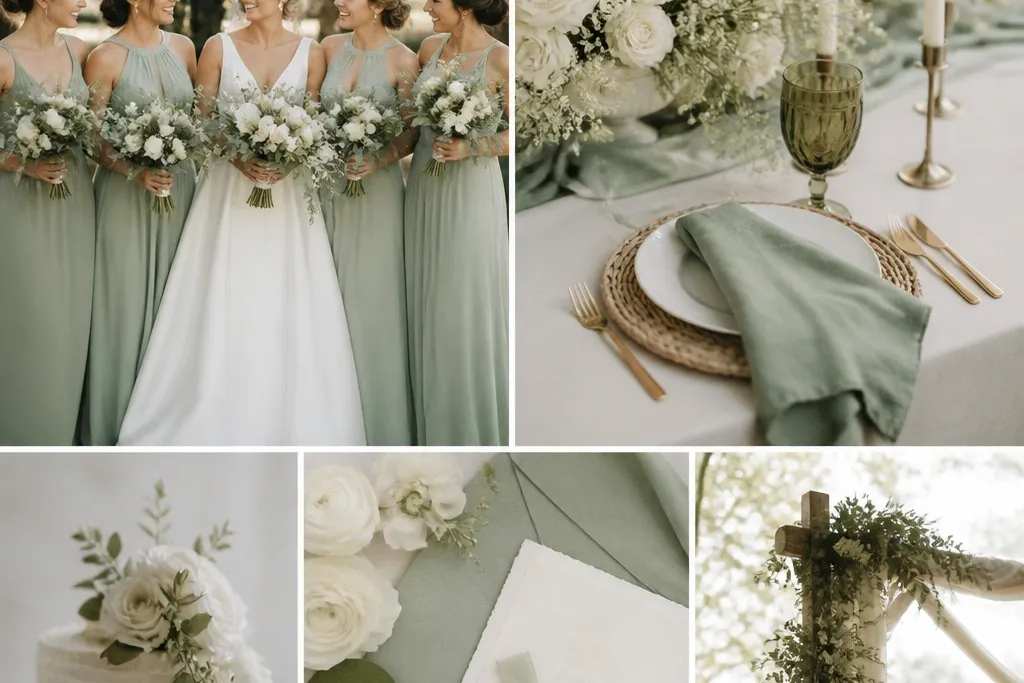
This look works because crepe is matte and forgiving, so sage green reads smooth instead of neon. The ivory satin ribbon adds a gentle highlight at the waist where the eye naturally goes, which makes photos look polished without needing heavy jewelry. I've seen this flatter a wide range of body types because crepe drapes and doesn't cling too tightly. If you have guests with different heights, midi lengths keep proportions balanced, especially under warm venue lighting.
Start by choosing sage green crepe dresses with a defined waist seam or a gentle wrap-style belt. Then add ivory satin ribbon ties using 1.5-inch ribbon and tie them at the natural waist, not higher - aim for about 2 inches above the seam line. Keep the dresses in the same shade family: one "sage" tone across all bridesmaids. Pair with nude or champagne heels and small gold studs so the ivory ribbon stays the focal point. Finish with cream bouquets that include eucalyptus and small white roses to keep the palette cohesive.
Try thisIf you're ordering online, request fabric swatches or check photos in warm indoor lighting so the sage doesn't pull too gray or too bright.
Common mistakeAvoid bright white ribbon - it can make the whole palette look like it's missing warmth.
2. Ivory lace wedding dress with sage-green veil edge
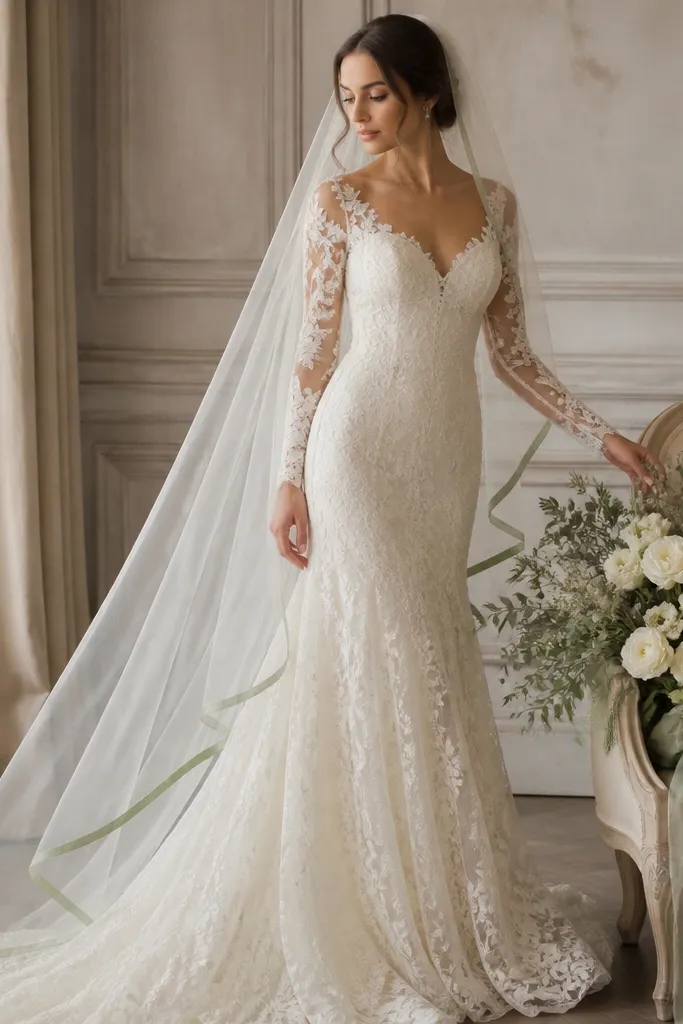
This is one of my favorite "subtle but memorable" combinations because the lace gives texture and the sage shows up like a soft frame. The veil border is small enough to look intentional, not costume-y, and it reads beautifully in close-up photos. Ivory lace flatters most skin tones because it's warm and textured, and it hides imperfections better than stark satin. If you want something romantic without adding color all over the dress, this is the cleanest way to do it.
Start with an ivory lace gown with a high neckline or sleeves if you want the palette to feel cohesive with garden florals. Then choose a sheer veil in ivory and add a sage green edge - either a dyed trim or a custom-stitched border 1 to 2 inches wide. Keep the sage detail only at the veil edge so your dress remains the main focus. Style with champagne gold earrings and a simple hair comb so the veil border stays visible. For the bouquet, use cream roses or peonies with eucalyptus and a few pale sage spray stems.
Try thisPin the veil edge while you're wearing it and check in a mirror under the same lighting as your venue - borders can look different under fluorescents.
Common mistakeAvoid heavy sage beading across the entire veil - it turns the look into a themed costume fast.
3. Sage satin jumpsuit for the mother-of-the-bride
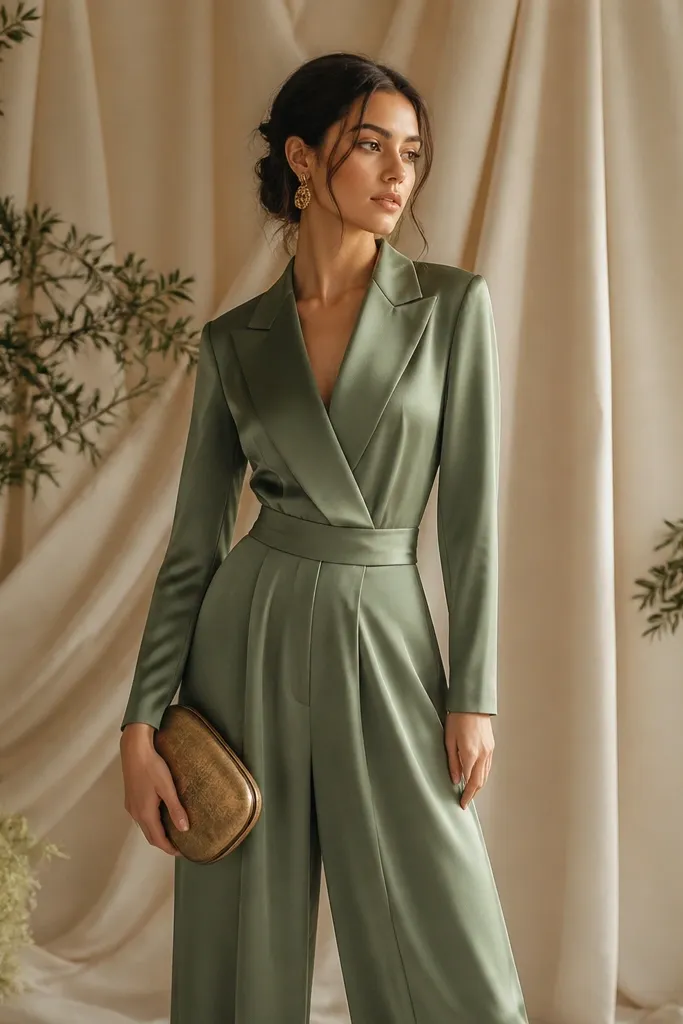
A sage satin jumpsuit looks grown-up and photo-friendly because satin catches light in a smooth way, not glittery. The key is tailoring - a structured blazer-style bodice and a wide-leg cut keep it elegant rather than casual. It flatters many figures by skimming the waist and balancing the hips with the trouser width. If your venue has warm bulbs, sage satin stays flattering and doesn't go flat like matte fabric can.
Start by choosing sage satin with a medium weight so it doesn't cling. Look for a neckline that sits cleanly - a V-neck or modest square works well with statement earrings. Pair with a cream or champagne underlayer cami so the satin doesn't show through. Add an antique brass belt or clutch for color harmony with sage and cream florals. Finish with nude heels and a small shoulder bag so the look reads formal from the back of the room too.
Try thisSteam the fabric before photos; satin shows wrinkles in a way crepe never does.
Common mistakeAvoid thin satin that wrinkles at the waist - it reads cheap and makes the color look dull.
4. Cream chiffon bridesmaids with sage sashes
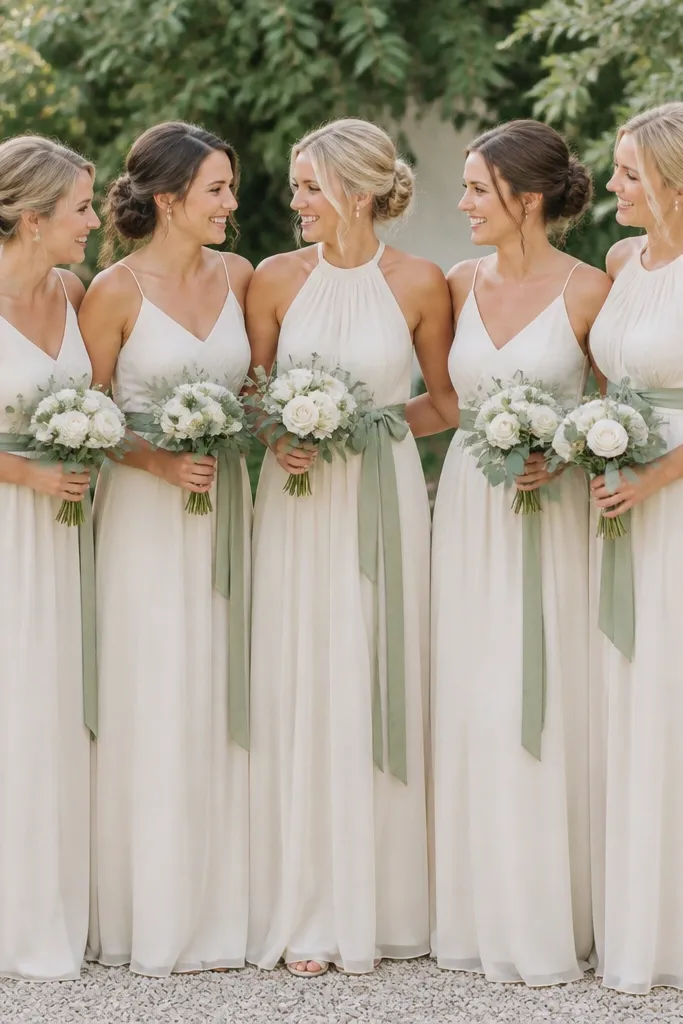
This approach flips the usual formula and it works because chiffon has movement, while sage sashes give structure. Cream chiffon keeps the group looking bright and cohesive, and the sage sash creates a clear color rhythm across the photos. It flatters most builds because chiffon skims and doesn't fight body shape the way clingy fabric does. If you're doing a ceremony with lots of greenery, the sage sash ties the outfits to the setting.
Start with cream chiffon dresses that have a defined waist seam or a built-in waist panel. Then add sage sashes - 2-inch satin or grosgrain works best - tied at the natural waist with a short tail that falls straight. Keep sashes the same knot style across everyone so the group looks uniform. Pair with delicate gold bangles and simple drop earrings. For bouquets, use cream flowers plus eucalyptus and a few sage spray stems, and avoid too many different greens.
Try thisChoose sashes in grosgrain if you want crisp lines in windy photos; chiffon sashes can twist and look messy.
Common mistakeAvoid multiple green shades in the bouquets - it makes the sage sash look accidental.
5. Sage and cream ceremony arch with draped linen
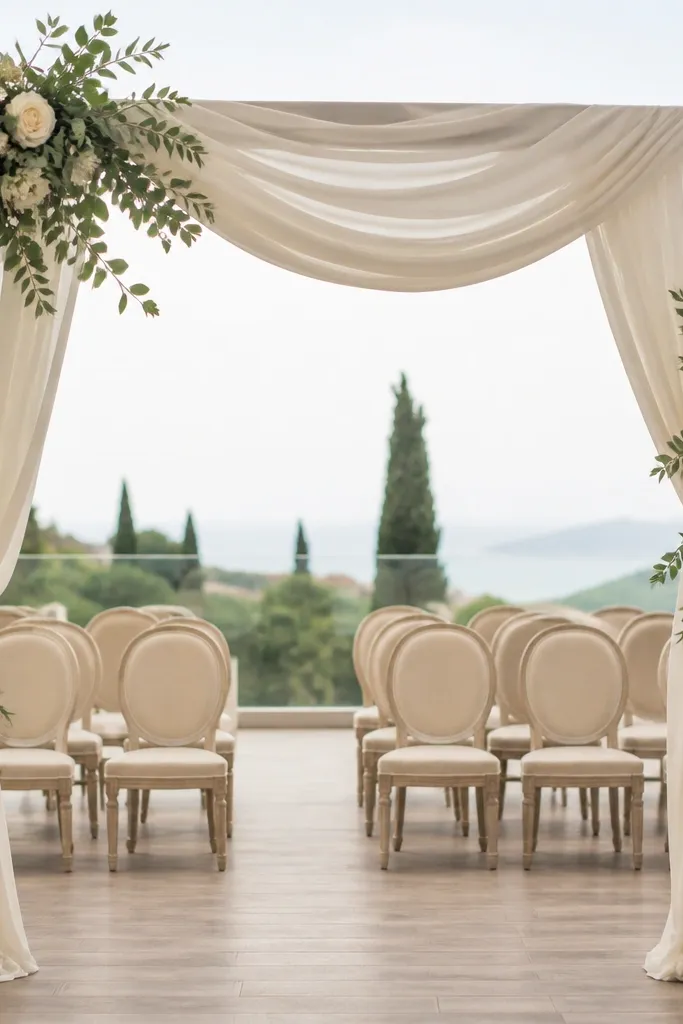
A draped linen arch looks expensive because linen has a soft, slightly textured fall that photos love. Sage green florals on top of cream fabric create depth without harsh contrast. I've built versions of this setup for both backyard and ballroom weddings, and it always photographs well from the front and from the sides. It also helps if you have a plain wall or a boring backdrop - the drape gives you instant design.
Start by selecting an arch frame size that matches your seating - for a standard aisle, aim for a width around 6 feet. Drape cream linen panels so they fall in two vertical sheets on each side, then pin them 10 to 12 inches from the top crossbar. Lay eucalyptus garland first, then tuck sage-toned blooms (think pale sage hydrangea or green-tinted roses) into the garland at three points: left, center, right. Add cream accents sparingly along the bottom edge. Keep all stems in the same direction so the arch looks structured, not messy.
Try thisIf you're renting linen, ask for wrinkle-resistant clips or bring a handheld steamer the day before.
Common mistakeAvoid mixing glossy satin drapes with matte linen florals - the shine mismatch looks off in photos.
6. Antique brass candelabras with sage taper candles
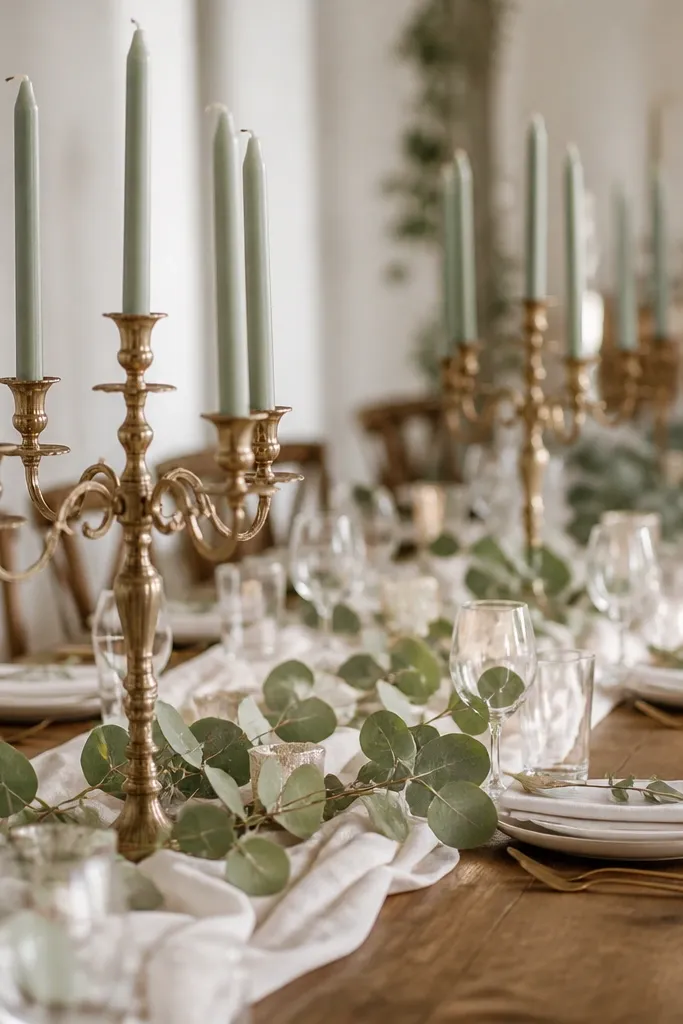
Candles make sage green wedding styling look more romantic, and the antique brass keeps it warm. Sage tapers are subtle - they don't look like holiday decor when you pair them with cream linens and greenery. This setup flatters most venues because it adds height and glow without needing a big floral installation. In evening photos, the candle flame turns sage into a soft muted tone, not a harsh color block.
Start by choosing cream tablecloths or thick cream runners with a matte finish. Place antique brass candelabras at regular intervals - I like every 3 to 4 feet for a long table. Insert sage taper candles and keep the height consistent; aim for candles that reach about 10 to 12 inches above the candelabra base. Add a small eucalyptus sprig and a cream votive or bud vase between candelabras. Finish with brushed brass napkin rings and simple place cards on cream cardstock.
Try thisBring a spare candle set and keep it in a labeled bag for quick swaps if one runs unevenly.
Common mistakeAvoid bright, neon sage candles - under flame they look muddy and cheap.
7. Sage green and cream macaron-style place cards
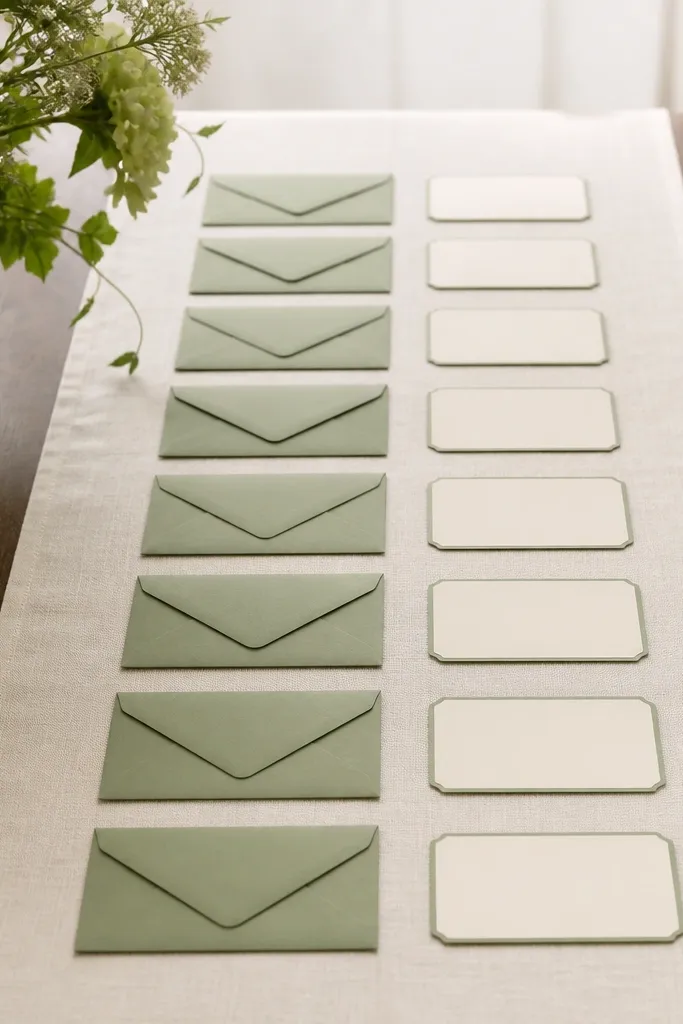
Paper details are the quickest way to make an affordable sage green and cream wedding look intentional. Rounded cards with a sage border echo the soft palette without adding heavy decor. I've used this style for receptions where the table centerpieces were modest - the place cards made the table feel designed. It also works for both formal and casual weddings because the cards don't require fancy printing techniques.
Start by printing cream cardstock cards with a thin sage border, about 1/8 inch thick. Size them around 4 x 2.5 inches so they look neat next to charger plates. Place each card in a small matching sage envelope or fold it into a tent-style holder. Use a cream table runner and keep the place card placement consistent - same distance from the plate edge for every seat. Pair with sage ink for names and a simple font that stays readable at a glance.
Try thisDo a test print at full size and check it under your venue lighting; some inks look darker under warm bulbs.
Common mistakeAvoid thick, high-contrast black borders - they pull the look away from soft sage and cream.
8. Sage green bridesmaid bouquets with cream garden roses
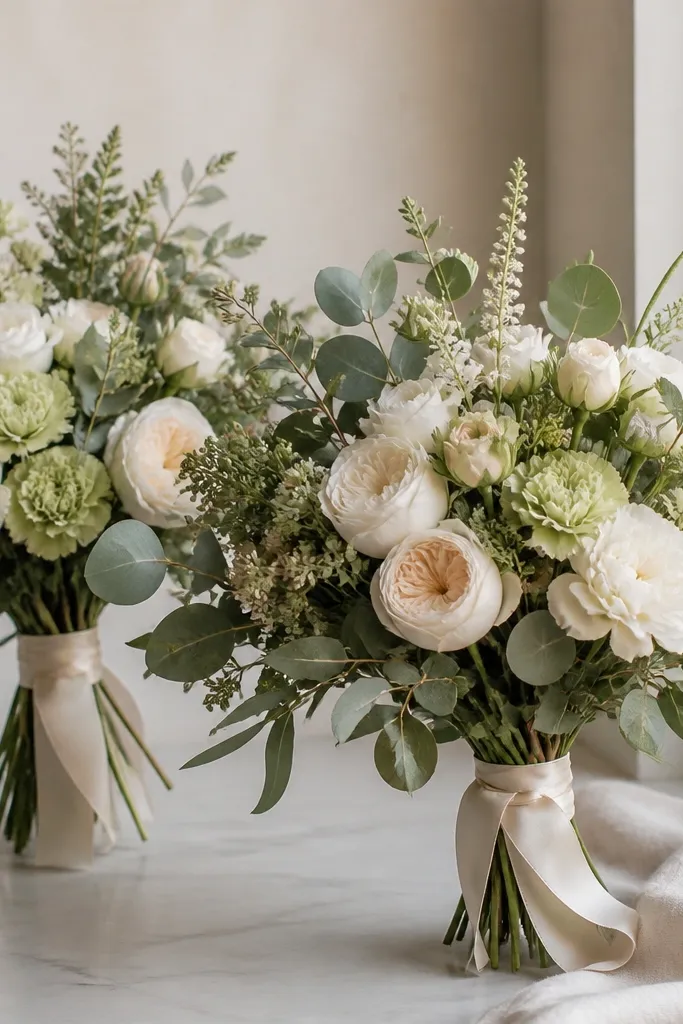
A bouquet is where the palette becomes believable. Cream garden roses give softness and volume, while sage green elements add that calm, muted color. This combo flatters every bridesmaid because it frames the face without overpowering makeup. If your bridesmaids have different skin tones, cream roses keep everyone looking cohesive under flash and natural light.
Start with a base of eucalyptus and filler greens so you get a consistent "green background." Add cream roses or peonies first for volume, then tuck in sage-toned spray flowers for color spots. Wrap the stems in cream paper and finish with a satin ribbon in sage or a slightly deeper muted green. Tie ribbon at the wrist-length so it doesn't hang too low in photos. Keep bouquet size consistent: aim for about 9 to 11 inches wide for a structured hand-tied look.
Try thisAsk your florist for stems in the same temperature of green - pale gray-green reads better with cream than bright yellow-green.
Common mistakeAvoid adding too many white flowers with different undertones; use one main white family.
9. Cream table runner with sage napkins and soft floral rings
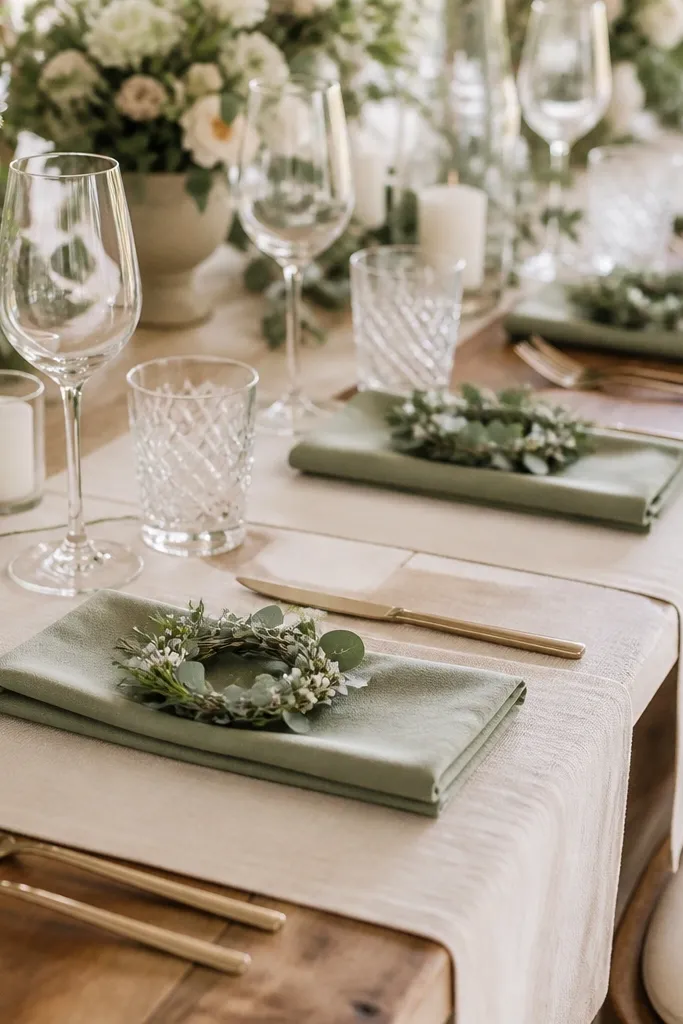
This is the table setup I reach for when couples want a clean look that still feels lush. Sage napkins create a clear color block, and the cream runner keeps the table bright. The floral rings add texture right at the place setting, which reads well in close-up guest photos. It flatters everyone because it doesn't fight with plate colors, and it works whether your venue is modern or rustic.
Start by laying a cream table runner centered on each table, about 16 to 20 inches wide. Fold sage napkins into a simple rectangle fold, then place a small eucalyptus-and-cream floral ring around the napkin. Keep rings small - about 3 inches across - so they don't crowd the plates. Use cream mini blooms like baby's breath alternatives or small spray roses, and keep greenery consistent. Add brushed brass flatware and simple glassware so the sage stays the only strong color.
Try thisMake napkin rings from eucalyptus wired together the night before; it holds shape better than hot-glued bases.
Common mistakeAvoid bulky centerpieces at every seat - the table becomes crowded and the palette gets lost.
10. Sage green suit for the groom with cream pocket square
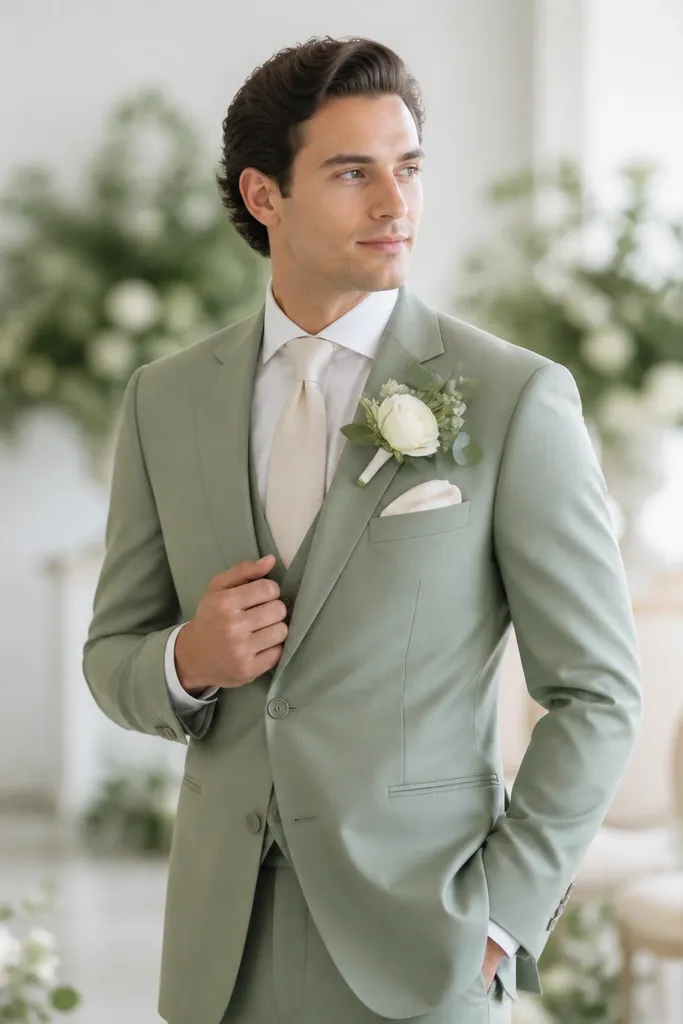
A sage green suit looks modern without feeling trendy, and it photographs with soft contrast against cream florals. The cream pocket square gives you a bright focal point near the face, which makes the groom look sharper. I've seen sage suits flatter a range of skin tones because the green is muted, not saturated. If you're doing an outdoor ceremony, sage also blends nicely with leaves without turning the groom into a "tree theme."
Start by choosing a sage suit in a medium shade - if it looks too gray in daylight, it will look flat in photos. Add a white or ivory dress shirt, but choose a warm ivory if your skin runs pink. For the pocket square, use cream linen with slight texture and fold it into a straight rectangle fold. Add a tie in cream knit or a light champagne tone; keep it matte. Finish with a boutonniere of eucalyptus and a cream rose, plus a small sprig of pale sage-green filler.
Try thisPress the lapels right before the ceremony; sage fabric shows shine and creases more than you'd expect.
Common mistakeAvoid a glossy white shirt - it can create harsh contrast next to sage and cream.
11. Cream and sage bridal party mix - sage dresses, cream accessories
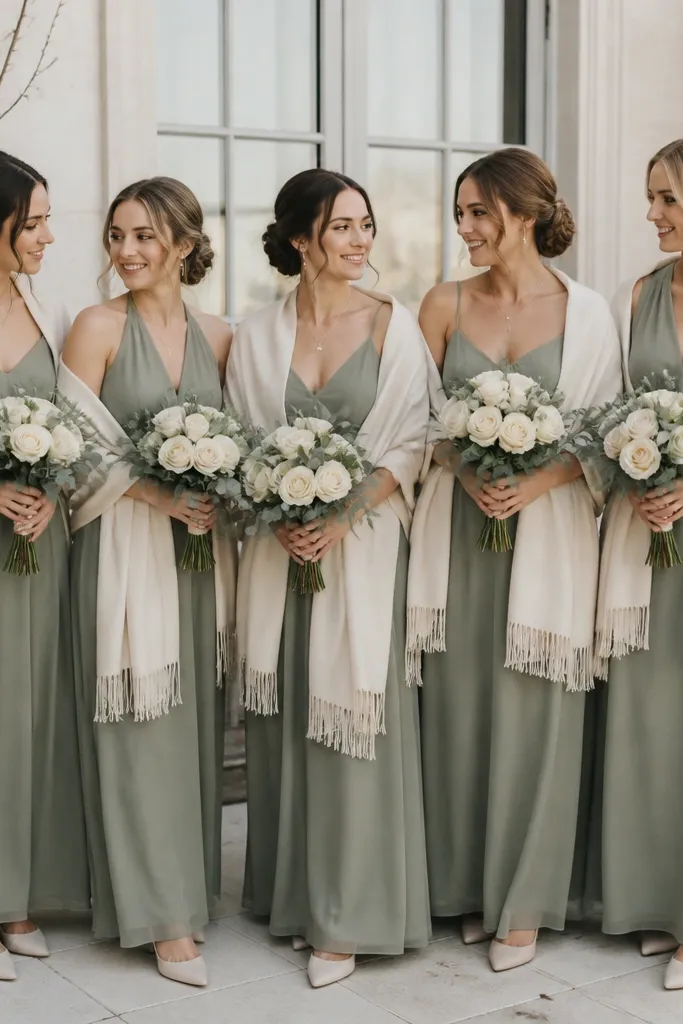
This is how you keep an affordable sage green and cream wedding looking cohesive when you have different dress styles. Let the sage be the consistent color on the body, then repeat cream through accessories - shoes, shawls, and hair details. It's flattering because it gives visual lightness around the face and hands, which helps in group photos. You also get flexibility if your bridesmaids buy different silhouettes but can agree on color and accessories.
Start by picking sage dresses (same shade) and let each bridesmaid choose the style. Then require cream accessories: choose one cream shoe option like nude-champagne with a low heel or ballet flat. Add cream wrap shawls if the venue is chilly, and keep the shawl fabric matte like chiffon or light crepe. For hair, use cream pins or a small cream ribbon in the same style on everyone. Build bouquets with cream roses and eucalyptus so the flowers match the accessories, not just the dresses.
Try thisCoordinate one photo reference: same pose, same lighting time, same bouquet size - it prevents shade drift across photos.
Common mistakeAvoid random shoe colors like true white or silver; they break the cream warmth.
12. Sage green and cream dessert table with textured buttercream accents
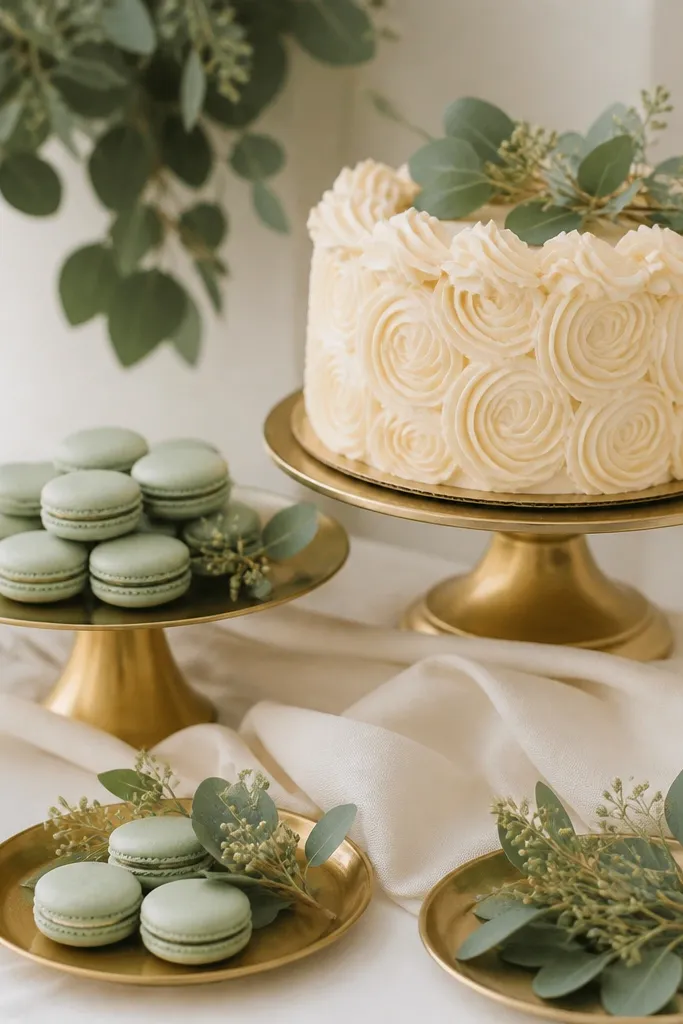
Dessert tables are where guests linger, so the palette needs to look intentional up close. Cream buttercream textures read soft and romantic, and sage sweets add color without screaming for attention. I've styled dessert setups in both hotels and barns - cream linens and textured icing always look good under overhead lights. It also helps that macarons and small pastries naturally create a gradient effect from sage to cream.
Start with a cream linen tablecloth and add a sage runner only if you keep the rest mostly cream. Place sage macarons or sage-tinted cookies in small clusters of 6 to 8 at a time so the color repeats. Put the cake in the center and keep the cake tones cream with sage accents like a thin sage ribbon around the base or sage flowers on top. Add eucalyptus sprigs between platters on gold or brass trays. Label desserts with cream cards and sage ink for consistency.
Try thisUse one sage shade across all sweets; mix-and-match greens look like a mistake on dessert photos.
Common mistakeAvoid bright green icing - it looks artificial next to cream buttercream.
13. Sage green bridesmaid jumpsuits with cream lace camis
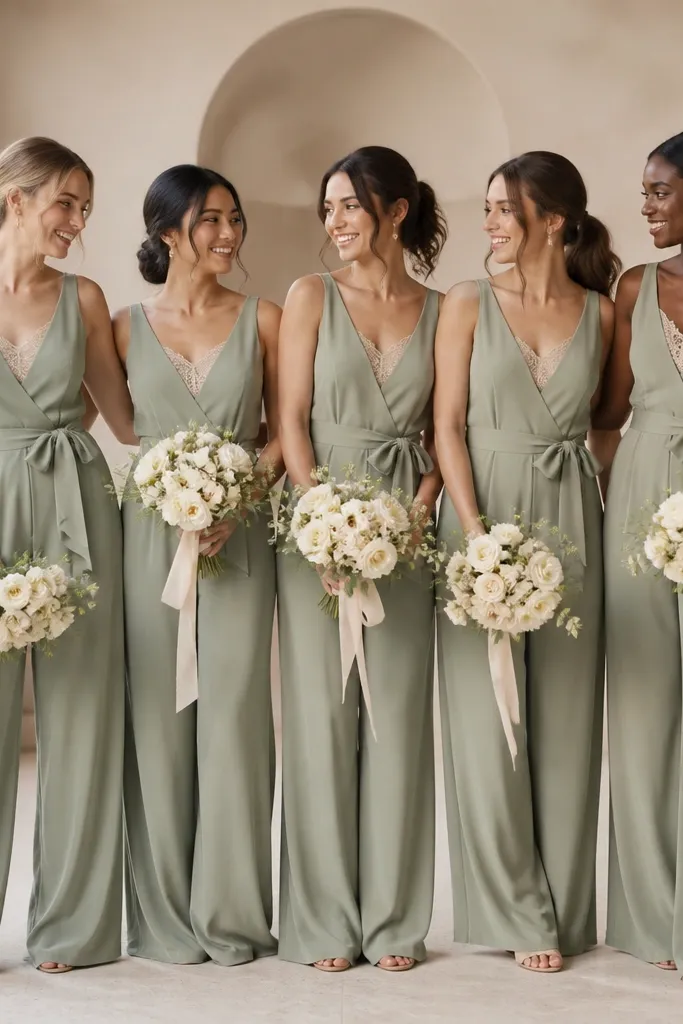
Jumpsuits give a modern silhouette, and the cream lace camis add romance without needing a full dress. Sage green wide-leg pants make legs look longer and balance out curvier hips, especially with a defined waist seam. The cream lace adds dimension near the chest and shoulders, which matters for both candid photos and ceremony portraits. If you're planning an affordable wedding, this also lets you keep comfort high for a long day.
Start by choosing sage jumpsuits with a waist seam and wide legs so the outfit looks tailored. Add a cream lace camisole underneath with straps that match the neckline - avoid bulky lace that crowds the fabric. Tie a sage bow at the waist using grosgrain ribbon if the jumpsuit is plain. Pair with cream or champagne sandals with a low block heel. Bouquets should stay consistent: cream roses plus eucalyptus and a few sage-toned filler stems.
Try thisDo a quick movement test: sit, walk, and lift your arms in the jumpsuit before the wedding day - wide-leg fabric should stay smooth, not twist.
Common mistakeAvoid jumpsuits with shiny fabric - they reflect venue lights and can look uneven in photos.
14. Cream and sage floral table centerpieces in low glass
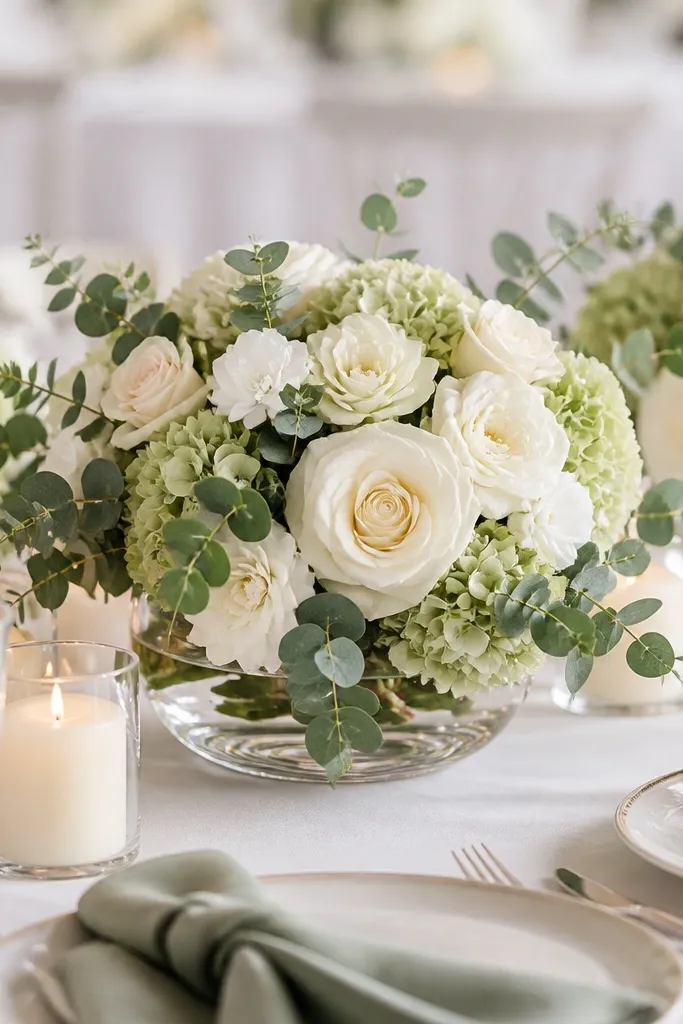
Low glass centerpieces are the most practical way to make an affordable sage green and cream wedding look styled without blocking guest faces. The clear glass lets you see the linens, which keeps the palette airy and bright. Cream roses give height and softness, while sage hydrangea or green-tinted blooms add the signature color. I've used this exact structure for seated dinners where people complained about centerpieces being too tall.
Start with low glass bowls or cylinder vases about 8 to 10 inches tall. Fill the base with water-foam or floral frogs rated for submerged arrangements. Add eucalyptus first for texture, then place cream roses in a loose cluster, not in a tight ball. Tuck sage hydrangea or sage spray flowers around the sides so the color wraps the bowl. Keep the top layer flat-ish so guests can talk across the table, then add one small candle nearby in cream glass.
Try thisMeasure your table spacing: leave at least 24 inches between centerpiece edges on round tables so people don't bump them.
Common mistakeAvoid tall single-stem centerpieces - they force guests to look down and the palette stops feeling cohesive.
15. Sage green and cream invitation suite with wax seal look
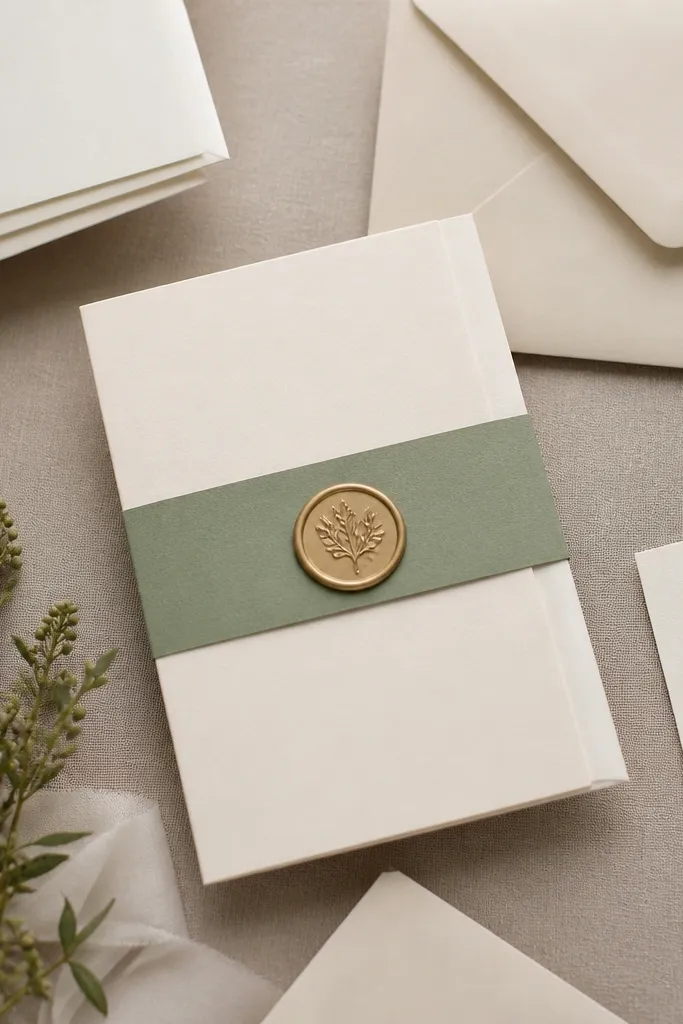
Paper sets the tone before anyone ever sees your flowers, and this combination reads classy without being expensive. Cream cardstock feels warm and premium, while a sage band adds color that matches your wedding without overpowering the text. The wax-seal-style sticker gives a raised detail in photos that looks fancy even when the printing is simple. I've used this when couples wanted a calm aesthetic but didn't want formal black typography.
Start with cream cardstock and choose a sage green band around the invite, about 1/2 inch tall. Use antique gold ink or a gold foil sticker for the wax-seal look - keep it centered so it photographs cleanly. Add matching cream envelopes and print return addresses in sage or deep olive ink. If you're assembling yourself, use a strong adhesive so the band doesn't peel at corners. Include a small RSVP card in cream with sage border lines to keep the set consistent.
Try thisShoot a test photo of the invite against a cream wall in daylight; adjust sage shade if it looks too dark on camera.
Common mistakeAvoid busy patterns behind the text - they make affordable printing look messy.
16. Sage green and cream bridal bouquet ribbon in layered widths
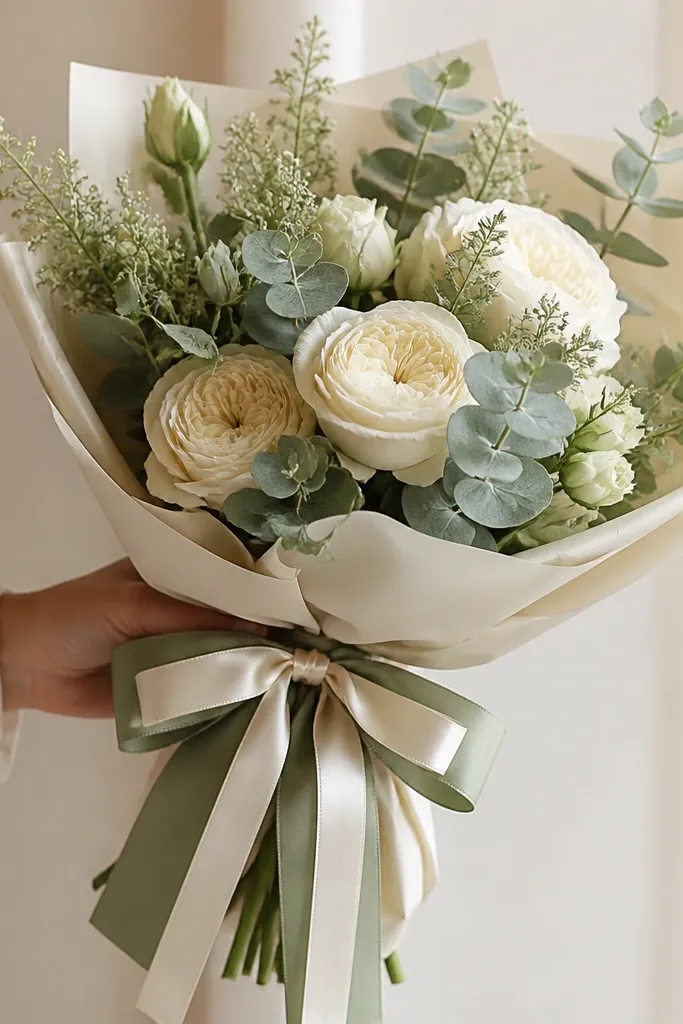
Ribbon layering is one of those small tricks that makes a bouquet look "finished" instead of last-minute. The wide sage ribbon gives the color identity, and the narrow cream ribbon keeps it soft and ties back to the wedding palette. I like this because it reads well from a distance - the wide ribbon catches light - and from up close - the narrow ribbon shows texture. It flatters photos because it frames the bouquet without blocking flowers.
Start by wrapping stems in cream paper and trimming it so it sits about 2 to 3 inches below the ribbon knot. Then add a wide sage ribbon (about 2.5 inches) and tie it in a tight bow at the center. Layer a narrower cream satin ribbon (about 1 inch) on top, wrapping once around the knot so it looks intentional. Let ribbon tails hang to mid-forearm length for most brides. For flowers, keep the palette simple: cream roses or peonies plus eucalyptus and a few sage spray stems.
Try thisCut the ribbon ends at a slight angle and seal with a lighter carefully so frays don't show in close-up photos.
Common mistakeAvoid three different ribbon colors; two widths is enough for a clean look.
17. Sage green bridesmaid hair accessories with cream pearls
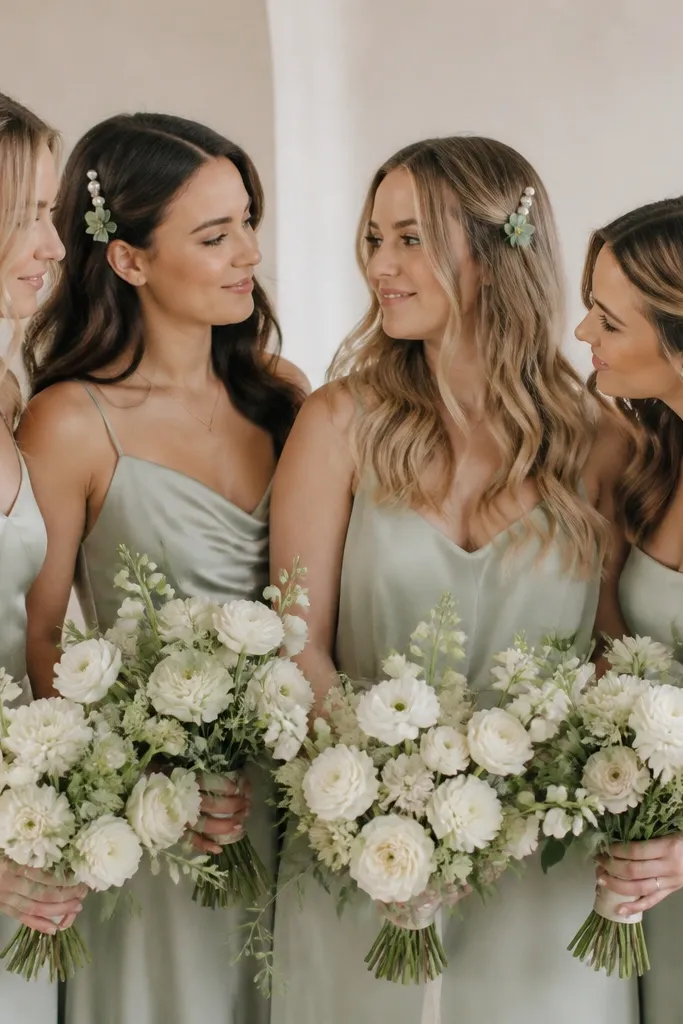
Hair accessories are budget-friendly and they read "wedding" in a way that plain hair can't. Sage green clips or combs tie directly into the palette, and cream pearls add a classic touch that works with both casual and formal dresses. I've used this trick when bridesmaids had different dress necklines; the hair detail creates visual unity. It also flatters most faces because the accessory sits near the cheek and eye line without covering makeup.
Start with a consistent hairstyle base, like loose waves or a low twist, across the bridesmaids. Then place a sage green clip slightly behind the ear so it shows in side photos. Add cream pearl pins in a small cluster, usually two pins per side, so they don't scatter. Keep the clips matte, not glittery, so they match sage green's muted tone. Finish with light makeup and nude or champagne lip shades so the cream pearls look crisp.
Try thisBring bobby pins in the same color as everyone's hair and test hold - pearls can slide if the base pins aren't strong.
Common mistakeAvoid big rhinestone headbands; they make sage green look less soft.
18. Sage green and cream welcome sign with eucalyptus corners
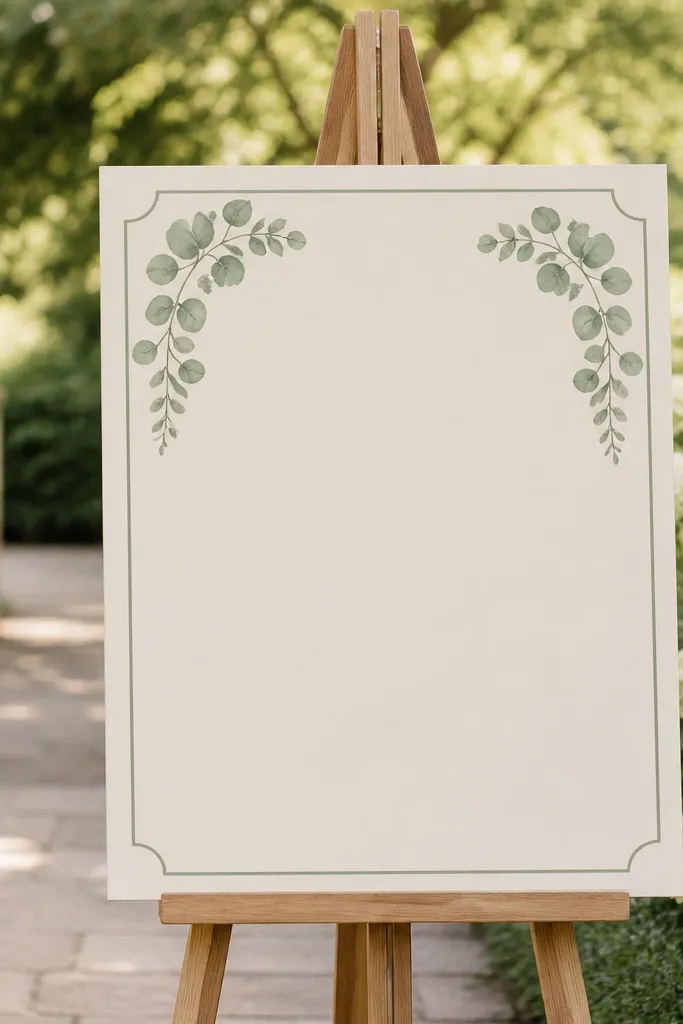
A welcome sign is the first design moment guests see, so it needs to match the palette without fighting it. Cream paper with sage lettering keeps the vibe calm, and eucalyptus corners make it feel fresh even if florals are limited elsewhere. I like this setup for affordable weddings because the sign is a one-time purchase and it photographs cleanly. It also gives you a clear color reference for the rest of the day.
Start with a cream board, about 18 x 24 inches, and choose sage lettering that isn't too dark. Add a thin sage border line around the edges for structure. Tape or wire eucalyptus sprigs into the top corners only, so the sign stays readable. If you're printing, use a matte finish so it doesn't glare under sunlight. Place the sign on an easel 3 to 4 feet from the path so it's visible without blocking traffic.
Try thisUse a level and measure from the ground - crooked signs look worse than simple signs in photos.
Common mistakeAvoid heavy full-garland signs; they look crowded and can hide the text.
19. Sage green and cream photobooth backdrop with linen panels
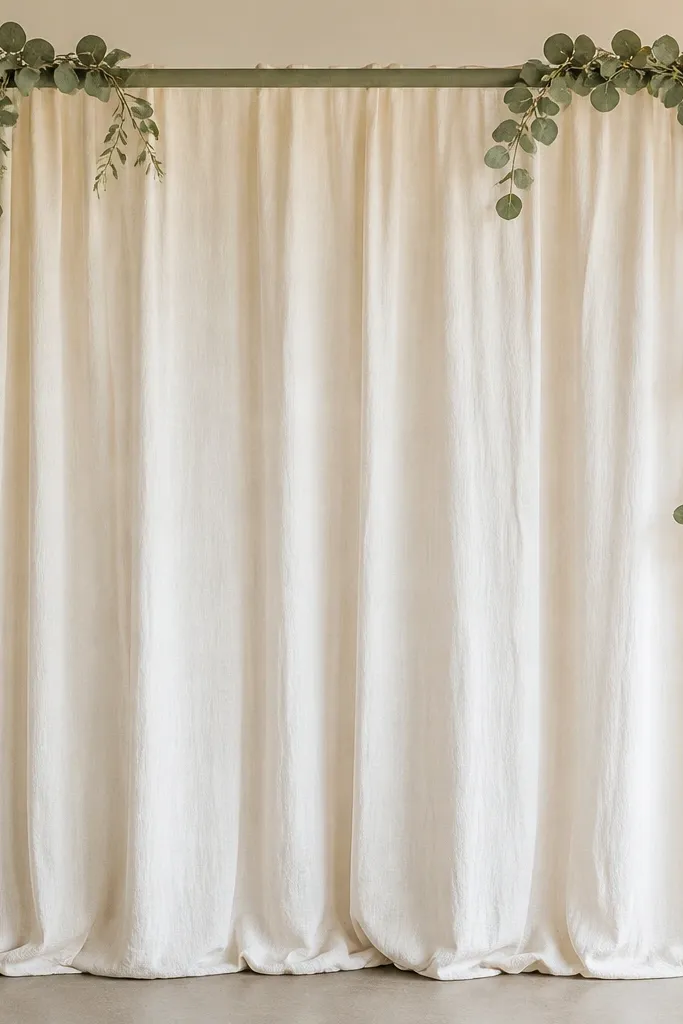
If you want your wedding photos to look styled even when guests are just goofing around, a linen backdrop is the answer. Cream linen gives a soft, flattering background that doesn't clash with outfits, and sage ribbon adds color without turning into a theme. I've set up versions of this for backyard weddings where there was no good wall to use, and it instantly upgrades the look. The best part is that it works for both men and women in photos because the background is neutral and warm.
Start by hanging two or three cream linen panels behind the photobooth spot, each panel about 4 feet wide. Add sage ribbon across the top in a straight line, then let two short tails hang down 8 to 10 inches. Tuck eucalyptus garland into the top corners so it frames the center. Keep the center area clear so people stand in the middle and their faces stay the focus. Add one small cream prop table with a sage-and-cream sign so the palette stays consistent.
Try thisUse matte black tape to secure linen edges discreetly; glossy tape reflects flash and shows up in pictures.
Common mistakeAvoid shiny satin backdrops; they make everyone's skin look uneven under flash.
20. Sage Green and Cream Wedding Guestbook with Pressed Herb Pages
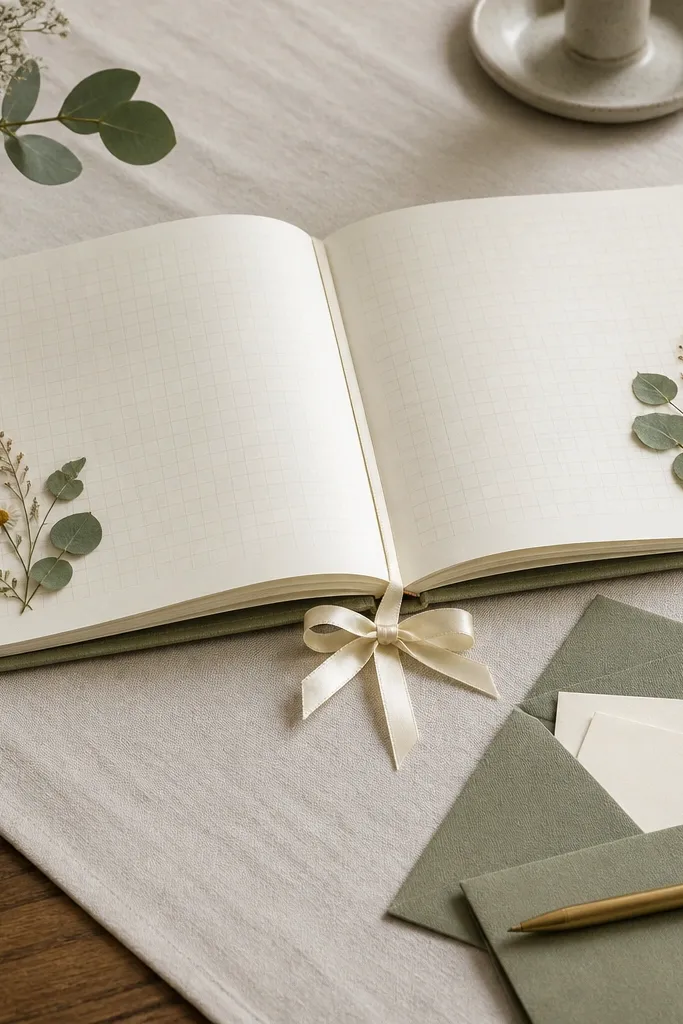
This guestbook setup looks soft and intentional in photos because it mixes a matte fabric base with real botanical texture. The pressed herb pages make people slow down and write, instead of signing quickly and moving on. I've done this for a small wedding where the guestbook ended up being the most handled table item during cocktail hour. It also fits the affordable sage green and cream wedding vibe because you can buy plain materials and do the decor with things you already have or can gather locally.
Buy a sage green linen or linen-look photo album with a lay-flat spine so pages don't fight the writing. Choose cream paper inserts that are thick enough not to bleed - 120-160 gsm works well. Press eucalyptus or similar greenery for 5-10 days under books, then add chamomile or small dried flowers in the corners using acid-free glue dots. Set the album open and place small cream cards nearby so guests can write longer notes without smearing ink on the pressed pieces. Finish with a cream satin ribbon bookmark and a brass pen so the whole table feels coordinated with the sage and cream palette.
Try thisUse a pencil for the guestbook grid and let guests trace over with a darker pen if they want - the pressed herbs don't smear as easily when ink is applied lightly.
Common mistakeSkip glossy photo paper - ink smears on it when someone leans a forearm on the page.