
1. Half-arch greenery with a fabric runner aisle
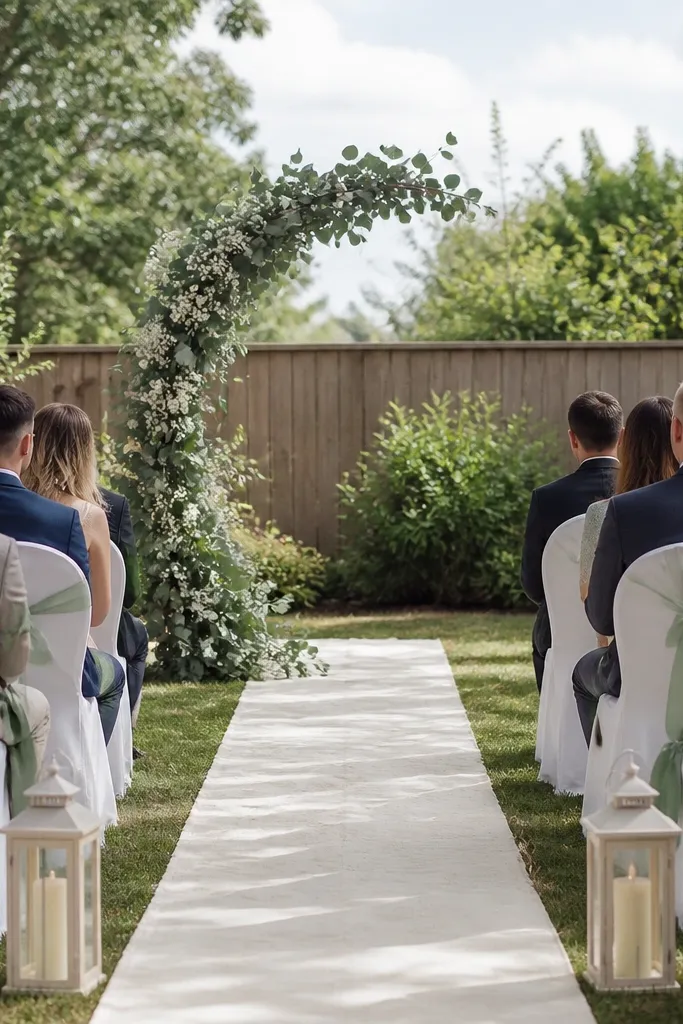
This layout works because it creates a ceremony focal point without eating the entire yard. The half-arch gives you height and a photo "frame," while the fabric runner gives a clean line from the walkway to the couple. I've used eucalyptus because it reads green even in harsh afternoon sun, and white spray flowers keep the look light instead of bulky. The runner is especially flattering for everyone because it keeps the aisle visually straight, which helps people line up their feet and makes the photos look tidy. If your yard has patchy grass, the runner also hides it fast.
Start by building the arch on the ceremony end only, leaving one side open for guests to walk through. Use 2 to 3 large floor planters or weighted bases so the arch doesn't wobble when wind hits. Lay a 3-foot-wide ivory runner down the center aisle, then trim it so it stops 2 feet before the couple's feet. Finish by tying sage ribbon to chair backs in a single knot - don't over-wrap, or the fabric looks messy in close shots. Shoes for the couple: nude or white flats for comfort on grass, and keep the hem of dresses off the runner so it doesn't drag.
Try thisHang a single warm-white fairy light strand from the arch and test it at dusk - it makes the whole scene feel "done" even if flowers are minimal.
Common mistakeAvoid covering the entire yard with greenery - it makes small spaces feel tighter and harder to move through.
2. Chalkboard welcome board on a ladder with framed seating
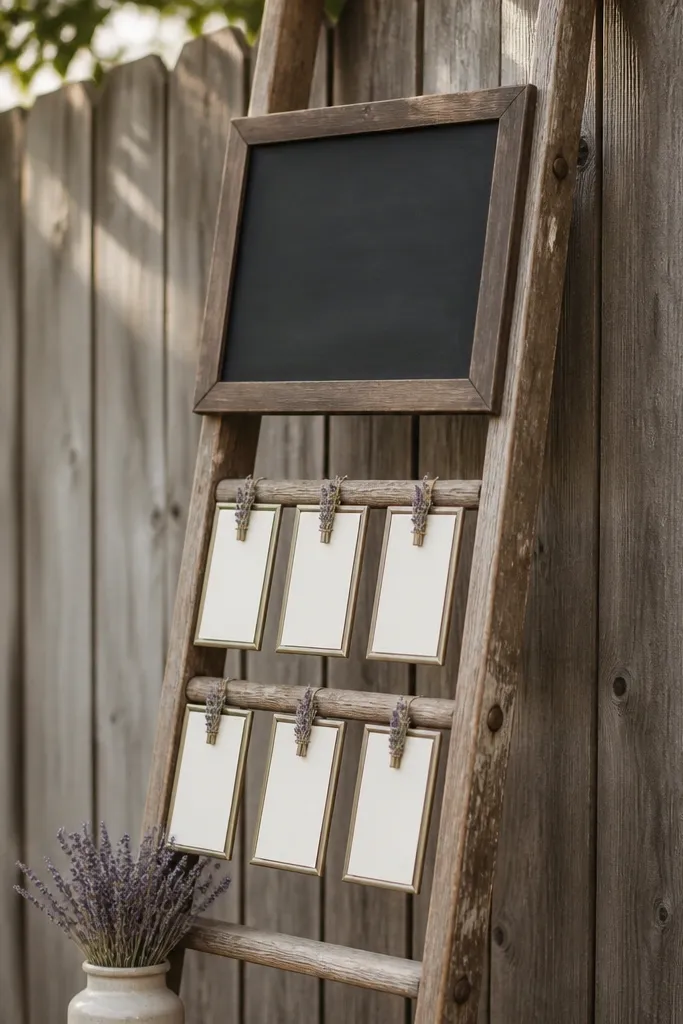
In small spaces, signage needs to be readable fast and not sprawl across tables. A ladder gives you vertical height, which feels airy in a yard where flat surfaces are already crowded. Chalkboard looks soft in natural light, and the frames keep your seating info neat without needing a big printed board. I like this for couples who want a slightly rustic vibe without going full barn. It's also flattering for photos because the sign sits at human eye level, so it doesn't get lost behind flowers or balloons.
Mount the ladder so it leans slightly back toward your main path, not toward the ceremony area. Use one chalkboard sign for welcome and two short lines for "ceremony starts at..." and "please park here" - keep it simple. Add framed seating cards only if you're actually assigning seats; otherwise, use the frames for a welcome quote and a "no gifts" note. Place the ladder near the first turn of your walking route, so people see it before they enter the seating area. If you're doing a wedding arch, keep signage on the opposite side so it doesn't compete in the background.
Try thisWrite the chalk text in one consistent width line style, then add tiny doodles only at the corners so the board looks intentional up close.
Common mistakeAvoid glossy printed signage taped directly to fences - it reflects sunlight and looks cheap in photos.
3. String light canopy across two fences
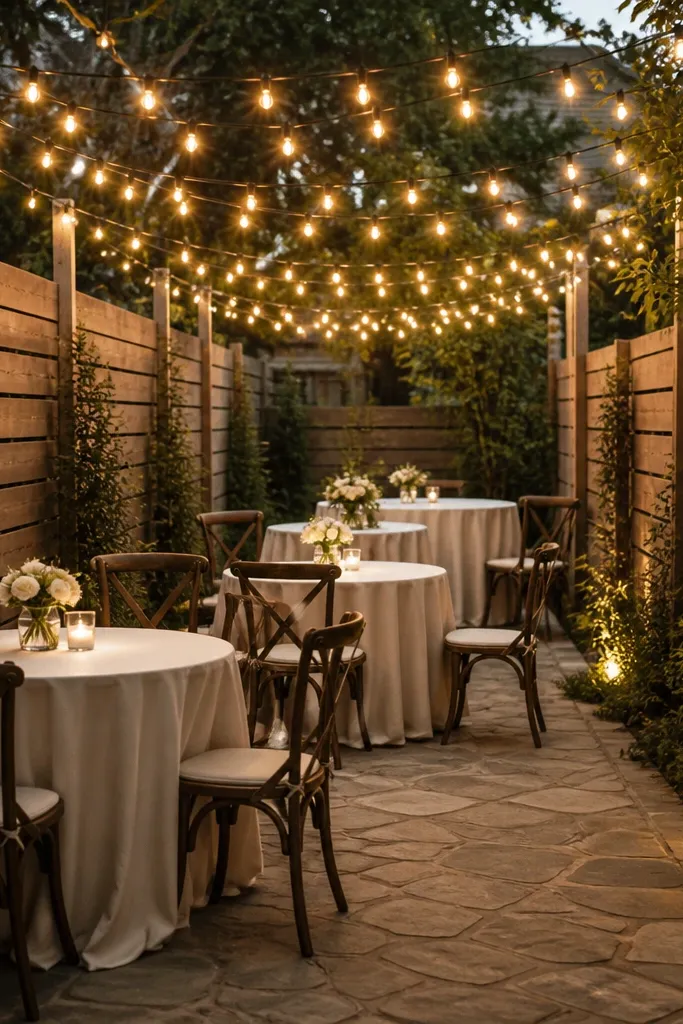
This is the fastest way I've found to make a small backyard feel bigger after sunset. By pulling lights across the yard at head height, you create a glowing ceiling effect that fills the negative space. I've used warm-white micro bulbs because they look flattering on skin and don't turn everything blue like some colder lights. The canopy also helps photos because it adds consistent background light behind the couple. If your yard is narrow, spanning between two fences avoids the problem of lights sitting too low and blocking heads.
Measure the distance between your fences first, then set two anchor points about 7 to 8 feet high so the lights clear chair backs. Use outdoor-rated extension cords and cable clips attached to the fence posts, not loose tape. Drape the string lights in a gentle curve, then secure the slack so it doesn't sag over people. Under the canopy, keep table decor low - bud vases at 6 inches and candle jars no taller than 4 inches. For shoes and hems, choose low heels or flats because you'll be walking through cords and chairs at dusk.
Try thisTurn the lights on 30 minutes before guests arrive so photos capture the warm glow, not the "we just started setting up" stage.
Common mistakeAvoid using bright LED strip lights overhead - they create harsh hotspots and make skin look flat.
4. One long table with mixed heights and a single runner
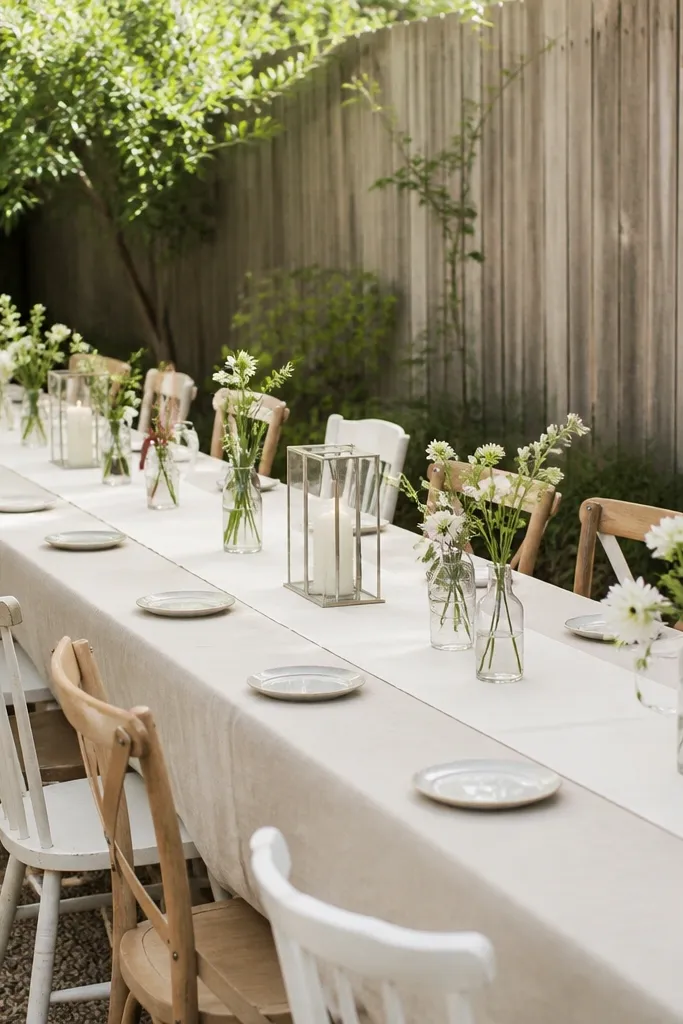
A single long table makes small spaces feel organized because it gives guests one clear direction. Mixed heights keep the table from looking like a flat cafeteria line, but you still keep the footprint narrow. I like a wide cream runner because it hides minor spills and looks polished without needing piles of florals. Use bud vases and one tall candle lantern so the eye travels upward in photos. This setup is flattering for couples because it makes the sweetheart moment feel intentional even in a tight yard.
Start by placing the table parallel to the fence line, leaving at least 3 feet for walking between chairs and the fence. Add the cream runner centered and straight, then tuck it 1 inch over each edge. Build the centerpiece in layers: low bud vases every 4 to 5 feet, then one tall lantern at the middle and one near the head table. Keep napkins in one color, like soft blush, and repeat it on every place setting. Finish with place cards on a narrow rail or a small tray so you don't need extra stands across the table.
Try thisUse candles in glass jars with the same color tint (clear or amber) so everything matches in daylight and at night.
Common mistakeAvoid giant centerpieces in a long narrow table - they force guests to lean and ruin conversation.
5. Sweetheart table on a raised blanket platform
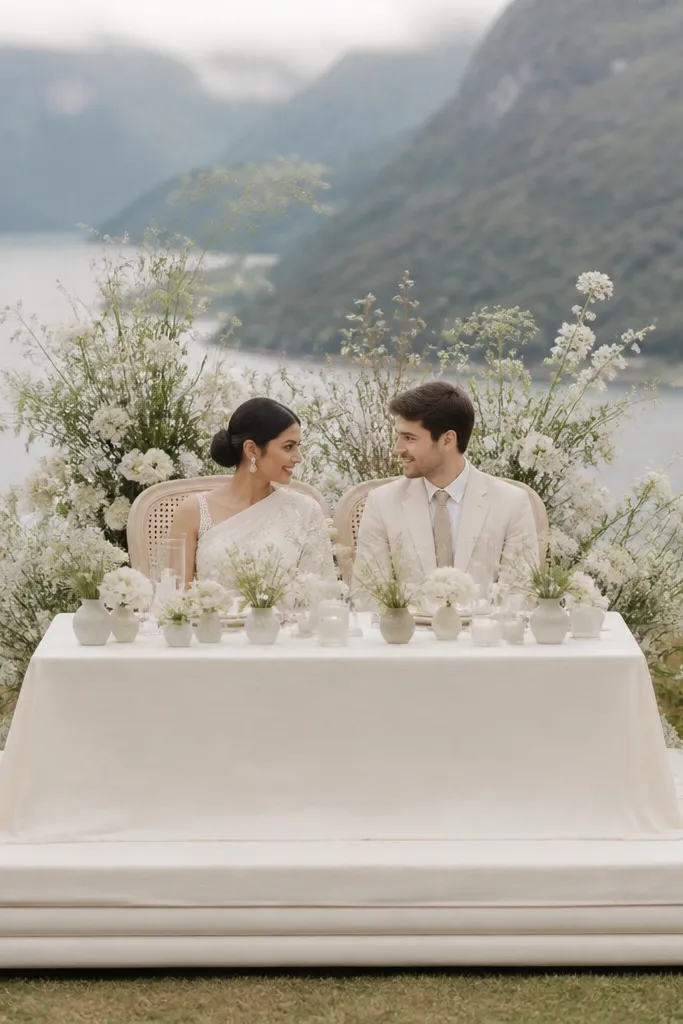
A raised platform gives you height without a full stage, and height matters in small spaces. When the couple sits higher by even 8 to 12 inches, guests can see them from farther away. It also makes the photos look more "event" and less like a backyard meal. I use ivory fabric over blankets because it drapes softly and hides uneven ground. This is flattering for people of all heights because the couple stays centered in the frame and doesn't get blocked by chairs.
Start by building a rectangle platform roughly 6 feet long and 2.5 feet wide so chairs fit without crowding. Cover stacked blankets with an ivory sheet, then pull it tight at corners to avoid lumps. Place a simple tablecloth on top and keep it fitted so it doesn't billow in wind. Add one focal floral cluster behind the chairs - about 24 inches wide - and keep the rest minimal. Choose table linens in cream or champagne, then match the runner to the aisle fabric if you're doing one.
Try thisAnchor the platform with sandbags or weights under the corners if your yard slopes - a little shift shows up in photos.
Common mistakeAvoid placing the sweetheart table directly on uneven grass - chairs wobble and the whole look turns unstable.
6. Ceremony seating in a horseshoe with a garden edge
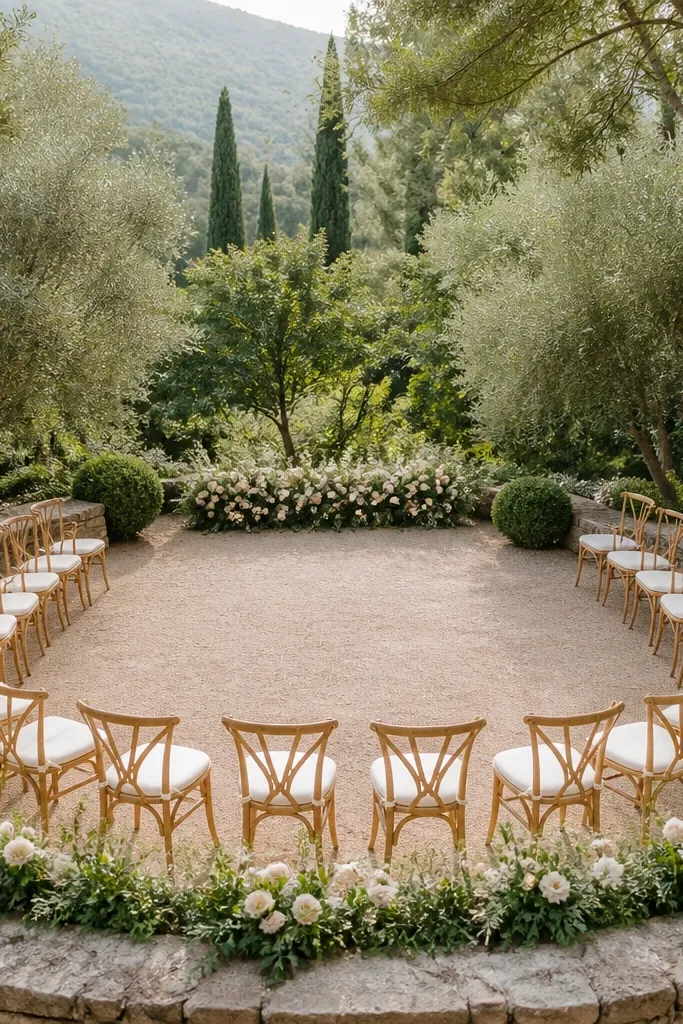
A horseshoe seating plan fits small yards because it wraps people closer to the couple without needing a deep space. It also reduces wasted chair rows that you'd need in a straight layout. I like it with a low garden edge because it creates a natural boundary and keeps the aisle from looking random. The floral line at the front stays low, so chairs don't block sightlines. This layout looks good on camera because the couple is always framed by the arc of chairs.
Mark the ceremony point first, then lay out chairs in a semi-oval so the opening faces the couple. Keep the inner arc radius tight - around 6 to 7 feet from the center - so the yard feels intimate. Place the ceremony focal decor low: a floral line or lantern cluster 1 foot from where the couple stands. Leave one clear walkway gap on one side for easy movement to the bar and restrooms. Style chair backs with a single ribbon color, like soft sage, to keep it cohesive.
Try thisUse a handheld aisle runner only on the center line so the horseshoe doesn't feel carpeted and heavy.
Common mistakeAvoid chair placement that forces guests to turn their bodies sideways - it reads awkward in candid photos.
7. Bouquet-forward color palette using dusty rose and sage
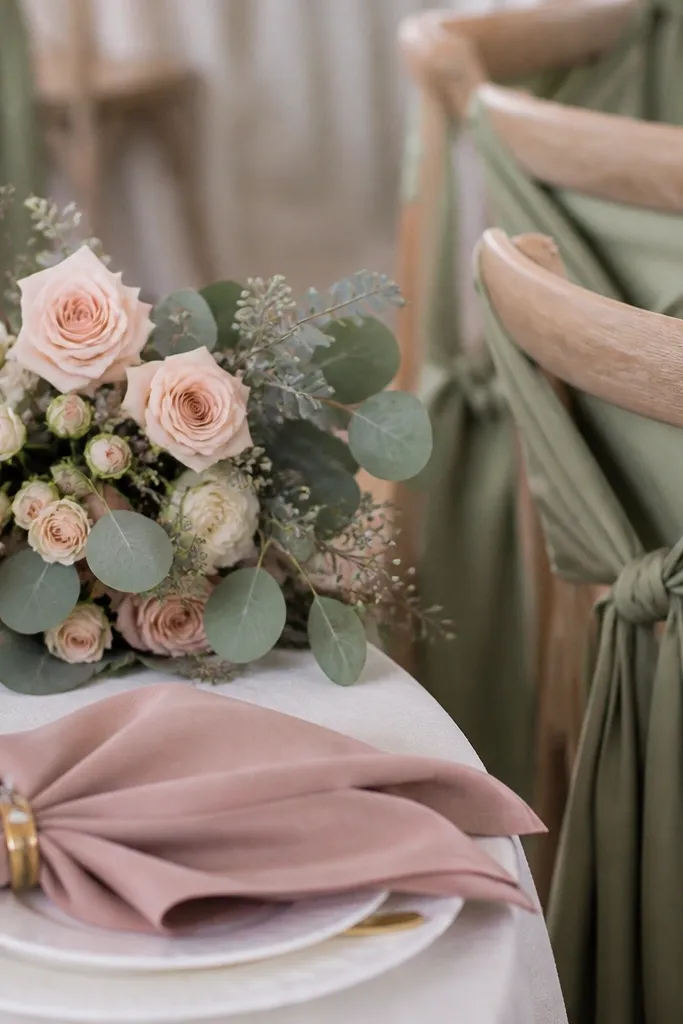
Small spaces punish busy palettes, so I keep color controlled and let the bouquet do the heavy lifting. Dusty rose and sage look good in daylight and also photograph well because they aren't neon. I use eucalyptus for green structure since it looks full without needing a ton of stems. The key is to repeat the sage in at least one more place - chair ribbon or table runner - so the yard feels tied together. This palette looks especially flattering on lighter skin tones and also complements deeper complexions because dusty rose doesn't wash anyone out.
Choose one base neutral for linens, like cream or champagne. Add dusty rose only in napkins, table flowers, and maybe one signage accent. Use sage as the secondary green in chair ribbon and small bud vases. Build bouquets with one main bloom type (spray roses or peonies if you can get them) and 1 to 2 filler textures (baby's breath or small statice). Keep the bouquet size proportional to the yard - handheld bouquet should stay around 10 to 12 inches wide.
Try thisTest your color pairings in natural shade by holding the napkin against your bouquet - if the rose looks muddy, switch to a slightly cooler blush.
Common mistakeAvoid mixing dusty rose with bright fuchsia - it clashes in backyard light and looks off in photos.
8. Floating bud vases on the table edge
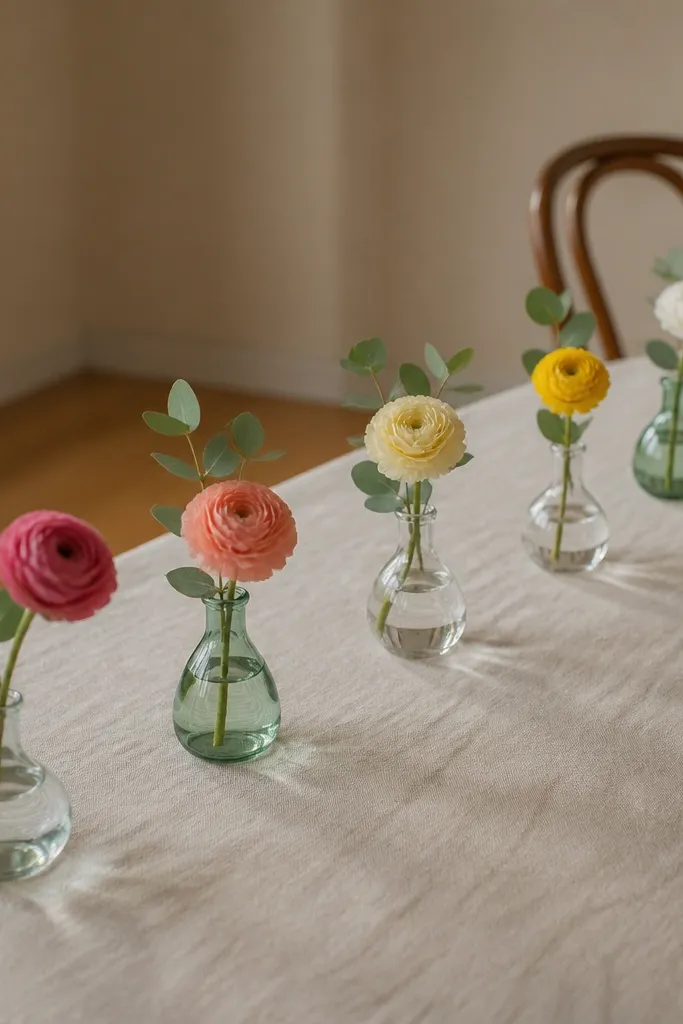
This is a small-space centerpiece trick I learned the hard way after a centerpiece took over the table and guests kept bumping it. Bud vases along the edge keep the middle open for plates, conversation, and hands. The staggered heights make the table feel styled without adding bulk. I like using one stem per vase so the look stays airy and clean from across the yard. This works for couples who want flowers but don't want a "formal dining" weight in a casual backyard.
Start with a long runner or tablecloth that covers the center, then place bud vases along the front edge in a straight line. Use 6 to 8 vases for a 6-foot table, spacing about 10 to 12 inches apart. Fill each vase with water and one main stem, then add a couple eucalyptus leaves to connect them visually. Add a single candle at the center back of the table so you get warmth without blocking eyes. For place settings, keep plates and cutlery aligned so the edge flowers don't look random.
Try thisUse painter's tape on the table to map vase positions before you pour water - it saves you from crooked spacing.
Common mistakeAvoid tall centerpieces in the middle - they create eye-level barriers for photos and conversations.
9. Garden party arch made from a salvaged ladder frame
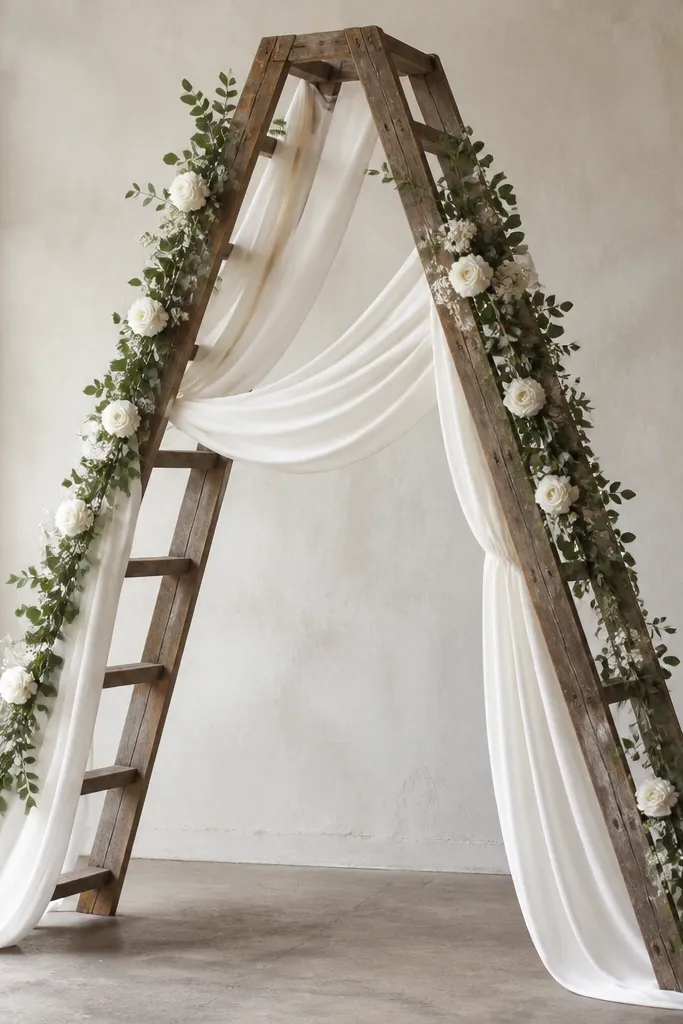
A ladder arch is a practical hack for small spaces because it uses your yard's existing materials and keeps the structure narrow. It also adds charm without needing a wide floral wall. The draped white fabric between rungs softens the ladder's lines so it doesn't look like a construction prop in photos. I like white fabric with a subtle texture like cotton gauze because it catches string light nicely. This works for both men and women styling because the arch isn't competing with outfits - it stays vertical and slim.
Start by finding a ladder you can clean and sand down, then check it's stable before decorating. Build the arch by placing the ladder legs into two weighted pots or anchored bases. Drape a single length of white fabric across the top and let it fall in two gentle folds down each side. Add greenery in thin sprays where the ladder rungs are, then tuck small white blossoms at eye level. Keep the bouquet and boutonniere in the same white flower family so the arch doesn't look separate.
Try thisTie fabric with hidden zip ties or twine behind the ladder so wind doesn't lift it into weird angles.
Common mistakeAvoid metal ladder arches without fabric - the hard lines look harsh and can dominate small yards.
10. Vintage china dessert table with one statement cake stand
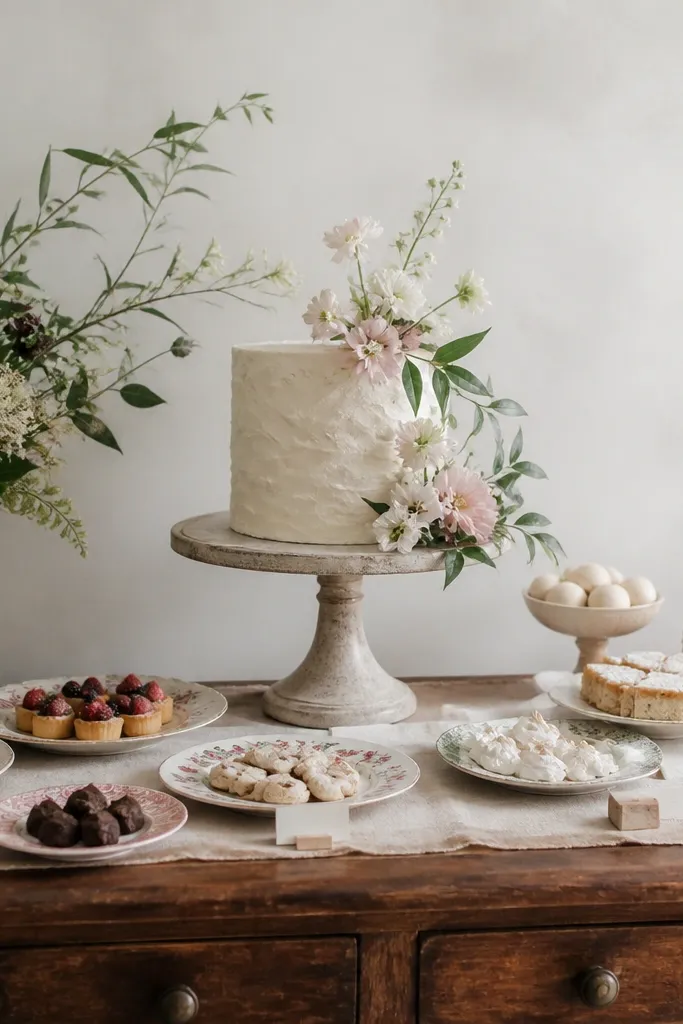
Dessert tables can eat up space, but vintage china makes them feel curated even when the table is small. The mismatch hides imperfections because every plate is its own frame. I keep the cake stand as the only tall centerpiece so the table doesn't feel cluttered. For the cake, I like a simple buttercream or soft fondant finish in white or pale ivory because it matches the china and doesn't look too glossy. This works great for small yards because guests gravitate toward the dessert area and you want it to feel like a destination, not an afterthought.
Choose one table size that fits your walkway, like a 5-foot table set against a fence or wall. Lay a narrow runner down the center and center the cake stand on it. Arrange plates in a gentle arc so the tallest items are at the back corners and the smallest plates are closest to guests. Add small bowls for cookies or cupcakes and keep serving utensils on one tray at the end. For styling, pick one ribbon color for name cards and tie it on a few spots so it looks intentional.
Try thisCover the table edge with a cloth that matches the runner - it stops the "folded table" look in close photos.
Common mistakeAvoid filling every inch with desserts - leave 15 to 20% empty space so it reads clean, not cramped.
11. Chair decor with satin ribbon bows in two sizes only
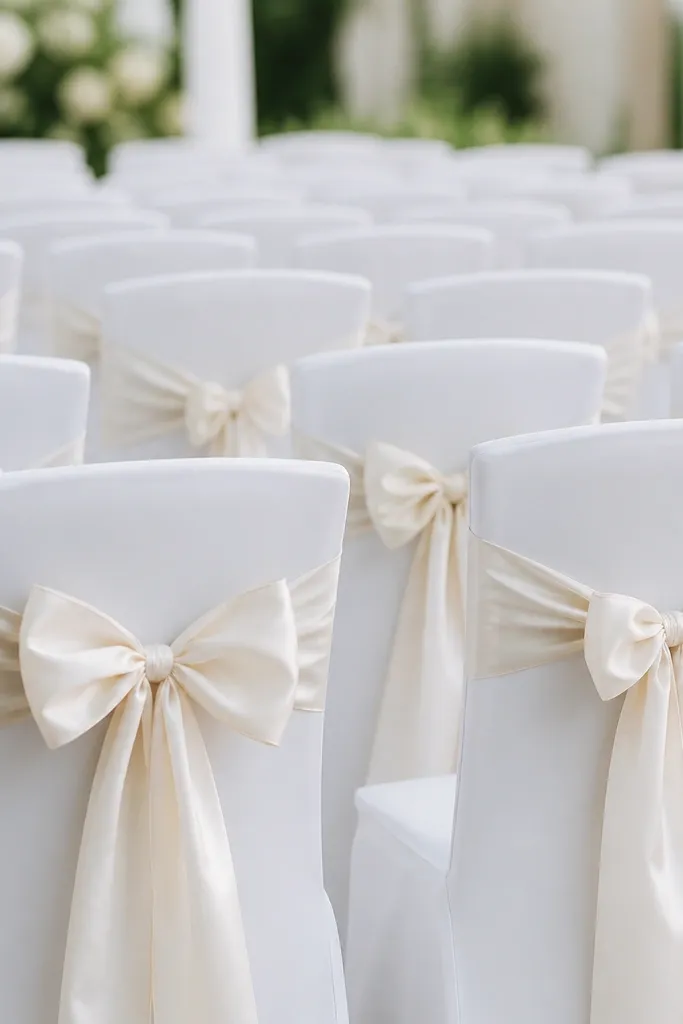
Ribbon bows are one of the best ways to make a small wedding look dressed up without building big structures. The trick is to keep it controlled: two ribbon sizes only, so your yard doesn't look chaotic. Satin reads smooth and looks good in sunlight, especially on white or ivory chair covers. I like sage or dusty rose ribbon because it matches florals without overpowering them. This style flatters everyone because it frames faces in photos and makes the seating look cohesive from any angle.
Tie ribbon bows at the center of each chair back, not off to one side. Use one ribbon width, like 1.5 inches, and keep the bow size consistent by cutting identical lengths. For a second size, use the same ribbon but slightly shorter lengths on every other row. Keep bow tails around 4 to 5 inches so they don't hit the chair arm in close shots. If you're using chair covers, make sure they fit tight at the seat so the ribbon doesn't look like it's hanging on wrinkles.
Try thisDo a test tie on 3 chairs in your actual lighting - satin can look different under shade versus direct sun.
Common mistakeAvoid using too many ribbon widths or patterns - it looks handmade in a sloppy way instead of designed.
12. Matte black lantern clusters for a modern backyard
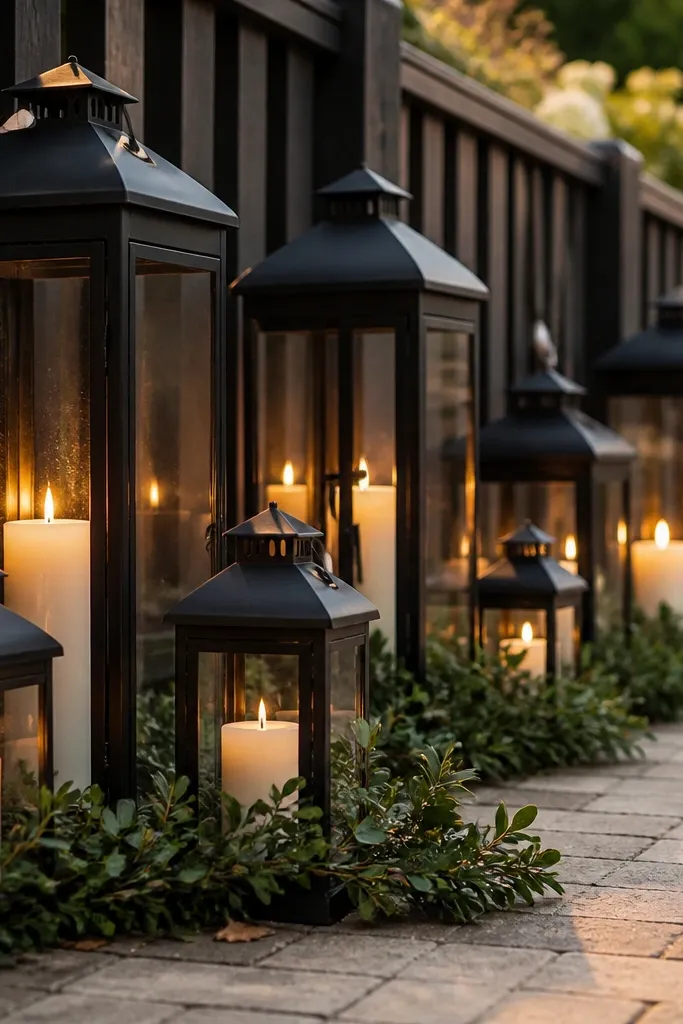
If your backyard has a lot of green, you need something dark to anchor the scene. Matte black lanterns give you that grounding effect and look sharp in photos without looking heavy. I group lanterns in clusters of three so they read as intentional, not random. Warm candles inside keep it romantic even if your style is more modern than rustic. This setup is flattering for couples who wear clean-lined outfits because the lanterns echo the crispness.
Start by placing the largest lantern first along the fence line, then add two medium lanterns on either side. Use 18 to 24 inches spacing between lanterns so the cluster doesn't merge into one blob. Wrap a little eucalyptus or dried olive around the base of each lantern, but keep it thin. Choose candle sizes that don't tower - aim for 2 to 4 inches of flame height for a safe backyard look. Finish by matching lantern color choices with your other metals: if you have black signage hardware, keep it black here too.
Try thisUse flameless candles if the wind is strong - they still look warm and you avoid constant relighting.
Common mistakeAvoid placing lanterns directly in the ceremony sightline if you have aisle photos - they can block faces.
13. White gauze backdrop curtain with a single brass ring
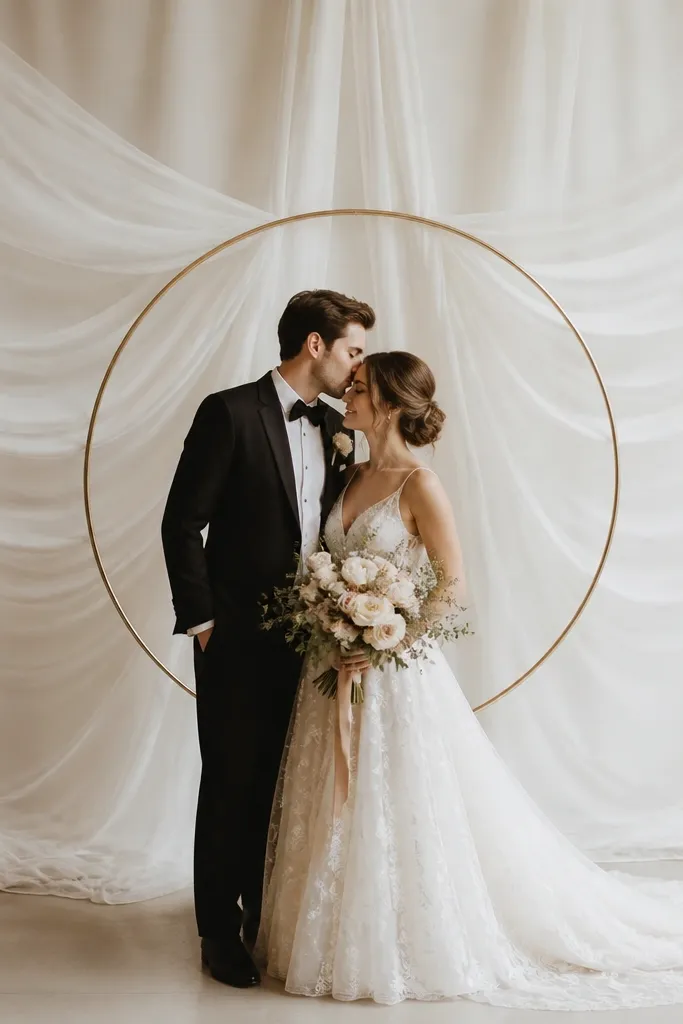
A gauze curtain backdrop is a small-space magician. It takes up vertical space but doesn't crowd the ground, so you get a clean photo wall without building a wide floral structure. The gauze catches string lights and creates soft texture behind the couple. I like a brass hoop because it adds a warm metal note that looks good against ivory fabric. This works for both men and women because the backdrop doesn't compete with outfits - it makes them pop. If you have a busy fence behind you, gauze also hides it.
Hang the gauze from a sturdy stand or a beam using clear hooks so it drapes evenly. Place the brass hoop at the center about chest height for the person standing. Let the fabric fall in two main curtains, then gather the ends slightly so the middle stays open. Keep the bouquet and table florals simple so the backdrop stays the star. In styling, match your stationery ink to brass - warm gold or dark brown looks natural with the hoop.
Try thisSteam the gauze before setup and pull it taut for the first 10 minutes after hanging - it drops smoother once it relaxes.
Common mistakeAvoid heavy thick drapes that look like a carnival curtain - they hide the shape of the couple in close photos.
14. Mini bar cart with clear acrylic menu and citrus garnish
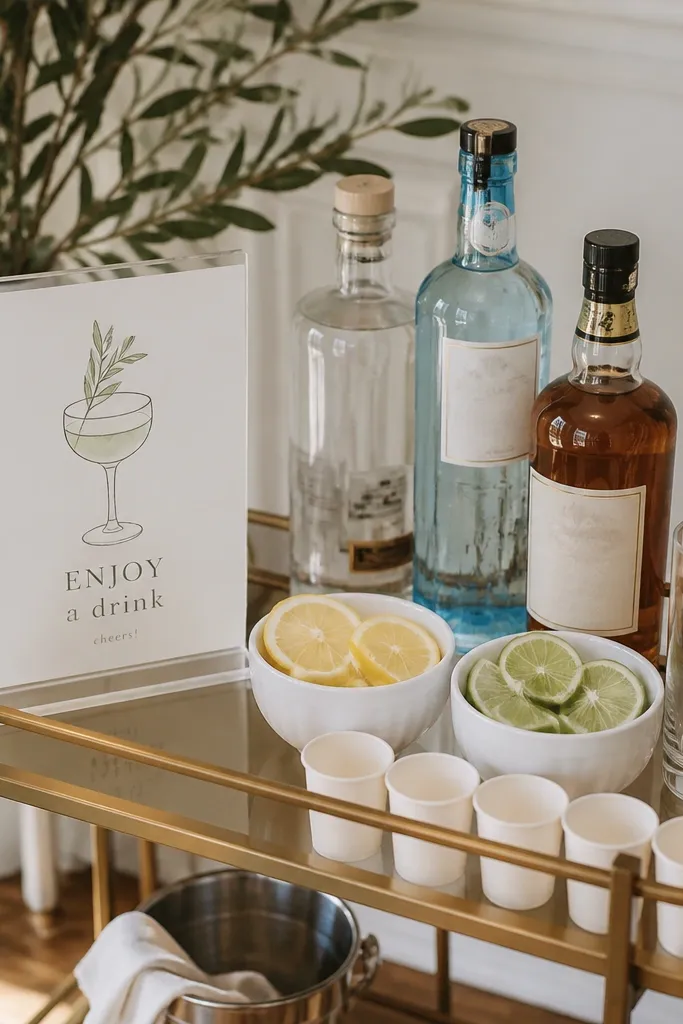
In small spaces, the bar is where people cluster, so it needs to be easy to read and easy to move around. A mini cart keeps it contained, and a clear acrylic menu sign stays legible in bright daylight. Citrus garnish adds color without taking up extra space, and it looks great in drink photos. I've used lemon and lime because they match almost every wedding palette, from blush to sage to navy. This setup also helps guests decide quickly, which reduces bottlenecks near the cart.
Pick a cart width of about 28 to 32 inches so it fits between chair rows. Set your menu sign at the front edge at about 40 inches high, then arrange bottles in a single row with labels facing out. Add two bowls of citrus near the center of the cart, not at the back, so guests can grab garnishes easily. Keep cups in stacks in one container and put stir sticks and straws in a small tray. For styling, tie a ribbon around the cart handle in your main wedding color and keep everything else neutral.
Try thisUse clear drink tubs for ice - they stay visible and help your bartenders move faster.
Common mistakeAvoid placing the bar in the tightest corner of the yard - it traps guests and makes everything feel smaller.
15. Ceremony aisle lanterns with one flower tie per lantern
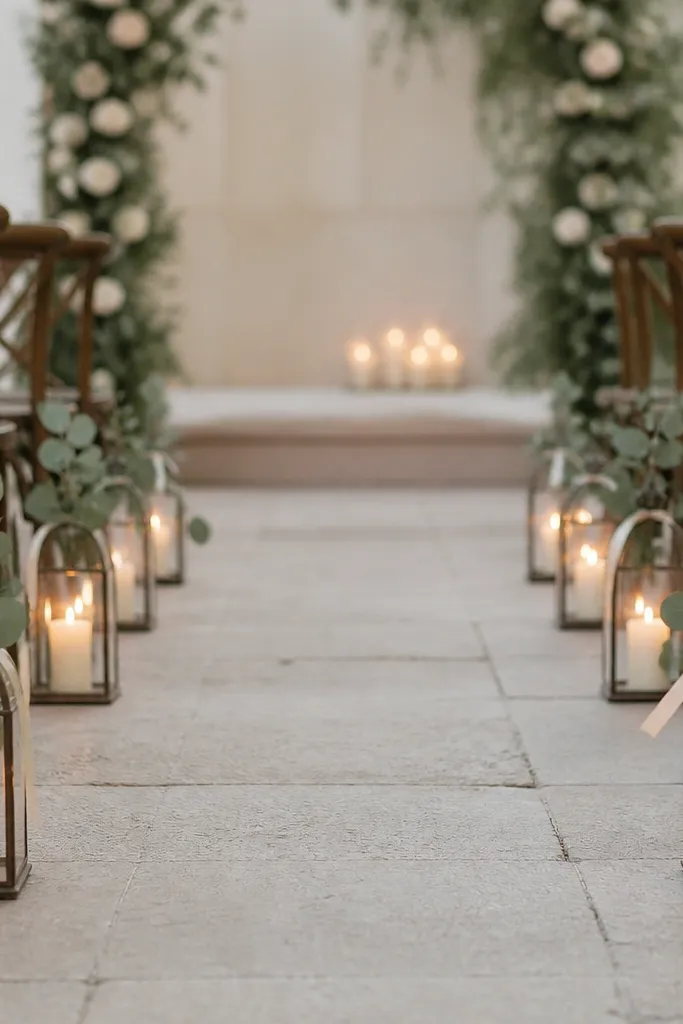
Lanterns along a narrow aisle add depth without needing a wide arch. By tying only one sprig per lantern, you keep the look airy and consistent, which matters in small spaces where everything is close to guests. The warm candlelight makes skin look flattering, and the repeated shapes create rhythm in photos. This is great if your yard has wind because lanterns are more stable than hanging florals. It also looks good for both men and women because it frames the aisle rather than competing with outfits.
Start by placing lanterns every 3 to 4 feet along the aisle, keeping them off the runner edge so guests don't trip. Use warm LED candles if you're nervous about open flame, and keep them centered inside each lantern. Tie one eucalyptus sprig with ribbon in the same color as your chair bows. If your aisle is on grass, use small stakes or weights to keep lanterns from shifting when people pass. Finish by keeping the ceremony focal flowers low so the lanterns and aisle line up visually.
Try thisDo a quick walk-through at ceremony time and check that no lantern blocks anyone's feet as they sit and stand.
Common mistakeAvoid stuffing lanterns with too many stems - it looks cluttered and the scent can get overpowering in a small yard.
16. Single-flower bud bouquets for bridesmaids and guests
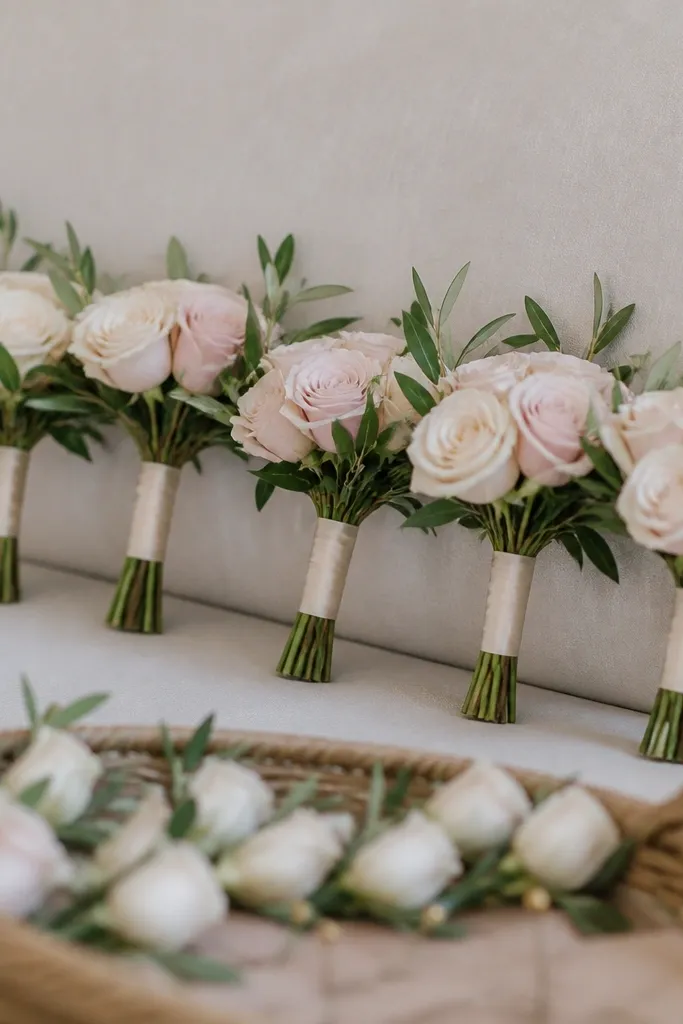
Small spaces don't need huge bouquets everywhere. When you use smaller bud bouquets with one main flower type, you keep the overall visual weight light while still looking intentional. I've done this with blush spray roses and white stock because the shapes are tidy and photograph well. It flatters people across skin tones because the color stays concentrated and doesn't overfill the frame. Guests also like it because it doesn't feel like they're holding something bulky during photos. This approach also makes it easier to match your palette without buying a ton of different blooms.
Choose one main bloom type and keep every bouquet the same size, around 8 to 10 inches wide. Add greenery only as a thin base layer so the bouquet doesn't look heavy. Wrap stems with matching satin ribbon in dusty rose or sage. For guests, place a few bud bouquets in a basket near the entrance and hand them out as they arrive. If you're styling for a small ceremony, keep the bride's bouquet slightly larger, about 12 to 14 inches wide, so she reads as the focal person.
Try thisOrder an extra 10% blooms so you can fix any droopy stems without panicking on setup day.
Common mistakeAvoid mixing five different flower types in tiny bouquets - it looks messy up close.
17. Reception photo circle with a DIY fabric ring and fairy lights
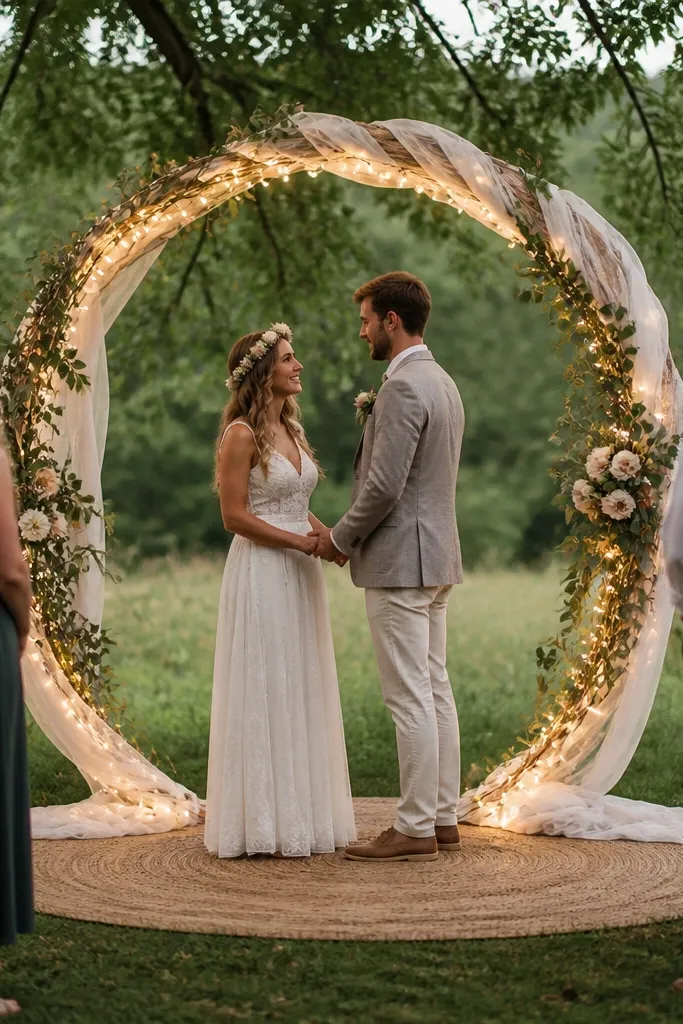
A photo circle is a small-space cheat because it gives people a clear spot to stand without needing a big backdrop wall. The ring shape also looks good from different angles, which matters when your yard is narrow and you can't get far camera distances. I use fabric because it softens the ring and makes it look romantic instead of DIY craft-time. Fairy lights wrap around the ring and create a halo effect behind the couple. This works for both men and women because the ring frames faces and keeps the background consistent.
Build a circular frame using a lightweight hoop or flexible branch ring about 6 feet wide. Wrap the ring with thin white fabric strips so gaps stay soft, not obvious. Secure fairy lights around the ring before you attach fabric so wiring doesn't show. Place the ring on a flat section of lawn, and mark the couple's standing spot with a small piece of tape on the ground. Keep the surrounding decor minimal - one small stool or side table max, so the ring stays the focus.
Try thisUse warm-white lights and turn them on before guests arrive so the camera exposure doesn't struggle.
Common mistakeAvoid placing the ring right next to a busy fence - it makes the background look cluttered.
18. Table numbers as mini framed herbs on the fence
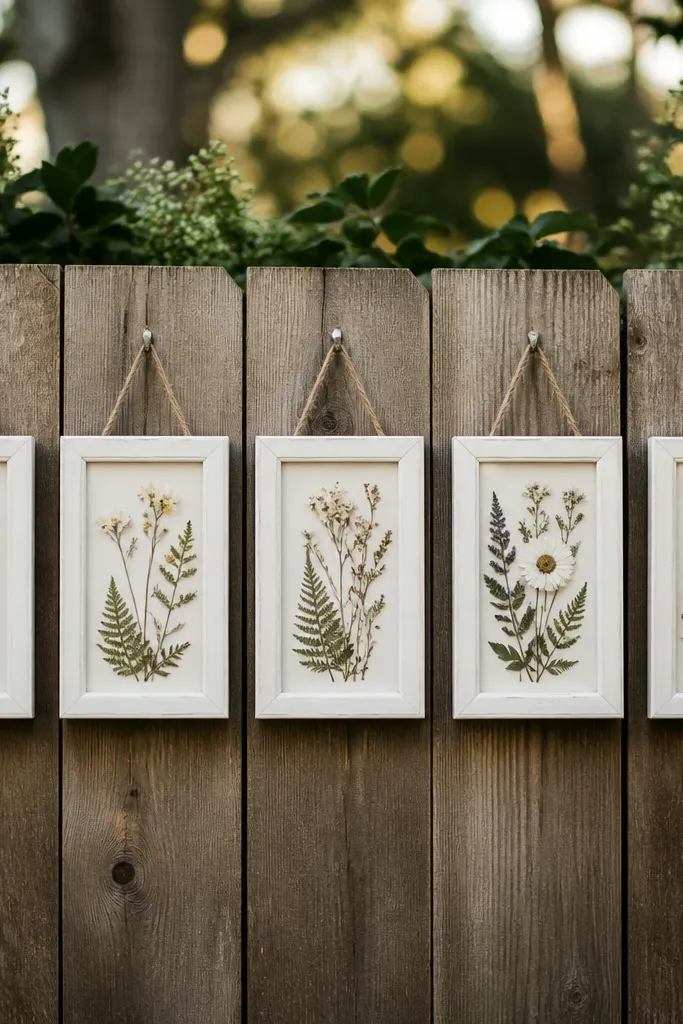
Table numbers can look bulky on small tables, so I hang them where guests already glance while walking. Mini frames on a fence keep the numbers readable and add texture without taking up centerpiece space. Pressed herbs give a backyard feel that doesn't require fresh flowers for every table. I like white-painted frames because they match cream linens and don't fight with greenery. This is flattering for photos too because the numbers create a clean vertical line behind the dining area.
Measure your walking route and decide where guests will pass between the ceremony and tables. Place mini frames along that route at about 4.5 to 5 feet high so they're readable without stretching. Paint or buy uniform frames, then add a simple printed table number in dark ink. Inside each frame, glue a small pressed herb cluster at the bottom and leave space at the top for the number. Match the font style with your welcome sign so the yard looks cohesive.
Try thisUse removable hooks or command strips rated for outdoor use so you don't damage fences.
Common mistakeAvoid giant table number signs on the table edge - they look like last-minute rentals and block views.
19. Soft blush napkins folded into a simple fan
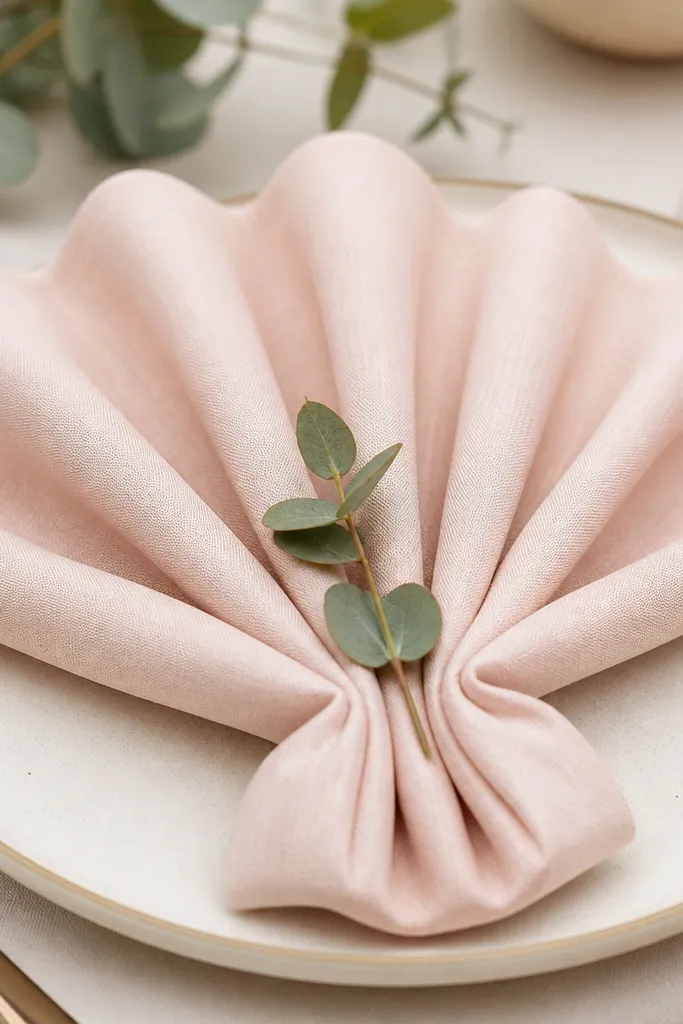
Napkin folding is the easiest way to make a small backyard table look styled even when the centerpiece is simple. A fan fold looks neat from above and from the side, which matters when your tables are close together. Soft blush napkins match dusty rose accents and look flattering against cream or champagne tablecloths. The eucalyptus leaf tucked under the fold adds a tiny green detail that ties to bouquets. If you're wearing lighter tones, this fold keeps your outfit from looking washed out in warm daylight.
Lay the napkin flat and fold it into thirds first, then crease firmly. Start at one short edge and accordion-fold until the napkin is about 6 inches wide. Fan the folds open slightly and place it centered on the plate. Tuck one small eucalyptus leaf at the back of the fan so it peeks out, then add a small dot of ribbon wrap only if needed. Keep all napkins the same orientation so photos don't show random angles.
Try thisIron the napkins before folding and set them under a stack of books for 10 minutes - the creases hold.
Common mistakeAvoid loose, wrinkled napkins - they make the whole table look less intentional even with good flowers.
20. Low floral line on the fence instead of a full garland
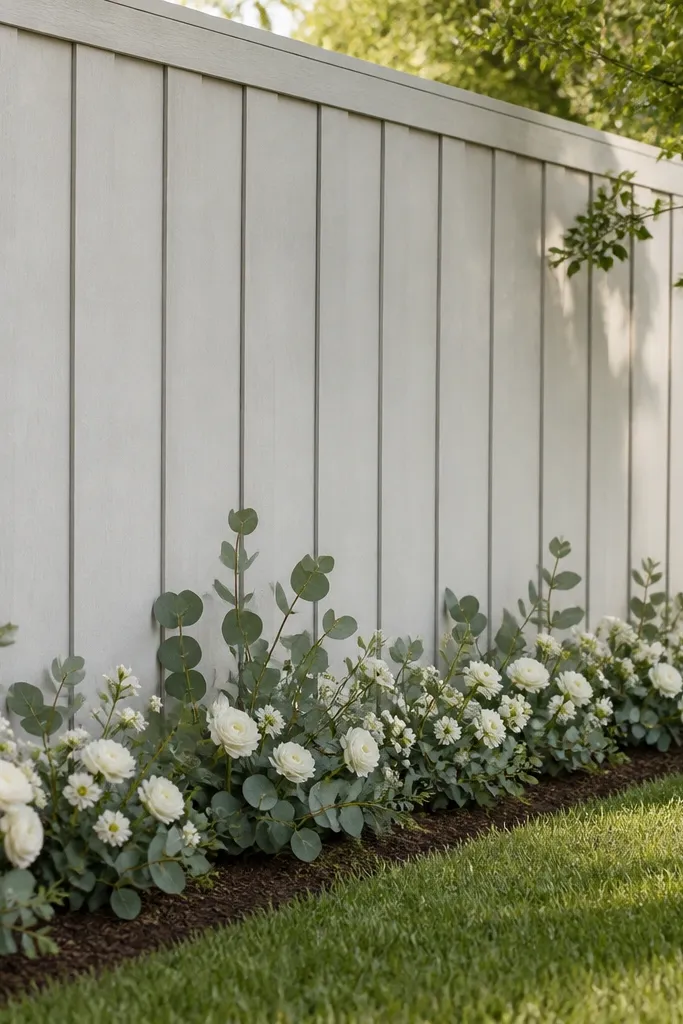
A full garland can swallow a small yard because it spreads across too much visual space. A low floral line keeps the decor grounded and gives you a clean background for photos and dessert tables. I like white flowers mixed with eucalyptus because the green fills gaps and the white reads bright against darker fence paint. This approach is flattering because it doesn't compete with faces in close shots. It also makes the yard look taller by leaving empty vertical space above.
Start by choosing a straight fence section behind the tables or dessert area. Attach a thin line of greenery using zip ties or floral wire to a guide string at about 18 to 24 inches high. Add small clusters of white blooms every 10 to 12 inches, then step back and check spacing in natural light. Keep the line narrow - no wider than 18 inches - so it doesn't bump into chairs or walking paths. If you're using table numbers on the fence, place the floral line below them to avoid clutter.
Try thisUse a mix of eucalyptus types if you can get them - one is more airy, one is fuller, and it hides any uneven fence spacing.
Common mistakeAvoid hanging garlands at head height - it blocks sightlines and makes the yard feel smaller.
21. Garden-friendly seating covers with a matching throw blanket
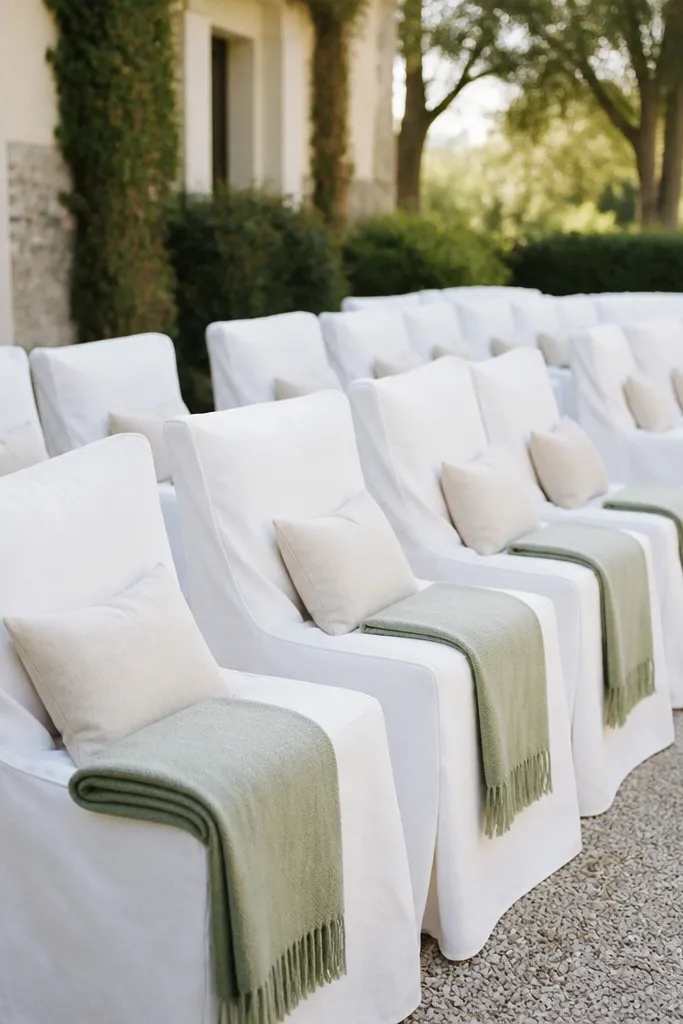
Comfort matters in small backyards because guests sit closer and stay longer. I've found that simple chair covers plus a matching throw blanket makes the setup feel thoughtful without adding a ton of decor. Sage throws hide grass color shifts and look calm in photos. The blankets also help if the ceremony runs long and evening air cools down. This styling flatters everyone because it adds softness around bodies and reduces the "bare chair" look that can feel stark in daylight.
Choose chair covers you can tighten at the seat so they don't slip while people sit and stand. Lay a sage throw at the end of each row or on a chair in the aisle so guests see it as part of the design. Add one small cushion per chair if you're renting - keep it neutral like ivory. For color cohesion, match the throw with your table napkin or ribbon color. Keep chair back bows simple and avoid stacking extra fabric on top of the chair cover.
Try thisBring a small lint roller and a damp cloth for setup - chair covers show dust and it reads in close photos.
Common mistakeAvoid using slippery satin throws - they slide off chairs and look messy by the time photos happen.
22. Monochrome white ceremony with clear acrylic signage
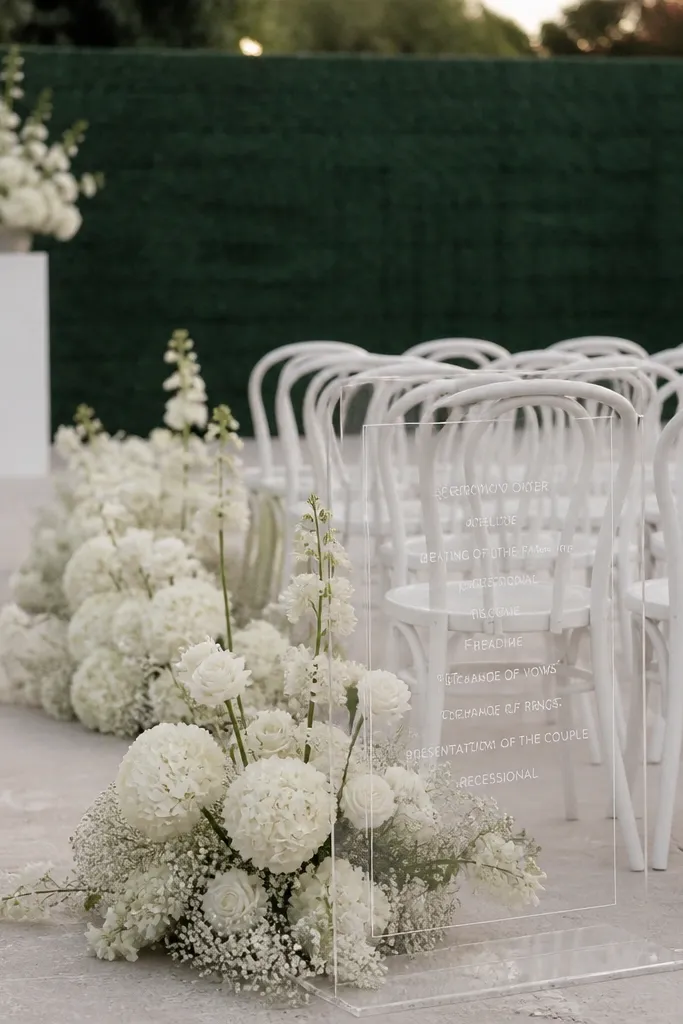
Monochrome white looks clean in small spaces because it doesn't create visual clutter. When you keep everything in one family of whites, your photos look cohesive even if the yard has different textures. Clear acrylic signage adds modern readability without blocking background greenery. I've done this with white chairs, white spray flowers, and simple white candles, and it always reads "intentional" instead of "random backyard." This is flattering for all skin tones because white reflects light and brightens faces in daylight.
Start with white chair covers or rental chairs if you have them, then choose one white floral type for consistency. Build ceremony decor with small clusters: one at the aisle entrance and one behind the couple, not dozens of mixed arrangements. Use clear acrylic signs for the ceremony order and welcome so they don't look heavy. Add warm string lights at dusk so the white doesn't look sterile. For shoes, keep the couple's footwear close to skin tone so it blends under the bright white theme.
Try thisUse warm-white lighting and avoid cool LED bulbs - cool light makes white look gray on camera.
Common mistakeAvoid mixing bright optical white with cream without intention - it looks patchy in sunlight.
23. Short cocktail tables with one floral bowl per table
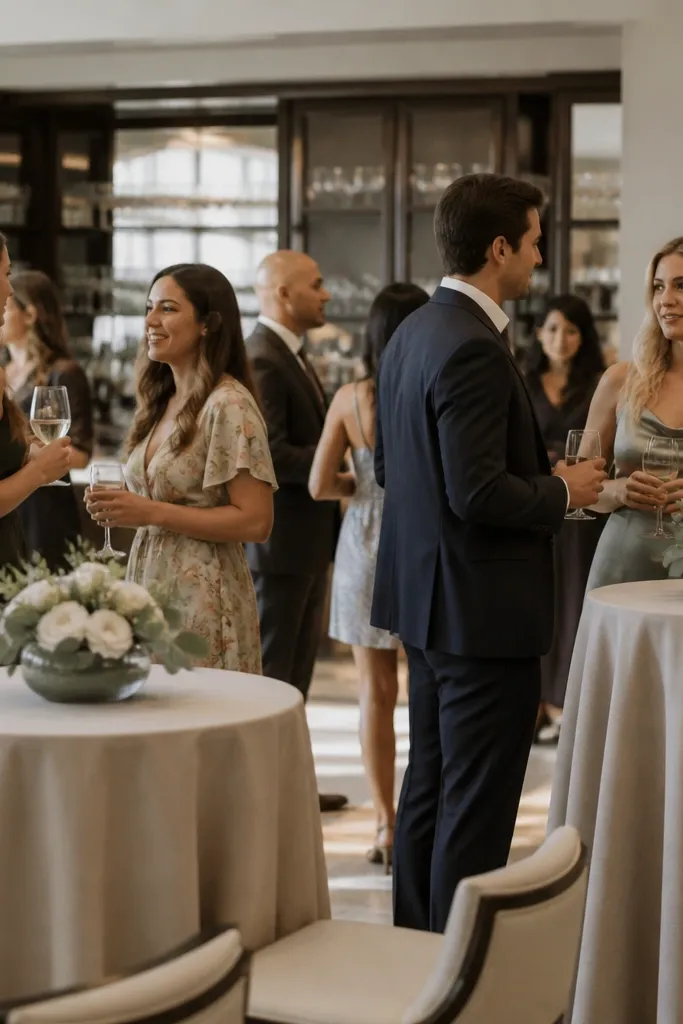
Cocktail tables keep guests from crowding the bar, and small yards need that kind of "breathing room." When you use one shallow floral bowl per table, you get the flower look without blocking movement. Shallow bowls also stay stable and don't tip as easily as tall vases on uneven ground. I like eucalyptus plus white blooms because it looks full even with fewer stems. This style flatters candid moments because the flowers sit low and don't cover faces.
Place cocktail tables at the edges of your bar zone so they act like buffers. Use shallow glass or ceramic bowls, about 10 to 12 inches wide, filled with water and floral foam if needed. Add eucalyptus as the base layer and tuck 6 to 10 white blooms into it. Keep tables low so guests can see each other across the space. For practical styling, add a small tray with napkins and one spare drink stirrer box so staff doesn't need to keep walking back and forth.
Try thisSet one table slightly closer to the walkway and the other closer to the fence - it balances sightlines in narrow yards.
Common mistakeAvoid tall vases on cocktail tables - they snag in close conversation and look crowded.
24. Men's boutonniere that matches the bouquet without repeating every stem
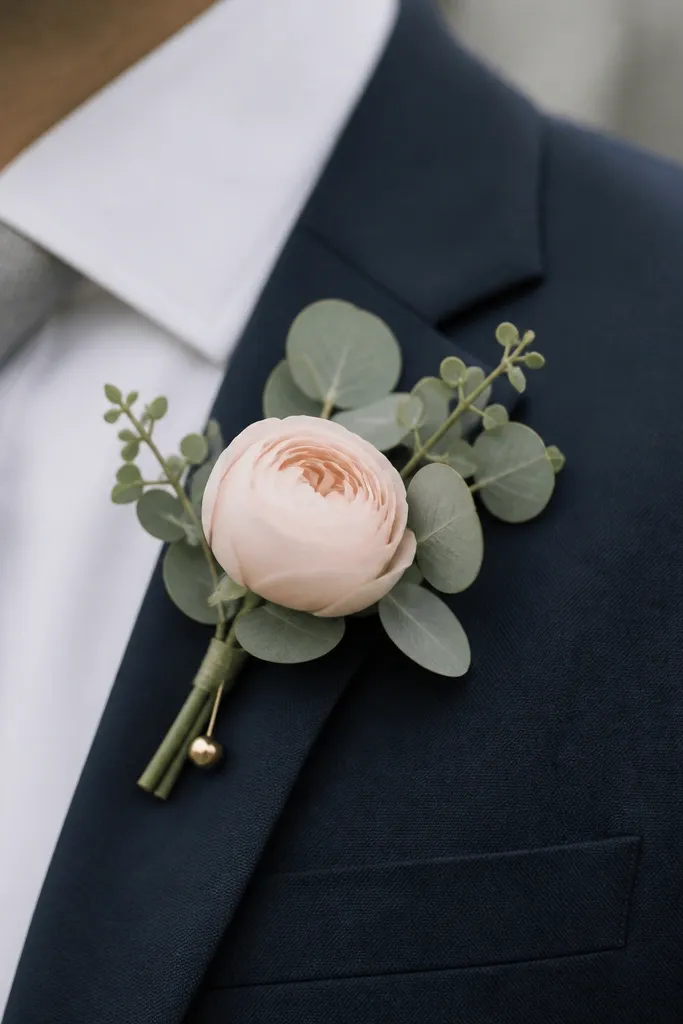
In small weddings, the boutonniere is one of the few details people see close up. Matching the boutonniere to the bouquet without copying the entire bouquet keeps it clean and proportional. I build men's boutonnieres with one main bloom (blush spray rose or white stock) and just enough eucalyptus to echo the bouquet texture. Matte gold pins look good in backyard light and match brass accents used elsewhere. This is flattering because it keeps the groom's chest from looking bulky under suit jackets. It also makes photos more consistent when the couple is near each other in tight frames.
Start with the main bloom from the bouquet and trim the stem so the boutonniere sits 2 to 3 inches above the lapel seam. Add 2 to 3 eucalyptus leaves wrapped around the stem, then secure with floral tape. Finish with a small ribbon wrap that matches the chair ribbon color or napkin tone. Attach with a pin through the tape so it doesn't twist. For styling, coordinate the groom's pocket square with the boutonniere color - a pale blush or ivory square works best.
Try thisMake the boutonniere 2 hours before photos and mist the flowers lightly, then store it in the fridge in a zip bag.
Common mistakeAvoid oversized boutonnieres - on a small lapel they look heavy and cheap fast.
25. Lemon-sun tea lights in glass jars for a daytime glow
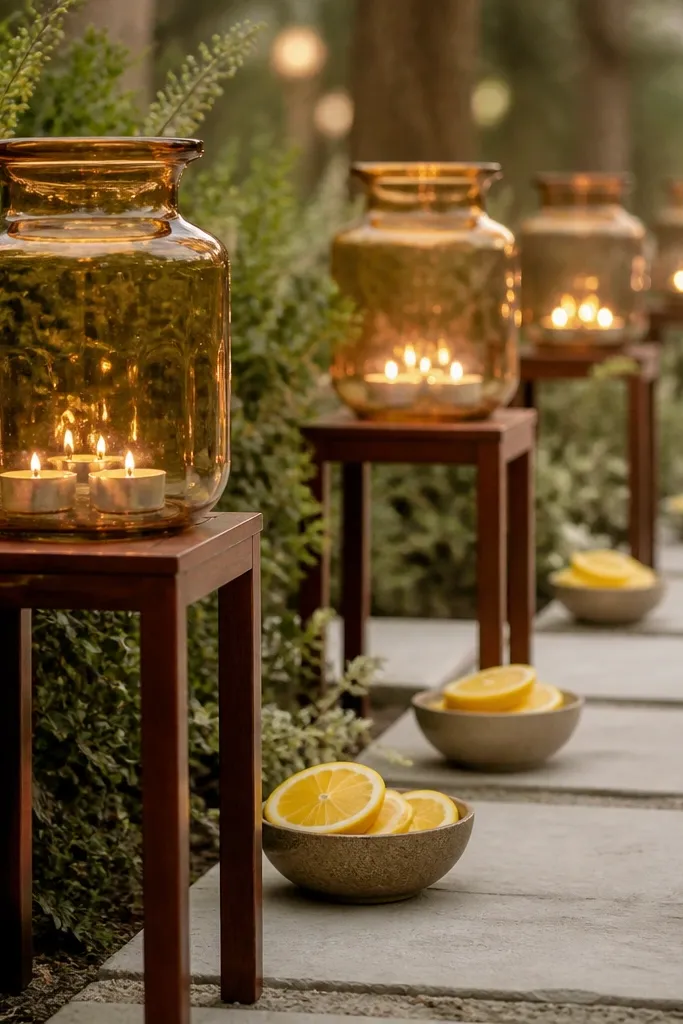
Daytime lighting is tricky in backyards because sunlight can wash out decor. Warm glass jars with tea lights help because the amber tint adds warmth even before night falls. Lemon-sun accents also tie into citrus garnish at the bar, so the whole party feels connected. I use this when the ceremony ends around late afternoon and guests linger - you need decor that looks good at both 5 pm and 7 pm. This is flattering because warm tones make skin look healthier and photos more inviting. It also works for couples who want a cheerful vibe without going overly bright.
Place glass jars along the main walking path at least 2 feet apart so people don't trip. Add tea lights in clear or amber jars and keep the flames low by using LED if wind is expected. Put small bowls of lemon slices at the start and end of the path, not in the middle, so it doesn't attract spills. Keep the overall height under 12 inches so lanterns don't block sightlines. Match the jar finish to your metal accents - if you have matte black hardware, choose black-capped jars.
Try thisSpritz lemon slices with a tiny bit of water just before guests arrive so they look fresh on camera.
Common mistakeAvoid using bright colored candles that clash with your floral palette - they pull attention away from faces.



