1. Crepe Paper Fan Wall Behind the Couple
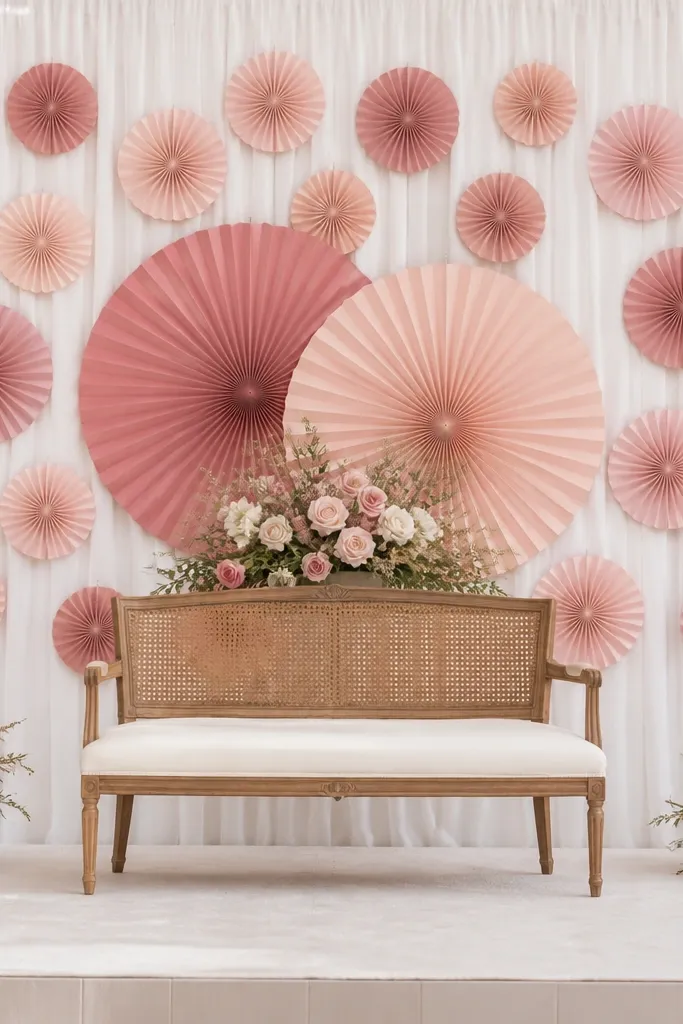
This is the fastest way to make a flat wall look like it has depth. Crepe paper fans give you big shape without needing real flowers, and they photograph well because the folds catch light instead of reflecting it. I recommend blush plus a second tone like dusty rose or mauve, with a plain off-white curtain underneath so the fans don't blend. This setup flatters most skin tones because the pinks sit warm and forgiving on camera. If you're doing a beachy or garden vibe, keep the rest of the decor simple - no heavy gold everywhere.
Start by stretching a white backdrop sheet or thin curtain on a frame or stand, and tape the top edge so it stays smooth. Make crepe paper fans from 20-25 inch strips, then attach each fan to the backdrop using hot glue at the folded center, spacing them 6-8 inches apart. Place the two largest fans in the middle and taper down to smaller fans on the sides. Add a small runner of greenery or a single low bouquet at the base so the center looks anchored. Finally, step back 10-15 feet and adjust spacing until the fans read as one continuous wall, not scattered pieces.
Try thisUse a matte backdrop (cotton sheet or muslin), not shiny satin, so the fans look soft in flash photos.
Common mistakeAvoid thin, uneven fan spacing - it makes the wall look like party decor instead of a stage backdrop.
2. Linen Curtain Backdrop with Two Hanging "Cloud" Garlands
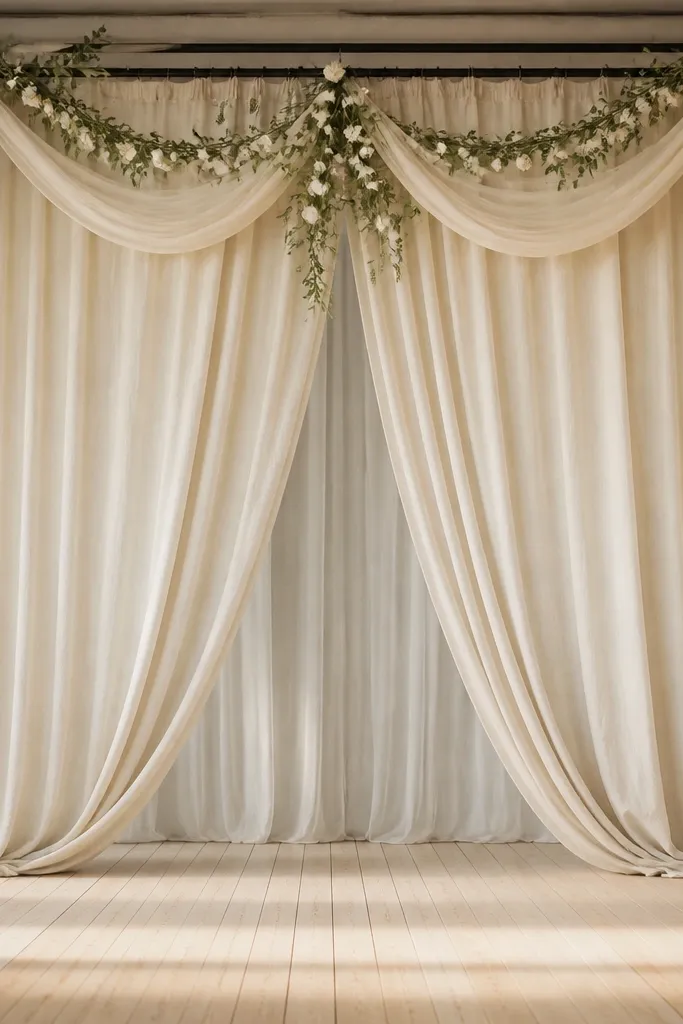
Linen curtains make a budget stage look expensive because the fabric has weight and movement. The key is using two "cloud" garlands - you get volume without a full wall of flowers. I like ivory linen because it flatters everyone and it doesn't fight with wedding dresses or suits. The garlands add a soft frame around the couple, which is great for both men and women because it keeps attention centered on faces. If your venue has low ceilings, this still works because the fabric hangs vertically instead of creating a big horizontal block.
Hang a curtain rod or tension system above the stage, then use 2-3 panels of ivory linen per side so you get real folds. Pull the center panels slightly inward and secure with ribbon tiebacks at about chest height. Build two garlands by wiring faux greenery into a loose loop and then tacking on small white fabric blossoms at the front edge. Drape each garland from the top rail so the "cloud" sits at eye level behind chairs, then secure with zip ties on the inside of the curtain. Finish with a simple base - a low runner or candle cluster - so the stage doesn't look top-heavy.
Try thisSteam the linen until the folds look consistent; wrinkled linen reads like storage fabric in close-up photos.
Common mistakeDon't use stiff tulle for the curtain - it looks cheap and the folds won't fall naturally.
3. Window-Frame Backdrop Using PVC and Sheer Organza
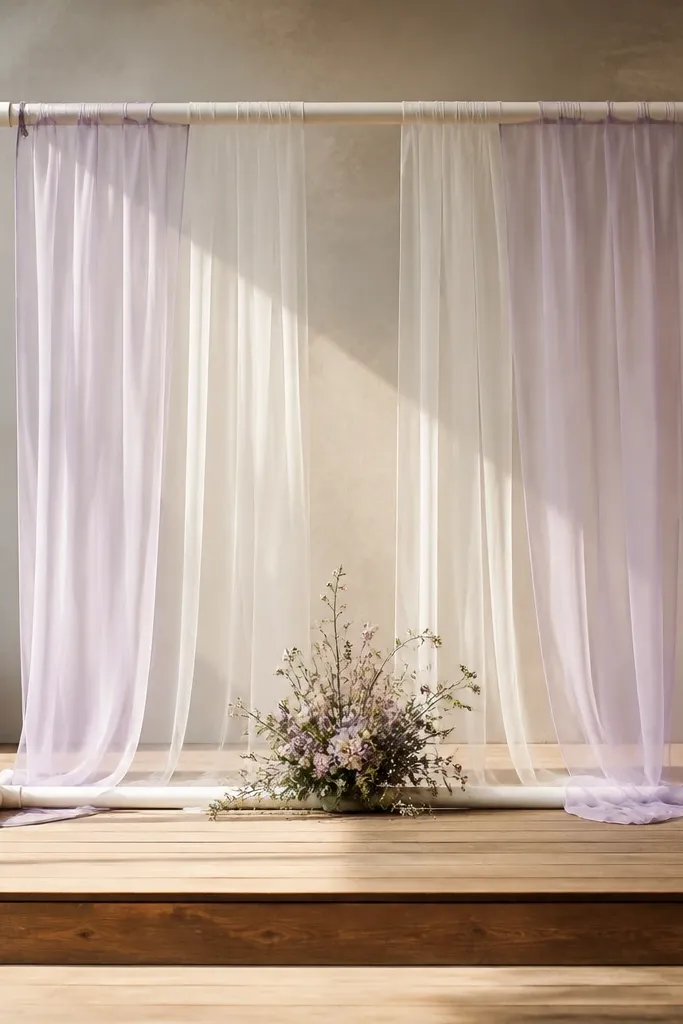
This idea looks clean and architectural, and it's forgiving when your venue stage is oddly shaped. The PVC frame gives you a crisp border that reads "designed," while sheer organza adds softness and depth. Organza holds up under overhead lights without looking shiny like satin. I've used pale lavender with white because it photographs flattering on both warm and cool skin tones. It also works for couples who don't want a full floral wall but still want a focal point behind them.
Cut PVC sections to create a rectangle about 7-8 feet wide and 7 feet tall, then connect with elbows and primer-safe PVC glue. Paint the frame with spray paint labeled for plastic so it doesn't chip. Hang it in front of the stage backdrop using weighted bases or sandbags if it's freestanding. Insert sheer organza panels inside the frame, layering lavender behind white so the center has a gentle gradient. Secure the fabric at the top with zip ties and let the bottom hang 6-8 inches above the floor so it doesn't pool.
Try thisStagger the organza lengths by 2-3 inches so the layers show even when the wind is calm.
Common mistakeAvoid transparent fabric with visible wrinkles - it makes the frame look like a craft project.
4. Balcony-Style Balloon Clusters with No Balloon Arch
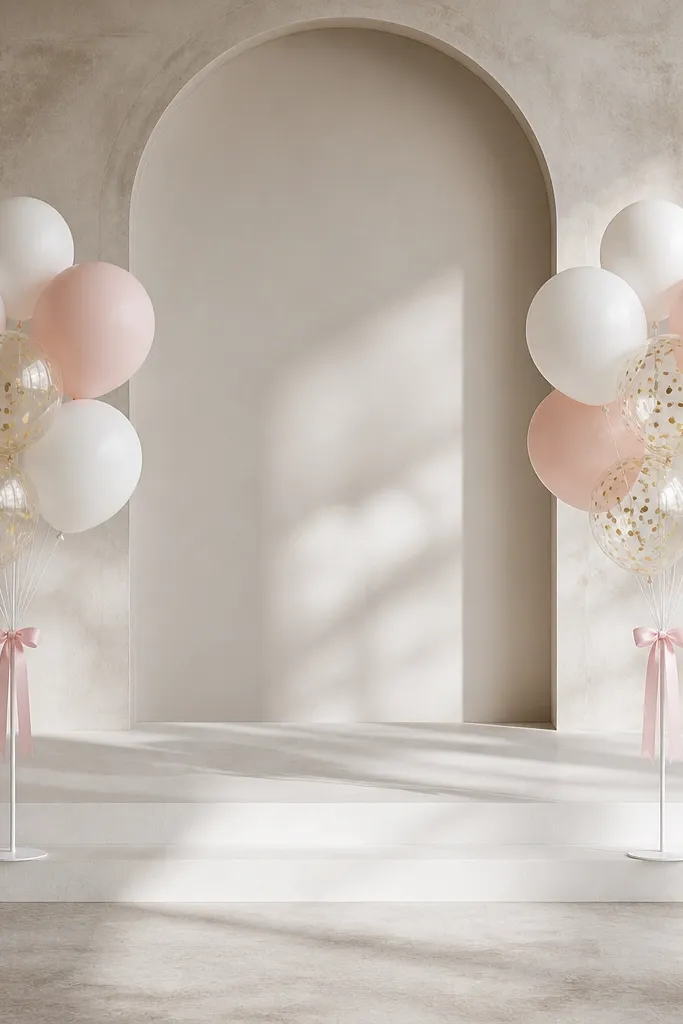
Balloons get a bad rap, but used like a cluster they look intentional, not childish. By skipping the full balloon arch and focusing on left-right "balconies," you keep the stage airy and camera-friendly. Matte balloons are your friend because they don't glare under venue lights. I like a palette of matte white, blush, and a single confetti type for sparkle. This works for couples who want a soft romantic vibe but don't want a heavy floral budget. It also looks good from the side because the clusters sit in the same plane as the couple, not behind a messy arch.
Make two clusters using 12-18 inch matte balloons and 5-7 inch accent balloons. Tie the balloons to a simple weighted base or a balloon pole, then arrange them so the largest balloons are closest to the stage center line. Add one small confetti balloon cluster at the top of each side for a controlled pop of shine. Keep the ribbon tails short - about 8-10 inches - and tie them so they don't hang into the couple's seating area. Test from 6 feet away and adjust until both clusters match height within 2 inches.
Try thisUse balloon glue dots or fishing line to keep clusters tight; loose balloons look messy fast.
Common mistakeDon't use one-color balloons with no variation - the stage looks flat and boring in photos.
5. Thrifted Frames + Greenery Garlands for a Center Focal Wall
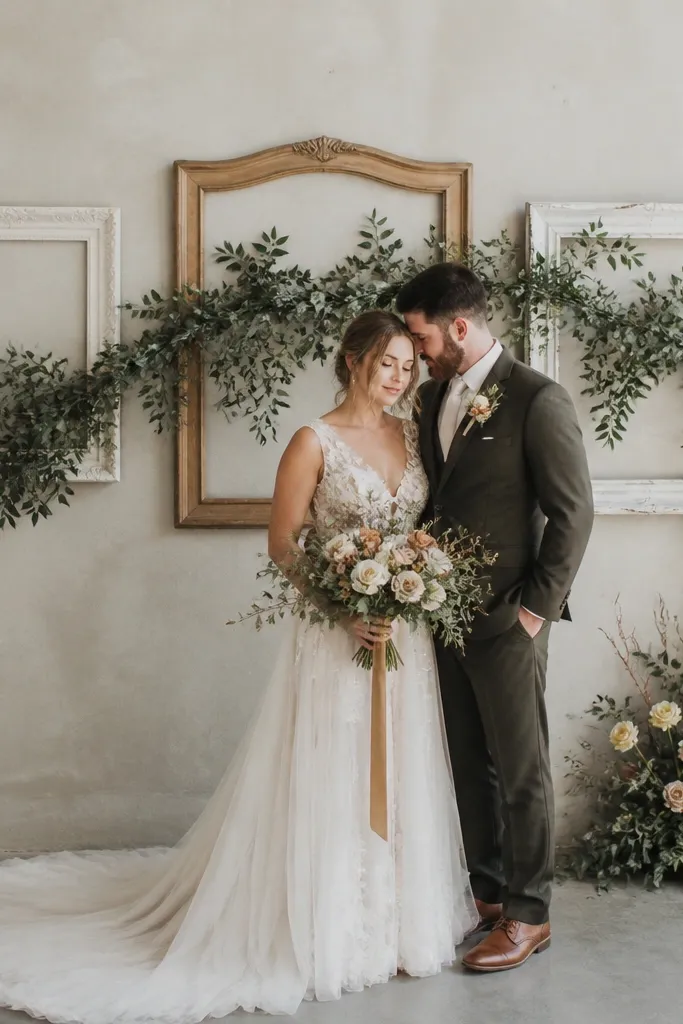
If you have thrift stores nearby, this is a budget hack that looks curated because it's real objects, not printed backdrops. Frames create a built-in grid that gives structure, and greenery garlands add softness without needing a full floral wall. I love the mix of white-painted and natural wood frames because it reads neutral and works with almost any wedding color. This flatters the couple because the frames frame the body shape and keep the eyes at face level. It's also great for smaller stages where a full backdrop would swallow the room.
Find three frames that are roughly 24x36 inches, 18x30, and 20x34 so the center frame is tallest. Remove glass and paper, then clean and paint only if needed - scuffs are fine if they look consistent. Line frames up on a backdrop sheet or directly on stands, leaving 6-10 inches between them. Weave a pre-made faux greenery garland across the top and let it drape down at the outer edges. Use floral wire to secure the garland at the frame corners so it doesn't sag mid-ceremony.
Try thisAdd one thin ribbon bow on each side frame - not more - so the frames read wedding, not home decor.
Common mistakeAvoid frames with heavy gold scrollwork if you're doing a modern palette; it makes the whole setup look mismatched.
6. Fabric Swag Runner with Three Hanging Lanterns
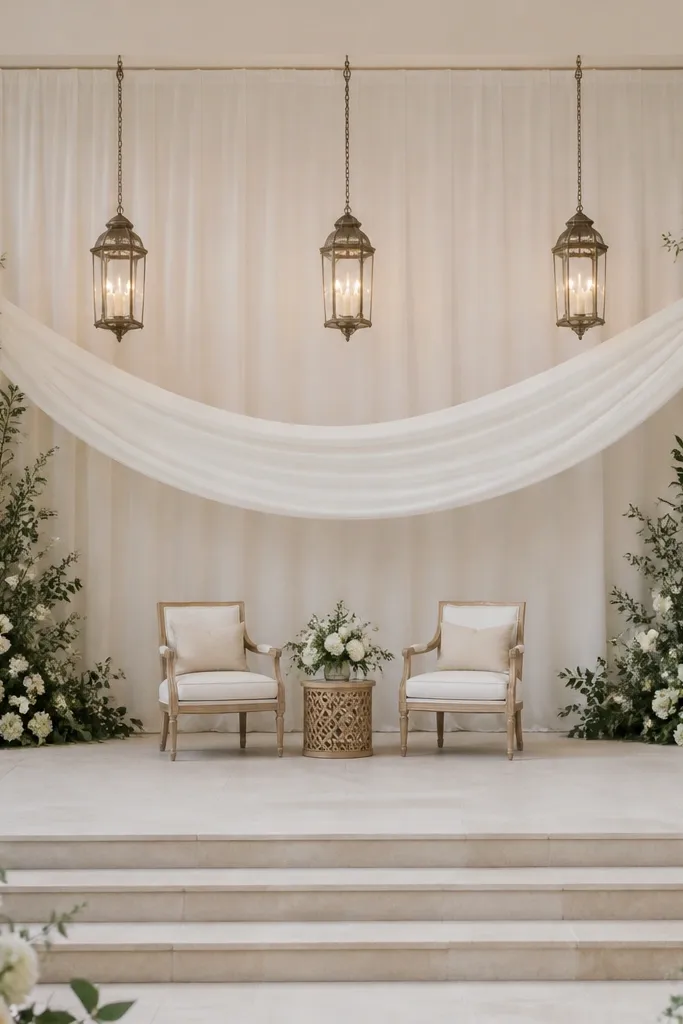
This setup adds motion and vertical interest without needing flowers. Fabric swags create a soft "stage ceiling" effect, while lanterns pull the eye upward - that matters in venues with ugly lighting. I've done this with white and light champagne fabric because it photographs clean and doesn't clash with skin or dress tones. Lanterns also look great for both daytime and evening because you can go unlit for daylight and lit for night. If your venue has a plain wall behind the couple, this turns that wall into a styled focal point.
Start by hanging a fabric runner at two points across the stage so it forms gentle dips, not straight lines. Use 10-12 feet of fabric per swag span, and secure with zip ties to a hidden support line. Choose three lanterns: one centered, two on the sides, suspended about 18-24 inches above chair backs. Put flameless candles inside if the venue has strict rules, and keep the light temperature warm (around 2700K). Add a simple base runner on the floor in the same fabric color so the whole look ties together.
Try thisPin the fabric folds with safety pins before you secure the swag so they hold shape all day.
Common mistakeAvoid lanterns that are too large - if they block the couple's heads, it looks accidental in photos.
7. Rattan Fan Backdrop with Woven Placemats
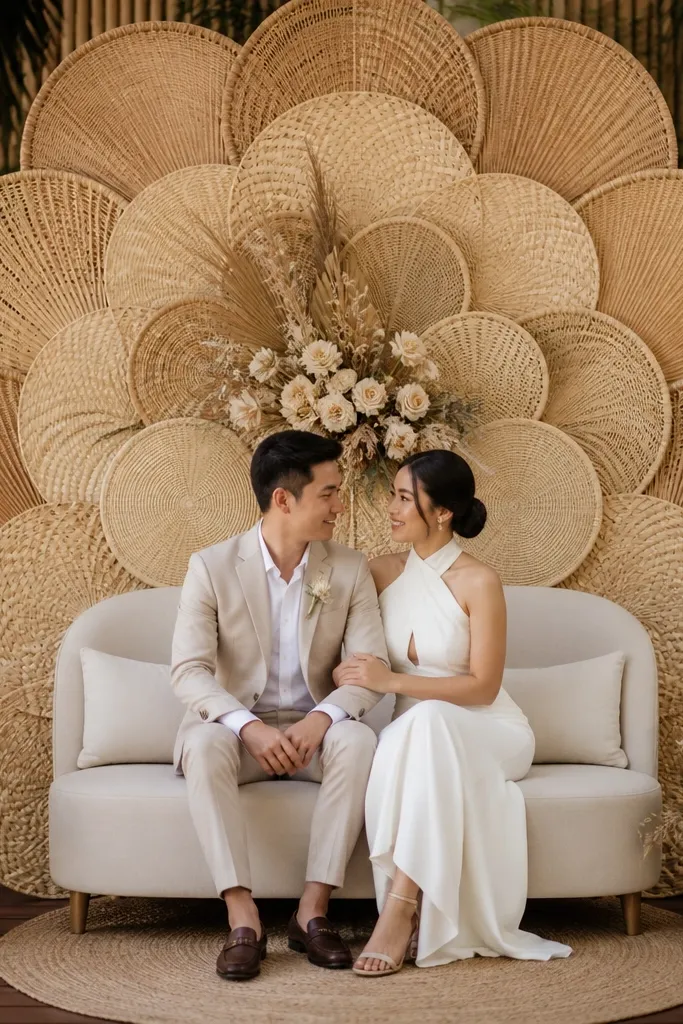
This one looks handmade and earthy, and it's cheap if you buy woven placemats on sale. The woven textures create depth and a warm tone that flatters most skin colors, especially in natural light. The rattan fan pattern also gives a gentle radiating shape that frames the couple without adding visual clutter. It's a great match for boho, garden, and destination weddings. Because it's neutral, you can keep your florals minimal and still get a full look.
Lay out 12-20 woven placemats in a radiating pattern on a backing board or directly on a curtain with removable hooks. Cut a simple base backing from foam board or use a lightweight panel, then mount placemats using hot glue at the center. Position the largest placemats behind the couple's seated heads and taper outward. Add two small rattan fans on the outer edges for height and symmetry. Finish by placing a low greenery garland in front so the backdrop doesn't feel like it floats behind empty air.
Try thisUse a neutral curtain behind the placemats so gaps don't show bright wall color behind them.
Common mistakeAvoid mixing too many weaves and colors - keep it within tan, cream, and one darker brown.
8. Oversized Silk Ribbon Bow Wall at Center
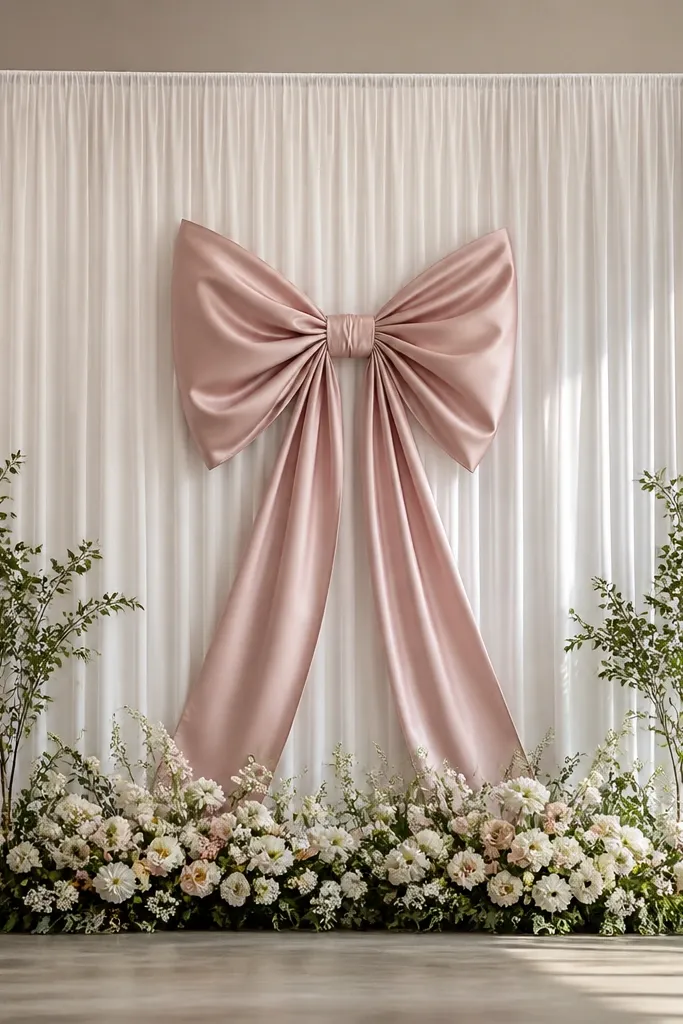
A big bow is a stage cheat code because it reads as "gift" in a good way. Satin ribbon creates a clean focal point, and when you mount it centered you get a photo-ready center even if you skip a full floral wall. I like blush satin against white because it gives contrast without looking harsh. This works well for both men and women because the bow sits behind the couple, not around them. If you want a soft romantic vibe but don't want the stage to look like a wall of flowers, this is the move.
Start with a flat backdrop of white fabric panels or a white sheet pulled tight. Cut ribbon lengths: 12-15 feet total for the bow, using 3-4 loops for the top and 2-3 long tails for the bottom. Build the bow on the ground using zip ties to hold the loops, then mount it to the wall using a foam board backing. Add a small greenery spray at the base to connect the bow to the stage floor. Keep the rest of the stage minimal: one runner and one candle cluster.
Try thisUse double-sided fabric tape on the back of the bow for a secure hold when the ribbon shifts slightly in air flow.
Common mistakeAvoid a bow that's too small - it looks like a decoration, not the main stage moment.
9. Tablecloth to Backdrop: Pleated Chiffon Panels
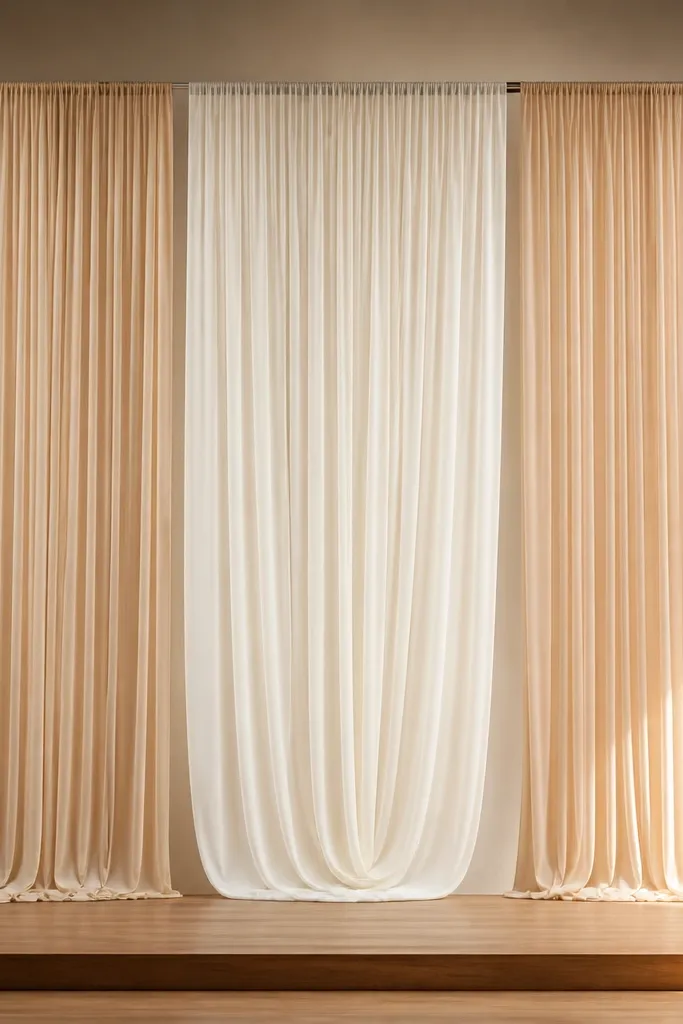
Chiffon pleats look delicate up close, but they hold shape better when you hang them in panels instead of loose fabric. This is a budget approach because tablecloths and fabric yardage are cheaper than buying a full backdrop system. Pleats create a shadow pattern that reads as depth in photos even when the background is plain. I've used champagne and soft white because it flatters warm venue lighting and doesn't clash with gold jewelry. It's also forgiving for couples who don't want a bold color - the stage stays soft and clean.
Buy 3-4 yards of chiffon per panel or repurpose large tablecloths if the fabric is wide enough. Create a pleated effect by pinching fabric folds every 2-3 inches and securing them with fabric clips to a top rod. Hang the outer panels slightly forward and let the center panel fall deeper by about 6 inches. Add a thin string of faux pearls or small beads only if you want extra sparkle, but keep it light. Finish by placing a matching satin or linen runner at the base so the pleats look intentional from floor to top.
Try thisSteam the chiffon right before setup; wrinkles show as dark lines and make it look cheap.
Common mistakeAvoid flimsy polyester that clings and curls - it looks messy and doesn't make clean pleats.
10. Ceiling-Hung Photo Tubes with Fairy Lights
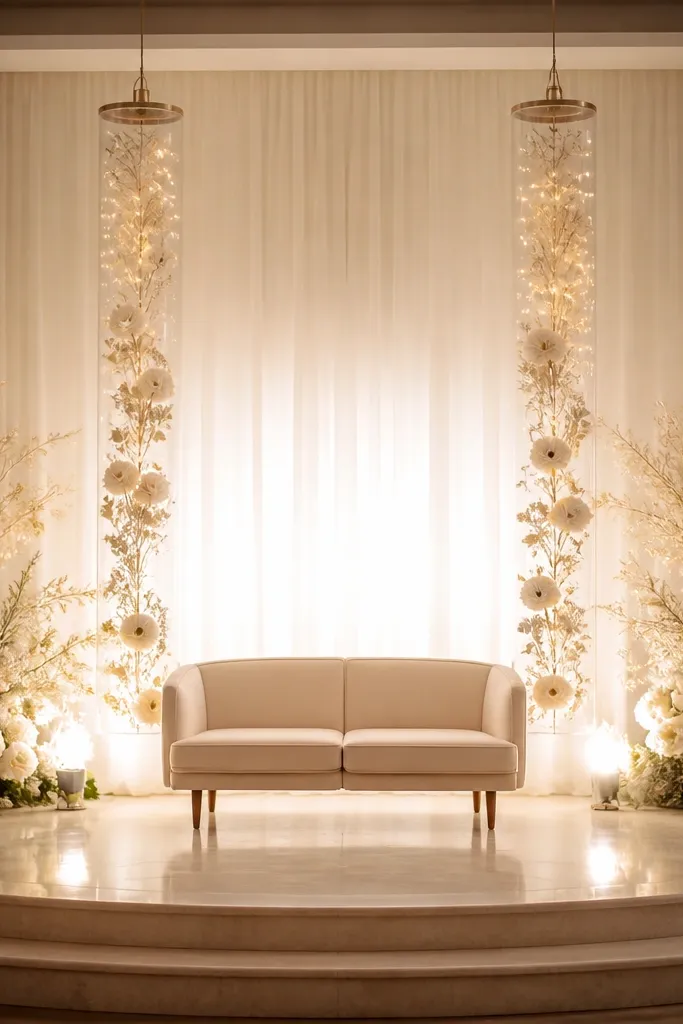
Hanging elements change how your stage reads without building a full wall. Clear tubes with fairy lights create a layered glow behind the couple, which makes faces look brighter in photos. I've used pale dried flowers like baby's breath look-alikes inside the tubes, but any muted filler works. The effect is modern and calm, especially for couples who don't want heavy decor. It also works for outdoor night ceremonies because the lights give you a controlled focal point even when the venue background is busy.
Find clear plastic tubes or acrylic sleeves and cap the top with removable lids. Fill each tube with fairy lights, then add dried filler lightly so it doesn't block the light. Hang two or three tubes from the ceiling or a high stand using fishing line so they sit about 12-18 inches above chair backs. Place the tubes behind the couple's seating, centered, with equal spacing. Add a low base decor - candles or a short greenery row - so the glowing tubes connect to the stage floor.
Try thisUse warm-white lights and keep the brightness low; harsh LEDs wash out skin tones.
Common mistakeAvoid tubes that are cloudy or scratched; they catch shadows and look messy in close-up.
11. Budget "Floral Wall" Using Faux Stems in a Grid
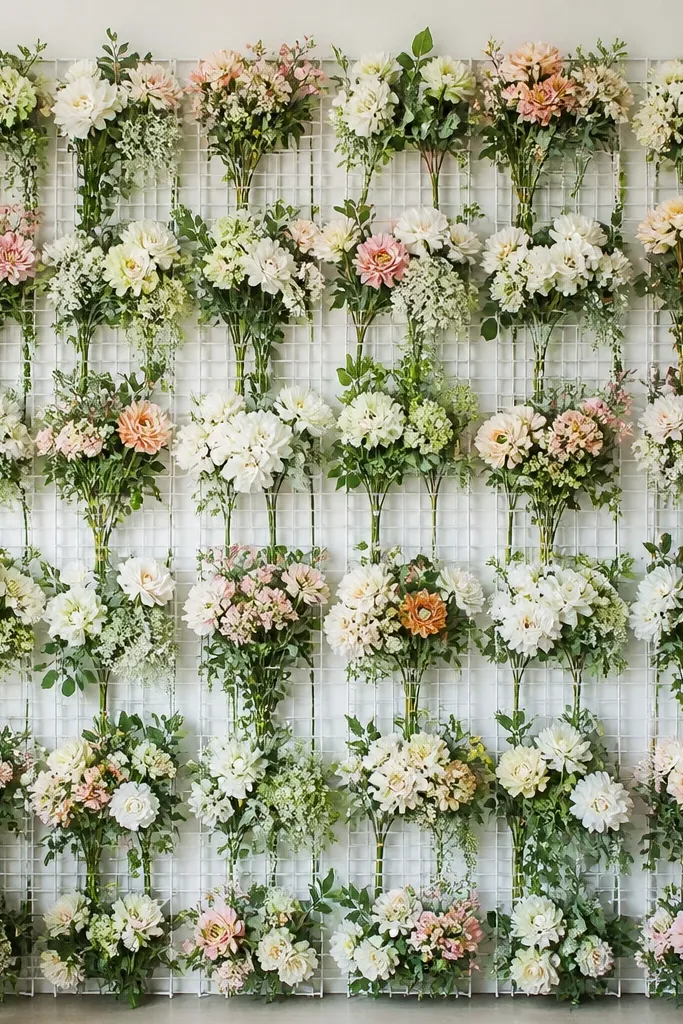
This is the best way I've found to get a real floral-wall look for less. Instead of buying a pre-made wall, you use faux stems and place them like tiles - the wall looks dense where it matters and lighter at the edges. A grid on a mesh panel keeps everything straight and prevents the "random bunches" look. It flatters the couple because the wall is full behind them but doesn't sprawl into the floor area. Choose one flower type and one leaf type so it doesn't get chaotic on camera.
Buy a roll of white plastic mesh and cut it to your stage width, then frame it with zip ties to a stand or backdrop board. Insert faux stems into the mesh by wiring the stem stems through the grid squares. Start from the center and work outward, placing the densest clusters at head height and tapering down. Use taller stems in the middle blocks and shorter ones on the sides so the wall has a gentle shape. Add a thin border of greenery along the edges so the wall looks finished, not unfinished.
Try thisKeep your stems in two main colors and vary only the shade - not the type - to keep it photo-clean.
Common mistakeAvoid mixing too many flower varieties; it turns into a craft basket instead of a wall.
12. Mirror Tabletop Arrangement with Floating Candles
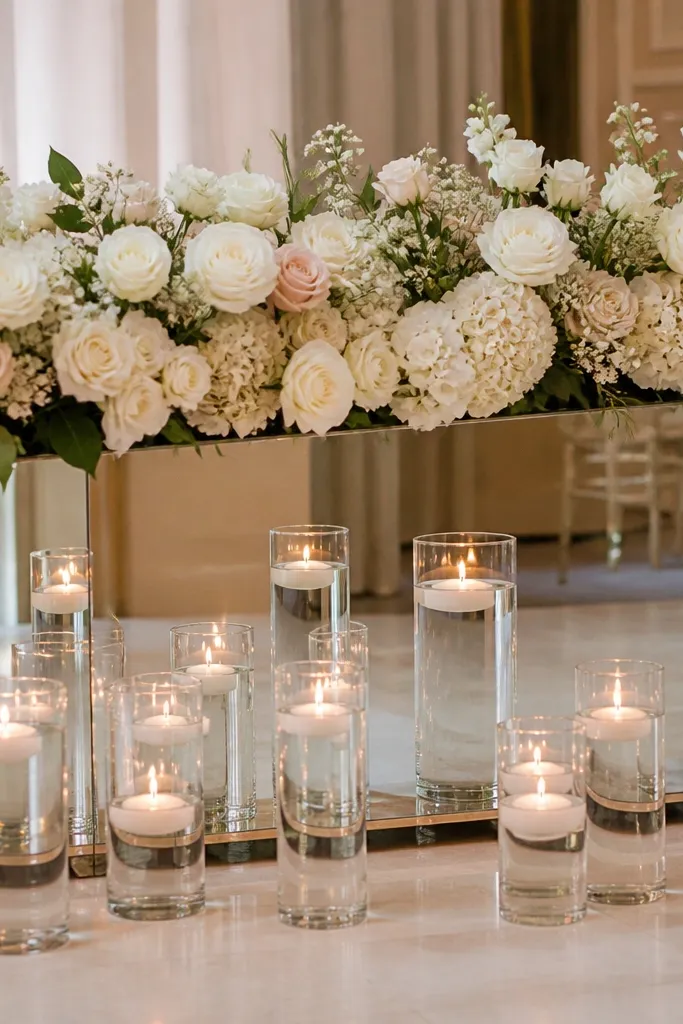
A mirror changes the whole stage because it doubles light and adds depth without extra height. Floating candles add movement and warmth, and the mirror makes the stage feel fuller even when you use less decor. I've done this with a simple greenery strip and a few white blossoms so the mirror does the heavy lifting visually. This setup flatters both formal dresses and simple suits because it adds soft glow and keeps the background clean. It also works well for evening ceremonies where you want candlelight to read on camera.
Place a large mirror panel (or mirrored acrylic for safety) on the stage floor behind the couple's chairs, centered. Lay a low greenery strip across the mirror so it sits about 6-8 inches from the front edge. Add a few white flower heads spaced 8-10 inches apart so you don't get a dense clump. Put floating candles in clear glass cups or shallow containers on the front edge of the mirror. Finally, check reflections in a phone camera - if you see glare, tilt the mirror slightly and reposition the candles.
Try thisUse warm LED candles if the venue is strict; the mirror still makes them look like real flames.
Common mistakeAvoid glossy sequins or metallic confetti on the mirror - it creates harsh glare spots.
13. Pallet Wood Backdrop with Chalked Welcome Sign
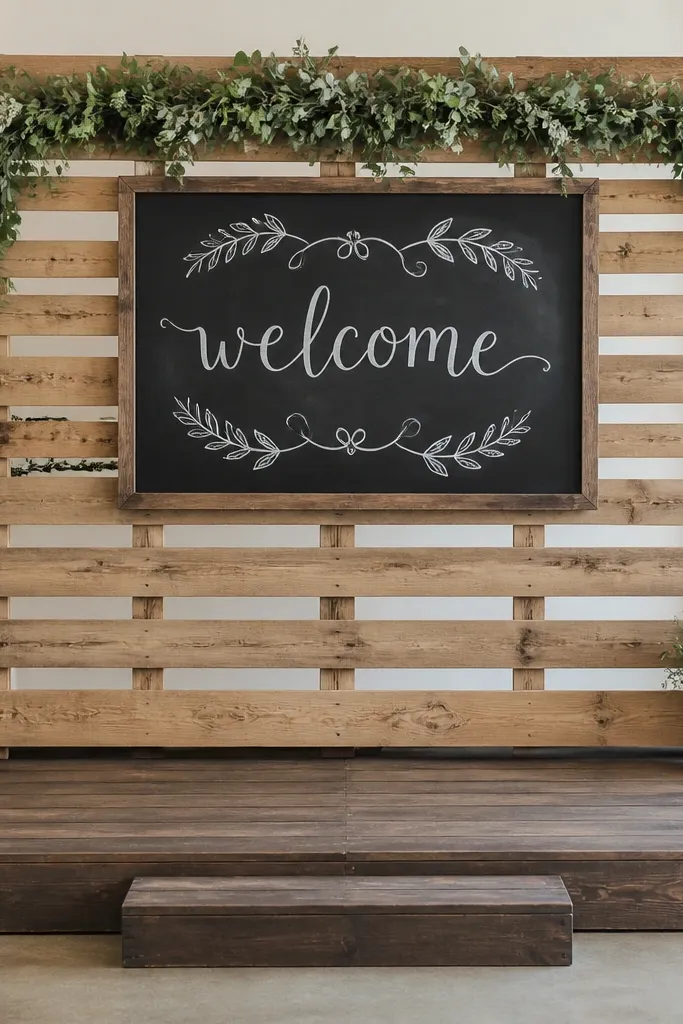
Pallet wood looks rustic, but it photographs surprisingly clean when you keep the palette tight. The wood grain gives texture and depth instantly, and you don't need a lot of extra decor to make the stage feel styled. A centered chalked sign gives you a clear focal point that also works for vows photos. I like using light brown or sanded pallets because dark wood can swallow lighting and make the stage look heavy. This is a solid choice for outdoor ceremonies, barn venues, and informal weddings.
Sand your pallet lightly and wipe it clean so dust doesn't smear the chalk. Stand the pallet against the stage or mount it on a board for stability. Paint or seal lightly if the wood is rough, then add a chalked sign centered at about 5-6 feet from the floor. Run a thin greenery garland along the top edge only, keeping it under 10 inches wide so it doesn't crowd the sign. Add a simple runner in burlap or cream linen at the base to tie the look together.
Try thisUse a chalk marker for the sign outline, then fill the lettering with chalk so it looks crisp in photos.
Common mistakeAvoid dark, unsealed pallets - they absorb light and make everything behind it look dull.
14. Rope + Dried Lavender Bundles as a Side Runner
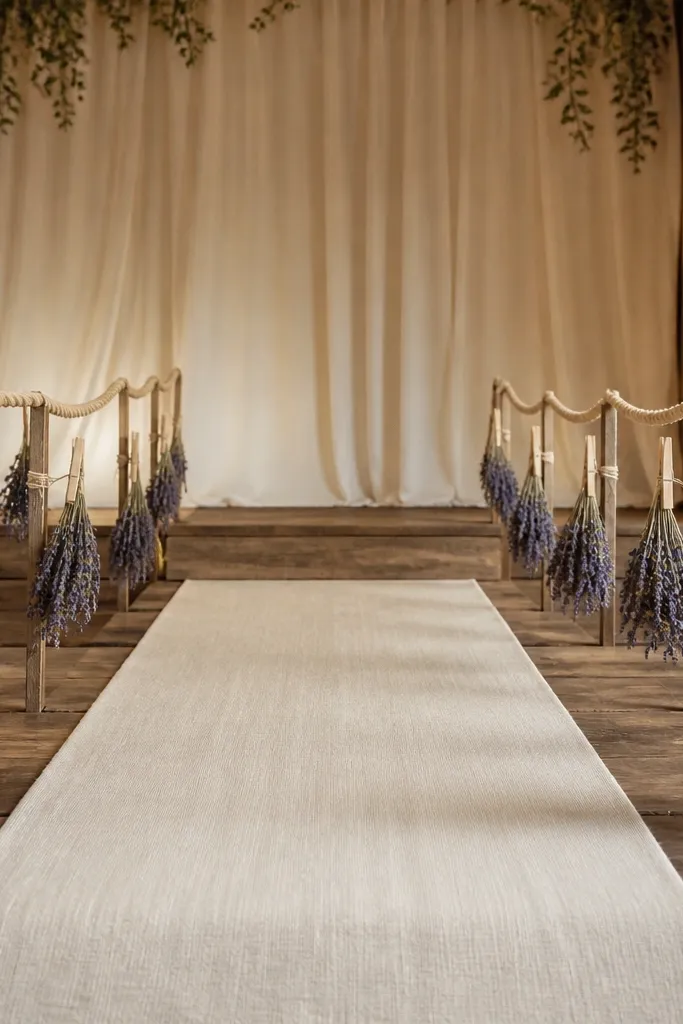
This is a budget stage idea that looks intentional without being "wedding themed." Dried lavender bundles have a soft color and visible texture, and rope adds a tactile frame along the edges. It's great for ceremonies where you want the couple to be the main event and the stage to feel airy. Lavender also flatters warm skin tones and looks clean with white dresses and navy suits. If your venue has a plain background wall, this side treatment gives you depth without needing a full backdrop.
Start with a cream or natural linen runner on the floor, centered under the couple's seating. Along the left and right edges, lay thick rope in a gentle curve, then secure it with zip ties to weights underneath or to a hidden chair-leg support. Clip dried lavender bundles onto the rope using small binder clips so you can adjust spacing quickly. Place the largest bundles at the corners and slightly smaller ones toward the center so the line looks curved, not uniform. Finish by adding one small lavender bundle at the base of the center table or chair so the look ties together.
Try thisSpritz the lavender lightly with a tiny bit of lavender oil on a cloth, not directly on the bundles, so it smells great without staining.
Common mistakeAvoid overly messy bundle sizes - pick 3-4 consistent bundle sizes so it looks designed.
15. Yarn Pom Pom Clouds Across the Back Wall
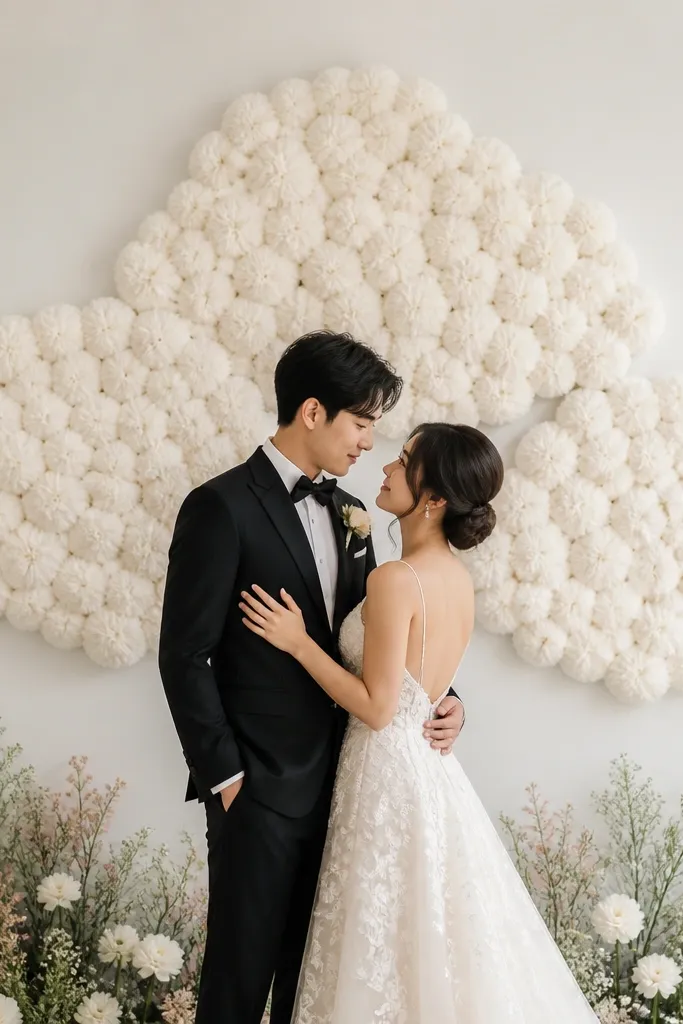
Pom pom clouds are one of those ideas that look playful in person but read styled in photos when you use a limited palette. Yarn texture fills negative space and creates a soft background that doesn't compete with faces. I like all-white or white plus one warm shade like ivory because it looks clean under flash. This works for indoor ceremonies and for couples who want a cozy, modern vibe instead of formal floral walls. It also hides uneven walls because the pom poms cover patches and seams.
Make or buy yarn pom poms in two sizes, like 4 inches and 2 inches. Stretch a white backdrop sheet, then mark three cloud zones with pencil lines on the sheet. Hot glue the larger pom poms first in each cloud outline, then fill gaps with smaller ones until the cloud edges look fluffy. Leave a 2-3 inch margin around the center so the couple's seating stays visible. Place a simple low bouquet in the center bottom and keep side decor minimal so the pom pom clouds stay the focal point.
Try thisUse a lint roller on the pom poms before setup so fibers don't stick up unevenly.
Common mistakeAvoid bright neon yarn - it looks like a craft room under wedding lighting.
16. Fabric Flower Budget Garland with Tulle Loops
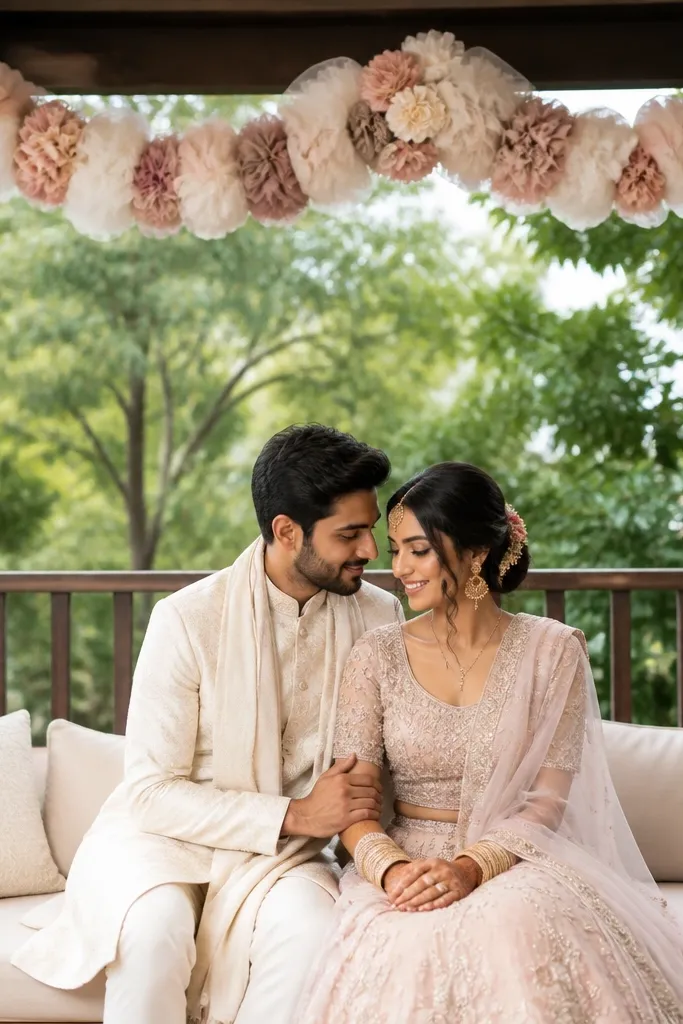
If you want the look of a floral garland without buying a full set, fabric flowers plus tulle loops give you volume and softness. The tulle loops act like little petals, so even a smaller number of flowers looks full. This reads romantic and works with both pastel and neutral palettes. I've used white plus blush and it always photographs clean because the tulle is light and the flowers sit on top. It's especially good for outdoor stages where wind can move lighter fabric - the garland still looks intentional.
Create a base garland line using thin floral wire or a pre-made vine garland. Attach fabric flowers every 10-12 inches using hot glue on the back of each flower and then wire tie the stem. Add tulle loops between flower clusters by folding tulle strips and tying them around the wire line. Hang the garland from a top rail so it sits above head level and drapes down 8-12 inches at each side. Secure the garland at the ends so it doesn't twist and expose the wire in front of the couple.
Try thisMatch your garland color to the couple's accent accessories, like boutonniere tones or hair pins, so it feels coordinated.
Common mistakeAvoid thick, heavy fabric flowers - they make the garland droop and look saggy in photos.
17. Gold Picture-Frame Runner Backdrop with Faux Leaves
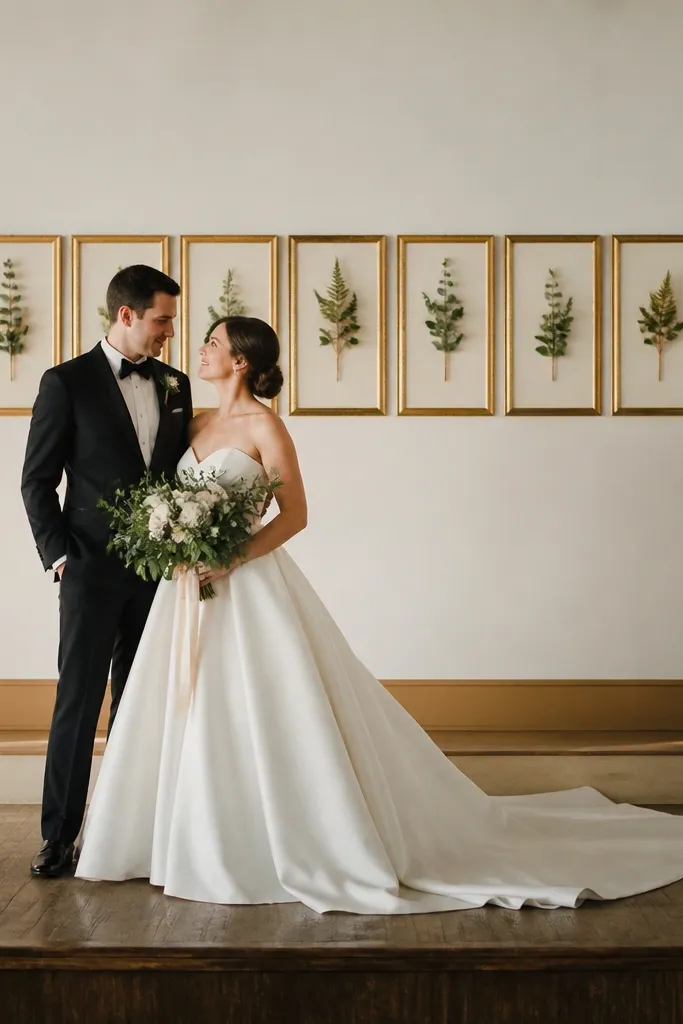
This is a clean stage idea when you want something modern and not too "romantic." Gold frames add structure and catch light, and the faux leaf sprays keep it from looking empty. I keep it horizontal and aligned so it reads tidy in photos. The gold tone flatters warm lighting and pairs well with cream, white, and soft green palettes. It also works for both men's and women's outfits because the leaf color sits in the neutral-green zone instead of competing with wedding colors. If you're doing a small stage, this design uses the wall space without crowding the floor.
Mount or stand 9-12 picture frames in a straight line across the back wall, keeping the top edges level. Use frames that are about 8x10 inches for a tight row, and remove glass so you can place greenery directly. Wire one faux leaf spray into each frame, then trim it so it doesn't extend past the frame edges. Add a small central cluster in the middle frame with a few extra leaves for emphasis. Place a simple runner on the floor and keep table decor low so the frame line stays the focus.
Try thisPaint frame backs the same color as your backing wall so gaps don't show bright mismatched material.
Common mistakeAvoid crooked frame spacing - even a 1-inch difference shows clearly in the camera.
18. Thrifted Vases in a Color-Blocked Trio
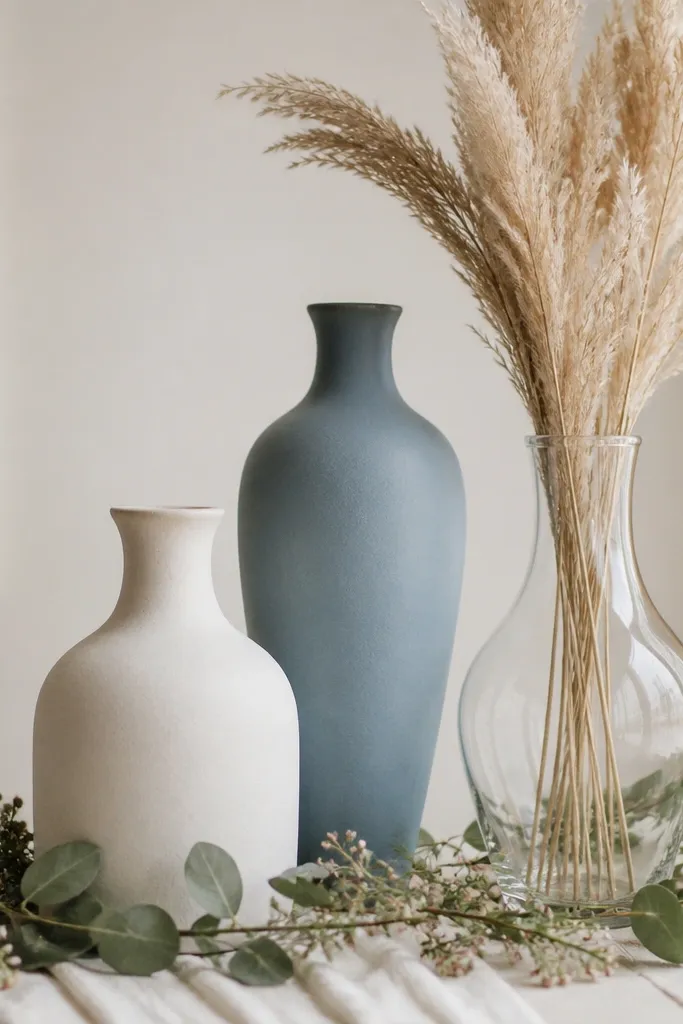
Color-blocked vases make the stage look styled without a big backdrop. You build the focal point through repetition of shape and color, not through a wall of flowers. I tested a trio on a small stage and it looked balanced because each vase height matched the couple's eye line. Matte ceramic reads soft in photos, while one clear vase adds dimension. This setup works for almost any ceremony because it's neutral enough to let the couple's outfit be the hero. It's also easy to adjust if your venue lighting is warm or cool.
Find three vases with different heights: 10-12 inches, 16-18 inches, and 22-26 inches. Choose a tight palette like matte white, dusty blue, and clear glass so it looks intentional. Place them on a cream runner centered behind the chairs, with the tallest vase in the middle. Add greenery first, then small filler flowers, then one statement dried element like pampas or a tall branch. Keep the arrangement height consistent across the trio so the stage looks symmetrical from the front.
Try thisUse foam or floral tape inside the vases so stems stay upright and don't droop during the ceremony.
Common mistakeAvoid mixed random colors - if you can't name the palette in one sentence, it will look messy on camera.
19. Paper Lanterns with a Single Floral Band at Head Height
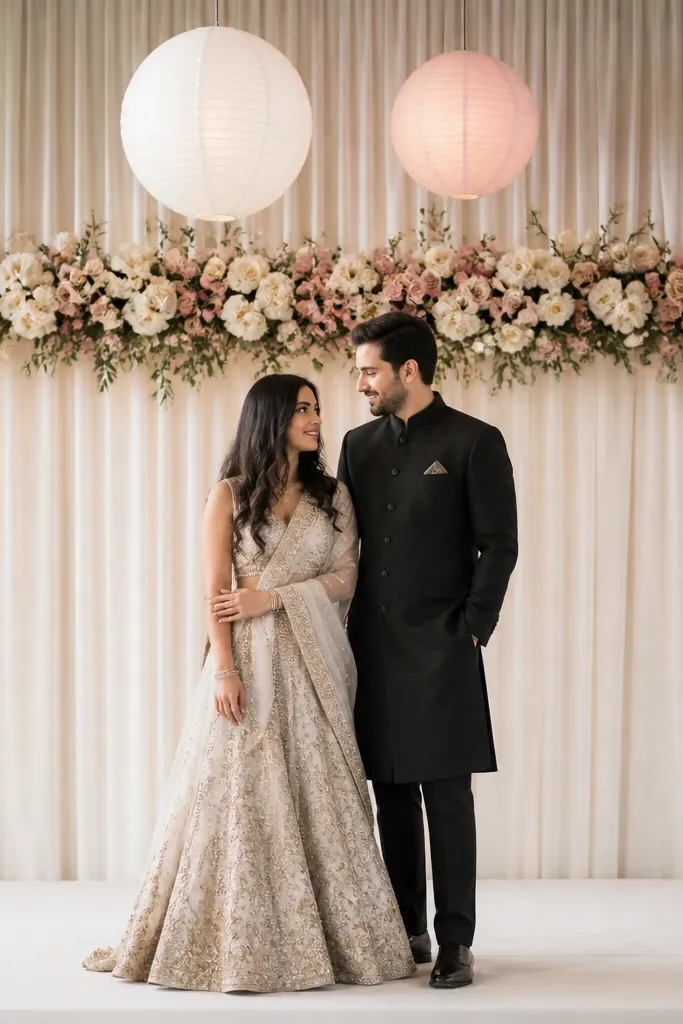
This idea works because it uses one horizontal floral band for structure and lanterns for vertical interest. Paper lanterns are cheap, easy to hang, and they soften harsh lighting in a way that always looks good in photos. The floral band keeps it wedding-y without the cost of a full floral wall. I use blush and white lanterns with a simple greenery band so it doesn't clash with dresses. This is especially good when your venue has a plain wall and you want the stage to look styled from both front and side angles.
Hang two paper lanterns behind the couple, one on each side of center, about 6-8 feet apart. Keep the lantern bottoms at about chest-to-head height so they frame faces, not just the ceiling. Create a floral band using faux greenery and a few larger blooms, mounted on a lightweight rod or tied to a backdrop line. Place the band at head height, centered, and keep it about 2-3 feet wide so it doesn't cover the couple. Add a small base arrangement on the floor to connect the band to the stage.
Try thisUse lantern lights inside only if your venue allows; otherwise, keep them unlit and rely on the soft lantern shape.
Common mistakeAvoid lanterns placed too low - they block faces and ruin the framing.
20. Back Wall Fabric Strip Curtain in a Gradient
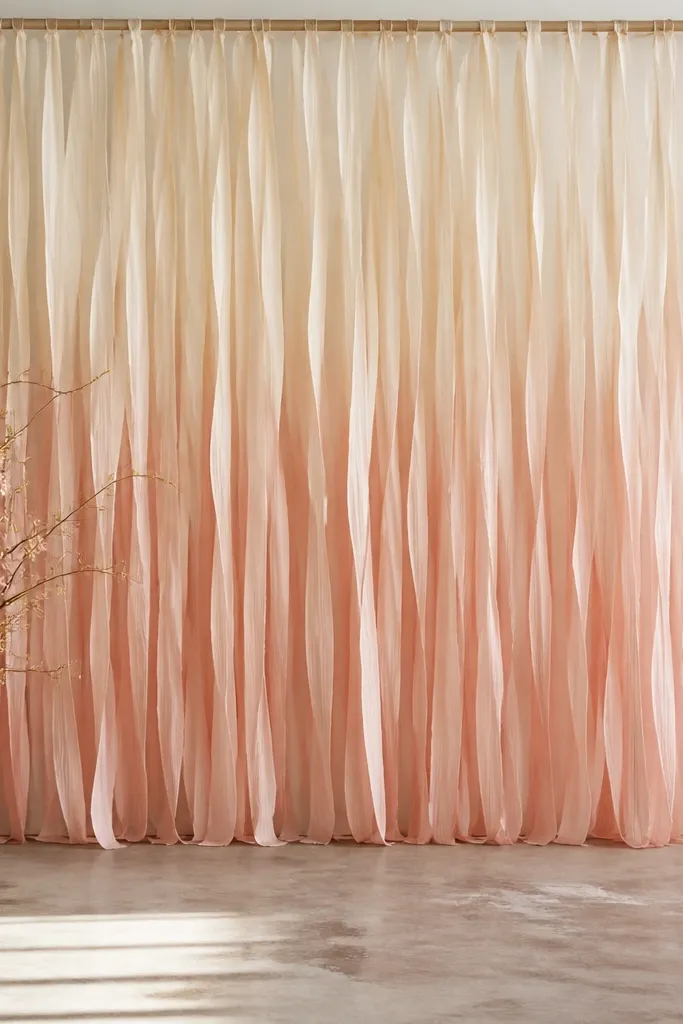
A fabric strip curtain is one of the cheapest ways to get movement and depth at the back of the stage. The gradient effect makes the background look intentional, and the strips create soft shadows that help the couple stand out. I like ivory-to-blush because it flatters almost every skin tone and looks good under both warm and cool venue lighting. This is a good option when you don't want flowers, or when flowers would be too expensive. It also works for both men and women outfits because the background stays soft and doesn't compete with details like lace or buttons.
Cut fabric strips about 10-12 inches wide and 4-6 feet long, using a mix of chiffon or lightweight cotton. Attach strips to a top rod with rings or clips, starting with ivory at the highest point and moving to blush lower down. Keep strip spacing consistent, about 1-2 inches between strips, so the gradient looks smooth. Gather the center slightly so it frames the couple, then let the sides hang straight. Place a simple low runner and one small floral arrangement at the center bottom so the stage has a grounding point.
Try thisIron the fabric strips in batches so the edges fall crisp instead of curling.
Common mistakeAvoid heavy velvet strips - they look thick and swallow the light.