1. Dusty Sage Linen + Warm Ivory Plates
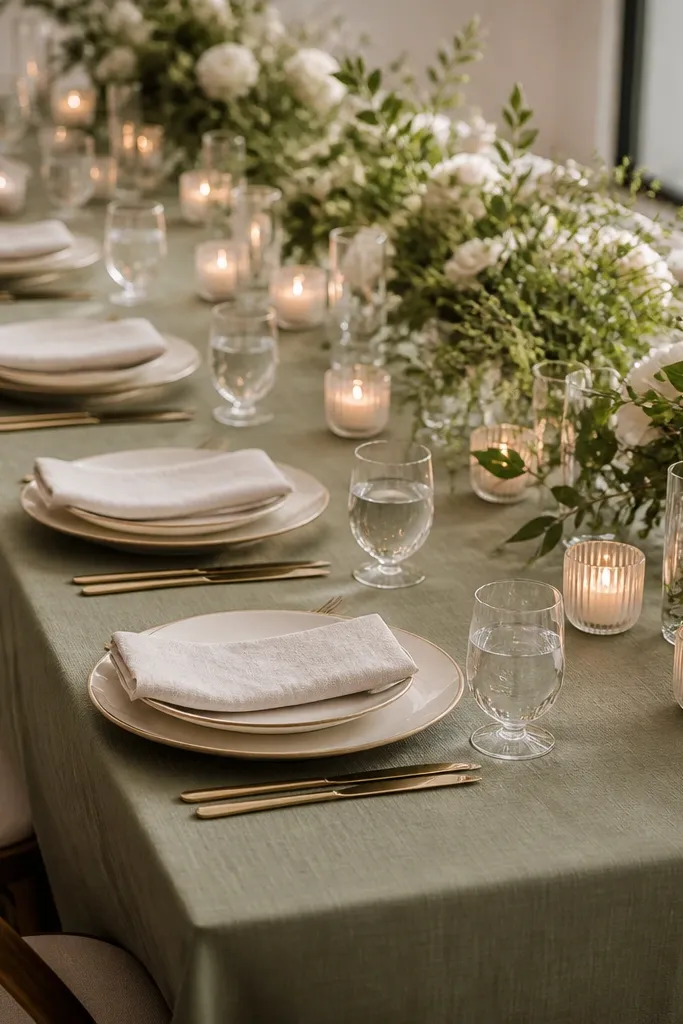
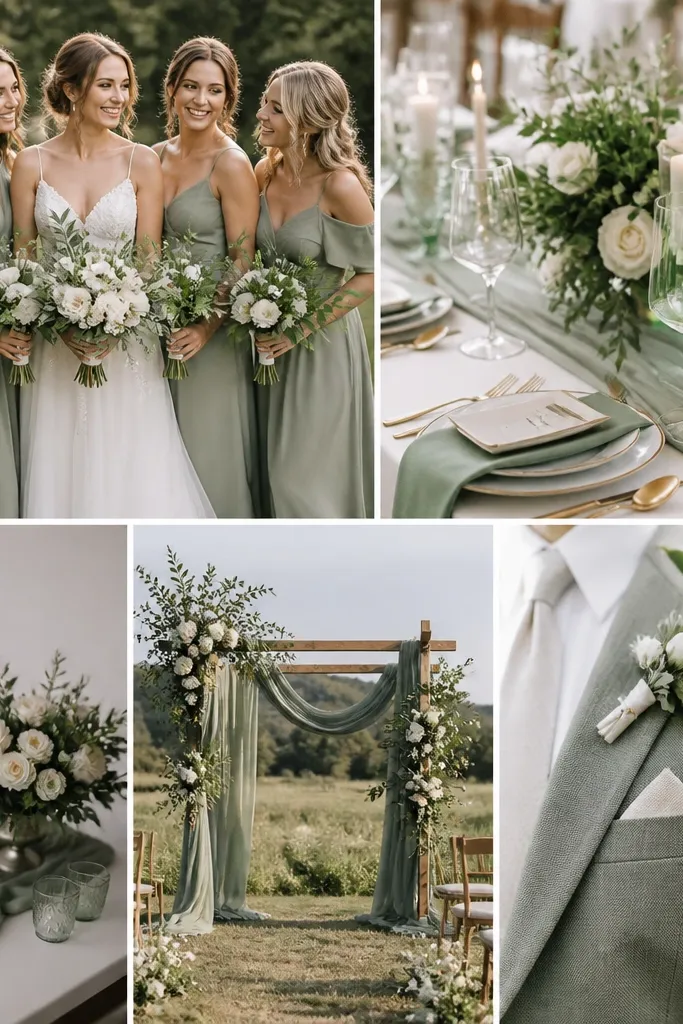
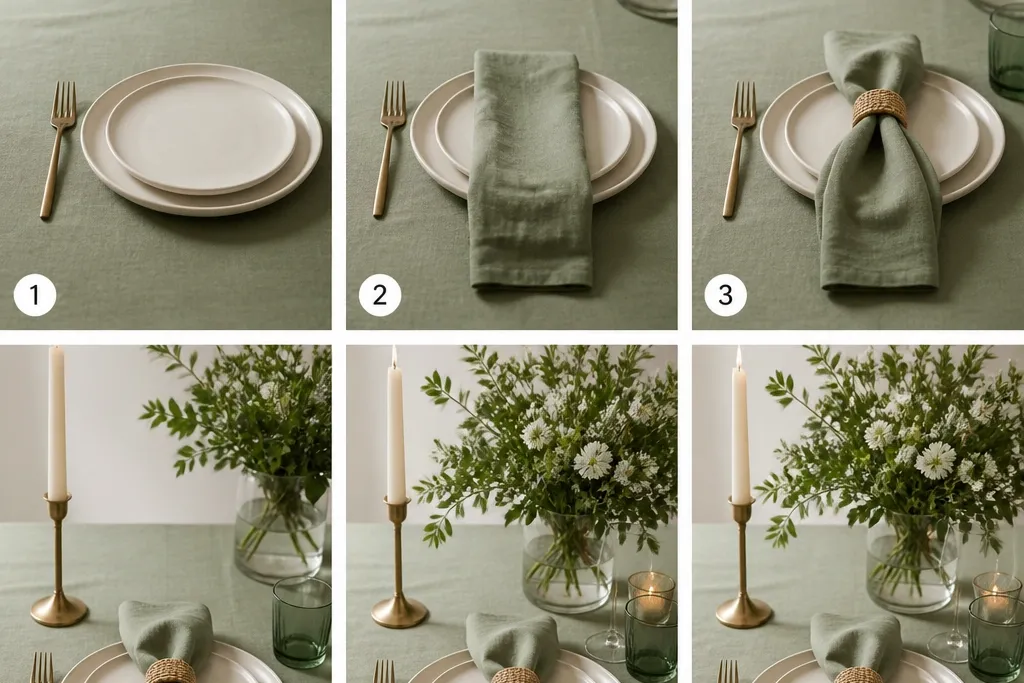
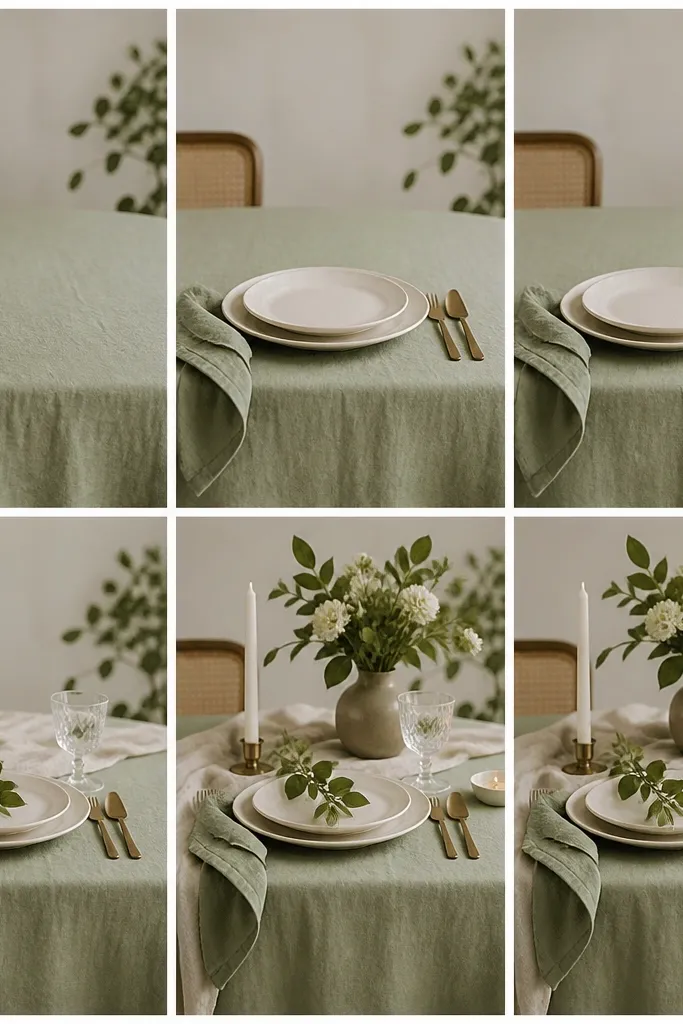
I use this combo when the venue lighting is warm because warm bulbs can make sage look too muted. Dusty sage linen has enough body that it doesn't look sheer or slippery, and warm ivory plates keep it from turning gray. The result reads calm and romantic, not "country green." It flatters most skin tones when guests wear neutrals or soft pastels, because the table doesn't fight with their clothing. I also like it for daytime receptions because the ivory brightens the whole scene without adding harsh contrast.
Start by laying your sage tablecloth so it hangs evenly - aim for 10-14 inches of drop on a standard dining table. Place ivory plates centered on top of chargers (matte ceramic or subtle bone china look best). Fold napkins in a simple rectangle or classic tri-fold and set them with the fold opening facing inward toward the center of the table. Add brass cutlery accents and keep candle holders clear or frosted so light bounces across the sage. Finish by aligning glasses so every place setting has the same spacing from the plate edge.
Try thisIf your sage looks too gray, swap to warm ivory plates and add one brass element per setting like a napkin ring.
2. Sage Runner Over Cream Cloth (Asymmetrical Draped Look)
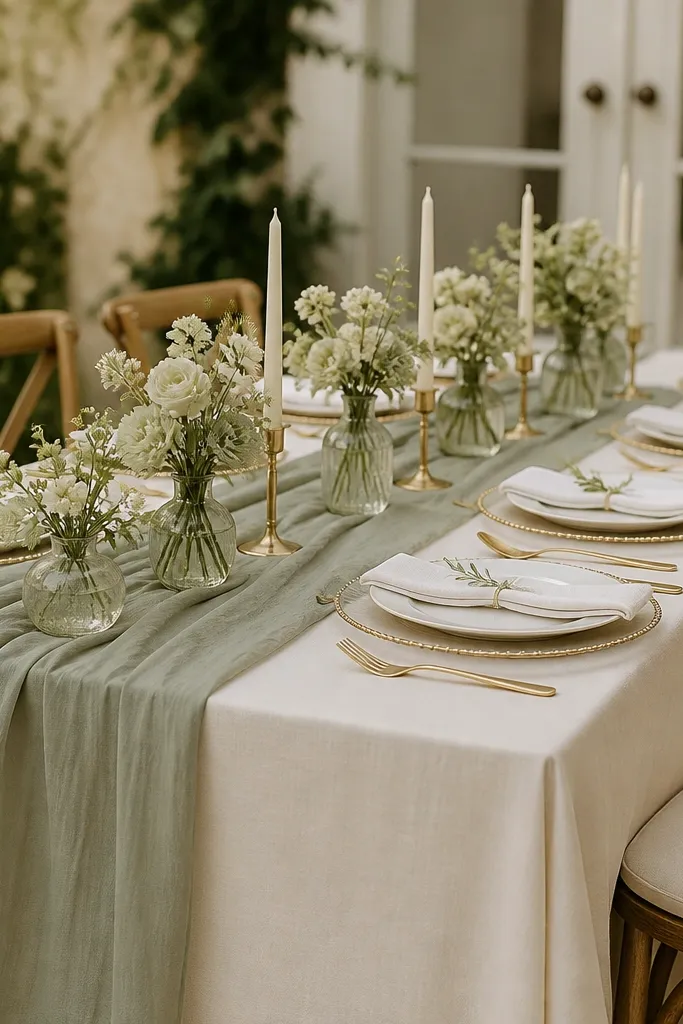
This look is for brides who want sage to feel intentional but not heavy. The cream base keeps everything bright, while the sage runner adds the wedding color without covering every inch of the table. I've done this for outdoor tables where the wind makes full cloth coverage look messy, and the runner stays simpler to manage. It flatters people who wear cooler tones like silver jewelry, because sage reads clean against cream. The asymmetry makes the table feel styled even when your centerpieces are minimal.
Start with a full cream cloth and iron it flat so the surface doesn't pucker under the runner. Place the sage runner lengthwise, then shift it about 2-3 inches off center and let one side fall more than the other. Set plates slightly under the runner so each place setting catches sage at the edge. Fold napkins in a soft roll and tie a sage ribbon around them or use a sage-toned napkin ring that matches the runner. Add a narrow floral line of bud vases down the runner center, then put taller candles only at the far ends and one mid-table spot.
Try thisUse a runner width of 14-18 inches so the sage reads like a deliberate stripe, not a narrow ribbon.
3. Smoked Glass + Sage Florals in Clear Vessels
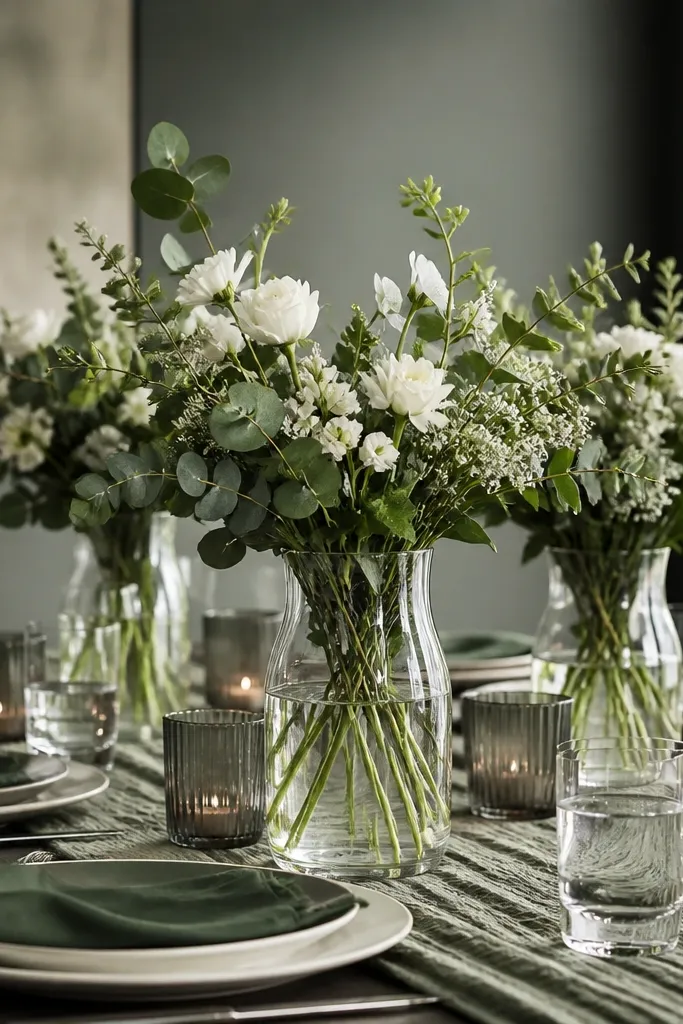
If you want sage to feel modern instead of "garden cottage," smoked glass is the trick. Sage foliage looks richer when it sits next to dark, low-sheen glass because it adds contrast without turning the table flashy. I've used this for evening receptions where guests wear darker outfits, and the table photos come out crisp. It works especially well if your wedding palette includes charcoal, deep green, or black accents. The key is keeping the florals mostly green and white so the sage stays the star.
Start with a neutral base - either cream cloth or a very light stone table covering. Add smoked glass votives in a loose line, leaving 6-8 inches between each cup so the table doesn't look cluttered. Place your main clear vessels in the center and fill them with sage foliage first, then tuck in small white blooms. Use dark green napkins only if they match the foliage undertone - think olive, not neon. Set cutlery so the metal is minimal; I like brushed nickel or simple steel with smoked glass nearby.
Try thisKeep white blooms limited to one type so the arrangement looks styled, not random.
4. Sage Velvet Napkins with Ivory Chargers
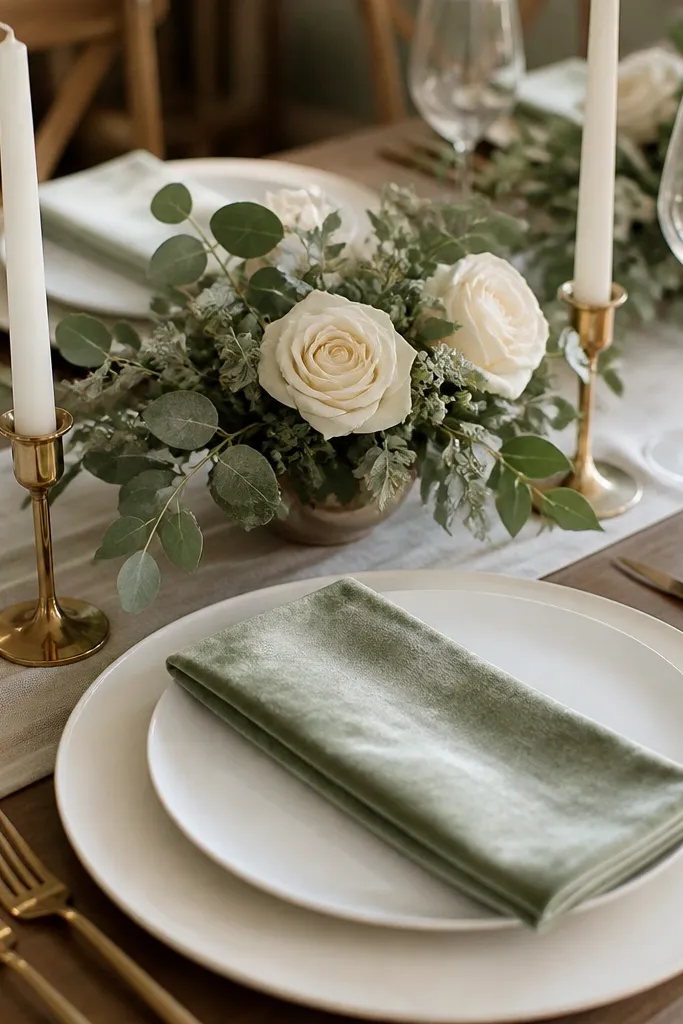
Velvet changes sage from "color choice" to "texture statement." I use this when the venue has wood, warm walls, or low lighting because velvet absorbs glare and makes the table look rich without adding lots of extra items. Sage velvet also flatters guests who wear gold jewelry, since the napkin texture makes gold accents look intentional. It feels more formal than linen, so it works best for dinner-style layouts. The table reads cozy and elevated in photos, especially with matte ivory plates.
Start by choosing a velvet napkin that's deep sage, not pale mint. Fold each napkin into a clean rectangle and place it centered on the plate, with the velvet face up. Use matte ivory chargers under your white plates so the texture contrast stays interesting. Add a small gold or brass candle holder every other setting, not at every place, so the gold doesn't overwhelm the sage. For florals, keep arrangements low and airy - sage leaves plus cream roses - and avoid bulky blooms.
Try thisSteam velvet lightly from a distance so you don't crush the pile.
5. Olive-Sage Mix with Blush Peonies
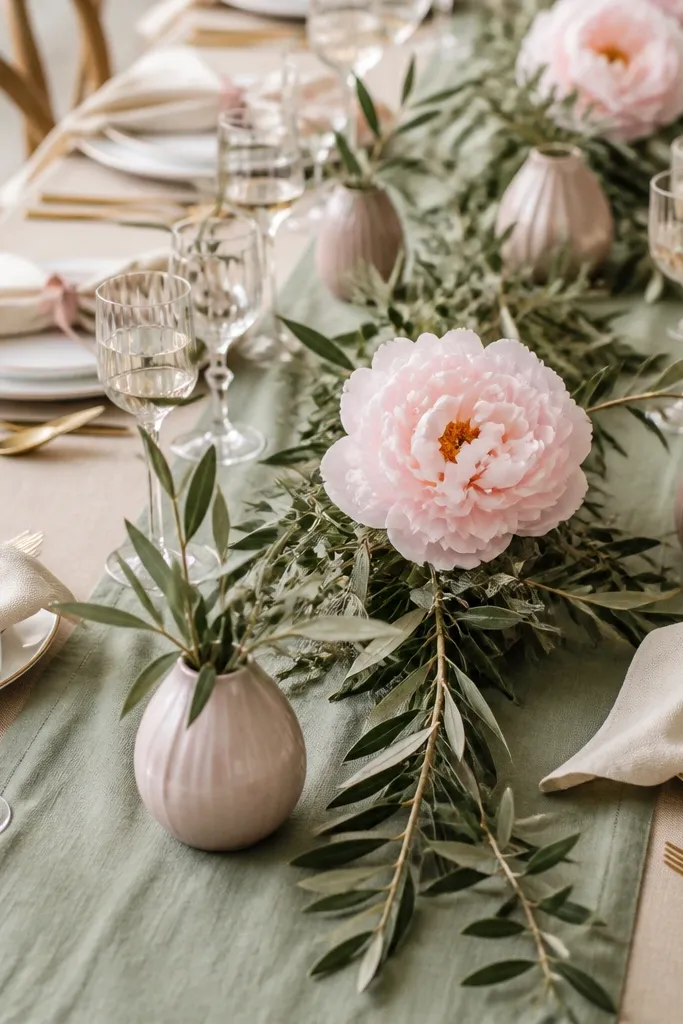
This mix is my go-to when the bride wants sage but also wants a romantic floral look. Olive-sage greenery gives depth, while blush peonies add warmth so the table doesn't look cold. I've found sage alone can feel a little sterile next to bright whites, but blush brings the skin-tone-friendly softness back. It flatters people with warm undertones because the blush echoes that warmth. The styling principle is undertone matching: keep your sage toward muted green, not gray, so it plays well with blush.
Start by spreading your runner so it's wide enough to hold the eye, then place ivory plates centered on top. Fold napkins in a simple fan and tie a thin blush ribbon around the middle, leaving ends uneven for a natural look. Build your centerpiece with olive branches as the base, then layer sage leaves around them. Place blush peonies at the top center only, then add small cream filler blooms around the edges. Finish with gold flatware and a few blush bud vases spaced every 3-4 settings.
Try thisIf peonies are unavailable, use garden roses in blush and keep the greenery mix the same.
6. Sage and Cream Macrame Runner
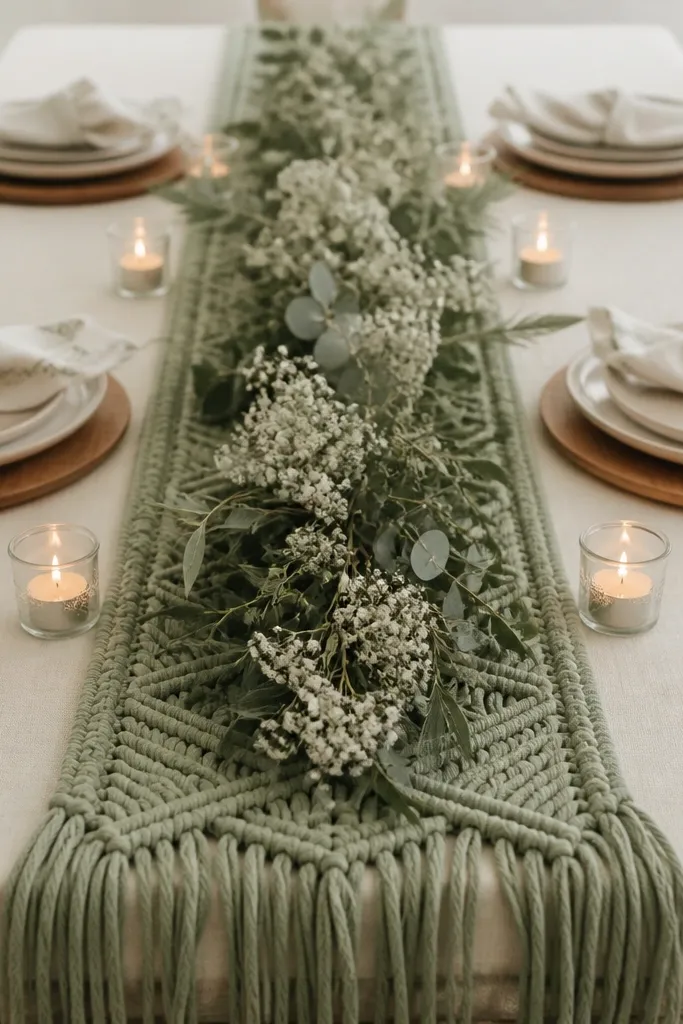
Macrame brings a handmade feel that makes sage look intentional even with simple florals. The open weave lets the cream table show through, so the color stays light and airy. I use this for spring weddings when you want texture more than bold color. It photographs well because the runner creates shadows and depth. It flatters guests wearing casual chic outfits because it looks warm and lived-in, not formal-glossy. The guiding idea is to match texture with your centerpiece: airy greens and small white flowers work best.
Start with a cream base cloth and place the macrame runner centered, then check that it sits flat at both ends. Use natural wood chargers under cream plates for a cohesive warm tone. Fold napkins in a loose roll and tie with a thin sage twine or place them with sage-stitch napkins if you have them. Put candle jars in clear glass on either side of the runner, keeping them spaced so shadows don't overlap. Keep the centerpiece low and spread gently - no tall stems - so the macrame stays the visual star.
Try thisPin the runner to the table with hidden clips so it doesn't shift during setup.
7. Monochrome Sage Layers with Matte Black Cutlery
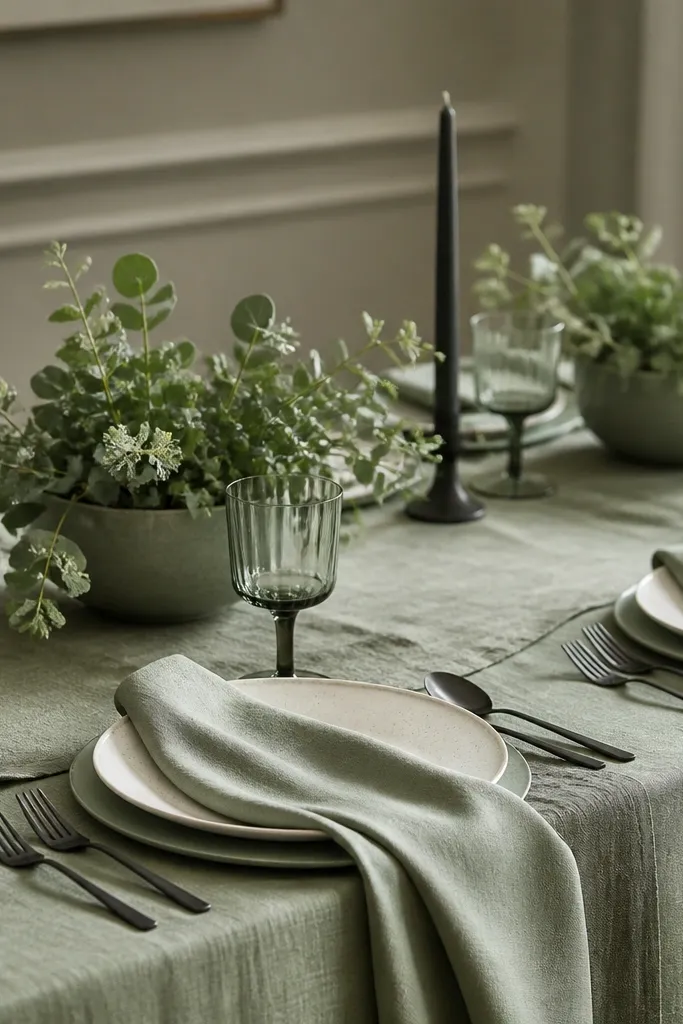
This look is for people who want sage to feel graphic. Matte black cutlery and black candles sharpen the sage so it doesn't blur into greenery. I've set this up for couples who wear black suits or dark dresses, and the table photos look clean and modern. It flatters cooler skin tones because the black contrast makes complexion look more defined. The principle is monochrome layering: keep your greens in the same family, then add one dark element to anchor it.
Start with a sage tablecloth and then add a second layer like a sheer sage overlay or a sage runner in a different finish. Place ivory plates and sage chargers so each setting has a clear color block. Fold napkins into a structured rectangle and use a sage napkin ring in a matte finish. Add matte black cutlery and keep it aligned - same angle at each place. Use low ceramic bowls filled with sage greenery as centerpieces, and keep candle heights consistent across the table.
Try thisChoose black tapers with a slight wax texture so they don't look too glossy in photos.
8. Sage Tablecloth with Gold Rim + Pearl Napkin Rings
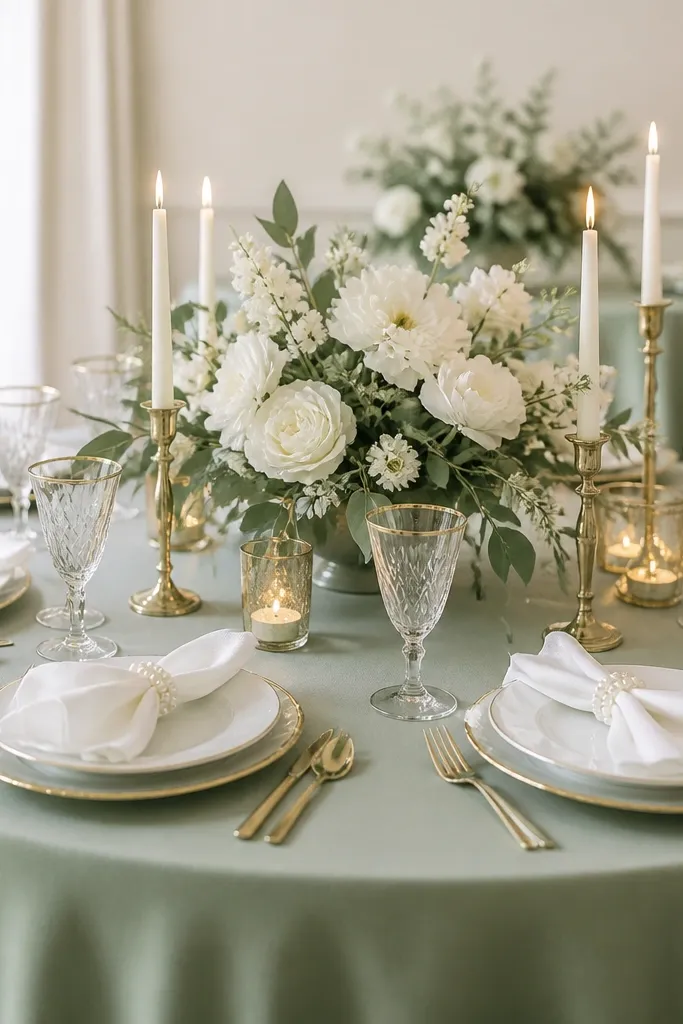
This is the "classic wedding" version of sage, and it's the one I reach for when the venue is formal. Gold rim plates add warmth to sage without changing the overall calm feel. Pearl napkin rings keep the look feminine and make the table feel dressed up even with a simple centerpiece. It flatters nearly everyone because pearls read neutral and flattering next to both warm and cool skin tones. The styling principle is controlled shine: one kind of metallic and one kind of soft detail.
Start by using a sage tablecloth with a smooth finish so the gold rim doesn't look fuzzy. Place gold-rim plates centered on the table, and set white napkins folded into a crisp rectangle. Slide pearl napkin rings onto the napkins so they sit about 1 inch below the plate rim. Add gold candle holders in the center line, spaced so each holder aligns with a gap between place settings. Keep florals low with white blooms and sage leaves, and avoid adding extra colors like bright pink.
Try thisWipe gold-rim plates with a microfiber cloth right before the ceremony so fingerprints don't show.
9. Herb Garden Theme: Sage Sprigs on Place Cards
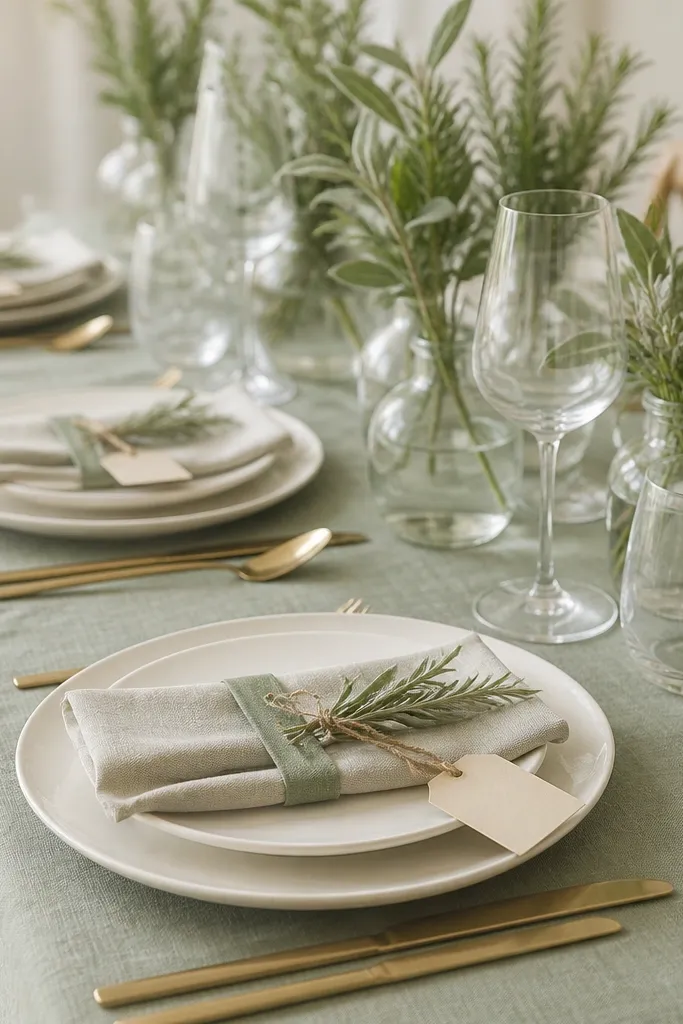
This is my favorite trick when you want sage to feel personal instead of decorative. Herb sprigs look real and read well in close-up photos, especially when you place them right at the napkin or card. Sage cloth gives the backdrop, while rosemary and small green stems add the "garden" texture without extra colors. It flatters guests because the place cards and herbs guide their eye, so the table feels thoughtfully arranged. The principle is small-scale repetition: repeat the same herb accent at every setting.
Start with a sage tablecloth or runner and place ivory plates at standard spacing. Fold napkins into a simple rectangle, then tie each one with a narrow sage ribbon or twine. Attach a fresh sage sprig or mini rosemary sprig to the place card using a thin piece of floral wire or twine, keeping it short so it doesn't hit cutlery. Place the cards upright at the top corner of each plate. For the centerpiece, use small bud vases with sage and rosemary, and keep the height under 8 inches.
Try thisMist herbs lightly before setup so they look fresh, then keep them shaded from strong direct sun.
10. Sage and White Porcelain with Wicker Charger Base
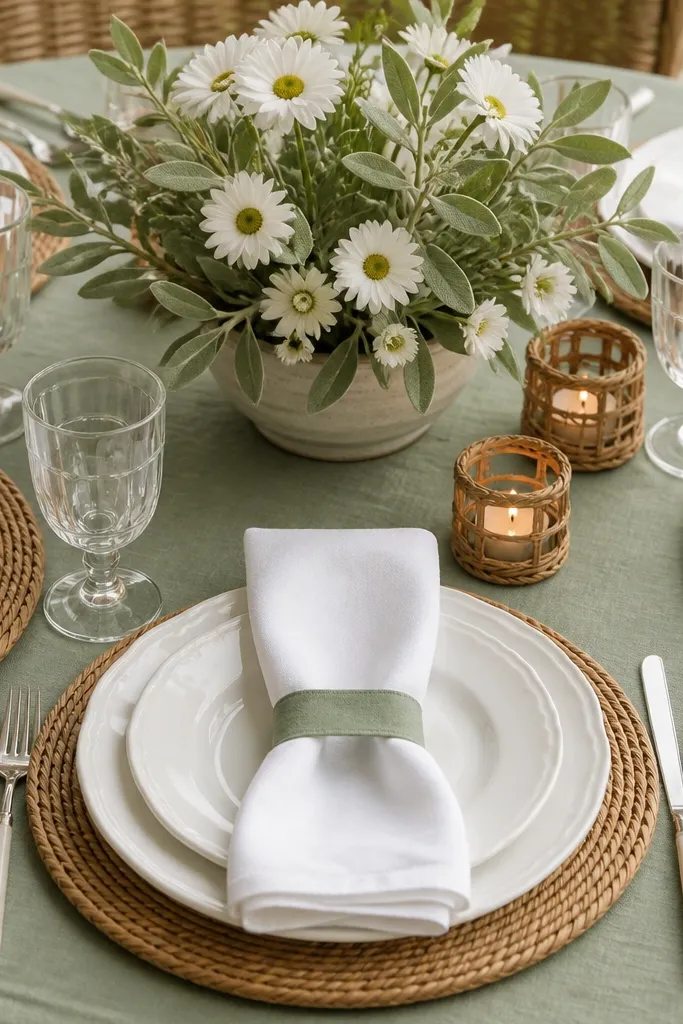
Wicker chargers make sage feel warm and lived-in. The woven texture adds depth that shiny plates can't, and it keeps the table from looking too "flat-green." I've used this for rustic venues where chairs and wood tones dominate, and it ties everything together without needing lots of decor. It flatters neutral outfits because wicker adds a warm undertone that makes ivory and sage look richer. The principle is texture layering: smooth porcelain meets woven chargers meets soft napkins.
Start by placing wicker chargers centered under each plate - keep them consistent so the table looks even. Use white porcelain plates and keep the rim simple, not overly ornate. Fold napkins in a soft rectangle and add a sage band or ribbon tied once around the middle. Add a centerpiece in a ceramic bowl with sage leaves as the base and white daisies or small garden blooms on top. Place rattan candle holders at either ends of the table so the wicker repeats beyond the chargers.
Try thisChoose wicker chargers with a flat top so plates don't wobble when guests move through the table.
11. Sage Runner with Mixed Metals (Brass + Antique Copper)
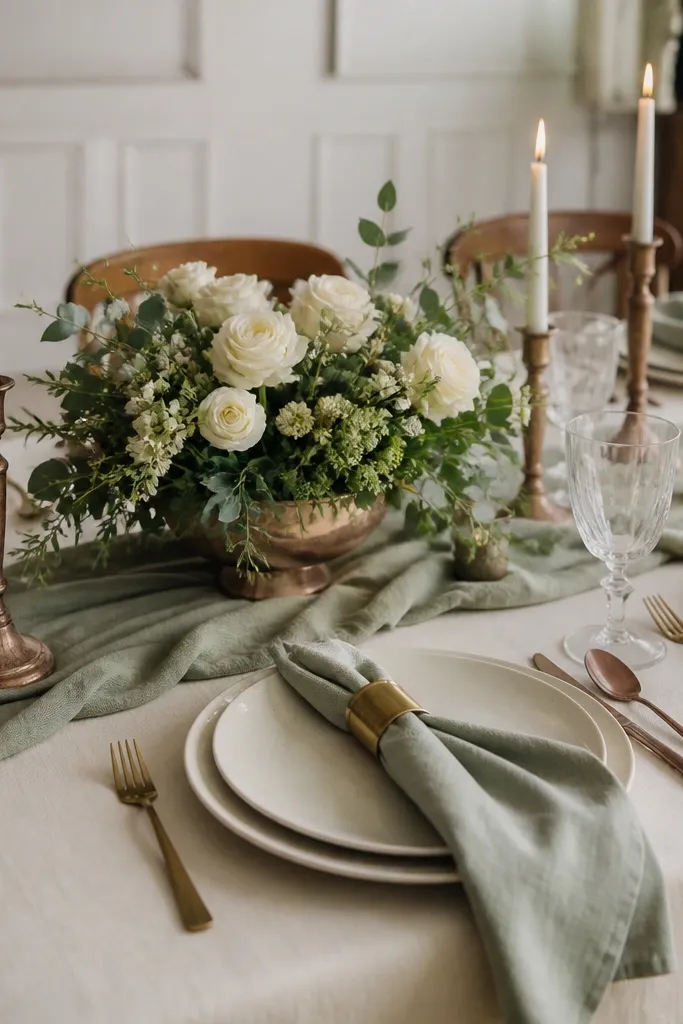
Mixed metals work with sage when you keep the rest of the palette quiet. Brass and antique copper create warmth and depth, and they make sage look less gray. I've seen tables fail when people mix too many metals at once, but two metal tones plus sage looks intentional. This setup flatters people wearing both gold and rose-gold jewelry because the table has a matching range. The principle is limited repetition: use brass for napkin rings and copper for candle holders, then repeat that pattern across the table.
Start with a cream cloth and place a sage runner centered, then add a subtle second layer like a thin lace or sheer cream overlay if you want softness. Place ivory plates and align cutlery so the metal tones don't look random. Use brass napkin rings and keep them all the same size. Put antique copper candle holders at intervals, not directly next to every setting. For florals, use clear or copper-toned vases and keep blooms cream and white with sage leaves as the base.
Try thisTest your metal mix under the venue lighting at night - copper can turn orange if the room is too warm.
12. Sage Linen Napkins in a Half-Moon Fold
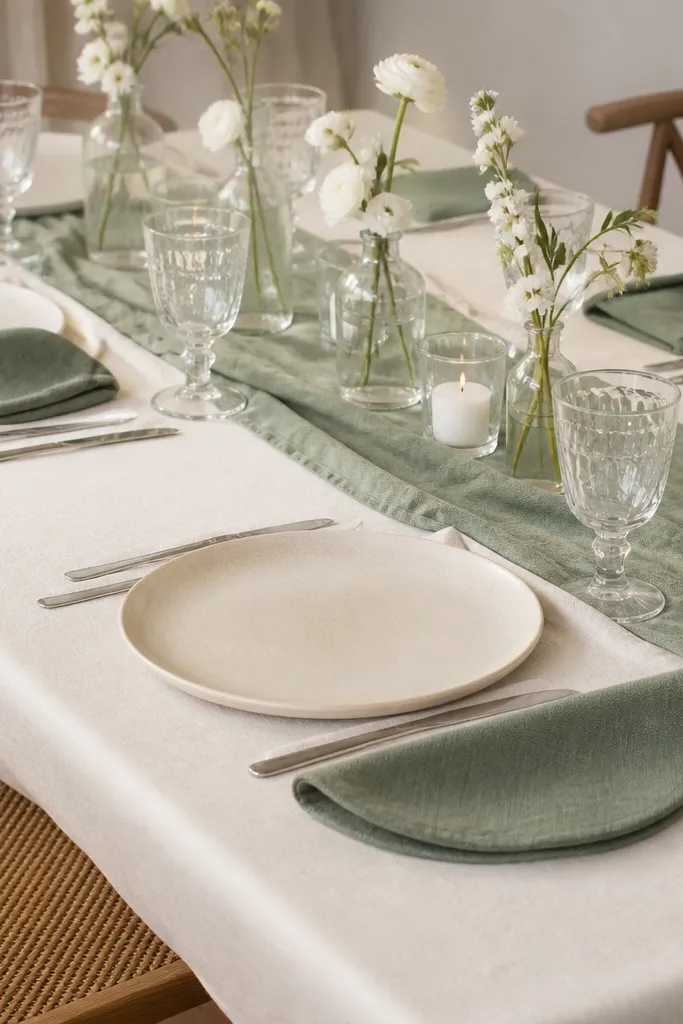
A napkin fold can make sage look styled even with a simple table. The half-moon fold creates a curved shape that catches light and keeps the sage from looking flat. I like this when the table has neutral plates and you want the color to show through the napkins without covering the entire tablecloth. It flatters guests because the curved napkin shape visually softens sharper plate edges and looks good on both slender and fuller tablescapes. The styling principle is shape repetition: keep the rest of your table linear and let the napkins add softness.
Start with a cream cloth and a narrow sage runner down the center. Place ivory plates and keep charger optional - I prefer none for this look so the table doesn't get too heavy. Fold sage linen napkins into a half-moon and place them beside or slightly on top of each plate so the curve faces the center aisle. Add a single stem of greenery in a small bud vase between every 3-4 settings, or keep florals low in one central cluster. Use clear or silver-toned cutlery so the focus stays on the napkin shape.
Try thisPress napkins with a seam-down crease so the half-moon holds during transport.
13. Sage and White Candle Clusters in Different Heights
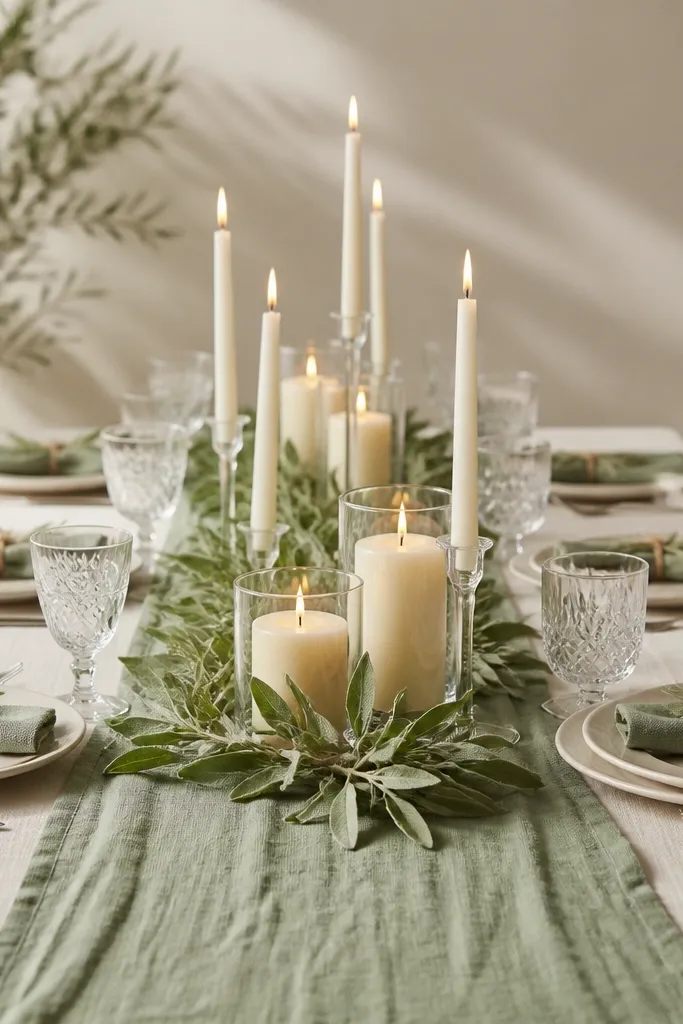
Candles are the easiest way to make sage wedding tables feel expensive. The trick is height variation that stays controlled - tall tapers and short candles in the same family so the table looks intentional. I've used this for evening receptions where the lighting is dim and the table needs glow. Sage leaves around the candle base keep the color consistent even when the candles dominate the visual. It flatters guests because warm candlelight makes skin tones look better, and sage doesn't overpower the glow. The principle is layering light: candles first, then greenery, then a small amount of florals.
Start with a cream base and place your sage runner centered. Arrange candles in the centerline - use one glass tray or a few matching holders so the base is steady. Add tall white tapers at the back and shorter candles at the front, keeping spacing about 4-6 inches between each flame. Tuck sage leaves around candle bases, then add a small cluster of white flowers only where there's blank space. Keep napkins sage and tie them with twine or a thin ribbon, placing them consistently at each setting.
Try thisUse LED candles for rehearsal and test the real candles after you confirm wind protection.
14. Sage + Blush Rosette Napkins with Ivory Linen
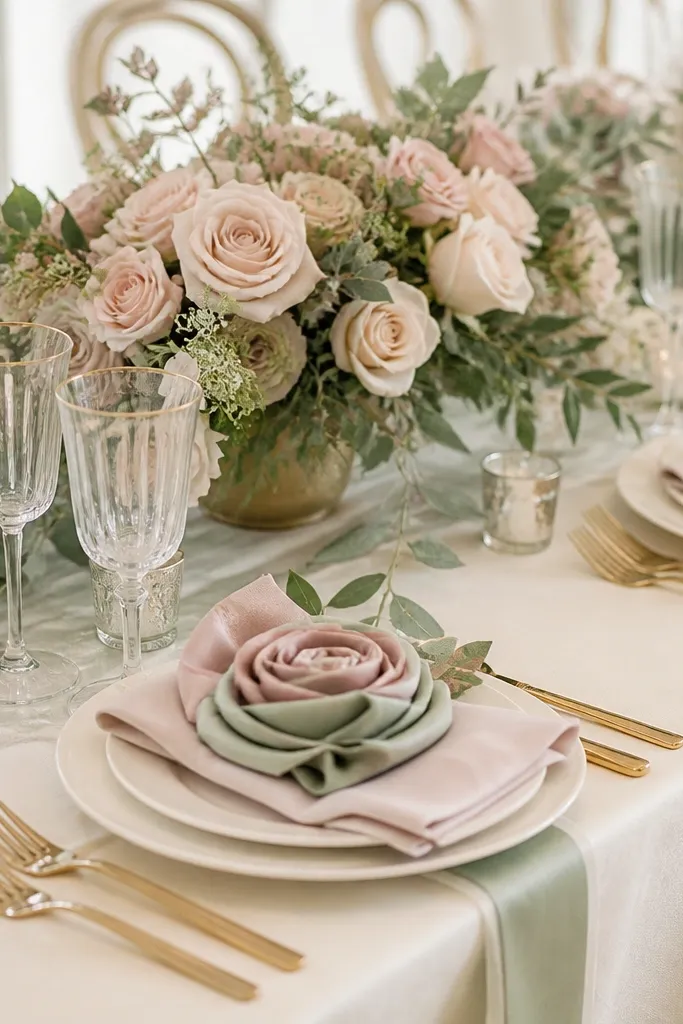
This look gives sage a sweet, romantic energy without turning the table into full blush. The rosette napkin shape reads feminine and photo-friendly because it has dimension even from above. I've used it for bridal showers and weddings when the couple wants soft colors but still wants "wow" at the place setting. It flatters guests who wear blush, rose-gold, or champagne makeup because the table repeats that warm softness. The styling principle is texture and shape: rosettes handle the drama so you keep centerpieces simpler.
Start with an ivory cloth and add a thin sage runner only if your venue needs color at the center. Fold sage and blush napkins into rosettes and place one per setting. Keep the rosette height under the plate rim so guests can still see their place card. Use ivory plates and gold flatware, then add a small blush bud vase or a low blush-and-sage arrangement in the middle of the table. Keep the greenery mostly sage leaves so the color stays coherent.
Try thisPin the rosette fold temporarily with a bobby pin during transport, then remove right before serving.
15. Sage Table Styling with White Lace Overlay
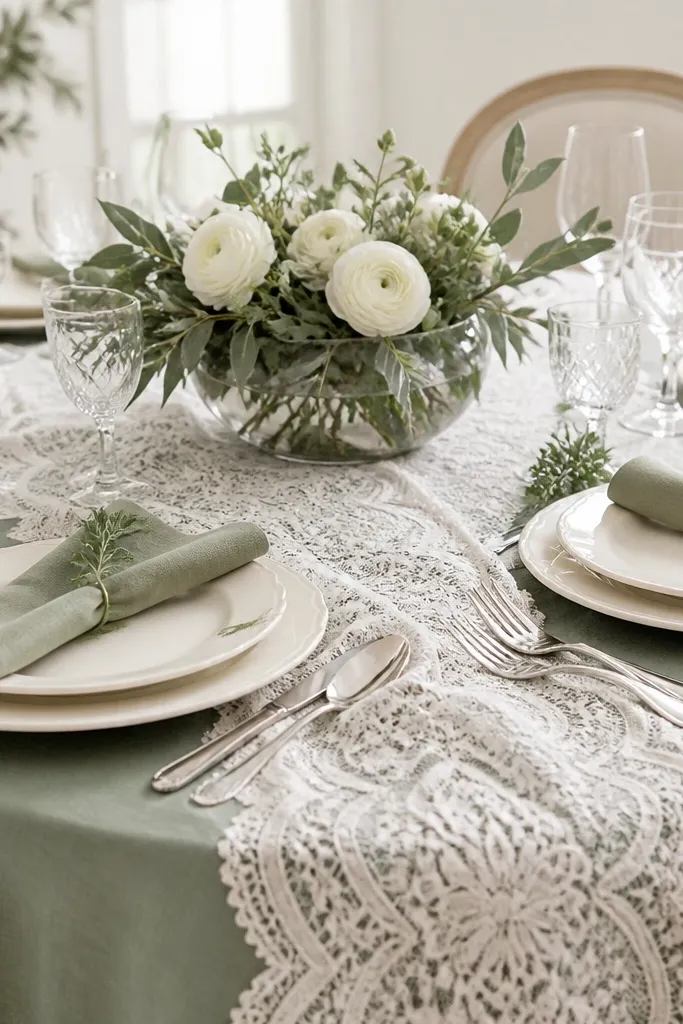
Lace overlay makes sage look softer and more bridal, especially in photos taken from the front. The white lace breaks up the flat color and adds a pattern that makes the table feel finished even if your centerpieces are minimal. I use this when the venue is modern and plain - the lace gives texture without extra props. It flatters a wide range of skin tones because lace is neutral and bright. The principle is contrast through texture, not through adding more colors.
Start with your sage tablecloth, then drape a white lace runner or lace overlay across the center, leaving equal amounts on both sides. Center your plates so the lace pattern sits behind them, not off to one edge. Fold sage napkins into a crisp rectangle and place them centered on each plate. Use white flowers in a glass bowl centerpiece, keeping blooms low and airy. Add a few small clear votives along the lace line, then check that the lace doesn't bunch under candle holders.
Try thisSpray lace lightly with starch before setup so it stays flat and doesn't curl at the edges.
16. Sage + Cream Pampas Grass Look (Soft and Tall)
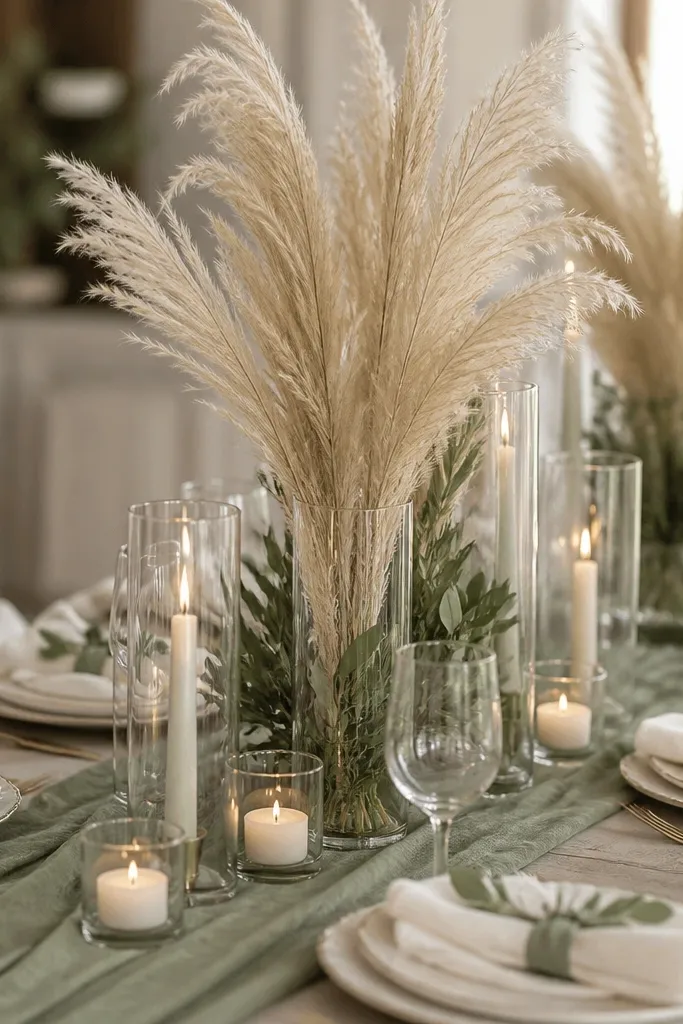
Pampas grass is the fastest way to make sage feel fashion-forward. The beige plumes create a soft vertical line that makes the table look taller in photos, and the sage greenery anchors the color so it doesn't look like a neutral boho table. I like this for indoor receptions with high ceilings or for outdoor receptions where you want a "light" centerpiece that doesn't block conversation. It flatters guests because the beige tone complements both warm and cool makeup. The styling principle is one tall element - pampas - repeated in a few spots, not everywhere.
Start with a sage runner on top of a cream base. Place ivory plates and keep napkins cream with a sage ribbon tied in a simple knot. Put pampas grass in tall vases or tall clear cylinders, and tuck sage leaves right at the base of each vase so the green connects to the table. Add small clear votives around the vases, not directly under the plumes. Keep flower additions minimal - maybe a few white blooms tucked into the sage leaves - so the pampas stays the main shape.
Try thisSpray pampas lightly with a matte fixative or hair spray from a distance so plumes don't shed during setup.
17. Sage + White Orchids in Low Waterfall Bowls
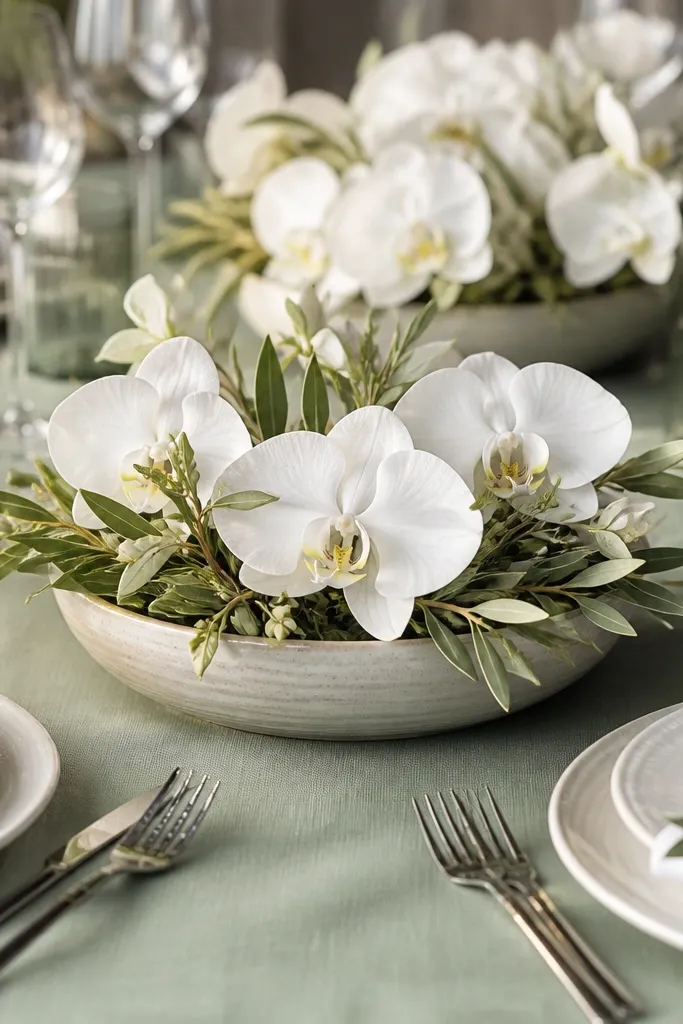
Orchids make sage feel polished without needing heavy gold. White orchids have a strong shape, so they read clearly even if your table is busy with guests. I use low waterfall-style bowls when I want the centerpiece to look like it's flowing down the sides, not towering over plates. It flatters the table because the white blooms brighten everything around them and the sage leaves tie it back. The styling principle is clean lines: low bowls plus strong orchid silhouettes keep the look crisp.
Start with a sage tablecloth that has a smooth finish so the centerpiece looks intentional. Use low ceramic bowls in a matching neutral - cream or white - and place them in the centerline. Put sage leaves around the bowl edges first, then insert white orchids so the blooms face outward. Add a few floating candles or small votives nearby, but keep them low so the orchids stay the focus. Set ivory plates and keep napkins white or cream with a sage ribbon so the table doesn't get too many greens at once.
Try thisTrim orchid stems so the blooms sit 2-3 inches above the bowl rim for a clean waterfall effect.
18. Sage Napkin Rings on a Textured Linen Table
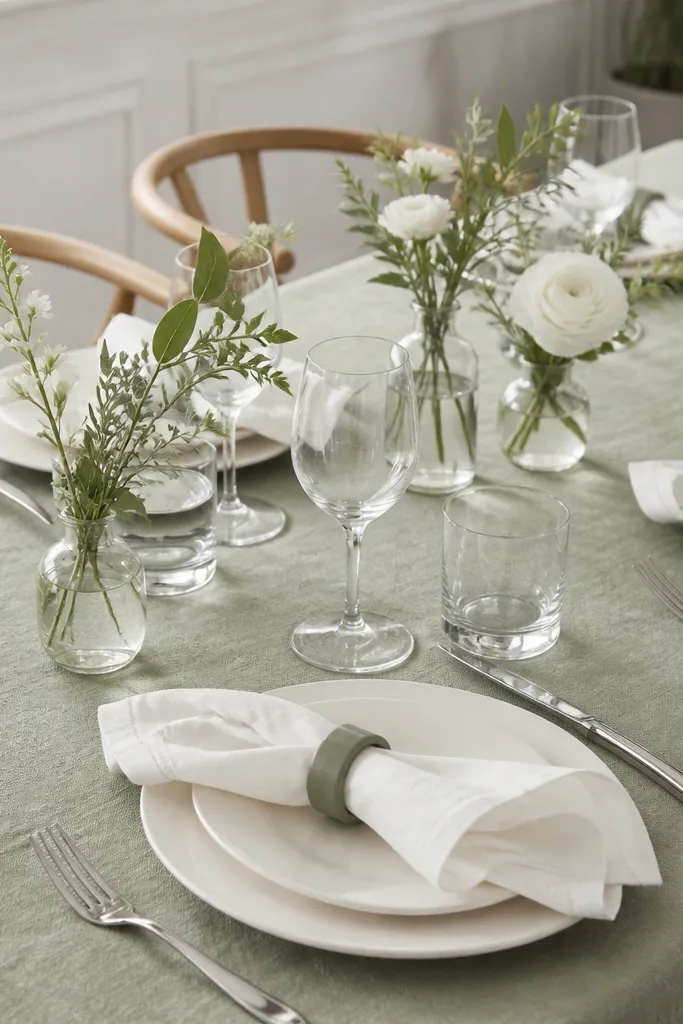
Texture does half the work here, and sage napkin rings are the other half. When your tablecloth has a visible weave, you don't need a lot of extra decor - you just need consistent accents. This look is ideal if your venue has textured walls or wood beams because the table won't look too shiny. It flatters because off-white napkins keep the place settings bright and the sage rings add color at the right height. The principle is repeating a small item - the napkin ring - so the table reads cohesive even with simple centerpieces.
Start by choosing a textured sage linen or a sage table runner with a clear weave. Place off-white plates and keep chargers minimal or skip them. Fold napkins into a consistent rectangle and slide sage napkin rings onto each one so the rings sit at the same vertical point relative to the plate rim. Add bud vases with sage greenery and small white blooms between settings, keeping heights under 10 inches. Use silver cutlery or brushed steel so it doesn't compete with the sage texture.
Try thisMatch napkin ring finish to your tablecloth finish - matte rings look best on woven linens.
19. Sage + Cream Place Cards with Sage Wax Seals
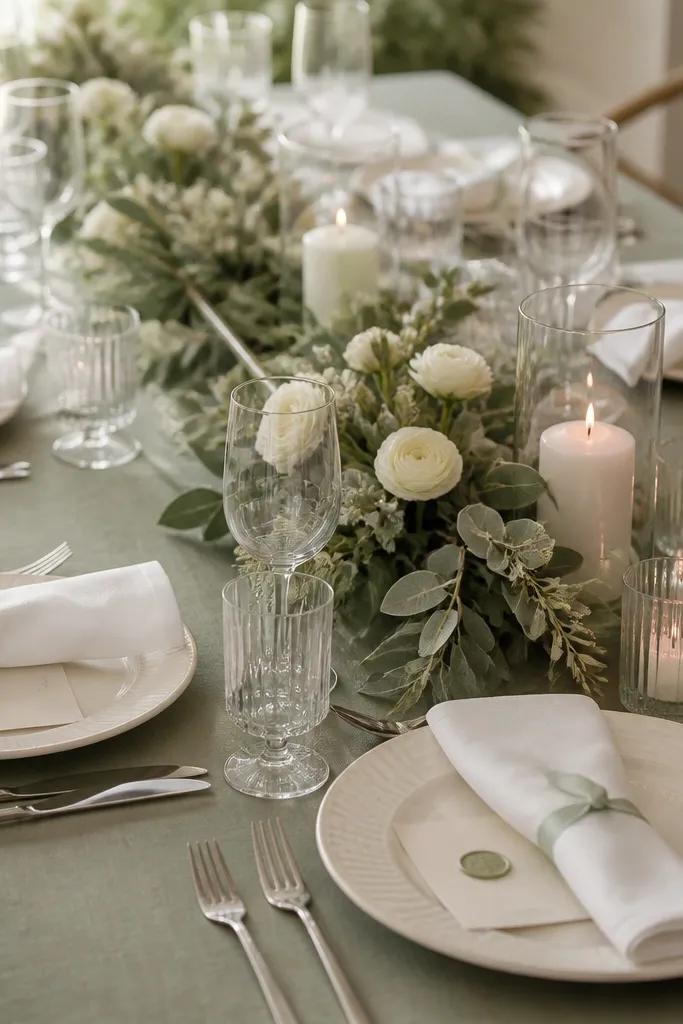
This is a small detail that makes the whole table feel finished. Sage wax seals add a tactile, slightly antique feel that pairs beautifully with clean ivory and sage linens. I've used this at tables where the couple wanted a minimalist look but still wanted a "special" moment at each seat. It flatters because the cards sit near guests' faces in photos, and the sage color ties back to their outfits without being loud. The principle is detail repetition: if every seat has the same seal style, the table looks designed.
Start with ivory or cream place cards sized about 4x6 inches so the wax seal has room. Tie sage ribbon around the napkin and place the card at the top right of each plate. Use wax seals in a muted sage tone - not bright mint - and attach them centered near the top of the card. Arrange a simple centerpiece in the middle with sage leaves and cream flowers, keeping it low so the cards remain visible. Add clear glass candles so the table doesn't get too dark around the wax.
Try thisLet wax cool fully before handling so it doesn't smear onto the card edges.
20. Sage Green Ombre Table Skirt + Brass Candlesticks at the Center
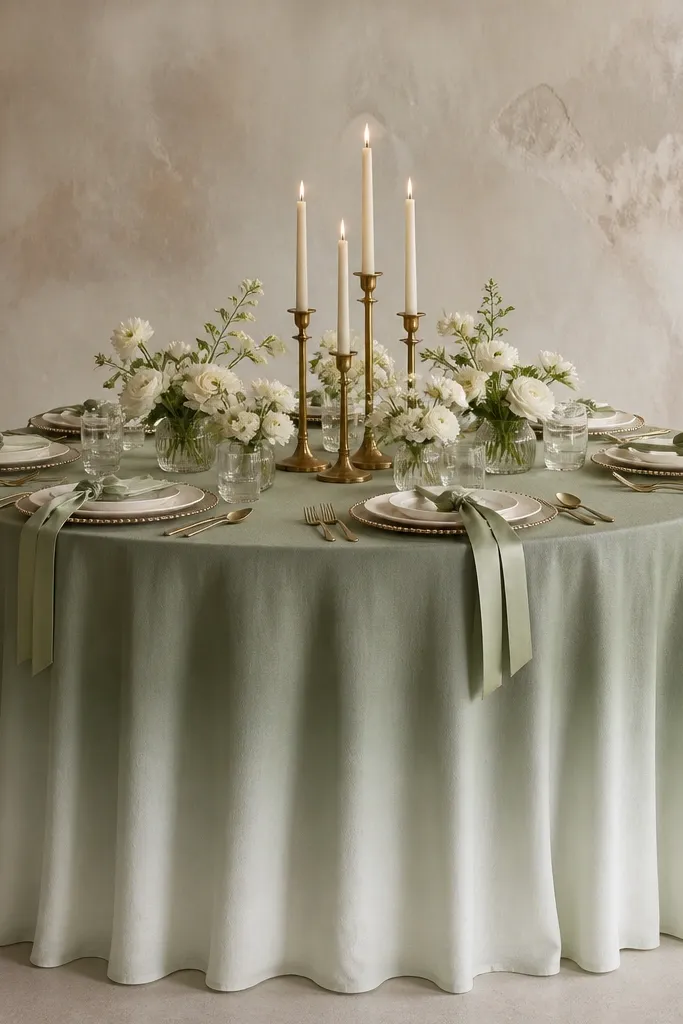
This look gives you movement without adding more clutter, because the ombre skirt creates a soft gradient from the tabletop down to the floor. I've used this when the room lighting is warm and golden - the sage deepens near the top and turns airy at the hem, so photos don't look flat. Keep the center area clean: brass candlesticks pull the eye to the middle and the cream tapers echo the ivory plates. The key is height control. When the candles are the tallest objects and everything else stays lower, the table reads intentional instead of crowded.
First, drape the ombre table skirt so the darkest sage sits right above the plate line and the fade lands evenly on the front edge. Pin it in place at the corners and then smooth the fabric outward from the center so it falls in a gentle arc, not straight creases. Second, place a pair of brass candlesticks in the center with a small tray or mirrored brass base under them, then set cream tapers so the flame sits about level with the top of your tallest floral stem. Third, build the center arrangement in clear glass cylinders or short vases, keeping stems 2-3 inches shorter than the candles. Finish each place setting by tying a short sage satin ribbon around the napkin in a single knot, then angle the knot toward the guest so it catches light.
Try thisMatch the candlestick metal to the ribbon sheen - if the ribbon is satin, use brushed brass instead of shiny gold.
Common mistakeDon't let the floral stems climb above the candle flames - if they do, the center looks messy in both person and photo.