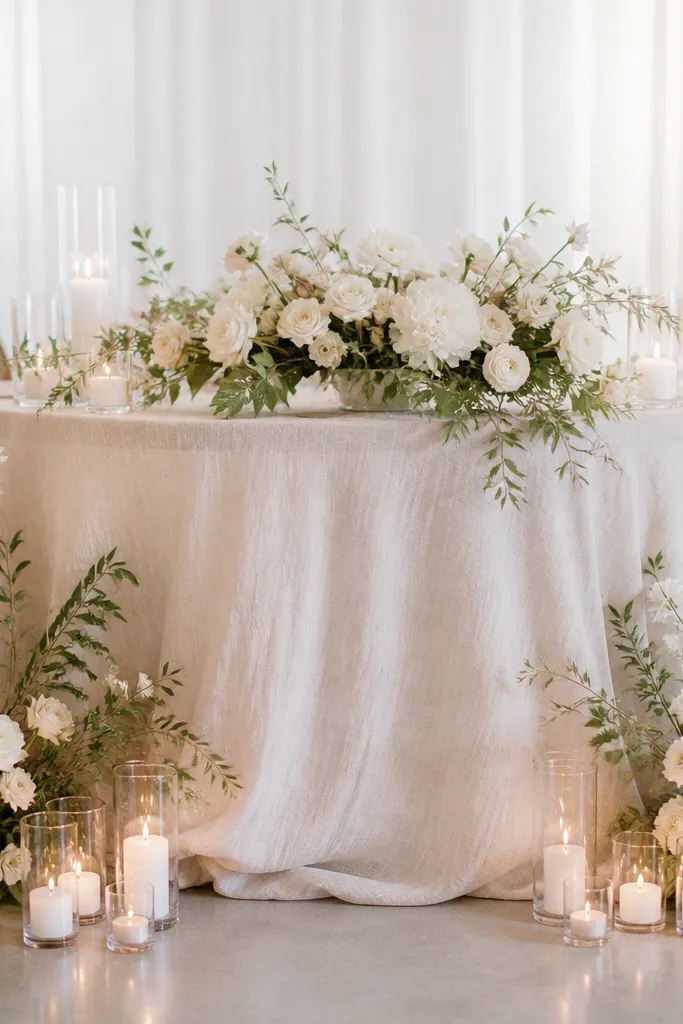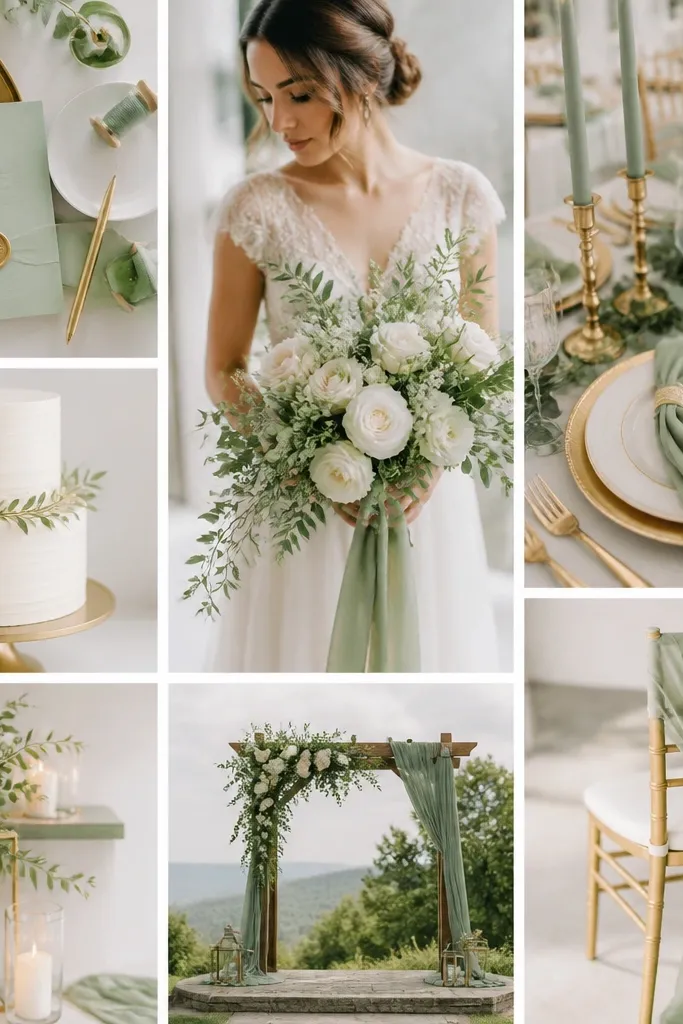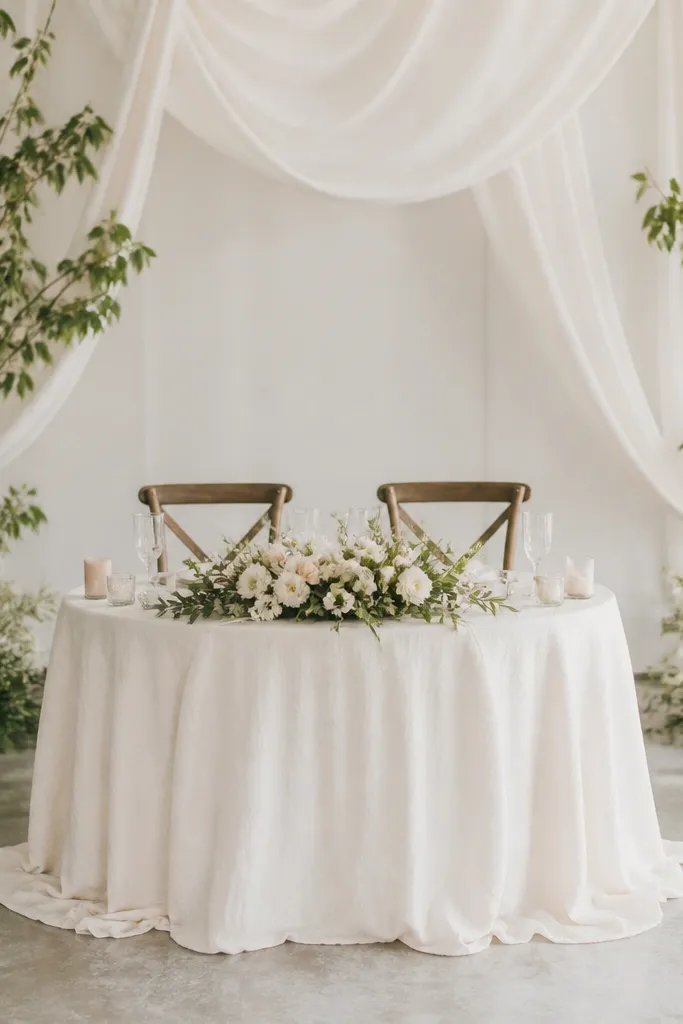
1. Cream tulle cloud on a round frame
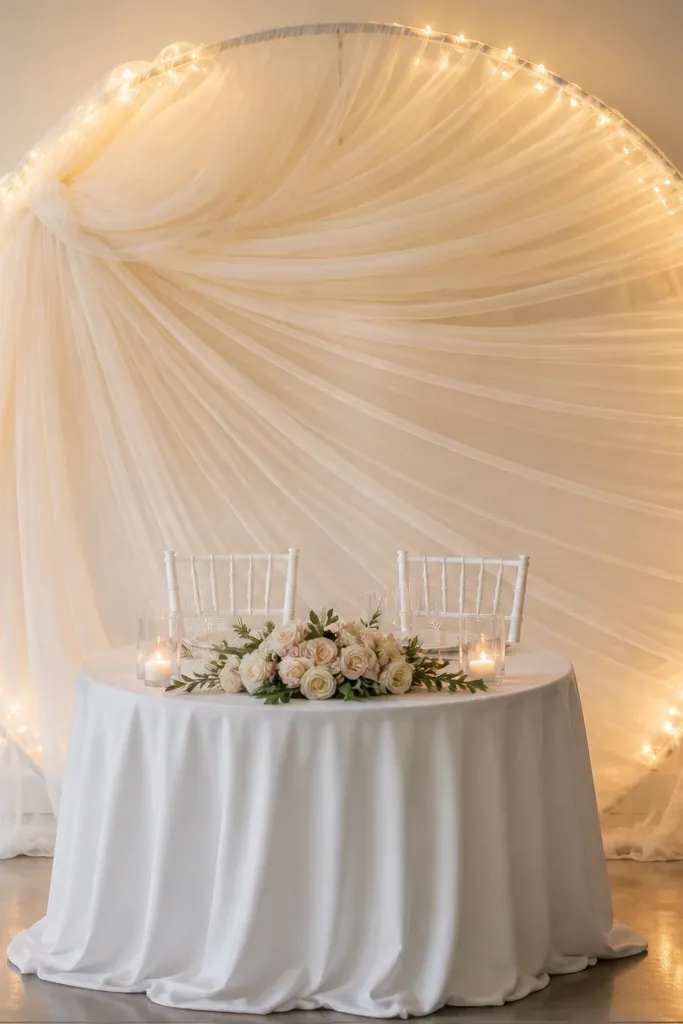
This is the backdrop I reach for when the venue lighting is unpredictable. The cream tulle gives you a forgiving, photo-friendly glow, and the circular shape naturally matches a round sweetheart table wedding layout. I've used it for couples with both fair and medium skin tones because the warm cream flatters without turning skin pink like some icy whites can. Keep the tulle airy, not thick - you want movement when the wind or fans hit the fabric. Style it as a "soft halo" behind the couple, so guests' eyes land on the faces first, then drift to the texture.
Start by building or renting a circular frame about 6 to 10 inches wider than the table edge on each side. Drape cream tulle in vertical strips, then pull each strip slightly toward the center to create gentle volume, not tight gathers. Add warm white micro LED lights along the inner ring so the glow comes from behind the fabric. Finish by wiring a small bow or satin ribbon at the top center only, then stop - too many accents make it look costume-y. For styling, place a low floral cluster on the table front so the backdrop reads as airy, not crowded.
Try thisUse tulle that's at least 108 inches wide per strip so you get real fullness without layering too many seams.
Common mistakeDon't use stiff, net-like tulle that stays flat - it looks like a craft project instead of a soft cloud.
2. Blush rose foam wall with sage leaves
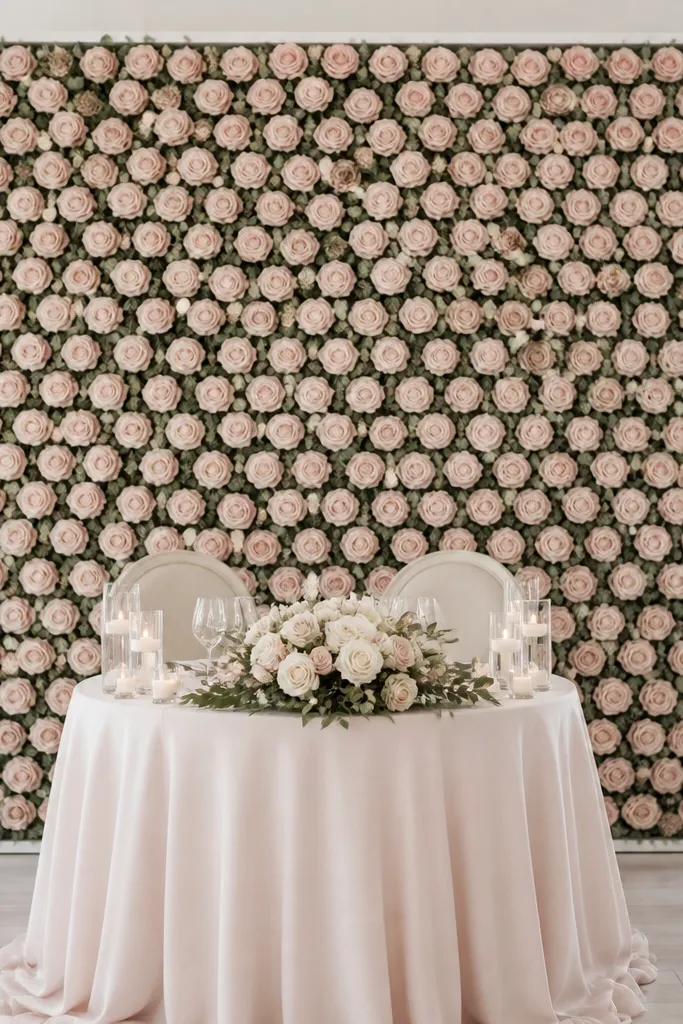
A foam rose wall gives you a "full coverage" look that photographs sharply, especially when you're dealing with a plain venue wall. Blush roses read romantic without being too pink, and the sage leaves keep the color from running flat. I've seen this work beautifully for brides with cool undertones because the blush is warm enough to balance, while sage keeps everything fresh. The key is density: you want texture you can see from across the room, but you still need gaps for greenery so it doesn't feel like a single pink sheet. This style suits classic, garden, and modern-romance weddings.
Start with a lightweight backdrop frame (about 7 to 8 feet wide) that can be anchored safely. Attach foam rose sections from the bottom row upward, overlapping each piece by 1 to 2 inches so you don't see the backing. Fill gaps with sage greenery sprigs, focusing on edges and corners first so the wall looks finished. Keep the center slightly denser than the sides so the couple looks framed. On the sweetheart table, repeat blush with a single runner or bud vase clusters so the wall and table feel like one design.
Try thisBuy extra greenery and use it like "mortar" between rose sections; it makes the wall look intentional instead of patched.
Common mistakeDon't leave visible backing in the corners - that's where cheap installs get caught in photos.
3. White balloon garland with pearl accents
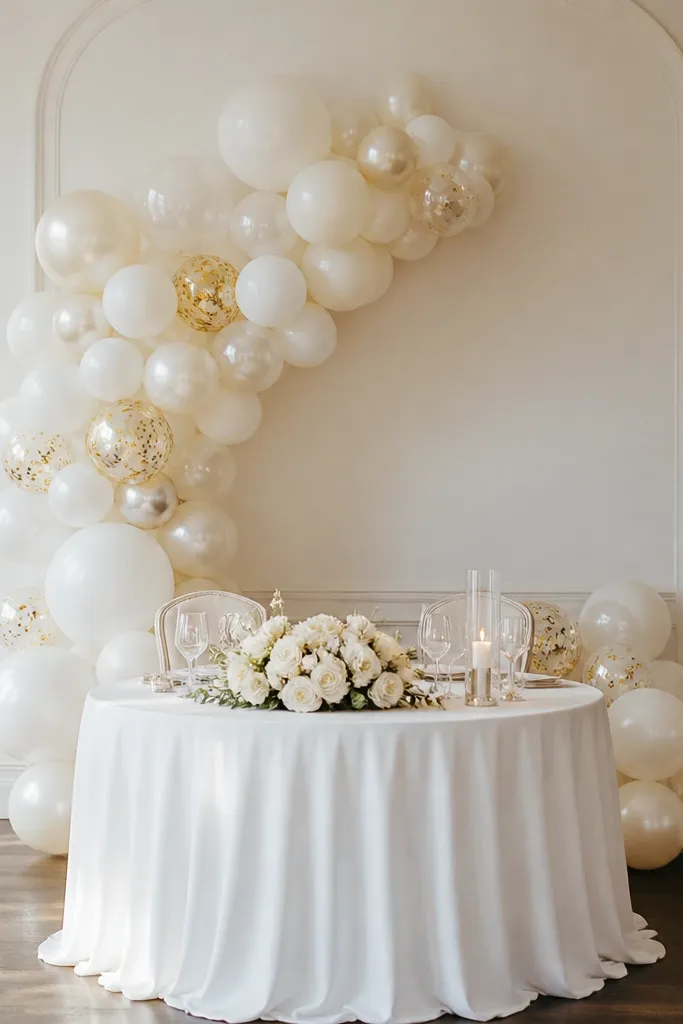
Balloon backdrops look surprisingly elegant when you keep the palette tight and the balloon shapes varied. For a round sweetheart table wedding, a balloon garland behind the couple creates a soft, rounded frame that matches the table shape. White and soft ivory flatter most skin tones, and the pearl-like accents add a high-end sparkle without going glittery. I've used this for evening receptions where the lights are low - the balloons catch light and make faces look brighter. This style works best when you want a fun party feel but still want photos to look polished.
Start by creating an anchor point: a curved metal frame or fishing-line grid behind the table. Build clusters using three sizes - small 5-inch balloons, medium 10 to 12-inch, and a few larger 18-inch balloons for the top corners. Tie the smaller balloons first, then fill the negative spaces with medium ones so the garland looks full in the center. Add pearl accents sparingly at eye level, then place gold confetti only in the upper third. Keep the height around 8 feet so you don't block the bride's face in wide shots.
Try thisUse matte white balloons plus a few gloss pearl ones - the contrast makes the backdrop look expensive in real photos.
Common mistakeDon't overfill with one balloon size - it reads flat and balloons look like a wall of bubbles.
4. Macramé fringe backdrop with warm white uplights
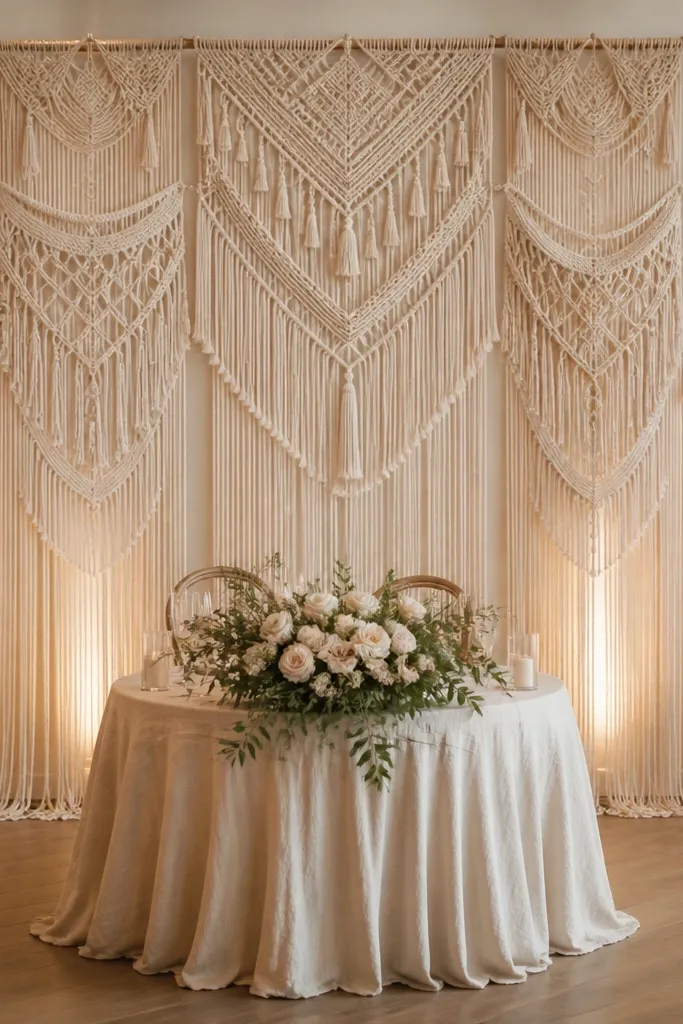
Macramé fringe looks handmade and expensive because it has real depth. The hanging strands create motion in photos, and the warm cream tone pairs well with both wood and white table linens. For skin tones, this is flattering because it doesn't push the cool blue cast that some synthetic fabrics do under LED lighting. I've used this in boho weddings where the room has textured walls - the macramé adds softness without fighting the venue. This works when you want a backdrop that feels cozy and intimate rather than heavy and floral.
Start by hanging two macramé panels on a frame or using ceiling hooks spaced about 24 inches apart so the center stays full. Overlap the panels by 6 to 8 inches so you don't see gaps when people stand off-angle. Add warm white uplights aimed at the lower wall so the fringe glows from behind. Keep the sweetheart table styling simple - cream runner, small bud vases, and one greenery accent so the fringe stays the star. If you want height, let the fringe hang to about 2 feet below the top line, then stop.
Try thisPick macramé with a tighter knot pattern; looser knots look casual in close-ups.
Common mistakeDon't use cool white uplights - they turn cream macramé gray on camera.
5. Rattan half-moon panels with sheer drape
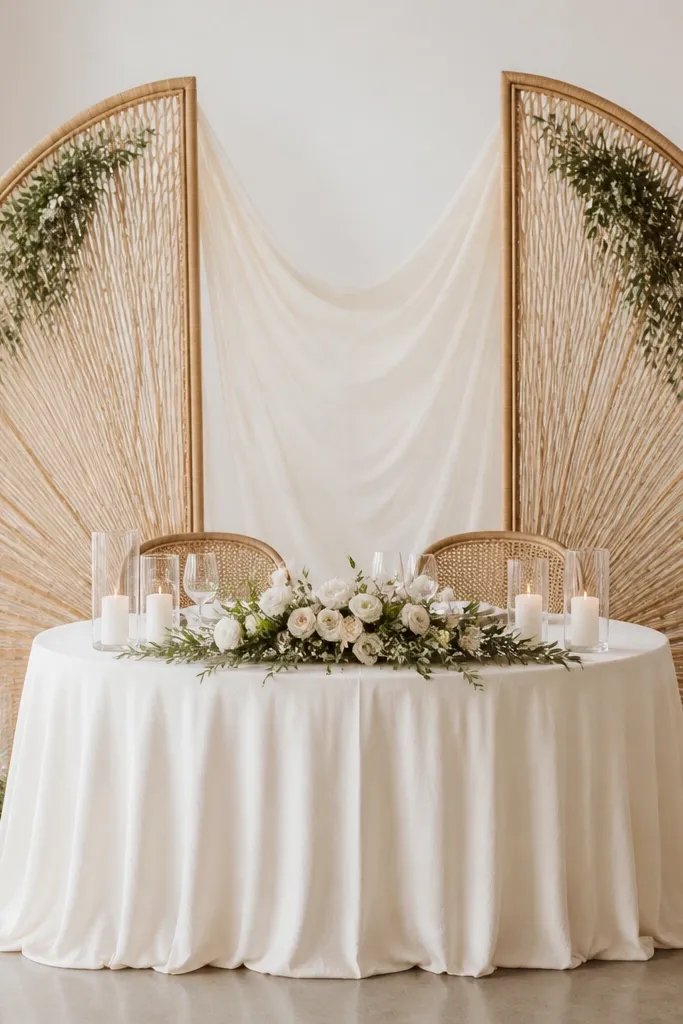
Rattan half-moon panels give you structure that still feels airy, which is exactly what you want for a round sweetheart table wedding. The curved shapes frame the couple without creating a hard rectangle that can look mismatched to the table. Sheer ivory drape softens the rattan and helps the whole setup blend into the room. I've seen this look best for medium to deep skin tones because the warm rattan and sheer ivory create contrast that doesn't flatten. It also works for couples who want a "natural" look without going full rustic.
Start by placing the rattan panels so the inner curves form a gentle oval behind the chairs, with about 18 to 24 inches of space between panels. Drape sheer ivory fabric from the top crossbar, then tie it in two spots so the fabric falls in soft waves. Add greenery only at the top corners and let it trail down 6 to 12 inches. Keep the center open so you can see the couple clearly. Finish by adding one small floral cluster at the base of each panel to anchor the backdrop visually.
Try thisSteam the sheer fabric before install; wrinkles show immediately on camera.
Common mistakeDon't hang the sheer fabric too tight - it should float, not look like a curtain pulled taut.
6. Garden arch of dried pampas and blush blooms
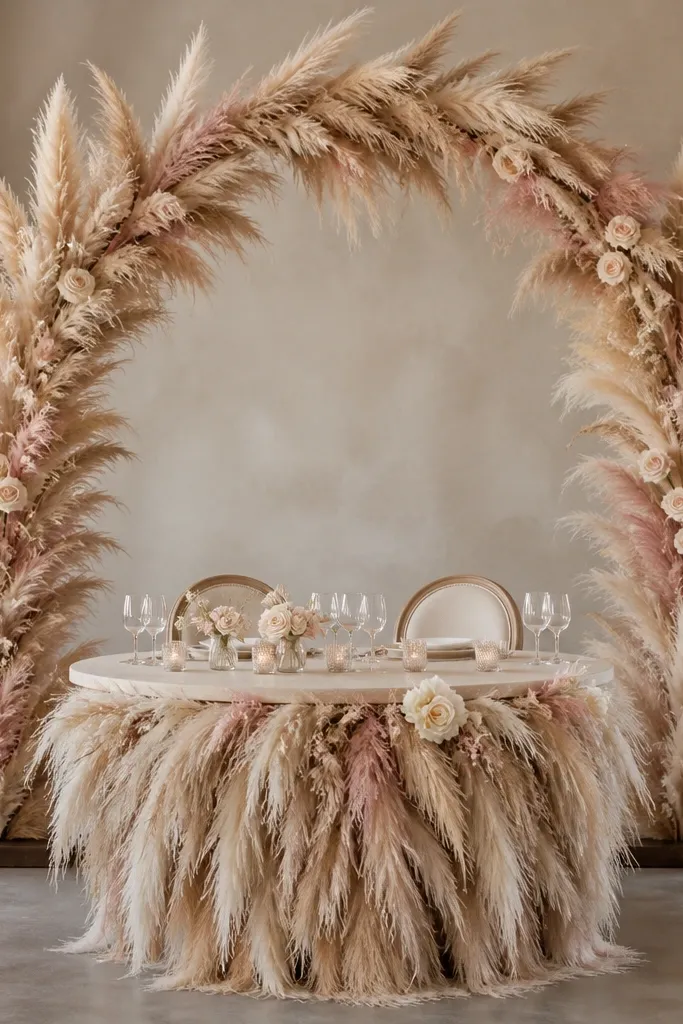
If you want a backdrop that looks stunning in both daylight and golden-hour photos, dried pampas is the move. The plumes create vertical softness, and blush flowers add a romantic pop without the maintenance of fresh blooms. This is especially flattering for brides with warm undertones because the beige tones harmonize, and the blush stays gentle. The arch shape gives you a clear focal point behind the couple, and the feathery texture prevents the whole scene from looking heavy. It's perfect for garden, desert-chic, and late-summer weddings.
Start by building or renting a simple arch frame and covering the base with dark fabric or a dark wood riser so it doesn't look unfinished. Insert pampas plumes first in alternating directions, then tuck smaller blush stems around the center and sides. Keep the densest cluster at eye level - about where the bride's face sits - so photos look intentional. Add a few cream blooms for contrast, then stop; dried arrangements look best when they breathe. Style the table with a mix of beige candles and one or two blush bud vases so the colors match the arch.
Try thisSpray pampas lightly with matte hairspray before install to reduce shedding during the ceremony.
Common mistakeDon't over-pack the arch with too many stems - it turns into a tangled mess instead of a curated plume wave.
7. Mirror tiles with warm fairy light grid
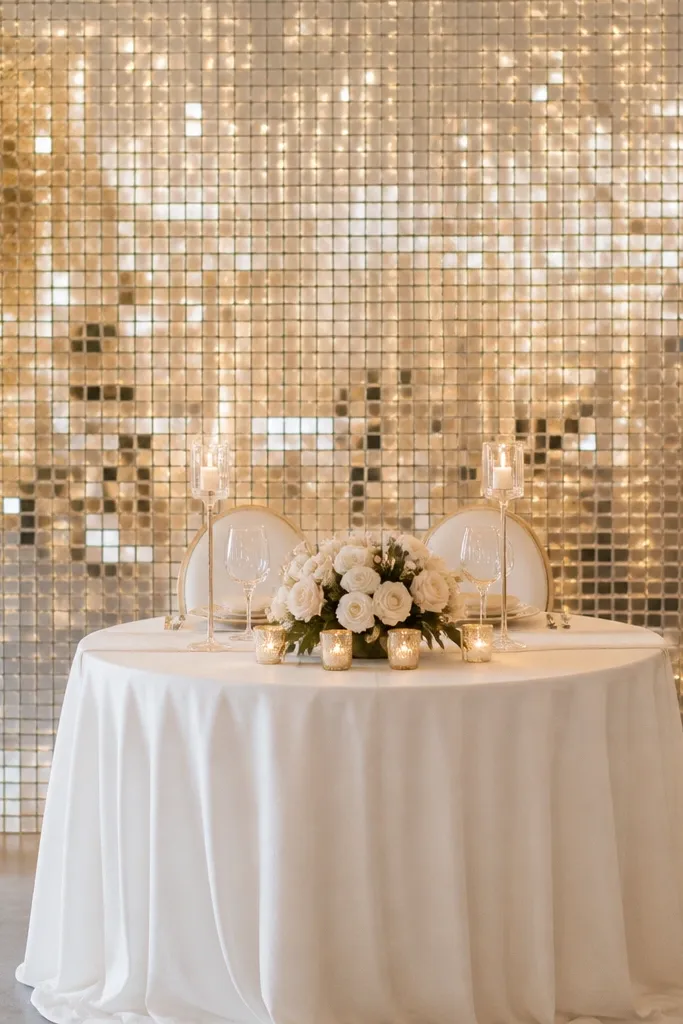
Mirror tile backdrops are a cheat code for making photos look brighter without adding heavy lighting. For a round sweetheart table wedding, the mirror grid gives you crisp reflections behind the couple, which makes the table and chairs look more dimensional. I like warm fairy lights behind mirrors because the glow reads golden instead of harsh. This style flatters a wide range of skin tones since it reflects the room's warm color palette. It also works well when the venue is plain - mirrors make the background look designed instantly.
Start by using mirror tiles mounted on a lightweight backing panel so you can transport and hang it safely. Place tiles in a tight grid with minimal gaps, then mount the panel at about 6 to 8 inches behind where the couple will sit. Weave warm fairy lights behind the panel, then secure with zip ties so wires don't shift. Keep the top edge level with the couple's head height for balanced framing. Style the table with glass or metal accents so the reflections look cohesive, not random.
Try thisTest the mirror panel under the venue lights a day before if you can; some halls have greenish lighting that shows in reflections.
Common mistakeDon't use cold blue LEDs - they turn mirror reflections gray and make skin look washed out.
8. Statement fabric bow backdrop in ivory satin
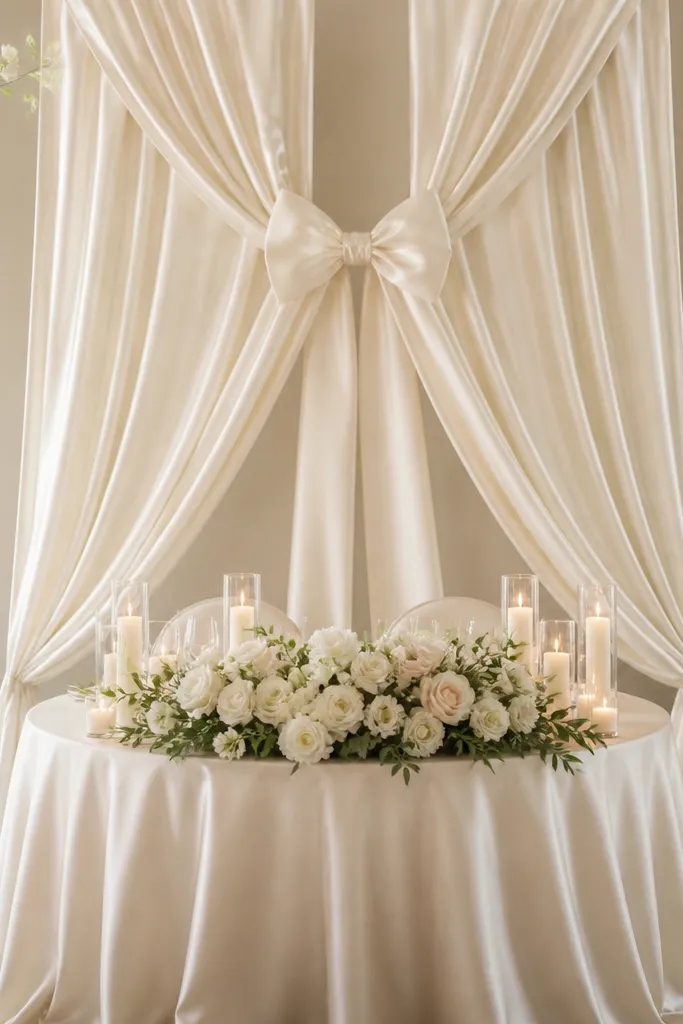
This is the most "photo-ready" fabric backdrop when you want something classic and clean. Ivory satin drapes beautifully and creates a formal frame for a round sweetheart table wedding without taking over the entire room. I've seen it work for brides in both strapless and long-sleeve dresses because the vertical folds add structure behind the shoulders. The big center bow gives you a focal point in every wide shot, which is what you want when guests are standing around at ceremony time. Choose ivory satin that looks smooth, not shimmery - heavy shine can look cheap on camera.
Start with two vertical satin panels hung from a straight crossbar, letting each panel fall to just above the table center. Create the gathered center by tying the panels to a hidden hook so the folds pull inward. Make a large bow from satin ribbon or pre-made bow pieces, then attach it at the center top at about 7 to 7.5 feet. Add one small cluster of greenery or tiny silk blossoms at the base of the bow to keep it from feeling too empty. Keep table styling simple: ivory runner, two candle heights, and one floral element that matches the greenery.
Try thisUse fabric weights at the bottom hem so the satin falls straight in photos.
Common mistakeDon't use wrinkled satin - creases look like you rushed and show up in every close-up.
9. Paper fan wall in soft blush ombré
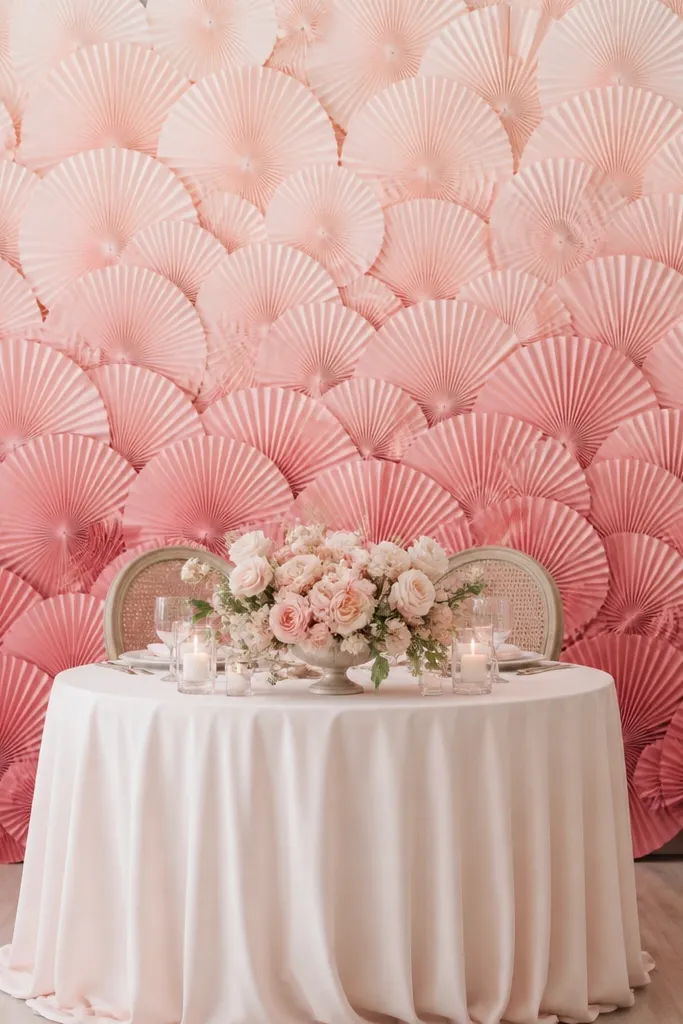
Paper fans are one of the most budget-friendly ways to get a high-impact wall that still looks intentional. For a round sweetheart table wedding, the fan texture creates depth behind the couple and helps your photos avoid the "flat venue background" problem. The ombré blush palette is forgiving on skin - it doesn't go neon and it looks soft under both daylight and warm indoor lighting. I like this when you want something modern without balloon clutter or heavy floral cost. It also works well for couples who want a clean, graphic look with a romantic color story.
Start by deciding your backdrop width: measure your table diameter and plan fans to cover about 1.5x that width. Lay the top row with pale blush fans, then rotate each fan slightly so the ridges catch light. Build downward with deeper blush fans, keeping the ombré shift gradual over 4 to 5 rows. Mount fans on a fabric or board backing so they don't sag. Style the table with plain white or blush linens and keep centerpieces low so the fan wall stays visible.
Try thisAngle the fans so light hits them from the side; straight-on placement looks flatter in photos.
Common mistakeDon't leave gaps between fans - it makes the wall look like a budget craft board.
10. Hydrangea-inspired silk clusters with dusty blue accents
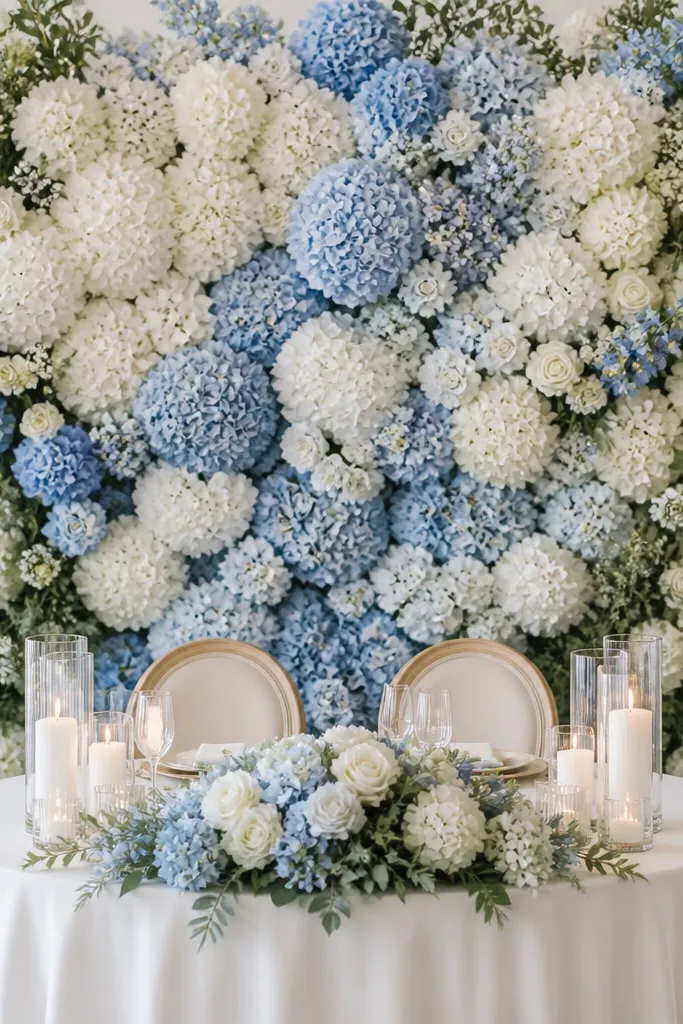
Silk hydrangea-inspired clusters give you the "old-world garden" look without the wilting problem. White and pale blue blooms look especially good when the bride's dress is satin or crepe, because the backdrop picks up soft highlights. For skin tones, dusty blue accents keep the overall palette cool and flattering, especially for fair skin that can look washed out against warm-only backdrops. I've used this for couples who want romantic but not overly pink, and it reads elegant in both candid and posed photos. Keep the greenery minimal so the blooms stay the star.
Start by building a panel frame about 7 feet tall and 8 feet wide, then attach greenery strips along the edges first. Add large silk clusters in a tight grid, overlapping each bloom by about half an inch so you don't see the backing. Place dusty blue clusters at the center and taper outward with more white. Use a small amount of olive greenery only at the borders and between large clusters. On the table, repeat the dusty blue with one ribbon wrap on candle bases or a few bud vases, and keep the rest white so it doesn't compete.
Try thisPick silk blooms with a slightly matte finish; shiny fabric flowers look off under flash.
Common mistakeDon't mix too many flower types - it turns into a noisy bouquet wall.
11. Curtain backdrop with layered chiffon waves
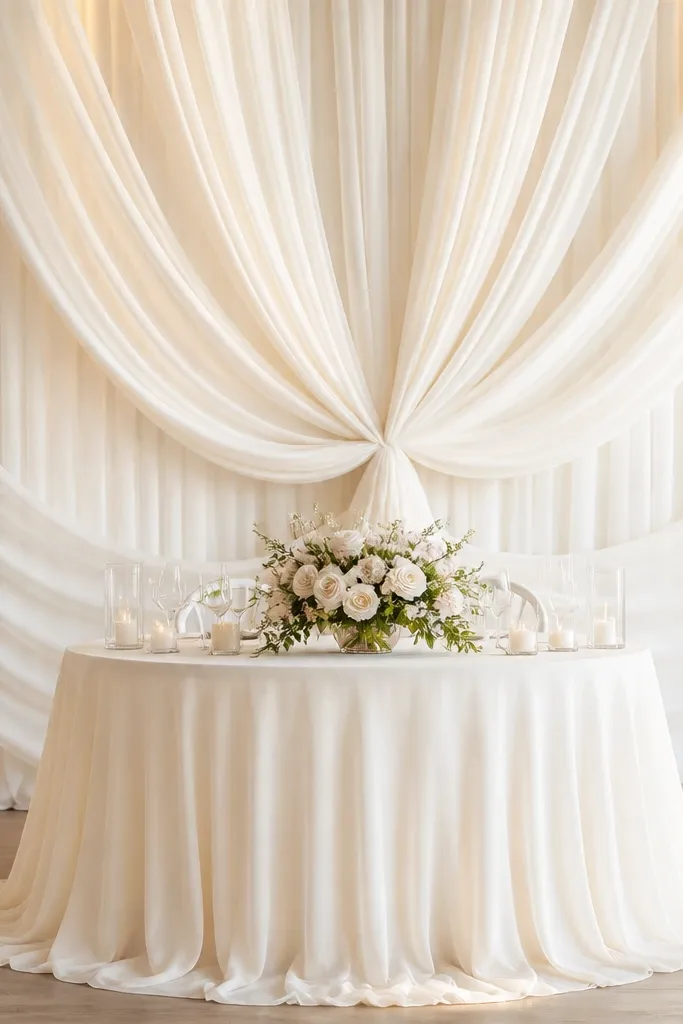
Layered chiffon waves give you that luxurious drape effect without building a heavy wall. The movement is the whole point - it makes your wedding photos feel airy, and it looks good when people walk past the backdrop. For a round sweetheart table wedding, the curtain layers create a soft oval focus behind the couple, even if your venue walls are plain. I've done this in both church halls and modern venues, and it always reads elegant because chiffon takes light gently. It flatters almost everyone since the palette stays neutral and the fabric texture adds dimension instead of color pressure.
Start by hanging two curtain rods or a single top beam with multiple tie points so you can create waves. Attach chiffon in 3 to 4 layers: one thicker chiffon for body, plus two lighter layers for flutter. Gather each layer at the center, then let it fall outward in U-shaped folds so the backdrop looks rounded behind the table. Keep the bottom of the chiffon about 10 to 14 inches above the table linens so it doesn't tangle in centerpieces. Finish with one small cluster of greenery at the center gather so the drape doesn't look like empty fabric.
Try thisUse a steamer right before install - chiffon wrinkles show fast.
Common mistakeDon't let the fabric pool too low - it makes the couple look higher than they are and can block chair backs in photos.
12. Eucalyptus garland ladder behind the chairs
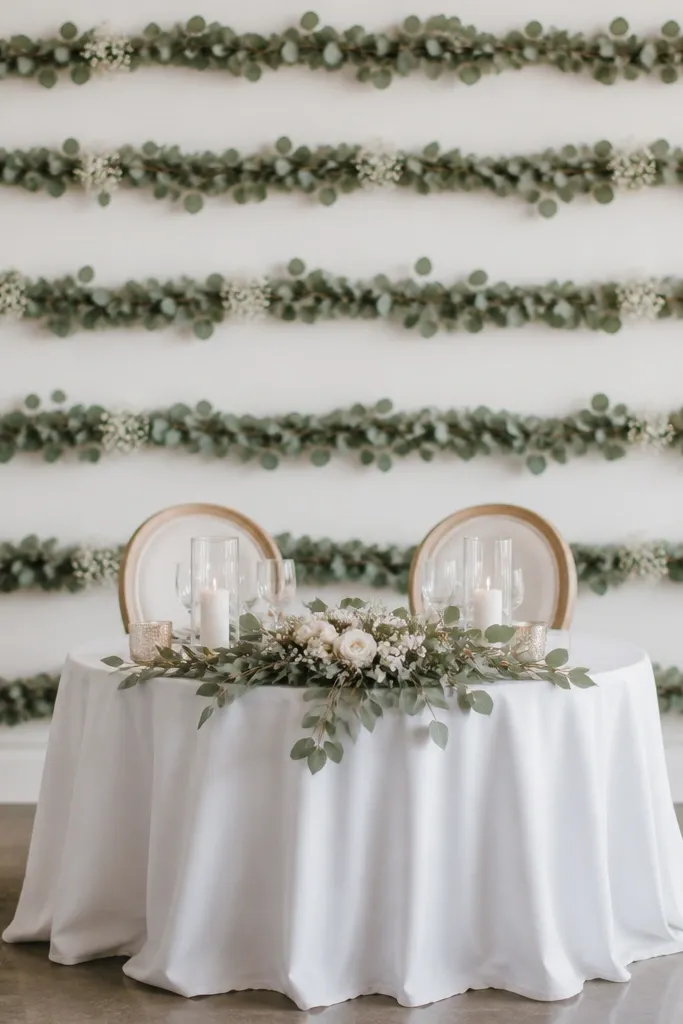
This one is simple and looks expensive because it has spacing. Instead of stuffing everything full, you create bands of greenery, and the couple sits in the "window" between lines. For a round sweetheart table wedding, the horizontal structure balances the round table and makes the seating arrangement look intentional. Eucalyptus has a nice gray-green tone that looks great in mixed lighting, especially when you have both daylight and warm indoor lamps. I've used this when the venue already has texture on the walls, because the garland pattern doesn't fight the background.
Start by stretching a thin support grid behind the sweetheart seats, with lines spaced about 12 to 14 inches apart. Attach eucalyptus garlands across each line, then tuck small white blossoms at the center band and a few off-center spots. Keep the garland density slightly higher in the middle so it frames faces. Add a small vertical element at each end of the backdrop to stop the greenery from looking like it floats. Style the table with matching eucalyptus in bud vases and a clean runner, then keep the centerpieces low and simple.
Try thisUse eucalyptus with a matte finish; glossy leaves look plasticky under flash.
Common mistakeDon't overcrowd every line - full-stuffed garlands lose the airy, framed look.
13. Satin ribbon cascade with pearl strands
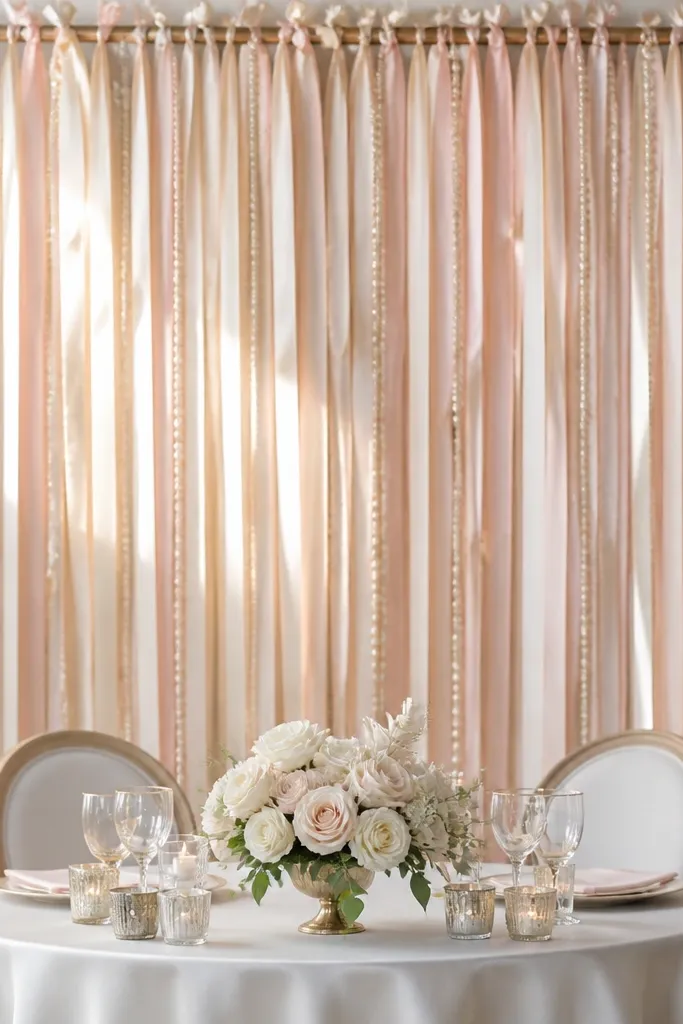
Ribbon cascades look like movement and give you a "soft curtain" effect without needing a full fabric wall. The satin finish reads luxe, and pearl strands add a subtle sparkle that shows up in the background blur during dancing. For a round sweetheart table wedding, the cascading ribbons create a vertical frame around the couple's torsos, which is where photos usually focus. This style is flattering across skin tones because it stays in creamy neutrals with gentle blush. It's also easy to match with different wedding palettes - you just adjust ribbon shades.
Start by installing a top rod or sturdy beam at about 8 feet, then tie ribbon strips in 2 to 3 lengths: one group around 6 feet, another around 4.5 feet, and a shorter group around 3.5 feet. Alternate ivory and blush satin so the cascade has movement rather than one flat color. Thread pearl strands through a few ribbon ties at random intervals, focusing on the center and two sides where cameras catch. Keep the ribbon width consistent so it looks neat - about 1.5 to 2 inches per strip. Style the table with a single satin ribbon on the runner and one pearl detail in the centerpiece so everything ties together.
Try thisCut ribbon ends with a sharp blade and seal edges with a quick heat pass to stop fraying.
Common mistakeDon't mix too many ribbon colors - it turns the cascade into a scattered mess.
14. Velvet drape backdrop in deep wine with gold candle cones
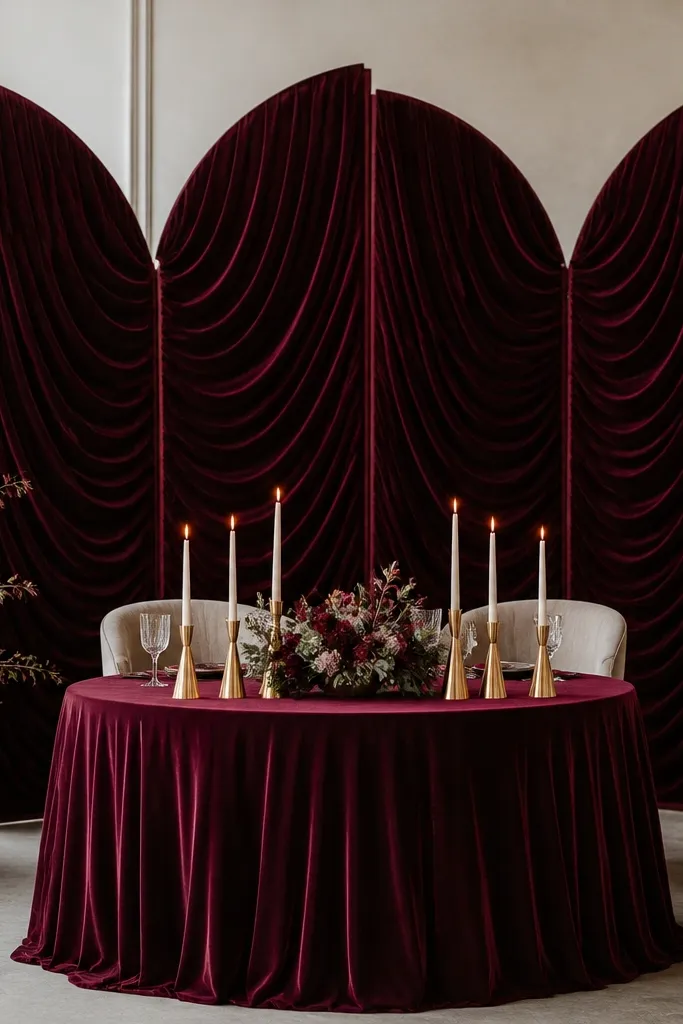
Velvet adds drama fast, and deep wine looks rich without turning into black. For a round sweetheart table wedding, velvet panels create a curved frame that complements round shapes and makes the couple stand out against lighter decor. I've photographed this with both warm and cool lighting, and the wine always reads flattering - it adds warmth to fair skin and depth to deeper skin tones. The gold candle cones in front make the backdrop feel intentional rather than heavy. This is a great pick for fall and winter weddings when you want something moody but still romantic.
Start by hanging two velvet panels from a crossbar so they meet in the center at about face height. Gather each panel with hidden ties so you get soft arcs, not straight falls. Choose a velvet with a good weight so it drapes cleanly; thin velvet clings and looks wrinkled. Add a third accent piece: a shorter velvet swag across the top center. On the table, keep your florals minimal and use gold candle cones or gold holders to echo the backdrop's richness.
Try thisSteam velvet before install and let it hang flat for 30 minutes so the nap settles.
Common mistakeDon't use cheap velour - it looks fuzzy and dull in close-ups.
15. Tropical monstera leaf wall with white orchids
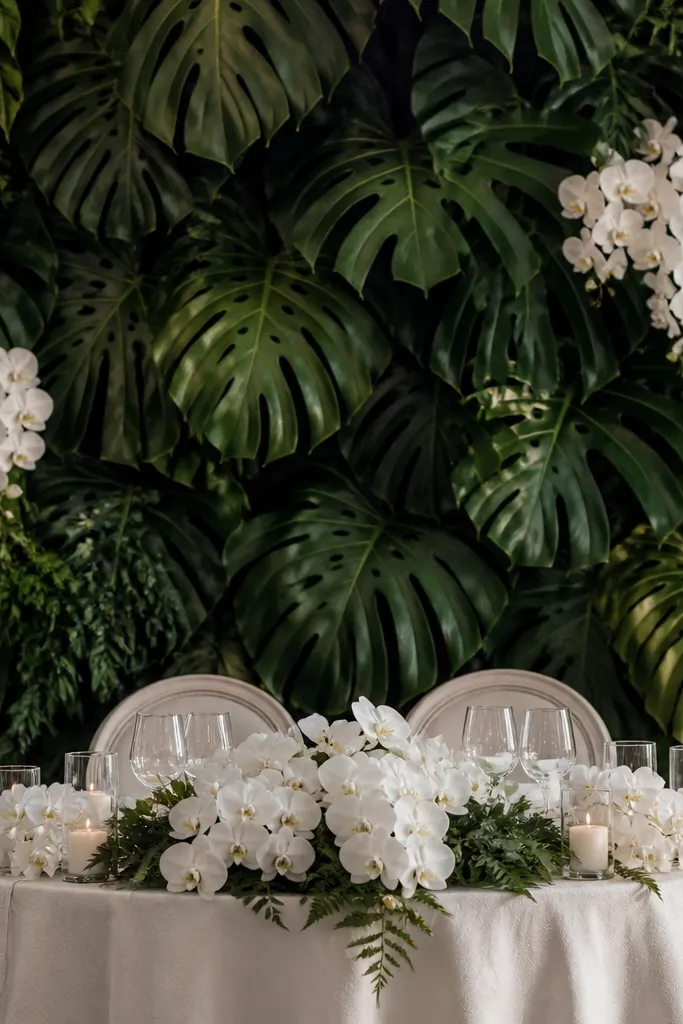
Monstera leaves are bold, but when you keep the flowers white and the styling clean, it looks chic instead of theme-y. This backdrop is great for couples who want a fresh, modern tropical vibe without loud colors. White orchids pop against green and read elegant in both daylight and evening lighting. For skin tone, green is usually flattering because it gives a natural contrast, especially for brides with warm undertones. The leaf texture also adds depth behind the couple, which helps photos look less flat.
Start by arranging monstera leaves in a "fan" pattern: larger leaves in the center, smaller ones toward the edges. Overlap leaves by a couple of inches so the wall looks dense and intentional. Place white orchids at eye level - usually where the bride's face sits - then add a few orchids at the lower corners. Keep a small amount of filler greenery only at the borders so it doesn't become a tangled mass. Style the table with green accents and white bud vases, then choose table linens that are white or cream to keep the palette crisp.
Try thisUse a few leaves with visible splits; they show texture better than perfectly uniform leaves.
Common mistakeDon't add too many colored orchids - white keeps it elegant and stops the backdrop from fighting the dress.
16. Hydrangea foam dome centerpiece frame behind the table
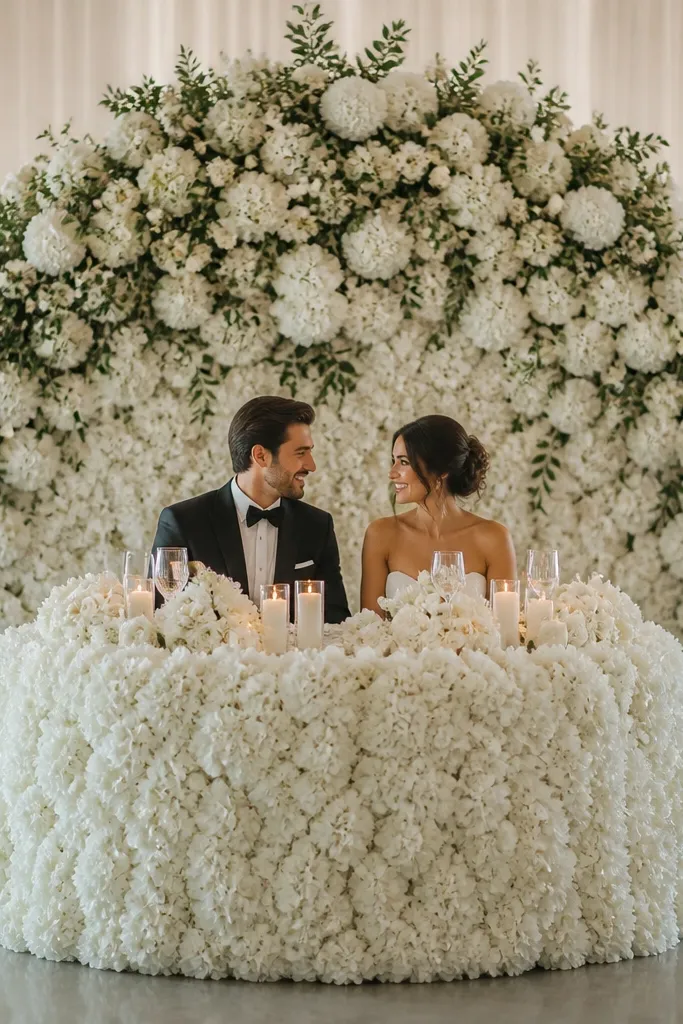
A dome frame is a smart trick for round sweetheart table weddings because it creates a soft "ceiling" behind the couple without blocking them. White hydrangea-like clusters give you volume and a classic feel, while the dome shape keeps the background from spreading sideways too much. I like this for ceremonies where you want the backdrop to read from the aisle - the dome is visible even when people are seated farther back. It's also flattering because the white clusters brighten the area behind faces and dresses. If your venue has a busy wall, a dome hides it quickly.
Start with a semi-dome frame that's wide enough to cover the table plus 6 inches on each side. Attach foam clusters starting at the bottom curve and work upward, overlapping pieces so you don't see the frame. Add a thin band of greenery at the sides to soften the edges and prevent the dome from looking like a solid ball. Keep the center slightly fuller so faces get framed. On the table, use smaller versions of the same flowers in bud vases and keep the runner plain for a clean look.
Try thisLightly mist foam flowers with matte setting spray so they don't look too shiny on camera.
Common mistakeDon't make the dome too tall - if it climbs above 9.5 feet, it starts dominating the entire photo.
17. Sunburst rattan backdrop with candlelit glow
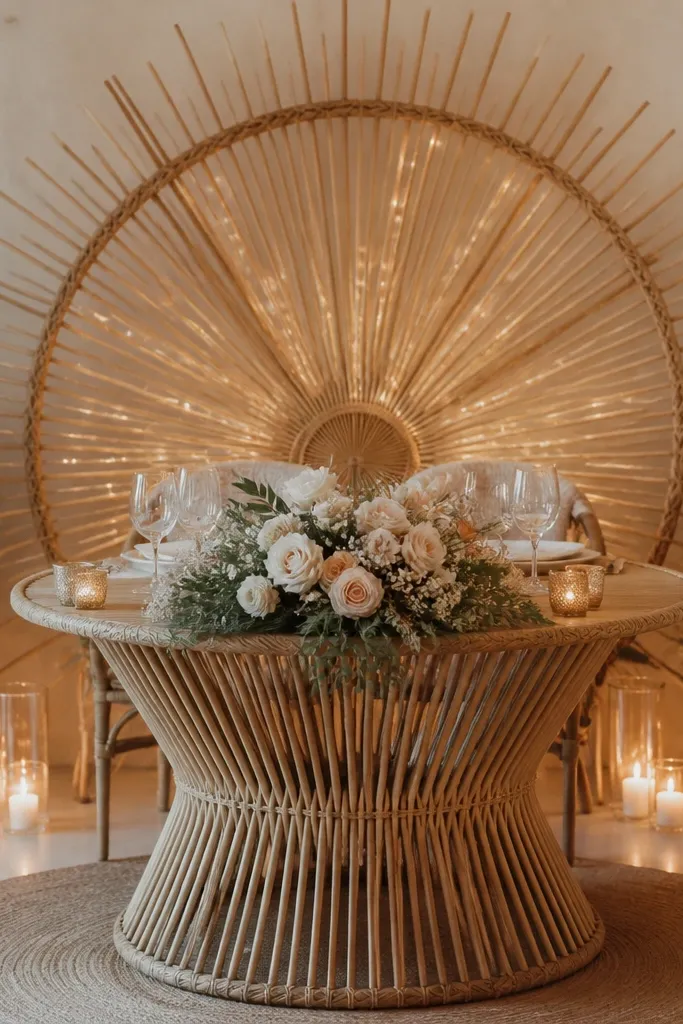
A sunburst rattan backdrop gives you motion and a strong focal point without looking heavy. The radiating lines frame the couple and make the round sweetheart table wedding feel designed, even in a plain banquet hall. Warm lighting between the spokes makes it look cozy rather than graphic. I've used this when the room has strong overhead fixtures - the sunburst pattern draws attention away from harsh lights and puts focus where it belongs. It's flattering because the texture is warm and the lines help guide eyes to faces.
Start by positioning a sunburst frame so the center point aligns with the couple's head height, about 6.5 to 7 feet up. Weave warm fairy lights between rattan spokes, focusing on the inner half so the glow is concentrated behind the couple. Add a small garland at the bottom edge so the frame doesn't look like it floats. For table styling, use warm cream linens and one row of candles in varying heights, keeping the tallest candles centered. Add one small greenery swag on each side to tie the rattan to the floral theme.
Try thisUse unscented LED candles if you're indoors and need a clean, consistent flicker in photos.
Common mistakeDon't use cool white fairy lights - they make rattan look gray and flat.
18. White rose and gardenia foam columns with center gap
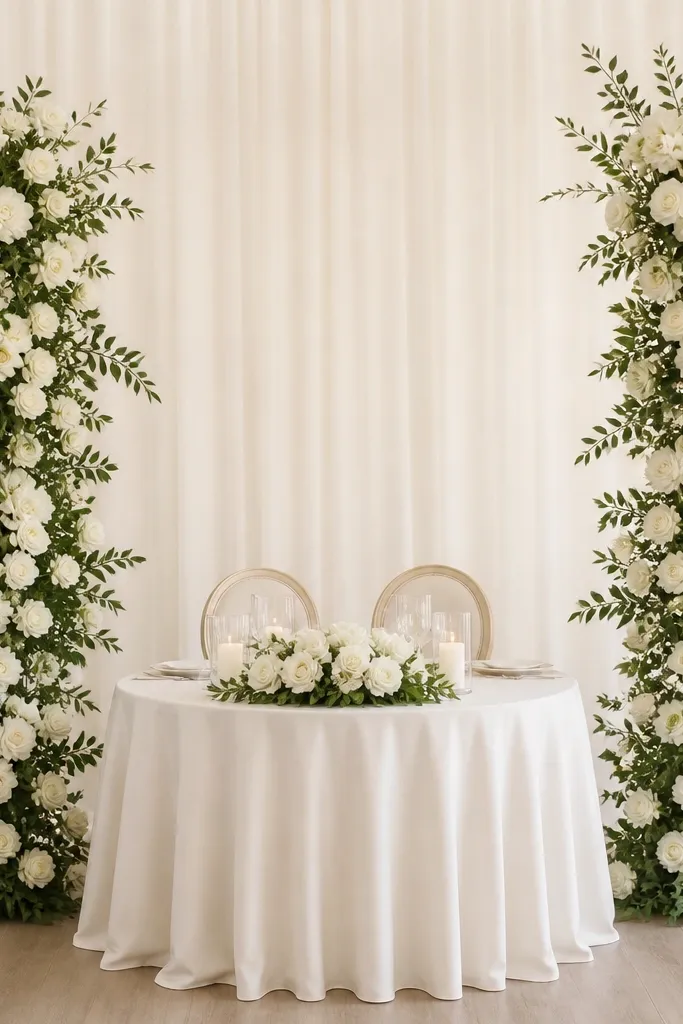
This is a smart option when you want the backdrop to frame the couple but not completely cover the background. Two columns create symmetry, and the center gap makes the couple the brightest focal point in the photo. White roses and gardenia-like blooms read classic, and the greenery edges keep the columns from looking like a flat floral stripe. I've seen this work well for couples whose ceremony space has a decorative wall behind them - you keep the beauty without hiding it. It's also flattering because the vertical columns elongate the look behind chairs and dresses.
Start by placing two foam floral panels on stands or building a removable frame, leaving a center gap roughly equal to the width of the sweetheart table center area. Arrange blooms from the bottom up, with a denser cluster at the top so the columns look topped, not ended. Add greenery edging along the inside and outside borders, then tuck a small floral cluster at each top corner. Keep the center gap clean so it doesn't become a messy void. Style the table with white blooms in bud vases and a single greenery runner so the columns and table match.
Try thisHang a thin sheer strip behind the center gap for a soft light effect without hiding the background.
Common mistakeDon't fill the center gap with random greenery - it ruins the clean framing effect.
19. Sculptural pampas fan wall with black accents
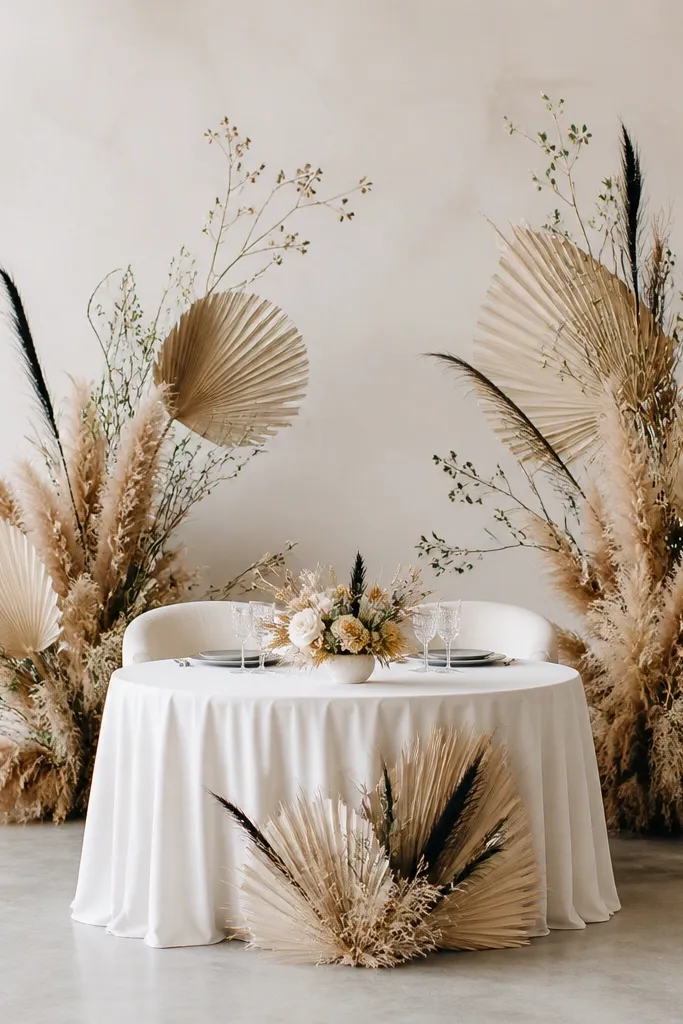
Airy pampas fans with black accents look editorial and modern, and they photograph well because you can see negative space. For a round sweetheart table wedding, this style keeps the background from overwhelming the couple while still looking intentional. Beige pampas is flattering because it's warm and soft, and the black accents add contrast so the faces pop. I've used this for couples who want low floral volume and high visual impact, especially in venues with lots of natural light. It also works for both minimal and modern-romance aesthetics because the palette stays controlled.
Start by creating a fan arrangement on a panel or frame, spacing pampas clusters so there's breathing room between them. Place the biggest pampas fans at the center and taper down toward the edges. Add black dried stems sparingly at the sides and near the top center so they act like punctuation, not a theme. Keep greenery minimal; one or two olive sprigs per cluster is enough. On the table, use simple cream linens and add black accents through candle holders or ribbon ties, not through flowers.
Try thisWear gloves when handling dried plants - fingerprints show on light fabrics and dark stems.
Common mistakeDon't overfill the negative space - the emptiness is what makes this look high-end.
20. Linen and lace scallop frame with warm LED candles
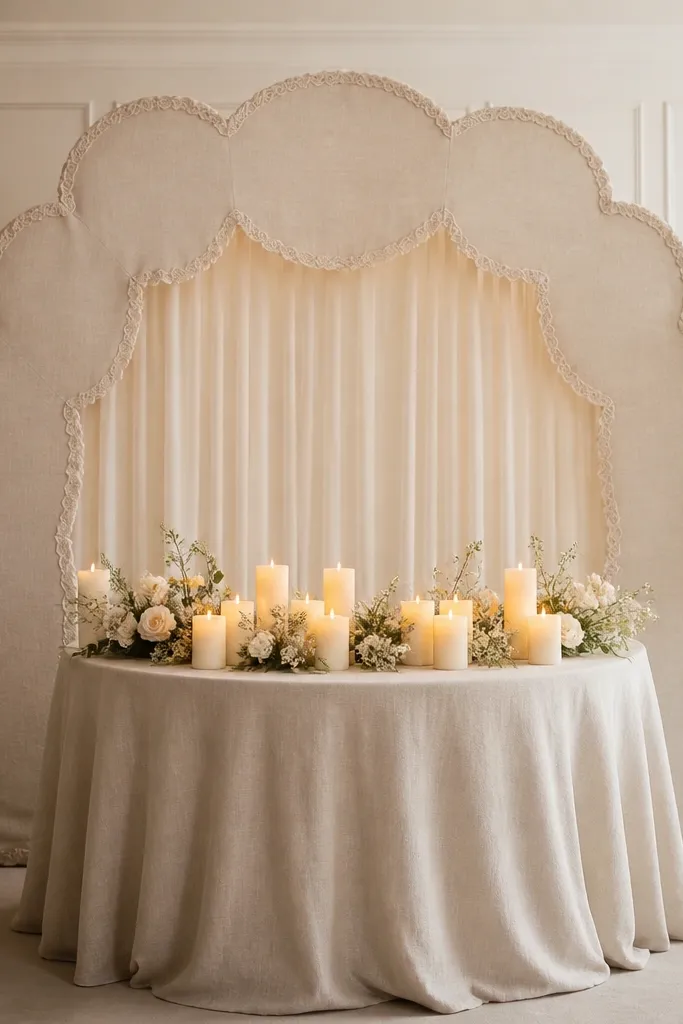
A scalloped linen-and-lace frame brings a vintage-soft look that still feels clean. The scallops create a gentle rhythm that suits round tables and keeps photos from looking too geometric. Linen texture reads warm and real, and lace trim adds detail without needing heavy florals. I've used this for couples who want "romantic old house" vibes but don't want a wall of flowers. It's flattering because the cream tones brighten the background area around the couple. Use it when your venue has classic architecture, like tall windows or wood paneling.
Start with a fabric frame using linen stretched over a lightweight backing, then add lace trim along the scalloped edges. Hang the frame behind the sweetheart table so the scallops sit around head level, roughly 6.5 to 7.5 feet up. Add a soft ivory drape behind the scallop frame, letting it fall straight with minimal gathers. On the table, place warm LED candles in varying heights and keep the florals low so the lace stays visible. Add a tiny bow or lace ribbon at the center bottom of the frame to tie it together.
Try thisChoose lace with a small pattern; big lace motifs look busy behind faces.
Common mistakeDon't use lace that's too shiny - it can reflect flash and create distracting highlights.