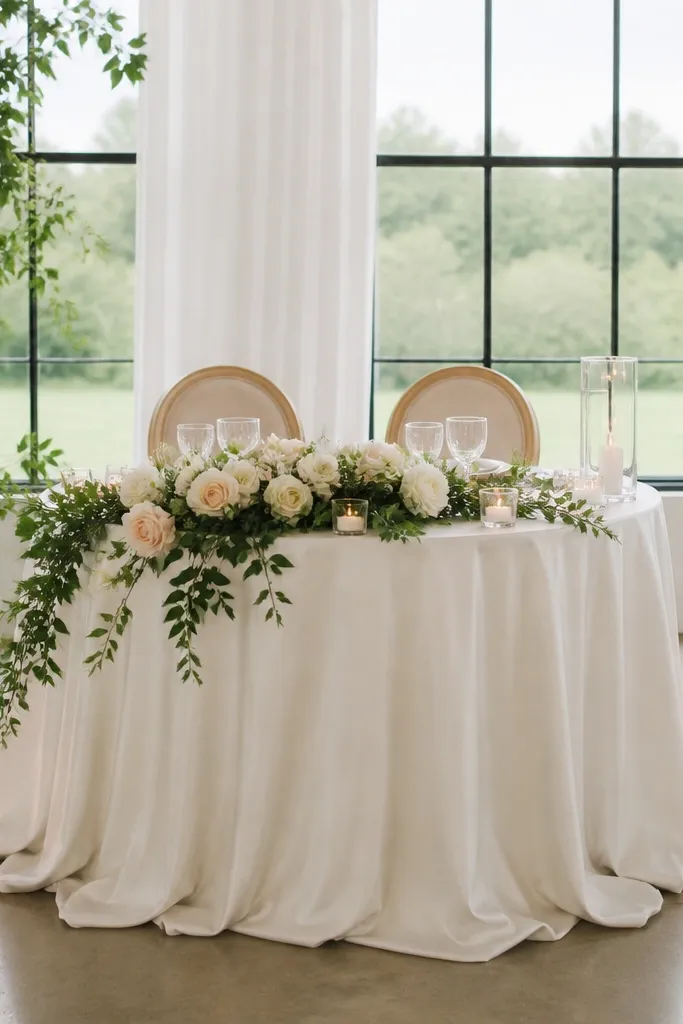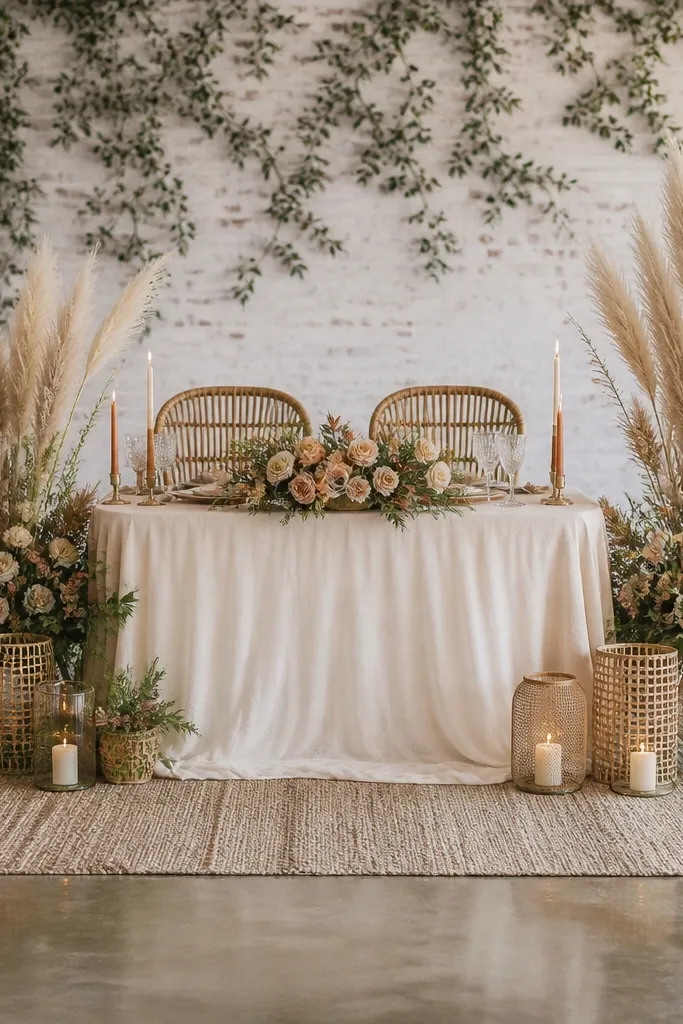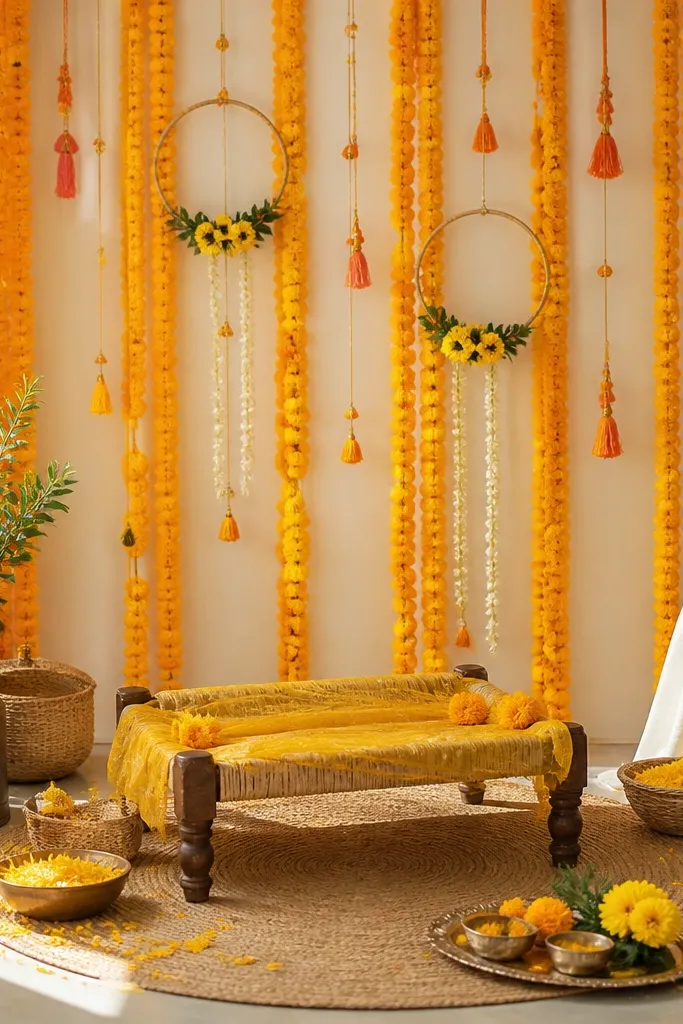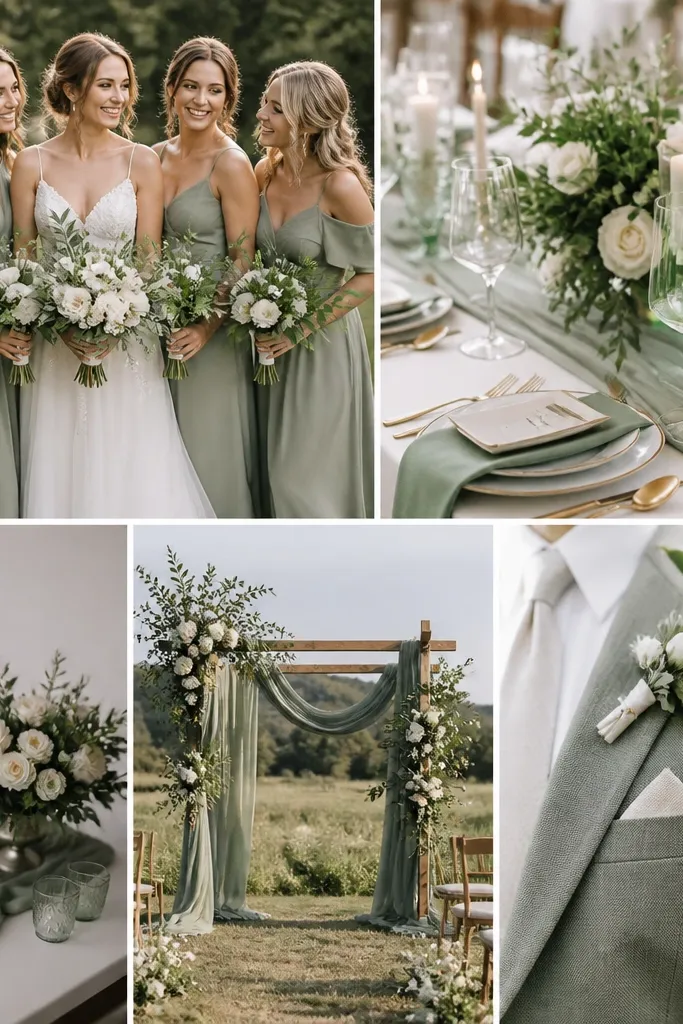
1. Blush satin runner + matching chair ribbon repeat
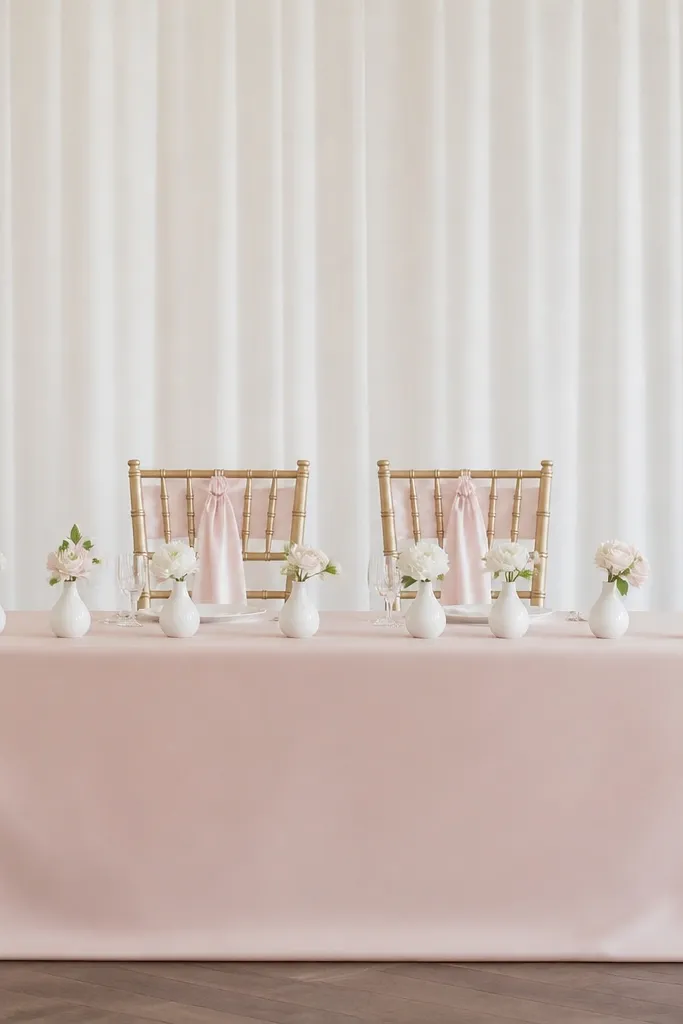
This look works because blush satin reads romantic even when the room light is flat. I used a 14-16 inch wide blush runner with a slight sheen so it catches camera flash without looking shiny-cheap. The chair ribbon repeat matters - it ties the table to the frame around the couple's faces. It flatters fair to medium skin tones because blush softens contrast, and it looks clean for both minimal brides and classic brides. Keep the rest of the decor white and green so the blush stays the main story.
Start by measuring your table length and buying enough runner width to cover the center plus 3-4 inches on each side. Drape the runner straight, then tuck the ends under the table lip so you don't see raw edges. Tie 6-10 inch satin ribbon pieces onto the top of each head chair back, letting the tails hang down 12-18 inches. Place three to five white bud vases across the centerline and fill them with baby's breath or small white filler flowers. Finish with a white fabric panel behind the chairs so the blush ribbon shows up in photos.
Try thisUse satin-like polyester, not thin chiffon, for the runner. Thin fabric wrinkles and shows seams when guests move in the background.
Common mistakeAvoid mixing blush with dusty gray - it can make the table look tired instead of soft.
2. White fabric wall with one oversized floral cluster
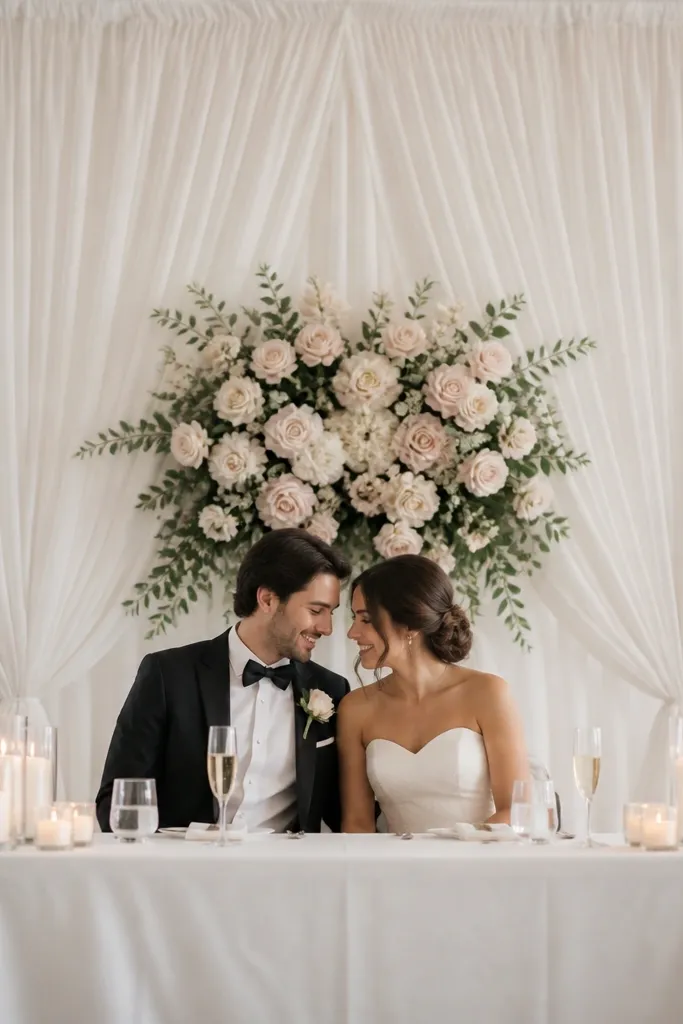
One big floral cluster looks expensive because your eye lands on a clear focal point. A white fabric wall gives you a clean background that makes blush and cream flowers pop without needing a full arch. I've done this with silk-touch faux peonies and it still photographed like fresh flowers because the cluster sits at face level. It flatters most wedding palettes, especially cream, blush, and champagne, and it suits couples who want romance without clutter. If your venue has busy walls, this setup also hides the background without covering everything.
Hang a white fabric backdrop panel using a tension rod or stand, pulling it tight so it doesn't pool on the floor. Build one oversized floral cluster using 1-2 larger blooms (peonies or garden roses) plus smaller filler, and anchor it at the center with floral foam or zip ties. Place the cluster so its top edge is about level with the couple's shoulders when seated. Cover the table with a crisp white cloth or fitted skirting, then add only three candles or lanterns along the center. Keep chair decor minimal - a small greenery sprig at the top of each head chair looks intentional.
Try thisChoose flowers with matte petals and varied sizes. Glossy flowers reflect venue lights and can look like plastic up close.
Common mistakeAvoid scattering small flowers across the whole backdrop - it reads like budget filler in photos.
3. Greenery runner + tiny bud vase line
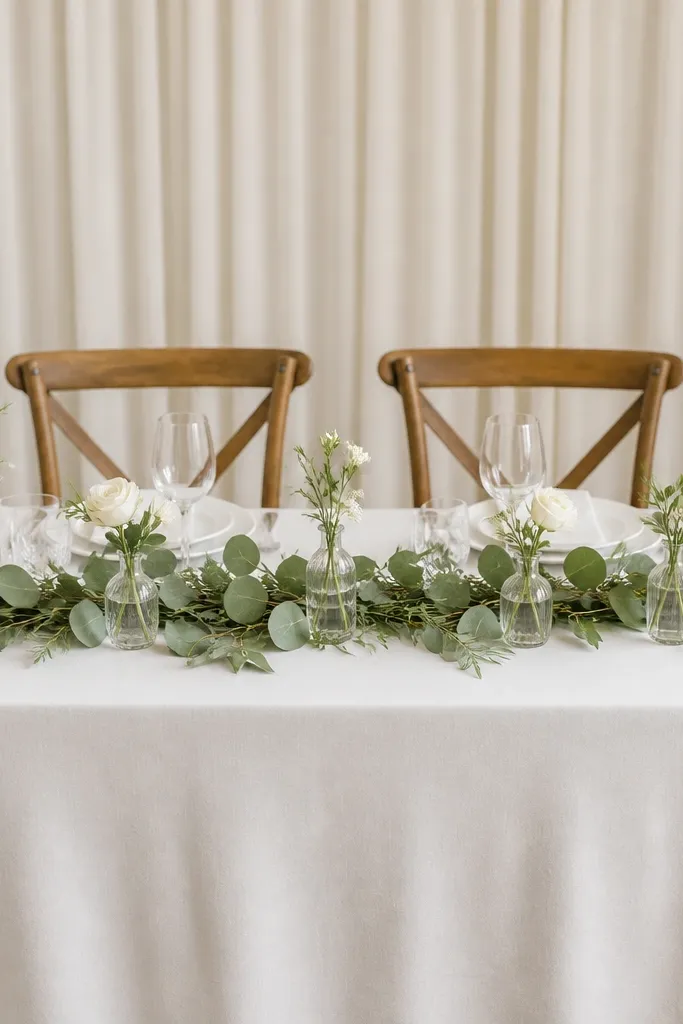
Greenery does the heavy lifting when you're keeping costs down. A greenery runner gives texture and depth, while a tiny bud vase line keeps the table from looking flat. I like sage because it flatters warm and neutral undertones and doesn't clash with blush, ivory, or soft gold. This setup looks best when the flowers are consistent - same stem count, same vase height - because repetition looks "planned," not "last-minute." It's also forgiving if your couple's outfits have mixed colors, since greenery bridges them.
Lay a pre-made sage greenery garland or create one with faux eucalyptus strands along the table center, then trim it to about 2/3 of the table length. Add bud vases in a straight line with consistent spacing (about 10-12 inches apart). Fill each vase with one white bloom plus a small greenery sprig so they look airy, not crowded. Use an ivory tablecloth or fitted skirting to keep the runner the star. Finish by adding one small candle at each end of the runner to balance the line.
Try thisUse identical bud vases with the same opening width. If the vases vary, the line looks uneven in close-up shots.
Common mistakeAvoid using too much greenery across the entire table surface - it can look like a craft project.
4. Champagne sequin tablecloth + matte white florals
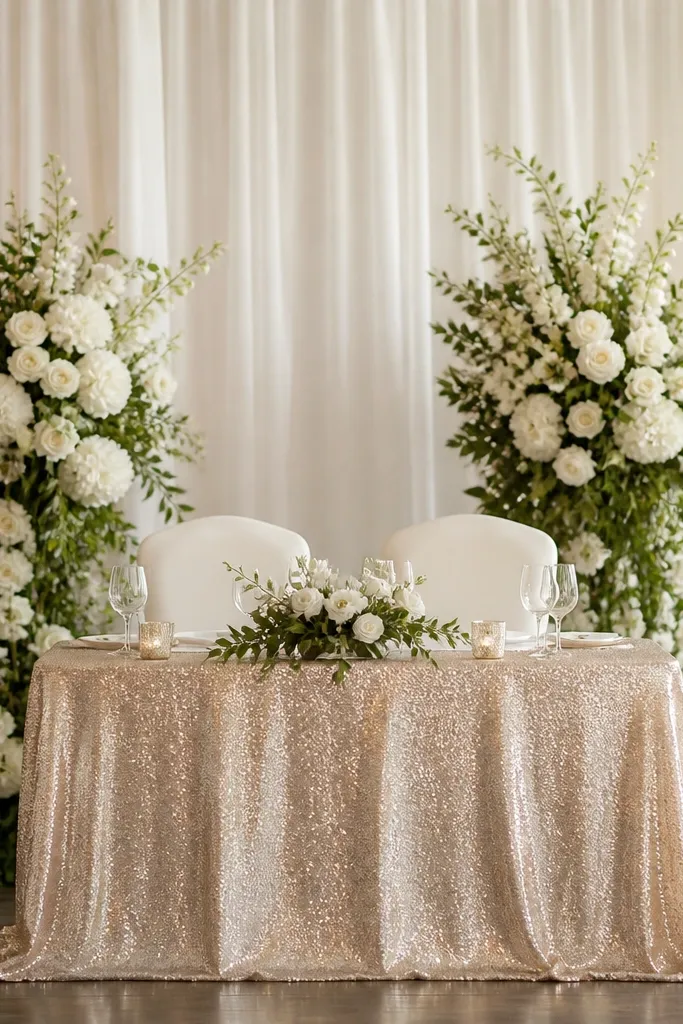
A champagne sequin cloth makes the whole table look "event-ready" without needing heavy decor. The key is pairing sparkle with matte florals so the texture contrast looks intentional. I've used this with white garden roses and dusty greenery and it photographed beautifully because the sequin reflects warm light while the flowers stay calm. It flatters medium skin tones and warm undertones, and it fits weddings with golden hour lighting or indoor uplighting. If your venue has lots of overhead light, the sparkle reads classy instead of harsh when you keep the rest minimal.
Choose a sequin tablecloth that fits the table width and hangs evenly at the sides, then smooth it before adding anything. Add matte white florals in two clusters behind the head chairs and keep the table itself mostly clear. Place two low candle holders on the table edges near the clusters so the sparkle doesn't overwhelm the center. Dress the head chairs in ivory chair covers with simple ties so they don't compete with the sequins. Keep your backdrop plain - a cream curtain or a neutral wall is enough.
Try thisTest the sequin cloth in your venue lighting. If it looks too mirror-like, switch to a satin table runner under the flowers and leave the sequin only on the front panel.
Common mistakeAvoid adding more glittery elements like rhinestone candles. Too many reflective surfaces can look chaotic.
5. Paper fan backdrop in blush and ivory
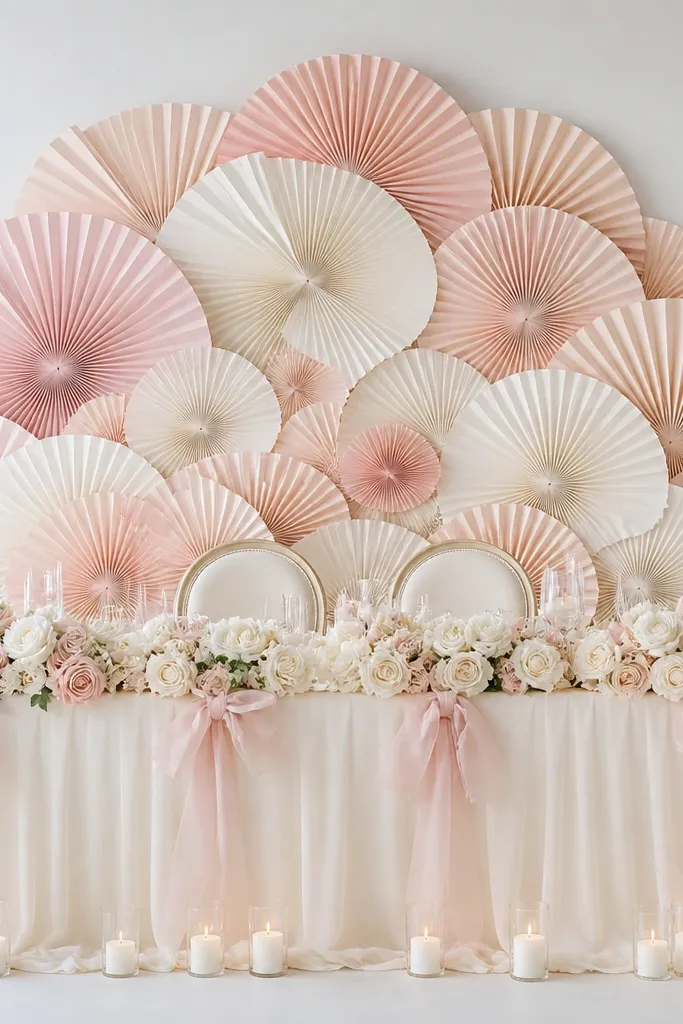
Paper fans look surprisingly high-end when you stack them in layers and keep the color palette tight. I built this for a small backyard wedding and the photos looked like a much pricier floral wall because the fans create dimension behind the couple. Blush and ivory work well for both fair and deeper skin tones since the colors sit close to natural warmth. This is also gentle on the budget because you can reuse fans as ceiling decor later. It's a great option when you want a clean, modern romantic look without heavy setup.
Start by buying paper fans in two sizes: one larger set in ivory and one smaller set in blush. Build a half-circle arrangement behind the head chairs, pinning fans to a backdrop mesh or hanging line so the gaps stay even. Place the fans so the center aligns with where the couple's heads sit. Cover the sweetheart table with an ivory cloth, then add a blush ribbon bow on the center of the table or on each head chair. Add two to four white candles low on the table so they don't block the fans.
Try thisUse a matte fan finish. Glossy paper catches light and can look cheap in harsh venue lighting.
Common mistakeAvoid uneven fan spacing. If the gaps vary, the backdrop reads messy instead of intentional.
6. Balloon garland with one tall arch cluster
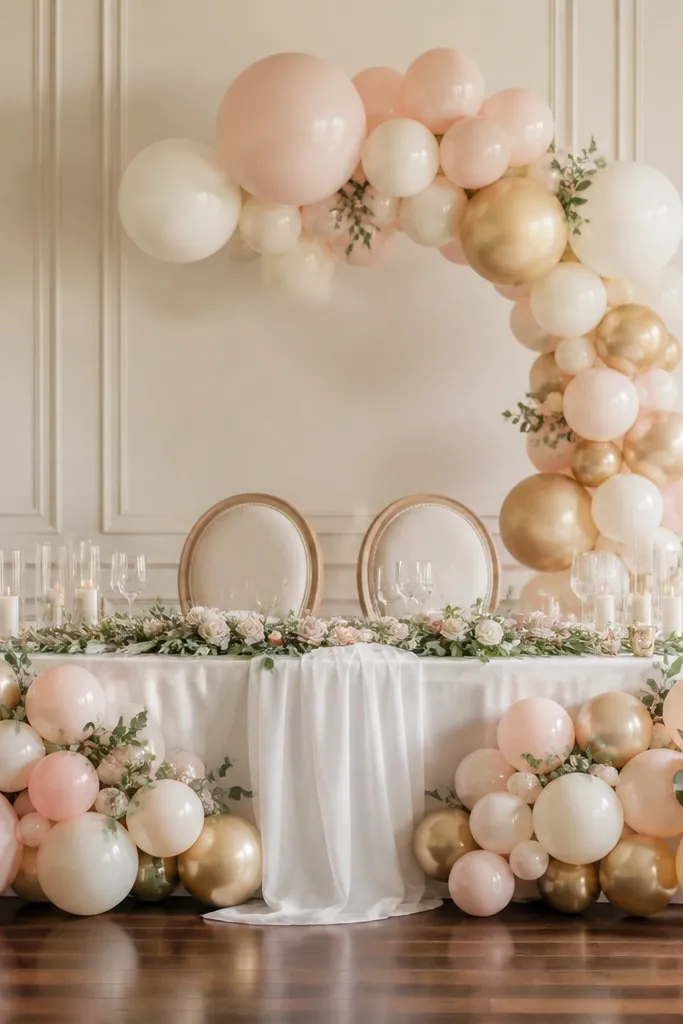
Balloons can look bridal, not party, if you keep the palette small and the shapes controlled. I used cream and blush balloons with two light-gold accents and it photographed like a soft romantic wall. The tall arch cluster frames the couple's faces, while the edge garland adds movement without covering everything. This works well for couples who want a modern sweetheart table but still want it to feel sweet. It also flatters a wide range of skin tones because these colors sit in the same warm family as most wedding florals.
Pick two main colors and one accent - for example blush and cream, with light gold as the accent. Create a balloon garland along the sides of the sweetheart table using clusters that are denser near the corners. Build a tall arch cluster above the head chairs using larger balloons in the center and smaller ones on the sides. Tie the garland to a backdrop stand or secure it to chair backs with clear fishing line. Keep the table styling simple: white runner, two bud vases, and one candle on each side.
Try thisUse balloon weights and secure ties behind the chair backs. If the garland shifts, it ruins the photo framing.
Common mistakeAvoid adding too many colors like navy or bright red. It turns the table into a general celebration.
7. Crepe table skirting with pearl button trim
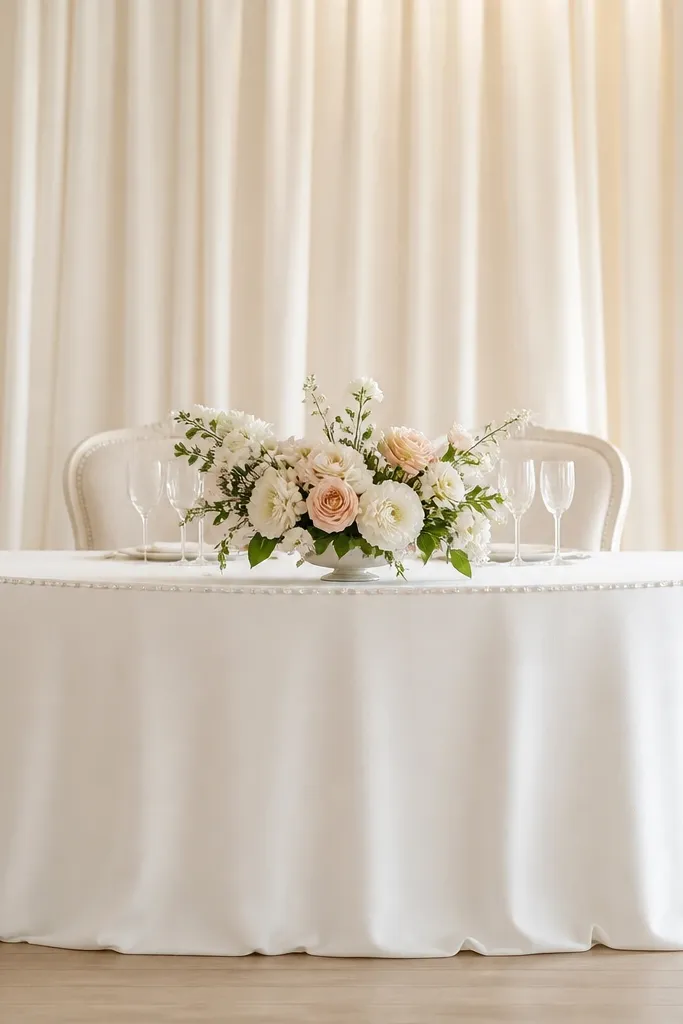
Crepe skirting makes a budget table look tailored because it drapes rather than clings. The pearl button trim adds a photo-friendly detail without needing expensive rentals. I used this on a table that had a plain metal frame, and the skirting hid every seam and leg. It flatters anyone because the clean vertical line helps the couple's outfits look more structured in photos. This setup also works for both daytime and evening weddings, as long as you keep the florals light and not too dark.
Measure the table height including the top surface, then buy crepe skirting panels that reach the floor or sit just above it (about 1 inch clearance). Attach the skirting to a fitted base or bungee tie system so it hangs straight. Sew or hot-glue (with fabric-safe glue) a thin pearl button trim along the front edge - keep the spacing consistent. Add one center arrangement behind the table, not across the whole width. Finish with a simple runner on top in ivory and two short candles at the ends.
Try thisIron crepe on low heat with a pressing cloth. Wrinkles show more on fabric that's matte and smooth.
Common mistakeAvoid cheap stretchy tablecloths that ride up during the night. You want the skirting to stay put.
8. Lanterns on a mirror strip for instant glow
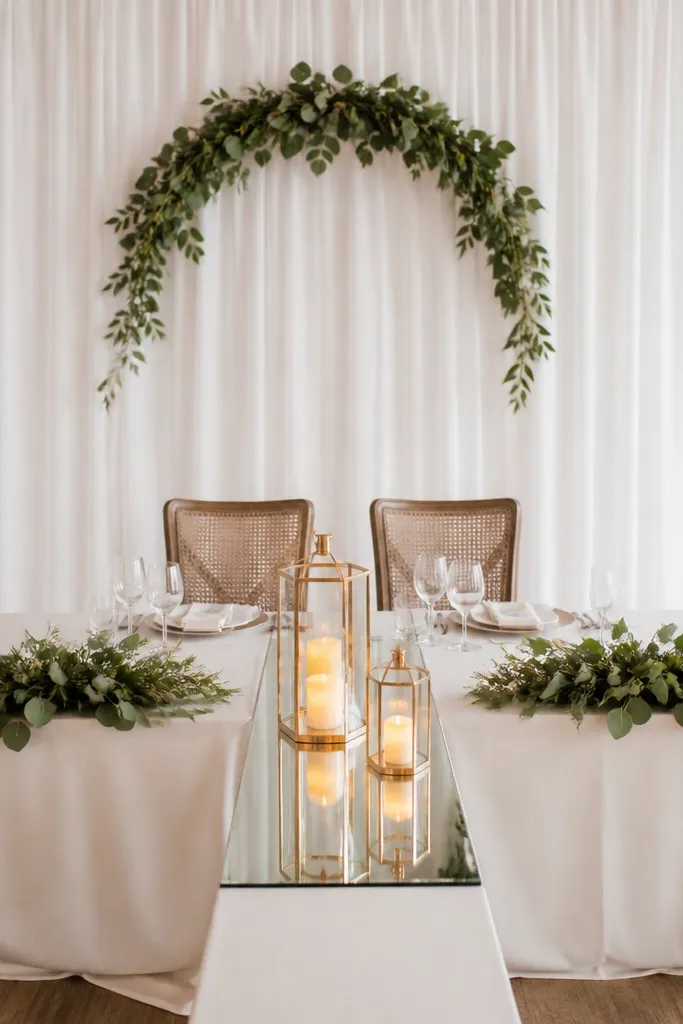
This is my go-to when the venue lighting is unpredictable. A mirror strip makes warm candlelight look fuller, and lanterns give you height without building a tall floral wall. I've used this with LED tea lights because they stay consistent and don't burn your budget in replacement candles. It flatters skin tones because the warm glow reduces harsh shadows on faces. Keep the florals minimal and let the lanterns create the romantic mood.
Place a rectangular mirror acrylic sheet or mirrored tray down the center of the table on top of your tablecloth. Set three glass lanterns evenly spaced, with the center lantern slightly taller if you can. Add warm LED candles and set them so the light sits at about chair eye level. Behind the couple, hang a white drape and add a short greenery arc above the head chairs using one garland piece. Keep the rest of the table clear so the mirror glow stays the focal point.
Try thisIf you see glare on faces in photos, angle the mirror slightly or move the lanterns 3-4 inches toward the table center.
Common mistakeAvoid using cold-blue LEDs. They make skin look gray under camera flash.
9. Two-tone linen runner with a knot at center
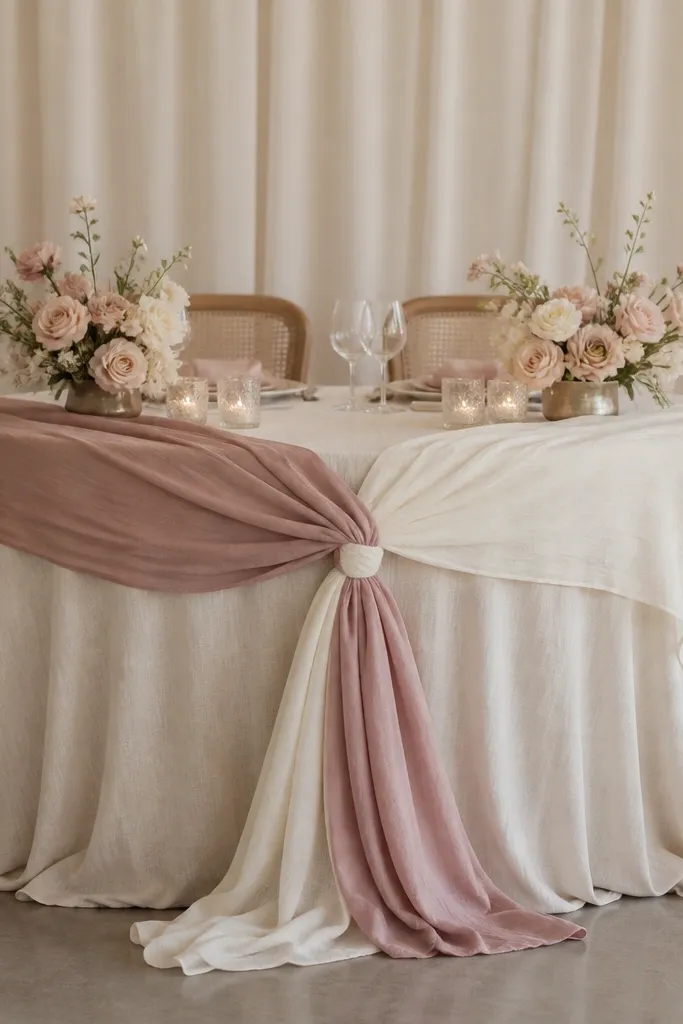
Two-tone linen looks custom because the fabric texture shows even when the budget is small. The knot at the center front creates a focal point that reads well in wide shots and close shots. I've done this with medium-weight linen blends that don't slide around, and it stays neat through dinner service. Dusty rose over ivory flatters cool and warm skin tones because it sits in a soft neutral range. This works best if your flowers are white or cream, since the runners already carry the color story.
Start with an ivory tablecloth or fitted skirting. Add a wide ivory linen runner across the center, then layer a dusty rose runner on top at a slight diagonal so you see both edges. Tie a small knot at the front center where the couple's hands rest in photos. Secure the knot with a hidden stitch or fabric-safe tape under the runner edge. Place two small bud vases or a single low floral arrangement behind the knot so the center looks intentional.
Try thisChoose linen blends with a matte finish. Shiny fabric makes the knot look cheap in overhead lighting.
Common mistakeAvoid slippery satin underlayers. The runners drift and your knot ends up off-center.
10. Monogrammed napkin rings + matching table numbers
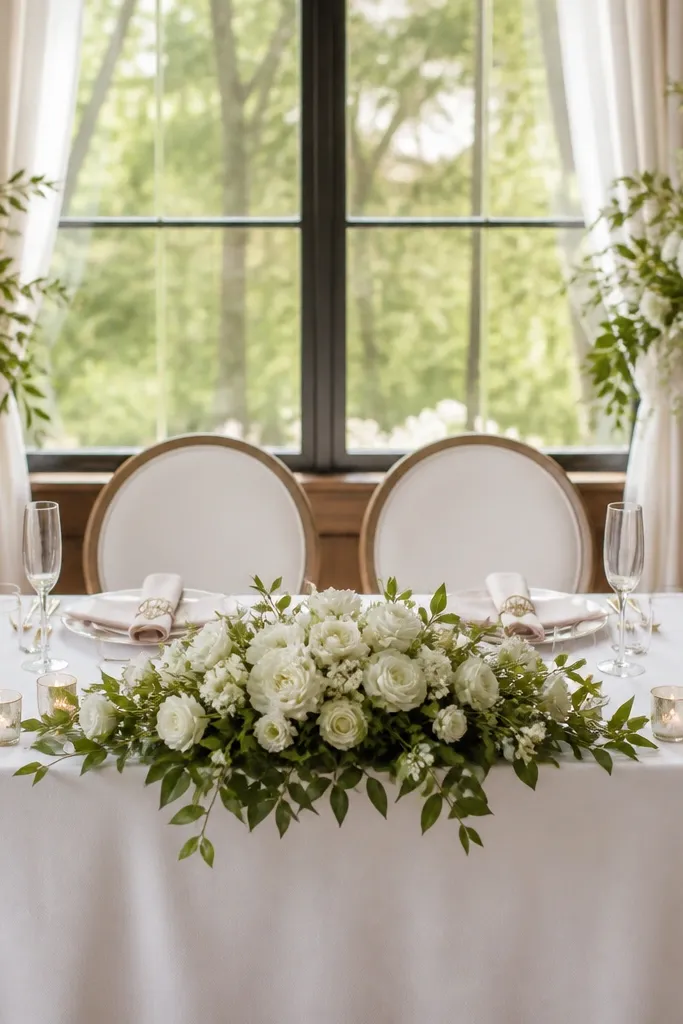
This setup makes the table look thoughtfully styled because details match across items. Monogrammed napkin rings are small, but they show up in photos at the table edge and they make the table feel "designed," not rented. I used blush acrylic rings with gold lettering and it paired perfectly with champagne or warm gold palettes. It flatters a wide range because the color is near neutral and the gold lettering adds warmth. If you're trying to keep your sweetheart table budget-friendly, this is one of the highest impact changes per dollar.
Pick one monogram style you can repeat: blush acrylic with gold text, or white with gold. Use napkin rings that fit your napkin thickness, then fold napkins consistently so the rings sit at the same height. Place a low greenery and white floral centerpiece behind the table front so the napkins show clearly. Add two table number cards or welcome cards near the corners on small stands, using the same font style as the rings. Keep candlelight warm and low so the ring lettering stays readable in pictures.
Try thisPrint your table number cards on thick matte cardstock. Glossy paper flares under flash.
Common mistakeAvoid mismatched fonts between rings and cards. It makes the table look like leftover stationery.
11. Ivory tulle drape with a single gold hoop
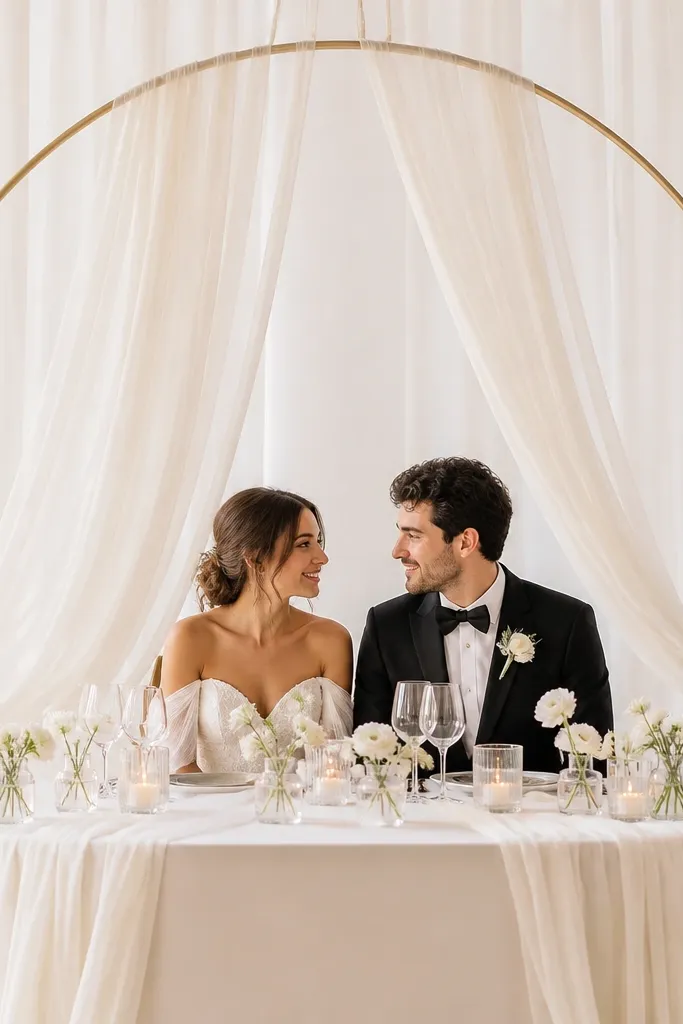
A gold hoop with tulle strands gives you that framed sweetheart look without building a full arch. I've used this when the venue stage is too plain and you need a defined photo frame behind the couple. The tulle moves slightly in air, which makes photos feel alive instead of static. Ivory tulle works for both fair and deep skin tones because it keeps the focus on faces and doesn't add extra color noise. It also suits modern, boho, and classic weddings because the hoop can be styled with either greenery or white florals.
Hang a gold embroidery hoop or metal hoop frame on a backdrop stand at the height where the couple's heads will sit - usually just above shoulder level. Drape ivory tulle strands from the top of the hoop down 18-24 inches, keeping strands evenly spaced. Pin the tulle so it doesn't bunch - you want vertical lines, not a thick cloud. Cover the table with an ivory runner and add one low floral arrangement in white and greenery. Place two candles or lanterns on the table edges so the hoop stays the main focus.
Try thisCut tulle into slightly different lengths by 2-3 inches. The stagger adds depth without looking messy.
Common mistakeAvoid chunky knots at the hoop attachment points. They show up clearly in close-up photos.
12. White rose foam-free centerpiece line
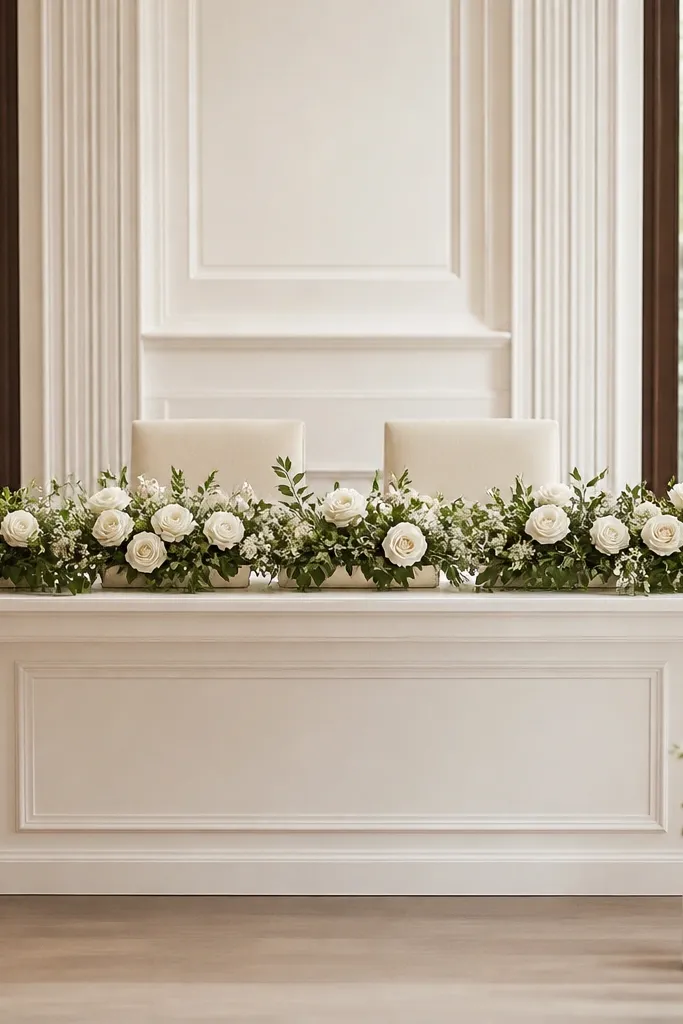
A foam-free centerpiece line looks lush because it's low and continuous, not tall and scattered. I prefer shallow containers because they let the flowers stay close to the camera, which makes the table look full even when you don't use a ton of blooms. White roses with greenery are forgiving - they match almost any dress color and they don't fight with blush bridesmaid tones. This setup flatters because it keeps faces unobstructed and keeps shadows off the couple's clothing. It also makes cleanup easier after the reception.
Lay a strip of floral-safe shallow containers or bud vases along the centerline with equal spacing. Fill each container with water and use floral tape to stabilize stems so they stand upright. Build the line with mostly white roses and add a little greenery between them for texture. Keep the height low - around 6-10 inches total - so the couple's faces stay clear. Add a plain white table runner or fitted cloth underneath and keep the table sides simple for a clean look.
Try thisUse a mix of rose sizes - one larger bloom every 2-3 containers - so the line looks intentional, not uniform.
Common mistakeAvoid tall centerpieces. If the blooms reach eye level, the photos look blocked.
13. Macramé runner with neutral candles
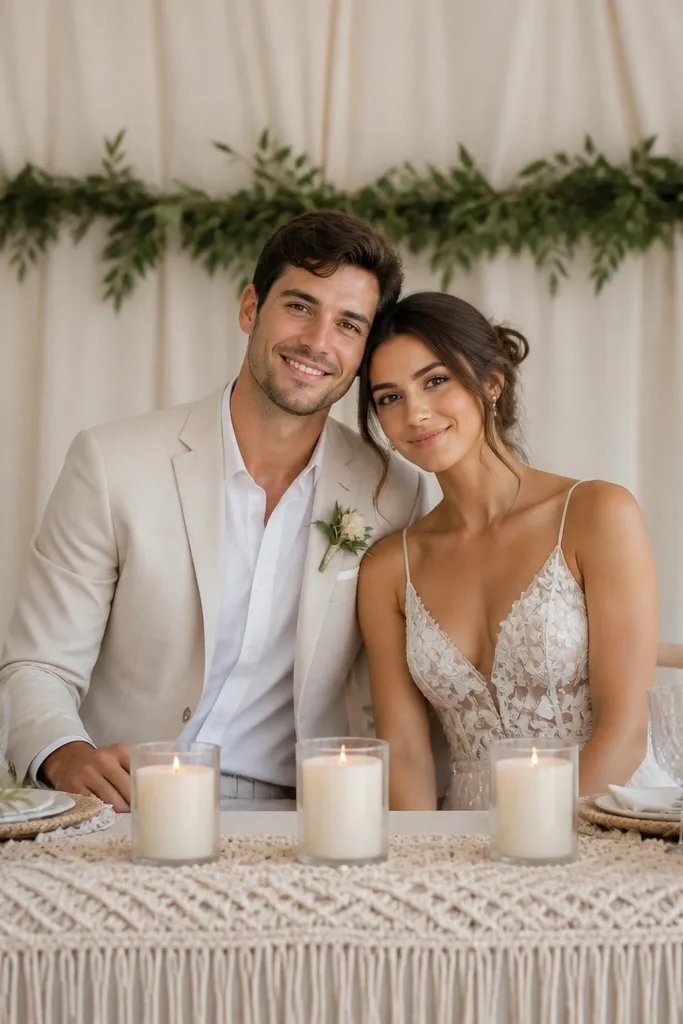
Macramé brings handmade texture, and texture reads expensive on camera. I've used a natural macramé runner with cream candles and a small greenery line behind the head chairs, and it always looks warm without needing a big floral budget. This works especially well for couples with boho touches, neutral outfits, or a desert-inspired palette. It flatters because the beige tone sits close to skin warmth and doesn't create harsh contrast. Keep florals minimal so the runner stays the hero.
Start with a neutral tablecloth or skirting in ivory so the macramé shows clearly. Lay the macramé runner centered, trimming only if it bunches - you want it to hang straight. Place three cream pillar candles at equal spacing along the runner, with the center candle slightly taller. Behind the couple, hang a neutral fabric panel and add a short greenery line above the runner height. Add a single bud vase on each side of the candles for symmetry.
Try thisUse unscented LED candles if your venue has strict fire rules. The flame effect looks good in photos and keeps the setup easy to maintain.
Common mistakeAvoid dark brown macramé with cool-white florals. The combination can look harsh and heavy.
14. Fabric canopy with two satin bows
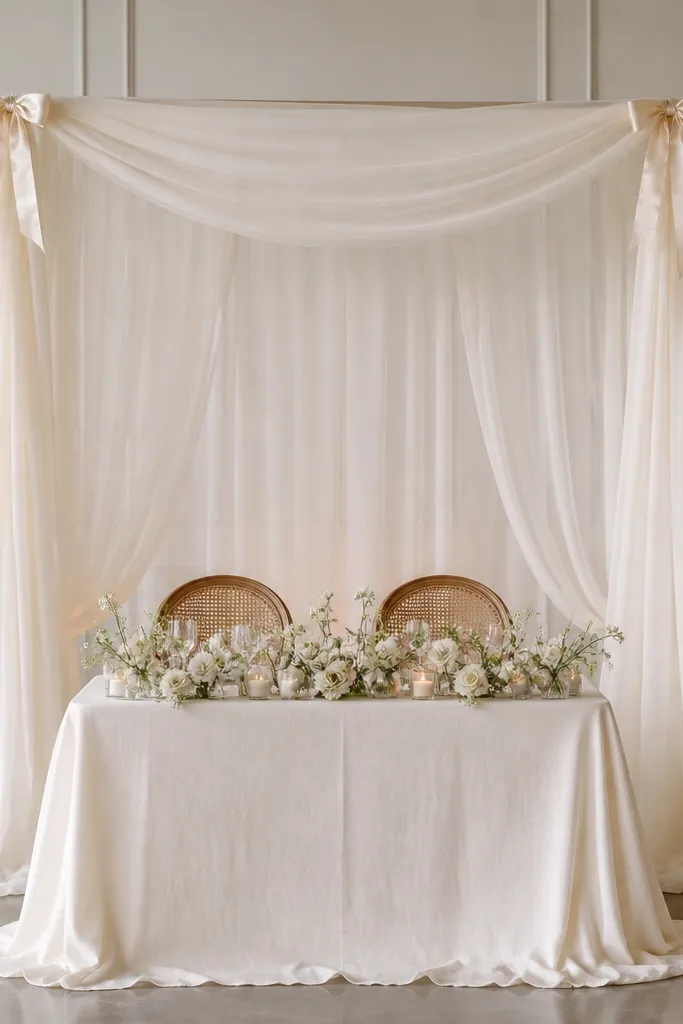
A fabric canopy gives you a romantic ceiling effect without paying for a full floral installation. The key is keeping the canopy fabric lightweight but structured, so it falls in smooth folds. I used 108-inch satin-like panels and gathered them at the top corners with satin bows, and it photographed like a custom drape. This flatters because the canopy creates a gentle frame around the couple, drawing eyes to faces. It works best when your wedding palette is ivory, cream, blush, or champagne.
Set up a simple backdrop frame or tension system behind the head chairs. Drape two fabric panels so they meet above the couple, then gather each side at the top corner. Tie a satin bow at each top corner with 6-8 inch ribbon tails so the gathers look intentional. Cover the table with ivory linen and add two low floral arrangements at the center. Finish with two bud vases near the head chairs and keep chair decor simple so the canopy stays the focal point.
Try thisChoose fabric with a slight sheen, not full satin. Matte fabric can look flat, while full gloss can look too plastic.
Common mistakeAvoid wrinkled fabric. Wrinkles catch light and make the canopy look like a borrowed sheet.
15. Monochrome blush floral foam blocks on a tray
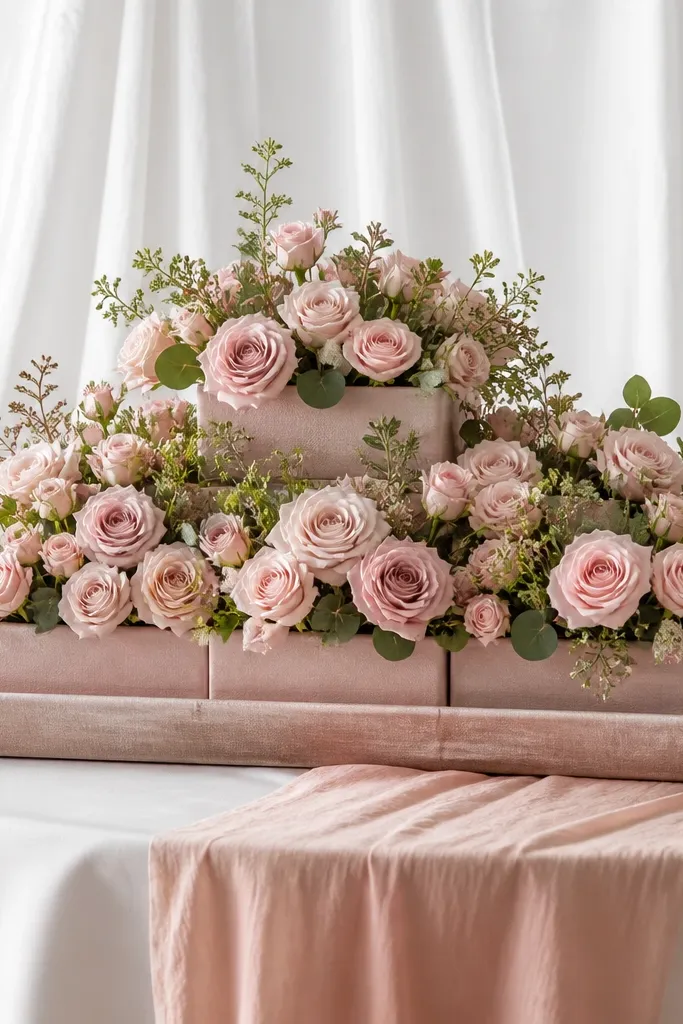
When you need maximum impact for minimal budget, foam blocks can look great if they're wrapped and kept monochrome. I used blush roses and blush filler with a bit of eucalyptus and wrapped the foam in blush fabric so you never see the texture. This creates a dense, photo-ready floral surface without spreading flowers across the whole table. It flatters because monochrome blush softens skin tones and makes the couple look cohesive in pictures. It also works for venues where you can't hang heavy decor - everything sits on the table safely.
Buy a large rectangular tray and place wrapped floral foam blocks on top in a staggered layout. Wrap foam with blush fabric or floral wrap so edges look smooth. Insert faux blush roses and filler at varying angles, keeping the top surface mostly flat and dense. Cover the sweetheart table with a blush runner or blush tablecloth so the tray blends in. Add a narrow line of greenery at the tray edges only - skip extra side flowers so it stays clean.
Try thisKeep the foam blocks at least 4 inches apart at the edges so you get depth instead of a single flat mass.
Common mistakeAvoid mixing too many blush shades. Multiple pink undertones can look patchy in daylight.
16. Ivory candle garland down the center with greenery edges
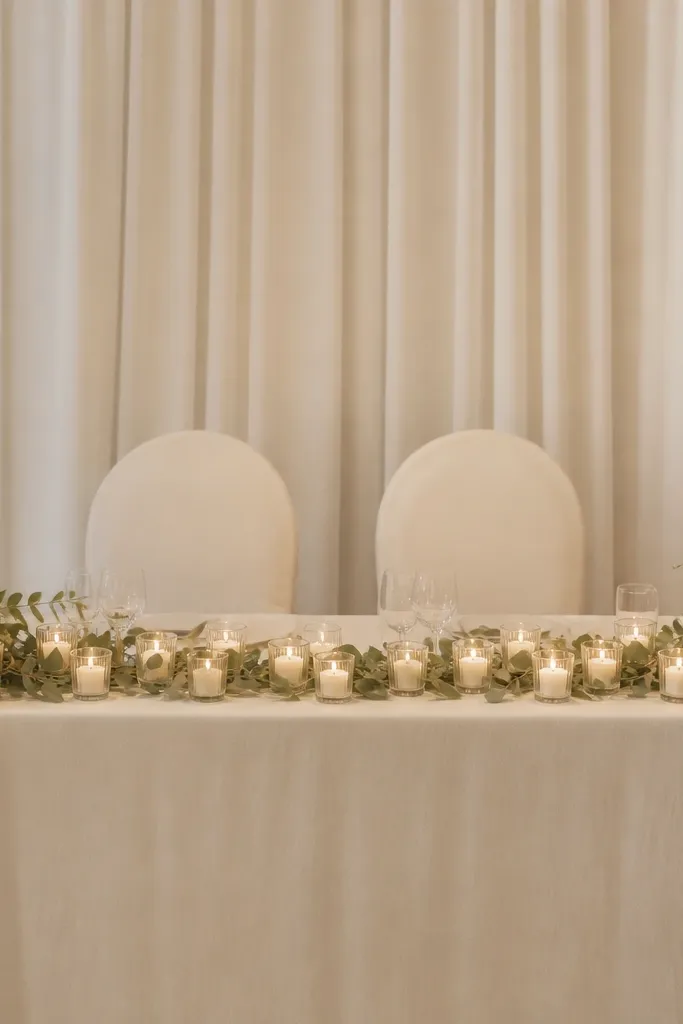
A candle garland makes the table feel formal without buying a ton of floral stems. I like this when the reception has evening light because the candles create a warm glow that hides small imperfections in decor. The greenery edges add structure and keep the center from looking like "just candles." Ivory candles flatter most skin tones since they're neutral and reflective enough to show detail on camera. It's also great for couples who want a classic romantic look and don't want a big backdrop built for photos.
Cover the table with an ivory cloth or fitted skirting and place a thin greenery strip along the left and right edges of the table center. Arrange small ivory candles in holders along the middleline, spacing them about 10-12 inches apart. Anchor the garland with floral tape to the table surface or use a tray base so it doesn't slide. Behind the couple, hang a cream curtain and add two short greenery sprays at the top corners. Keep head chair decor to simple ivory covers with a small greenery tie at the back.
Try thisIf your venue is windy, use weighted candle holders or LED candles. Wobbling candles look messy in video.
Common mistakeAvoid placing candles too close together. Crowded candles create a hot, uneven look on camera.
17. Cream linen backdrop with pinned eucalyptus verticals
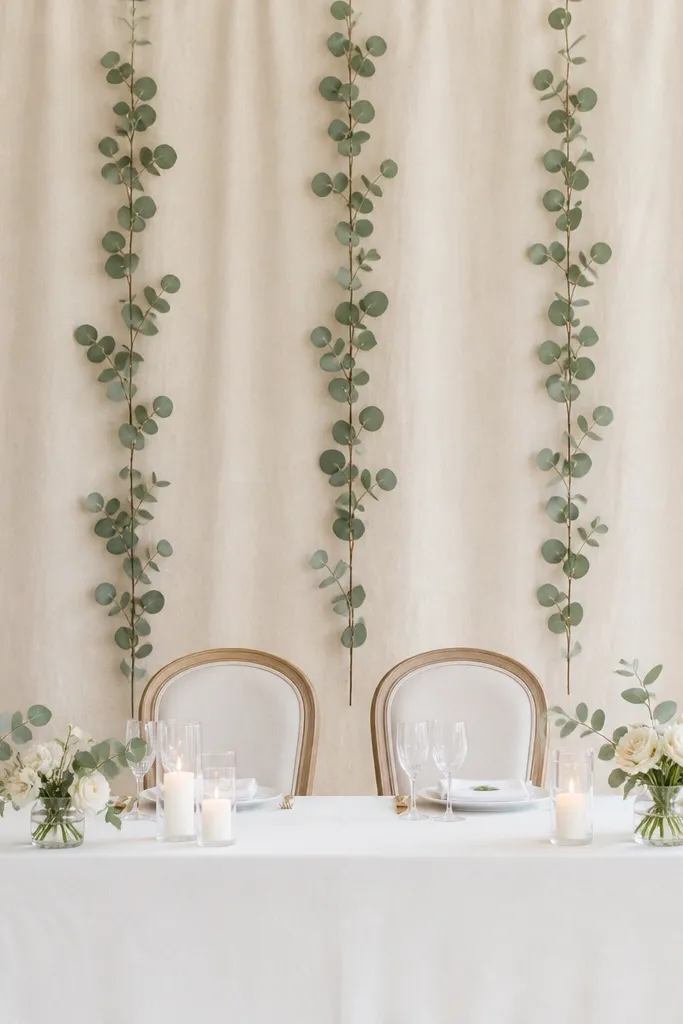
Pinning eucalyptus verticals on a cream linen backdrop gives you a natural, structured look without building an arch. I've used this when the venue walls are bland and you need something that reads romantic but not too heavy. The vertical branches guide the eye toward the couple's faces, which makes the photos look framed. Cream linen is forgiving because it doesn't compete with blush or white outfits. It also works for both fair and deep skin tones because the greens are muted and the base stays warm-neutral.
Hang a cream linen panel behind the head chairs using a stand or curtain rods. Pin eucalyptus branches vertically across the panel in a symmetrical pattern, usually three clusters per side. Keep the branches spaced so you can see the linen between them - that negative space is what makes it look clean. Cover the table with a white cloth and add a simple runner in cream. Place two small bud vases at the front corners and keep the centerpiece low so it doesn't block the eucalyptus.
Try thisUse clothespins or small pin hooks for eucalyptus so you can adjust spacing fast on the day.
Common mistakeAvoid thick, tangled greenery masses. They look messy and read "craft" instead of "styled."
18. Pastel ombre fabric panels behind the couple
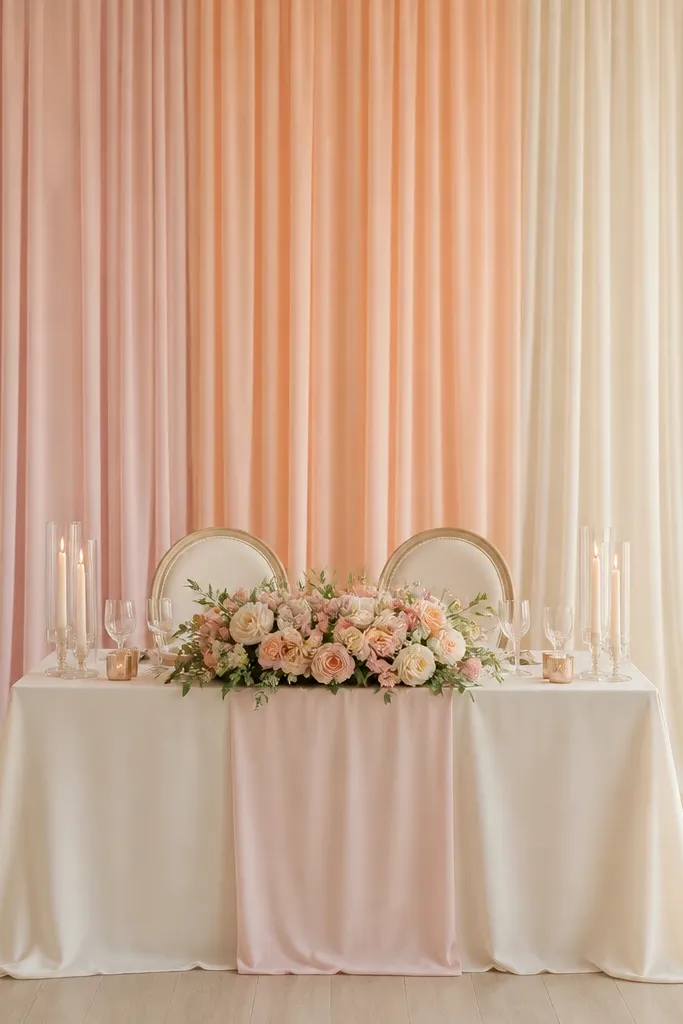
Ombre fabric panels create depth instantly, and they're one of the easiest ways to make a sweetheart table look designed on a budget. I used blush-to-cream ombre panels and it gave the backdrop a gentle glow that looks good in daylight and at night with warm lights. This flatters because the gradient sits in warm tones that complement skin without looking too saturated. It also works when your floral budget is small, since the fabric does the visual work behind you. Keep the table itself mostly neutral so the ombre stays the focus.
Buy three matching ombre fabric panels or one wide panel cut into three vertical sections. Hang them behind the head chairs with slight overlap so you don't see seams, and keep the fabric pulled taut. Center the lightest shade behind the couple's heads so faces catch the brightest part of the gradient. Cover the table with ivory linen, then add a narrow blush runner at the center front. Place one small floral arrangement or a few bud vases in cream so they don't fight the gradient.
Try thisIf your ombre fabric looks too bright in person, add a layer of cream fabric behind it so the gradient softens.
Common mistakeAvoid strong purple or neon ombre. It can clash with bridal makeup and looks harsh in photos.
19. White floral garland across the table front edge
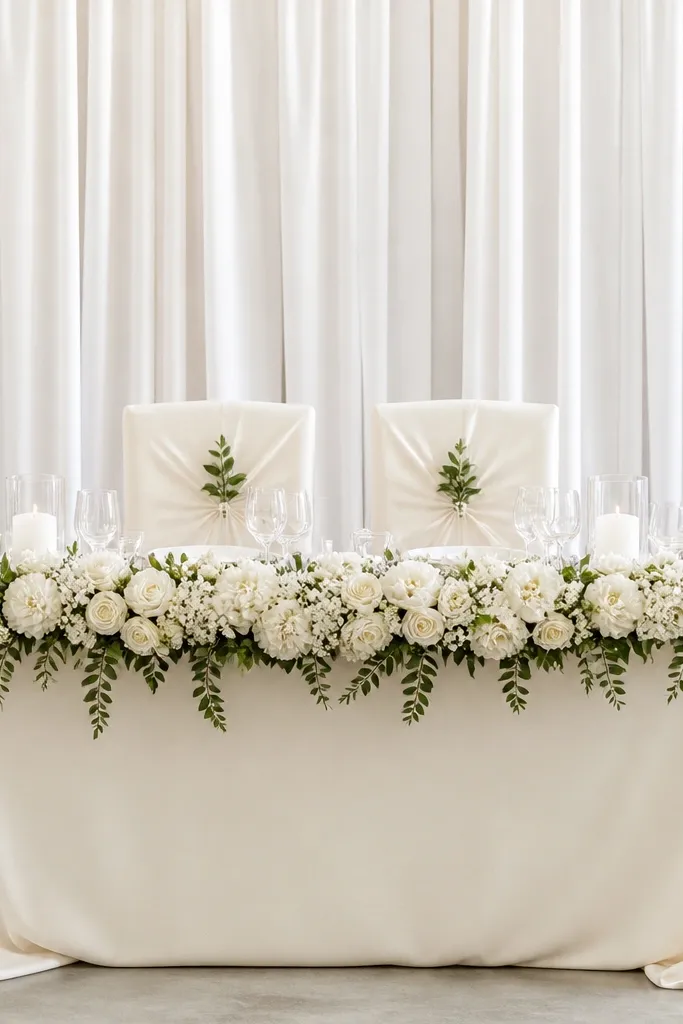
A garland along the table front edge makes the whole setup look finished, even if you keep the backdrop simple. I like this because it frames the couple's torsos and adds movement in photos - especially when guests walk by. White florals with greenery are safe and flattering, and the drape hides any imperfect table edges. It also works for smaller venues where you can't build a big wall behind the table. The styling principle is simple: one continuous line of texture across the front reads more "intentional" than scattered bouquets.
Cover the table with a fitted ivory cloth or skirting so the front edge is straight. Place a white floral garland along the front edge and let it drape down 2-4 inches so it looks soft, not flat. Secure the garland with floral tape to the table underneath so it doesn't shift. Add a small low centerpiece behind the garland so the centerline looks full when the couple leans forward. Dress the head chairs with ivory covers and tie a small greenery sprig at the top of each chair back. Keep candles minimal - one at each end is enough.
Try thisUse garlands with a mix of sizes. Uniform tiny blooms look thin and cheap in wide shots.
Common mistakeAvoid garlands that are too long for the table. If it bunches, it looks like it was thrown on.
20. Hay bale base with gauze runner for rustic romance
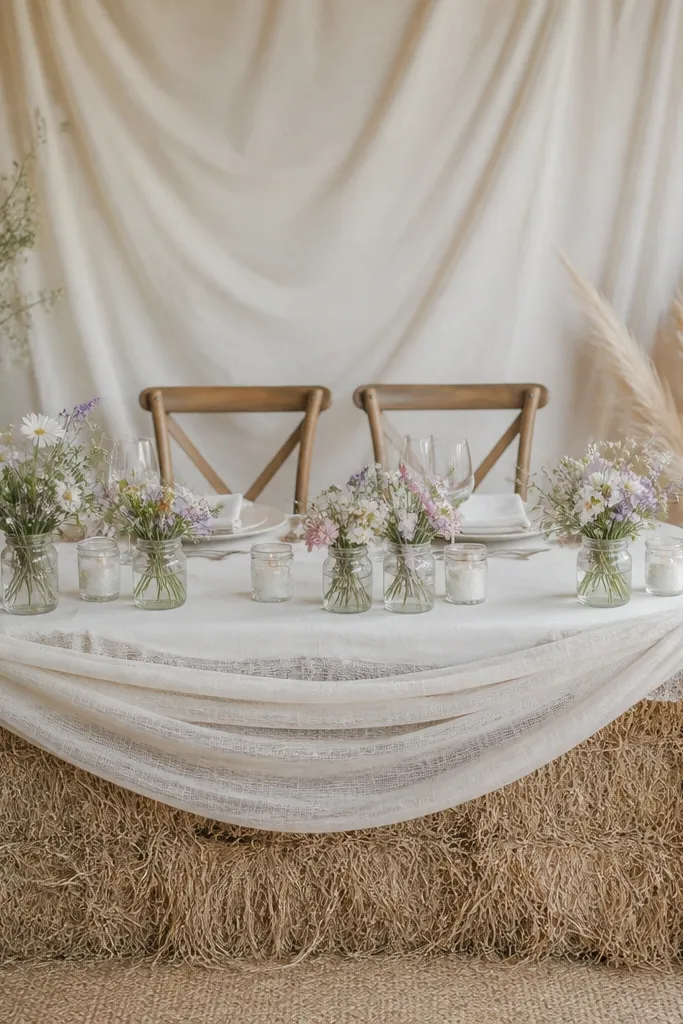
This is the kind of setup that looks romantic in a barn without spending on expensive rentals. The hay bale base gives texture and height, and the gauze runner keeps it soft instead of looking like a farm prop. I used light cream gauze and small jar arrangements with white and pale pink wildflower-style blooms. It flatters the couple because the natural tones make skin look warm and healthy under barn lighting. This works best for rustic venues, fall weddings, and couples who want a cozy sweetheart table that still photographs beautifully.
If the venue allows it, place hay bales as a base under the table area or as a platform, then cover them with a fitted neutral cloth to avoid visible straw edges. Lay a cream gauze runner across the top so it drapes over the front in gentle folds. Set the sweetheart table top on top of the covered base and secure it so it doesn't wobble. Add jar arrangements in three heights - one short, one medium, one tall - aligned in the center. Finish with a neutral fabric backdrop and a small greenery line at the top corners of the head chairs.
Try thisUse clear vote of jar bases and keep labels hidden. Anything readable on jars pulls attention away from the couple.
Common mistakeAvoid bright synthetic gauze that looks plasticky. It catches light and makes the rustic style look fake.