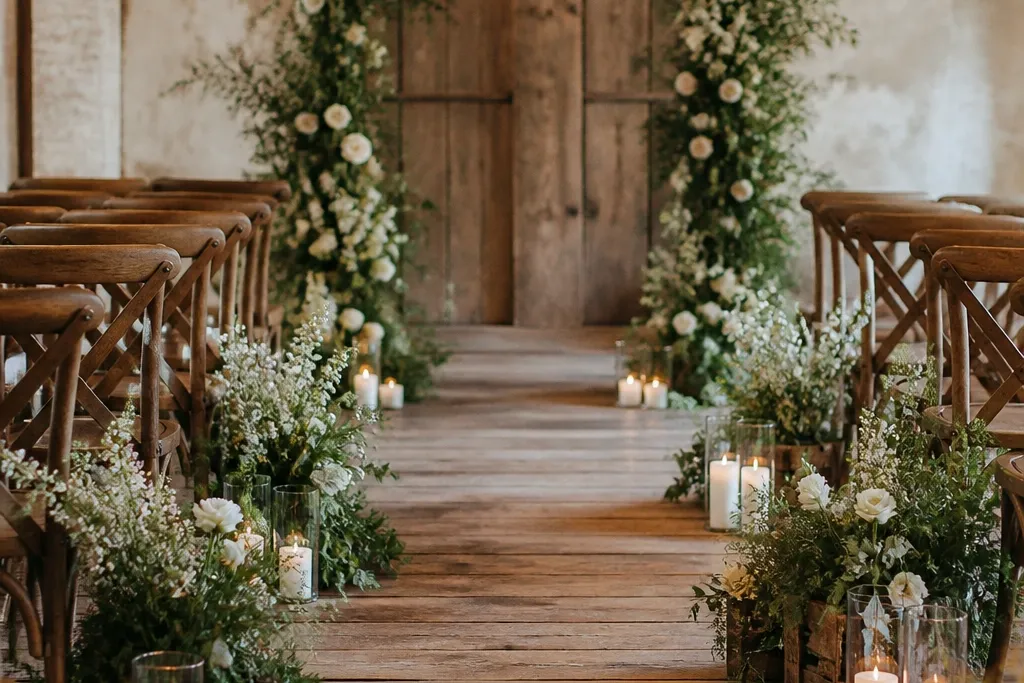
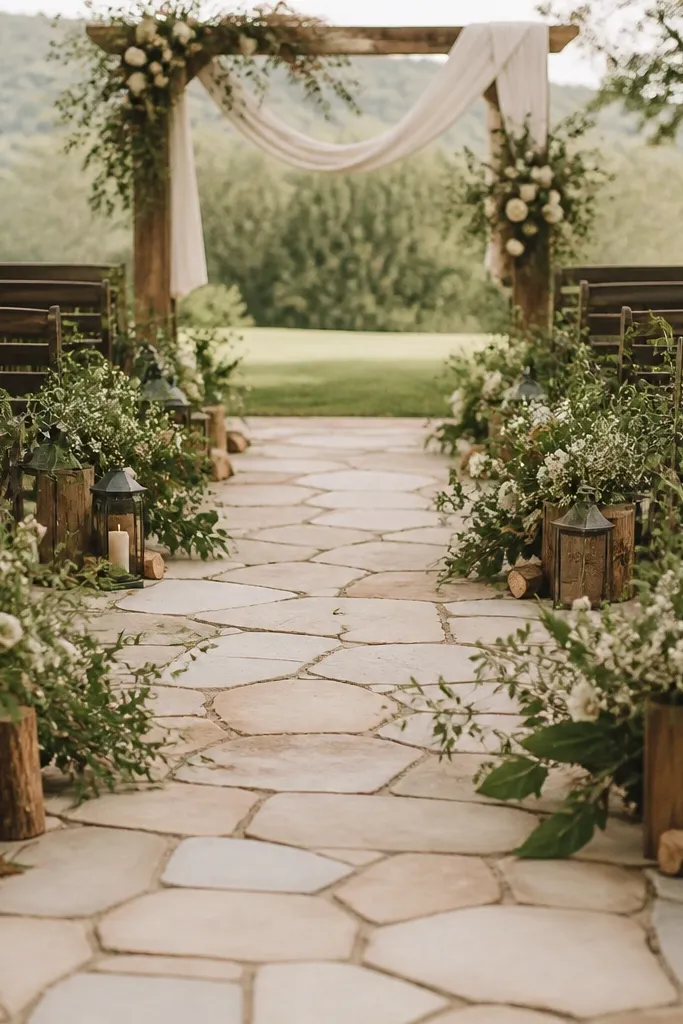
1. Galvanized lantern line with warm pillar glow
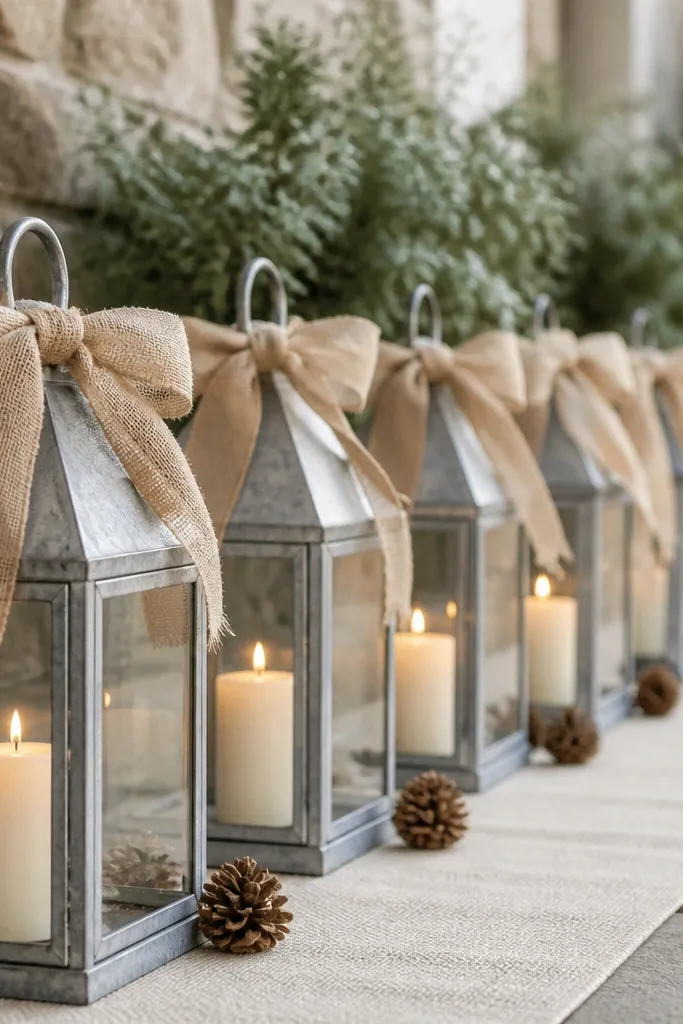
I use galvanized lanterns when I want rustic aisle decor all year that still looks clean in daylight and magical at night. The metal finish reads farmhouse without needing heavy floral work, and the clear glass keeps the look bright even in dim venues. For a summer ceremony, I keep the candles cream and skip the pine - the lantern line still looks intentional. For winter, I add a few pine cones and evergreen sprigs inside the lantern bases so the glow feels seasonal. This setup flatters most skin tones in photos because it's mostly neutral - it doesn't fight with bridesmaid dresses or guest outfits.
Start by choosing 14-24 lanterns depending on aisle length; I space them 4-5 feet apart so the line is readable but not crowded. Fill each base with a real pillar candle or LED candle sized to the lantern opening, then tie burlap ribbon around the top handle so every lantern matches. Add a small handful of dried filler - wheat stems or pine cones - only at the base, not touching the glass. Finally, place the lanterns on a runner or interlocking ground cover so they look level even on grass or gravel.
Try thisUse battery candles with a warm 2200K bulb if your venue has any fire restrictions. They look better than cool-white LEDs and you can keep the setup consistent year to year.
Common mistakeAvoid lanterns that are too short - if they sit below knee level, guests feel like they're walking past clutter instead of a designed aisle.
2. Burlap runner with stitched cream cotton edge
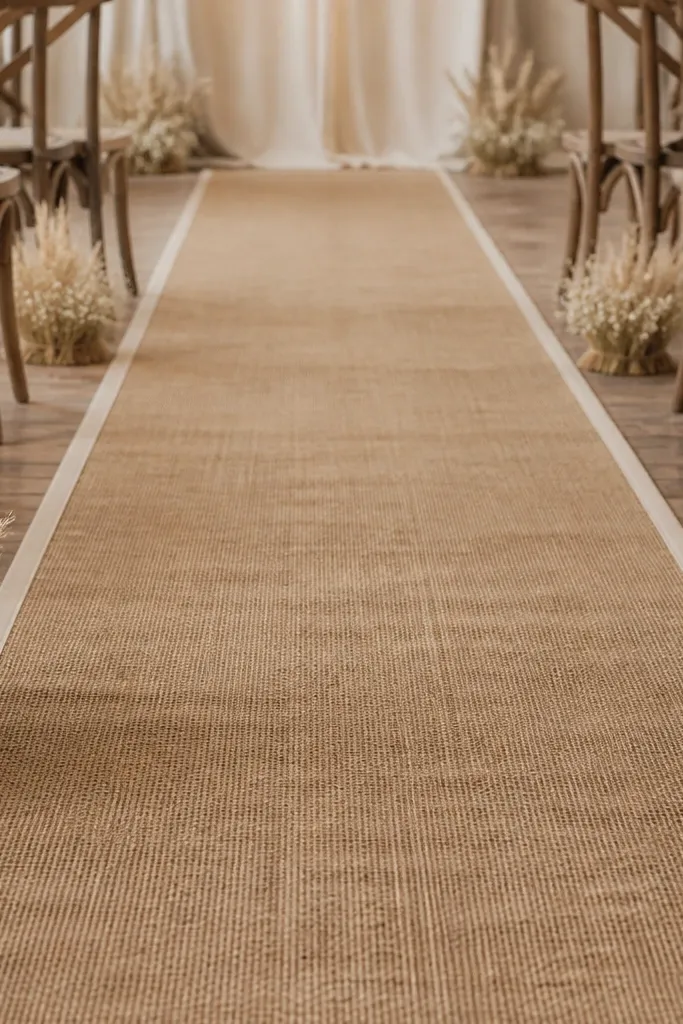
A runner is the quickest way to make rustic aisle decor look finished, and burlap is the most forgiving fabric I've worked with across seasons. It hides minor dirt and uneven boards, so you don't have to stress about every gap in the floor. In spring and summer, I pair it with cream cotton and thin dried greenery so it reads light, not heavy. In fall and winter, I add deeper accents like cinnamon-brown ribbon or a few evergreen sprigs at the aisle start. This flatters darker and lighter skin tones because the runner keeps a neutral mid-tone background for skin and bouquets.
Start by measuring your aisle length and width; I cut runners to leave 8-10 inches of floor showing on each side so the aisle doesn't look boxed in. Lay the burlap down first, then edge it with strips of cream cotton or canvas using simple fabric tape or upholstery pins. Add filler only at the aisle entry and near the ceremony focal point - tuck wheat stems into small bundles and tie with twine. Finish by placing two small clusters of decor at the front corners so the runner reads from the back rows.
Try thisIf you're on grass, tack the runner edges with landscape staples every 2-3 feet so it doesn't bunch in photos.
Common mistakeSkip shiny burlap or polyester blends - they catch light weirdly and look cheap on camera.
3. Reclaimed wood crate planters with seasonal greenery swap
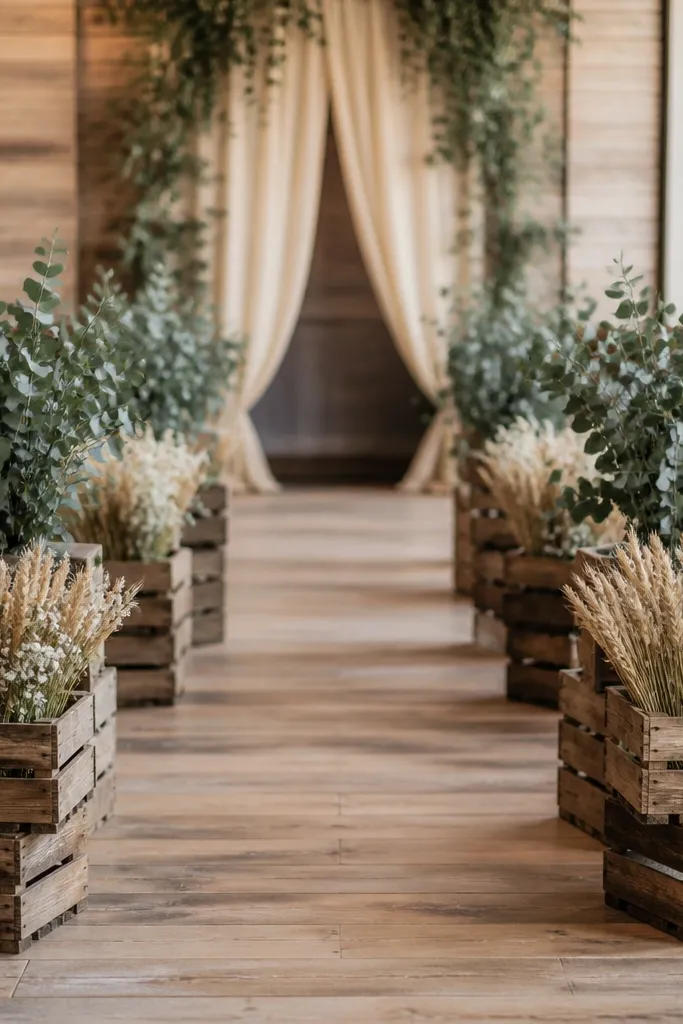
Wood crates are one of the few rustic elements that work in every venue type because they look like they belong on a farm property. I like them because you can keep the crate and change the contents - that's how you get rustic wedding aisle decor all year without buying new structures. For summer, use eucalyptus and airy dried grasses; for fall, swap in orange-toned dried leaves and wheat. Winter gets evergreen sprigs and pine cones inside the crates, still neat and contained. The aged wood color also looks good with both warm and cool bridal palettes, from ivory to soft blue.
Start by choosing crates that are sturdy enough to hold weight; I line each crate with a plastic insert so the wood doesn't soak up water or dirt. Add a base layer of floral foam for fresh greens or a dry oasis-style filler for dried pieces, then place your greenery bundles in a repeating pattern. Tie bundles with jute twine so the ends face toward the aisle and look consistent from the back. Finally, stagger the crates - one slightly higher on one side, one lower on the other - so the aisle feels dimensional.
Try thisPick one greenery shape (rounded eucalyptus vs. Spiky pine) and repeat it. Mixing shapes everywhere makes it look accidental.
Common mistakeDon't let plants spill over the crate rim - overhang makes the whole line look messy fast.
4. Hanging macramé aisle garlands with dried florals
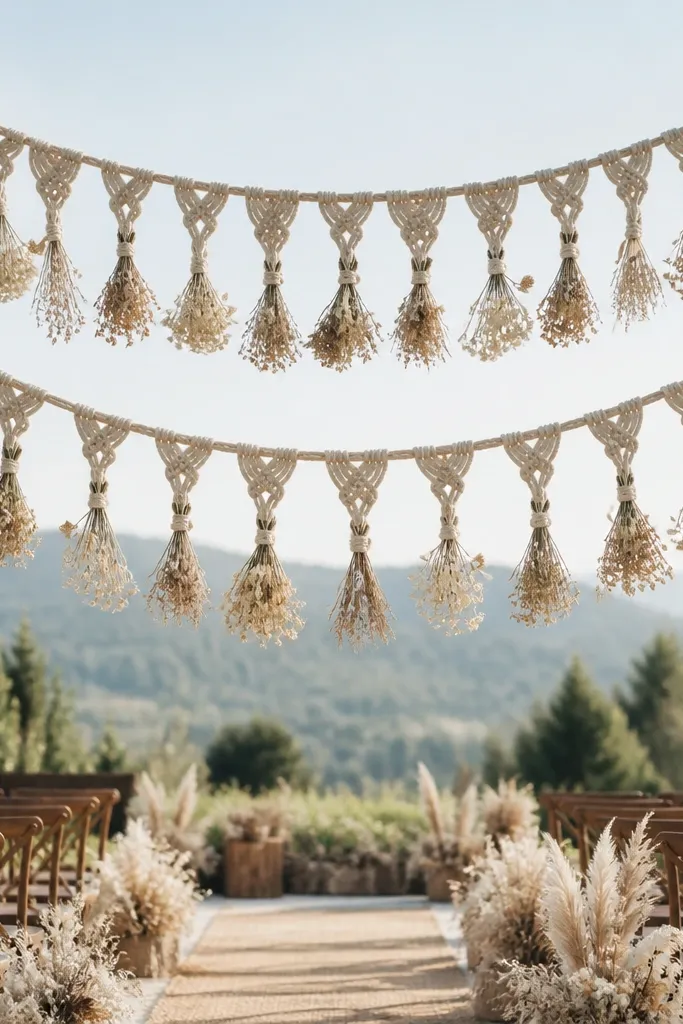
Hanging garlands are my go-to when the venue has a ceiling or sturdy anchor points and you want the aisle to feel cinematic. Macramé rope looks rustic instantly, and dried florals keep the look steady across seasons. In summer, I use cream dried flowers and light tan wheat so it feels airy. In winter, I add a few pine cones and darker brown dried leaves while keeping the rope color the same. This setup flatters tall guests because the line draws the eye upward without blocking sightlines to the couple.
Start by measuring the ceiling height and aisle width; keep the lowest garland point at least 7 feet from the ground so no one walks into it. Tie or hang one macramé garland per side, then add dried bundles spaced every 2-3 feet. Use jute twine to secure stems inside small kraft-paper sleeves so petals don't fall. Finally, anchor the garlands to metal poles or strong hooks and test the swing with one person walking under it.
Try thisUse LED fairy lights inside clear tubing behind the knots for a soft glow that still looks rustic at night.
Common mistakeAvoid fresh flowers overhead if you're outdoors - heat and wind make them droop and shed petals.
5. Pine cone and wheat bundle clusters at aisle corners
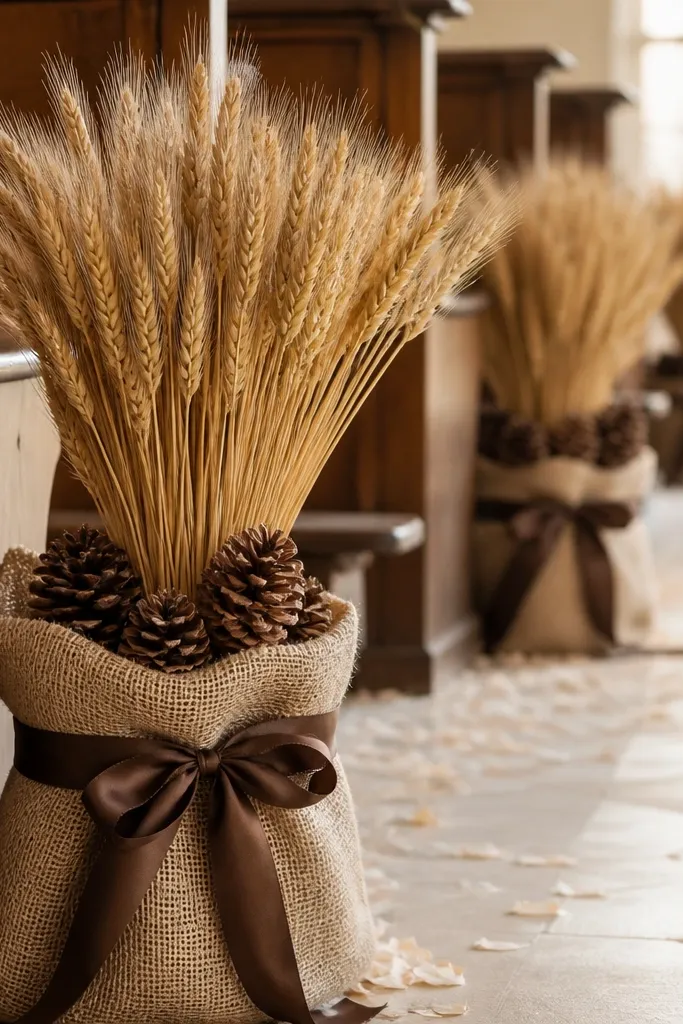
Corner clusters are a smart way to make rustic wedding aisle decor all year look intentional without covering the whole aisle. Wheat bundles add movement and texture, and pine cones give you that winter-ready cue that still works in fall and early spring. I keep the main palette neutral - straw gold, dark brown, and cream - then swap only the binder ribbon color by season. Summer gets lighter ribbon like natural cotton; winter gets deep green or oxblood for contrast. This looks good for photos because the clusters frame the couple's entry without making guests feel like they're stepping through a forest.
Start by making or buying 8-12 wheat bundles; tie them with jute twine at the stem ends so the heads fan upward. Add pine cones into burlap sacks or small kraft boxes and tuck them around the base of each bundle. Place clusters at both aisle ends and, if your aisle is long, add two more sets near the middle. Keep the clusters 2-3 feet away from the aisle center so the bride's walk stays unobstructed.
Try thisSpritz a light mist of unscented hairspray on dried wheat so it holds shape during windier ceremonies.
Common mistakeDon't use glossy pine cones or dyed glitter ones - they read as craft-store in photos.
6. Cream linen napkin bows on black lanterns
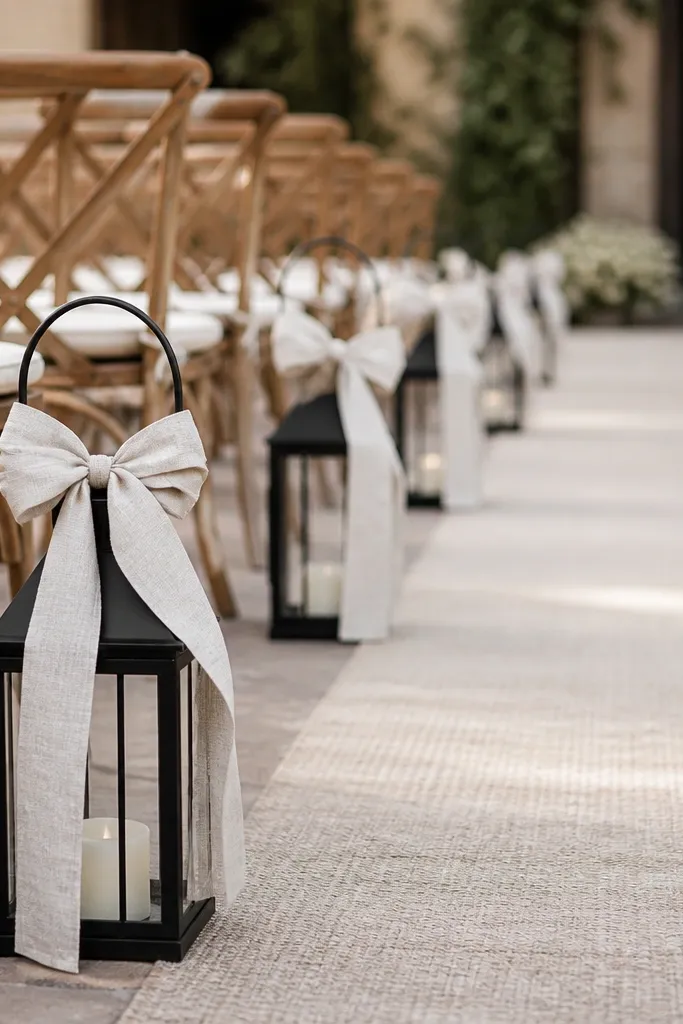
When people say rustic, they often picture brown and burlap only. I've found that black lanterns plus cream linen makes the aisle feel rustic and polished, not heavy. The linen bows catch soft light and look good in close-ups, which matters because aisle decor gets photographed from arm's length. For all-year use, keep the lanterns and bows the same, then swap the small interior filler: wheat in summer, eucalyptus in fall, evergreen in winter. This pairing flatters warm undertones in skin because cream and black create a clean contrast.
Start by choosing lanterns that are the same height and width; I aim for 10-14 inches tall for an aisle line. Tie a double bow from cream linen strips around each lantern handle, letting the tails hang 6-7 inches. Add a small LED candle centered inside, then place one or two filler pieces at the bottom so they don't crowd the glass. Space lanterns 4 feet apart and keep all bows facing the same direction for a consistent look.
Try thisIron the linen strip briefly before tying so the bow holds crisp folds.
Common mistakeAvoid satin ribbon for bows - it reflects hard and looks out of place with lantern glass.
7. Seasonal fruit and greenery swag on low shepherd hooks
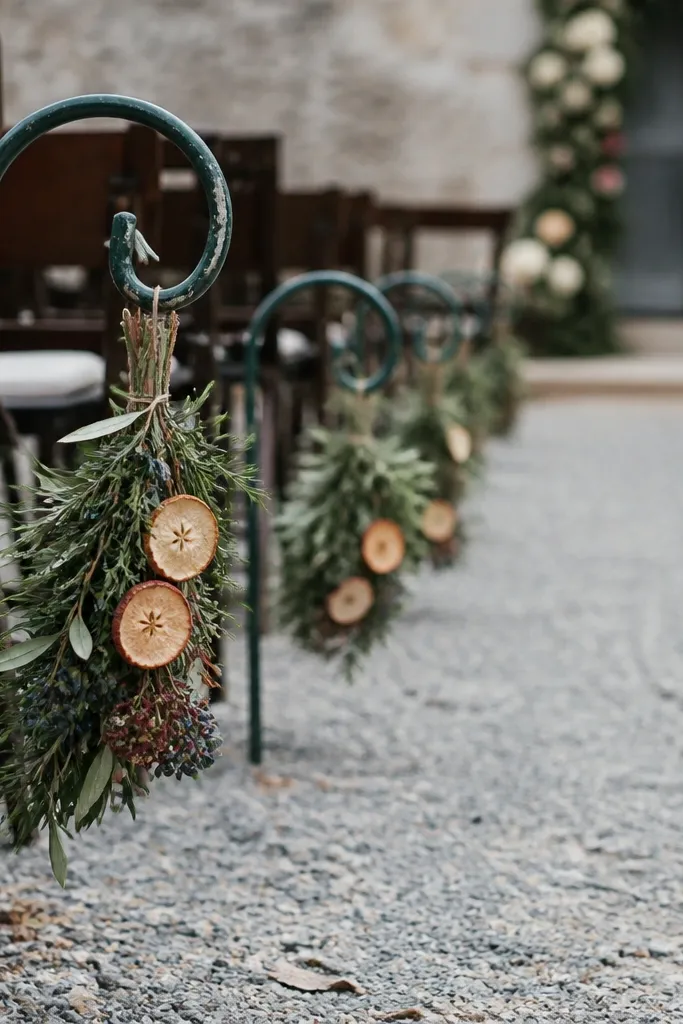
If your aisle has stone or gravel, low shepherd hooks are easier than freestanding containers. They also look good all year because you can swap the "fruit" accents and keep the same greenery base. In fall I use dried apples and cinnamon sticks; in winter I switch to pine sprigs and red berries; in spring I go lighter with dried citrus or pale blossoms. The greenery fills the gap between guests and the aisle without blocking their view. In photos, the fruit accents add color without needing a full floral budget.
Start by setting hooks 3-4 feet apart along one side only, so the aisle stays open. Create swags by tying greenery bundles with jute twine, then attach dried fruit or berries with floral wire. Keep swags short - about 18-22 inches long - so they don't snag guests. Finally, add a small anchor weight at each hook base if the ground is loose, or screw the base into a paver if allowed.
Try thisUse floral wire to hang each dried fruit piece so it doesn't rotate and look crooked mid-ceremony.
Common mistakeDon't overload the hook with too many heavy fruit pieces - the sag makes it look homemade.
8. Wheat sheaf center markers with handwritten tag cards
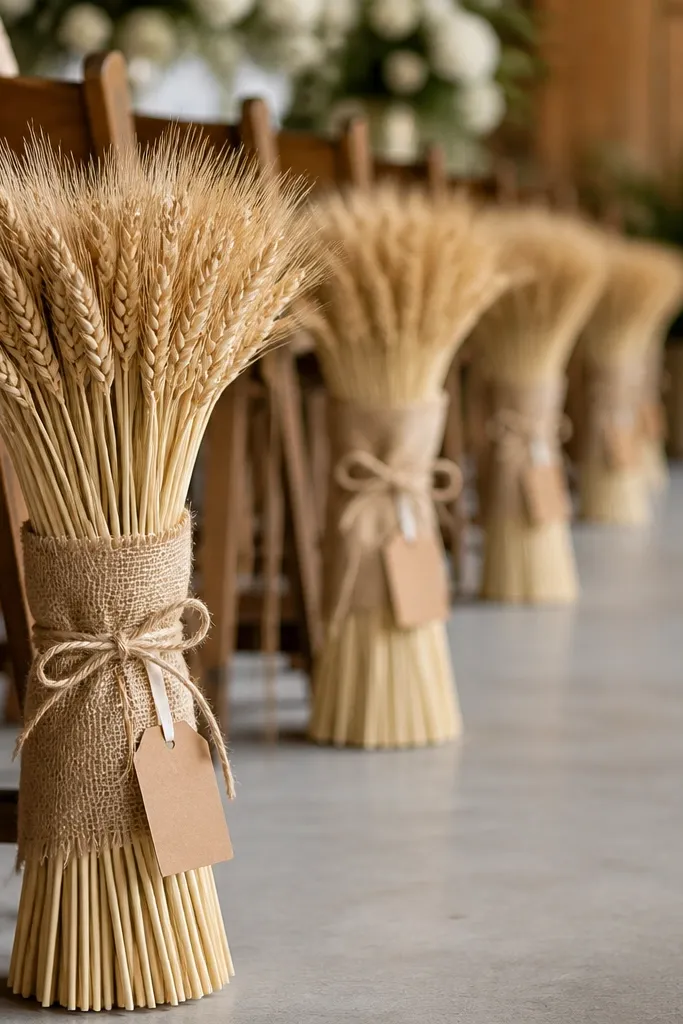
Wheat sheaves feel rustic in a way that reads "intentional" instead of "decor pile," especially when you add simple tag cards. This is one of my favorite rustic wedding aisle decor all year ideas because wheat is the backbone of the look, and the tags can change seasonally. For summer, tags can be simple names or date cards in cream ink; for winter, I add small pine cone illustrations or a darker ribbon. The upright shape also gives guests a visual rhythm as they walk, which looks great in aisle photo lines. It works for most venues because you can place sheaves on stands, buckets, or weighted bases.
Start by building sheaves: bundle 10-16 dried wheat stems and tie them tightly with jute twine at the midpoint. Wrap the base with a strip of burlap and tie a bow so the tie point looks neat. Attach a small kraft tag using thin ribbon, then write with a dark ink pen for high contrast. Place sheaves at 4-6 foot intervals along one side, keeping the tag cards turned toward the camera side.
Try thisUse the same font style across all tags - even messy handwriting looks cohesive when the style is consistent.
Common mistakeAvoid bright neon ink on tags - it grabs attention away from the couple.
9. Old-fashioned wash tubs turned aisle planters
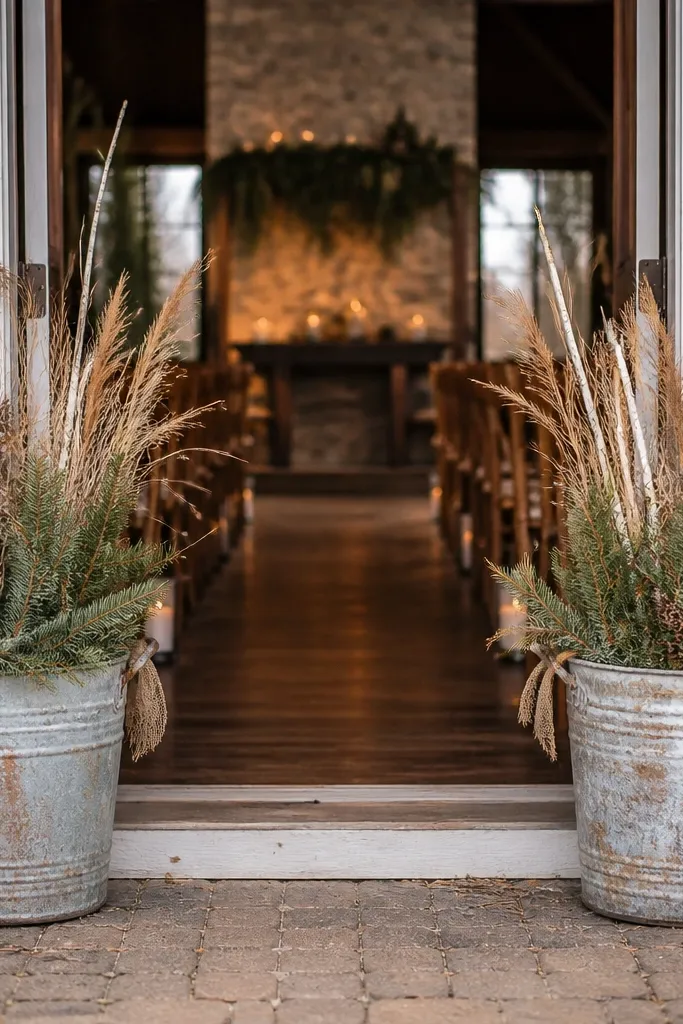
Wash tubs are one of the most convincing rustic props because they look like they've lived somewhere - scuffs and dents included. I like using them as aisle entrance anchors, because that's where guests focus before walking down. For all year use, keep the tub and base shape, then swap the "top layer" plants by season. In spring and summer, I use airy dried grasses plus pale blooms; in fall and winter, I add evergreen clippings and pine cones. The metal texture also photographs well because it reflects light softly rather than glaring.
Start by securing the tub position so it won't tip; fill the bottom with sand or small stones under your plant filler. Layer dried grasses first, then tuck evergreen sprigs or wheat stems around the edges so you don't see bare filler. Tie a short burlap ribbon around the tub handle and let it drape toward the front. Place tubs at the aisle entrance and add two smaller tubs mid-aisle if the space needs balance.
Try thisIf you're using fresh greens, line the tub with a plastic insert and use floral foam that's sized to the tub lip.
Common mistakeAvoid bright painted tubs - the shine makes them look like rental patio decor.
10. Cotton bloom and sage runner garlands
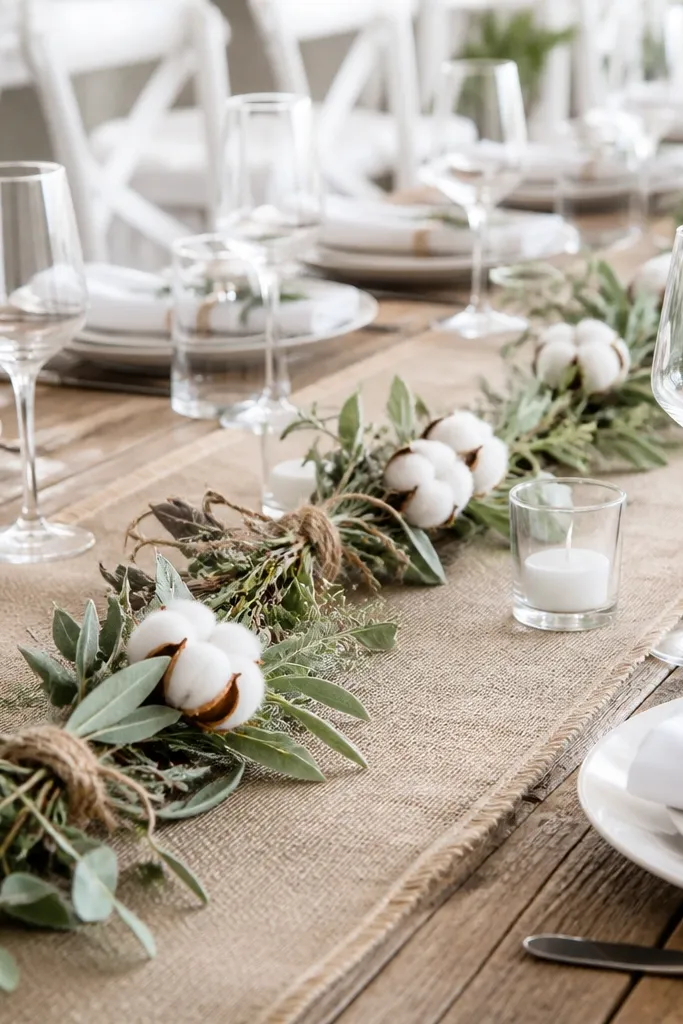
For rustic wedding aisle decor all year, cotton-style blooms are a cheat code. They look soft and romantic without needing fresh petals, and they sit nicely in sage tones that don't scream one season. I've used this in late spring ceremonies where people wanted rustic but not "fall harvest." It also works in winter if you add a few pine accents and keep the cotton blooms as the main texture. The muted palette flatters both cool and warm color schemes, especially if your bridesmaids wear neutral fabrics like taupe, cream, or dusty blue.
Start by laying your runner and then plan garland placement along one edge only so the aisle doesn't look crowded. Tie small bunches of sage greenery with jute twine and attach cotton blooms to the top of each bunch using floral wire. Keep spacing about 18-24 inches between clusters so the aisle still shows floor texture. Finish by pinning the garland to the runner with fabric pins or discreet zip ties if you can hide them under burlap.
Try thisUse matte sage greenery, not glossy - it looks more natural in indoor venues.
Common mistakeDon't cram every inch with blooms. Dense garlands look like craft projects instead of ceremony decor.
11. Black iron candelabra with hurricane glass
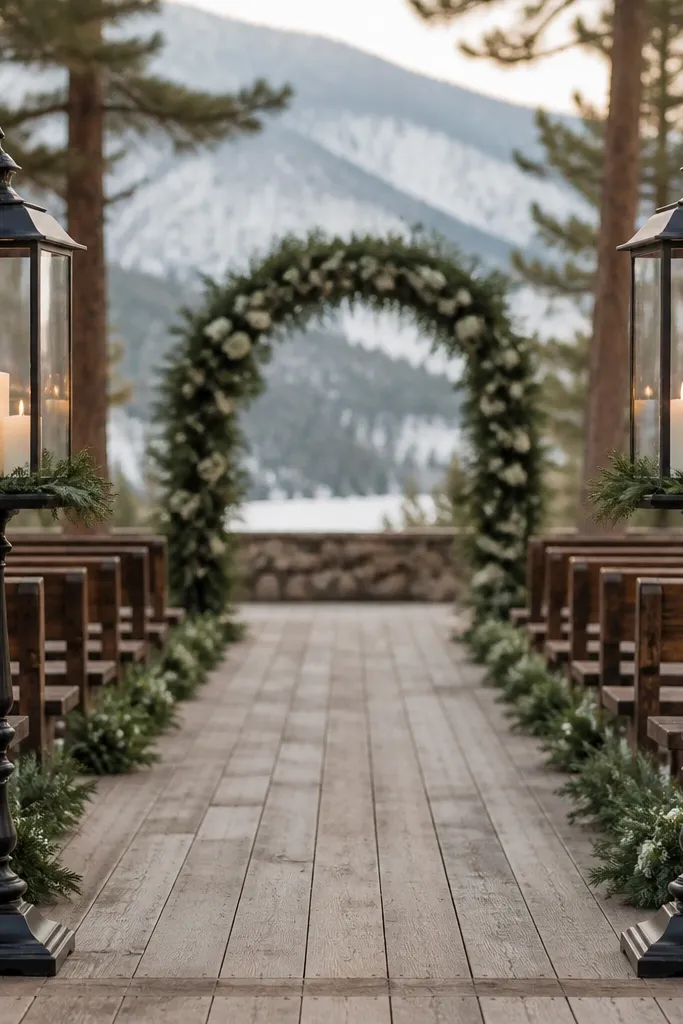
Candelabras give you height and symmetry fast, and black iron feels rustic without going full barn-board. I use them when the aisle is long and you need something that reads from farther back. The hurricane glass also protects candles from wind, which matters outdoors. For all year use, the base setup stays the same; you swap the filler inside the base: spring gets light greenery, fall gets dried leaves, winter gets evergreen. The black frames the couple and makes the aisle look dressed up even with minimal flowers.
Start by placing candelabras at equal intervals on both sides; for most aisles, I do 2-4 sets depending on length. Insert LED candles or real candles in the correct size so the flame stays centered and doesn't melt plastic. Add a ring of greenery at the base using floral wire, then keep the greenery low so it doesn't block the glass. Use a neutral tablecloth or burlap drape under each candelabra base if the floor is uneven.
Try thisChoose LED candles with flicker - the soft movement looks more real than steady light in photos.
Common mistakeAvoid candelabras with mismatched candle heights. Uneven flames look sloppy in wide shots.
12. Dried lavender bundles tied to ribbon posts
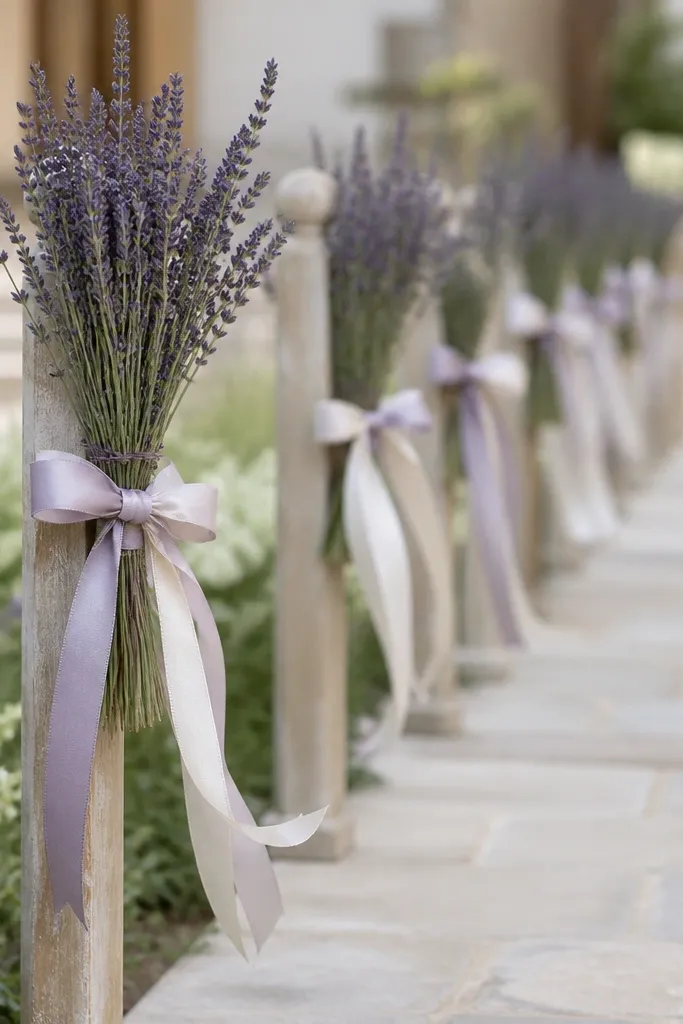
Lavender bundles bring a soft color that still reads rustic, and they work across seasons because they're dried. I've used this idea in spring weddings when guests wanted something "farm" but not too orange or too dark. In summer, lavender looks fresh and calming; in fall, it still blends with wheat and burlap. Winter can include a few pine sprigs around the bundle base without changing the main look. Lavender also photographs well against wood, stone, and black metal - it doesn't wash out.
Start by choosing posts, stakes, or low stands that are stable; space them 4-5 feet apart along one side. Bundle dried lavender into clusters and tie with thin ribbon, then attach the bundle to the post so the stems face upward. Add a small strip of cream burlap at the knot to hide the tie point. Finally, keep the number of colors to two: lavender and cream, then let the venue materials do the rest.
Try thisStore lavender in a dark bag before the wedding so the color stays deep during the weeks leading up to it.
Common mistakeDon't use fresh lavender - it wilts fast and sheds petals onto guests.
13. Evergreen swag from aisle arch poles with jute ties
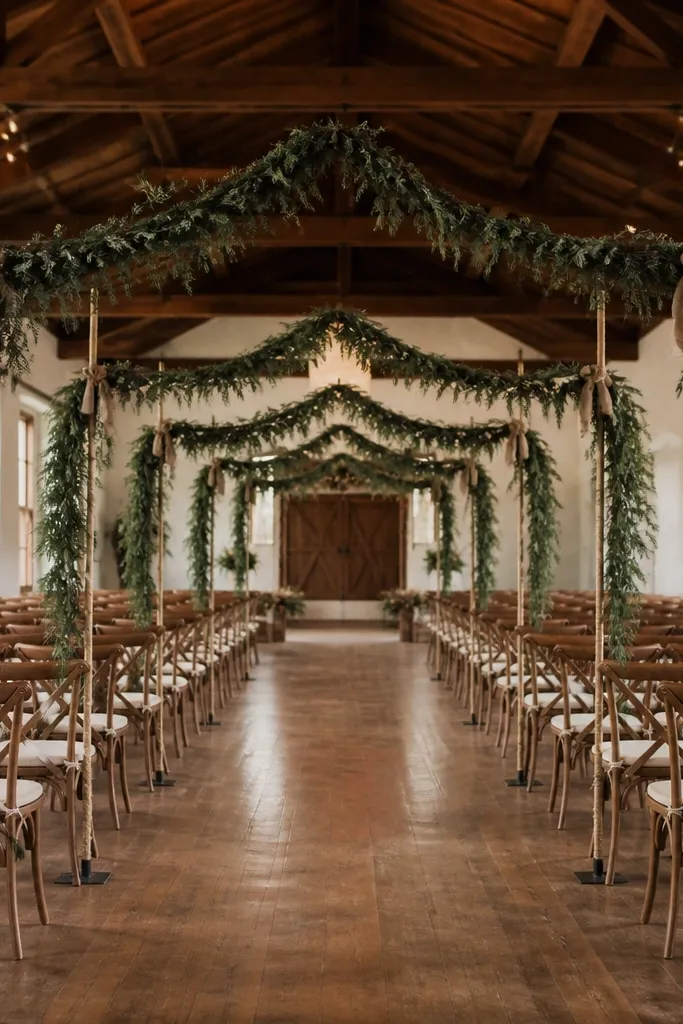
Arch poles are a strong choice when you want a clear aisle line that works even in a large venue. Evergreen swags give winter structure, but you can swap the greenery for year-round use by changing the top layer. In fall, replace some evergreen with dried leaves in burnt orange and keep the jute ties the same. In summer, use eucalyptus and wheat instead, so the arch still has texture without looking seasonal-heavy. The jute ties keep everything looking handmade, but controlled - no random droop. This setup flatters the couple because the aisle line leads straight toward them.
Start by setting poles at 6-8 foot intervals along the aisle, then confirm clearance for guests and photographers. Create swags with dense evergreen or eucalyptus, then drape them between poles and secure with jute ties at three points. Keep swags about 18-24 inches wide so they read as a line, not a curtain. Finish each pole connection with a small burlap bow to hide tie ends and keep the look consistent.
Try thisUse zip ties hidden behind the greenery to lock the swag position before you add the final jute wrap.
Common mistakeAvoid thin garland stringers that sag. If it droops too much, it looks like decoration that got left out.
14. Terracotta pots with moss and seasonal stems
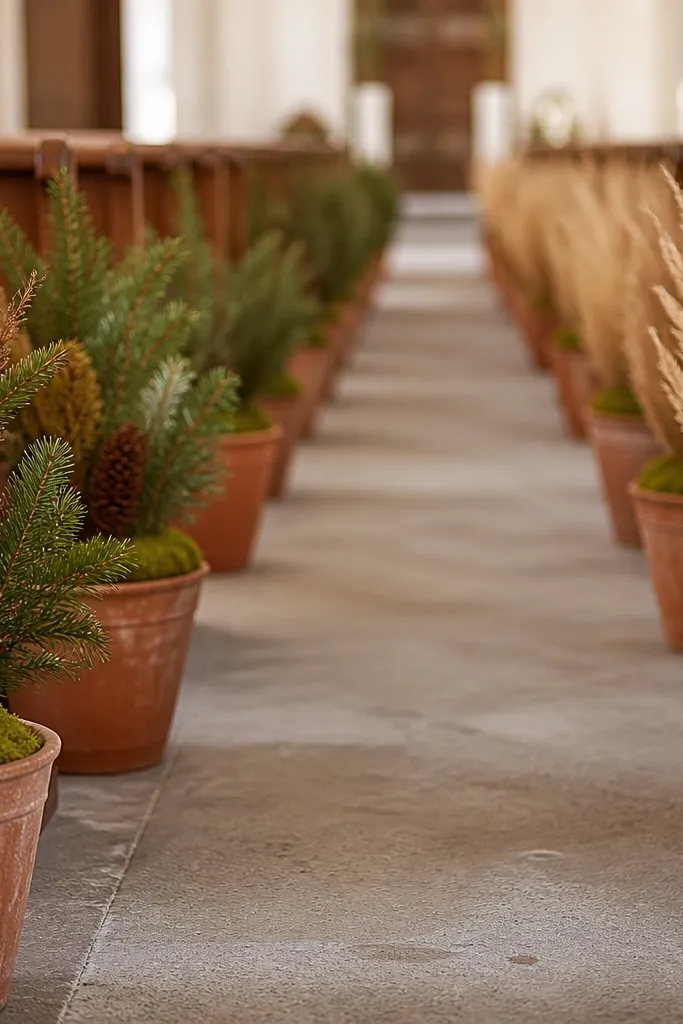
Terracotta pots are the rustic glue that ties everything together because they look earthy year-round. Moss inside the pot adds a soft green texture in spring and summer, and pine cones make it feel winter-ready without changing the base. I use this when the venue has a lot of natural stone or wood because terracotta blends with it immediately. For summer, keep stems lighter - wheat and pale dried blooms. For winter, add evergreen sprigs and darker dried leaves. In photos, terracotta warms up cool-toned venues and makes skin look healthier.
Start by choosing pots with matching shapes and sizes, usually 10-12 inches wide for aisle placement. Line the pot with a thin layer of florist moss or preserved moss, then anchor stems with a small foam plug or floral wire. Insert one tall stem cluster per pot and two shorter side stems so the arrangement has a triangle shape. Place pots 3-4 feet apart along one side, then repeat the same stem plan on the opposite side for symmetry.
Try thisMist preserved moss lightly with water the day before if it looks dry - it photographs richer.
Common mistakeDon't use mismatched pot heights. Uneven pots make the aisle look unevenly designed.
15. Stoneware bottles with foraged branches and ribbon
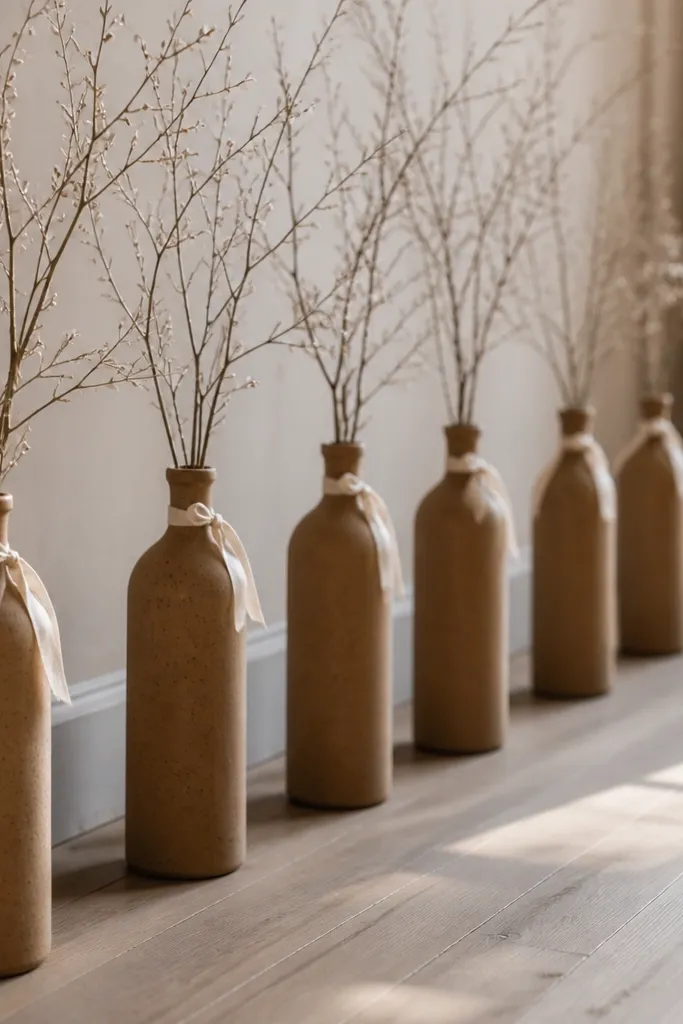
This is rustic aisle decor all year that looks like you collected it on a walk, but it still stays neat. Stoneware bottles have that imperfect texture that reads handmade, and using single branches keeps the look uncluttered. For summer, use foraged branches with small dried blooms; for fall, add branches with dried seed heads; for winter, add bare twigs plus a few pine tips tucked into the bottle opening. The neutral bottle color works with any wedding palette, from bold burgundy to soft neutrals. It also photographs well because each bottle has a clear focal point.
Start by cleaning and drying bottles so labels don't show and the glass is clear. Fill each bottle with water and a small floral foam plug if you're using fresh twigs, or just dry filler if using dried branches. Trim branches to about 16-22 inches so they sit above the bottle rim but don't hit guest eye level. Tie a simple ribbon around the bottle neck - I use 1.5-inch widths - and keep ribbon color consistent for the whole aisle.
Try thisIf you're indoors, place bottles on a runner so they don't roll on smooth floors.
Common mistakeAvoid mixing bottle shapes without a plan. Too many different silhouettes make the aisle look random.
16. Hanging mason jar clusters on railing or shepherd hooks
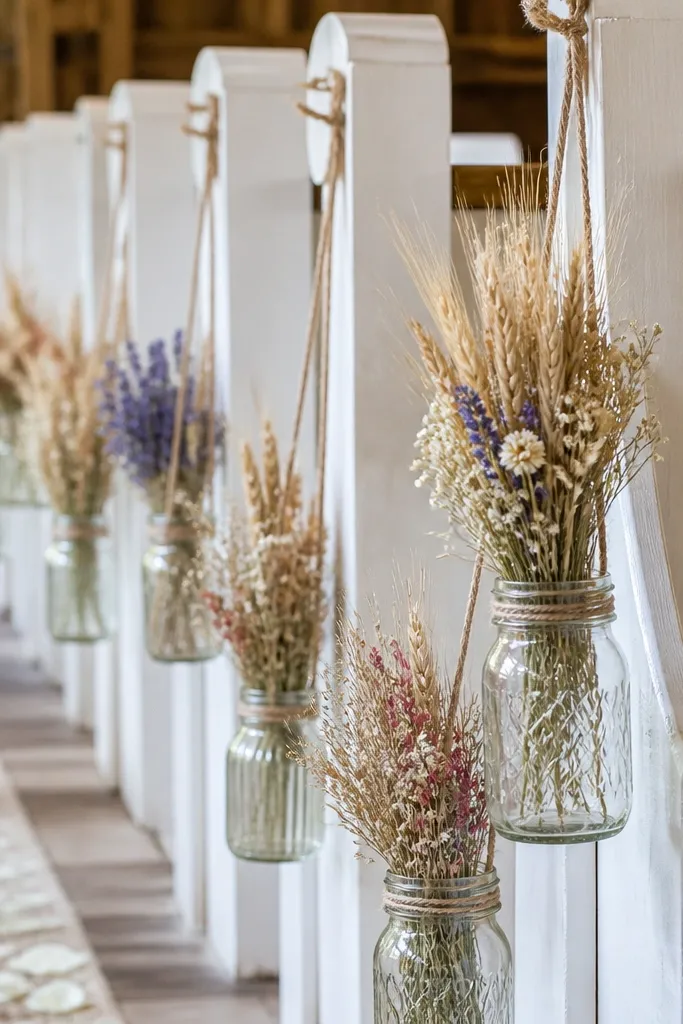
Mason jars make rustic feel familiar, and hanging them keeps your aisle from feeling crowded on the ground. I like jar clusters when the ceremony space has a railing, posts, or sturdy beams where you can suspend decor. They work all year because jars are the constant, while you swap the contents by season. In spring and summer, use dried baby's breath and wheat with light greens; in fall, add seed heads and a touch of burnt orange; in winter, use evergreen tips and pine cones. Jars also create a consistent photo pattern since they repeat at eye level.
Start by choosing jar sizes that match your hanging points; I use 8-12 jars for a typical aisle run. Tie jars with twine at three lengths so they hang straight, then fill each jar with a small amount of floral filler and greenery. Insert one focal stem and two supporting stems so the jar looks balanced, not lopsided. Hang jars along the same side at 2.5-3 foot intervals, and keep the lowest jar at least 6.5 feet high.
Try thisUse clear fishing line behind the twine knot when needed so the jar stays stable and doesn't rotate.
Common mistakeSkip real water inside jars if you're outdoors in wind - it sloshes and stains the ground.
17. Woven willow hoops with seasonal flowers at aisle ends
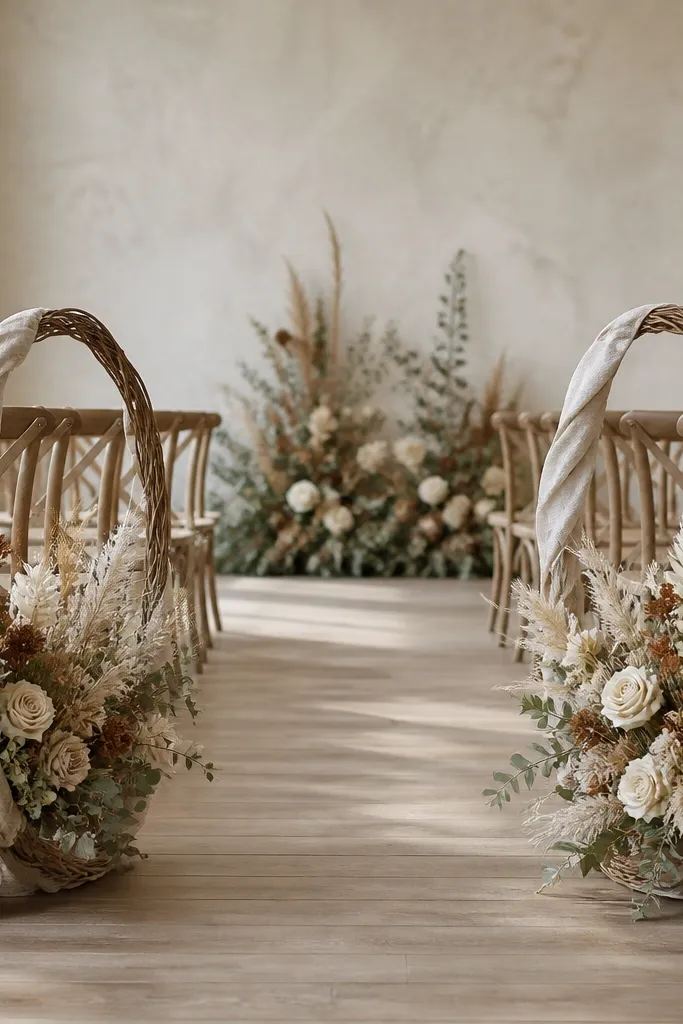
Willow hoops add a circular rustic shape that looks intentional even when you keep the rest of the aisle simple. I use them mainly at aisle ends because they create a strong frame for photos without needing to cover every inch. For rustic wedding aisle decor all year, the hoop stays the same and the floral insert changes seasonally. Summer gets cream blooms and light green eucalyptus; fall adds dried leaves and wheat; winter adds evergreen and pine cones inside the hoop. The woven texture also brings a natural pattern that looks good under sunlight.
Start by securing the hoops upright on weighted stands or in buckets filled with sand. Wrap the hoop with a strip of linen ribbon so it looks finished at the top. Create an insert by wiring dried stems into a small bundle, then place it inside the hoop and tie the ends to the hoop with floral wire. Place the hoops at the aisle ends and, if you want more symmetry, add smaller hoops mid-aisle every 20-25 feet.
Try thisKeep the insert slightly off-center toward the aisle so the hoop looks fuller from the camera side.
Common mistakeAvoid foam-heavy arrangements in hoops - they can look bulky and unnatural when stems dry out.
18. Copper watering cans with dried florals along one side
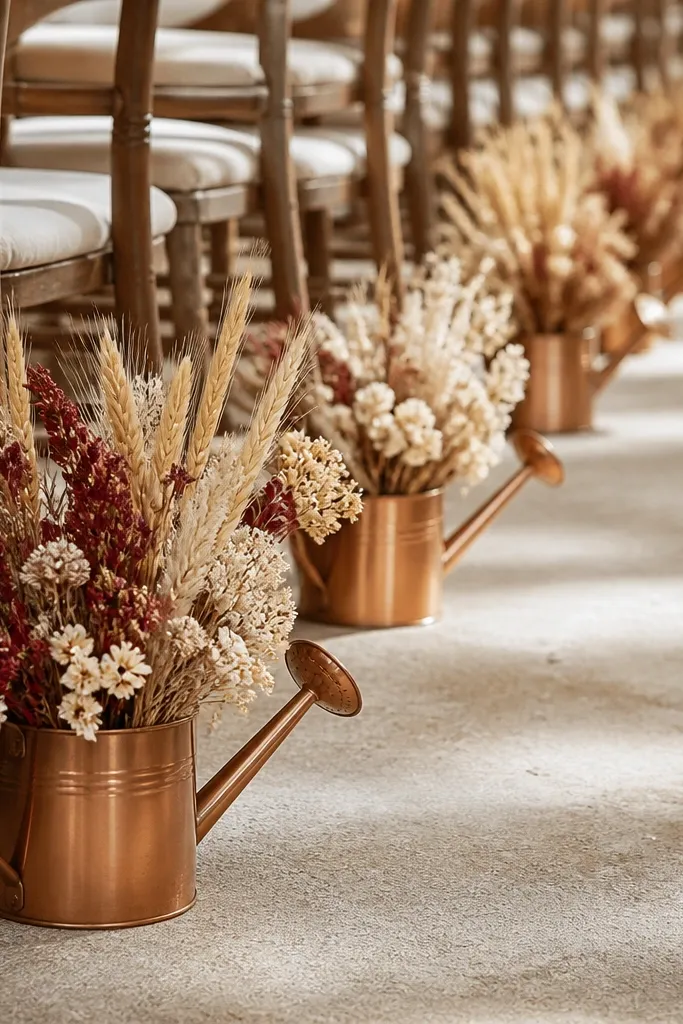
Copper watering cans bring warmth and a little shine, which makes rustic aisle decor feel fresh instead of flat. I like using them along one side so the aisle doesn't look like a craft aisle from every angle. The copper pairs well with cream, burlap, and dark green foliage - and it works across seasons by swapping stems. In fall, I add dried red berries; in winter, I use evergreen sprigs; in spring, I keep it pale with dried chamomile-like blooms. This setup flatters people in warm-toned clothing because copper adds a consistent glow in photos.
Start by picking cans that are the same size so spacing looks planned; I use 10-14 cans for a mid-length aisle. Add a small floral block or dry filler and insert dried stems so the bouquet sits 2-4 inches above the rim. Tie a thin ribbon around the handle in a neutral color so the ribbon doesn't fight the copper. Place cans 4 feet apart, then keep all bouquets leaning slightly toward the aisle center for consistent sightlines.
Try thisWipe copper with a dry microfiber cloth before setup so it doesn't look smudged in sunlight.
Common mistakeAvoid overcrowding the can top. If stems spill over the rim, it looks messy from the front row.
19. Vintage books and candle holders as aisle entry accents
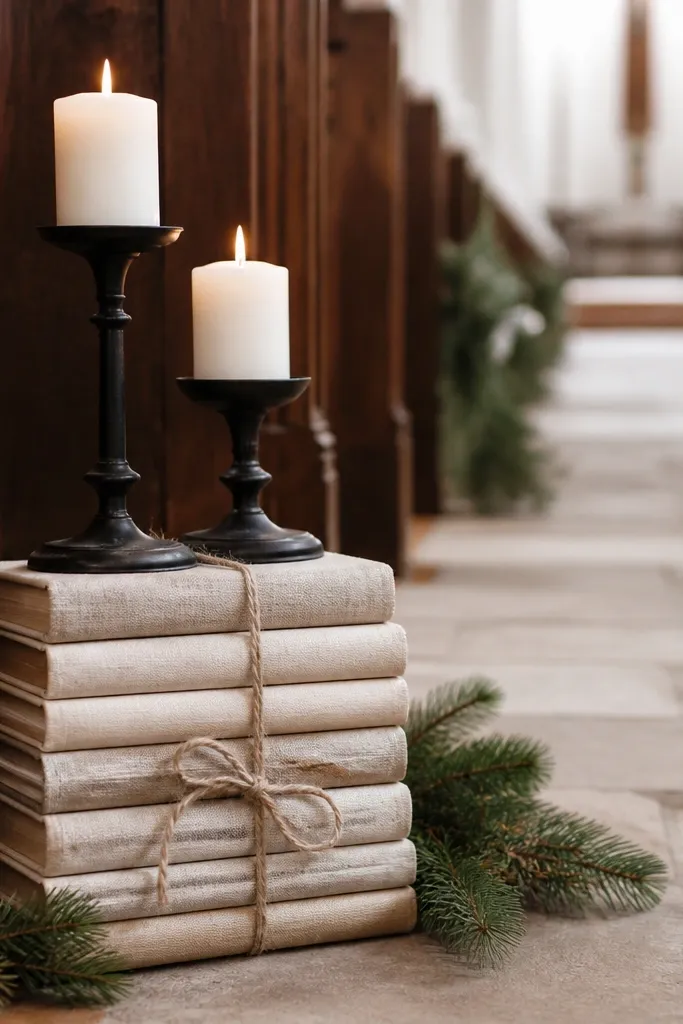
This one is for venues where you want rustic without adding more "nature" clutter. Vintage book stacks look cozy and editorial in photos, and they're easy to keep year-round because you only change the top layer. In fall, I add cinnamon sticks and a tiny dried leaf cluster; in winter, I swap to evergreen sprigs and pine cones. In summer, I keep it simple with cream candles and a single dried wheat bundle. It works great when the ceremony space is indoors and you want the aisle decor to look like it belongs in the room.
Start by choosing books with neutral covers or covers you can wrap in brown kraft paper or cream fabric. Stack 3-5 books to form a stable base, then place a black candle holder on top with a centered LED candle. Wrap twine around the stack so the edges look controlled. Add a small ring of greenery around the base using floral wire, keeping it tight so it doesn't look like it's spilling. Position the stacks at the aisle entrance on both sides, mirroring height.
Try thisUse LED candles and warm white light - the warm glow makes the book texture look richer.
Common mistakeAvoid glossy modern book covers - they reflect light and look like random props.
20. Hessian ribbon aisle markers with numbered guest path tags
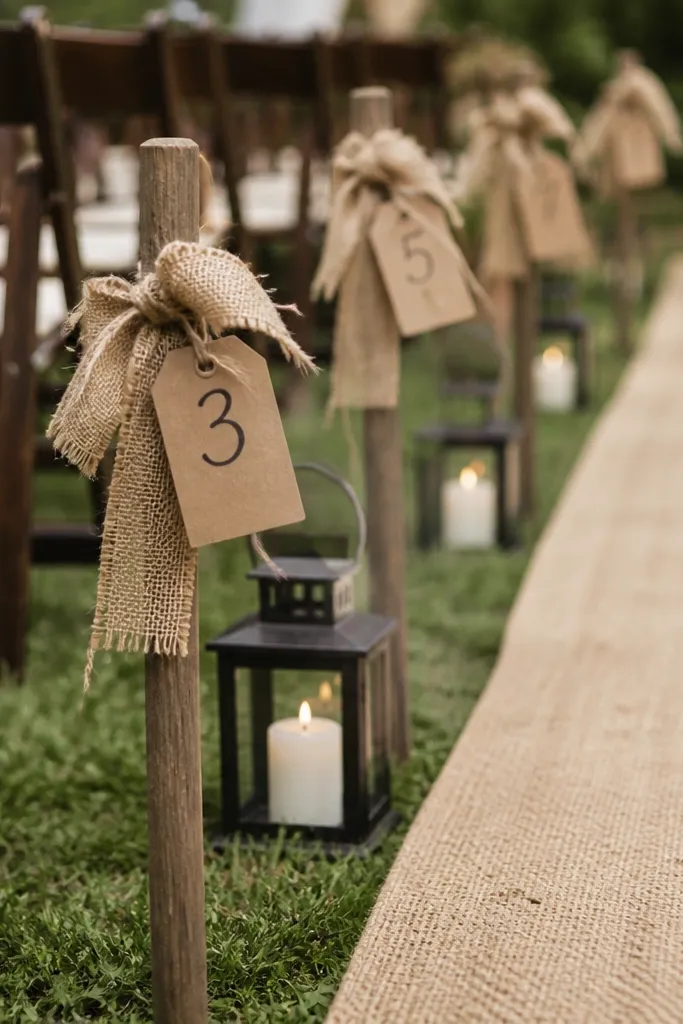
Aisle markers are more than decoration when you're dealing with a large guest count or multiple seating sections. Hessian ribbon tied to stakes looks rustic, and the tags help guests find their row without asking staff mid-ceremony. This is one of the most practical rustic wedding aisle decor all year ideas because the base stays the same and the tag style changes by season. For winter, I add tiny pine icons; for fall, I add leaf shapes. The neutral hessian also blends with almost any wedding palette, so it doesn't fight with bridesmaids' dresses.
Start by picking markers at the ends of seating rows or every 10-20 guests, depending on your layout. Tie hessian ribbon around each stake in two layers and let the tails hang evenly. Attach a kraft tag with dark ink and a small symbol that matches the season, then keep the font consistent across all tags. Place markers on one side only if the aisle is narrow so you don't block sightlines. Finally, coordinate marker color with your main aisle decor - if you use burlap, keep hessian natural; if you use black metal accents, use black ink tags.
Try thisMake tags with thicker cardstock so they don't curl if there's humidity.
Common mistakeAvoid flimsy paper tags - wind turns them into a mess fast.
21. Dried hydrangea-style clusters in glass cloches
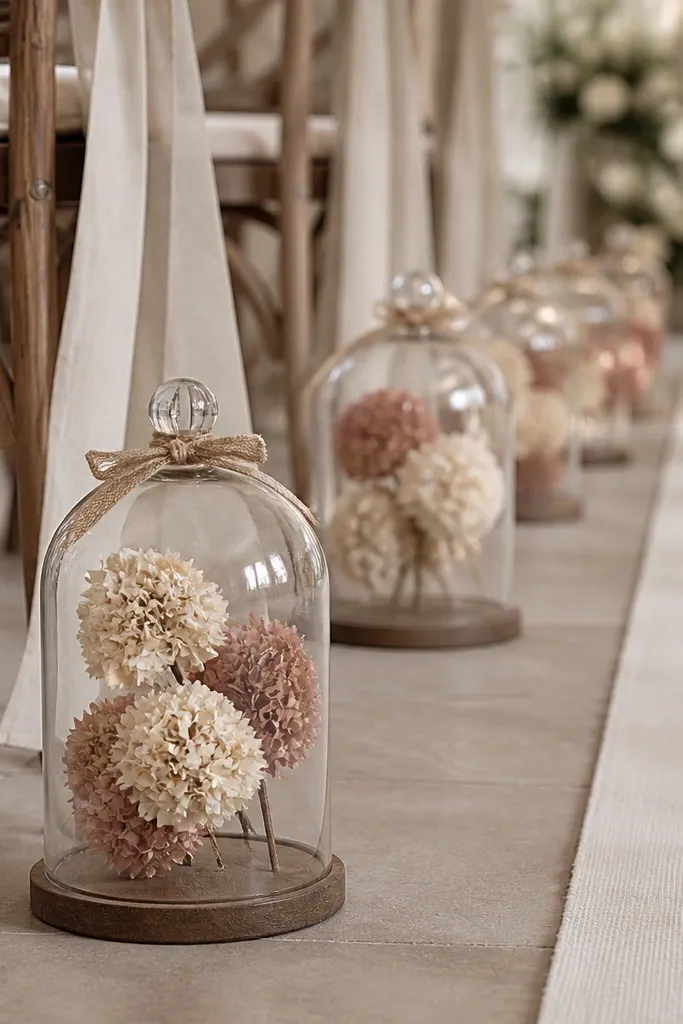
Glass cloches add a "museum" feel to rustic aisle decor, and they photograph beautifully because the flowers look framed. Dried hydrangea-style clusters hold their shape, so this setup stays consistent across all seasons. In spring and summer, I keep the clusters creamy and pale - fewer dark accents. In fall and winter, I choose dusty rose, plum, or deeper brown stems so the aisle feels warmer. Cloches also protect the flowers from light wind and guest bumps, which is a big deal at busy outdoor ceremonies. The glass reflections can look tricky, but with neutral bases and warm candles, it comes out elegant.
Start by placing cloches on small wooden rounds or weighted trays so they don't tip. Fill each cloche with a single dried cluster, then add a small sprig of greenery at the base so it looks fresh. Use warm LED candles inside nearby lanterns instead of bright overhead lights so reflections stay soft. Space cloches at 5-6 foot intervals along the aisle edge and keep them all at the same height from the ground. Tie a thin burlap ribbon around the base of each cloche to unify the look.
Try thisWipe cloche glass with vinegar-water mix on a microfiber cloth right before the ceremony for clear reflections.
Common mistakeAvoid crowded cloches with multiple stems. One bold cluster looks intentional; many stems look cluttered.
22. Seasonal ribbon-wrapped branches in floor buckets
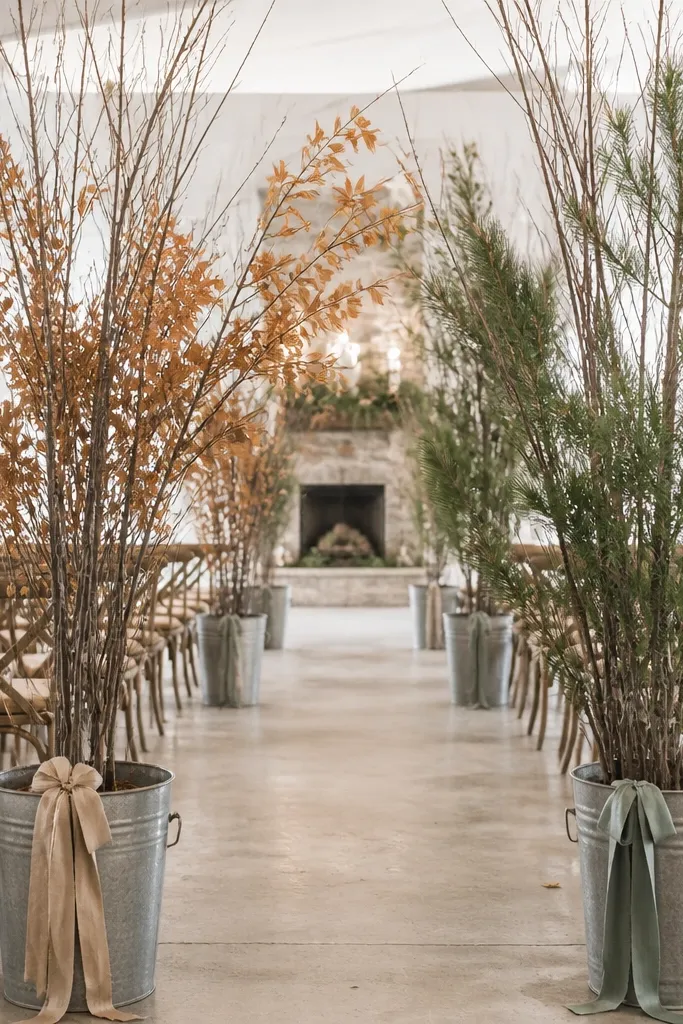
Floor buckets with ribbon-wrapped branches are my go-to when I want rustic wedding aisle decor all year that's adjustable fast. Branches give vertical movement without needing to build arches, and ribbon makes the decor look finished even when the branches are bare. For summer, use thin branches with light ribbons and a few dried blossoms; for fall, add dried leaf clusters and burnt orange ribbon; for winter, tuck in evergreen tips and switch to dark green or deep brown ribbon. The galvanized bucket keeps everything grounded and consistent from one season to the next. This setup also suits venues where you can't hang decor from above.
Start by choosing 12-18 buckets and filling each with sand or stones for stability. Insert a base branch bundle and secure it with floral foam or wire so it doesn't wobble. Wrap the branch with ribbon in two bands, leaving 4-6 inches of ribbon tails at the top. Add seasonal accents: dried leaves for fall, evergreen tips and pine cones for winter, pale dried blooms for spring and summer. Place buckets 4 feet apart along one side, then mirror the placement on the other side if your aisle is symmetrical.
Try thisUse ribbon widths of 1-1.5 inches so they look rustic, not gift-bag flashy.
Common mistakeAvoid overly thick branches - they look heavy and can block sightlines.
23. Rustic bead garland runner with burlap base
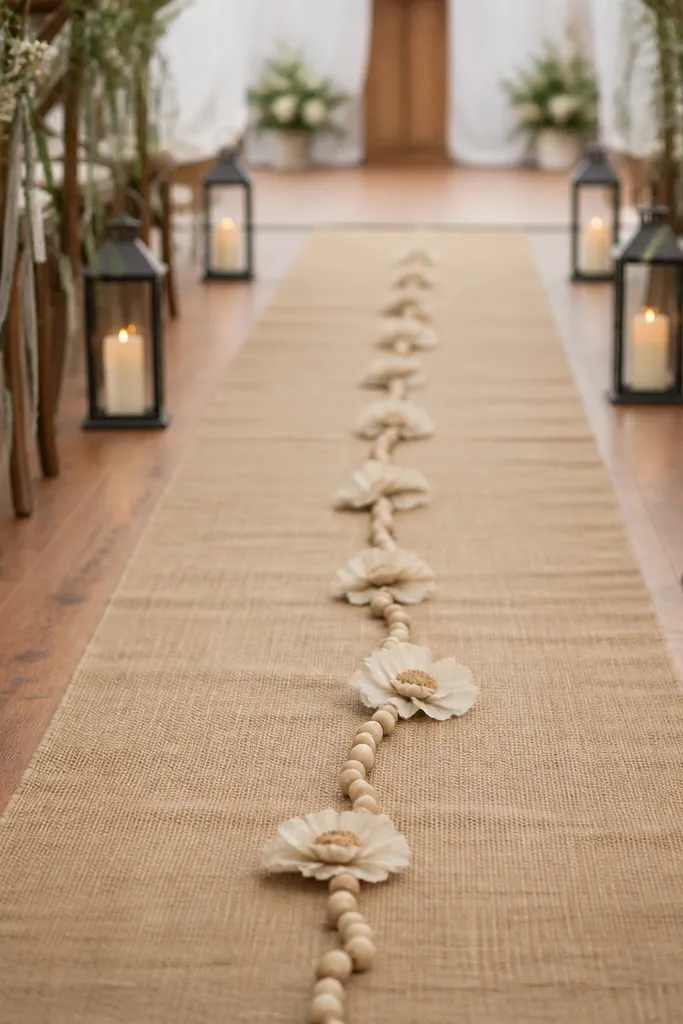
If you want something different but still rustic, bead garland runners add a tactile detail guests notice as they walk. The burlap base keeps it grounded, while the beads add a soft highlight that shows up in photos without looking flashy. For all year use, keep the beads and burlap constant, then swap fabric flower colors by season. Summer gets cream and pale green; fall gets warm tan and rust; winter gets white and deep green. This works well when your venue has plain walls or a neutral floor and you want the aisle to have a signature look.
Start by laying a burlap runner and centering a thin bead strand along the middle, pinned every 2-3 feet. Tuck small fabric flowers or dried bloom clusters at intervals where beads intersect visually, spacing them about 3-4 feet apart. Add one lantern cluster at the aisle start for a strong anchor. Keep the bead strand straight by using double-sided fabric tape under the runner edge. Finally, check photos from the side to ensure the beads read as a line, not a zigzag.
Try thisUse matte wooden beads, not glossy plastic - matte reads expensive and rustic.
Common mistakeAvoid too many different textures at once. If you add beads plus lots of loose greenery, it looks busy.
24. Cream lantern and moss topiary pairs at aisle entrance
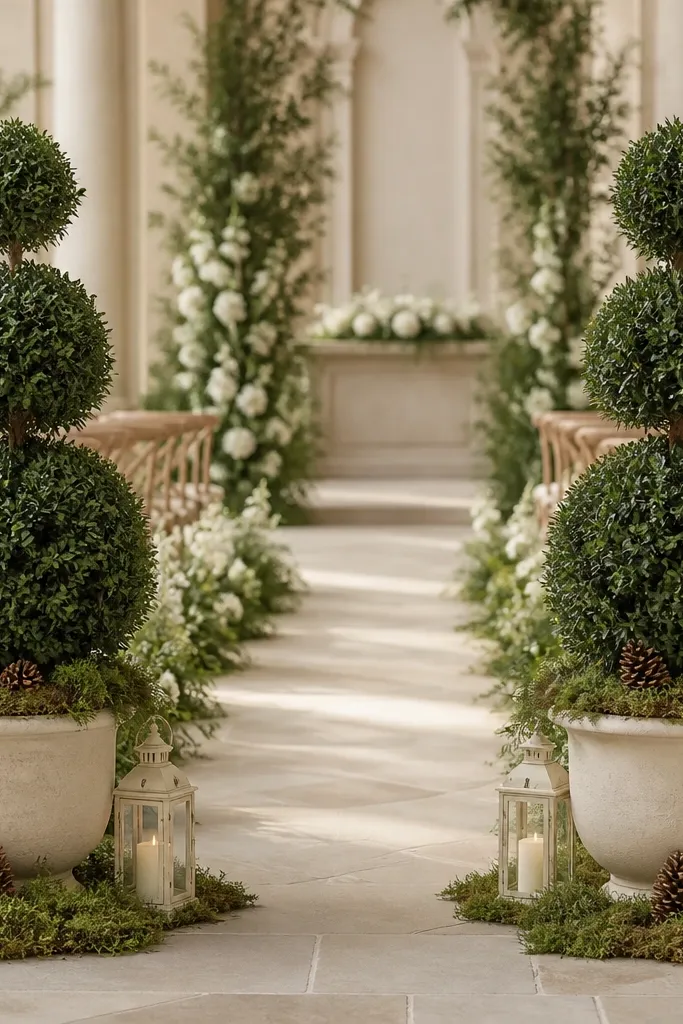
Topiary-style greenery gives the aisle entrance a "designed" look immediately, and moss makes it feel rustic without needing heavy flowers. I use this when the ceremony area is indoors or in a courtyard where you want clean shapes. For rustic wedding aisle decor all year, keep the moss and lanterns constant, then swap the top accents by season: dried wheat in summer, eucalyptus in fall, evergreen pine tips in winter, and pale cotton blooms in spring. This pairing also flatters lots of dress colors because cream and green don't clash with jewel tones or pastels. The rounded shapes look good for close-up portraits too.
Start by placing two matching cream pots at the aisle entrance, each filled with florist foam or a stable base. Add moss around the foam edge and press it in so no foam shows. Build a dense rounded greenery topiary using eucalyptus or boxwood-style greens, then tuck seasonal accents into the outer edge. Place two small cream lanterns nearby and keep them at the same height on both sides. Finish by tying a thin burlap ribbon around the base of each pot so the whole setup reads as one piece.
Try thisIf you're outdoors, use LED candles and anchor lanterns with hidden weights so they don't tip.
Common mistakeAvoid sparse greenery - thin topiaries look like potted plants, not aisle decor.
25. Rustic aisle seating signposts with reclaimed wood and ribbon
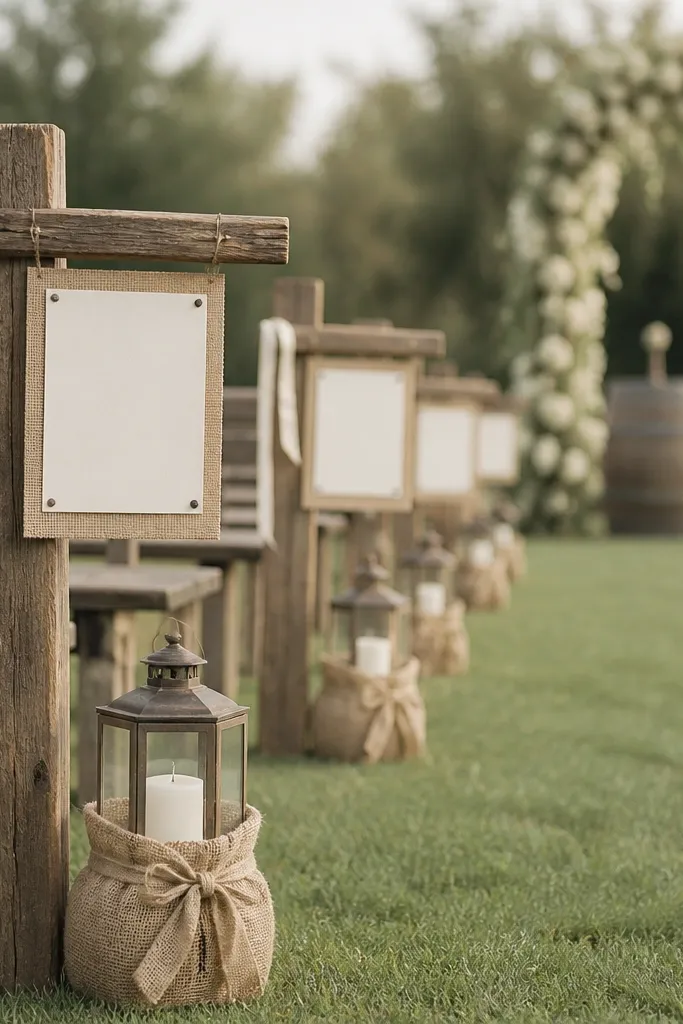
Signposts aren't glamorous, but they make rustic aisle decor look planned because they add functional structure. I've done this for weddings where guests were arriving from multiple parking areas and needed clear direction without modern-looking signage. Reclaimed wood keeps the look rustic, and ribbon streams can change by season while the signpost stays the same. Summer ribbon is light and cream; fall ribbon is rust or mustard; winter ribbon is deep green. The wood grain also adds texture in photos that plain tent walls can't provide.
Start by choosing reclaimed wood boards cut into similar sizes and sanding the edges so they don't look rough. Attach them to stakes or short posts and wrap the post with burlap ribbon at the midpoint. Add a simple sign in dark ink on cream cardstock, then attach it with twine so it looks handmade. Place signposts near the aisle entry and at the first seating section turn, not mid-aisle where they distract from the couple. Finally, match ribbon color with your main aisle decor palette so the signs don't look like separate props.
Try thisUse a matte clear spray on the wood sign face so ink stays readable in humidity.
Common mistakeAvoid using bright white vinyl letters - they read modern and ruin the rustic texture.