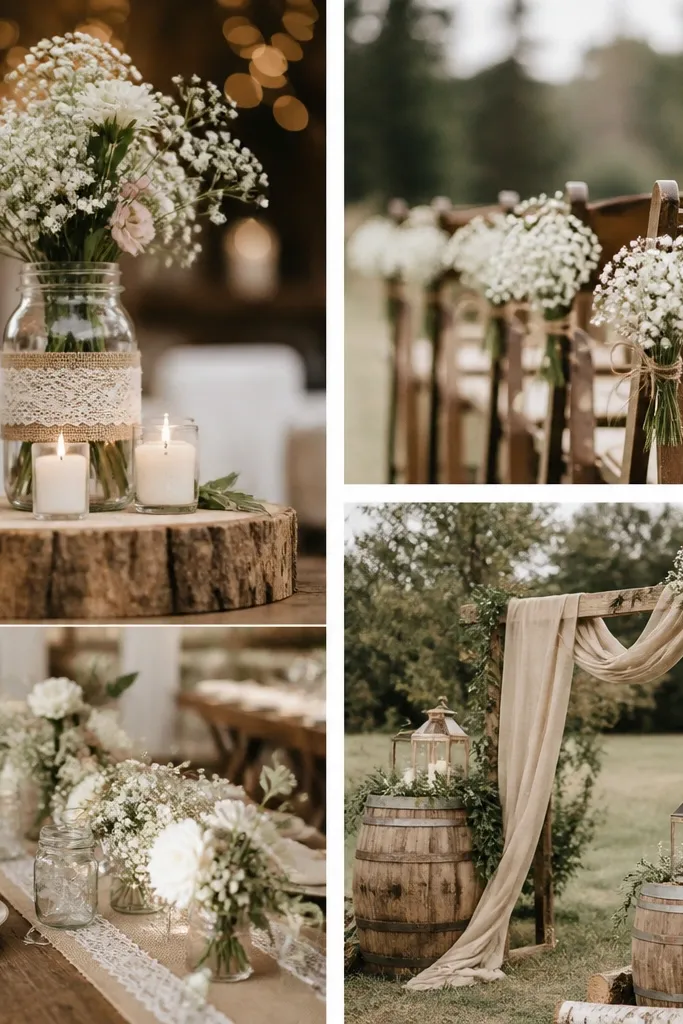
1. Thrifted picture frames turned welcome sign wall
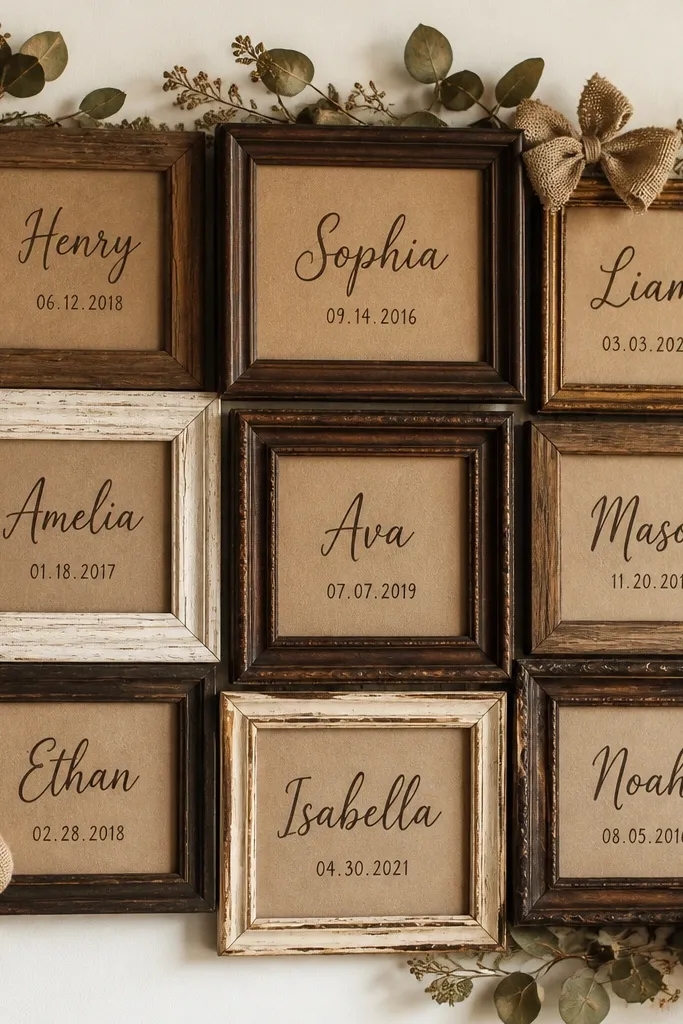
This works because rustic wedding decor on a budget needs something that looks crafted, not purchased. Thrifted frames give you real wood grain and different thicknesses, which makes the wall look layered instead of flat. I use kraft paper inserts so the color stays warm and consistent even when the frames vary in shade. It flatters most skin tones in photos because the ink is dark and the background is creamy, so faces pop without the decor stealing attention.
Start by grabbing 8 to 12 frames in similar sizes, like 8x10 and 11x14, with glass removed if possible. Cut kraft paper to fit each frame opening and tape it in place from the back so it sits flat. Add your welcome text and guest info using a thick paint marker or brown acrylic paint for a slightly imperfect, handmade look. Arrange frames first on the floor, then mount them with picture hooks - keep the top row about 6 feet from the ground so it photographs well.
Try thisSpray the frames once with a matte clear coat after sanding to reduce glare from venue lights.
Common mistakeAvoid using glossy white printer paper - it looks too clean for rustic and makes the whole wall look cheap.
2. Burlap runner with layered lace trim on the guest book table
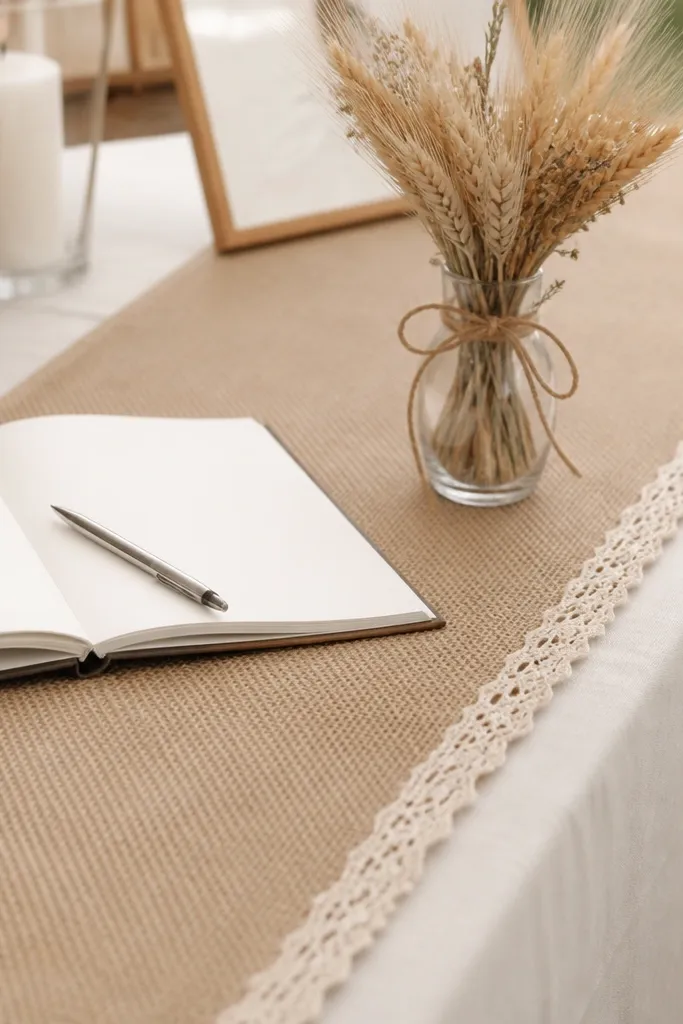
Burlap gives you that instant rustic texture, and lace trim adds a soft, romantic line that doesn't fight the rough material. I've used this on tables where the cloth underneath was too shiny or too white - the burlap kills the glare, and the lace gives it a "wedding" finish. The cream lace against natural burlap is flattering in photos because it creates a gentle contrast next to skin tones and dresses. It's also forgiving for different table sizes since you can trim and angle it to match what you have.
Start by laying a plain cream or white tablecloth, then center a burlap runner that's about 12 to 16 inches wide. Cut the burlap ends so they hang with a slight fray instead of a straight factory edge. Sew or hot-glue lace trim along one long side only, leaving the other side plain so it looks intentional. Place the guest book and pen in the middle third of the runner and add one dried arrangement - wheat or small baby's breath bundles - so the runner doesn't feel crowded.
Try thisUse a fabric glue stick for lace - it dries quickly and holds in outdoor humidity.
Common mistakeDon't cover the entire table in burlap if the venue already has heavy wood - it can look like a costume booth.
3. Paper lanterns with rust ribbon ties
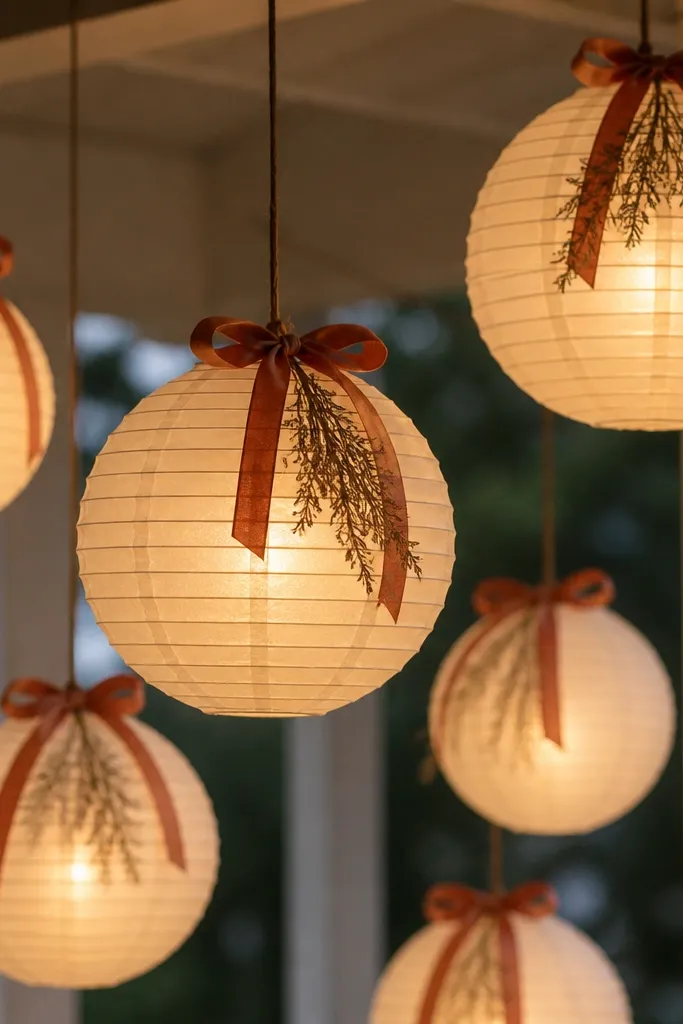
Plain paper lanterns are cheap, but the styling makes them feel like a venue upgrade. The warm yellow glow reads cozy, and the rust ribbon ties pull the color story into the room. This is the easiest way to add height without building anything, and it makes photos look softer because the light is diffused. It flatters everyone because warm lighting reduces harsh shadows on faces.
Start by buying lanterns in sizes like 10-inch and 14-inch, then hang the largest ones slightly higher than the smaller ones. Tie 2 to 3 loops of 1-inch rust ribbon around each lantern collar and secure with a hidden knot behind the paper seam. Add a short bundle of dried greenery under the ribbon using floral tape, one sprig per lantern so it doesn't look messy. Test hanging height by stepping back to where guests will stand for photos - aim for lanterns to frame faces, not hang directly over them.
Try thisChoose ribbon with a matte finish, not shiny satin, so it blends with burlap and kraft paper.
Common mistakeAvoid using clear fishing line that catches light - use thin dark wire or cup hooks instead.
4. Rustic floating candle clusters in mason jars
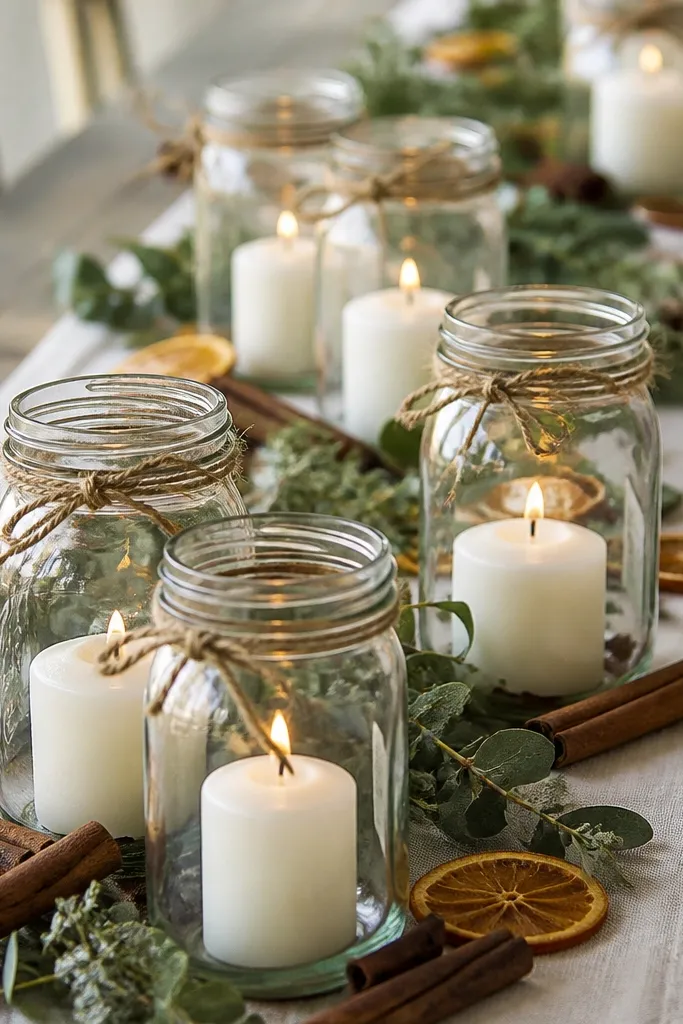
Candlelight is the fastest way to make budget decor look expensive, and mason jars keep it rustic without extra work. Cinnamon sticks and dried citrus add a warm, seasonal texture that reads well in close-up shots. I use pillar candles because they look intentional even when the jar sizes vary. The amber tones flatter deeper skin tones and also look great next to pale linen because it creates a warm glow instead of stark contrast.
Start by selecting jars that are all roughly the same height, like 4 to 6 inches, so the cluster looks uniform. Wrap twine around the jar neck with a small bow, then place cinnamon sticks upright inside around the candle base. Add dried orange slices on top, and tuck one small greenery sprig behind the candle holder so it frames the flame. Arrange jars in a staggered row with 6 to 10 inches between clusters, then light them 10 minutes before guests arrive.
Try thisIf you're outdoors, set jars on a tray or charger to catch wax drips and keep the table safe.
Common mistakeDon't use scented candles that are heavily perfumed with strong notes - the room can smell overpowering instead of cozy.
5. Wood slice place card holders with mini twine bows
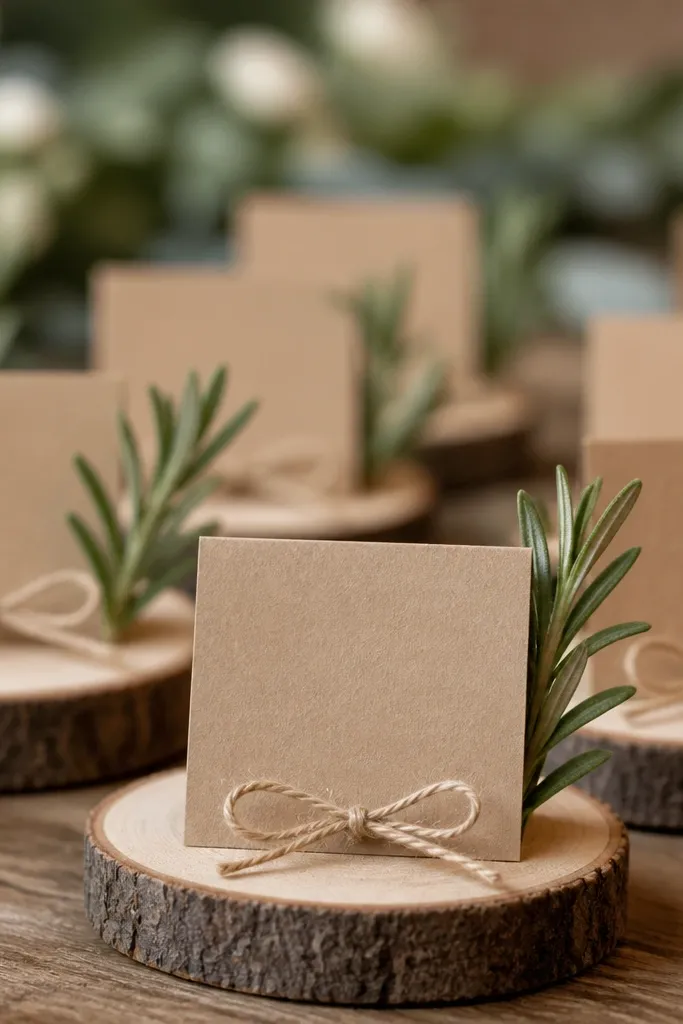
Wood slices look like you paid for custom pieces, but they're usually cheap in bulk. Place cards are one of the first things guests interact with, so they need to look clean and readable. Kraft cards keep the rustic palette consistent, while the mini twine bows add just enough handmade charm. The dark ink on light paper is easy to read and flatters all skin tones in photos because it's high contrast without looking harsh.
Start by buying wood slice rounds and sanding the top lightly with fine-grit sandpaper so ink won't smear. Cut kraft cards to small rectangles, then fold them so they stand up on their own or use a tiny clip at the back. Write names in brown or espresso ink with a thick marker, then add a mini twine bow tied around the base of each card. Place the holders on the table near the napkins, grouped by table number so the layout looks organized.
Try thisSeal the ink with a quick spray of clear matte fixative so names stay crisp in humidity.
Common mistakeSkip glossy paint pens - they reflect light and make names harder to read in photos.
6. Rustic table numbers in repurposed window frames
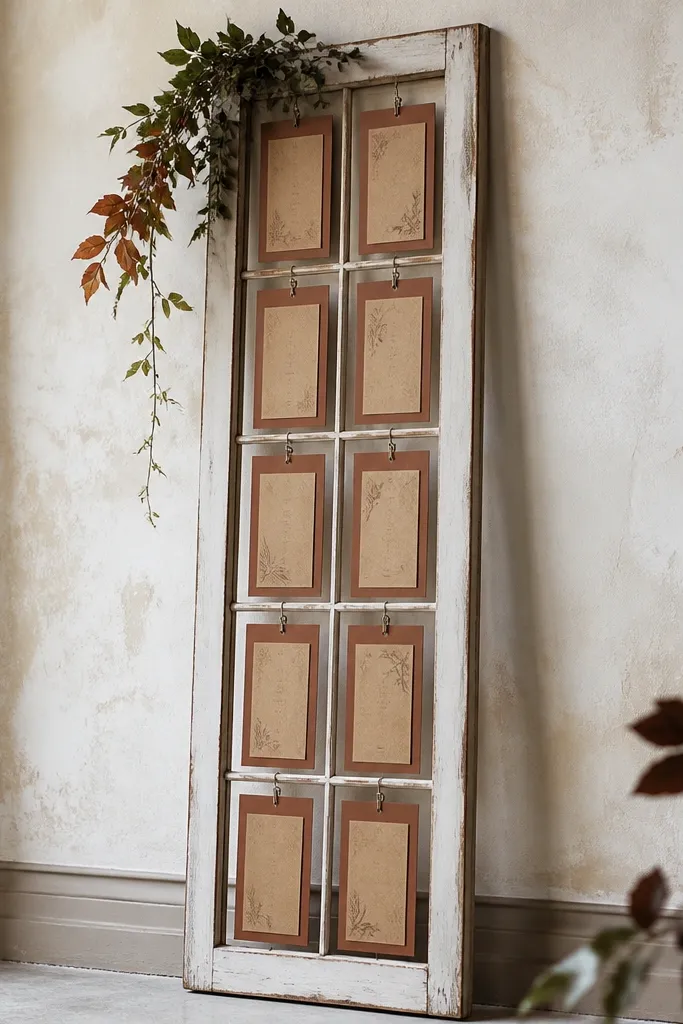
A window frame turns simple table numbers into a photo spot, and it fixes the common budget problem of "where do we put numbers?" This style looks good in barn venues and also in modern spaces because the wood frame gives warmth. I like using kraft paper with a rust border so the numbers match the rest of your palette. It flatters guests because the numbers are readable and don't compete with centerpieces.
Start by finding one old window frame at a thrift store, ideally with multiple panes or a grid. Cut kraft paper rectangles and add a 1/2-inch rust border using paint or a printed template. Attach each number sign to the frame with mini clothespins or hot glue dots so you can swap for different tables. Lean the frame near the entrance so guests see it before they sit, then add one small greenery string across the top for cohesion.
Try thisUse a bold font style with thick strokes - thin script looks pretty but disappears at night.
Common mistakeDon't put table numbers on tiny cards with no border - the text gets lost when guests are moving.
7. Sage and rust dried floral aisle markers
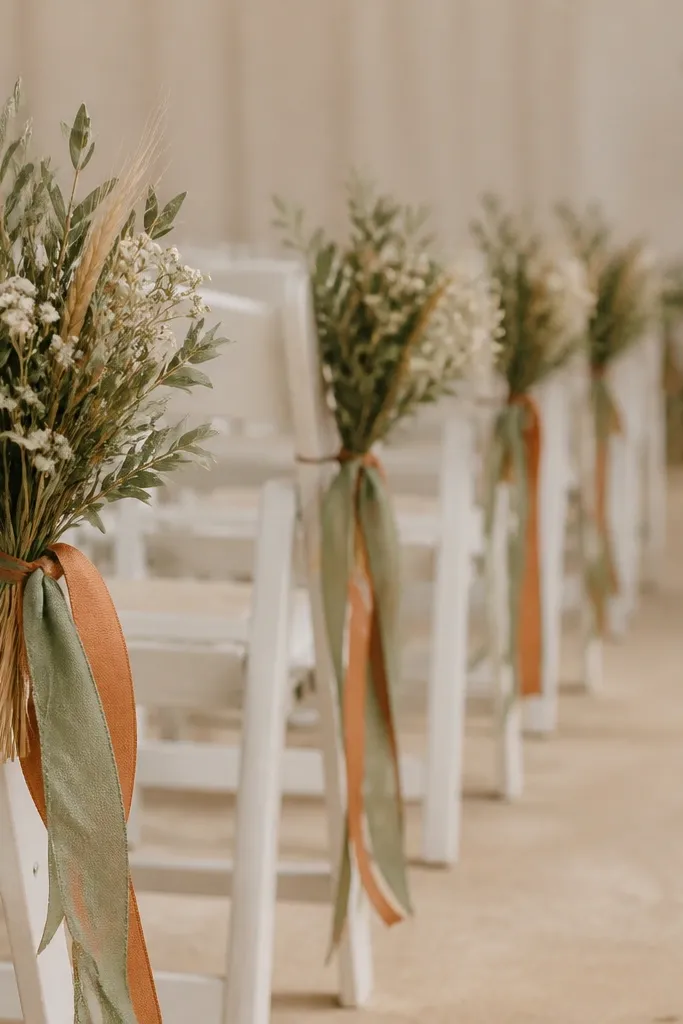
Aisle markers are one of the best places to spend money because they show up in every ceremony photo. Dried florals are cheaper than fresh and they keep their shape all day. Sage and rust create a soft, natural palette that matches wood, stone, and even dark floors. This also flatters guests because the greenery sits behind them, creating depth without blurring faces.
Start by making bundles using dried wheat, eucalyptus-like stems, and baby's breath lookalikes in small handfuls. Tie each bundle with 1/2-inch sage ribbon first, then add a second short rust ribbon tail for color. Attach bundles to chair backs with zip ties covered by ribbon, or use a loop of floral wire around the chair frame. Place markers consistently: one per chair or every other chair depending on your budget and aisle width.
Try thisKeep bundles small for a clean look - larger clusters start to look like you're decorating a festival booth.
Common mistakeAvoid mixing bright neon greenery - it looks artificial next to dried stems.
8. Kraft paper swag garlands across the buffet
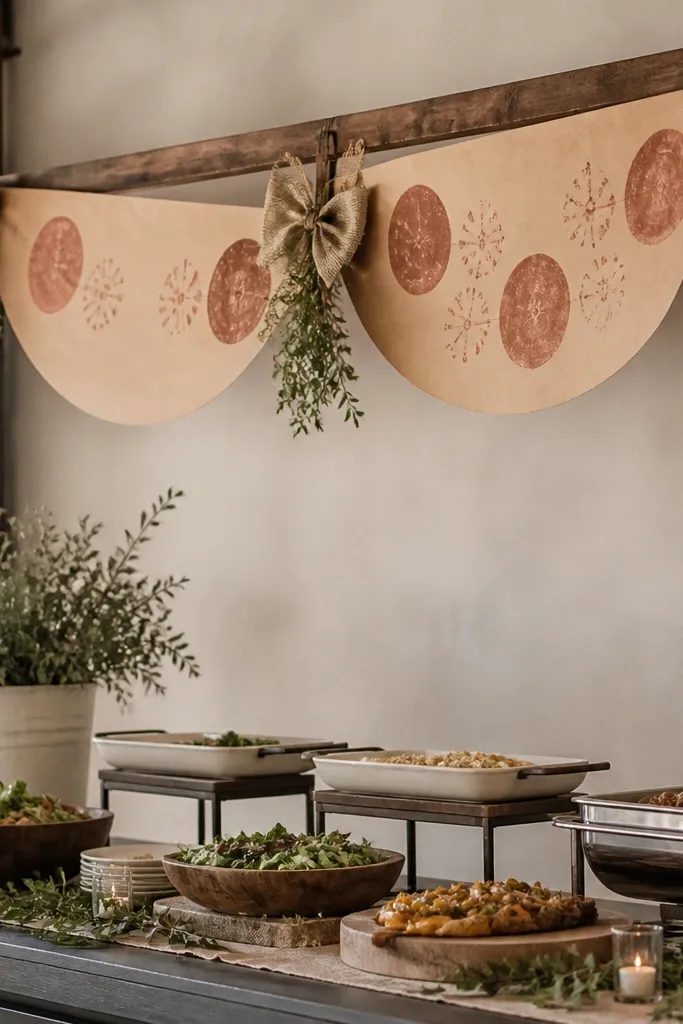
Garlands are cheap, but only if they're readable from a distance. Kraft paper with stamped shapes gives you a rustic pattern without needing expensive signage. Swagging the banner across a buffet makes the food area look styled even when the tables are plain. The warm paper color also photographs well under warm bulbs, and it doesn't reflect light like glossy banners.
Start by cutting kraft paper strips 6 to 8 inches wide and 24 to 30 inches long, then punch small holes along the top edge. Stamp rust circles or use a rust ink pad to make simple marks, keeping the pattern spaced. Tie each strip to twine with a small knot so the banner drapes in a gentle arc. Hang the twine across the buffet at two points, then add greenery sprigs at the ends and tuck a burlap bow under each end knot.
Try thisUse rust ink on kraft paper instead of printing - the imperfect stamp look reads handmade.
Common mistakeDon't hang garlands too low near food trays - you'll bump them all night.
9. Twine-wrapped bottle vases for mixed heights
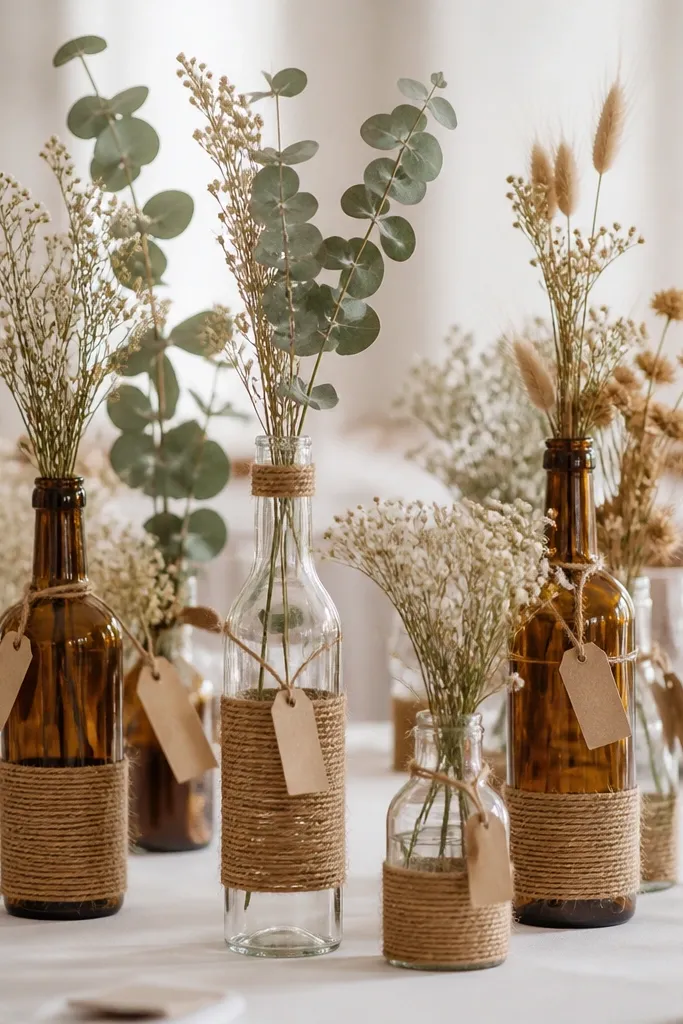
This is my go-to for rustic wedding decor on a budget because bottles are cheap and twine hides label clutter instantly. Mixed bottle heights create the kind of visual rhythm you see in higher-end tablescapes. I wrap twine in a consistent direction, then leave a small gap so the glass color still shows. The warm amber and green tones flatter guests because they create a natural palette that doesn't clash with clothing colors.
Start by collecting 6 to 10 bottles of different sizes and cleaning them thoroughly so labels peel off cleanly. Wrap twine around the neck first, then spiral it down the bottle by 3 to 4 inches, securing with small dots of hot glue. Add one long stem (like dried wheat or a tall eucalyptus spray) in each bottle first, then fill around it with shorter stems. Arrange bottles in a line with the tallest in the center and shorter ones at each end, keeping spacing of about 10 to 12 inches between bottles for a clean look.
Try thisIf bottles look too shiny, mist them lightly with matte spray after wrapping twine.
Common mistakeAvoid using only tiny short flowers - one tall stem makes the whole arrangement look designed.
10. Rustic napkin rings from wooden beads
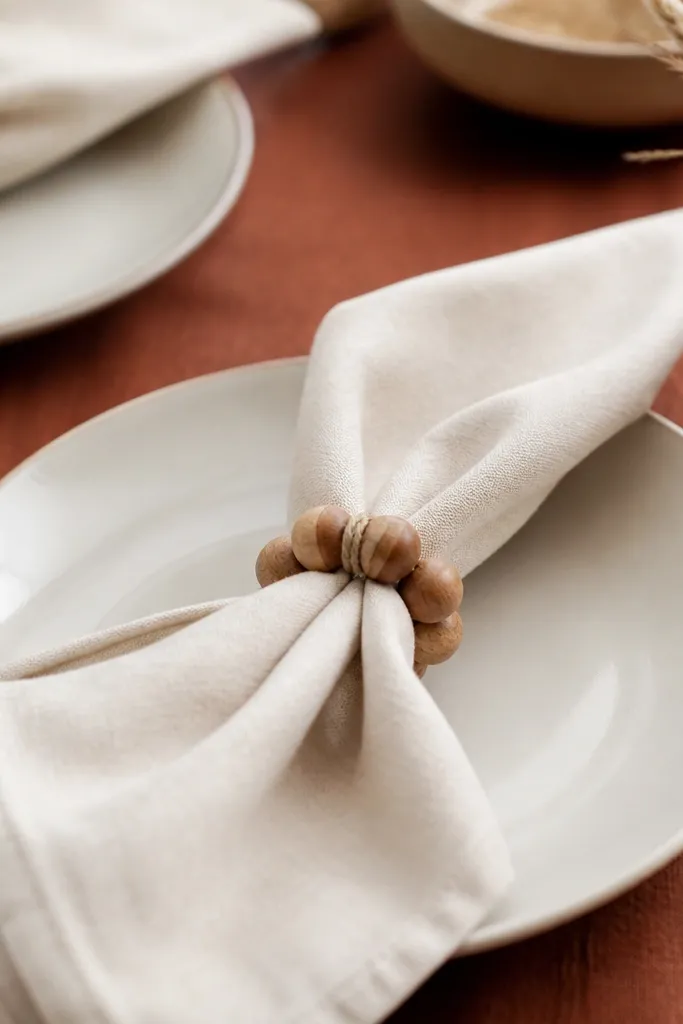
Napkin rings are small, but they read in every meal photo, especially when your tables are otherwise simple. Wooden beads connect to the rustic palette without looking like cheap plastic. I use rings that are chunky enough to be seen, but not so big they swallow the napkin fold. This styling flatters people because it keeps the table neat and makes hands look tidy when guests adjust napkins.
Start by buying wooden bead strands and cutting them into lengths that form a ring about 2 to 3 inches wide. Tie each ring with thin twine so it stays closed and doesn't slide. Fold cream napkins into a simple rectangle or a half-fold, then slide the bead ring around the fold. Place napkins on top of chargers or directly on the table runner, then keep all rings the same color so the table looks intentional.
Try thisUse a matte finish bead strand so the rings don't glare under overhead lighting.
Common mistakeDon't mix bead colors like bright red and lime - it breaks the rustic palette fast.
11. Mini hay bales painted with cream and rust dots
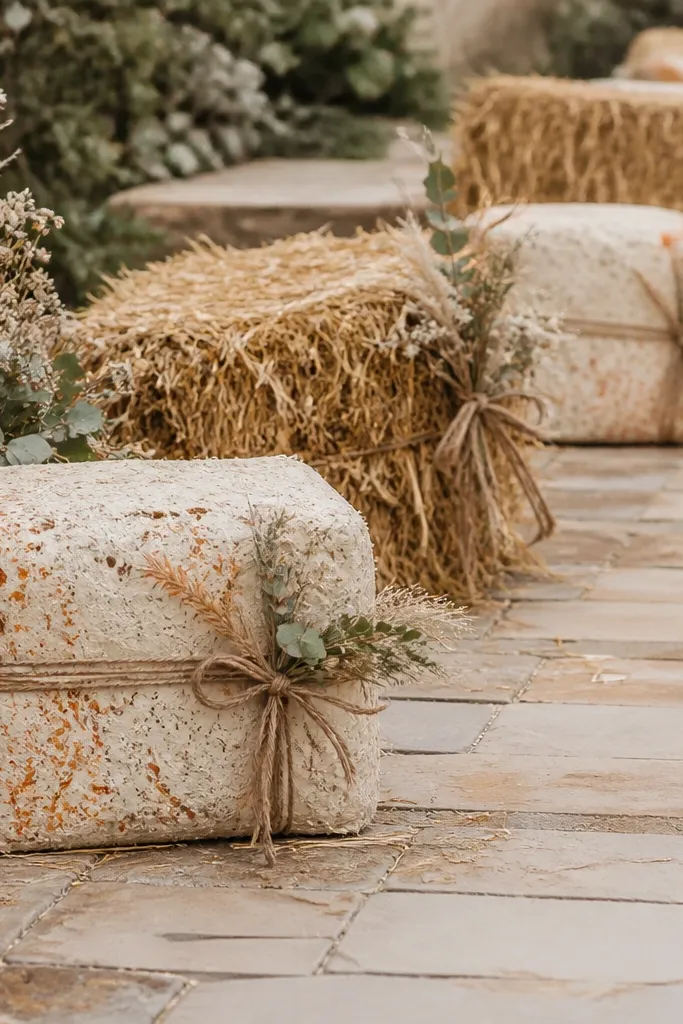
Hay bales are a classic rustic move, but painting them transforms the look from farm rental to wedding styling. Cream and rust dots look playful and photo-friendly, and they also make the bales match your table palette. I use this when the venue has a lot of open space and you need a "trail" for guests. It flatters the whole crowd because warm bales create a consistent background behind photos.
Start by choosing hay bales that are dry and not shedding heavily. Lightly cover the top surface with a thin layer of burlap or painter's cloth, then spray with a matte off-white primer. Add rust dots with a stencil or a small sponge brush for consistent spacing, then let it dry fully. Tie a small twine bow with a short greenery sprig on two corners, and place bales in a line or at the start of the aisle.
Try thisUse matte craft paint, not glossy - glossy shows every texture and looks cheap.
Common mistakeAvoid bales that are already damp or moldy - they smell and can ruin your decor.
12. Cinnamon stick escort card holders in thrifted trays
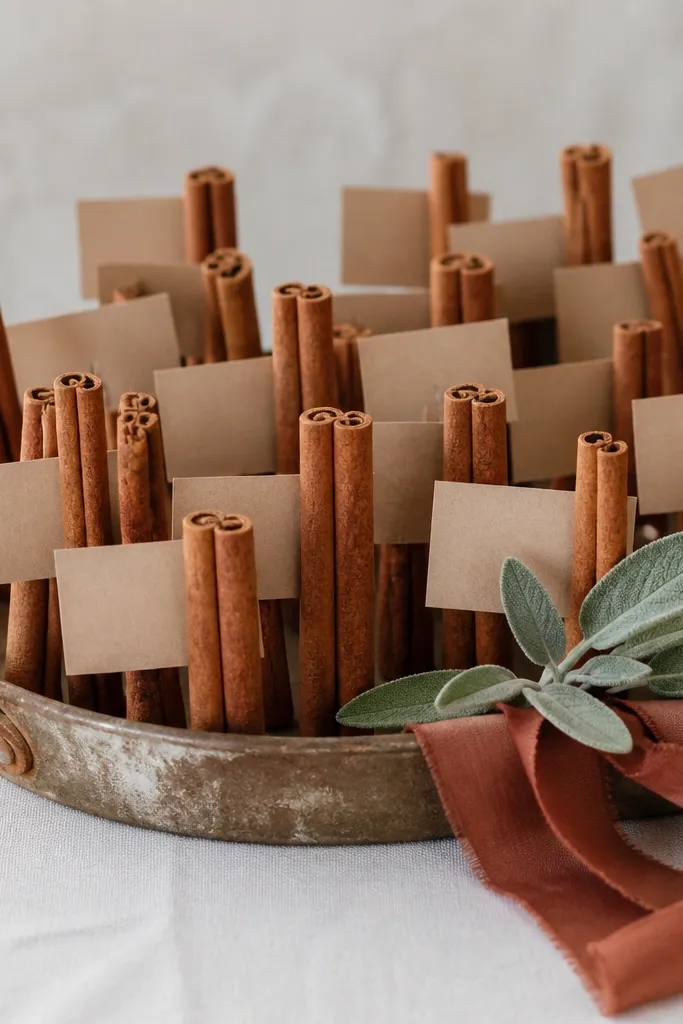
Escort cards are one of the biggest "look at me" moments, and cinnamon sticks make them feel custom without custom cost. The tray keeps everything contained, and the cinnamon adds a warm scent that makes the space feel lived-in. I like thrifted trays because they already have character and the metal tone balances wood and burlap. The warm browns also flatter skin tones in close photos at the card table.
Start by finding a shallow tray, then place a foam pad or crumpled kraft paper base inside so cinnamon sticks stand upright. Tuck cinnamon sticks into the base so they're tight enough that cards won't fall. Write guest names on small kraft cards and clip each card to a cinnamon stick with a tiny clothespin. Add one thin sage garland along the tray edge and tie a rust ribbon bow at the corner.
Try thisIf you're in a humid venue, use cinnamon sticks that are sealed or plan to swap them late in the day.
Common mistakeDon't use cards that are too thick - they won't tuck cleanly and look bulky.
13. Rustic chandelier look with hanging burlap tassel strands
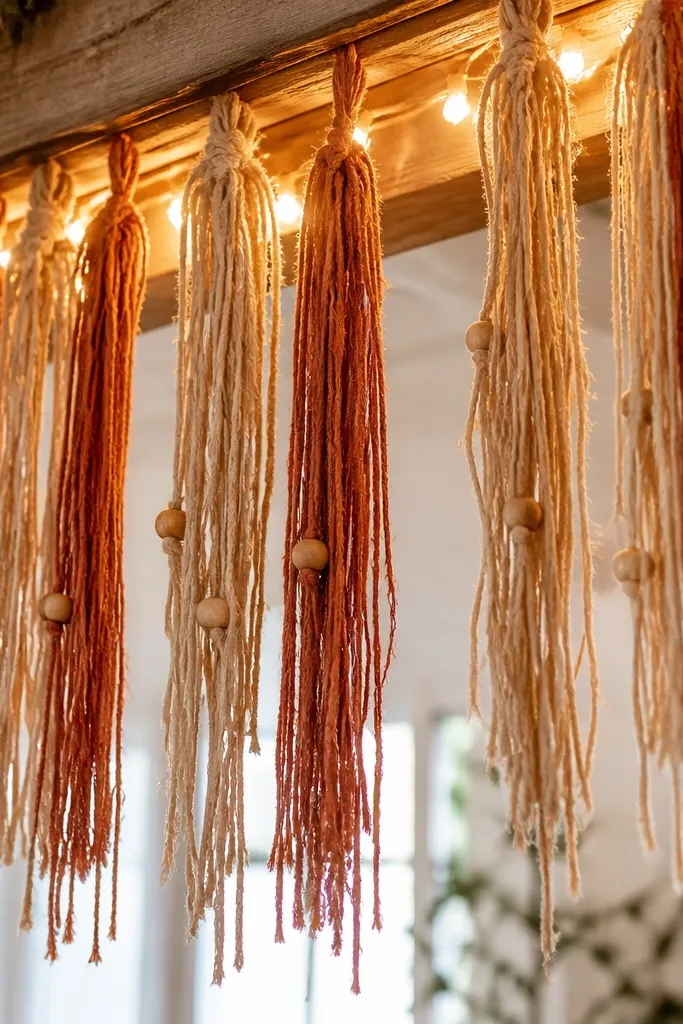
Hanging decor makes a venue feel intentional, and burlap tassels are cheap fabric drama. The movement catches light and reads well in video because the strands sway gently as people walk. I use this when the room has blank overhead space and no natural warmth. The natural burlap color and rust accents flatter everyone because they create a warm frame around heads and shoulders.
Start by cutting burlap strips 2.5 to 3 inches wide and 18 to 24 inches long, then fringe one long edge with small cuts. Tie each strip to twine at the top so the fringe hangs down evenly. Space strands about 6 to 10 inches apart, then run warm string lights behind the strands so the tassels glow. Secure the twine to ceiling hooks or beams using small carabiners so you can remove it quickly after the event.
Try thisUse bead accents on every third strand so the look feels more "designed" without adding more fabric.
Common mistakeAvoid cutting tassels unevenly - sloppy fringe can look like a craft project instead of wedding decor.
14. Sunflower substitute centerpieces using bulk dried stems
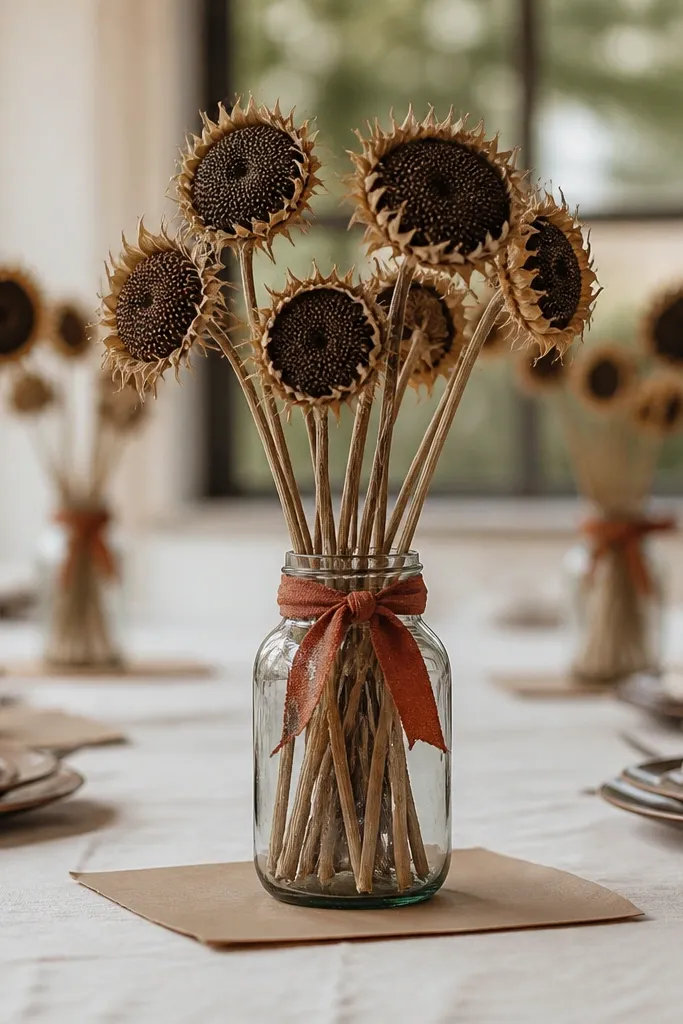
If you're doing rustic wedding decor on a budget, bulk dried stems beat fresh flowers every time. Dried sunflower-like heads and long stems give you the shape people expect from "farm" style without day-of wilt. I pair dried yellows with rust and sage so it doesn't turn into a plain fall table - it feels like a wedding color story. This also flatters guests because warm yellows add glow to faces without looking harsh.
Start by buying bulk dried stems from a craft store or floral supplier, then trim stems so they're 10 to 14 inches tall for small jars. Place a kraft paper square under each jar for a grounded look. Wrap a rust ribbon around the jar neck and secure with a hot glue dot or tape. Arrange one bold dried head in the center, then add 2 to 3 supporting stems around it for a full silhouette.
Try thisSpray dried stems with a matte clear coat if your venue is dusty - it keeps them from shedding.
Common mistakeDon't mix too many random dried colors like bright blue - it looks off against rust and cream.
15. Cream candles in lanterns lined with burlap
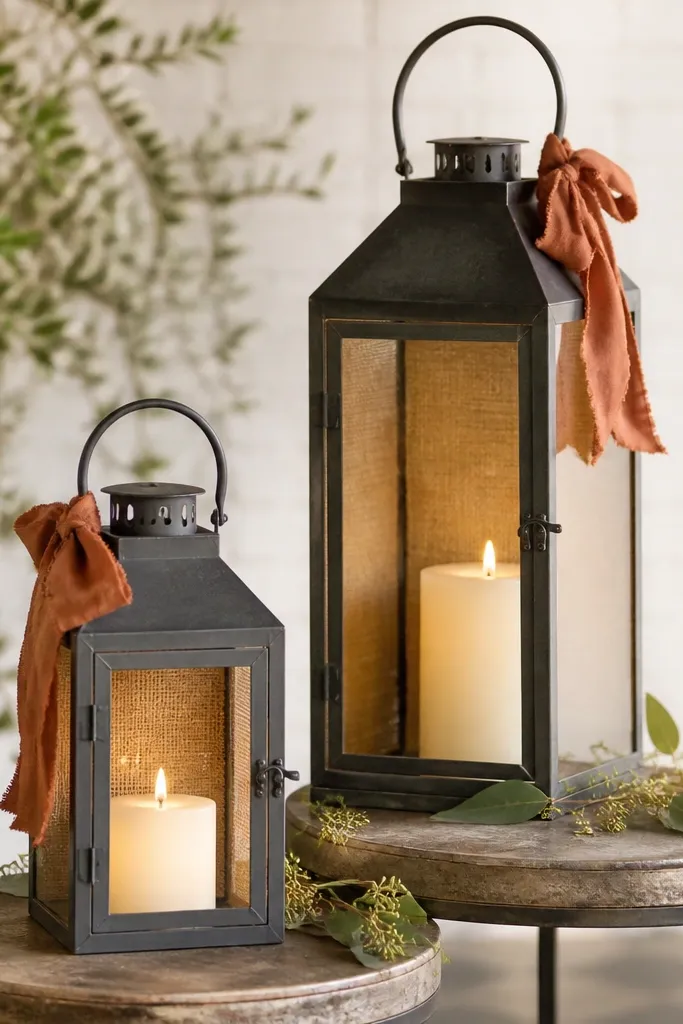
Lanterns make decor feel intentional because they frame the light source. Lining the inside with burlap adds texture so the lantern doesn't look empty or too shiny. I use cream candles because they match the rustic neutrals and keep the focus on your warm palette. This setup flatters guests in photos because the lantern glow creates soft shadows instead of harsh overhead lighting.
Start by placing lanterns on chargers or a wooden board so they don't sit directly on a tablecloth. Line the inside back panel with a small piece of burlap cut to size - hot glue it in place. Add a cream pillar candle that fits securely and won't wobble. Tie rust ribbon to the handle and keep lanterns grouped in sets of two or three along the table length.
Try thisUse LED candles if the venue has wind or if you're serving late into the evening.
Common mistakeAvoid lanterns with heavily reflective glass - they create glare spots that look cheap in photos.
16. Rustic aisle arch using thrifted curtain panels and twine
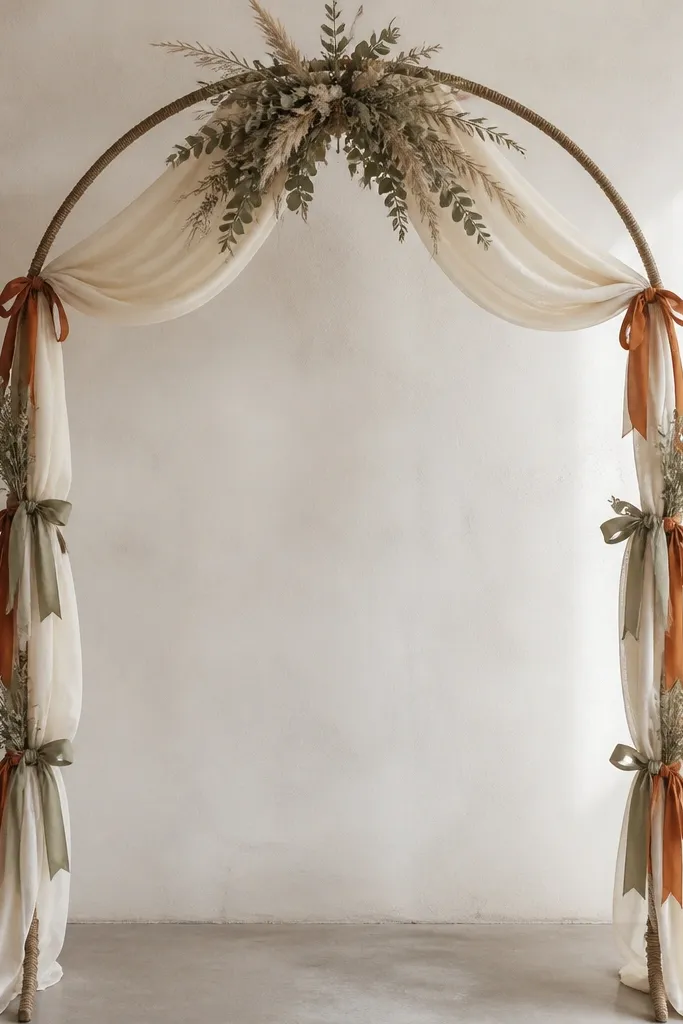
You don't need a custom arch to get the rustic wedding photo people want. Curtain panels drape beautifully and look expensive because fabric has weight, not because it's branded. Twine wrapping adds texture and hides the frame, and a small center greenery cluster gives a focal point. The cream fabric flatters people of all skin tones by creating a soft background behind dresses and suits.
Start by choosing a lightweight metal arch or even a basic frame rental, then wrap the frame with twine from top to bottom. Hang cream curtain panels so they overlap slightly in the center and fall to about knee height. Tie rust and sage ribbons in small knots along the sides, spacing them about 12 inches apart. Add a dried greenery cluster at the center using floral wire, then adjust until it sits at chest height for ceremony photos.
Try thisSteam the curtains before hanging - wrinkles make it look like decor pulled from a closet.
Common mistakeAvoid using thin, see-through fabric - it makes the arch look flimsy in daylight.
17. Kraft paper menu boards on reclaimed wood planks
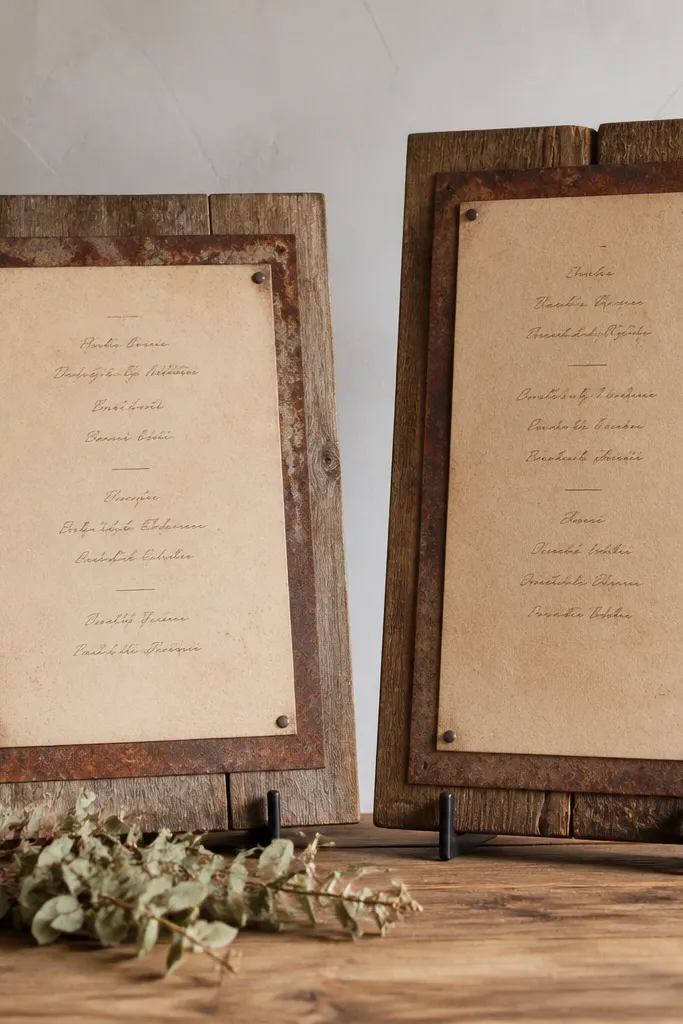
Menu boards pull guests into the experience, and reclaimed wood makes them look like real decor instead of printouts taped to a wall. Kraft paper keeps everything rustic and cohesive, and the brown ink makes the text easy to read. I use this style when the venue has a buffet or bar that looks plain and doesn't match the wedding vibe. The warm wood tones also flatter skin in photos because they create a natural background behind hands holding drinks.
Start by sanding reclaimed wood planks lightly so the ink surface won't smear. Cut kraft paper to fit the board and tape it down with double-sided tape for a flat edge. Write menu items with a brush pen or thick marker, then add a rust border using stencil lines. Lean the boards on stands at the buffet entrance so guests see them first, and place a small greenery accent under the "signature drink" board to anchor the space.
Try thisUse larger text for the drink names - guests read faster when the first line is bold.
Common mistakeDon't cram tiny font onto a big board - it looks messy and cheap from a distance.
18. Rust and sage balloon alternates using fabric ribbon clusters
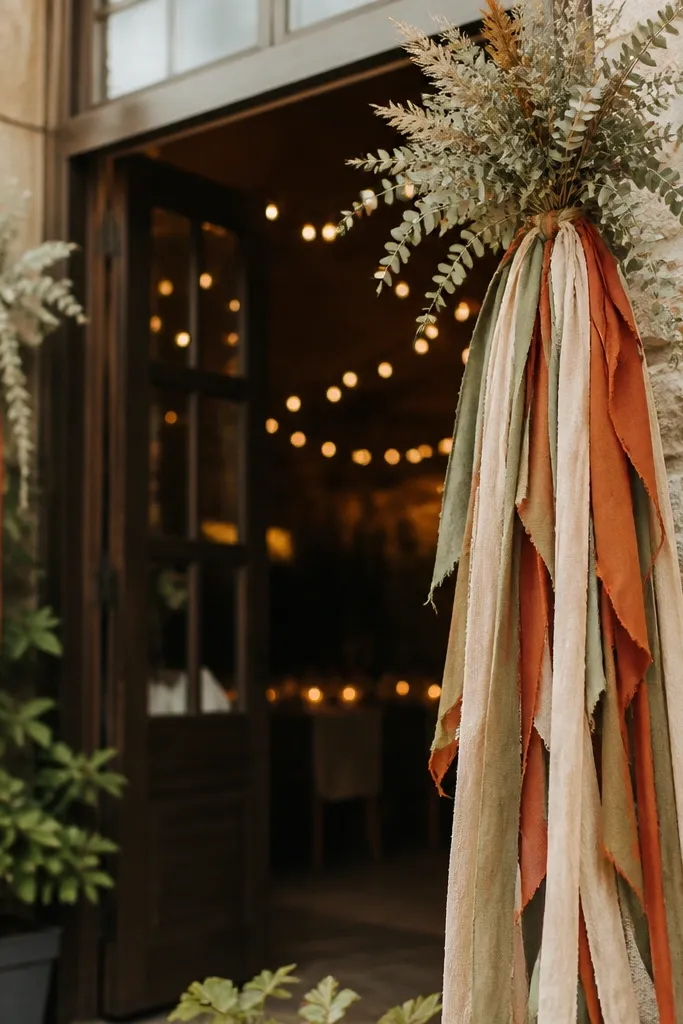
If you hate balloons or don't want helium costs, tall ribbon clusters give you the same vertical energy. Fabric ribbons look softer than plastic and move gently when people walk by. I use rust and sage with cream because it matches the rustic wedding decor on a budget color palette and doesn't clash with florals. This is flattering in photos because it frames the background and adds motion without covering faces.
Start by using a sturdy pole or stand and tying a base knot at the top. Cut ribbon strips in varying lengths, like 18 to 32 inches, then bunch them together and secure with twine. Tuck a small dried greenery sprig at the top knot, then add one rust ribbon tail longer than the rest for a focal point. Place the cluster near a door or photo corner and keep it angled slightly toward the camera so the ribbons fan out.
Try thisChoose matte ribbons and keep the widths around 1 to 2 inches so the cluster looks full, not messy.
Common mistakeAvoid mixing too many ribbon patterns - two solids plus one subtle texture looks intentional.
19. Weathered pallet seating signs with hand-painted arrows
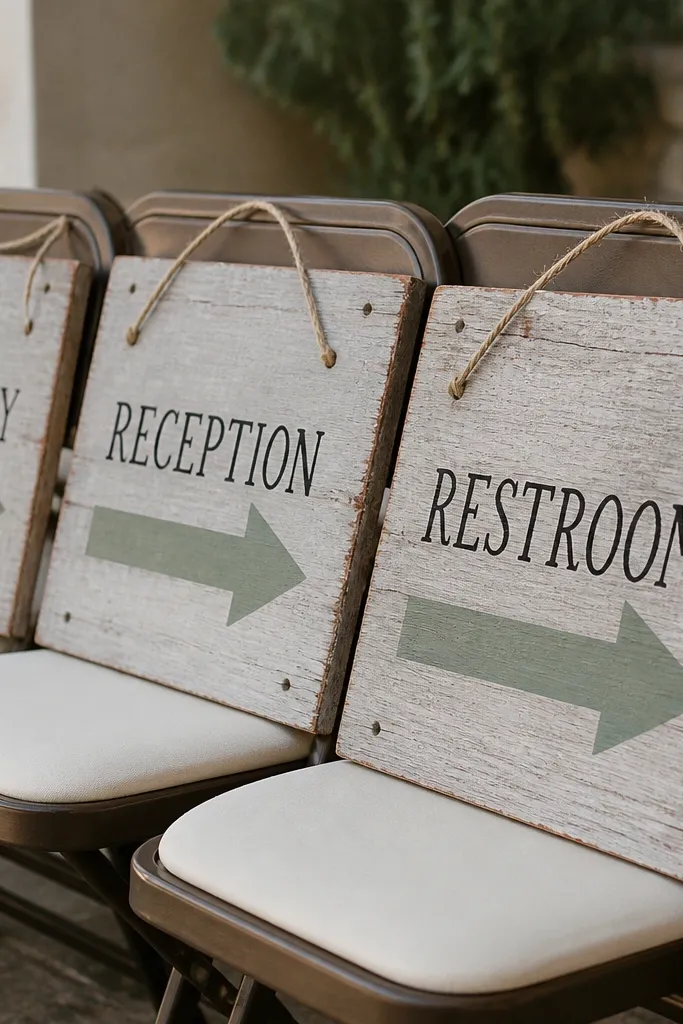
This decor looks like it came from a working farm because it uses real pallet boards with visible nail holes and uneven grain. The hand-painted arrows keep it readable from a distance, which matters when guests are moving around in a yard. I've used this format at two outdoor weddings where the venue had zero signage, and people kept taking photos of the arrows because they look intentional, not generic. It also stays budget-friendly because you can pull pallets for free and only buy paint and twine. It works especially well for rustic wedding decor on a budget because you're not buying a bunch of separate products. You're making one repeatable style that you can scale - three signs or twelve signs all look like the same set.
Step 1: Tear down a pallet into boards that are at least 10 inches wide and 18-24 inches tall, then sand only the splinters on the edges. Wipe the boards with a damp cloth, let them dry, then hit them with a thin gray wash (diluted interior latex paint) so the grain still shows. Step 2: Paint a simple arrow shape in sage (I use a small craft brush and keep the arrow thick), then add the text in black using a stencil so the letters stay consistent. Step 3: Drill a small hole or reuse an existing nail hole near the top and thread jute twine through, tying it so the sign can hang over a chair back or lean against a post. Step 4: Dry-brush rust-brown paint lightly along the bottom edge to match the rest of your palette and hide any paint drips. Step 5: Seal with a matte clear spray so the arrows don't smear if someone brushes past them.
Try thisUse painter's tape to mask the arrow edges and keep the sage paint crisp - the whole look depends on sharp lines. If your pallet is very oily, wipe with a degreasing cleaner first or the wash will bead up.
Common mistakeAvoid painting directly on raw pallet wood with no wash - the paint will patchy-spot and the arrow edges will look messy fast.
20. Rustic "barn door" backdrop using foam core panels and corrugated cardboard
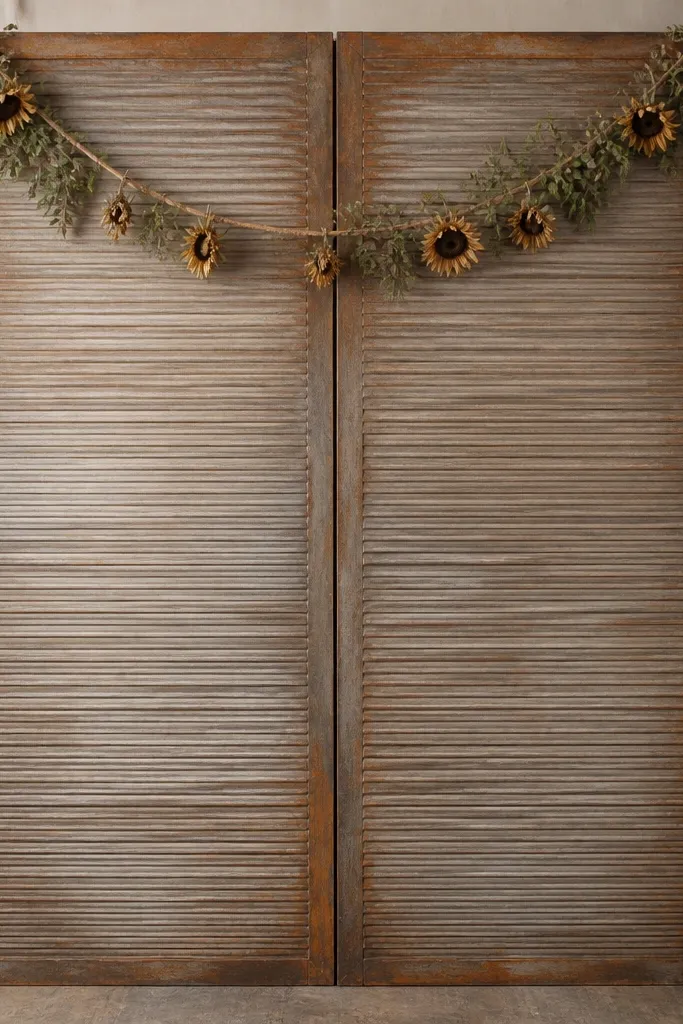
This is the kind of backdrop that makes photos look like you hired a set designer, but it costs way less than rented wooden panels. The corrugated cardboard gives you that tight "barn board" texture without needing actual boards, and it takes stain and dry-brushing really well. I built one for a friend's September wedding and the photos came out with strong shadows - the corrugation catches light even in cloudy weather. It also pairs nicely with rustic wedding decor on a budget because you can keep everything else simple and let the backdrop do the heavy lifting. The best part is you can customize it to your palette. I've done one version with sage and rust accents and another with cream and charcoal, and both read clearly as rustic from across the room.
Step 1: Cut two foam core panels to your size, then cover each panel with corrugated cardboard strips using a glue gun. Overlap the strips slightly so you don't see foam at the seams, and keep the strip ends rough so it looks like old wood. Step 2: Stain the cardboard with a mix of water-based wood stain and a little extra water for a lighter weathered look, then let it dry completely. Step 3: Dry-brush rust-brown paint into the corners and along a few "plank" lines to fake wear marks. Step 4: Add a simple "hardware" look by gluing two small metal-looking knobs (cheap cabinet knobs from a hardware store) at chest height on each panel, or skip knobs and paint two circles in dark brown. Step 5: Attach a twine arch across the top by tying twine loops around two stakes or hooks, then tuck faux greenery and dried sunflower heads into the twine at even intervals.
Try thisIf you want it to look like real barn wood, don't stain evenly - wipe more stain off the center and leave more in the corrugation grooves.
Common mistakeAvoid using glossy spray sealer - it flattens the texture and makes the corrugated lines look plastic in photos.