1. Weathered Wood Crate Centerpieces with Rust Pots
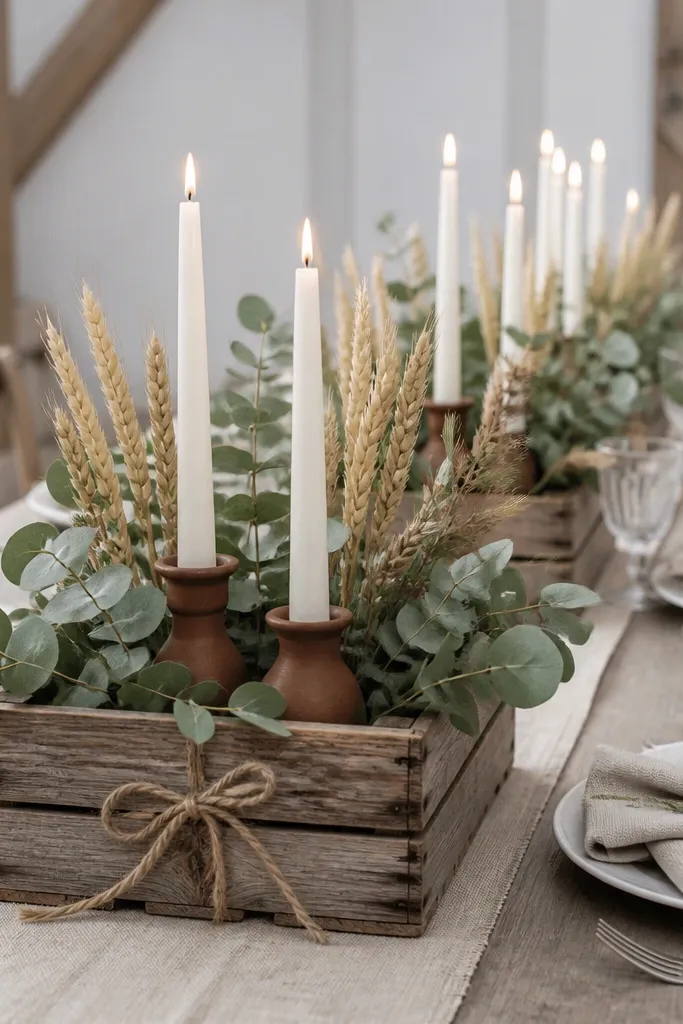
This centerpiece style works because crates bring honest texture and the rust pots add the color you need for a rustic wedding without turning everything orange. I like eucalyptus (or faux eucalyptus if you're short on time) because its gray-green tone softens the warmth of burlap and wood. The rust ceramic reads warm on camera and flatters most skin tones when guests lean in for photos. If your tablecloth is cream or light beige, these crates look grounded instead of washed out.
Start by finding crates that are roughly 12-18 inches long so they fit a typical 60-inch table without crowding. Line the bottom with burlap or a thin linen runner, then place two candle pots on the ends and greenery in the center. Add a short "bundle" of dried wheat or rattan stems, then secure everything with floral wire so it doesn't shift when someone bumps the table. Finish by wrapping a strip of jute twine around the crate front and tie it once - not three times - so it looks clean.
Try thisUse LED tapers inside the pots during setup. Real flames are beautiful, but LED lets you breathe when you're moving fast and the barn has drafty air.
Common mistakeSkip shiny spray paint on crates - it reflects light and makes the whole centerpiece look store-bought.
2. Burlap Runner with Stitched Seed Tags
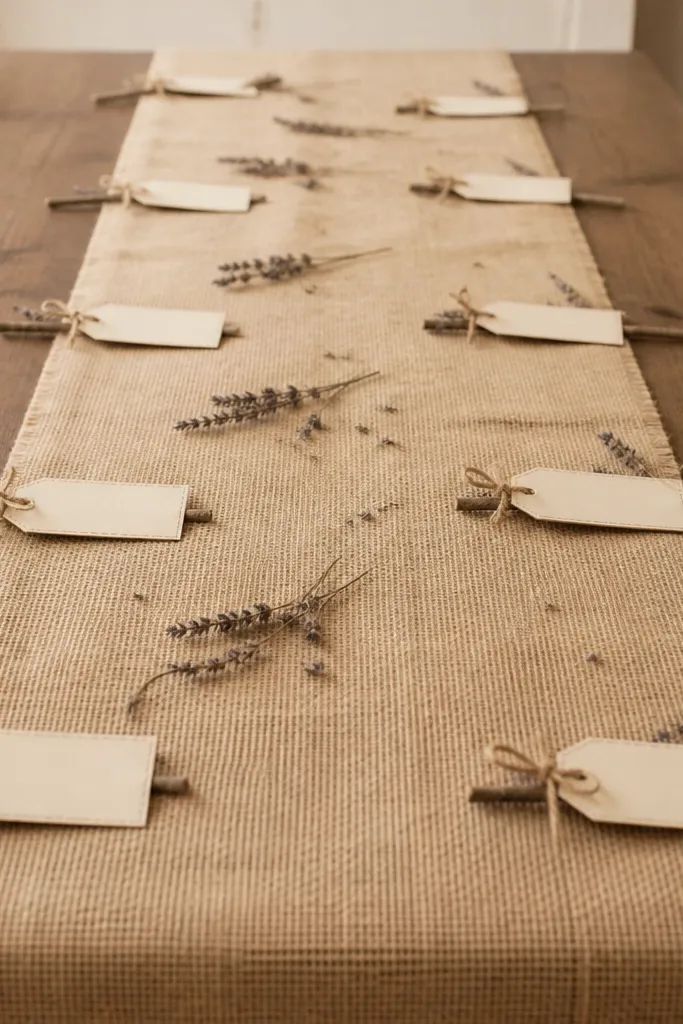
A burlap runner is the fastest way to make a plain table feel like a wedding, because it adds texture without needing a lot of extra items. The stitched seed tags make it feel handmade and personal - the cream cardstock keeps it from looking too dark. This looks best when your table is wood or has a warm cream cloth, because burlap can overpower cool tones. For photos, the tags create small highlights that catch light and guide the eye toward the center of the table.
Start by cutting a burlap runner to your table length minus 6-10 inches so it doesn't hang past the edges. Lay it flat and pull gently on the sides to straighten the weave, then press with a warm iron on low through a cloth. Make seed tags by punching small rectangles from cream cardstock, stitching around the edge with thick twine, and punching a hole at the top for tying. Tie each tag to a twig or short dried stem and place them in a line down the runner, spaced about 10-12 inches apart.
Try thisWrite dates and guest names with a fine-tip white gel pen on brown kraft tags for a crisp contrast.
Common mistakeDon't use too many tags - more than 7 on a standard runner makes it look messy instead of intentional.
3. Hanging Hoop Planter Backdrop for Ceremony
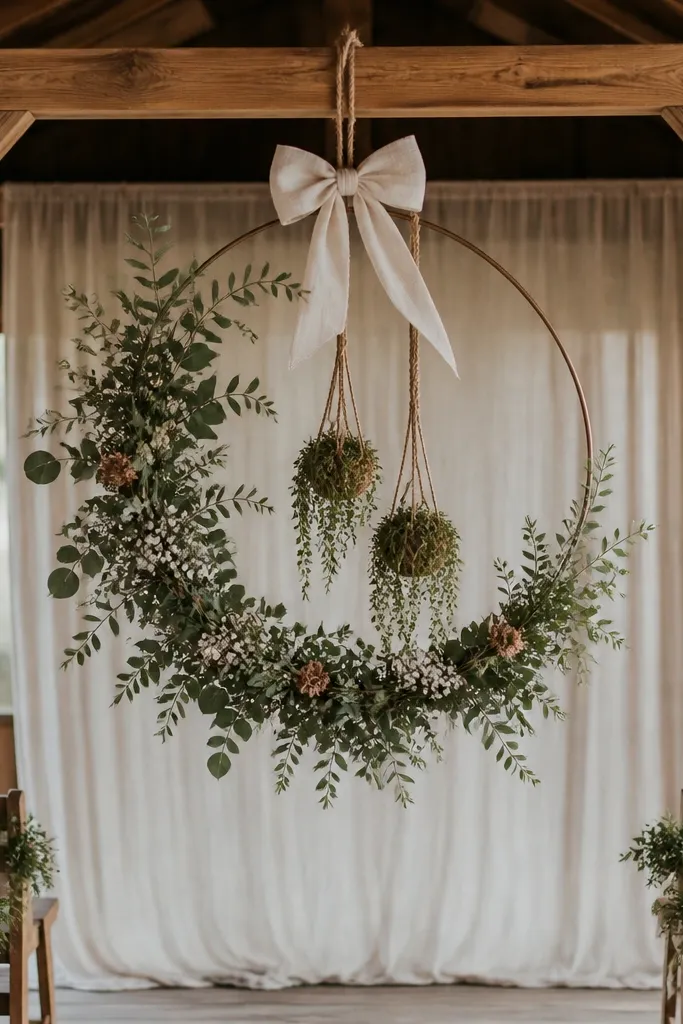
Hoop backdrops look romantic in rustic weddings because they frame the couple without taking over the whole wall. The hanging planters add depth, so even if guests move left or right for photos, the backdrop stays interesting. I like using faux greenery with a few dried elements because it stays consistent through wind and heat. This works for most body types because the hoop sits at head height and creates a clean visual line behind you.
Start by choosing a hoop diameter around 24-30 inches so it reads well from the aisle. Wrap the hoop with linen ribbon or jute twine, then hot-glue small faux greenery clusters into the wrap points. Hang two small planters (6-8 inches wide) from the hoop at different heights using fishing line or thin wire so they sway slightly. Finish by tying a cream linen bow at the top and placing your ceremony sign or seating chart directly under the hoop so everything lines up.
Try thisTest your height by standing where the couple will stand and measuring from the floor to the hoop's bottom edge - aim for 6-8 inches above head level for most guests.
Common mistakeSkip heavy ceramic planters on a thin hook - they swing too much and look sloppy in photos.
4. Lantern Aisle Markers with Numbered Tags
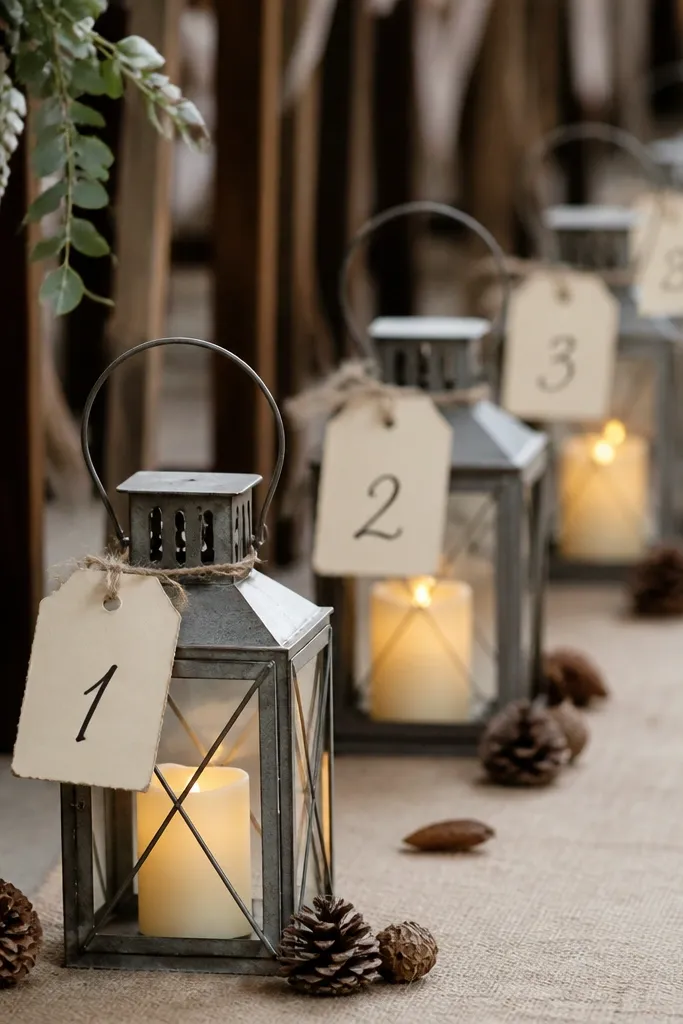
Lantern aisle markers make the ceremony feel guided and intentional, especially in barns where open space can look empty. The numbered tags help guests find seats without someone needing to do the "where do we go?" scramble. I like warm LED candles because they match the cozy rustic tone and avoid smoke stains on linen. The look flatters outdoor light too - the metal frames catch highlights and keep the aisle from blending into the floor.
Start by lining the aisle with a neutral runner or a strip of burlap (about 24-36 inches wide) if your venue allows it. Place lanterns every 4-6 feet so they're visible from the front row without crowding. Tie a tag to each handle using jute twine and write numbers in bold black marker on cream cardstock. Put warm LED candles inside and secure the tag string so it doesn't touch the candle.
Try thisUse the same tag font on every lantern - even if it's hand-drawn, consistency looks expensive on camera.
Common mistakeDon't tie tags too low where they dangle - they look like last-minute craft bits.
5. Mismatched Mason Jars with Ribbon-Wrapped Stems
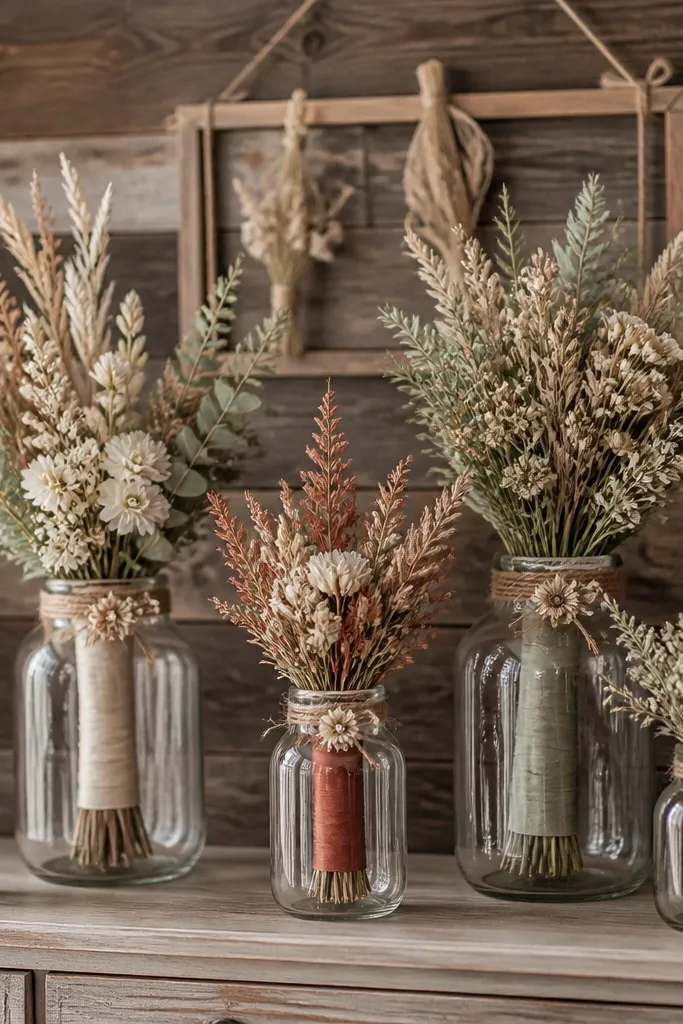
Mismatched jars look rustic because they feel collected, not manufactured. I've used this on both indoor barn walls and outdoor porch tables; the trick is keeping the ribbon palette tight. When the ribbon colors repeat (rust + sage + oat), the jars look coordinated even if the jars aren't. This works for any season because you can swap stems: dried wheat in fall, eucalyptus in spring, and small pine accents in winter.
Start by gathering 10-14 jars in three sizes, then wash and dry them fully so labels don't peel. Wrap each stem bundle with ribbon that matches your wedding accent, then secure with a small strip of floral tape hidden under the ribbon knot. Fill jars with water or floral foam if you're transporting them; keep water levels consistent for a uniform look. Place jars in a staggered row, then add a single dried flower at the top of each jar for a finishing touch.
Try thisIf you're using real stems, trim ends at an angle and change water the night before to keep them perky on the day.
Common mistakeSkip random ribbon colors - mismatched ribbon is the fastest way to make jars look like craft table leftovers.
6. Candle Cluster on a Live-Edge Slab
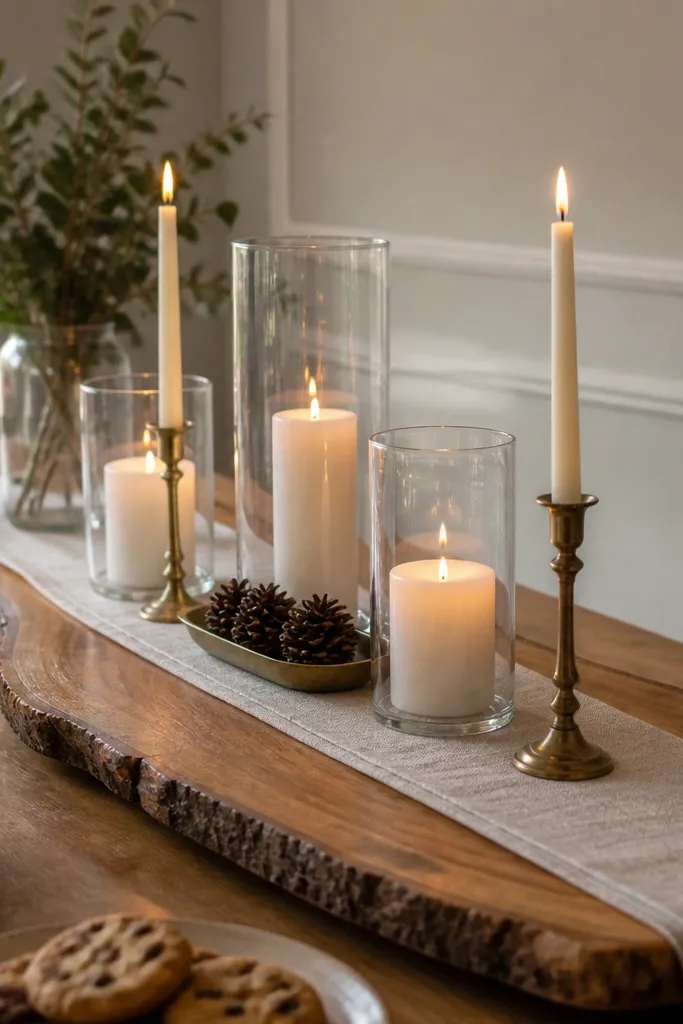
Live-edge slabs bring a real rustic shape that looks good even when you keep the decor simple. The candle cluster works because it gives you a focal point that reads from across the room, especially in a dim barn. Glass hurricanes make the candles look intentional and protect them from drafts. This style flatters photos because the wood grain and candle reflections create depth without needing lots of flowers.
Start by choosing a slab that's 18-24 inches long so it fits dessert tables without blocking serving space. Lay a thin linen strip down the center, then place the largest hurricane candles in the middle and the smaller ones toward the ends. Add a brass tray with pinecones or dried berries near one side, not the exact center, so the composition has balance. Finish by tucking a few greenery sprigs between holders and secure with floral wire underneath the slab.
Try thisUse one metal finish for candle hardware - brass + wood looks warm; mixing chrome makes it look off.
Common mistakeDon't place all candles at equal height - the cluster looks flat unless you vary height by at least 2 inches.
7. Rustic Table Numbers in Framed Scrap Wood
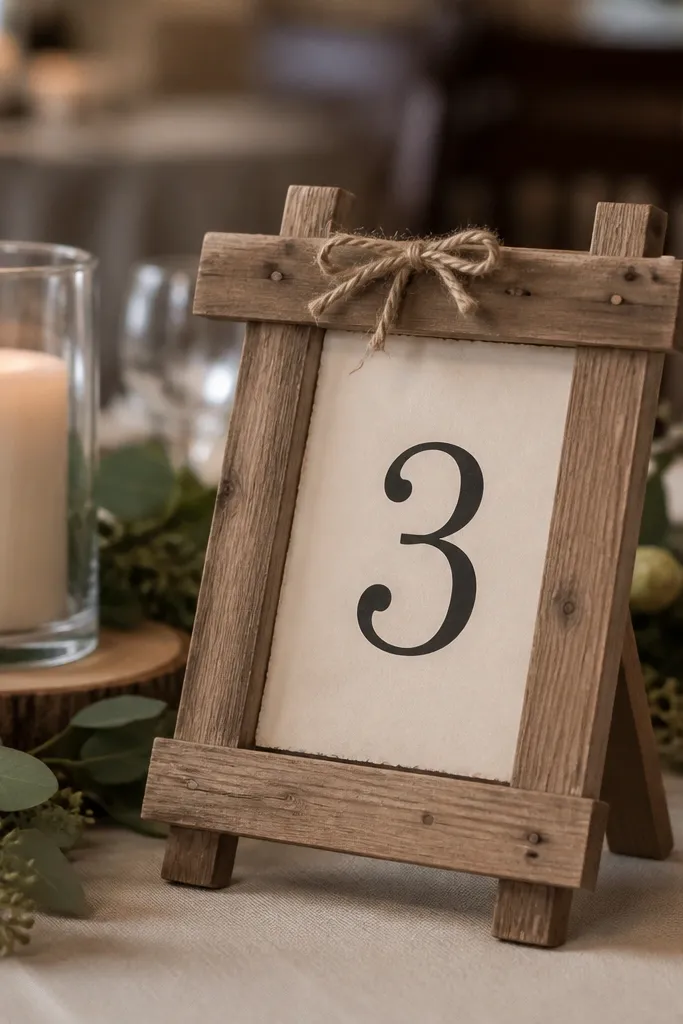
Framed scrap wood table numbers look handmade and clean, which is hard to pull off in rustic decor. The black numbers on cream paper stay readable from a few feet away, and the wood frames make the whole table feel styled. This works especially well if your venue has warm brown walls, because the cream paper pops instead of blending. If you have guests who sit far from the tables, legibility matters more than extra decoration.
Start by cutting scrap wood into 6x8 inch frames, or buy unfinished frames and stain them with a medium walnut tone. Print numbers in a bold font on cream paper, then glue them centered with a thin border. Tie a loop of jute twine around the top of each frame for visual continuity. Place the frames on small easels or lean them against lanterns, keeping the top of the sign around 18-24 inches off the tabletop.
Try thisLaminate the paper if your venue is humid. I've had ink smear when someone kept opening a door to a damp porch area.
Common mistakeSkip tiny fonts - if it takes effort to read, people stop looking and your decor loses impact.
8. Chair Back Burlap Sashes with Dried Lavender Tuck
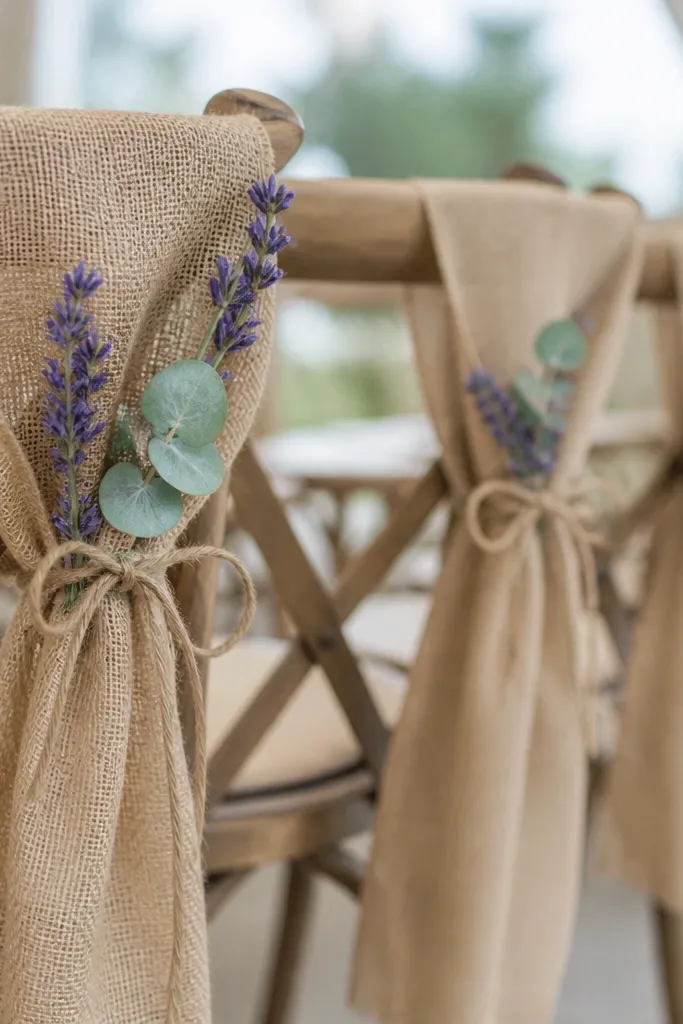
Chair sashes are a rustic wedding cheat code because they dress the space without covering the entire table. Burlap looks textured and forgiving, so you don't need perfect symmetry. The dried lavender tuck adds a soft purple accent that looks good on both warm and cool skin tones in photos. This setup is also beginner-friendly because you can adjust the knot height to match different chair sizes.
Start by cutting burlap strips about 10-12 inches wide and 30-40 inches long depending on chair height. Tie the sash around the chair back with a single knot at mid-height, then pull the ends to hang evenly. Tuck a small cluster of eucalyptus behind the lavender sprig, and secure with a thin twist tie hidden under the knot. Finish by trimming the ends so they fall to the same length across the row.
Try thisDo a quick "row test" with 3 chairs before you commit. If one chair looks too short, adjust strip length by 2 inches right away.
Common mistakeDon't use glossy ribbon - it fights the burlap texture and reads cheap next to wood and linen.
9. Hearth-Style Garland of Faux Greenery and Pinecones
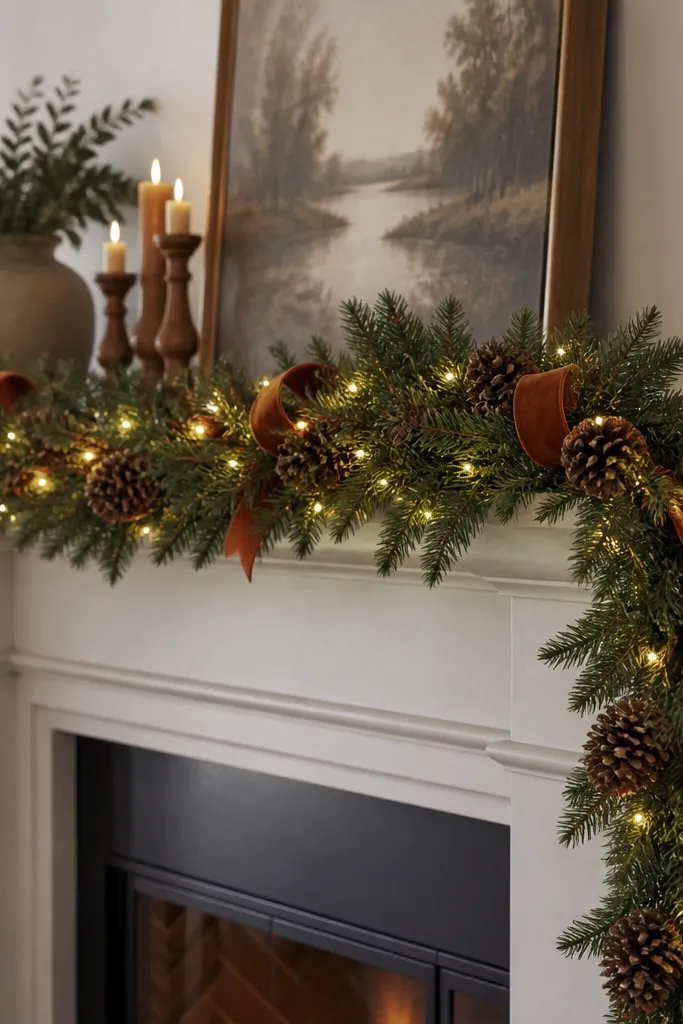
Mantle garlands look like you hired a decorator because they create a long, continuous line. Faux greenery is the practical choice in barns where real foliage can shed or wilt fast. Pinecones add the winter-to-fall rustic look, and fairy lights give you that soft glow that photographs well even when the room is dark. The rust ribbon loops bring your accent color into the decor without overpowering it.
Start by measuring your mantle and cutting garland sections so you can overlap them by about 6 inches. Attach pinecones with floral wire every 8-12 inches so spacing stays consistent. Weave warm white fairy lights into the greenery before you secure the final pinecones. Add rust ribbon loops by tying small loops around 3 points along the garland, then fluff the greenery to hide wire ends.
Try thisUse warm white lights, not cool white. Cool white can make greenery look gray and the whole scene feels colder.
Common mistakeSkip uneven pinecone placement - clusters look intentional, scattered pinecones look accidental.
10. Rust and Oat Napkin Rings with Jute Twine Wrap
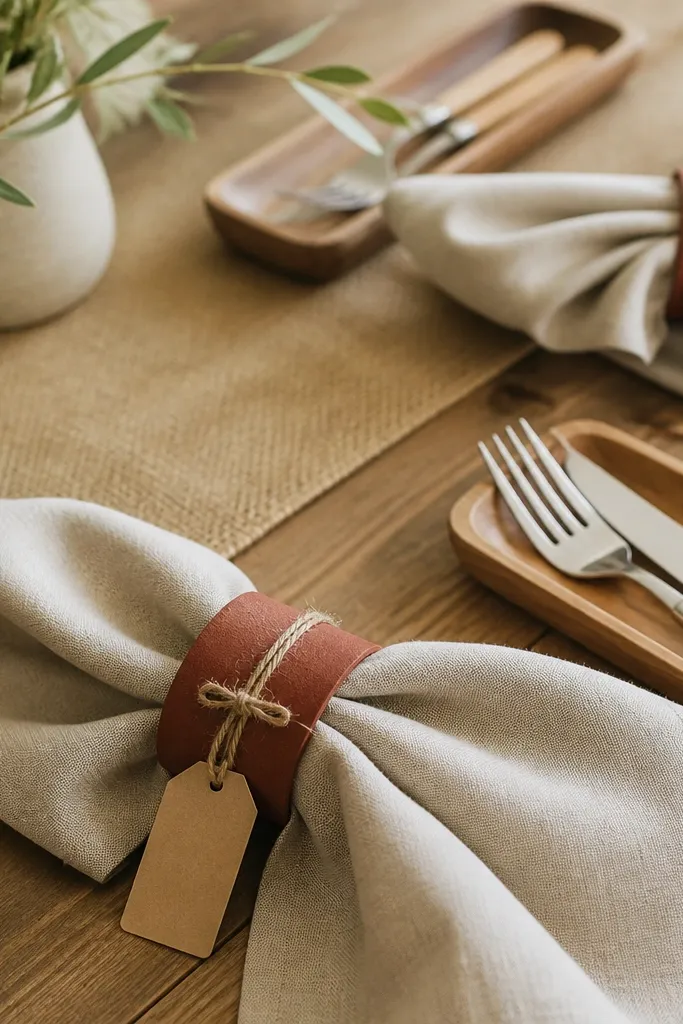
Napkin rings are small, but they're one of the fastest ways to make a rustic table look coordinated. Jute twine wraps look handmade, and rust rings bring warmth that matches barn wood and candlelight. This works best when your napkins are a natural fabric (linen or cotton) because the texture plays nicely with twine. In photos, the rings create a clean vertical accent that frames hands and silverware.
Start by buying napkin rings in a simple metal or wood base in a rust or bronze tone. Wrap the ring with jute twine in tight spirals, leaving no gaps, then tie off the end at the back. Fold napkins into a consistent shape, then slide them on so the knot or tie sits centered. Add a tiny tag (1 inch wide) with a single letter or symbol tied to the ring with twine if you want a personalized touch.
Try thisMake 20 rings at once and stage them in a box. When you set the tables, you'll move faster and keep the look consistent.
Common mistakeDon't leave loose twine ends - they catch light and make rings look undone.
11. Dried Wheat and Eucalyptus Table Wands
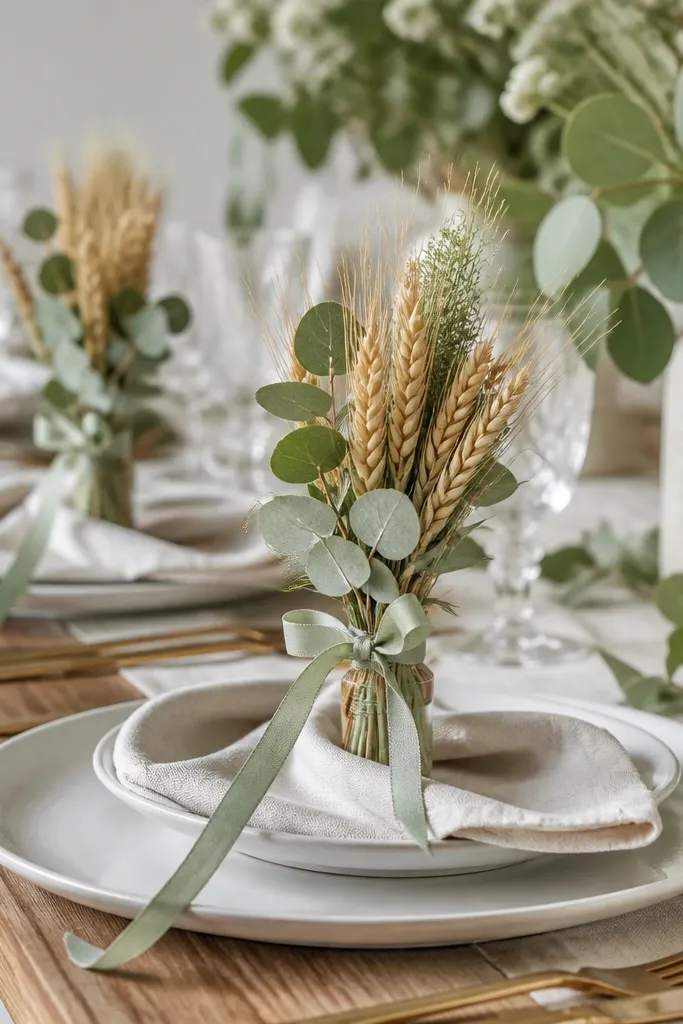
Table wands give rustic decor a "real moment" feeling because they connect to nature - dried wheat looks like it came from a field, not a craft store. Eucalyptus keeps the palette cohesive with a cool green that balances rust and burlap. These are especially flattering for photos because they create height near the plate without adding bulky centerpieces. If you have a smaller table or want room for food, wands help you decorate without taking up space.
Start by bundling dried wheat into small clusters about 6-8 inches long, then add 2-3 eucalyptus stems around it. Wrap the stems with floral tape and tie a thin sage ribbon at the base. Place each wand in a small kraft paper cup or tuck it into a napkin fold using a twist tie hidden under the fold. Keep the ribbon tails facing the same direction across the table so it looks intentional.
Try thisMist the eucalyptus lightly with water before the ceremony if it's real - it looks fresher and doesn't look dry on camera.
Common mistakeSkip tiny, scraggly bundles - if the wand looks thin, it disappears next to plates.
12. Rustic Welcome Sign on a Ladder with Chalk Ink
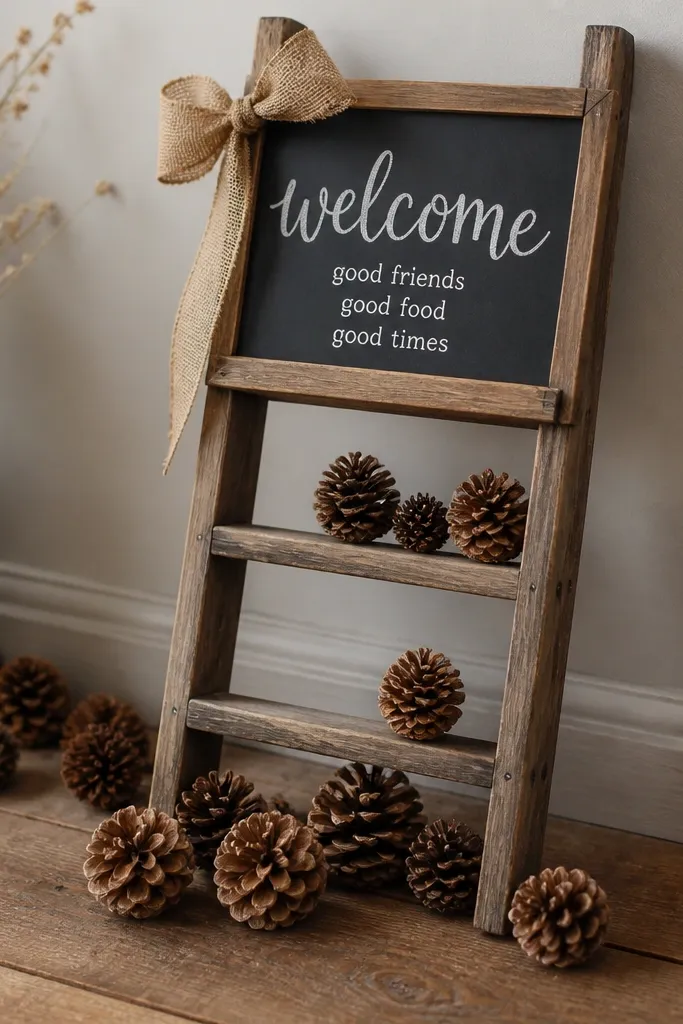
A ladder welcome sign is charming because it has built-in shape and height. The chalk ink looks soft and handmade, and you can adjust spelling or spacing easily right before the wedding. I like this when the venue has plain walls, because the ladder gives you structure without needing a big backdrop. It also works for both men's and women's photo angles because guests naturally stand near it for pictures.
Start by finding a small wooden ladder that leans safely, then sand or lightly stain it if needed. Use a chalkboard panel or a chalk-painted wood board mounted on the top rung with screws or strong adhesive. Write the main welcome text in large letters, then add the date and a short line like "Ceremony starts at 4:30" in smaller text. Tie burlap bows or wire pinecones to the ladder rails so the sign looks integrated, not floating.
Try thisTake a photo of the chalk sign in the lighting you'll use at the venue. Chalk can look darker under warm bulbs, and you'll want the contrast right.
Common mistakeAvoid glossy chalk markers - they reflect and can look plastic on ladder signs.
13. Wood Slice Escort Cards with Twine Hangers
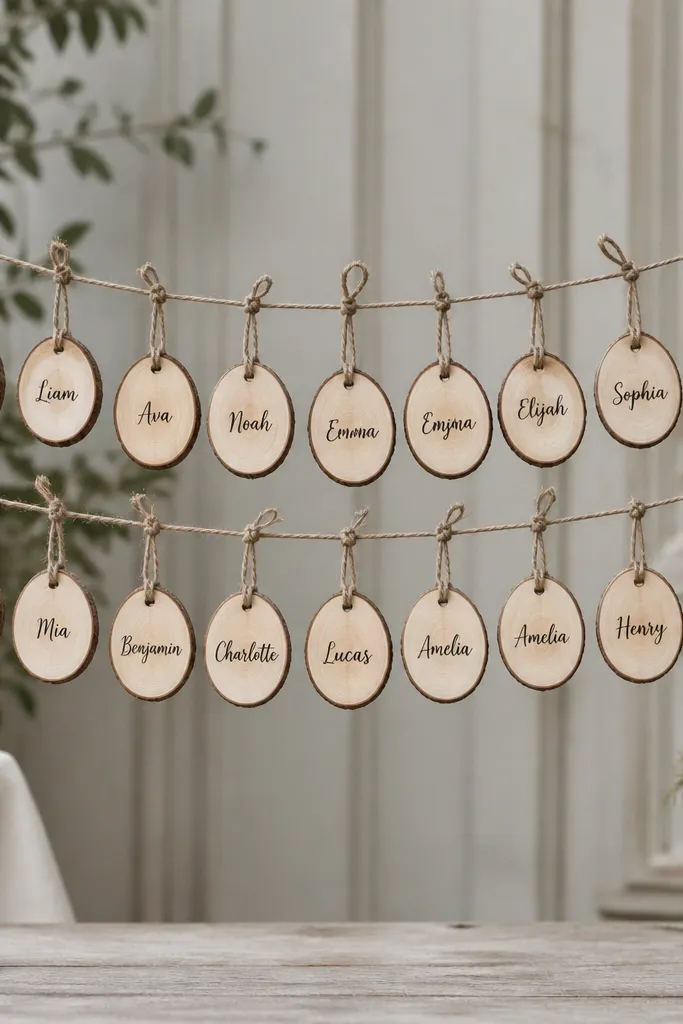
Wood slice escort cards look rustic and functional because guests can scan names without squinting at tiny printed cards. Hanging them on twine creates a wall-like display without needing a fancy board. This works well for both indoor and outdoor venues because wood slices handle airflow better than paper-only signage. The natural grain also hides small writing imperfections, which makes it beginner-friendly.
Start by buying wood slices with pre-drilled holes or making your own with a small drill bit. Stretch a string line between two stable stands at about chest height. Write names in bold black ink with a paint pen, then tie each wood slice to the line using short jute twine loops. Leave 1-2 inches between slices so the names don't get crowded, and group by table number if you're doing sorting.
Try thisSeal the writing with a matte clear sealer spray so it doesn't smear if someone's hands or weather get humid.
Common mistakeDon't hang slices too close - when names overlap, the whole board looks chaotic.
14. Rustic Dessert Table with Linen Skirt and Crate Levels
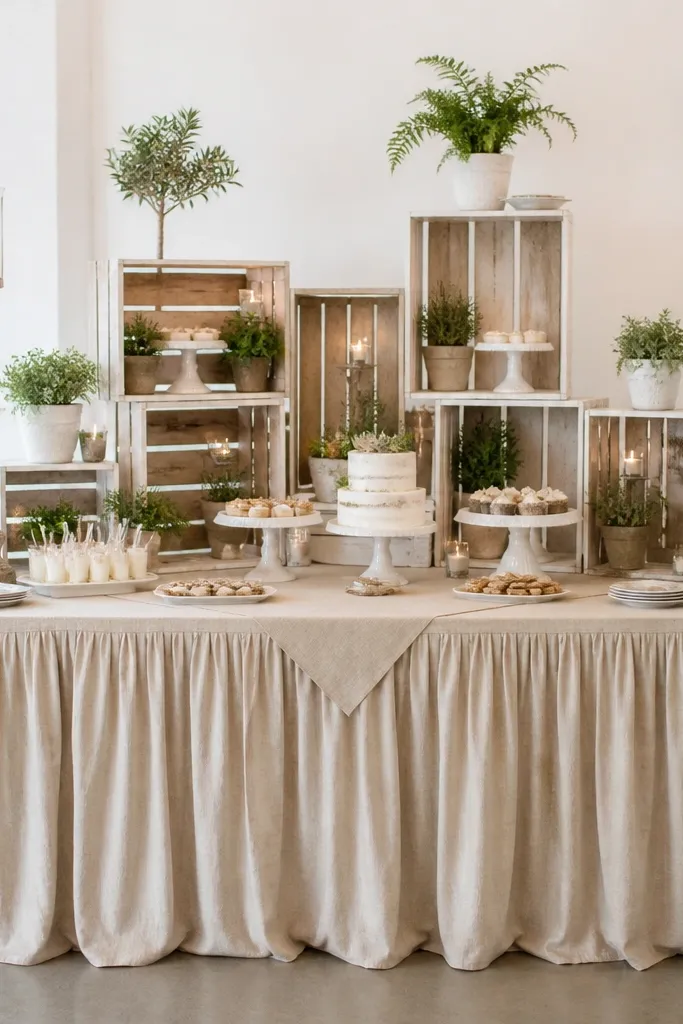
A linen skirt instantly makes a buffet table look like a designed station, and crates add height without buying a tower stand. I like this for rustic weddings because it looks like "real objects" arranged on a farm table, not like manufactured display shelves. The linen color matters - oat or cream hides spills better than bright white. This setup flatters the desserts because it frames them with soft fabric and keeps attention on cake height and cake texture.
Start by measuring the table top height and cutting a linen skirt to hang 2-4 inches above the floor for a clean look. Stack two wooden crates behind the table, with the tallest crate centered behind the main cake stand. Place greenery in small pots on the crate top and add a candle tower or lantern on each side. Finish by laying a neutral runner on the table and spacing cake stands so there's at least 6 inches between the tallest items.
Try thisUse command hooks or a staple gun to secure the skirt at the underside of the table so it doesn't slide when servers lean in.
Common mistakeSkip bright white linen with warm wood - it can look too stark and makes the setting feel less rustic.
15. Overhead Ribbon Ceiling with Jute and Linen Strips
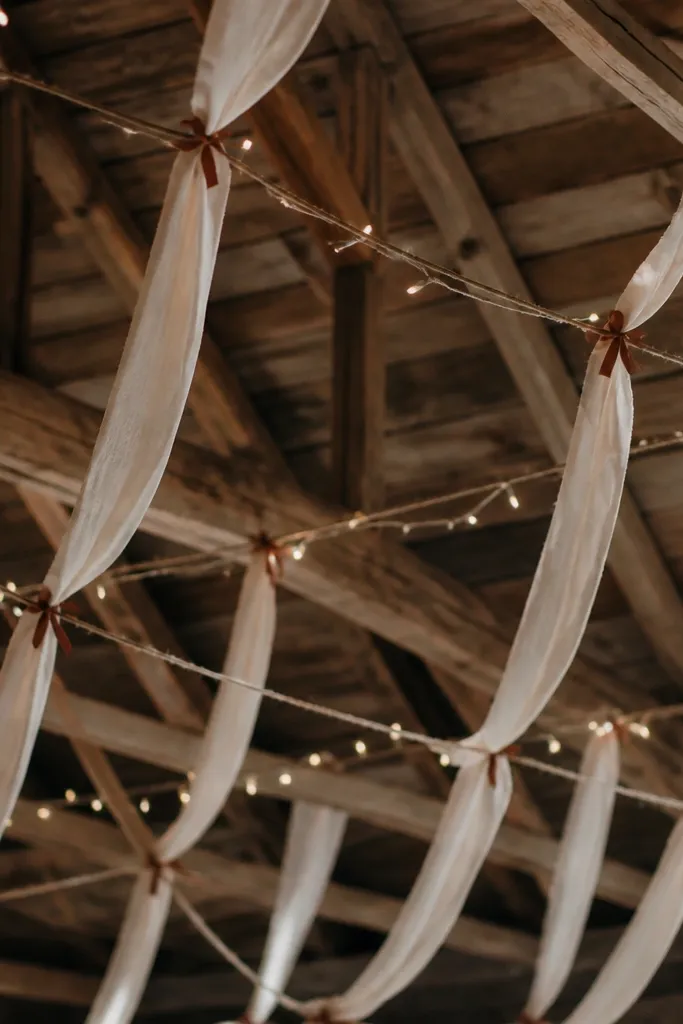
Overhead decor is the fastest way to make a big barn feel intimate because it fills the empty ceiling space. Linen strips look soft and romantic, while jute adds the rustic feel and keeps it from looking too "party." This works best when the ceiling is visible in photos - if your ceremony photos are wide, overhead makes the whole room look styled. The movement of hanging strips also adds life without needing more flowers.
Start by marking a light grid with painter's tape on the floor so you can mirror it overhead. Hang jute ropes at the intersections using adjustable hooks, then tie linen strips to the ropes at staggered lengths (some 18-24 inches, others 28-34 inches). Add small rust ribbon ties at 3-4 intersections so the accent color appears overhead too. Tuck warm fairy lights along one rope line and keep the wiring secured with zip ties or clear tape.
Try thisDo a 10-minute walk-through before guests arrive. Watch from the back row and adjust strip lengths so nothing blocks sight lines.
Common mistakeDon't tie strips at one exact length everywhere - it looks like a rental backdrop.
16. Pinecone Place Setting with Mini Twine Bow
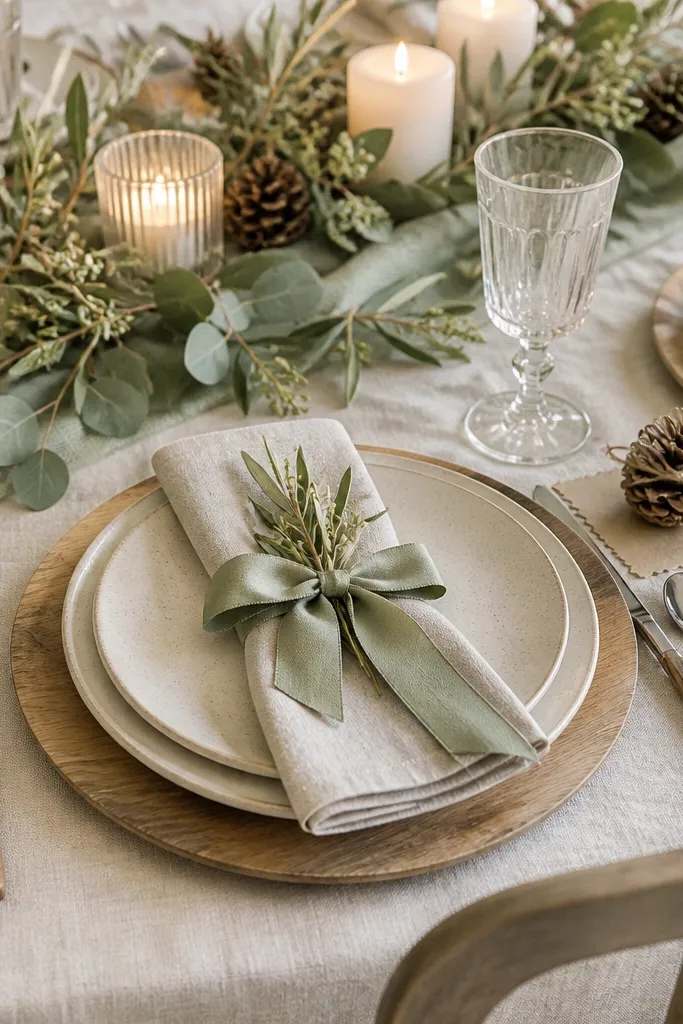
Pinecones are rustic without being theme-y, and small pinecone details make a table feel seasonal without heavy centerpieces. The jute bow keeps the look soft, and the kraft or parchment base makes the pinecone feel intentional instead of random. This works for fall and winter, but it also looks good in early spring when paired with sage greenery. In photos, pinecones add warm texture that shows up even when your lighting is dim.
Start by placing a small piece of kraft parchment or a doily square on each place setting so the pinecone has a landing spot. Choose pinecones that are small and tight, about 2-3 inches tall. Wrap jute twine around the pinecone midline and tie a mini bow on top. Place a sage ribbon-tied napkin next to it so the color repeats, then add a single eucalyptus leaf tucked under the bow if you want one extra detail.
Try thisIf pinecones shed, spray them lightly with matte clear sealer from a distance and let them dry overnight.
Common mistakeSkip big pinecones - they can look bulky next to plates and feel out of scale.
17. Terracotta Pot Vases with Single-Flower Focus
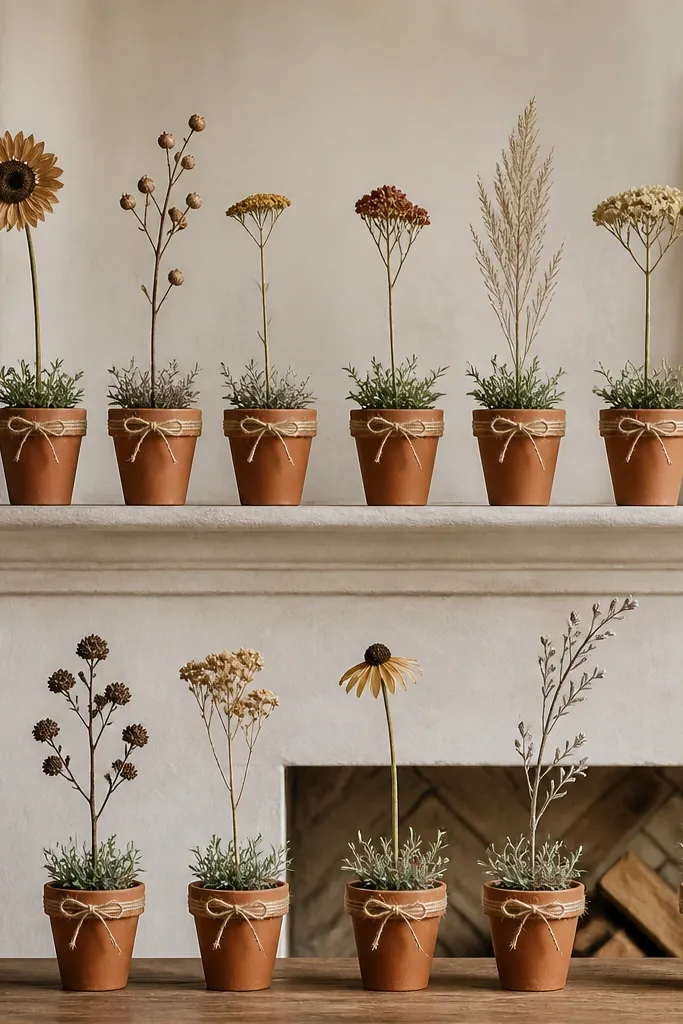
Single-flower focus in terracotta pots looks modern-rustic because each stem gets space to breathe. Terracotta brings an earthy warmth that matches barn wood and complements rust accents. I like this when you want a clean aesthetic without building big bouquets, because it's simple and still looks styled. It also flatters people in photos because the stems frame the table edges without blocking faces.
Start by lining your table edge or mantel with pots spaced about 12-16 inches apart. Fill each pot with floral foam or a small water insert, then place one tall stem upright. Add a few short eucalyptus leaves around the base, then tie jute twine around the pot rim in a single loop. Keep the flowers consistent in color or shape so the display looks cohesive even with different pot sizes.
Try thisCut stems at different heights on purpose - vary by 2-4 inches so the line looks natural, not uniform.
Common mistakeDon't mix too many flower types in one pot line - it turns into a random craft look.
18. Burlap and Lace Mix Cake Table Arch Wrap
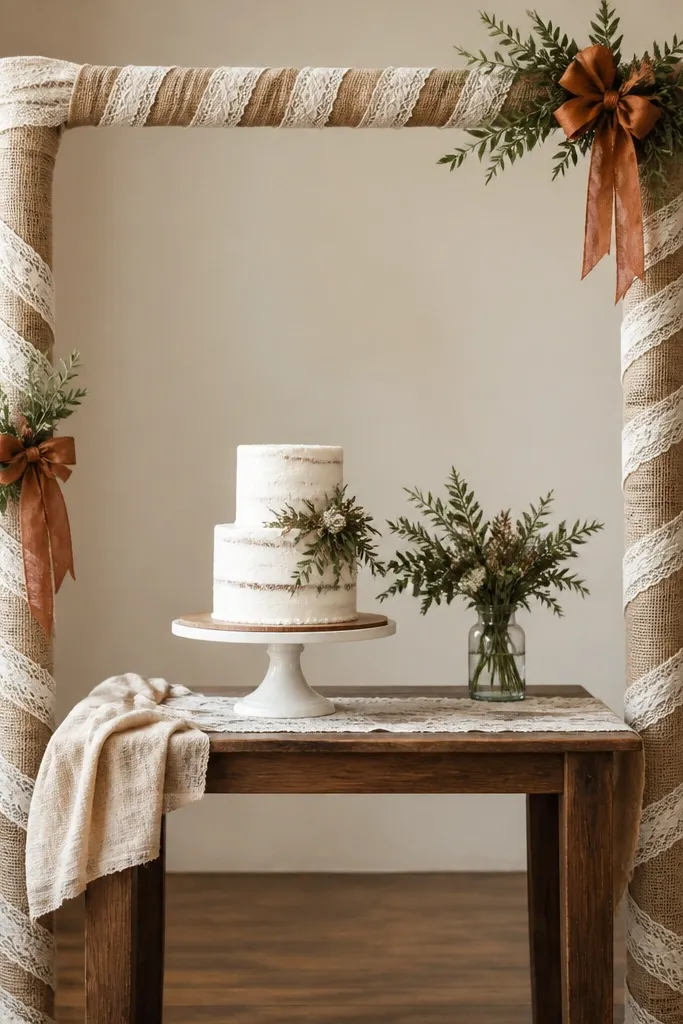
Mixing burlap with lace gives you rustic softness without going full farmhouse cliché. Burlap adds texture and weight, while lace adds lightness and a romantic edge that looks good in close-up cake photos. This style works best when the lace is cream, not ivory, because it blends with burlap warmth. It flatters both classic and boho wedding themes because the materials feel old-world and handmade.
Start by wrapping burlap strips around the arch frame, overlapping slightly so no frame shows. Secure with twine or zip ties behind the fabric so it doesn't show in photos. Layer lace strips on top in vertical panels, spacing them 2-4 inches apart. Add small greenery sprigs at the top corners and tie rust ribbon bows where the lace meets the burlap for a clean focal point.
Try thisPull the lace gently so it drapes with soft waves instead of hanging straight and flat.
Common mistakeDon't use lace that's too wide - it can look costume-like over burlap.
19. Milk-Glass Votives in Rope-Edged Trays
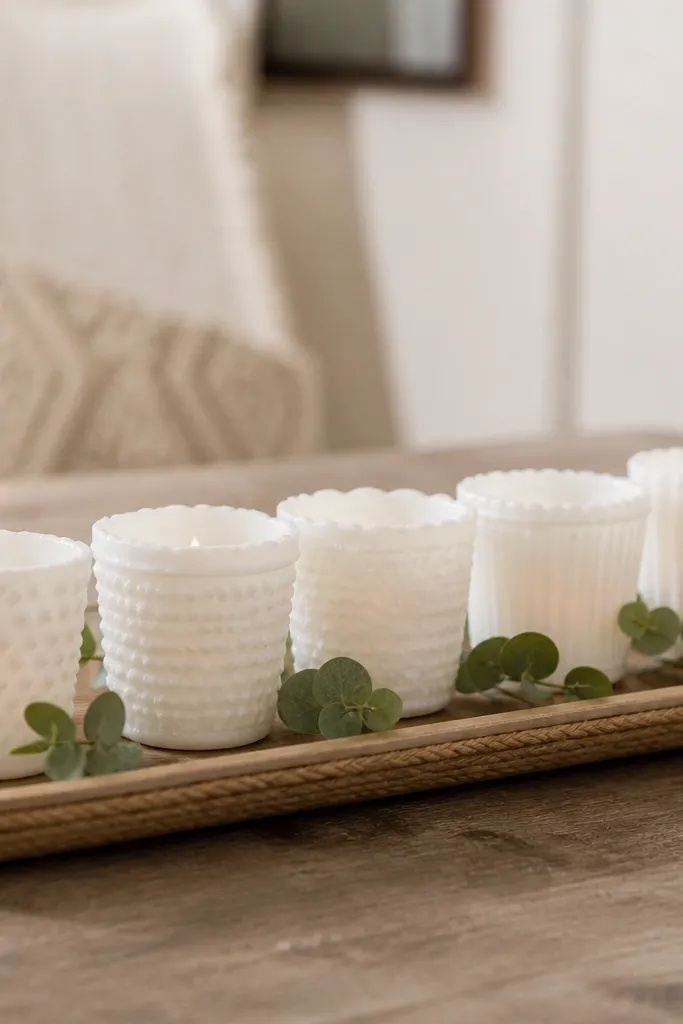
Milk-glass votives look vintage and soft, and rope-edged trays make them feel intentional. The matte white of milk glass works with almost any rustic palette because it doesn't compete with wood grain or greenery. I like this for weddings that want a cozy glow but don't want a lot of flowers. It photographs well because the glass catches small highlights and the rope adds a grounded texture line.
Start by finding a wooden tray that's 18-24 inches long so it fits centerpieces and dessert tables. Wrap the tray edges with jute rope using hot glue, then trim the rope ends neatly at the back. Place milk-glass votives across the tray in a straight line, leaving 1-2 inches between each. Tuck a few eucalyptus sprigs in the center and secure with wire under the tray so nothing shifts when you transport it.
Try thisUse warm LED tea lights inside the votives if you're setting up in a hurry or near fabric drapes.
Common mistakeDon't cram votives too close - tight spacing looks cluttered instead of curated.
20. Dried Flower Confetti Jars for the Exit
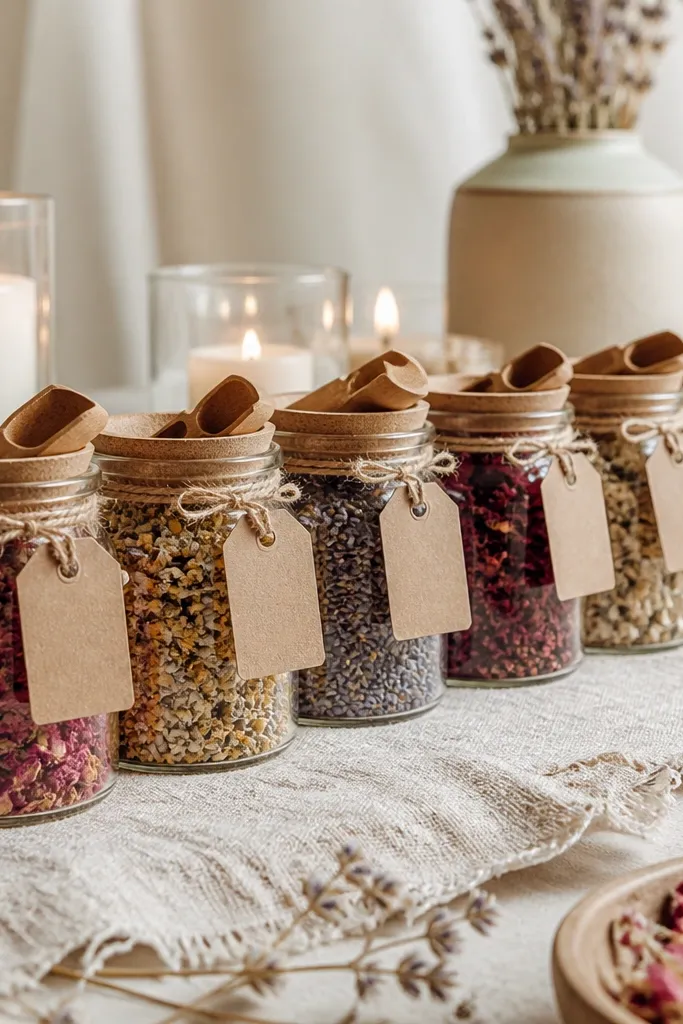
Confetti jars are one of those details that guests notice right before they leave, and they feel very rustic when you use dried petals instead of paper confetti. Jars create a contained, photo-friendly look, and kraft labels keep it grounded. This works for outdoor weddings because dried petals are lighter and feel more natural. It also gives you a "send-off moment" without needing a complicated setup.
Start by choosing jars that are about 4-6 inches tall, then fill each with dried petals and tiny dried herb pieces. Add a kraft label with a simple instruction like "Take a pinch" and tie it with jute twine around the jar neck. Place a small wooden scoop on top so grabbing is easy and mess stays low. Set jars in a line near the exit and add one small candle or lantern behind them to make the corner visible in photos.
Try thisMix petals with a few dried leaves for texture - it looks fuller and photos better than petals alone.
Common mistakeSkip wet or freshly dried petals that still feel damp - they clump and stain fingers.
21. Rustic Photo Frame Board with Burlap Hinges
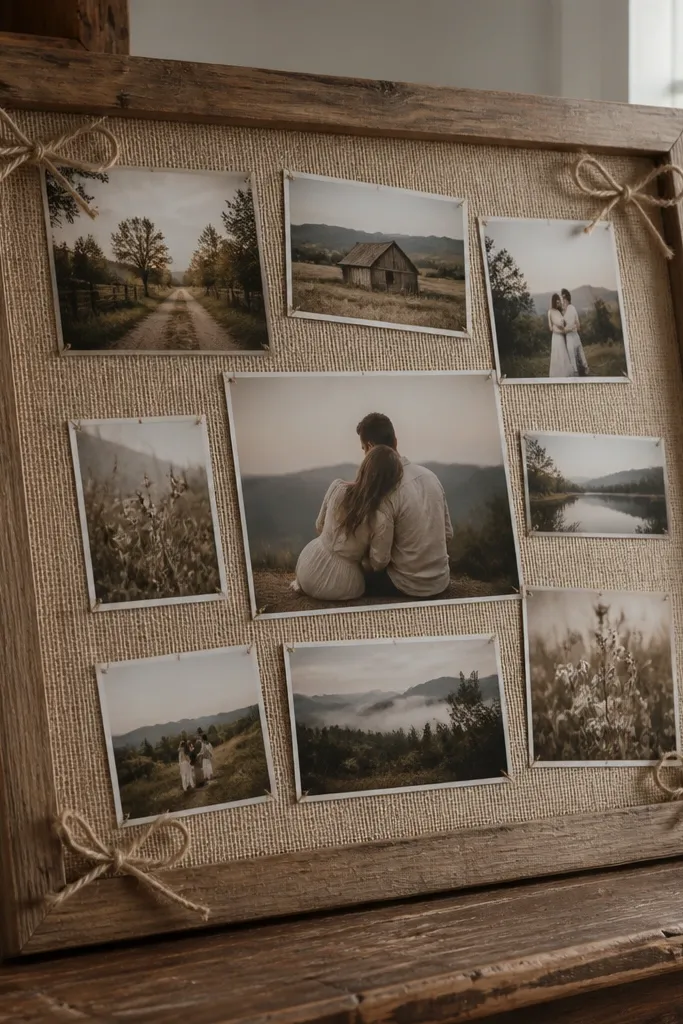
A photo frame board is a practical guest interaction piece that also looks good as decor. The burlap hinges keep it rustic and functional, so you can swap photos or add a message without wrestling with tape. I like this for barns because the wood frame ties into the venue and the burlap adds warmth. The board also flatters couples during photo ops since it creates a clear boundary for faces and signage.
Start with a large wooden frame (around 24x36 inches) and attach burlap panels to the back using a staple gun. Create a hinged flap using ribbon or twine so it opens flat for placing photos. Print photos in a consistent size, then place them inside with small clothespins or corner clips. Tie jute twine bows at the frame corners and add a handwritten date in black marker on cream cardstock taped at the top center.
Try thisIf you want guests to sign, leave a small envelope pocket at the bottom with a pen clipped inside.
Common mistakeDon't use a frame that's too narrow - it looks like a craft project instead of an actual display.
22. Rust-Etched Glass Place Cards with Vine Strings
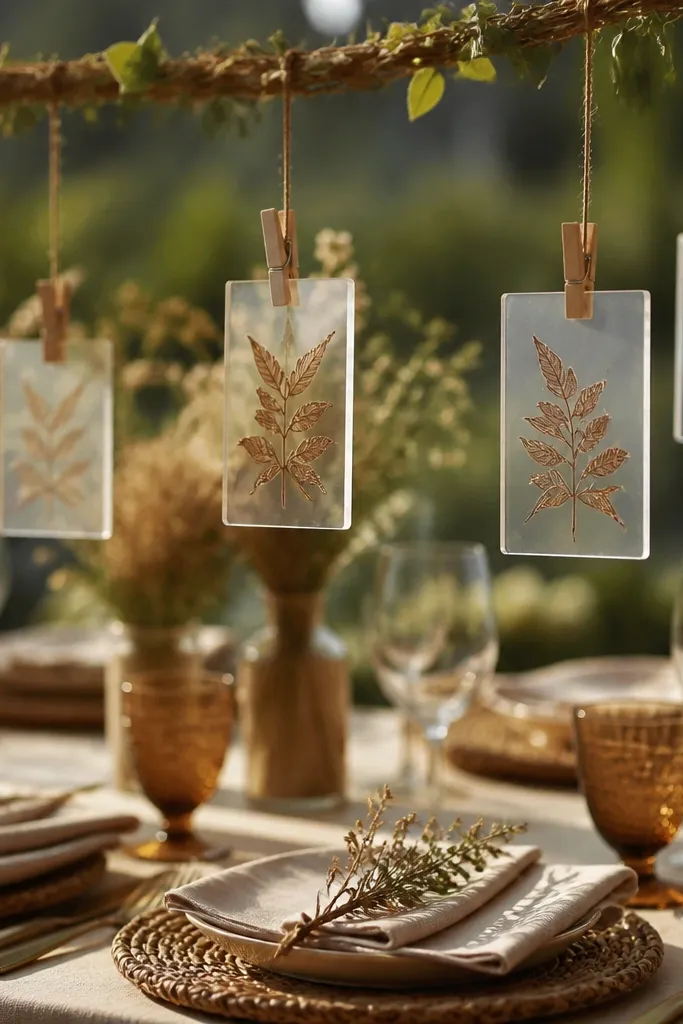
Etched-looking place cards read elevated without losing rustic character, especially when you use a warm rust-brown name color. Hanging them on vine strings keeps the look airy, which is a lifesaver if your tables are already full of centerpieces. This style is flattering in photos because it gives a vertical accent near guests' hands and plates. It also works well for both indoor and outdoor receptions since the cards are lightweight and easy to reposition.
Start by using small acrylic or glass-like cards and apply rust-brown vinyl lettering or a stencil with glass-safe paint. Attach each card to a vine string loop using a tiny wooden or metal clip. Place the clip so the card hangs about 2-3 inches above the plate, then adjust the string length so all cards line up at the same height across the table. Finish by tying a small sage ribbon knot on the string for a color repeat.
Try thisLay all place cards on the table first and adjust string lengths before you attach them to clip - it saves time and avoids rework.
Common mistakeSkip super thin strings that tangle - tangled strings look messy fast.
23. Stoneware Bud Vases with Sage Sprig Lining
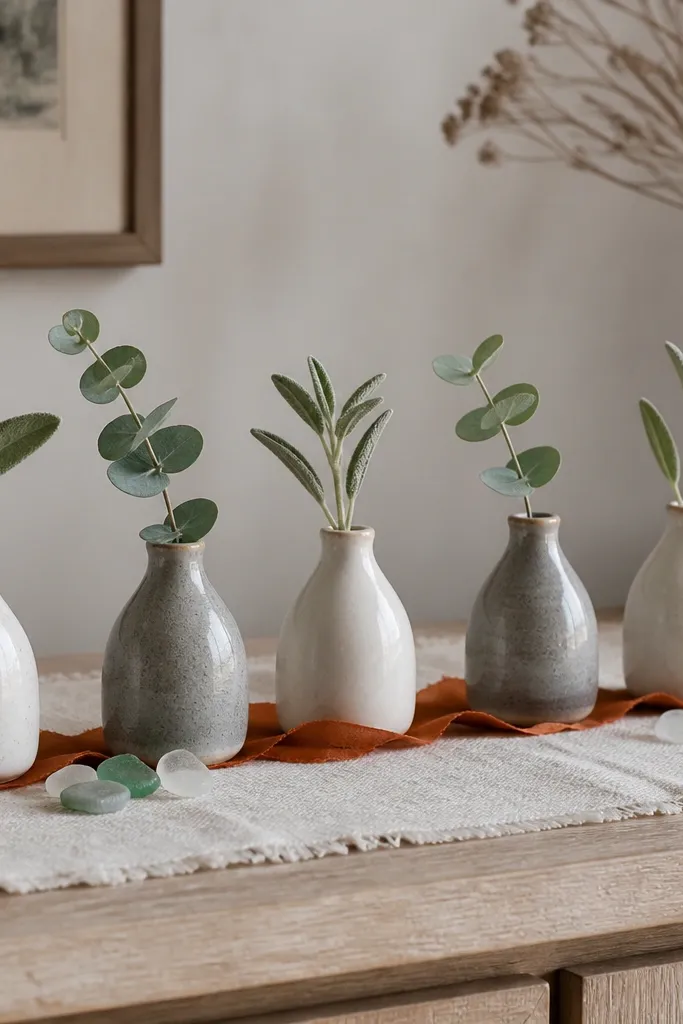
Stoneware bud vases feel grounded and grown-up, and they work well when you don't want obvious "wedding flower" look. Sage sprigs keep the palette calm and make the decor look intentional even if the flowers are minimal. This setup flatters people who prefer a clean, modern rustic look because it stays simple and doesn't crowd the room. In photos, stoneware has soft texture and doesn't glare like shiny glass.
Start by choosing 8-12 bud vases in two tones: off-white and gray. Place them on a linen runner centered on the table or sideboard, spaced about 8-10 inches apart. Add one sprig per vase and trim them so the tops are within 1-2 inches of each other. Tie a thin rust ribbon across the center of the runner and tuck a few eucalyptus leaves under the ribbon so the accent touches the decor.
Try thisUse florist foam inside each vase if you're transporting them. It keeps sprigs upright without water mess.
Common mistakeDon't overfill vases - empty negative space makes the stoneware look intentional.
24. Drape-and-Shadow Backdrop with Linen Panels
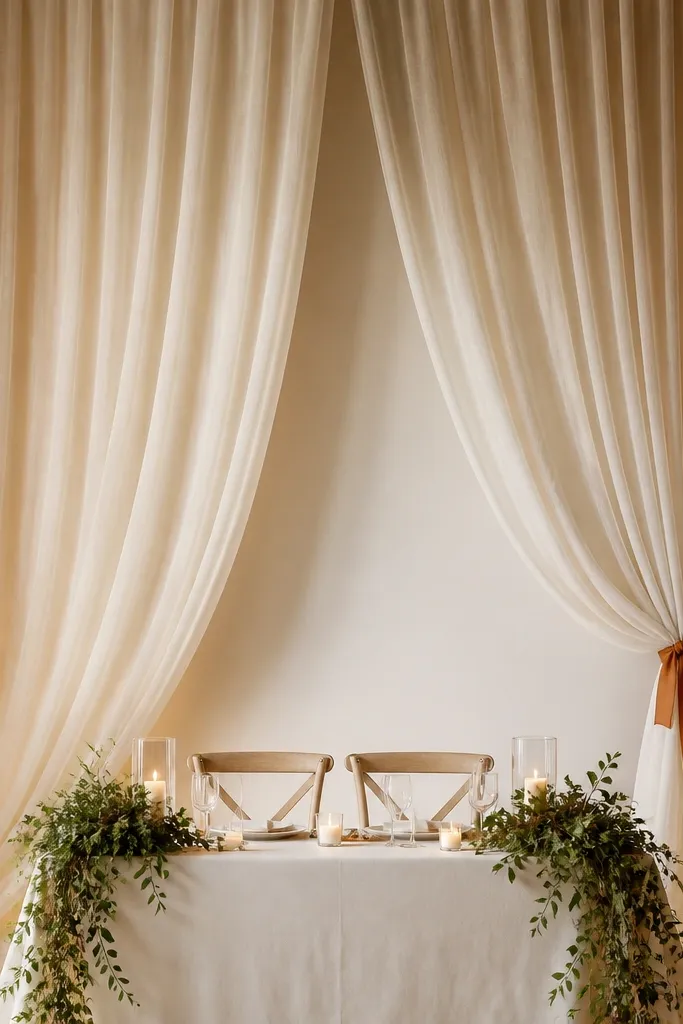
Linen drapes create that "soft wall" effect that makes rustic weddings feel romantic without adding a ton of objects. The folds catch light and hide minor wall imperfections, which matters in barns with scuffed paint or plywood. I like drapes when the couple wants a clean ceremony or sweetheart photo background. The warm fairy lights keep it cozy, and the rust ribbon tie gives you a clear accent point that matches table decor.
Start by hanging two long curtain rods or tension rods, then attach cream linen panels with rings or clip hooks. Pull each panel to create a deep fold pattern, and secure one panel with a rust ribbon tie about halfway down. Add warm fairy lights along the edge of the backdrop - not across the whole fabric - so you get shadow and glow instead of a flat sparkle. Place greenery at the base corners of the sweetheart table and keep it low so it doesn't block the drape folds.
Try thisSteam linen and do the final drape pull right before the ceremony. Linen wrinkles show up fast under barn lighting.
Common mistakeSkip sheer white linen - it can look like a tent curtain and lose the rustic warmth.
25. Rustic Welcome Table with Burlap Skirt and Wire Basket
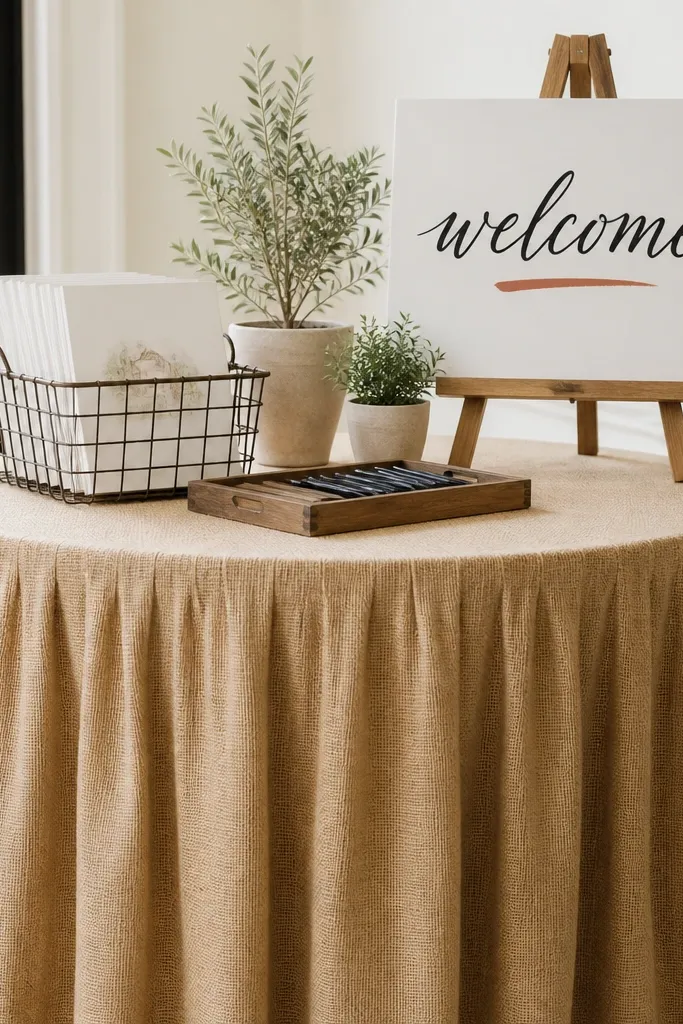
A welcome table is where guests decide whether your wedding feels organized, and rustic materials make that organization look charming. Burlap skirts hide table legs and instantly make the station feel finished. Wire baskets keep paper from looking wrinkled, and potted plants add life without big arrangements. This style fits beginners because you can assemble it in under an hour with basic supplies and small signage.
Start by choosing a table and adding a burlap skirt that covers the legs and hangs 1-2 inches above the floor. Place a wire basket near the center for programs and a small wooden tray to hold pens and extra RSVP cards. Set two mini potted plants on either side, then add a welcome sign on an easel at the back. Finish by wrapping a thin jute twine line around the front edge of the table skirt at one point so the station looks tied together.
Try thisPut a spare pen and extra RSVP cards in a zip bag inside the tray. Guests will use it, and it keeps the table from getting messy.
Common mistakeDon't clutter the top surface - too many items makes the station look like a storage table.