1. Over-the-door bride-to-be banner with a satin tie-back
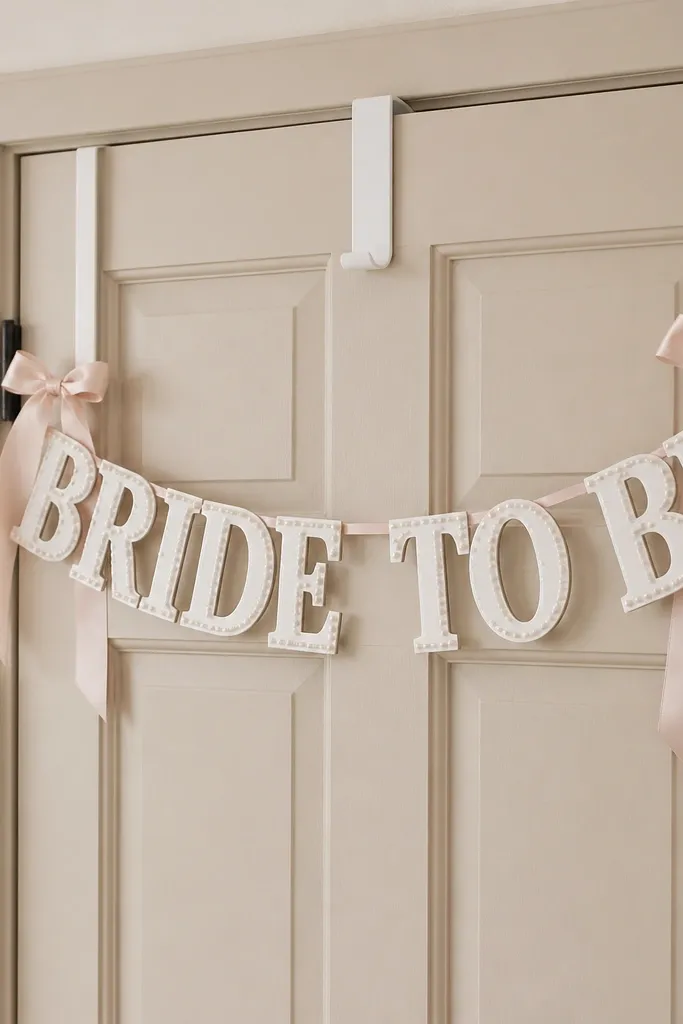
This setup works because the door is wasted space that doesn't require floor clearance. I like thick cardstock letters backed with white paper so the banner doesn't look flimsy when light hits it from a lamp. Choose blush satin ribbon with a soft sheen - it reads "bridal" without looking sparkly-crazy in photos. It flatters most rooms because it frames the entry area and gives you a clean vertical line, regardless of wall size. If your skin tone in photos runs warm, blush + champagne will harmonize; if it runs cool, keep the ribbon more pink and add a small amount of ivory.
Start by measuring the door width and cutting your banner to sit with 2-3 inches of breathing room on each side. Hang a small over-door wreath hanger or hooks so the banner is centered and stays flat. Tie two satin loops on the left and right, then add a 6-inch ribbon tail on each side so it looks styled, not accidental. Finish by pinning a few tiny pearl picks along the lower edge of the letters with clear tape so they don't snag on coats.
Try thisUse double-sided removable tape on the banner backing so it doesn't sway when you open the door.
Common mistakeAvoid thin glitter paper letters - they bend and look cheap under flash.
2. Bedhead fabric backdrop using a 2-inch tulle ruffle strip
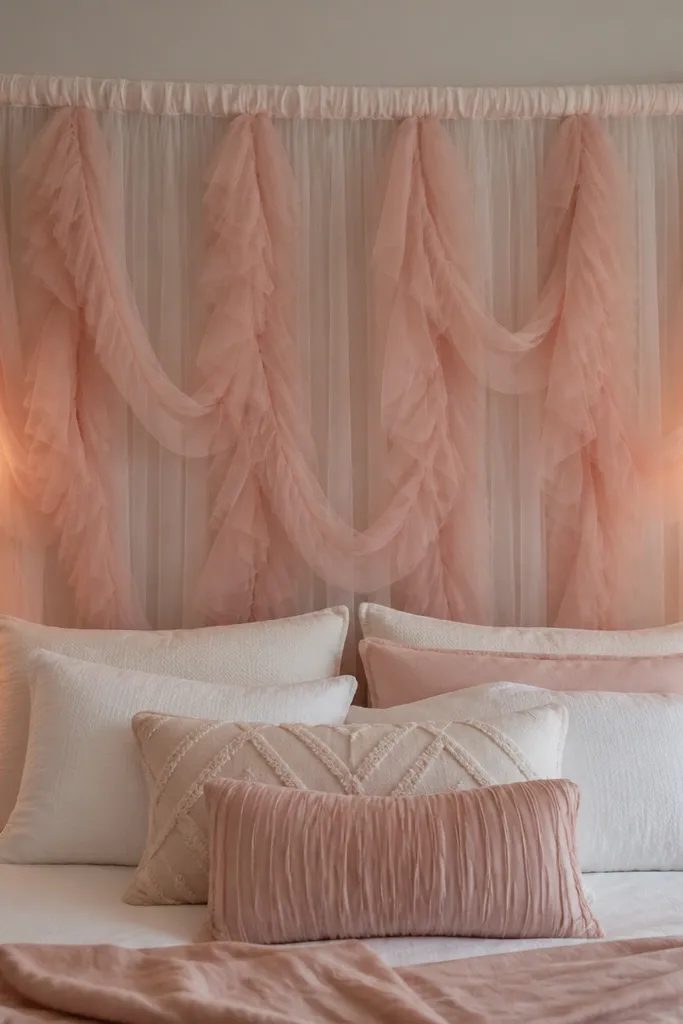
A bedhead backdrop is the most reliable way to make a small room photograph like a suite. The 2-inch ruffle strip gives movement without piling on bulk, so your room stays open while the photo looks full. I use sheer tulle over a solid white backing fabric because it eliminates patchy light spots. This flatters everyone - it makes skin look smoother in photos by diffusing harsh shadows. If you have a darker wall, use a white backing panel so your decor doesn't blend in.
Start by placing a tension rod above the bed or mounting two small wall hooks at the same height. Drape a solid white fabric panel behind the tulle so you don't see the wall. Tie a 2-inch-wide tulle ruffle strip in short sections across the rod, leaving 1-2 inches of gap between sections for a layered look. Then add blush tulle in longer strips from the center outward so the backdrop fans slightly.
Try thisSteam the tulle for 20-30 seconds before hanging - it drops cleaner and looks "expensive" on camera.
Common mistakeSkip heavy organza layers - they catch on bed sheets and look tangled.
3. Corner shelf styling with a bride-to-be keepsake tray
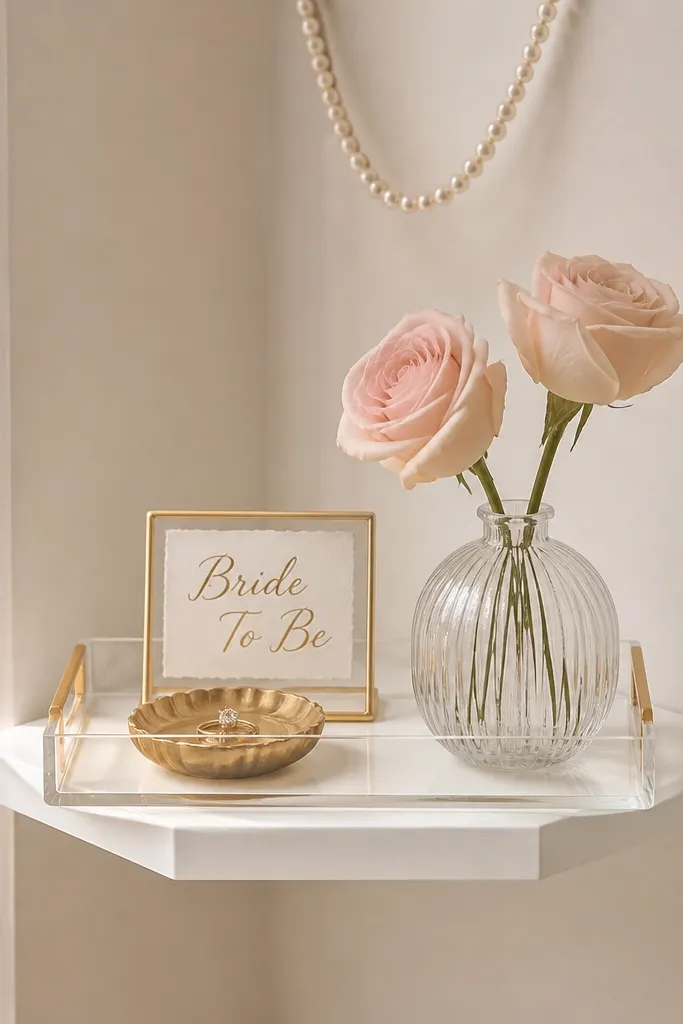
Corner shelves are perfect small space bride to be decoration ideas because corners are usually blank and ignored. I keep this look tight: one tray, one small floral, and one sign. The acrylic tray is key because it stays visually light and reflects warm lamp light, which makes the shelf feel bigger. This setup flatters petite rooms because it doesn't block sightlines; it sits upward and stays narrow. For brides with cooler undertones, choose white flowers and pink ribbon; for warmer undertones, use champagne ribbon and peachy blush petals.
Start by wiping the shelf and arranging a clear acrylic tray centered on the top layer. Place a gold ring dish inside the tray, then add a folded ribbon bow on one corner so the styling looks intentional. Add a small bud vase with two roses or a single statement stem capped at 6-7 inches tall. Drape a mini string of pearls behind the tray so it frames the items without filling the whole shelf.
Try thisMeasure your shelf depth first and keep the tray at least 1 inch away from the front edge for a neat photo line.
Common mistakeDon't add more than one type of metallic (gold OR silver) - mixed metals read messy in small rooms.
4. Window ledge bridal glow with battery fairy lights and tulle
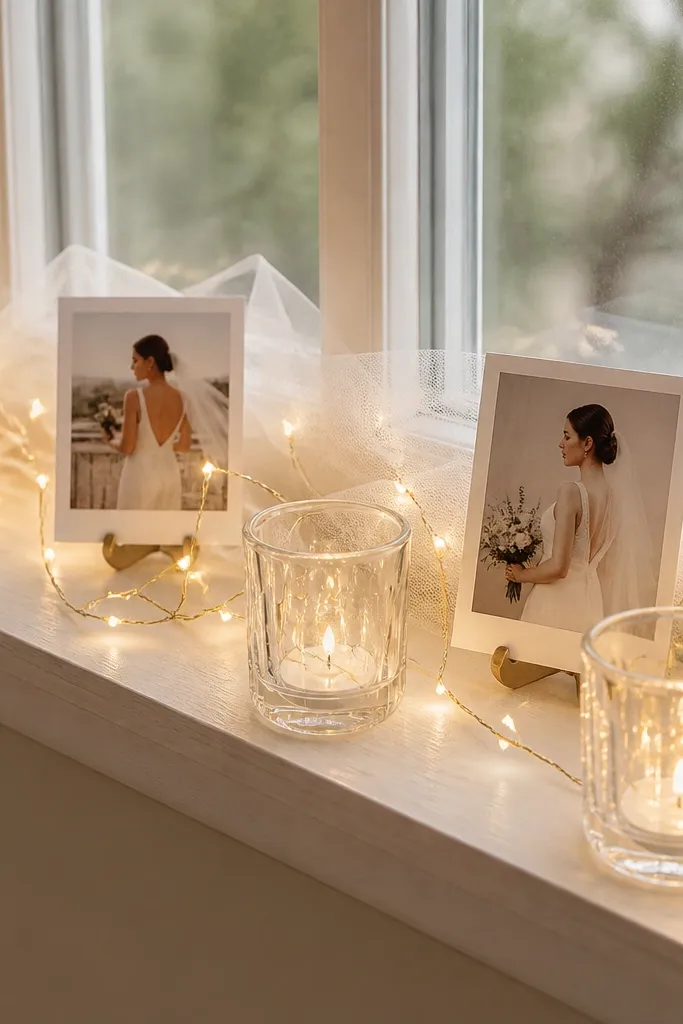
If your room has a window, this is the fastest way to add brightness without adding bulk. Battery fairy lights give you warm glow for evening photos, and tulle behind the lights softens the glare. I use clear glass votives because they reflect light in small, flattering hotspots. This looks good for almost any wall color because it brings its own warm light source. If your wedding palette is champagne or nude, keep the tulle ivory and the lights warm white, not cool blue.
Start by testing the fairy lights near the window so the cord doesn't tangle with blinds. Tuck a 10-12 inch strip of ivory tulle behind the lights so it forms a soft background. Place 2-3 clear votives in a line, then build height by adding mini photo stands behind the center votive. Finish by sliding the "Bride To Be" cards so they angle slightly toward the room.
Try thisUse warm white lights at 2700K if you can - the glow reads bridal, not dorm-room.
Common mistakeAvoid big paper lanterns on the ledge - they block the window and make the room feel smaller.
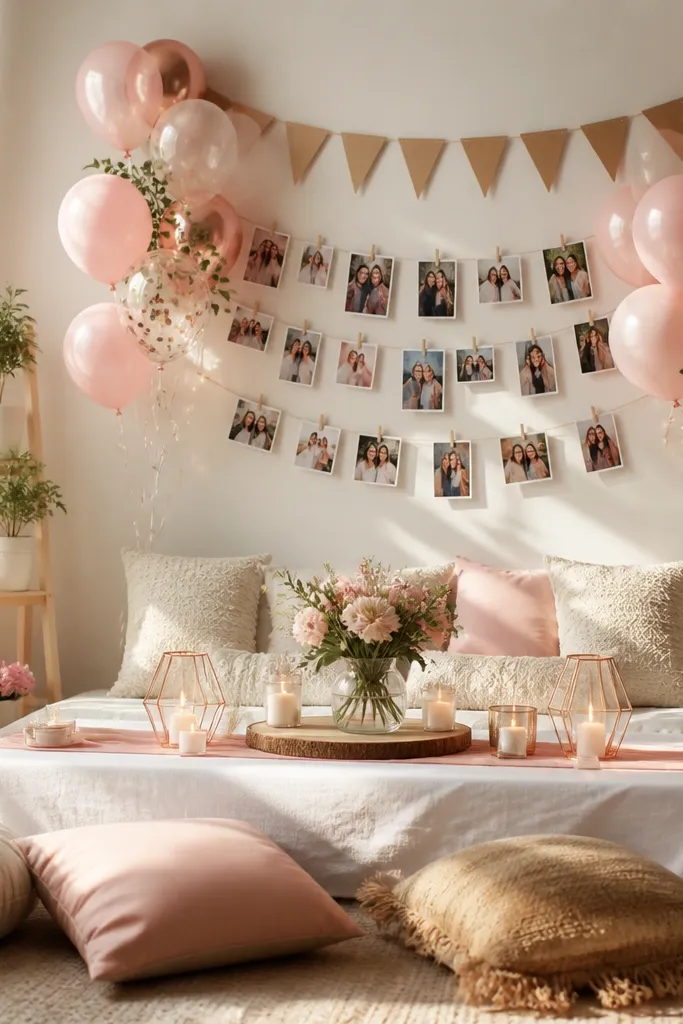
5. Photo strip wall using mini frames and removable washi tape
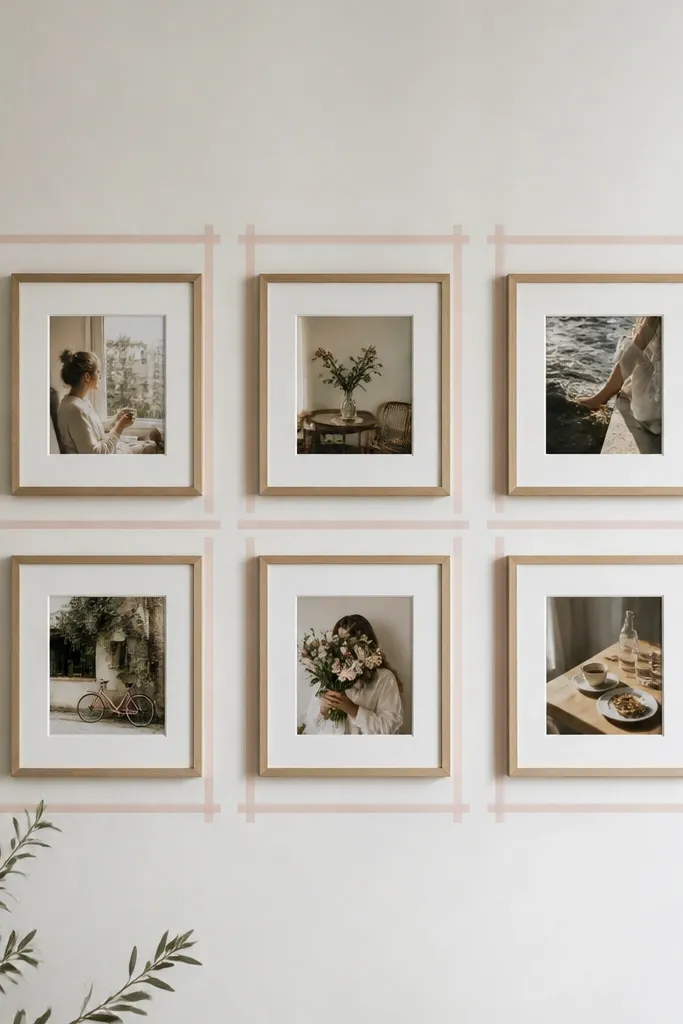
A photo strip turns "decor" into something personal, and it's one of the best small space bride to be decoration ideas because it uses wall real estate. I've put this in bedrooms where there was literally no room for a big backdrop, and it still looks styled because the frames create a grid rhythm. Mini frames keep the wall light, and white mats help photos pop without competing with florals. This works for all skin tones in photos because the frame mat reflects soft light. If you want it to feel bridal, add one frame with a "Bride To Be" card at the center.
Start by choosing 6 photos and printing them with a white border so you don't need extra editing. Lay them out on the floor in the exact grid you want: 3 across and 2 down is the cleanest for small walls. Use removable washi tape to create tiny borders around each frame, then hang the frames using picture hooks rated for your wall type. Finally, place a "Bride To Be" card in the center top frame and keep all other frames candid to avoid clutter.
Try thisMatch the frame finish across all pieces - black + gold mixed frames look chaotic in tight spaces.
Common mistakeSkip heavy foam board backing on the wall - it curls and makes frames look crooked.
6. Mini balloon cluster on a slim stand with a single metallic layer
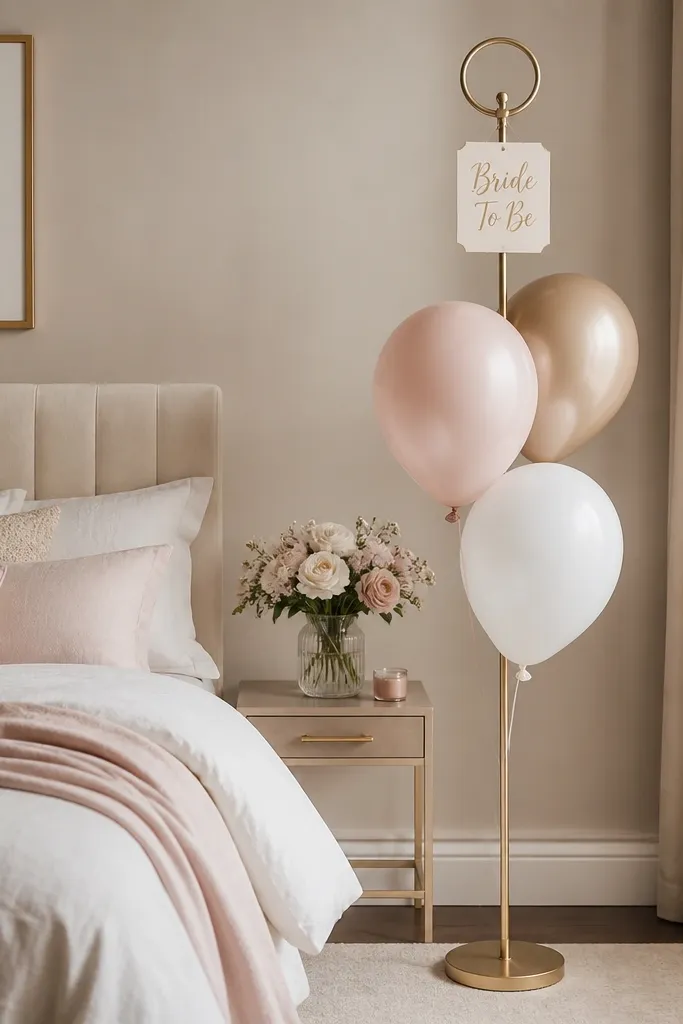
Balloons are tricky in small rooms, but a mini cluster adds instant party energy without eating the floor. I keep it to 3 latex balloons plus 1 metallic so it looks intentional. The metallic balloon behind the cluster gives depth on camera while the latex balloons keep the palette soft. This setup flatters the bride because the colors sit near your face in photos and create a gentle contrast against skin. If you're photographing in a dim room, choose champagne metallic - it looks warmer than rose gold under flash.
Start by buying a slim balloon stand or a weighted base that's under 10 inches wide so it doesn't crowd your walkway. Inflate 2 white and 1 blush latex balloons, then add 1 metallic champagne balloon slightly higher behind them. Tie them together with clear fishing line or thin ribbon so the cluster stays tight. Attach a small "Bride To Be" sign with a ribbon loop and keep the sign facing outward.
Try thisUse a weight that's heavier than you think - in small bedrooms, wobble looks messy fast.
Common mistakeDon't add helium to every balloon - too many floating pieces block doorways and look tangled.
7. Wall-mounted ring dish corner with faux flower sprigs
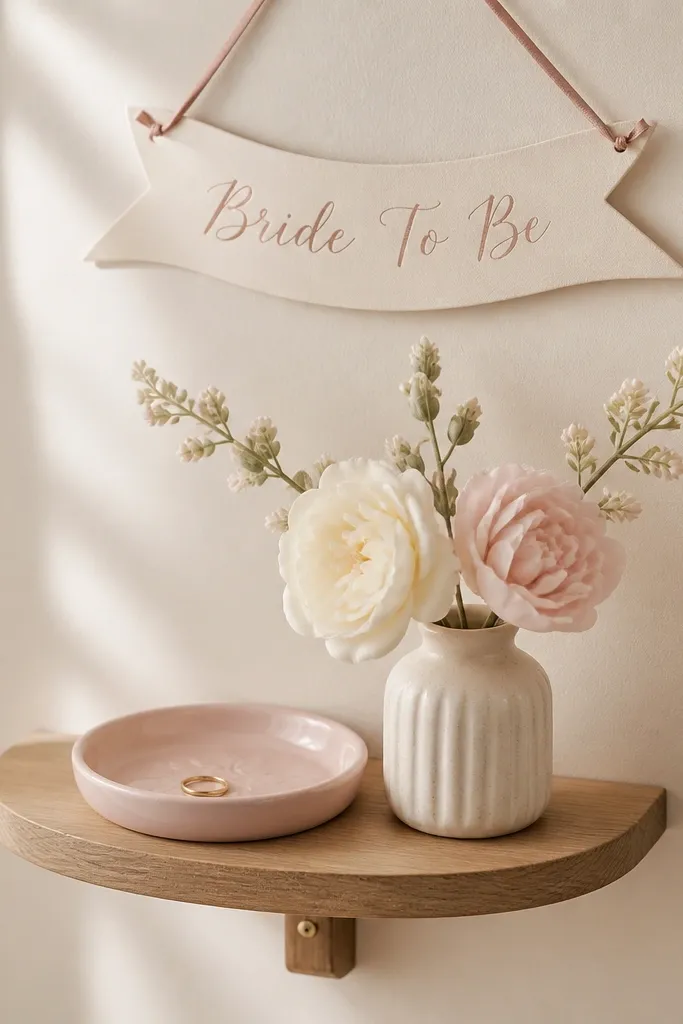
This is decoration that also solves a real problem: where do you put rings and little keepsakes when you're getting ready? A tiny shelf gives you a "station" without taking up your nightstand. I use a ceramic dish because it looks crisp and won't scratch like metal. Faux flower sprigs add softness without the mess of water in a small room. It works for all skin tones because the colors are neutral and light. If your room has dark wood furniture, choose cream and blush to keep it bright.
Start by choosing a shelf width of 4-6 inches so it stays narrow. Mount it 48-54 inches from the floor so it lands around eye level when you stand. Place the ring dish centered, then tuck two faux sprigs behind it so the stems create a gentle V shape. Hang a short ribbon banner above the shelf with two pushpins or removable hooks so it doesn't sag.
Try thisDust the faux stems with a soft brush before you hang it - it keeps the petals looking fresh.
Common mistakeSkip thick foam flowers - they cast harsh shadows and look flat in photos.
8. Satin ribbon garland across the dresser mirror
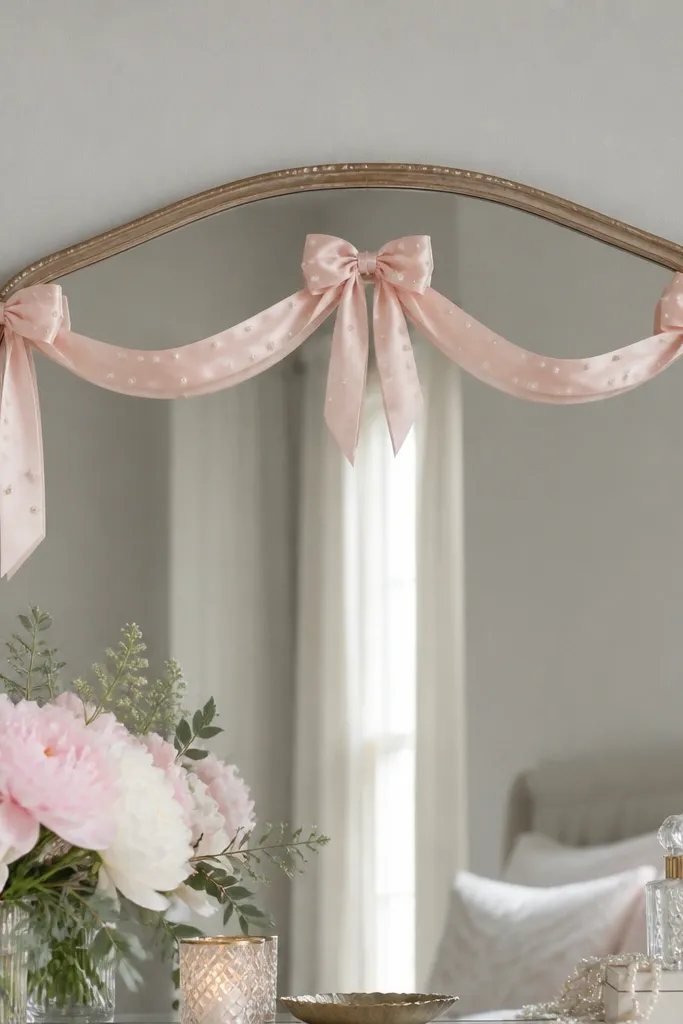
This is one of my favorite small space bride to be decoration ideas because it gives you a bridal "moment" right where you do hair and makeup. Satin ribbon reads smooth and hangs cleanly, so it doesn't look like craft-store mess. The mirror multiplies the effect, making the room feel bigger without adding objects. For photos, the mirror catches light and makes the ribbon glow softly. If your room lighting is cool, choose warmer blush satin instead of icy pink.
Start by measuring the mirror width and cutting ribbon lengths that leave 2 inches of extra on each side. Drape ribbon across the mirror top and tie three small bows at even intervals (left, center, right). Add pearl dot picks along the center ribbon line, securing them with clear tape under the ribbon so they don't fall. Finish by tucking the ribbon ends behind the mirror frame so there's no visible messy knot.
Try thisUse double-sided removable mounting squares for the pearl picks so you can remove it after the party.
Common mistakeAvoid chunky rosettes - they look bulky on mirror tops and can block your reflection.
9. Tension rod mini backdrop behind the vanity chair
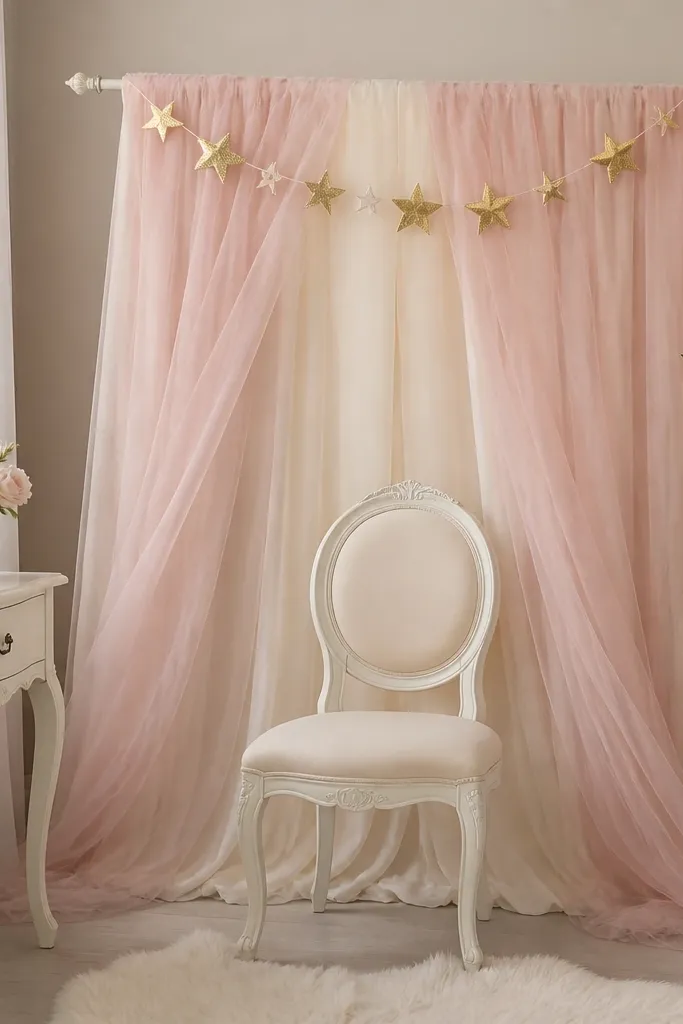
If your bed is too small to place a big backdrop, do it behind the chair where you'll sit for photos. A tension rod is fast, and the fabric panel makes a clean background that doesn't require wall mounting. I keep the height to about 36 inches behind the chair so it frames your upper body without swallowing the room. The ivory + blush combo makes skin tones look warmer and reduces harsh shadows from overhead lighting. This is especially flattering if you have a narrow room because the background is behind you, not around you.
Start by placing the vanity chair and measuring the space behind it. Install a tension rod between two walls or between wall and trim at about 6-8 inches above your head when seated. Hang a 36-inch-wide ivory fabric panel first, then add blush tulle in strips that fall just above the chair back. Pin a mini gold star garland along the top edge using small clothespins so it looks evenly spaced.
Try thisKeep the backdrop centered so your face sits in the empty space - it makes photos look intentional.
Common mistakeDon't hang decor too low - it shows in lap photos and makes your setup look cramped.
10. Floating shelf plus tassel fringe runner
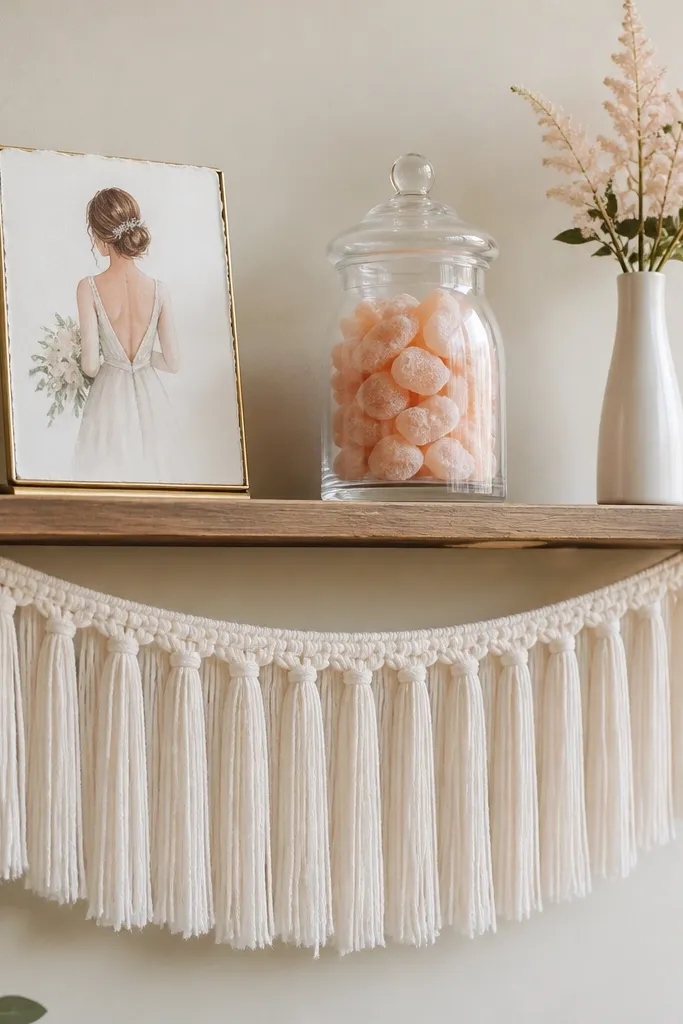
This look uses vertical motion, which is the secret weapon in tiny rooms. The tassel fringe runner makes the shelf feel dressed even when you don't have a lot of surface area. I use ivory fringe with soft tassels so it moves gently and doesn't look like a costume. It flatters because it pulls attention upward and creates a frame around your decor items. If your room has patterned walls, keep tassels plain and let the shelf items carry the color.
Start by installing a narrow floating shelf 6-8 inches above your dresser or desk. Attach tassel fringe strips to the underside with small zip ties or removable tape, keeping the fringe length around 10-12 inches. Place a small "Bride To Be" sign on the back edge of the shelf, then add one jar and one vase so the space stays airy. Finish by arranging the items so they form a triangle: sign at back center, jar left, vase right.
Try thisPress the tassels flat for a minute with a steamer so they hang in one direction for photos.
Common mistakeAvoid mixing tassel colors - ivory fringe with bright neon tassels looks off immediately.
11. Clear acrylic heart garland above the nightstand
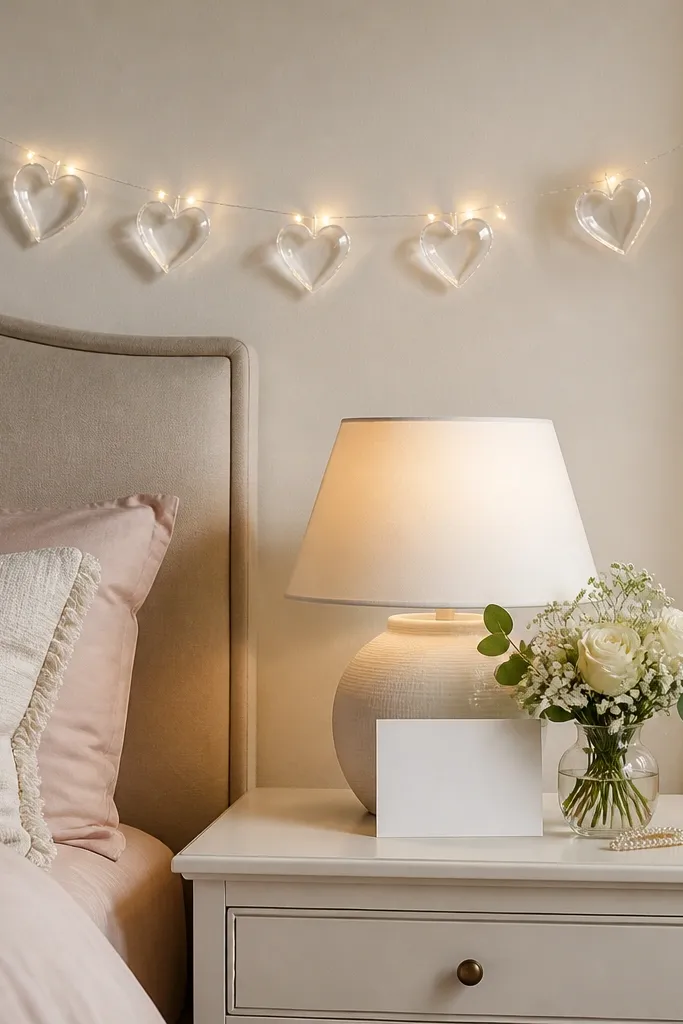
Transparent decor is magic in small rooms because it doesn't block your line of sight. Clear acrylic hearts catch the light and add sparkle without the mess of glitter. I thread tiny warm lights through the garland so the hearts glow gently rather than looking like plastic ornaments. This setup is flattering because it creates a soft halo effect behind you in bedside photos. For brides with darker hair, the clear hearts show up more clearly against the background.
Start by selecting a garland length that spans the width of your nightstand plus 2-3 inches. Hang it with removable hooks or a thin command strip so it sits 8-10 inches above the lamp. Thread warm LED fairy micro-lights through the garland if it's designed for it, or tuck the lights behind the hearts. Place a small "Bride To Be" card upright on the nightstand so it visually ties the garland theme together.
Try thisTest the LED brightness in the evening - too bright looks harsh, too dim looks invisible.
Common mistakeSkip bulky lanterns - clear acrylic hearts are light; heavy pieces make the nightstand look crowded.
12. Mini floral wreath on the bed frame with a ribbon bow
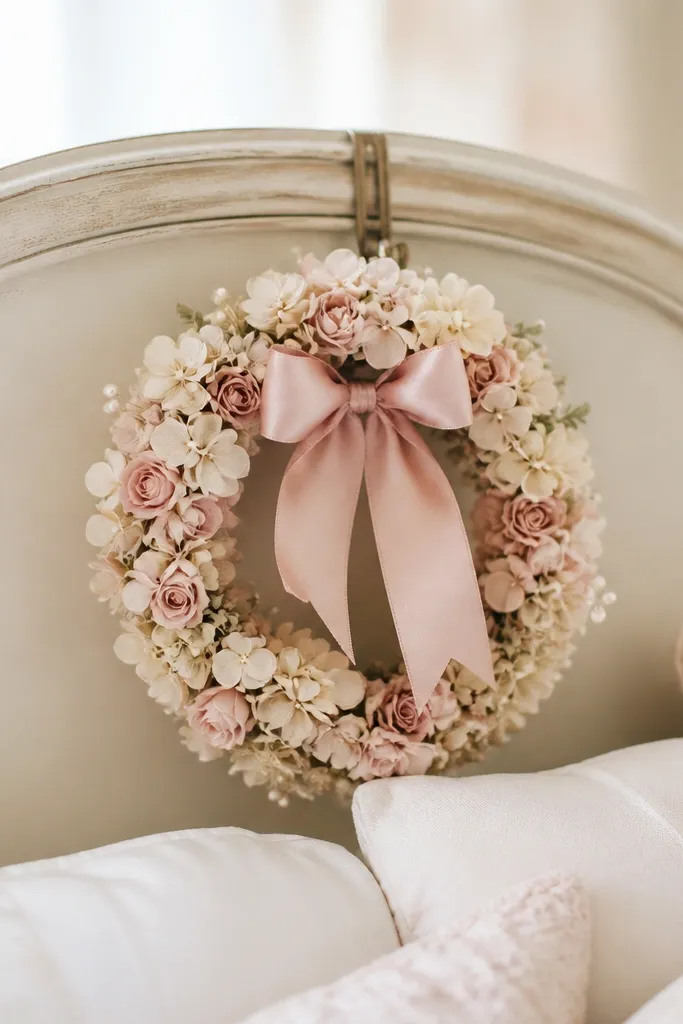
When floor space is tight, attach your "statement" to the bed frame. A mini wreath gives a bridal look that reads clearly in photos without covering your pillows or making your bed look chaotic. I use faux florals with a matte finish because shiny petals look plasticky in flash. The blush + cream palette works across skin tones and doesn't clash with most wall colors. If your bedspread is patterned, keep the wreath simple and let it act like a focal point.
Start by choosing a wreath diameter around 10-14 inches so it stays small and doesn't overtake the headboard. Clip the wreath to the top rail using strong binder clips or floral wire wrapped around the frame. Add a satin ribbon bow in the center and trim the tails to about 6-7 inches. Tuck pearl picks into the outer edge of the wreath so they catch light when you move.
Try thisUse a lint roller on the wreath before you hang it - dust makes faux flowers look older fast.
Common mistakeAvoid oversized 18-inch wreaths - they crowd the headboard and hide your bedding.
13. Stair-step table runner look for a narrow console
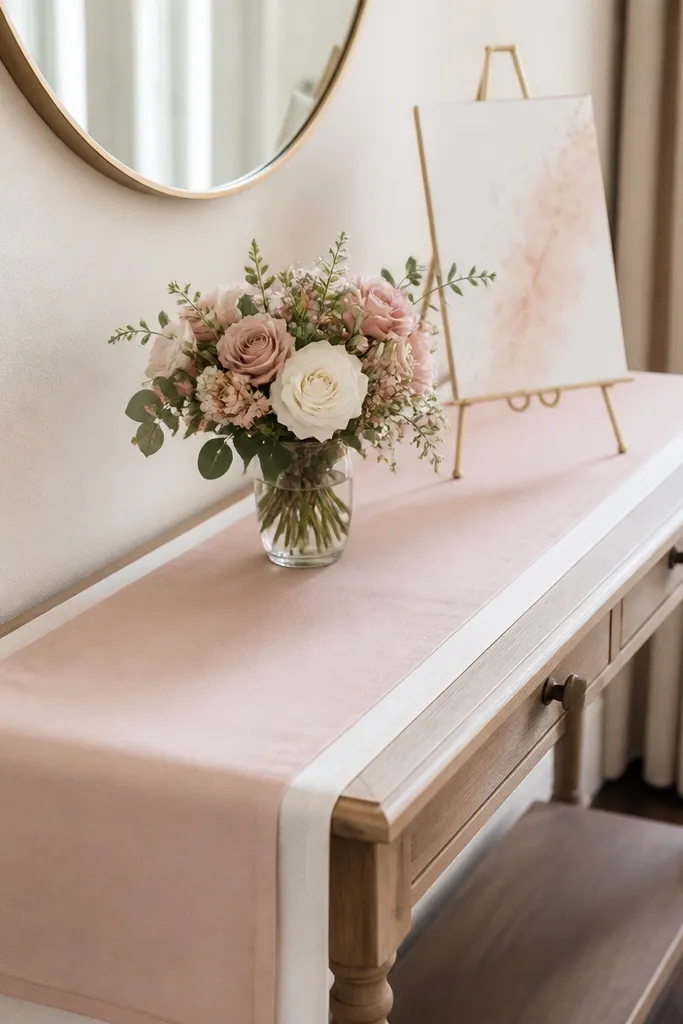
If you have a slim console or dresser, this is how you make it look styled without taking up width. The stepped runner creates depth so the table doesn't look empty, and it gives you a photo base for the sign. I use matte white fabric for the base and a blush satin runner on top so the colors stay soft but the texture shows. This flatters rooms with low light because satin catches gentle highlights. It works best in narrow spaces because you're using layering along the length, not stacking wide items.
Start by choosing a runner length that reaches 4-6 inches past the console ends. Lay a matte white runner flat, then place a blush satin runner on top so it's centered and overlaps by 6-8 inches. Put a small bouquet in a slim vase at the center, keeping the bouquet height under 10 inches. Place the "Bride To Be" sign on a gold easel at the back so it sits above the flowers and doesn't get blocked.
Try thisSteam the satin runner so it drapes smoothly - wrinkled satin reads messy in close photos.
Common mistakeAvoid tall candle stacks - they block the sign and crowd the surface.
14. Dresser lamp shadow frame with sheer organza panel
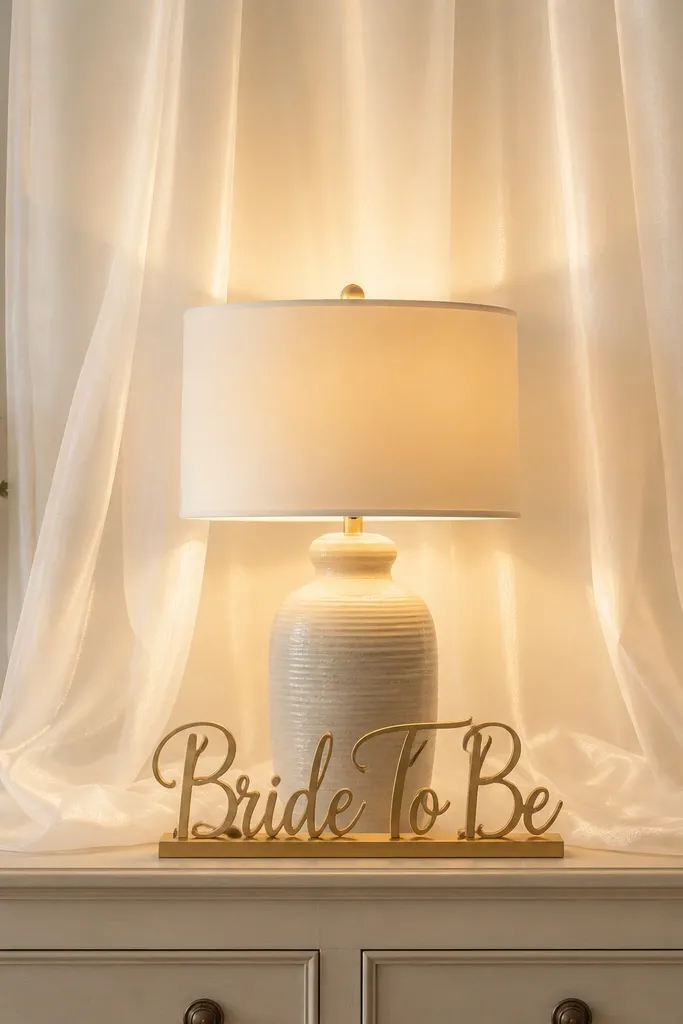
This one is sneaky-simple: organza behind a lamp creates a glowing frame without adding more objects. The sheer fabric diffuses the bulb light, so your decor looks soft and bridal even in dim bedrooms. I use ivory organza with a slight body, not thin tulle, so it holds shape and doesn't cling to the lamp. It flatters because the glow reduces harsh shadows under your chin in getting-ready photos. For cooler rooms, use warm bulbs so the glow looks creamy, not blue.
Start by placing the lamp on the dresser and attaching a 24-30 inch organza panel behind it using removable command hooks. Let the organza drape so it hangs like a vertical curtain, not a flat sheet. Put a small "Bride To Be" sign on a stand in front of the organza so the sign reads clearly. Adjust the panel width so it's about the same width as your lamp base plus 2-3 inches.
Try thisUse a warm bulb and test from the doorway - you want the glow to be visible but not overpowering.
Common mistakeSkip thick blackout curtains - they kill the soft light effect.
15. Wall-mounted balloon "string" using clear monofilament
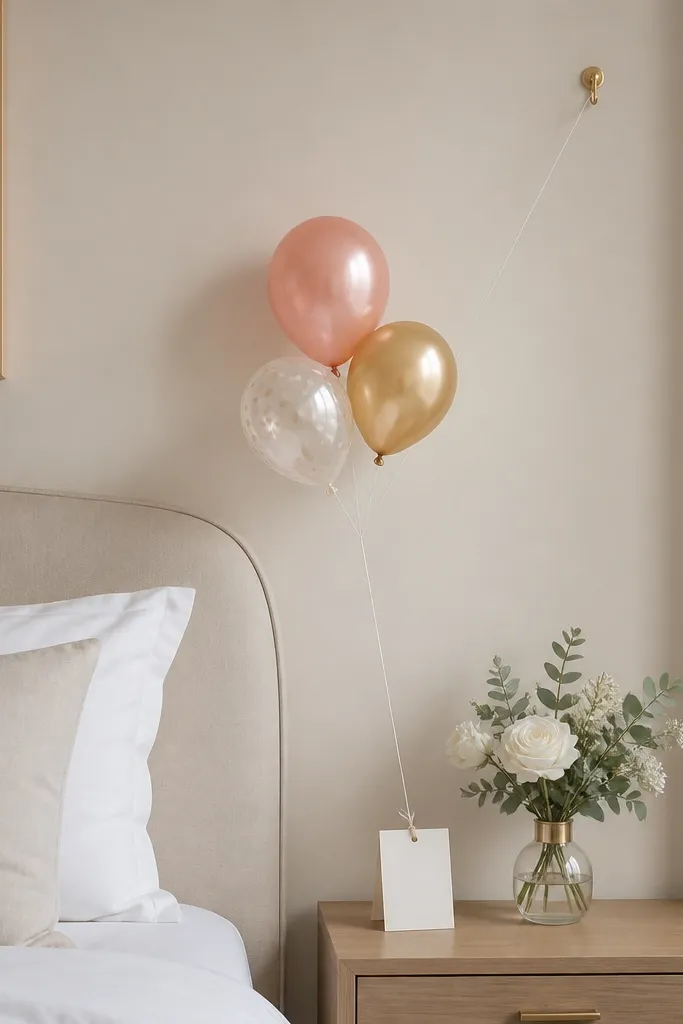
A diagonal balloon string uses wall space and creates a sense of height, which helps a cramped room feel less boxy. I like small balloons because they don't snag on bedding or door handles. The clear monofilament line makes it look like the balloons are floating, even though they're anchored safely. This setup flatters photos because it draws the eye upward toward your face and the "Bride To Be" card. If you have low ceilings, keep the balloon height modest so the ceiling doesn't feel lower.
Start by installing a wall hook at about 6 inches above your picture frame height. Tie the monofilament line to the hook, then bring it down diagonally toward a second anchor point near the nightstand. Inflate 2-3 mini balloons and tie them to the line at equal distances, leaving gaps so they don't clump. Attach a small "Bride To Be" card at the bottom anchor with a ribbon knot so it faces outward.
Try thisPull the monofilament tight before tying - sagging lines look messy fast in small rooms.
Common mistakeAvoid tying balloons directly to the bed frame - they bounce and look chaotic in photos.
16. Clothesline bride-to-be sign with mini clothespins
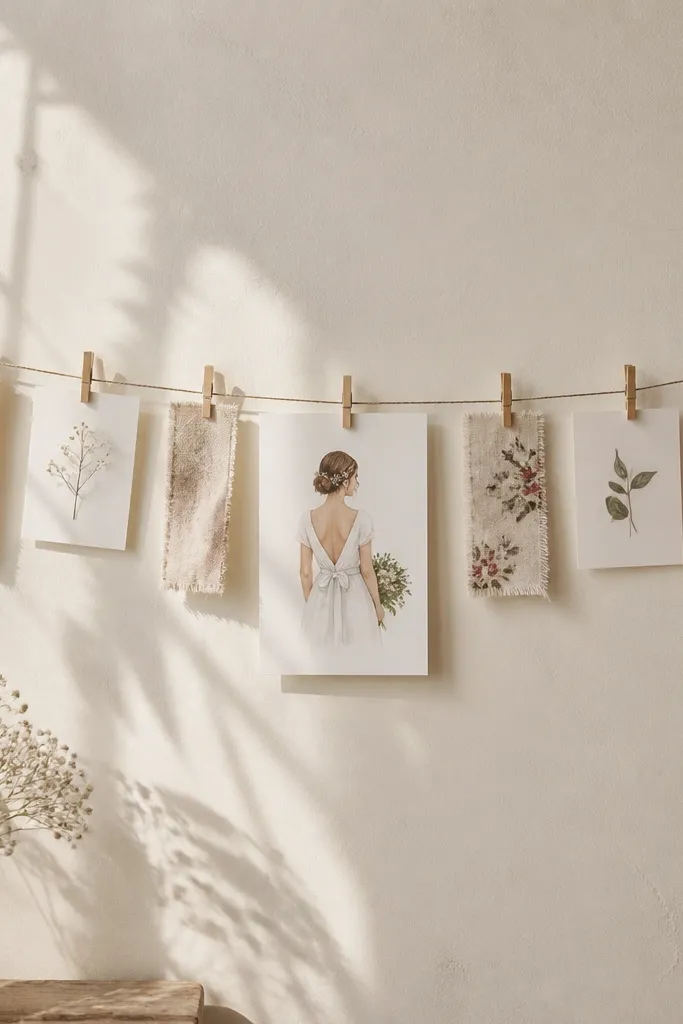
This is one of the best small space bride to be decoration ideas when you want something interactive and changeable. The clothesline creates a vertical display without bulky items, and clothespins let you swap cards after the event. I use thick string or clear fishing line so it doesn't look saggy. The cards can match your palette with blush, ivory, and soft gold accents. This looks good in photos because the line creates a clear frame, and the central "Bride To Be" card keeps the theme readable.
Start by measuring the wall gap between two hooks so the line is slightly taut, not stretched too tight. Hang the line at about 64-66 inches from the floor for a centered look. Print or buy 7-9 small cards, then use mini clothespins to hang them with even spacing. Place the "Bride To Be" card in the center, and tuck a small fabric tag on each side to add texture.
Try thisUse matte photo paper for the cards - glossy finishes glare under overhead lights.
Common mistakeAvoid too many cards - 7-9 looks styled; 20 looks like a craft corner.
17. Floating shelf with a single oversized pearl garland
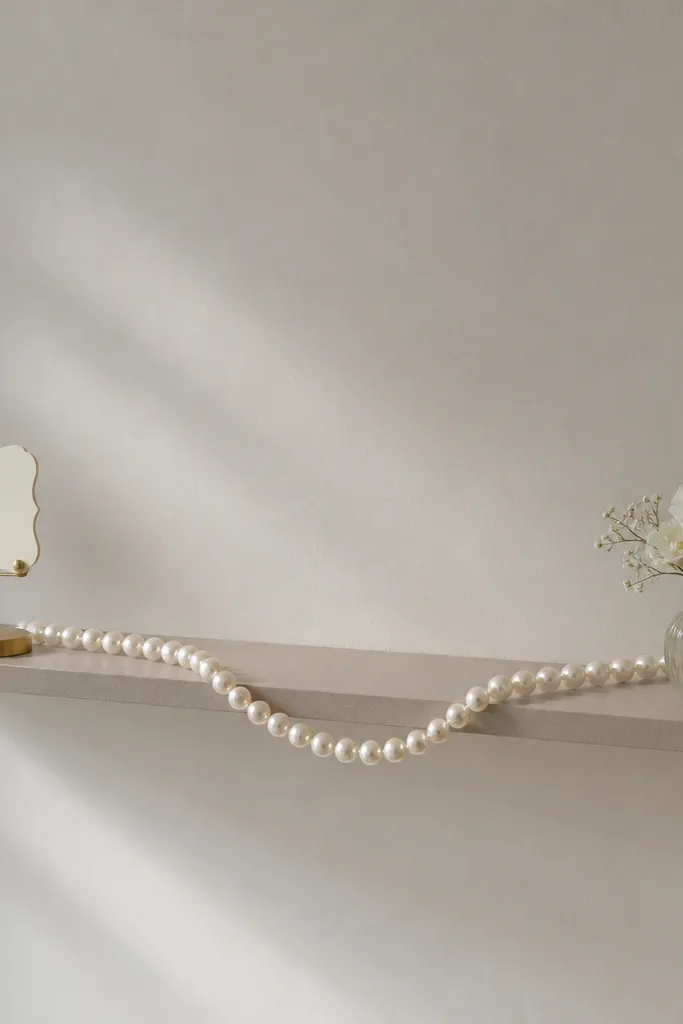
Instead of filling a shelf, fill it with one oversized element. A pearl garland draped in an S curve looks intentional and adds texture without clutter. I prefer faux pearls with a slightly warm undertone because they photograph like real pearls under warm lighting. This setup flatters small rooms because it uses a single line of decoration, leaving breathing room around the items. It also works for different palettes: keep the pearls warm and swap the flower color to match your wedding.
Start by choosing a shelf length that can hold the pearl garland curve, usually 18-24 inches. Place the garland first, draping it in an S shape so it doesn't all fall in one direction. Add the "Bride To Be" sign on a small stand at one end, then place a tiny vase with cream flowers at the other. Keep the rest of the shelf empty so the pearls become the star.
Try thisLightly press the garland curve with your hands before placing it - it settles more evenly.
Common mistakeAvoid adding extra trinkets under the pearls - the shelf starts to look crowded quickly.
18. Faux floral wall hoop with a removable ribbon ring
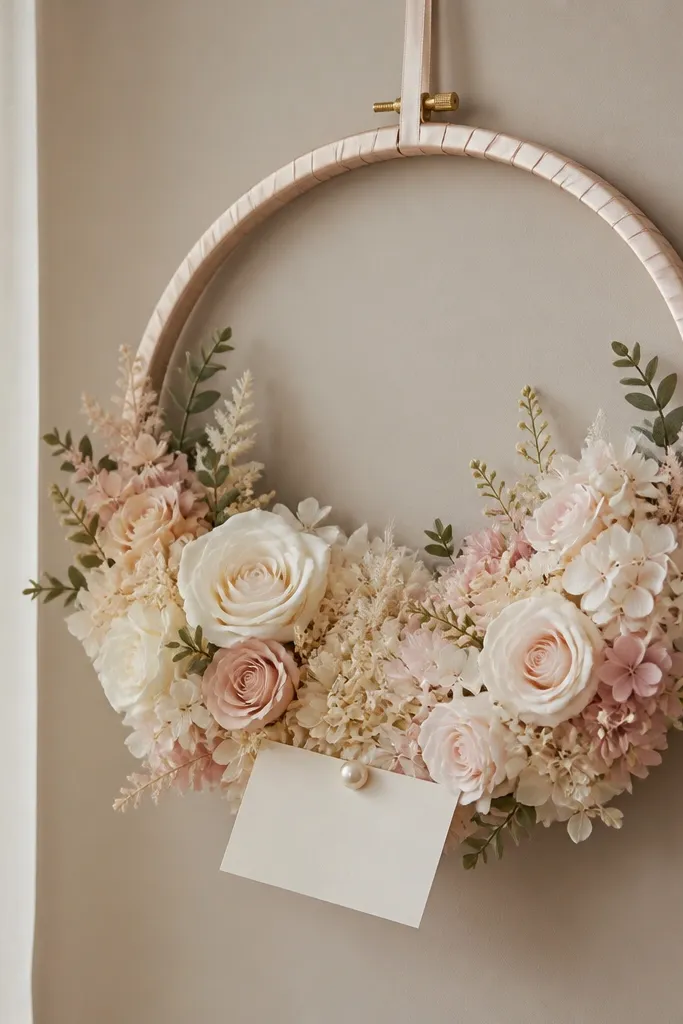
Hoops are underrated because they look like an art piece, not a pile of decor. In a small room, a 12-inch hoop gives you a focused focal point that doesn't take up a lot of wall width. I use faux flowers with matte petals so the hoop looks soft instead of shiny. The champagne satin ribbon adds bridal warmth and reads gold without being harsh. This works for most brides because the hoop sits at a photo-friendly height and frames your upper body.
Start by choosing an embroidery hoop size between 10-14 inches. Remove the inner ring so you can insert faux flowers easily, then reattach it with wire or glue dots. Wrap champagne satin ribbon around the hoop edge and secure the ends on the back. Hang using a removable hook at head height, then pin a small "Bride To Be" card at the bottom with a pearl-headed pin.
Try thisKeep the flowers concentrated in the center so the hoop edge stays clean in photos.
Common mistakeAvoid glossy flowers in a hoop - they reflect overhead light and look flat.
19. Bedding-side table styling with a mini tulle bow stack
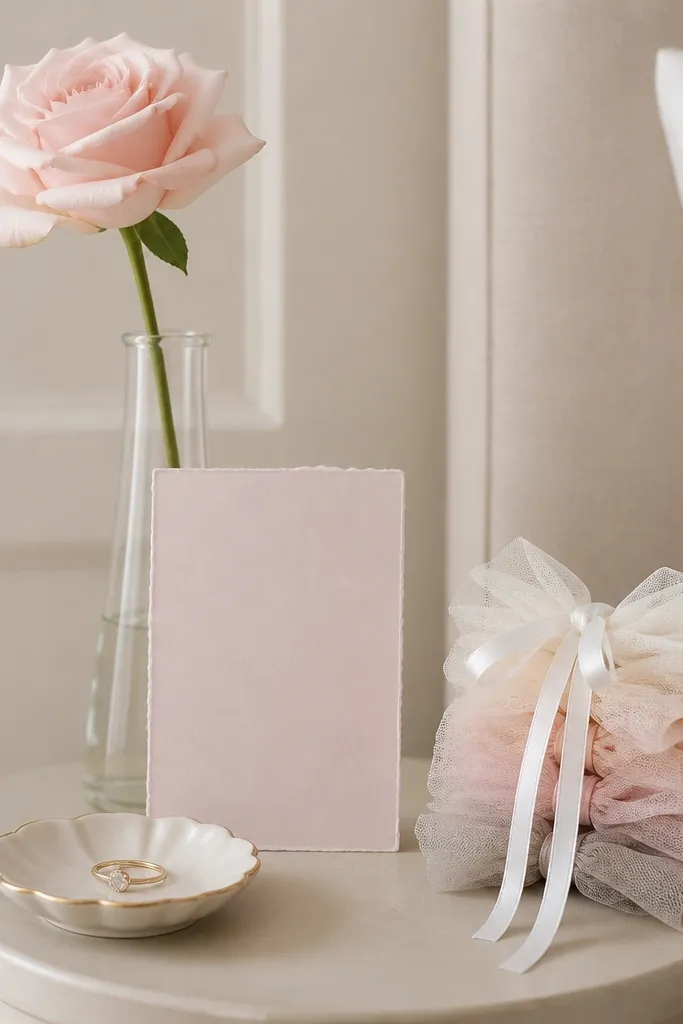
This is a gentle, photo-friendly way to dress the bedside without turning it into a craft desk. Mini tulle bows add softness around your getting-ready items, and the small scale keeps the table functional. I use one stem only because multiple stems crowd the vase and hide the sign in close shots. The white + blush ribbon stack looks good against both light and dark bedding. It flatters because it doesn't create harsh visual blocks near your hands when you're adjusting hair or jewelry.
Start by clearing the bedside table and placing a ring dish first, centered. Add a slim vase with a single blush stem so you have one vertical line. Tie three mini tulle bows: one small, one medium, one small again, then stack them on a ribbon loop leaning against the vase. Finish by leaning a "Bride To Be" card at a slight angle so it faces the bed.
Try thisUse a foam tape dot under the tulle bow stack so it stays upright.
Common mistakeAvoid bulky balloon clusters on the bedside - they block the lamp and make shadows weird.
20. Ceiling-to-bed tassel drops with a single anchor knot
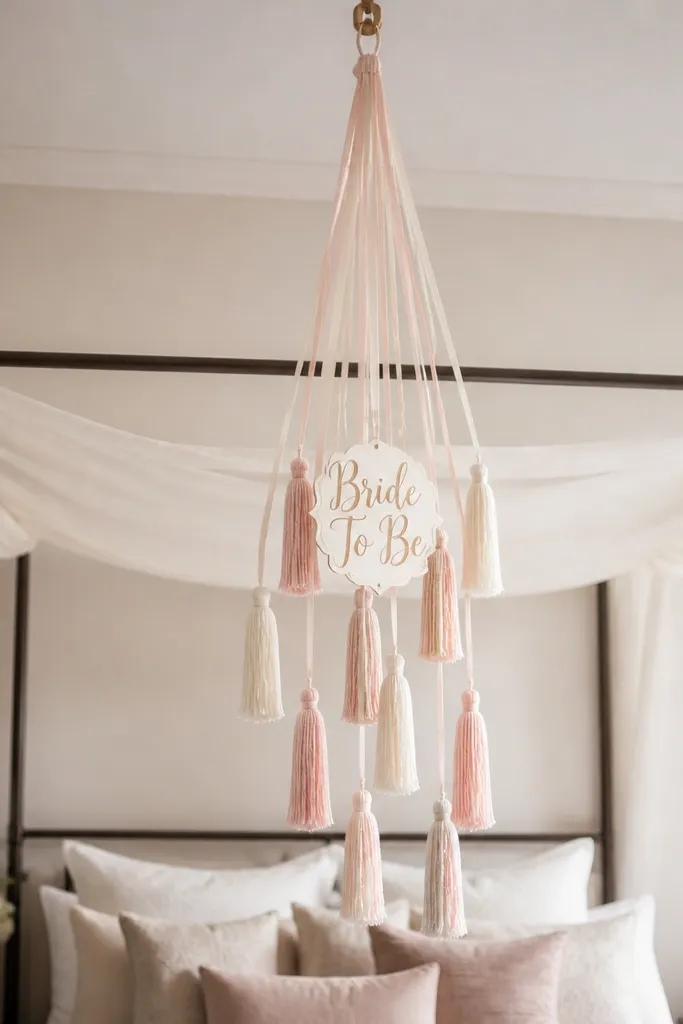
Ceiling-to-bed drops make a small space feel taller because the visual line goes up. I like tassels because they move slightly when you walk past, which adds life to photos without extra objects. Keep it to one anchor point so the setup doesn't look like a ceiling mess. This works especially well if you have a canopy frame or a bed with any vertical structure. The ivory and blush mix softens the whole look and flatters both warm and cool skin tones by keeping the palette light.
Start by finding a safe ceiling hook location above the bed center. Tie a single anchor knot and hang 5-7 tassel strands spaced evenly, each around 18-24 inches long. Add a small "Bride To Be" sign at the center strand about 6-8 inches above the top of the pillows. Separate the strands with your fingers so they fall in a fan, not a clump, then check the look from the doorway.
Try thisUse lightweight tassels - heavy ones pull the hook down and look saggy by the end of the night.
Common mistakeAvoid tying tassels to the bed frame - it sways and smears in photos.
21. Removable wallpaper stripe using peel-and-stick for a photo panel
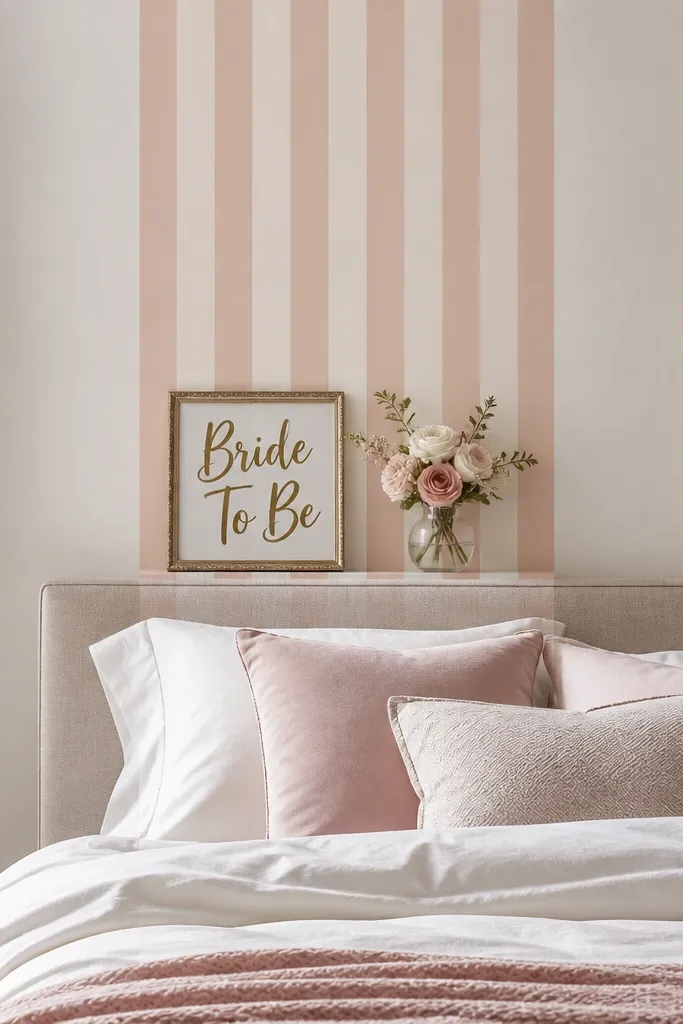
A peel-and-stick stripe creates instant depth, which is exactly what small rooms need. It also solves the problem of busy wall paint or textured walls that make photos look messy. I use a stripe panel that's narrow enough to fit even in a tight bedroom, usually 18-24 inches wide. The pattern should be subtle - think soft blush polka or gentle geometric - so it doesn't fight your decor. This flatters photos because it gives your face a clean background, and it works across skin tones because the stripe is light and warm.
Start by cleaning the wall with rubbing alcohol and letting it dry completely. Apply the peel-and-stick stripe centered behind the bed or behind your vanity chair. Trim edges carefully with a craft knife so it looks crisp. Place your "Bride To Be" sign in front on a small stand and add a tiny vase or ring dish to complete the scene.
Try thisPress edges with a plastic smoothing tool - it prevents bubbles that show up under flash.
Common mistakeAvoid bold large patterns - they steal attention from the bride-to-be message.
22. Mini champagne cork photo display on a cork board
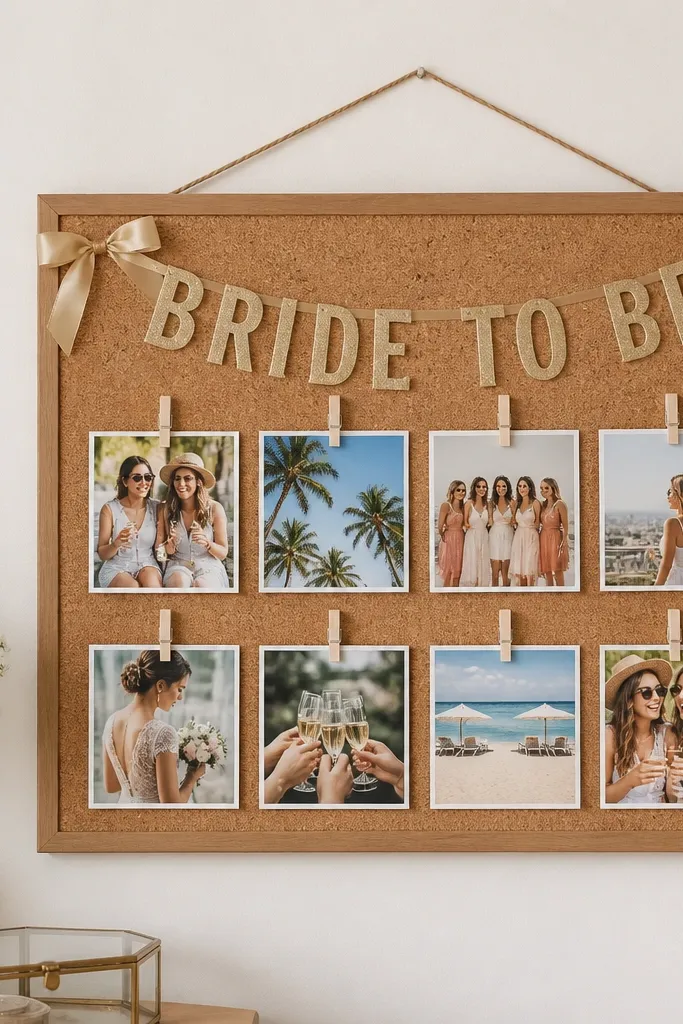
Cork board displays look charming and don't require large furniture or floor space. The cork texture gives your photos a warm background that reads "bridesmaid chic" without extra florals. I use a small board, about 12x16 inches, so it stays manageable in tight rooms. This setup flatters because the photos sit flat and face forward, making your getting-ready corner look organized. For brides with cooler palettes, use ivory photos and champagne ribbon; for warmer palettes, keep the photos slightly warm-toned.
Start by buying a small cork board and hanging it using a picture hook at about eye level. Cut a thin champagne satin ribbon and pin it across the top as a banner reading "Bride To Be." Print 8 photos in a consistent size and attach them with mini clothespins. Keep the spacing even so the board looks like a planned display, then add one small card at the center bottom for a date or message.
Try thisPrint photos with a white border - it makes the board look cleaner and more cohesive.
Common mistakeSkip random sizes - mixed photo dimensions make the board look messy fast.
23. Tabletop bridal bar cart using a folding tray and one flower vase
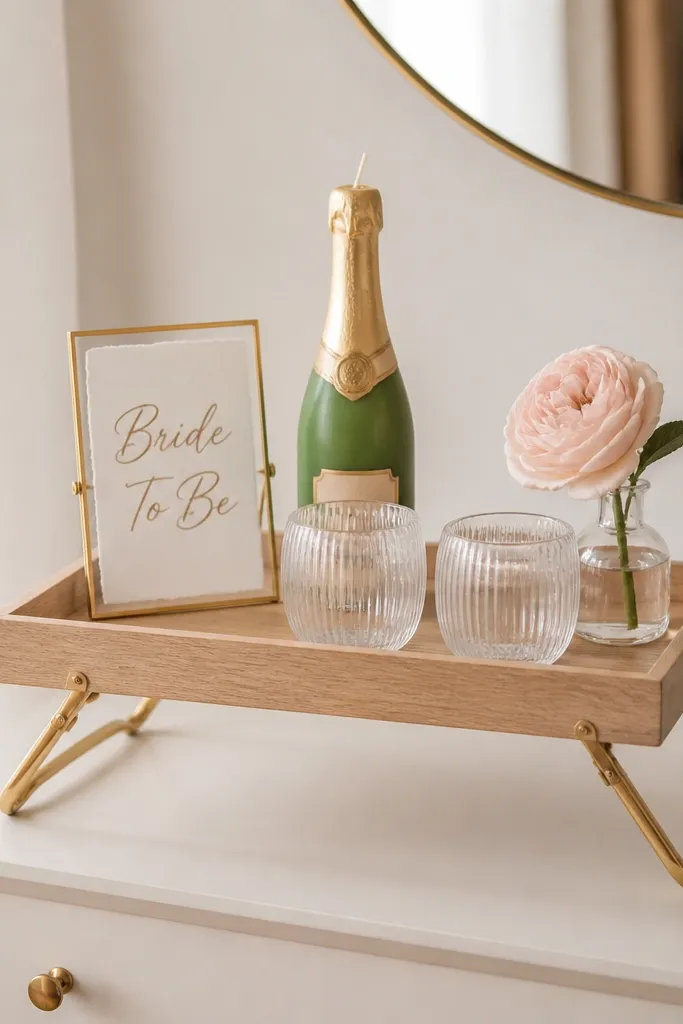
A tabletop bridal bar gives you a party vibe without adding a full bar cart that takes over a small bedroom. I keep it contained in one tray so it looks neat in photos and doesn't spread across surfaces. Clear cups add sparkle, and one bud vase keeps the height controlled. This flatters because the tray creates a clean rectangle framing your decor items. If your wedding colors are darker, use clear glass and white napkins so the cart still reads bright.
Start by choosing a folding tray with raised edges so items don't slide. Place the "Bride To Be" sign at the back center, then arrange cups on the left and right. Add one bud vase in the front center with a single blush stem and small filler petals. Finish by placing one champagne-colored decorative item, like a candle or mini bottle, so the palette stays cohesive.
Try thisWipe clear glass with a microfiber cloth right before photos - smudges show up instantly.
Common mistakeAvoid stacking multiple drink props - it makes the tray look cluttered and small-room crowded.
24. Fabric hanging pocket organizer as a bride-to-be mail station
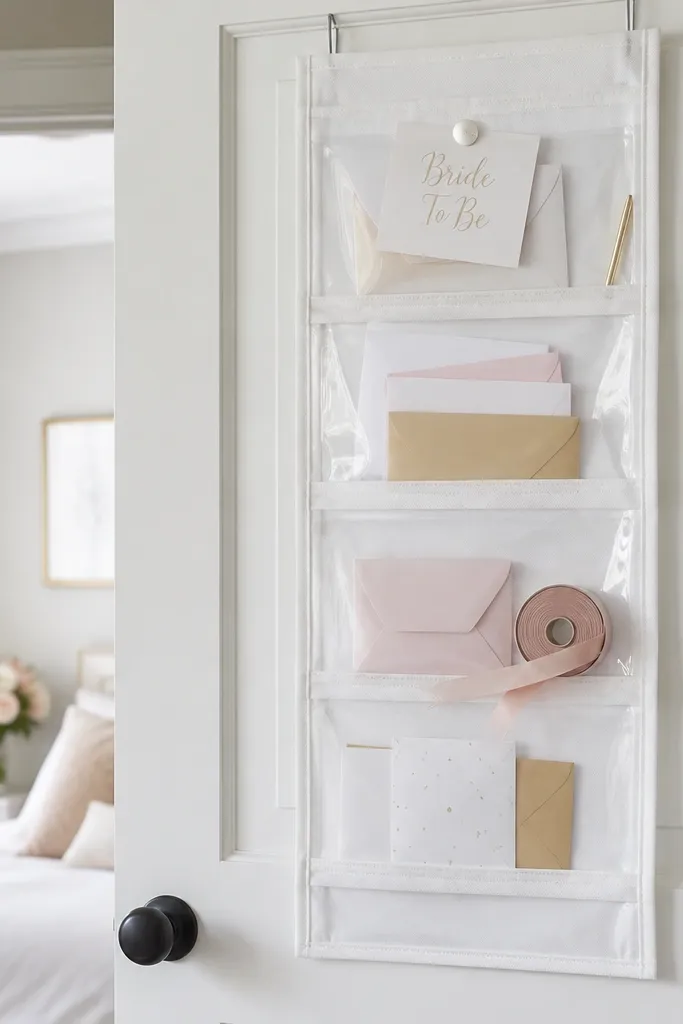
This is practical decor, and practical looks better in small spaces because it stays tidy. A hanging pocket organizer gives you a place for cards, little gifts, and accessories while keeping the room uncluttered. I like clear-front pockets because you can see contents without digging around, and it looks neat in photos. The "Bride To Be" card on top makes it feel themed, not utilitarian. This flatters the getting-ready space because it reduces visual clutter around your mirror and dresser.
Start by choosing a door organizer that fits your door width, usually 18-24 inches wide. Hang it on the back of the door using the built-in hooks so it sits flat. Put envelopes and small items in the pockets so the top row is mostly empty for a clean look. Add a "Bride To Be" card to the top pocket with a clip, then tuck a ribbon roll into one side pocket for texture.
Try thisUse one color for the envelopes inside, like ivory or blush, so the organizer looks coordinated.
Common mistakeAvoid dark organizers - they absorb light and make the door area look heavy.
25. Mini floral bud wall sprays on command hooks
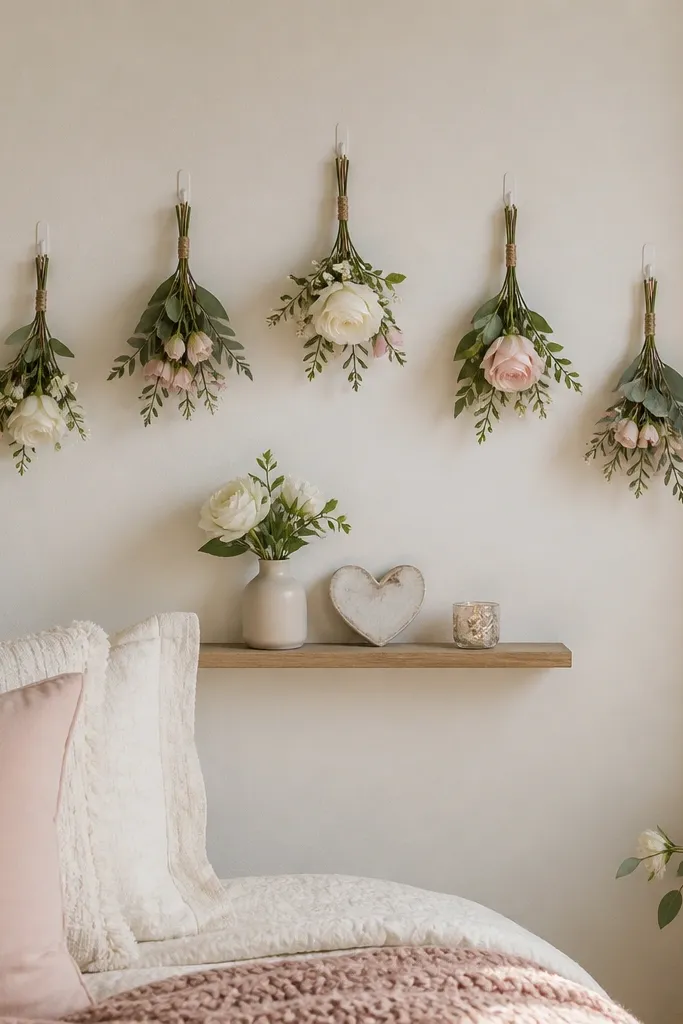
Bud sprays on hooks give you the look of a styled wall without needing a big garland. In small rooms, big garlands can wrap around furniture and snag on curtains, but mini sprays stay controlled. I use matte faux buds in cream and pale pink so the wall looks soft rather than shiny. The spacing creates an arc that pulls the eye toward the central sign and frames your photos. This flatters because it creates a background texture behind you without blocking light.
Start by marking 5 hook points in an arc above your focal area, about 6-8 inches apart horizontally. Install command hooks rated for your wall type. Hang each bud spray so the tips fall around 2-3 inches above the shelf or top of the sign. Place the "Bride To Be" sign on the shelf below, and adjust each spray so they don't overlap too much.
Try thisUse a lint brush on the wall before hanging - dust makes faux stems look dull.
Common mistakeAvoid random hook heights - the arc should feel intentional or it reads messy.