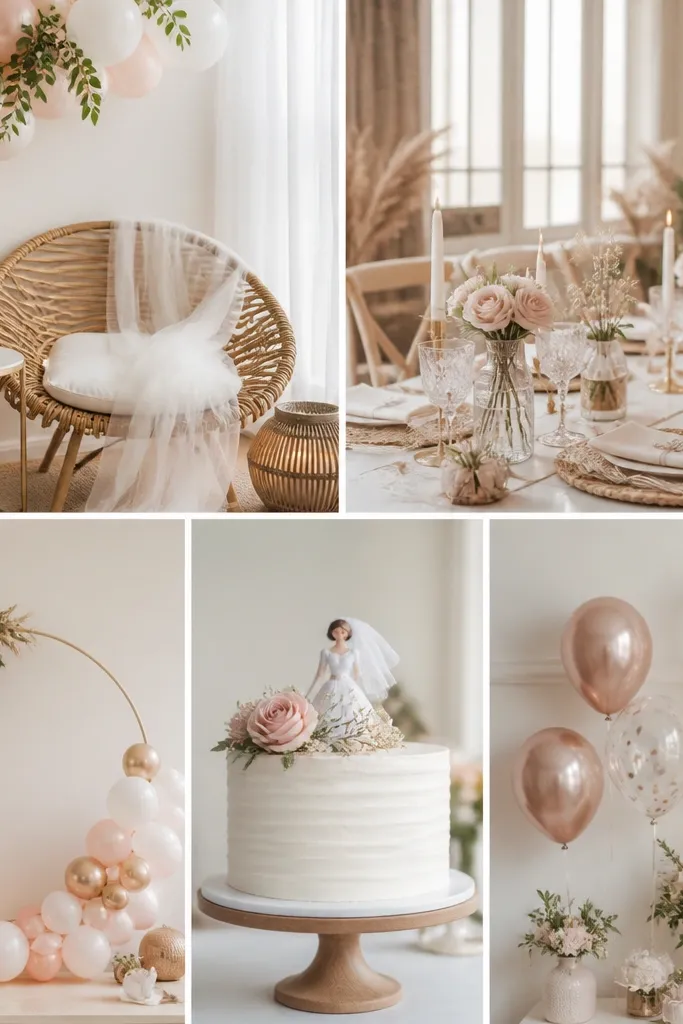
1. Blush + Cream Balloon Wall With a Center Sign
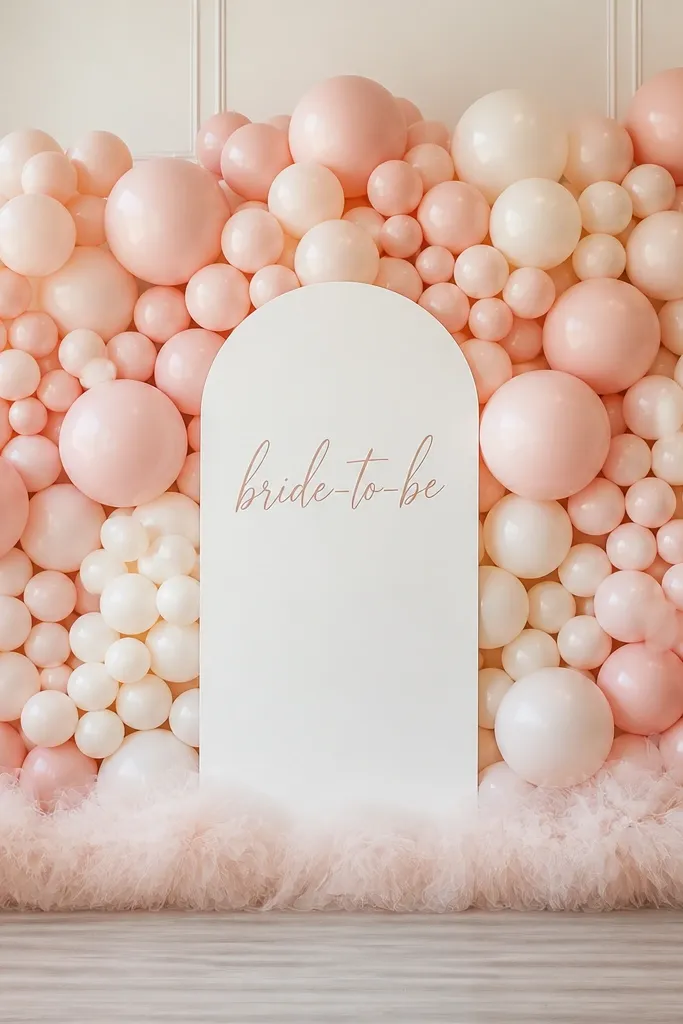
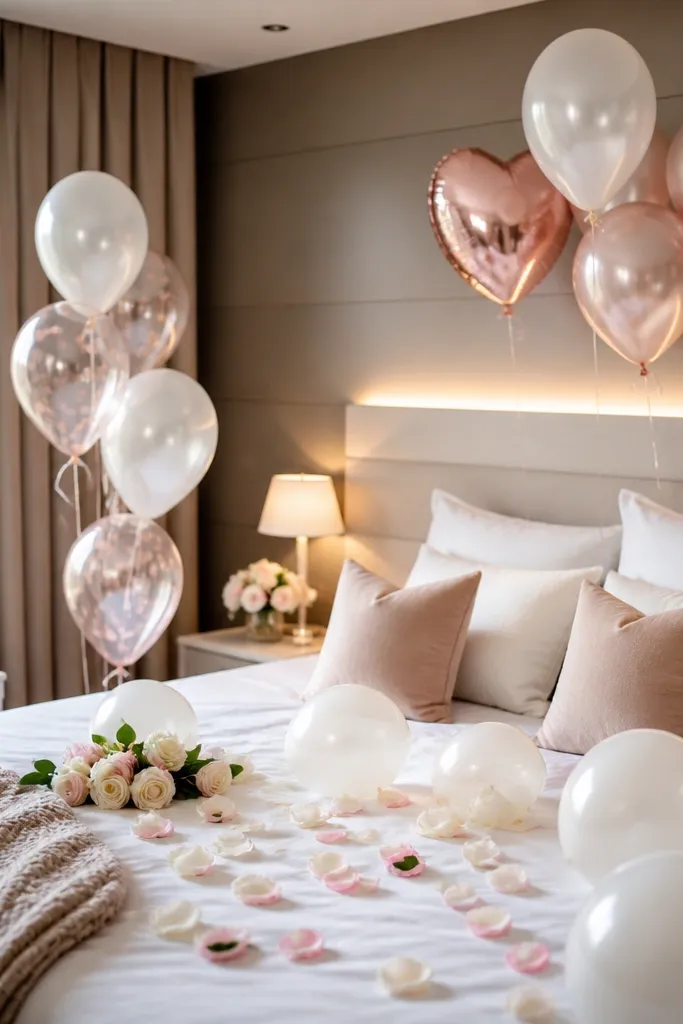
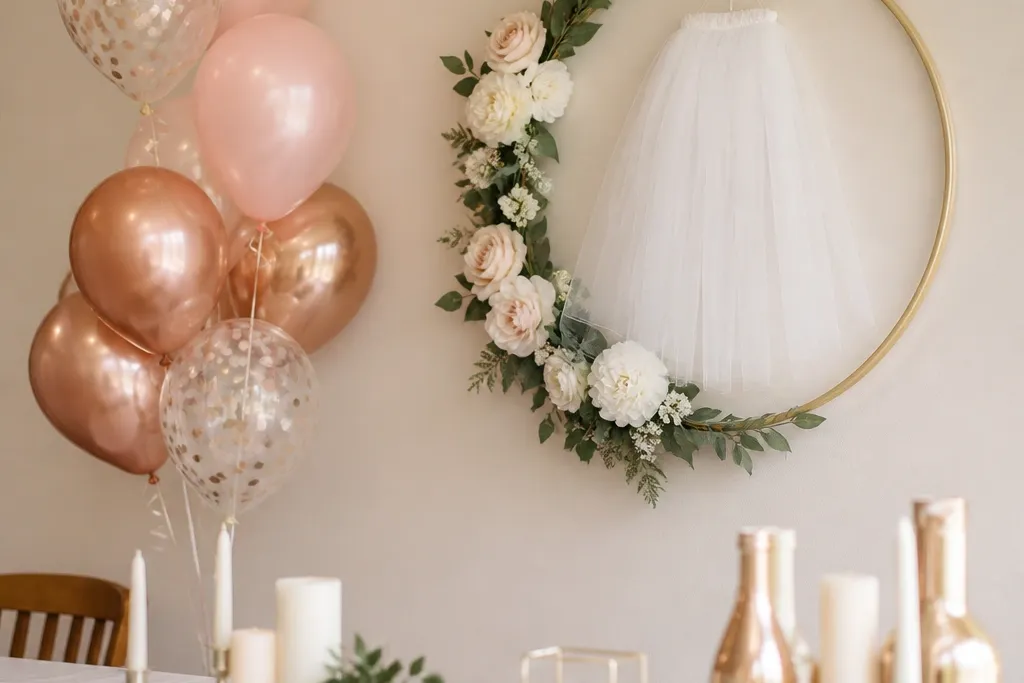
This setup works because the balloons create instant depth behind the bride-to-be, and the sign gives you a clear focal point for photos. I use blush latex (or matte balloons) paired with cream balloons so the backdrop looks warm instead of candy-bright. Add one metallic element like rose gold foil balloons sparingly so the light catches without turning the whole wall shiny. It flatters most skin tones because blush sits close to natural warmth. If you're doing a daytime shower, matte balloons look best in sunlight; for evening, mix in a couple of glossy balloons for sparkle.
Start by marking the center point on the wall at about 60 inches from the floor (eye level for most guests). Build the balloon cluster first - make a tight group with 2-3 larger balloons in the middle and smaller ones filling the edges. Tie the balloons to a balloon strip or fishing line so the spacing stays even. Hang the sign in the center using a couple of ribbon loops or command hooks, then add a thin tulle fringe strip along the bottom edge to soften the look. Finish by stepping back and adjusting the outer balloons until the cluster forms a clean rectangle in the frame.
Try thisIf the wall is textured, use command hooks to hold the sign and keep the balloons from shifting as people walk past.
Common mistakeAvoid mixing too many colors in the same cluster; it makes the backdrop look like a party supplier dump.
2. Doorway Frame With Rose-Gold Fringe and "To Be" Banner

Doorways make photos look instantly intentional because the frame is already built into your space. The fringe gives motion and catches overhead light, which makes the bride-to-be stand out even if the room is dim. I keep the banner text simple - white on blush or cream - so it reads clearly in pictures. This setup flatters petite setups too because the vertical lines pull the eye up. If the bride has a bold dress or jumpsuit, the neutral fringe keeps the focus on her outfit.
Measure your doorway width and cut two fringe panels so they hang from just below the top trim to about waist height. Attach the panels to the door frame with command hooks or removable adhesive clips, spacing them evenly so they hang straight. Add a ribbon loop or small bow at the top of each panel to make the attachment points look intentional. Then run a short banner across the top - keep it centered and leave equal space on both sides. Finally, place one small prop on the floor near the doorway, like a satin ribbon gift bag or a mini bouquet, so the lower half doesn't look empty.
Try thisUse a satin ribbon for the top tie so it reflects light softly instead of looking flat like paper.
Common mistakeSkip heavy tape on painted trim; it peels and ruins the clean look right before photos.
3. Dessert Table Runner With Blush Tulle Skirt
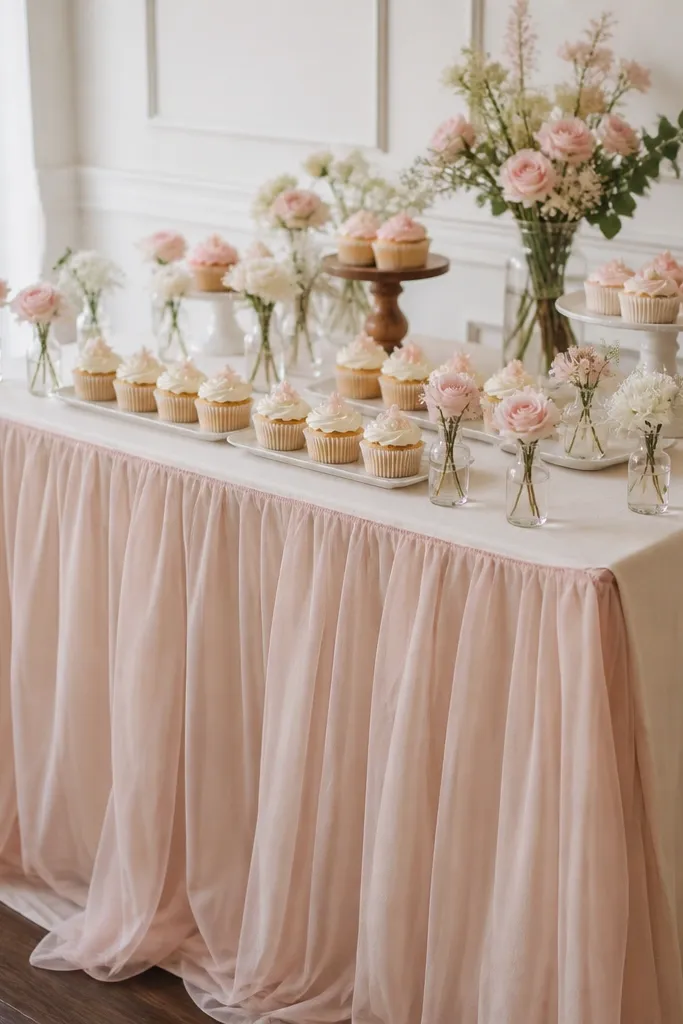
A table skirt is the quickest way to make a dessert spread look styled instead of assembled. Blush tulle looks airy and forgiving - it hides uneven table edges and makes the backdrop feel cohesive with the rest of the shower. I pair it with a cream base so the color stays soft and doesn't clash with frosting colors. This works especially well for people who don't want a full balloon wall but still want a "photo zone." It also flatters rounder tables because the drape creates a clean vertical drop.
Start by covering the table with a smooth cream cloth or a fitted table cover, then add a runner on top to create a straight line for the eye. Pin or clip a blush tulle rectangle to the front and sides of the table, letting it fall in gentle folds. Place one long row of items first - like cupcakes on a tray - then add two smaller clusters at each end. Put a mini sign or acrylic placard at the front center, aligned with the bride-to-be's chair position. Finish with two bud vases spaced evenly (about 12 inches apart) to break up the desserts with a vertical shape.
Try thisSpritz tulle lightly with a fabric mist so it hangs smoother and looks less wrinkled in photos.
Common mistakeDon't let dessert labels or random packaging show; wrap them in plain paper or hide them under trays.
4. Satin Ribbon Backdrop Over a Folding Screen
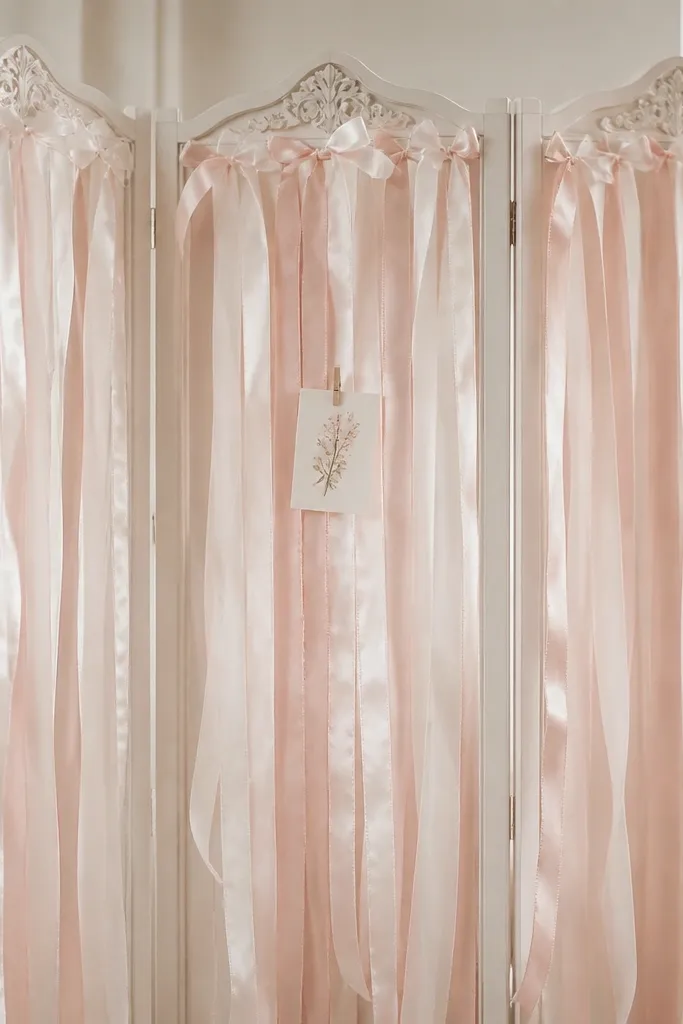
A folding screen is my go-to for apartments because it gives you height without needing a real wall installation. Satin ribbons look expensive on camera because they reflect light in a controlled way, unlike shiny streamers. I use blush satin ribbon plus white ribbon so the backdrop stays bright around the face. This setup flatters anyone because the vertical lines create a clean, lengthening background. If the bride is wearing patterns, the ribbon keeps the focus on her outfit without fighting it.
Fold the screen to create a stable backdrop, then cut ribbon lengths so they hang from the top bar to around the mid-torso height. Use zip ties or ribbon clips to attach ribbons in alternating blush and white stripes. Leave a small gap in the center for a sign - I use a cardstock "bride-to-be" card inside a clear acrylic frame for crisp readability. Add two small faux florals or a single rose cluster at the bottom corners so the screen doesn't look empty. Place the bride-to-be 2-3 feet in front of the screen so the ribbons aren't blurred and the text stays readable.
Try thisUse ribbon widths of 1 inch and 2 inch together; the mix adds dimension without extra decor.
Common mistakeAvoid using thin cheap paper streamers; they wrinkle and look flat in flash photos.
5. Mini Photo Corner With a Balloon Column and Acrylic Frame
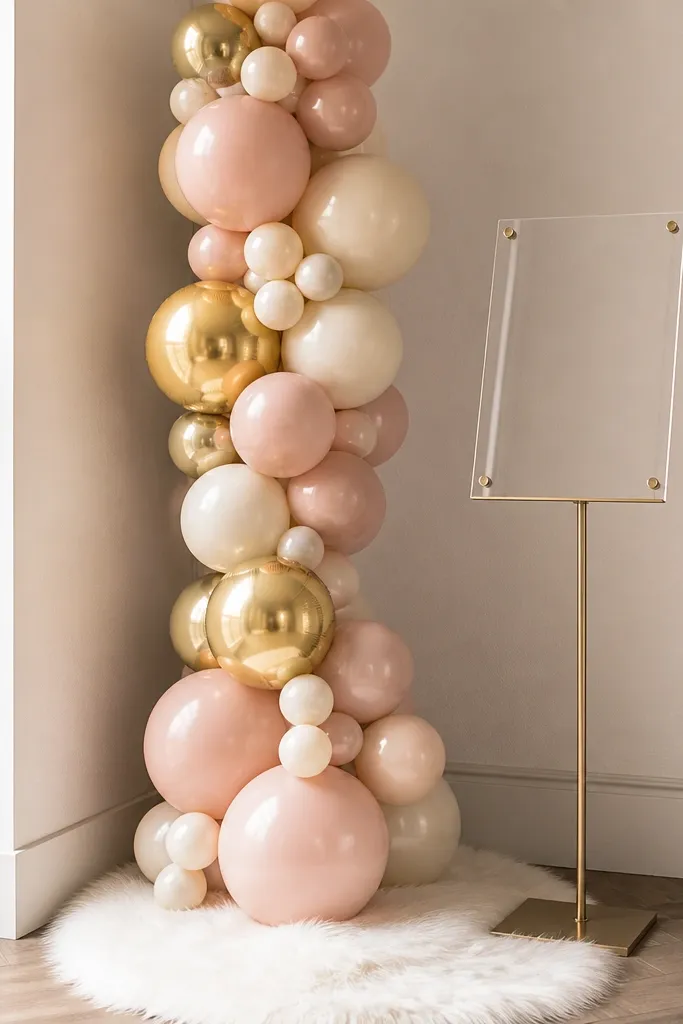
When your space is small, you don't need a full backdrop. A balloon column placed behind the bride-to-be's shoulder creates separation from the background and gives you a clean photo edge. Acrylic frames look sharp because they reflect light without turning into a distracting glare like some glossy signs. The faux fur base makes the lower half feel intentional and soft under flash. This works for both men and women bridal parties because the setup is neutral in shape and color.
Place a small rug or runner in the corner first so the photo area has a boundary. Build a balloon column with one larger balloon at the top, then stack medium and small balloons down the column. Secure the bottom to a weighted base or a bucket wrapped in white fabric so it doesn't tip. Position an acrylic frame sign at about face height, angled slightly toward the camera. Then add one small prop - like a satin sash or a "bride" hat - on the rug to give hands something to do.
Try thisAngle the acrylic frame a few degrees; straight-on glare ruins readability.
Common mistakeSkip placing the column too low; if it sits below shoulder height, it looks like random balloons instead of a photo prop.
6. Candle-Lit Table With Gold Mirrored Tray and White Florals
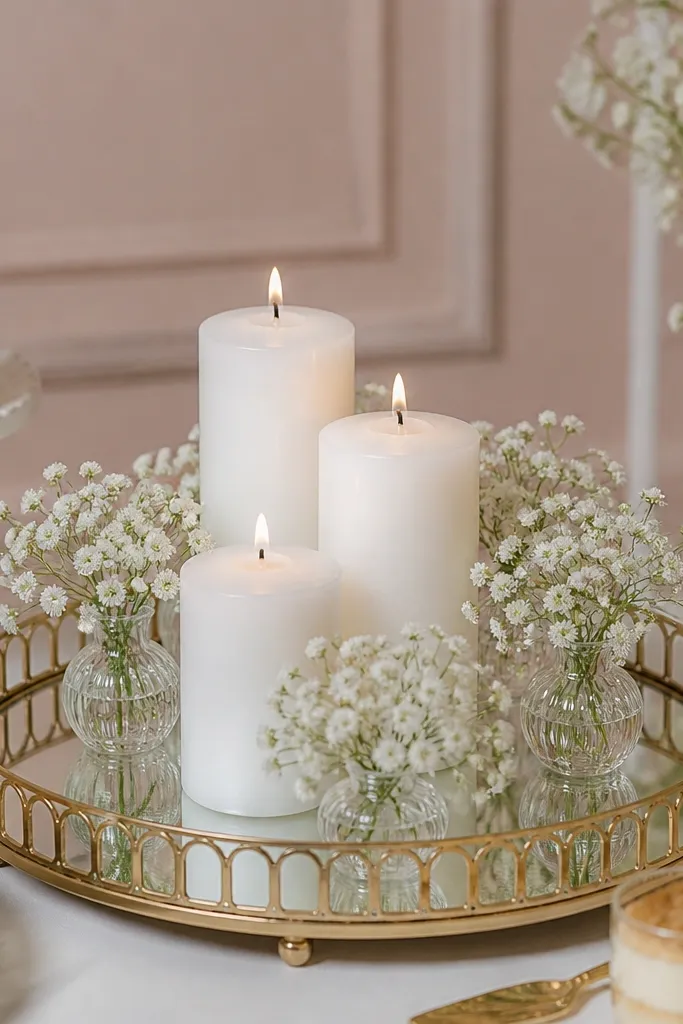
This is for the showers that happen at night or in low light. Gold mirrored surfaces bounce light around the room, so your setup looks polished even when you're not using a balloon wall. White florals keep the palette clean and let the bride's outfit be the color driver. I like this arrangement because it makes the table feel "designed" without needing tons of pieces. It's also flattering for many skin tones because it creates a bright, neutral glow near the bride's hands.
Start by centering a large gold mirrored tray on the table - about 18-20 inches wide - so it anchors the scene. Place three pillar candles evenly across the tray, with two smaller bud vases on the outer sides. Add white baby's breath or small white blossoms so the arrangement doesn't look bulky. If you're adding text, use a simple card stand behind the tray, not on top of it. Finally, keep smaller items like cupcakes on separate trays so they don't compete with the candle focal point.
Try thisUse flameless candles for safety and for consistent flicker in photos.
Common mistakeAvoid mixing dark backgrounds with heavy black decor; the whole table looks gloomy under flash.
7. Paper Fan Wall Behind the Chair With Blush and Champagne
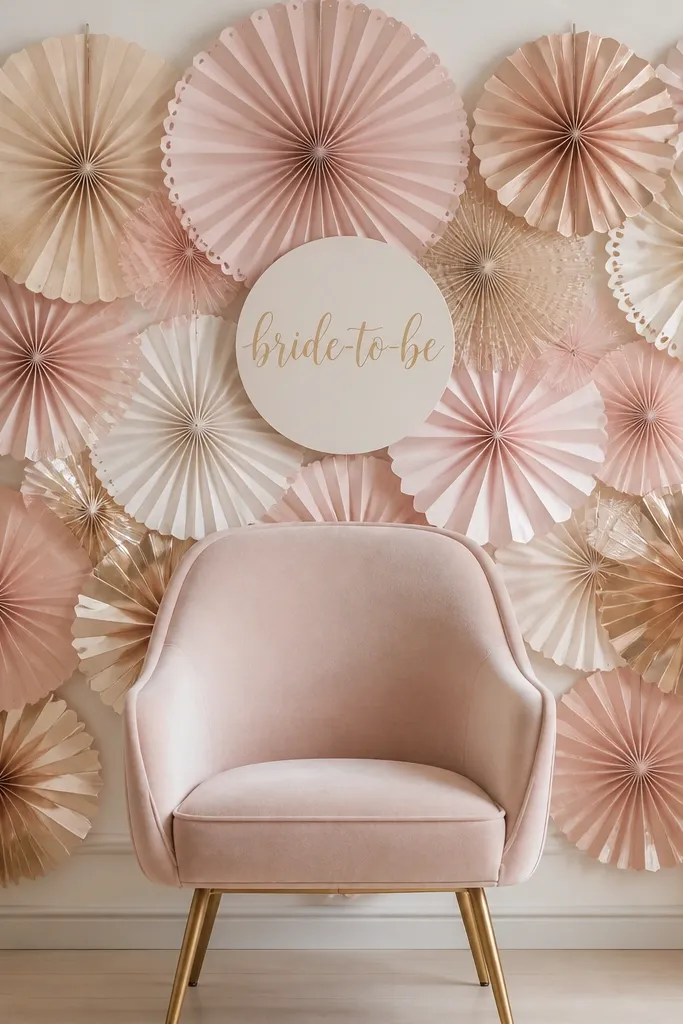
Paper fans look surprisingly high-end because they create a soft 3D backdrop with minimal effort. Blush and champagne keep it warm and photo-friendly, and the layered effect hides small wall imperfections. I do this when the room already has a lot going on, like a dessert setup, and I still want a clean photo background. The fans also flatter the bride's face by adding light texture behind her. It works for both casual showers and more formal ones if you keep the styling simple.
Decide your fan size based on space - 12-inch fans work well for apartments, 16-inch if you have a taller wall. Arrange fans in a loose grid behind the chair, with the largest fans around the center and smaller ones toward the edges. Tape the fan bases to the wall using low-tack tape or removable adhesive strips. Place a sign at the center - I use a white foam board cutout or a printed card mounted on a thin stand. Add two small faux flower stems at the bottom corners so the bottom doesn't look bare.
Try thisPress the fans flat for 30 seconds with your hand before taping; it helps them fan out evenly.
Common mistakeDon't use bright pink and hot orange together; it reads cheap in photos.
8. Tulle Balloon Garland Over a Plain Table
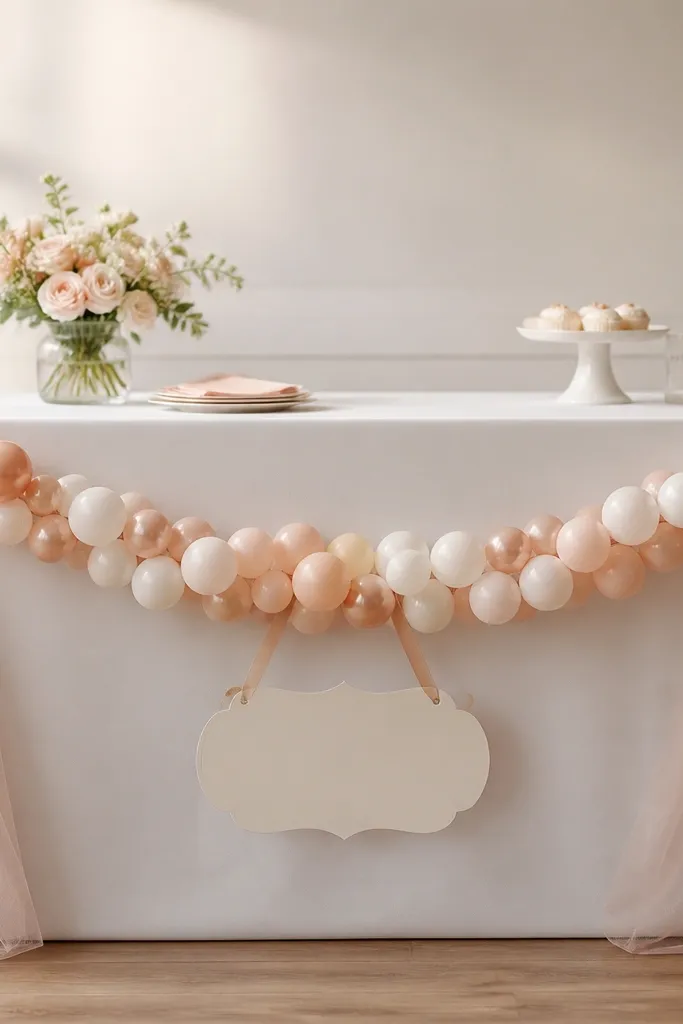
This setup is fast because it covers a wide area without building a full wall. The tulle softens the balloon look so it feels more like a styled party than a random balloon string. I use small balloons in blush and white so the garland doesn't overpower the table. It works best when your table already has a good cloth or runner, because the garland adds the "event" feeling. It's also great for groups where people mingle - the garland makes the area behind the table look intentional even when guests move around.
Start by measuring the table length and cutting tulle strips to span the width, about 6-8 inches wide per strip. Hang the tulle across the table front using clear fishing line, attaching it to small binder clips placed on the table edge. Add the balloon cluster next by tying balloons at intervals along the fishing line, spacing them about 10-12 inches apart. Hang a sign in the center of the garland with ribbon loops so it sits at chest height. Style the table with only three heights: a low tray, a medium cake stand, and one tall vase or candle holder.
Try thisUse matte balloons if you're shooting with overhead lights; glossy balloons reflect messy glare.
Common mistakeAvoid overfilling the garland with too many balloons; it turns heavy and droops in photos.
9. Champagne Metallic Backdrop With Fringe Curtain Panels
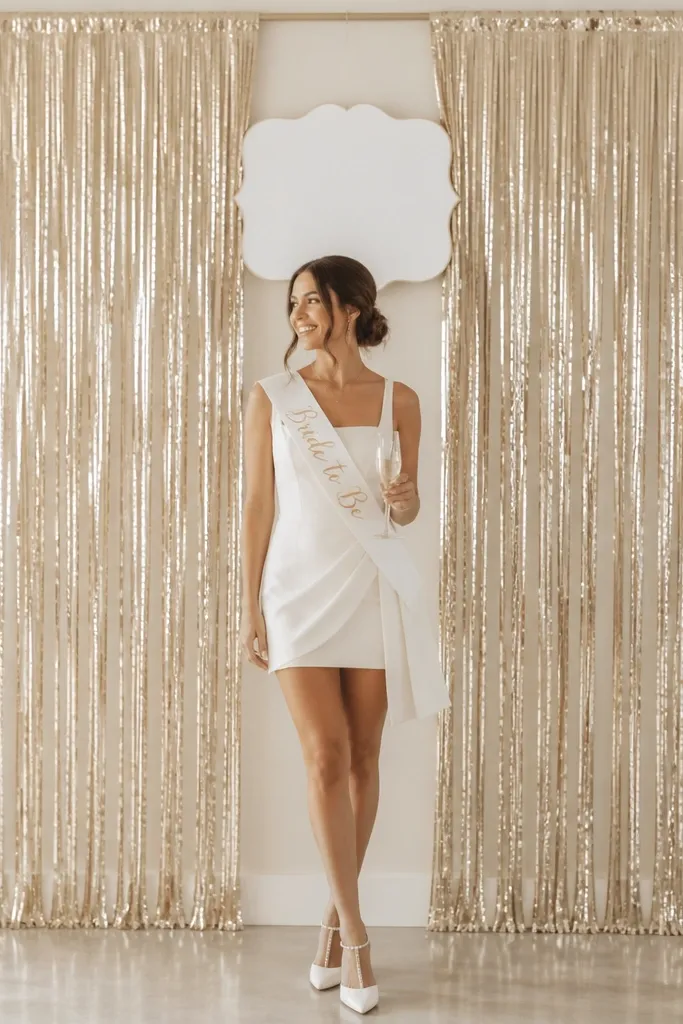
Metallic fringe looks like a photo booth without needing an actual booth. Champagne is forgiving because it reads warm and flattering, not harsh like silver can. The fringe also moves slightly when people walk past, so pictures look alive. I do this for bridal showers where you want a "celebration wall" but your time is short. It works especially well if the bride wears a dress with texture or lace; the fringe doesn't compete with detail.
Hang the curtain panels from a tension rod or a sturdy hook point, making sure the top is secure enough that it doesn't sway too hard. Position the panels so there's a small gap in the center where the sign sits. Add a white sign or monogram card at eye level, using a ribbon tie so it hangs flat. Place two small faux floral bunches at the bottom corners to anchor the metallic look. Keep the floor styling minimal - one runner or a small mat - so the metallic fringe stays the hero.
Try thisIf your rod is wobbly, tie the curtain corners to wall hooks with ribbon to stop jitter in videos.
Common mistakeAvoid mixing champagne fringe with pink neon accents; it makes the whole setup look mismatched.
10. "Bride-to-be" Balloon Bouquet on a Weighted Stand
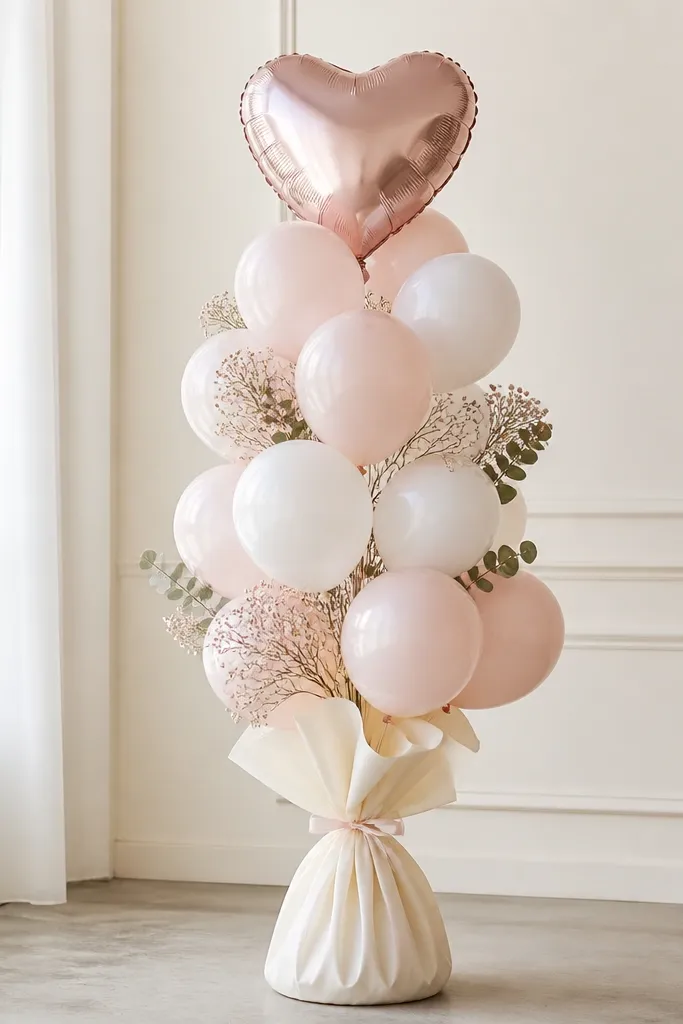
A bouquet stand is the easiest way to create a photo prop that looks styled even if you only have 10 minutes. The foil "bride-to-be" balloon gives instant text readability, while the latex balloons add softness around it. I wrap the stand in neutral fabric so it doesn't look like a hardware bin. This works for both indoor and outdoor showers, and it flatters the bride because it creates a vertical line beside her. It's also perfect for gift-opening photos where people want something held or positioned near the body.
Buy a weighted balloon stand or a bucket base and wrap it with cream fabric or a table napkin tied with ribbon. Arrange balloons in a bouquet order: foil text balloon at the top, then 3-5 latex balloons in blush and white, then add one rose gold balloon for contrast. Tie balloon strings to the stand's ring using short ribbon loops so the heights stay even. Position the bouquet to the side of the bride, not directly behind her face, so the text doesn't block her. Add one small satin ribbon bow near the base so the setup looks intentional from the bottom up.
Try thisKeep the bouquet about 8-12 inches away from the body so the strings don't tangle in hands.
Common mistakeDon't use a stand without weight; it wobbles and looks sloppy in every photo.
11. Welcome Sign + Flower Wall Corner (Fake Florals, Real Depth)
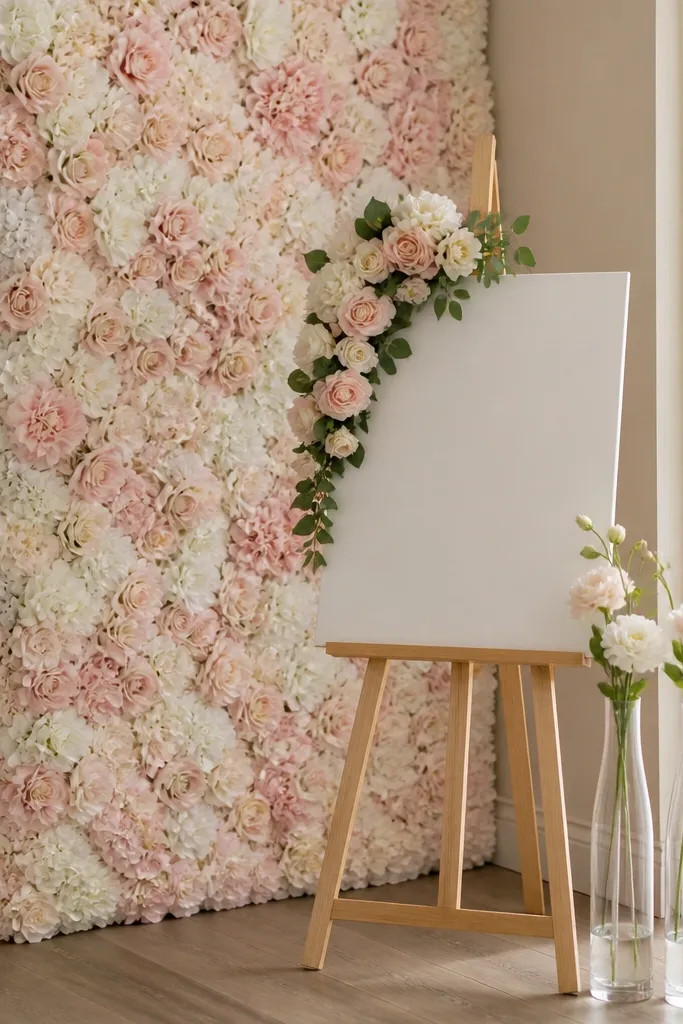
Flower walls look expensive because they create color blocks with texture, and corners make them feel full even in small rooms. I choose blush and cream faux florals with a little greenery because it gives depth without looking like plastic. Add a welcome sign on a simple easel so guests know where to look for photos. This setup flatters the bride's outfit by framing her with soft tones instead of busy patterns. It also works when you have limited floor space because most of the volume is on the wall.
Start by placing the easel sign where the bride will enter the photo - usually a few feet from the corner. Build the floral corner by leaning a pre-made faux panel against the wall, then add two smaller stems in front to break up the flat surface. Use zip ties or removable clips to keep panels from sliding. Add two bud vases at the base, spacing them so they align with the sign and the bride's standing position. Finish by tying a blush ribbon around the easel legs or adding a small bow at the base for a cohesive look.
Try thisSpray a tiny bit of matte fabric spray on shiny leaves so they photograph more natural.
Common mistakeAvoid all-white florals with no blush; it looks like a wedding chapel photo, not a bridal shower.
12. Tabletop Balloon Arch for the Dessert Backdrop
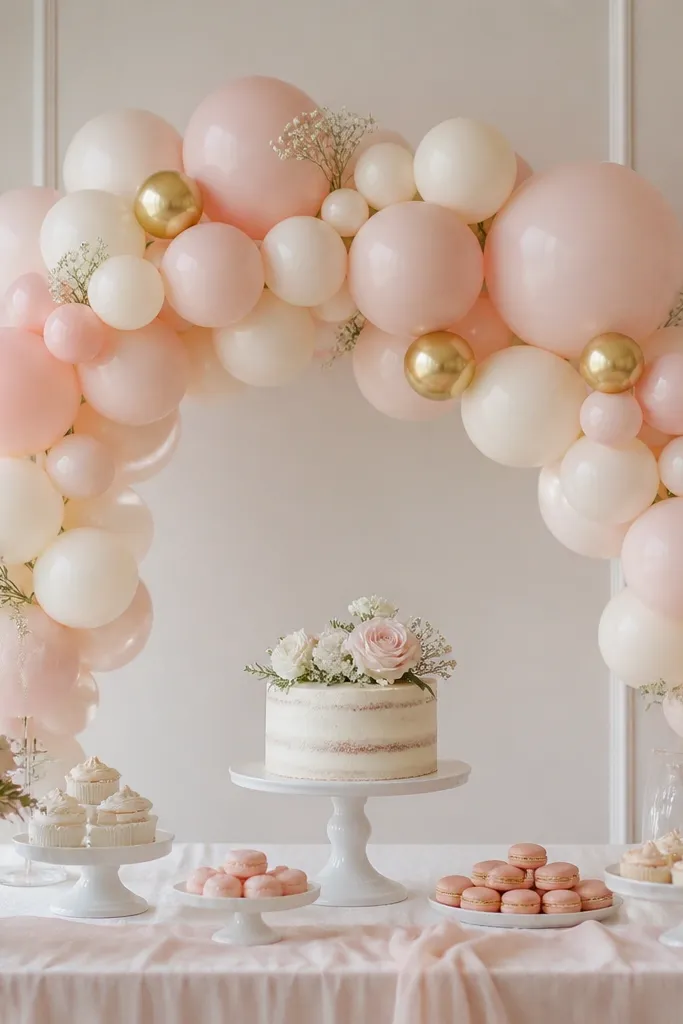
A tabletop balloon arch is a sweet spot: big enough to frame the center photo, small enough to assemble quickly. The arch shape pulls attention to the cake and the bride's hands without covering the whole wall. I use blush and cream so the arch looks soft, then add gold accents sparingly for light reflection. This is flattering for all body types because it centers the scene and keeps the visual focus at chest level. If the bride's outfit has a lot of detail, the arch keeps the background calm.
Choose a width that matches your table center - typically 18-24 inches for a small dessert setup. Build the arch using a balloon arch kit or a simple frame with removable zip ties. Create a gradient: more blush in the center, more cream toward the edges, with one or two gold balloons placed near the top corners. Place the cake stand under the arch so the cake sits exactly in the middle line. Add a small greenery garland along the table edge to connect the arch to the rest of the decor.
Try thisUse command hooks to hang a small "bride-to-be" card under the arch so it reads without blocking the cake.
Common mistakeAvoid a too-wide arch on a narrow table; it collapses visually and makes the center look cramped.
13. Gingham Picnic-Style Bridal To Be Setup With Neutral Bows
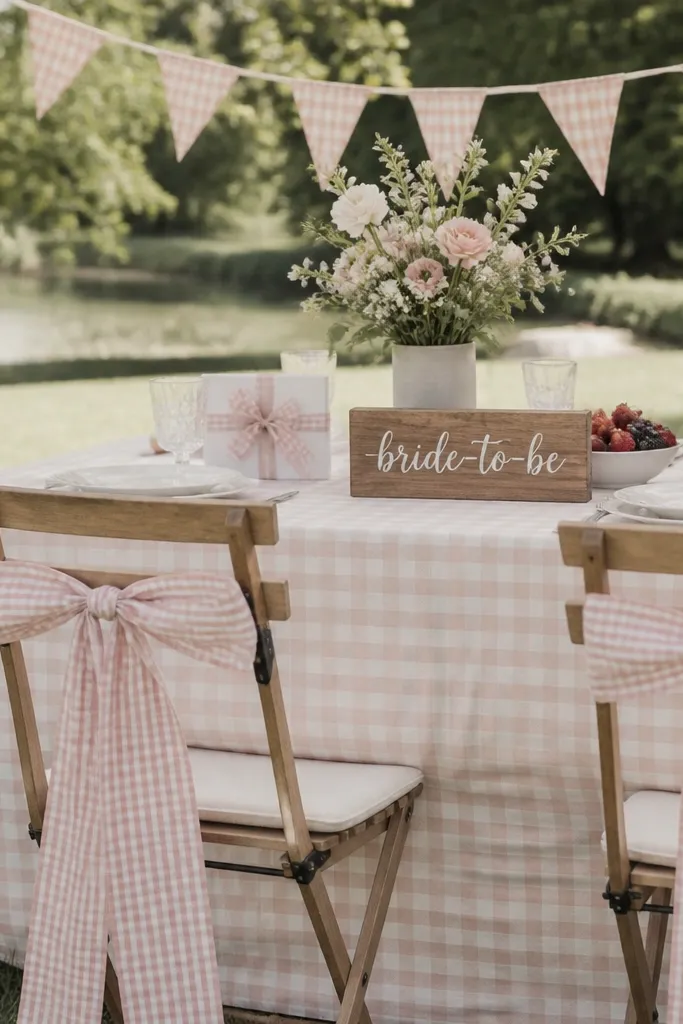
This is for outdoor showers or anyone who wants a casual, cozy look that still photographs clean. Gingham adds structure to the scene, so you don't need lots of fancy pieces. I stick to cream and blush gingham with neutral bows in cotton or satin so the palette stays soft and not overly themed. It flatters because the pattern gives a gentle contrast behind the bride's face and hands. If the bride wears denim, a white sundress, or a simple slip dress, this theme looks perfect.
Lay a cream-and-blush gingham cloth over the table, then add a runner only if the table is larger than the cloth. Tie small gingham or white cotton bows to chair backs using ribbon lengths about 18 inches long. Add a short bunting line across the table back or between two chairs using twine and clothespins. Place a "bride-to-be" sign on a wooden block at the table center - keep it at about 35-40 inches high. Style the food with simple trays and add one small vase with mixed white and blush flowers for height.
Try thisIf it's breezy, weigh down the bunting string with a small clothespin at the center.
Common mistakeAvoid using too many small patterned items at once; gingham already brings pattern energy.
14. One-Color Rose Wall With Acrylic "Bride" Sign
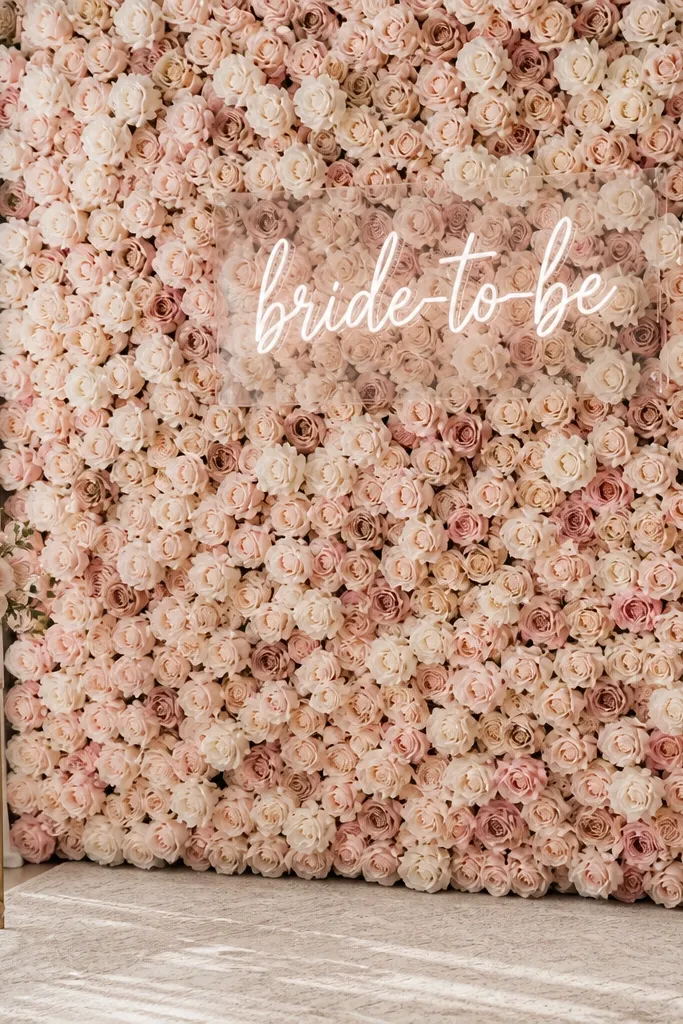
One-color rose walls are the fastest way to look styled because the color block fills the background completely. I prefer blush rose tones because they flatter warm and cool skin tones without looking too red. The acrylic sign keeps the text crisp and modern, and it doesn't fight the rose texture. This is a great choice when you want a dramatic photo spot but don't have time to build multiple layers. It also works well if the bride's dress is simple and you want the decor to carry the photo.
Place the rose wall panel against a flat wall or in a corner so it fills the background behind the bride. Add an acrylic sign on a stand at eye level, centered about 2-3 feet from where the bride will stand. Fill the lower area with a light rug or runner so the photo doesn't show bare floor. If the roses look too flat, add two or three extra stems at the bottom corners to create depth. Keep all other table items minimal - one cake stand and one floral vase - so the rose wall stays the main feature.
Try thisWipe the acrylic sign with a microfiber cloth right before photos to remove fingerprints and glare.
Common mistakeDon't add extra text signs around the room; the rose wall already reads as the event backdrop.
15. Wall Decal-Look Backdrop With Ribbon Grid and Mini Cards
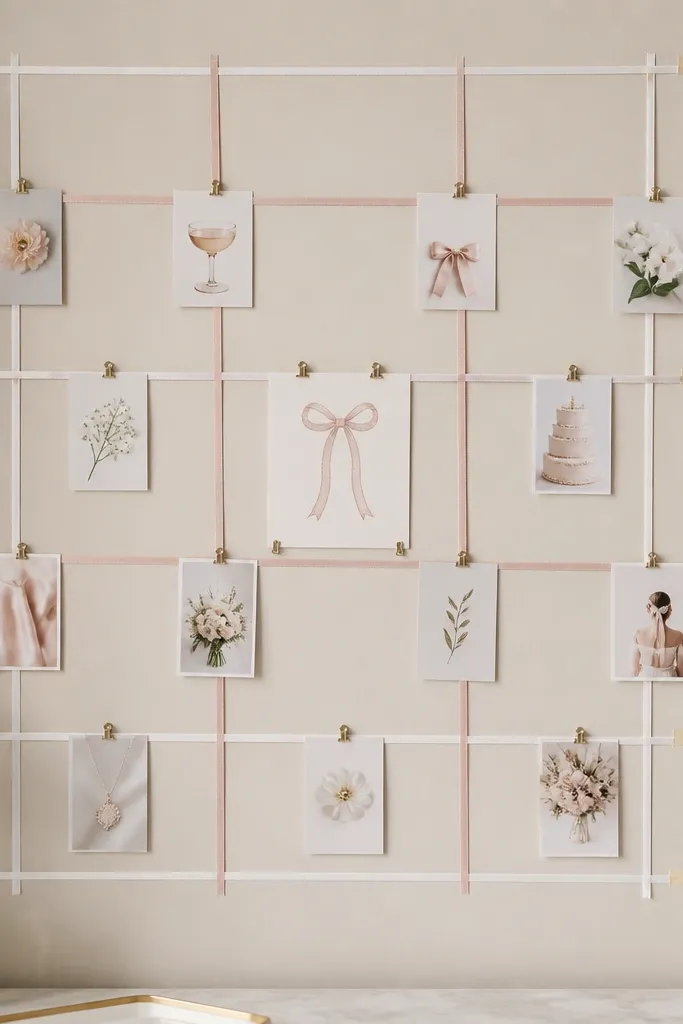
A ribbon grid gives you a clean backdrop that looks like a planned installation, even when you're using simple materials. I like thin ribbons because they don't overwhelm the room, and the grid pattern adds structure behind the bride's head and shoulders. Mini cards spaced across the grid make it feel interactive without needing a lot of objects. This setup works for both small and large rooms because it scales with your wall space. It also flatters because it keeps the background light and organized, so the bride doesn't disappear in busy patterns.
Use removable tape to create a grid on the wall with vertical and horizontal ribbon lines, spacing about 10-12 inches apart. Keep the center square open for the main card. Clip mini cards or photo tags onto ribbon intersections using small binder clips or ribbon ties. Place the "bride-to-be" card at the center intersection at about eye level. Add one small prop on the floor, like a blush gift bag or a small bouquet, aligned with the center so the lower half looks intentional.
Try thisMeasure once and tape the first vertical line perfectly; the whole grid looks better when the first line is straight.
Common mistakeAvoid using thick satin ribbon for the entire grid; it looks heavy and can peel tape off the wall.
16. Macaron Color Theme With Pastel Balloons and a Clear Cake Stand
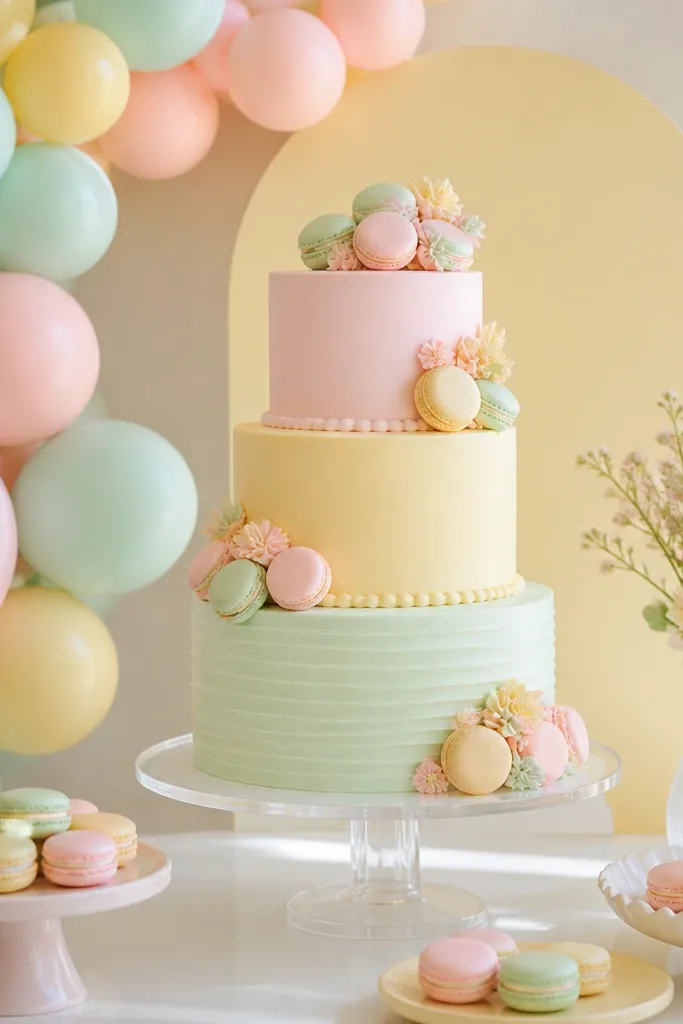
Pastel macaron tones look cute and grown-up at the same time, especially on clear acrylic. The balloons bring color without requiring lots of props, and the clear stand keeps the cake visually light. I keep the palette to three pastels plus one neutral so it doesn't turn into a rainbow. This setup flatters because soft pastels look good against both warm and cool skin tones. If the bride's dress is white, cream, or blush, the balloons bring the color to her without clashing.
Build a small balloon cluster behind the cake stand, not the entire wall. Use mint, pale pink, and butter yellow balloons, adding a few white balloons to soften the edges. Place the cake on a clear acrylic stand so the tiers look airy and the background balloons stay visible. Add a simple sign behind the stand - keep text black or deep charcoal for readability. Finally, scatter three to five pastel macarons or desserts on a tray near the front so the color theme repeats at table level.
Try thisUse a deep charcoal sign instead of light gray; it reads clearly in flash photos.
Common mistakeAvoid adding metallic everywhere; one gold or one silver accent is enough for a pastel theme.
17. Minimal Chic With White Draped Fabric and Blush Florals
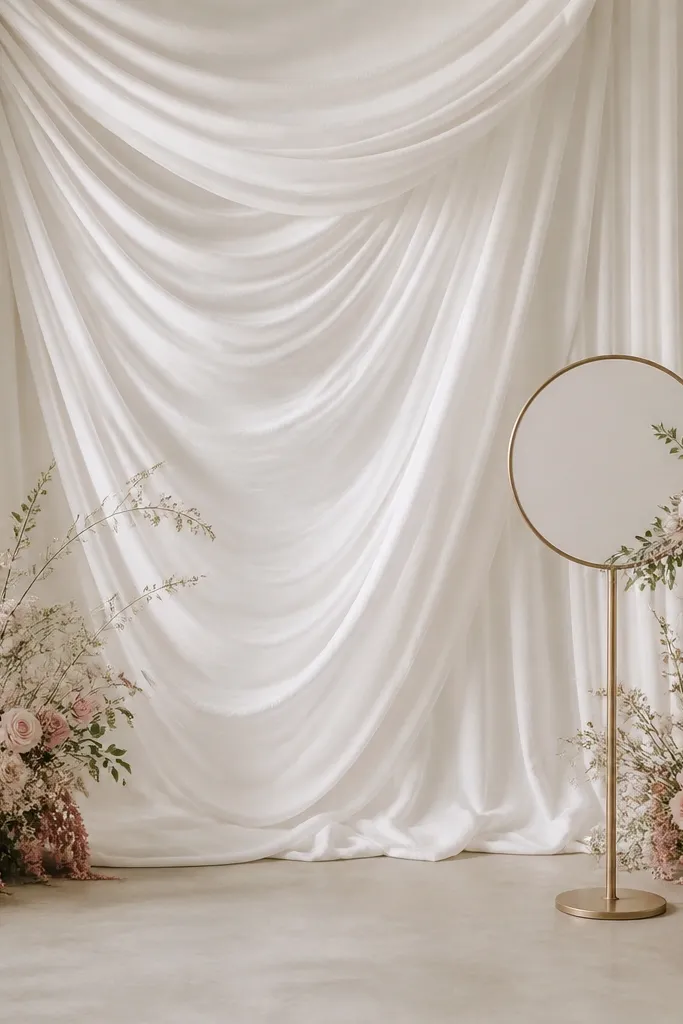
Minimal chic looks expensive because it relies on fabric movement, not lots of objects. White draped fabric makes a clean background that flatters skin and keeps attention on the bride's outfit. I add blush florals at the base so the scene isn't too blank. This works best when the bride-to-be has a dress with texture like lace, satin, or a structured bodice. It also works in rooms with busy walls because the fabric hides distractions.
Hang white fabric panels from a tension rod or two wall hooks so they fall in soft folds. Let the fabric drape from about 6-8 inches above where the bride's shoulders will be down to waist or hip height. Place blush floral bunches at the bottom corners using floral tape or removable clips. Stand a small sign in the center - keep it simple, white or blush with black lettering. Style the table with one neutral runner and one tall candle or vase so the decor doesn't compete with the fabric background.
Try thisSteam the fabric before hanging; wrinkles show up fast under overhead lights.
Common mistakeAvoid using sheer fabric that shows the wall through unevenly; it can look patchy in photos.
18. Kitchen Counter Bridal Setup With Tiered Cupcake Stand
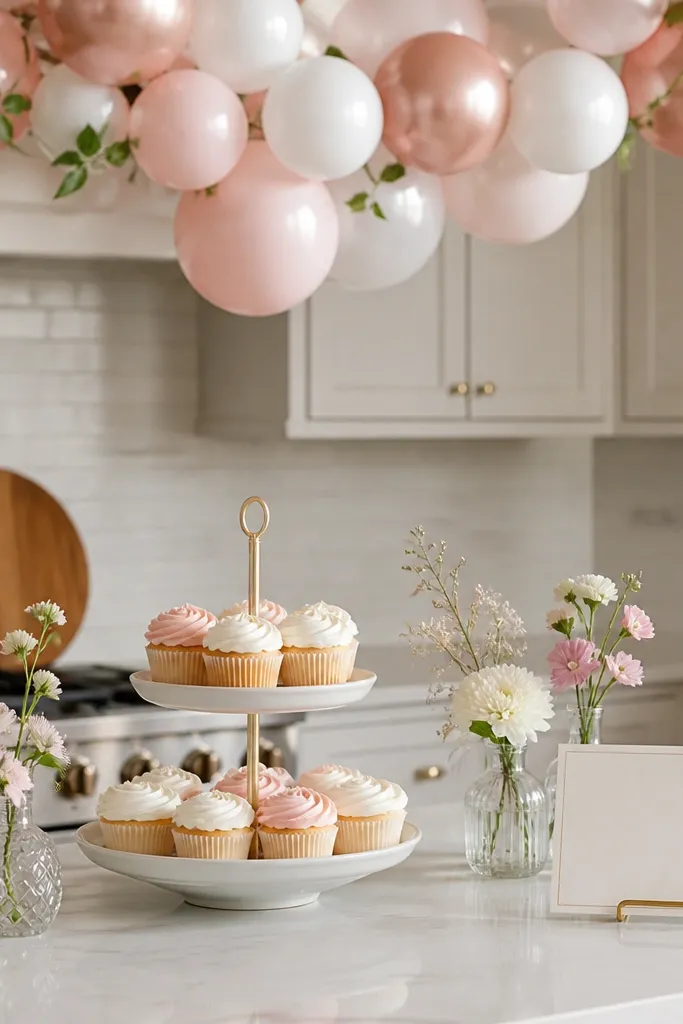
Kitchen counters are the real life decor space for many showers, and this setup makes them look intentional. A tiered cupcake stand creates height, while small bud vases add softness around it. I keep the balloon garland short because counters are narrow - you want it above eye level, not in guests' faces. This flatters the bride because it frames her when she stands nearby for photos with the stand. It also works for small gatherings where you don't want a full room transformation.
Start by wiping the counter and placing a runner or tray in the center so everything has a boundary. Add the tiered cupcake stand first, centering it so it's the tallest object. Place two small bud vases on either side, spaced about 10-12 inches from the stand. Hang a short balloon garland above the counter using removable hooks, keeping it narrow enough to fit the space. Add a placard sign at the front edge of the counter, angled slightly toward the camera.
Try thisUse a tray under the cupcakes so frosting doesn't smear counters if someone bumps the table.
Common mistakeAvoid cluttering the counter with random bags and napkins; it looks messy fast in kitchen lighting.
19. Chair Back Sashes With Mini Signs for Gift Opening Photos
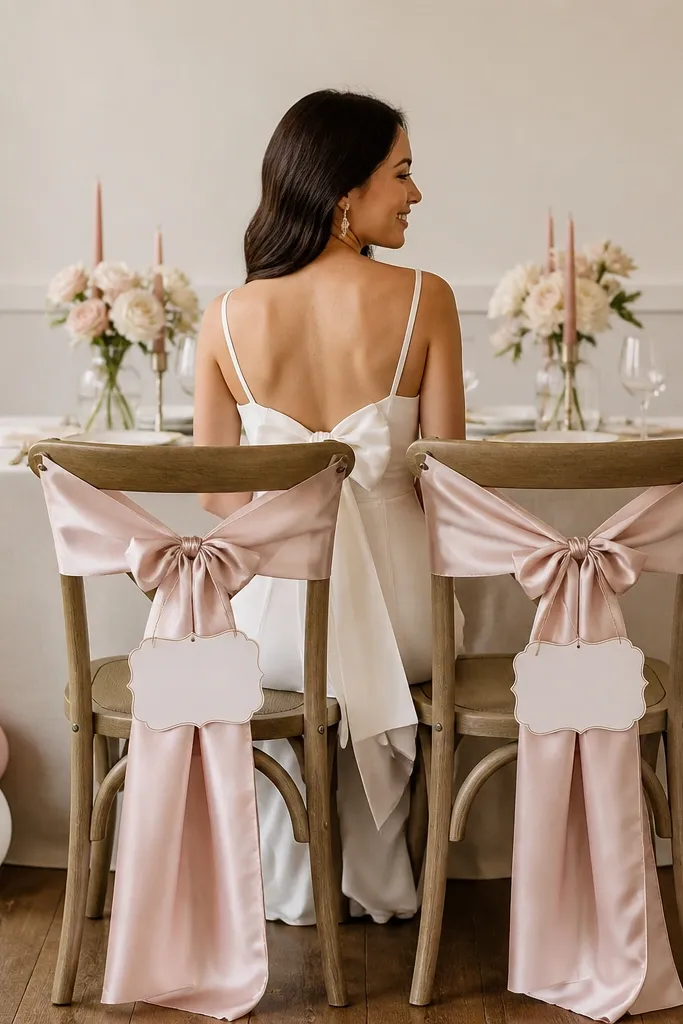
For gift opening, chair backs matter more than people think. Sashes create a clean vertical shape behind the bride, and mini signs add context without needing a big backdrop. I use blush satin sashes because they look smooth and reflect light gently. This setup works for both men and women showers because it's neutral in theme shape - it's about framing the person, not covering the room. It also helps photos because guests don't block the text when they sit in place.
Cut chair sash lengths so they hang from the top of the chair down to about mid-back (usually 22-28 inches depending on chair height). Tie the sash with a simple bow on the side so the knot shows toward the camera. Attach a mini sign to the front of the sash or the back using ribbon ties, with the bride-to-be name centered. Place the bride-to-be chair in the middle, then add a small balloon cluster on the floor behind the chair at knee height. Keep the background table simple - one runner and a single cake stand - so the chair framing stays the main feature.
Try thisUse satin or grosgrain ribbon, not cheap curling ribbon; it holds shape and looks neat in photos.
Common mistakeDon't use long sashes that drag onto the seat; they look rumpled immediately.
20. Clear Acrylic Table Sign + Rose Gold Confetti Balloons
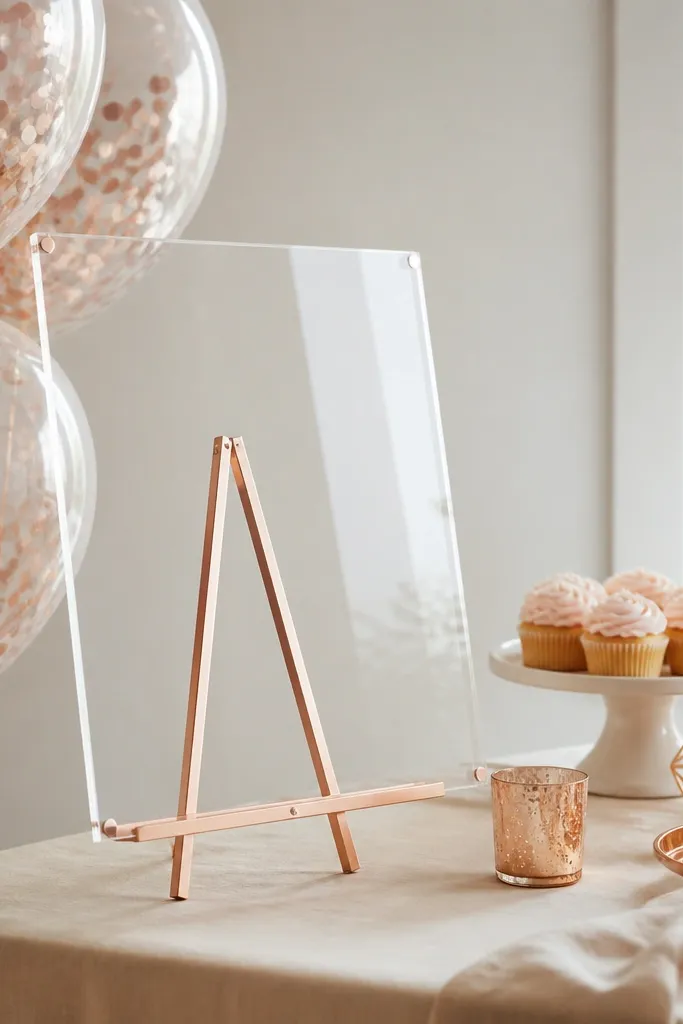
Confetti balloons add sparkle without needing extra lights, and a clear acrylic sign keeps text readable. I like rose gold confetti because it looks like party shine instead of random glitter blobs. The cream cloth base makes everything look clean and photo-friendly. This setup flatters because it adds brightness near the bride's face without covering the table completely. It's also a good choice when you don't want a big wall installation but still need a clear "bride-to-be" moment.
Place a cream table cloth or runner first, then position a clear acrylic sign on a small easel at the front center of the table. Cluster 3-5 rose gold confetti balloons to one side of the sign so the composition looks balanced. Add one small rose gold detail - like a napkin ring or metallic straw - but keep it minimal. Put a tray of desserts in front of the sign so the sign doesn't sit over empty space. Finally, adjust balloon heights so the confetti balloons sit around shoulder height when the bride stands beside the table.
Try thisWipe acrylic signs with microfiber before photos; even one fingerprint makes glare.
Common mistakeSkip heavy glitter confetti balloons if you're worried about mess; the smaller confetti looks cleaner and stays contained.