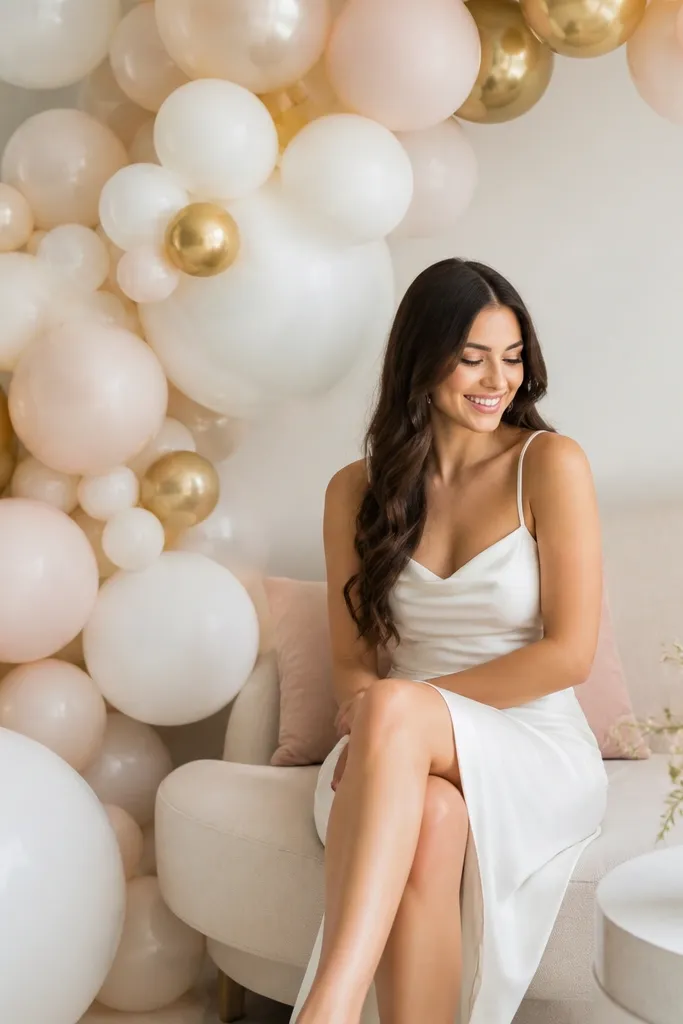
1. Blush Pearl Balloon Arch with Champagne Inner Halo
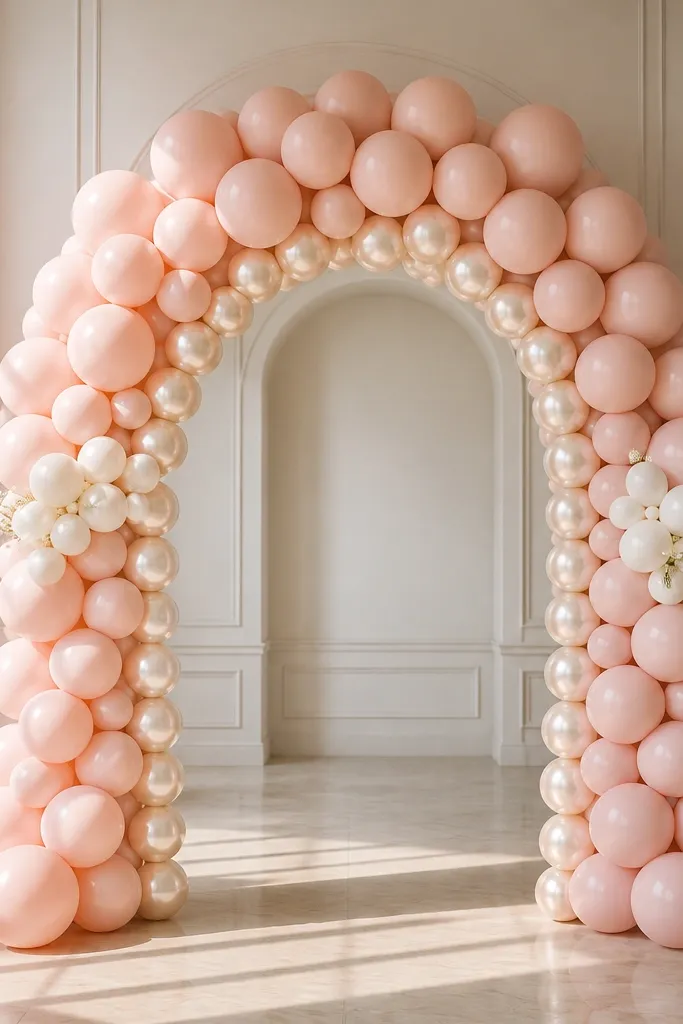
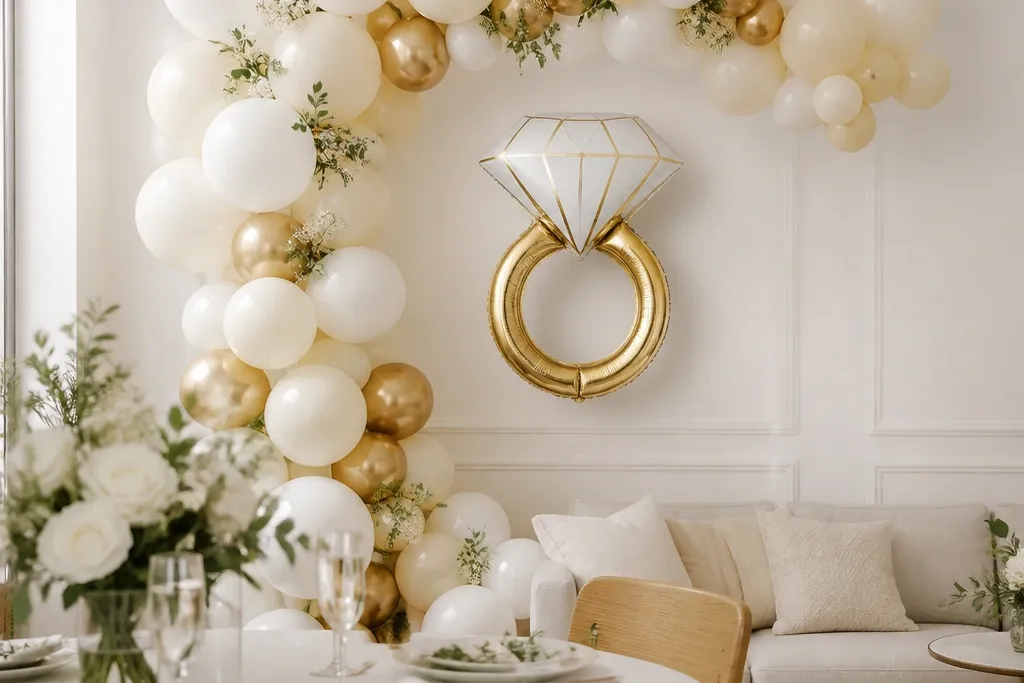
This is the "soft modern" look that still reads clearly in party photos. The blush matte balloons give you that smooth, skin-like color that flatters most skin tones, and the pearl champagne inner halo adds a gentle glow without turning yellow. I like this setup for baby showers and bachelorette brunches because it feels romantic but not overly bridal. If you're working with a warm venue (gold lighting, wood tables), the champagne ring keeps everything from looking pink-only.
Start by building a 4.5 to 5 foot arch frame and place the base feet about 20-24 inches apart so it stands without wobbling. Layer matte blush balloons as the outer layer, then tuck pearl champagne balloons inside the arch opening in a tighter loop so you get a halo effect. Add two small clusters at the bottom corners - one side can be slightly taller by 2-3 inches for a more natural curve. Finish with a white balloon mini-bouquet using 2-3 smaller balloons and keep the center of the arch clear for a sign or bride-to-be banner.
Try thisUse 10-12 inch matte blush balloons for the outer structure and 9 inch pearls for the halo so the halo stays defined on camera.
Common mistakeDon't use only glossy pink balloons - they reflect light and can look streaky in flash photos.
2. Pastel Gradient Balloon Frame for a "Bride-to-be" Photo Wall
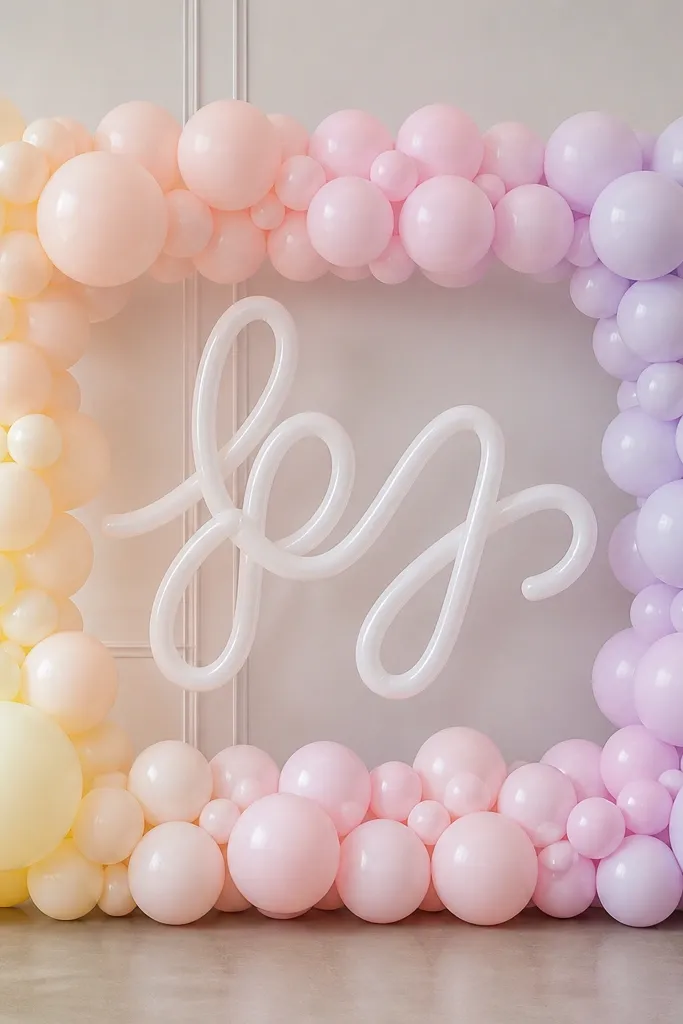
This design makes your photos look styled even if your party theme is simple. The gradient creates movement across the frame, so the background doesn't feel flat behind people. I've used cream-to-blush-to-lavender for mixed guest groups because it flatters a wide range of outfits - neutrals, denim, and even darker dresses. The key is keeping the gradient subtle - you want "soft fade," not rainbow.
Measure your photo wall area first, then build a rectangular balloon frame using a balloon strip method: create 2-3 horizontal balloon bands and connect them vertically. Place cream/pearl balloons on the left third, then blend into blush in the middle, and lavender on the right third. Use 12 inch balloons as your anchor points and fill with 5-9 inch balloons so the frame looks full. Put the bride-to-be script sign in the center and leave a small gap around it so the letters don't get lost in the gradient.
Try thisPhotograph test shots in the same lighting as the party so you can adjust the lavender ratio before it's fully filled in.
Common mistakeAvoid a hard color cutoff where each shade stops abruptly - it reads cheap and cuts the gradient look.
3. Soft Gold Confetti Balloon Column with White Base Cluster
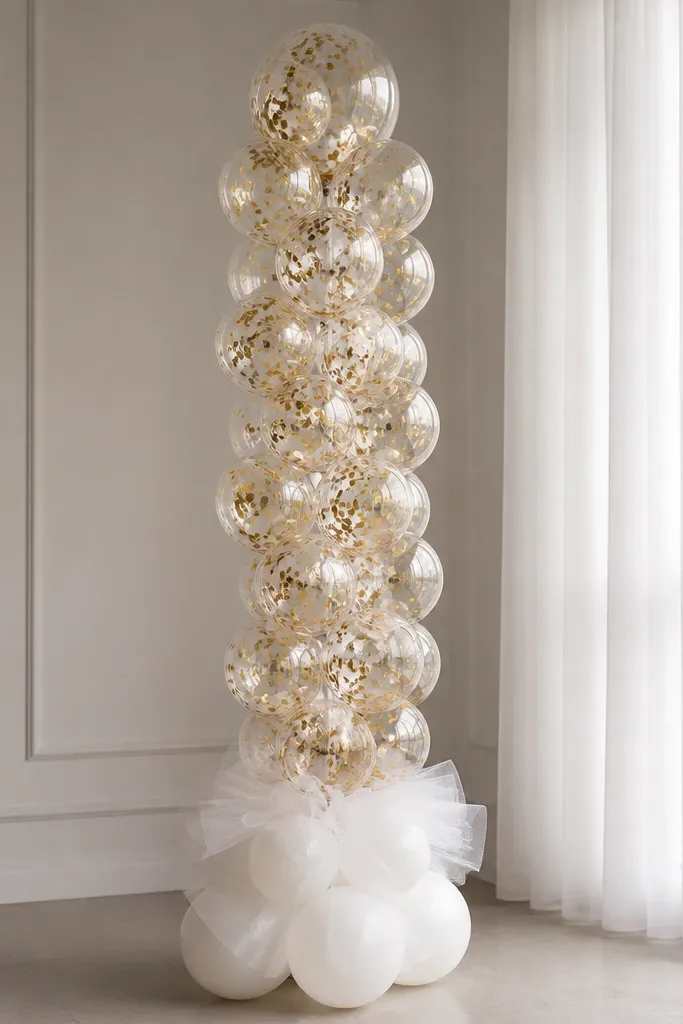
Confetti balloons add motion and sparkle without needing extra decor pieces. The clear + soft gold confetti combo looks luxe in person and doesn't overpower the rest of your table styling. I like this for modern bride to be decoration ideas when you want a glam vibe but the party is still daytime or casual. Pair it with white and cream so the gold stays warm instead of turning brassy.
Start with a weighted base - a balloon weight hidden under a tulle-wrapped container works great. Build the column using 18-24 inch clear confetti balloons in the center, then add white pearl balloons around the bottom to create a "bloom." Add a few blush matte balloons near the base so it doesn't look like a gold-only pole. Finish by tying a short loop of sheer tulle around the base so the column looks intentional from the side.
Try thisHang or place the column near a light source so the confetti catches sparkle when people walk by.
Common mistakeDon't overfill confetti balloons - if the confetti is too dense, the balloon looks messy instead of festive.
4. Matte Black + Blush Balloon Corner for a Modern Glam Backdrop
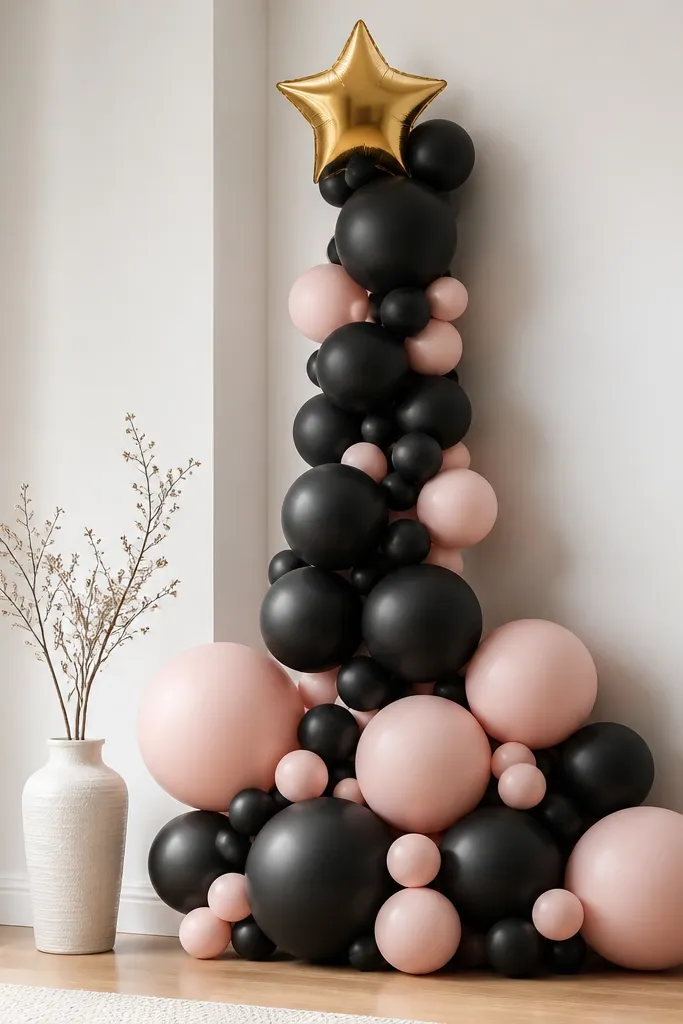
This is for the bride-to-be who wants modern, not sweet. Matte black gives clean contrast and makes blush look richer, especially under warm lighting. I've seen this work incredibly well with satin robes, black-and-white outfits, and even denim party themes. It also photographs well because the dark balloons reduce glare and make faces stand out.
Start by creating a V-shaped frame using a balloon stand or two freestanding bases. Place matte black balloons as the main verticals, with blush matte balloons filling the gaps between them. Add one gold foil star or heart at the top to give a single focal sparkle rather than a scatter of accents. Put a small white balloon cluster at the base so the corner doesn't look like it's floating.
Try thisUse mostly 12 inch matte black balloons and only a few smaller ones at the edges so the shape stays bold.
Common mistakeAvoid mixing black glossy balloons - they reflect overhead lights and can look uneven.
5. Rose Gold Foil Heart Balloon Trio with Mini Flower Cluster
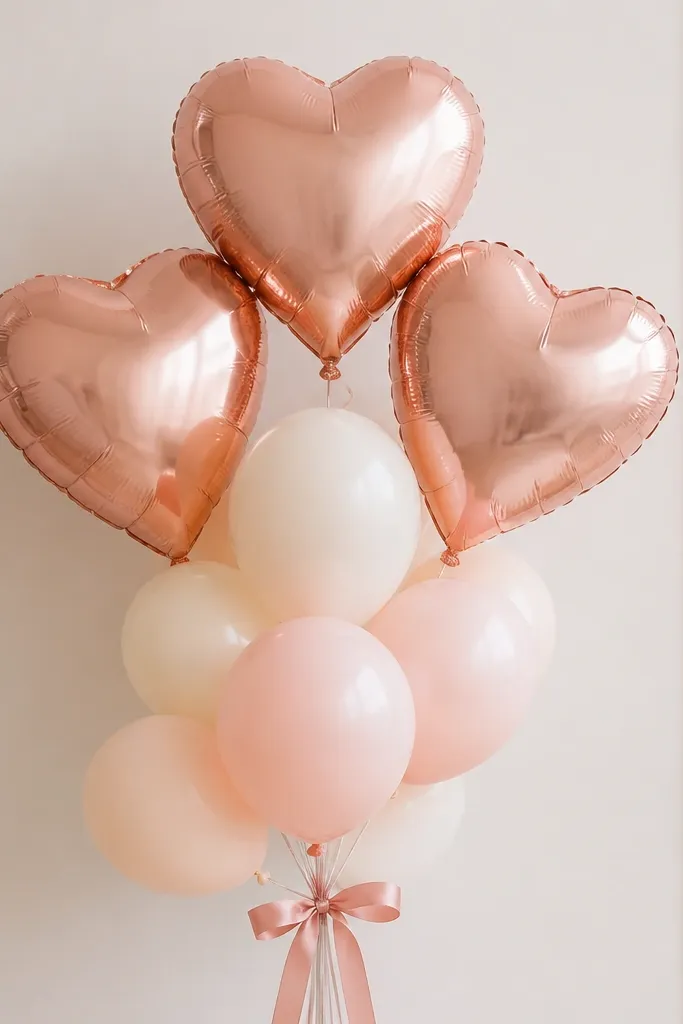
Foil hearts look cute, but this version keeps it modern by limiting the palette and using a clean trio layout. Rose gold is flattering because it sits between warm gold and soft pink, so it works with both blush outfits and champagne décor. I've used this on dessert tables and cake stands where you need height without a huge wall. It's also a great option if you're short on floor space.
Inflate three rose gold foil hearts - keep the center heart slightly taller by about 2 inches. Tie them to a small ribbon handle or a mini balloon base so they hang in an arc. Build a bottom cluster using 9-11 inch cream and blush matte balloons, then add 1-2 small pearl balloons for shine. Wrap the tie point with a 1.5 inch satin ribbon band so the knot looks finished in close-up photos.
Try thisUse a satin ribbon in champagne, not bright white, so it matches the rose gold tone.
Common mistakeSkip the extra foil shapes - too many different foils make the setup look cluttered.
6. Monochrome White Pearl Balloon Wall with One Blush Strip
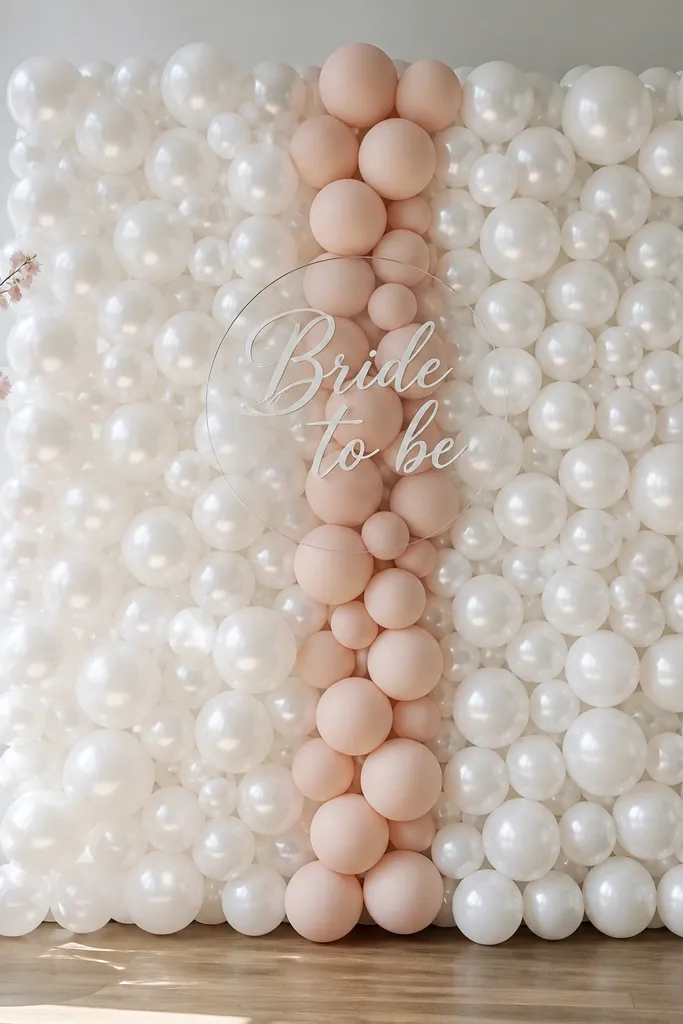
If you want sleek, modern bride to be decoration ideas, monochrome is the fastest way to look expensive. White pearl balloons give a soft reflective surface that looks clean on camera, especially with bright backgrounds. The one blush strip adds just enough contrast to guide the eye to the sign and the bride-to-be. This works well for minimalist venues, garden setups with lots of greenery, and parties where you already have lots of table decor.
Start with a balloon wall frame or grid using a lightweight net and connect white pearl balloons as the main fill. Create the blush strip by reserving a straight column for blush matte balloons and keep the rest fully white. Use 12 inch pearls in the center of each panel section and 9 inch pearls around edges so it looks layered. Add the acrylic sign in the center and keep the blush strip directly behind it for maximum readability.
Try thisChoose pearl balloons over standard glossy white - they look smoother and don't show fingerprints as easily.
Common mistakeDon't mix too many sizes randomly - chaotic spacing makes balloon walls look thin.
7. Champagne + Blush Balloon Garland Across a Dessert Table
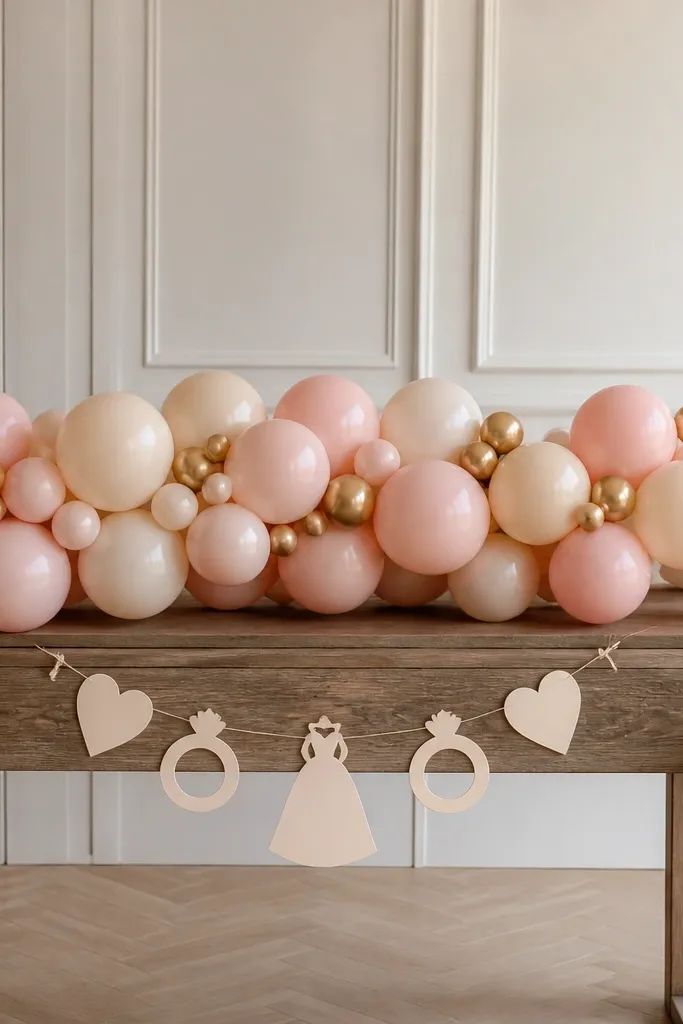
A garland is the smartest way to decorate without blocking sightlines. This one looks modern because the colors are tight and the balloon sizes graduate from larger at the center to smaller at the ends. Champagne and blush are easy on camera and pair with almost any cake frosting color. I use this when the room has strong décor already, like floral centerpieces, because balloons add structure without stealing the whole stage.
Start by marking the table length and plan your garland to span about 80-90% of it so it doesn't look like an afterthought. Use a balloon strip or balloon tape method and alternate champagne 11-12 inch balloons with blush 9 inch balloons. Add gold micro-balloons at the corners and between clusters so the garland looks airy instead of heavy. Hang a banner from the center balloon cluster, then tuck the ends slightly down so the garland sits like a curve, not a straight line.
Try thisKeep the banner centered and use white or cream lettering so it pops against champagne.
Common mistakeAvoid tying garlands too high - if it sits above eye level, the table looks unfinished from the front.
8. Baby Pink and Cream Balloon Stack with "Floating" Look
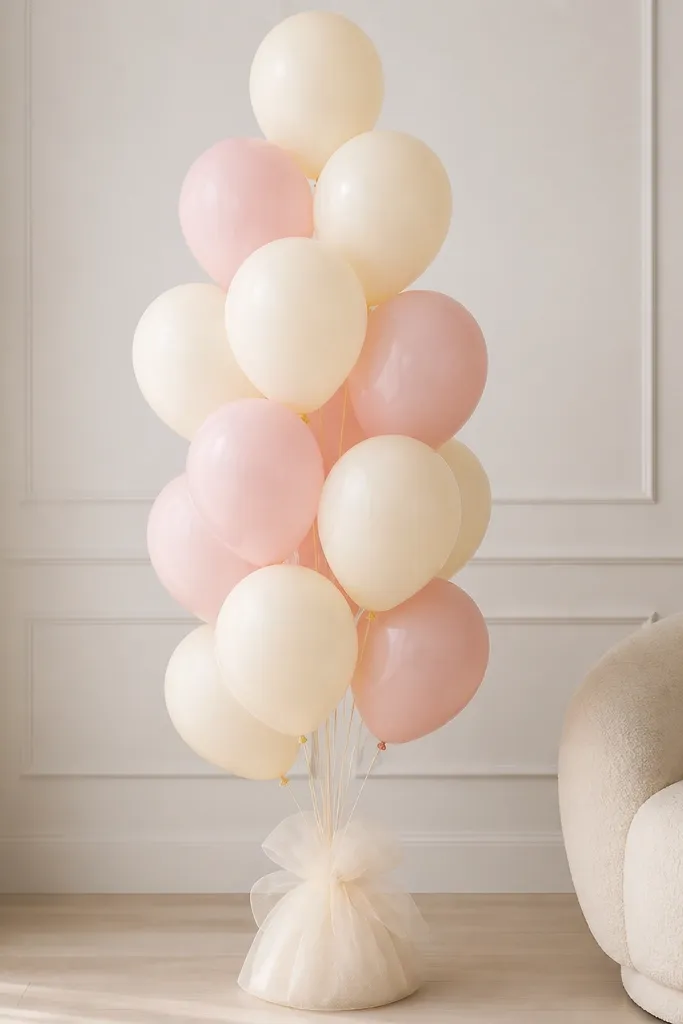
This setup gives you vertical height without a full arch. The floating look makes the party feel airy, and it's perfect for smaller spaces like apartments or narrow hallways. Baby pink and cream is forgiving with skin tones and works with both warm and cool lighting. The trick is the base - when the base is covered well, it looks like the balloons are just hovering.
Use a clear balloon weight or a hidden weighted container and cover it with a sheer fabric wrap. Stack balloons in graduating sizes: largest at the bottom, medium in the middle, and smaller on top so the silhouette tapers. Mix baby pink matte balloons with cream pearl balloons for a soft contrast. Finish by adding one small accent foil balloon near the top, then gather the sheer fabric at the base into a neat knot.
Try thisIf you're placing it near a doorway, keep the stack height at about 6 feet so it doesn't bump guests.
Common mistakeDon't leave the weight visible - it instantly kills the floating effect.
9. White Balloon "Bride-to-be" Letters with Blush Ombre Fill
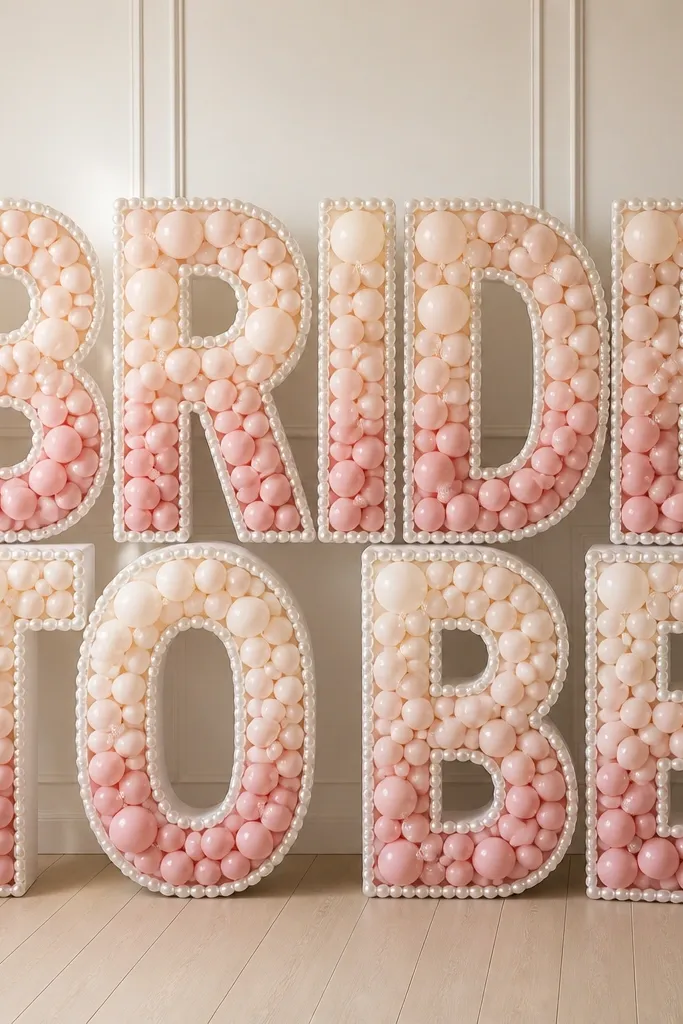
Letter balloons are the fastest way to make modern bride to be decoration ideas look intentional. This version uses white letter balloons as the clean outline, then fills behind them with blush ombre small balloons so the letters look dimensional. Ombre inside the letters keeps it soft and modern, not cartoonish. It's also great for guests because it gives them an obvious photo target.
Start by inflating your letter balloons and placing them upright on a stable weighted base. Build the ombre fill by placing pale pink behind the top and transitioning to deeper blush near the bottom - aim for a smooth fade over 8-10 inches. Use small 6-9 inch balloons and tuck them behind the letter contours so they don't pop out unevenly. Add pearl balloons at the corners of the base cluster so the bottom looks thick and finished.
Try thisUse matte small balloons for the ombre fill so the letters don't glare under flash.
Common mistakeAvoid filling too loosely - gaps inside the letters look hollow in photos.
10. Peach Rosette Balloon Backdrop with One Clear Balloon Accent
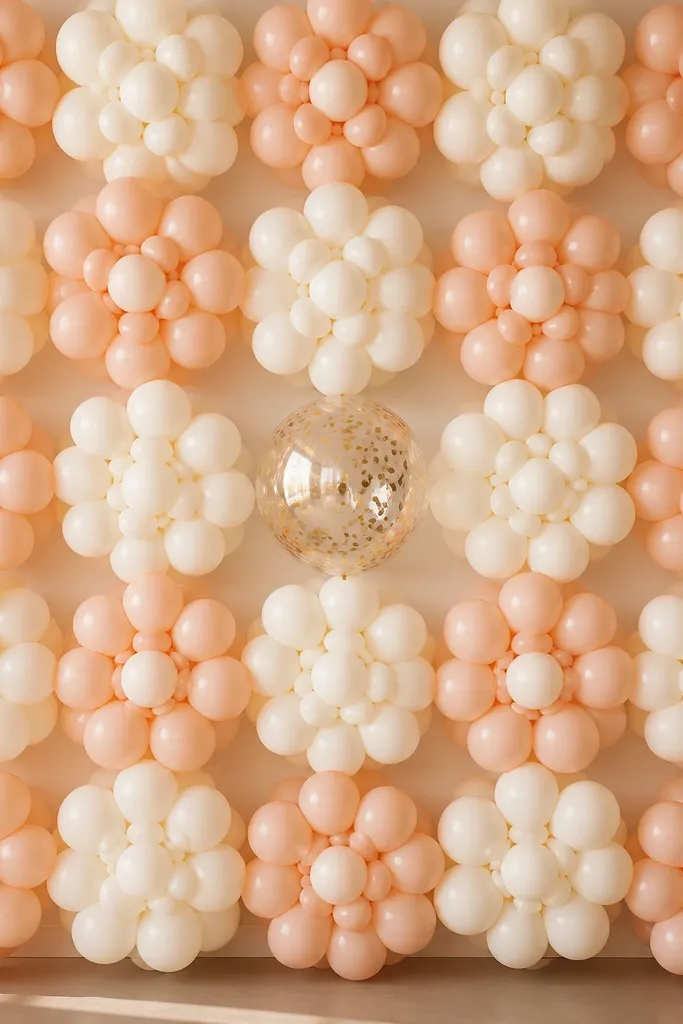
Rosette-style balloon walls look like décor you'd see at a boutique event, but they're totally doable at home if you plan your repeating pattern. Peach rosettes add warmth without going too orange, and the cream pieces keep it light. The one clear confetti balloon acts like a "spark button" that draws the eye to the center. This is perfect when you want a textured background that still looks modern and clean.
Choose a repeating grid size - I like 2-foot squares for a backdrop that's easy to manage. Create rosettes using 5-7 balloons per rosette, alternating peach and cream to keep the pattern balanced. Place the rosettes so seams are tight, then add a small central cluster with a single clear confetti balloon for contrast. Keep the top edge tidy by finishing with a slightly larger rosette row so the backdrop looks framed.
Try thisDo a dry layout on the floor first so you don't end up with one patch that's too peach-heavy.
Common mistakeDon't leave big blank squares - the rosette texture only looks premium when the grid is full.
11. Midnight Blue and Rose Gold Balloon Cluster with Starbursts
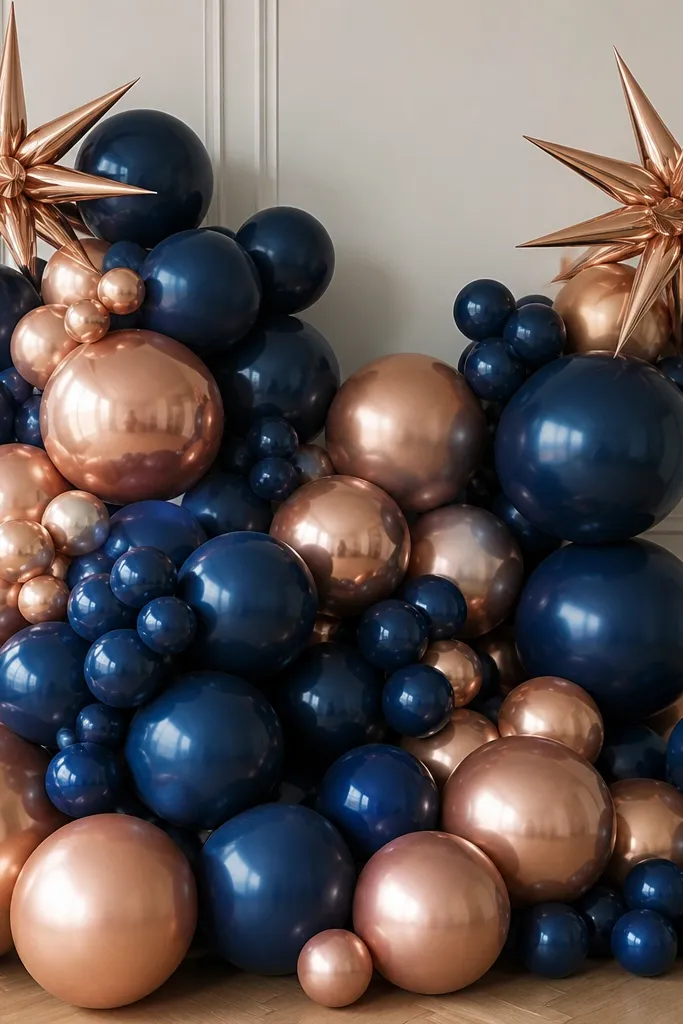
This is modern bride to be decoration ideas for the party that feels more like a night out. Midnight blue is dramatic, but it still photographs clean when you pair it with rose gold instead of bright pink. Starbursts add a sense of celebration without needing a full wall. I've used this for engagement parties and late-evening showers where the lighting is dim and warm.
Build a cluster on a freestanding base or weighted stand so it stays upright. Use midnight blue balloons as the majority, then scatter rose gold foil balloons in small pockets so the cluster has sparkle points. Add two starburst balloons at the top left and top right, keeping them angled toward the center so they frame the bride-to-be photo zone. Finish with a small halo of mini balloons around the base to hide the stand and make the cluster look denser.
Try thisKeep the color ratio around 70% midnight blue and 30% rose gold so it looks intentional, not heavy.
Common mistakeAvoid mixing too many different blues - it makes the cluster look like random leftovers.
12. Blush Balloon Curtain for a Small Entryway Photo Moment
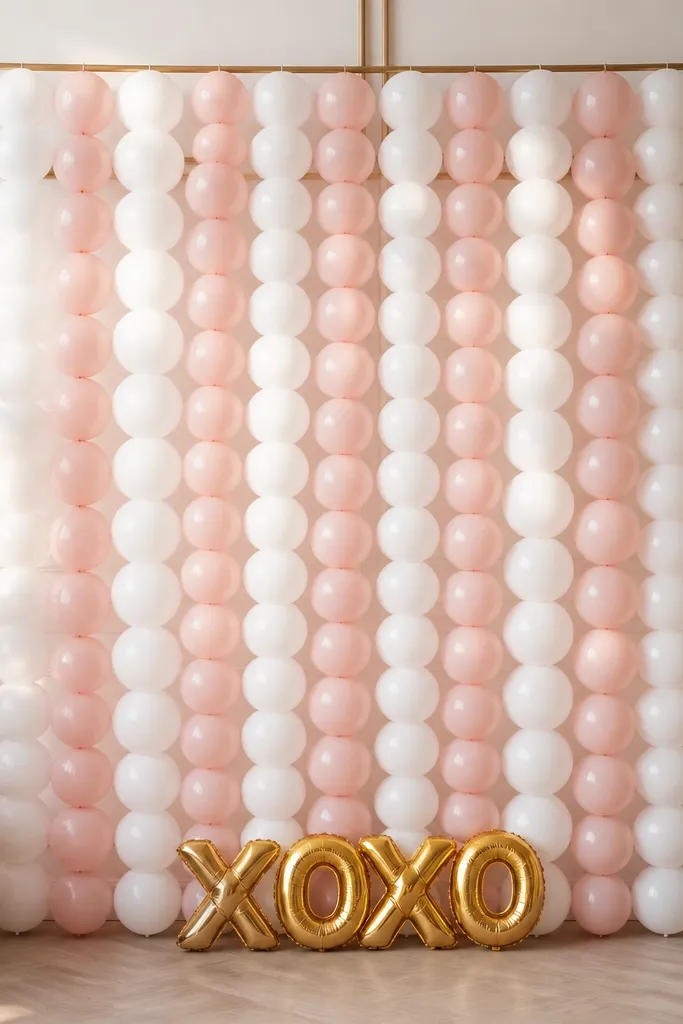
A balloon curtain is a sneaky way to create a photo moment when you don't have a full wall. It frames the person passing through and gives you that "step-in" feeling. Blush and white keep it modern and soft, and the vertical strands make people look taller in photos. This works especially well for entryways, hall corners, and photo ops behind the dessert table.
Measure your entry width and install a sturdy top bar or ribbon line strong enough to hold weight. Create vertical strands by tying balloon clusters to fishing line or clear string at staggered heights, then attach each strand to the top line. Alternate 10-12 inch blush balloons with smaller 6-8 inch white pearls so the curtain has rhythm. Add a single gold foil balloon near eye level for a focal point, then trim the bottom so the curtain ends around 6-8 inches above the floor.
Try thisUse pearl white in the middle strands - it creates depth when guests move past the curtain.
Common mistakeDon't make every strand the same height - uniformity looks flat and staged.
13. Tulle-Wrapped Balloon Bouquet Cluster for the Bride-to-be Chair
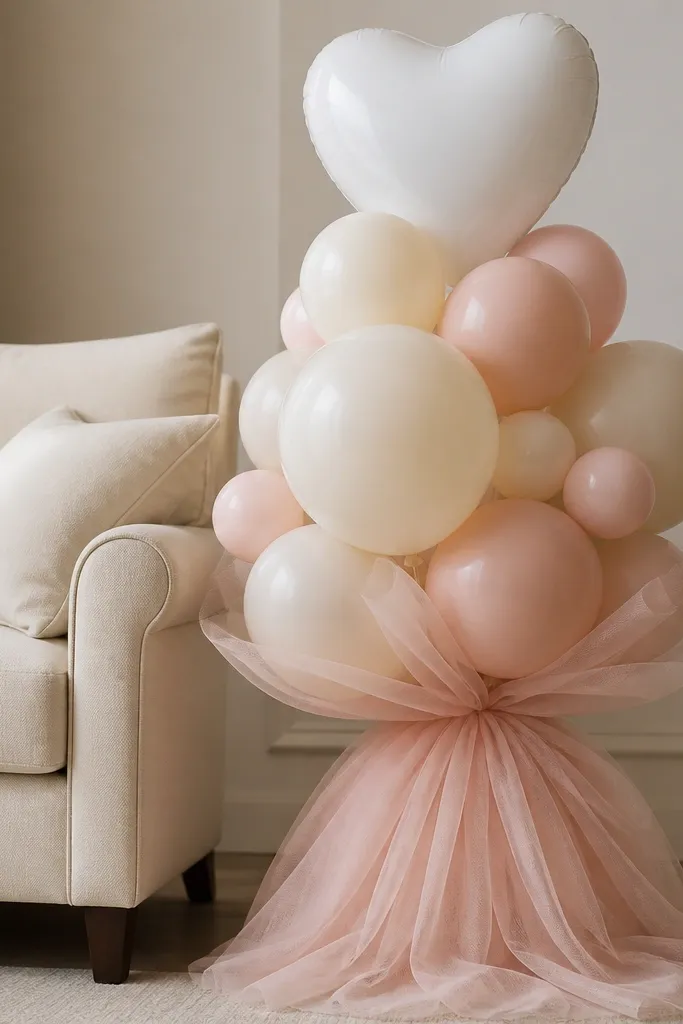
This chair-side bouquet turns a plain chair into a photo magnet. The tulle makes the balloons look styled instead of "just balloons," and it hides the messy base ties you get when you don't use a proper stand. Cream and blush are flattering in close-ups, and the white heart adds a gentle focal point without going full theme. I like this for bridal showers because it makes the bride-to-be feel centered without building a huge backdrop.
Start with a small weighted base or a bouquet holder that fits behind the chair so it doesn't tip. Arrange 12-inch cream balloons around the outside and 9-inch blush balloons in the middle for a layered look. Wrap blush tulle around the base and gather it behind the chair so the knot is hidden from the camera. Add one white heart balloon on top, then use a thin satin ribbon to tie the heart string so it hangs straight.
Try thisTulle should be soft and slightly see-through - thick tulle makes the bouquet look bulky and cheap.
Common mistakeDon't tie the ribbon directly to the balloon knot - the knot will show and look messy.
14. Clear Balloon "Number" Accent with Blush Fill and Gold Rim
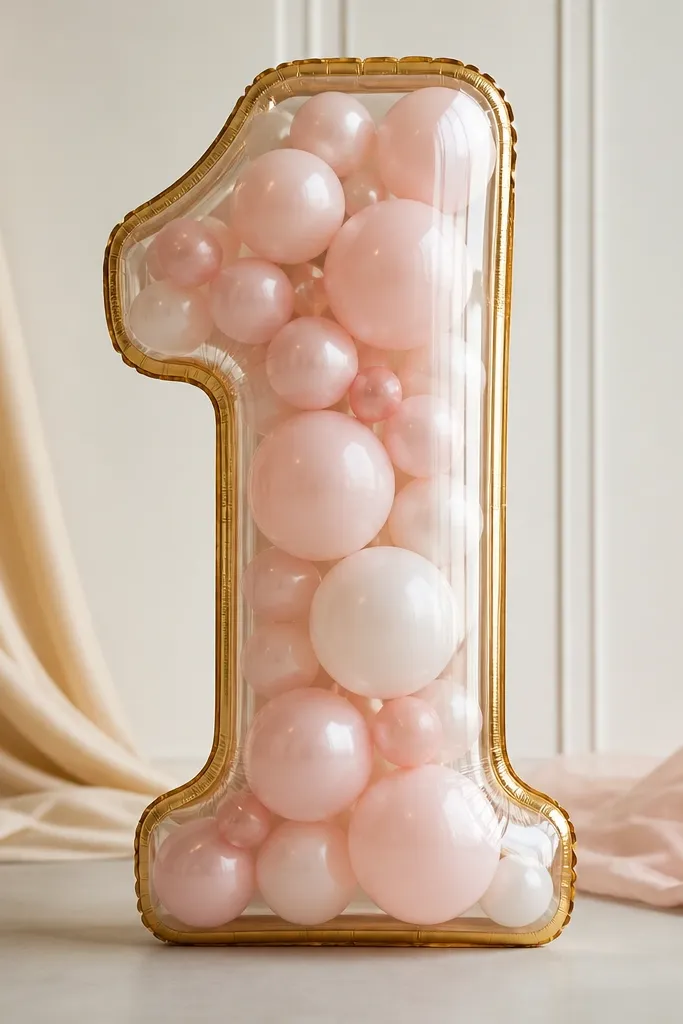
Number accents look modern because they feel like décor, not just a theme. Clear balloons with blush fill create depth - you can see the color layered inside, which reads well in both daylight and flash. A gold rim keeps the number from looking plain and ties it to rose gold or champagne décor. I've used this for "how far along" milestones and for bride-to-be parties where you want a clear, graphic focal point.
Pick the number shape you want and inflate it carefully, then insert blush balloon fill behind the clear shell using small balloons. Add a gold foil balloon strip or rim balloons around the edges for a defined outline. Place it on a weighted base or in a clear acrylic stand so it stands upright and doesn't lean toward the table. Add a small supporting cluster of cream and blush balloons behind it so the number looks like part of the scene, not floating alone.
Try thisKeep the blush fill tighter at the top of the number so it looks like a gradient inside the clear shell.
Common mistakeAvoid using too much fill - if it's packed solid, the clear balloon stops looking clear.
15. Champagne Balloon Arch with White Dried Flower Spray Accent
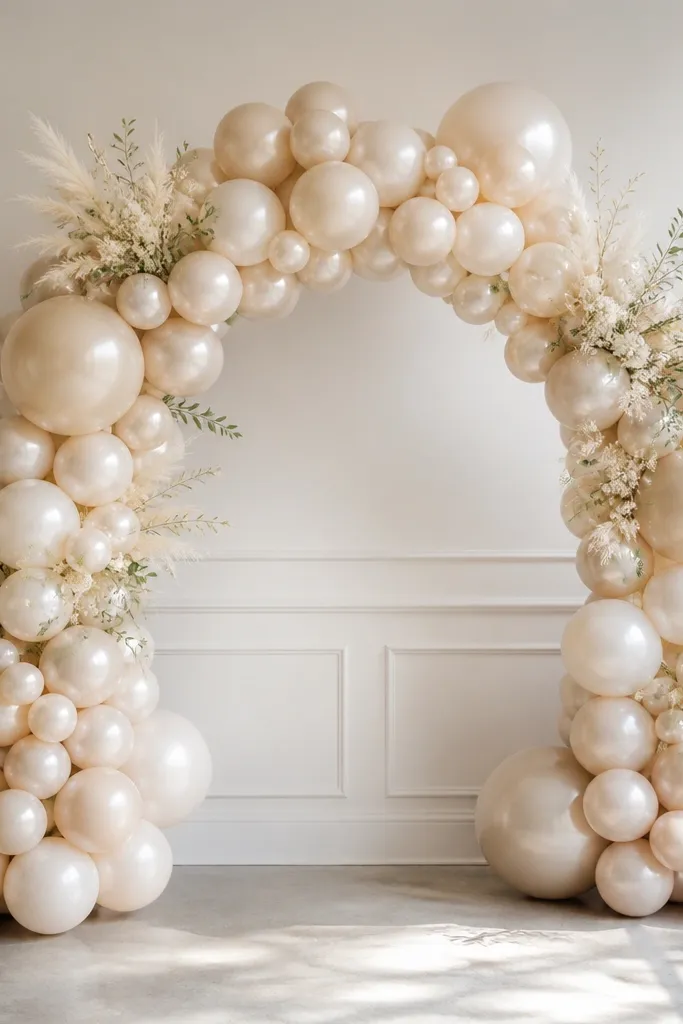
This is modern bride to be decoration ideas when you want "grown-up" instead of cartoon cute. Champagne balloons make dried flowers look intentional, not random. The white dried flower spray adds texture you can't get from balloons alone, and it photographs beautifully because it creates fine detail against the balloon smooth surfaces. I've done this at indoor garden-style showers and it looks especially good with linen napkins and neutral plates.
Build the arch using champagne pearl balloons as the main layer and add a few matte white balloons to keep the texture from going too uniform. Tuck small dried flower sprays into the balloon clusters at eye level - place them where the camera will hit, not randomly throughout. Add a tiny hint of soft green stems only in the top half so it looks like natural styling. Finish with a simple sign or banner placed inside the arch opening so the floral accents frame it.
Try thisUse faux dried flowers if you're in a humid venue - real dried stems can sag as the air changes.
Common mistakeDon't press the stems too deep - if the flowers get crushed by balloon pressure, they look flattened.