1. Champagne balloon column with ribbon streamers
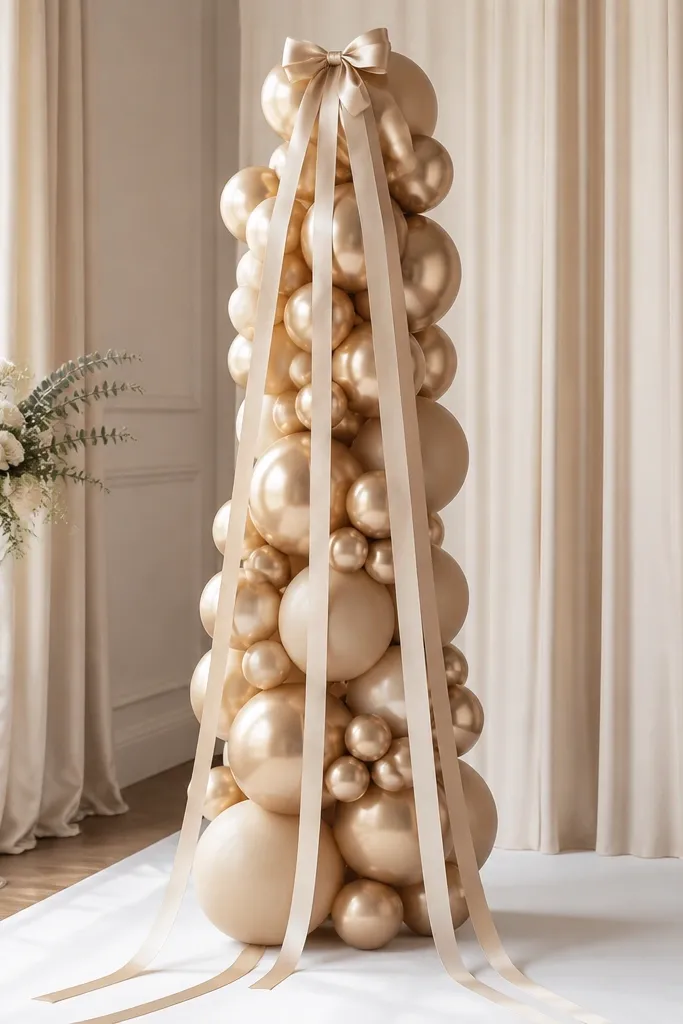
This is the fastest way I've found to make a room feel bridal without building anything complicated. Use champagne and soft white balloons together so the column looks cohesive from different angles, not like random singles. Add ribbon streamers in champagne satin or satin-like polyester so they catch light in photos and soften the hard balloon shapes. It looks best in rooms with neutral floors or light walls - cream, warm white, or light greige - because the champagne tone warms everything up. If the bride's skin tone is fair, champagne reads flattering rather than too stark; if she's deeper-toned, the metallic balloons still glow without washing her out in pictures.
Start by marking the spot where you want the column to stand, ideally near the main seating or gift table. Build a cluster with 3-4 balloons on the base height, then add a few more tiers as you go up, keeping the largest balloons at about chest height for guests. Tie ribbon streamers to each balloon group - aim for 3-5 streamers per tier so it looks full but not tangled. Place the column on a weighted base or a heavy balloon stand so it doesn't tilt when people walk by. Finish by centering a small bow or a mini "bride-to-be" label on the front so it reads clearly in close-ups.
Try thisUse matte balloons mixed with metallic ones; the matte ones hide scuffs and look more expensive under indoor lighting.
Common mistakeAvoid all one-color balloons - without matte/metallic contrast, it looks flat and cheap.
2. White tulle + cream satin backdrop behind the gift table
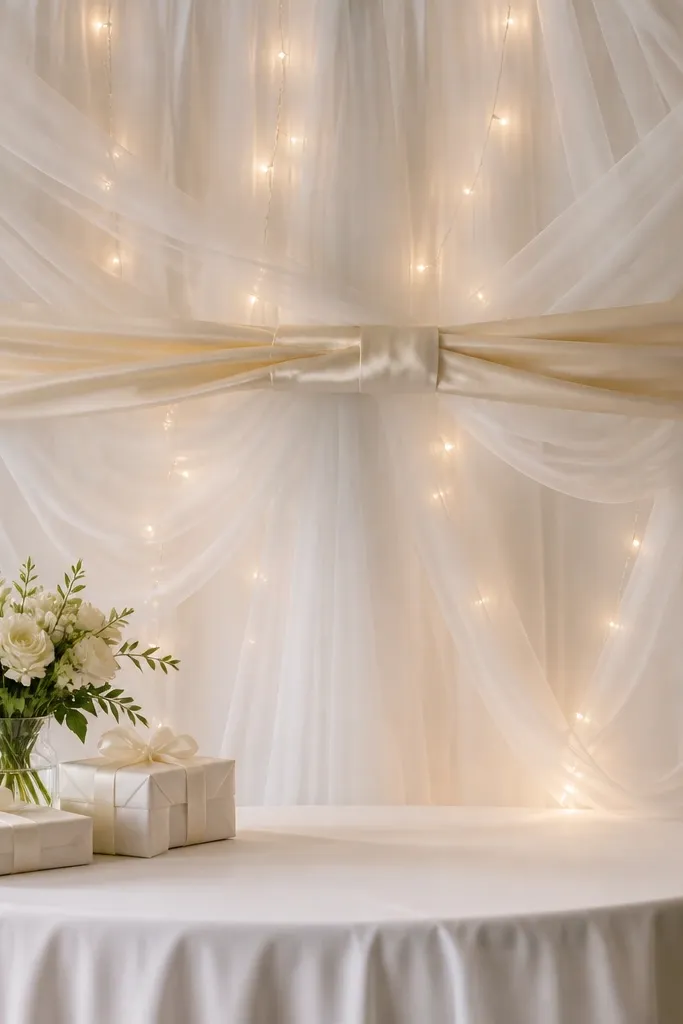
This backdrop makes every gift photo look intentional, even if the table decor is simple. The tulle brings softness and movement, while the cream satin gives structure so the background doesn't look like a foggy sheet. I like using white tulle over a cream base because the slight warmth keeps it flattering on both warm and cool skin tones. It works especially well for brides who want a clean, classic look without heavy florals. If the room has beige walls or warm wood, the cream satin makes the whole setup feel coordinated instead of stark.
Start by hanging a lightweight backdrop frame or tension rod behind the gift table so it stays taut. Drape white tulle in overlapping panels, letting the folds fall 8-12 inches down past the table edge. Add a cream satin ribbon or sash horizontally at mid-height, then tie it off on both sides for symmetry. Thread a small warm-white LED string lightly behind the tulle so you get a glow without visible wires. Style the table front with just two things - a simple floral arrangement or greenery and a clean runner - so the backdrop stays the hero.
Try thisChoose tulle that has a bit of stiffness; it holds folds better and looks fuller without extra material.
Common mistakeSkip thin, wrinkly fabric - it collapses and reads like a last-minute sheet.
3. Meadow-style faux greenery garland with blush mini bows
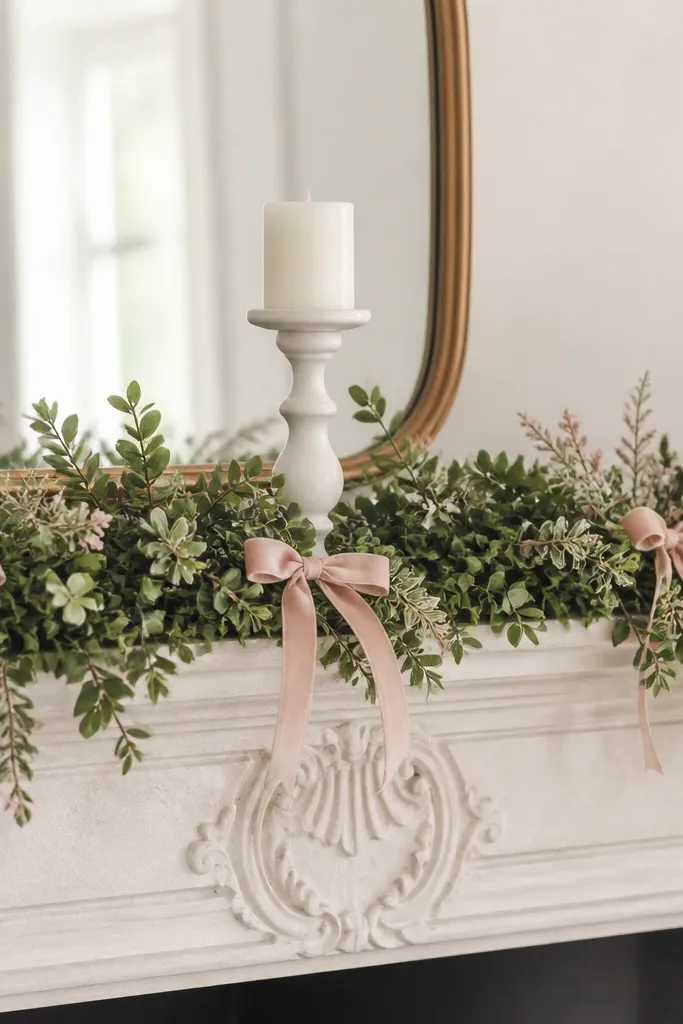
A greenery garland is my go-to low maintenance decoration because it looks "done" even before you add any candles or signs. Faux greenery stays full and doesn't shed like real branches, so it's easier for a room that will be busy with guests. Pair it with blush mini bows for a soft bridal feel without turning it into a cartoon theme. This works in nearly every home - farmhouse, modern, and even apartments - because greenery blends into wall colors and furniture finishes. It also photographs well for both lighter and deeper complexions because blush is gentle and the green gives contrast.
Start by measuring the surface you're decorating - mantel length, buffet length, or the top of a sideboard - then buy or cut a garland that covers about 90% of that length. Lay the garland in a loose S curve so it doesn't look like a straight border. Tie blush mini bows at every 12-18 inches, spacing them evenly so the color shows up in photos from multiple angles. Add two candle holders or lanterns in the middle and one on each end so the garland doesn't look empty. If you're using tape or clips, keep them on the underside so they don't show.
Try thisUse hot glue on the underside only to secure the bow tails so they don't slip during the party.
Common mistakeAvoid sparse garlands - thin greenery makes the whole setup look like you ran out.
4. Paper fan wall in blush-to-cream gradient
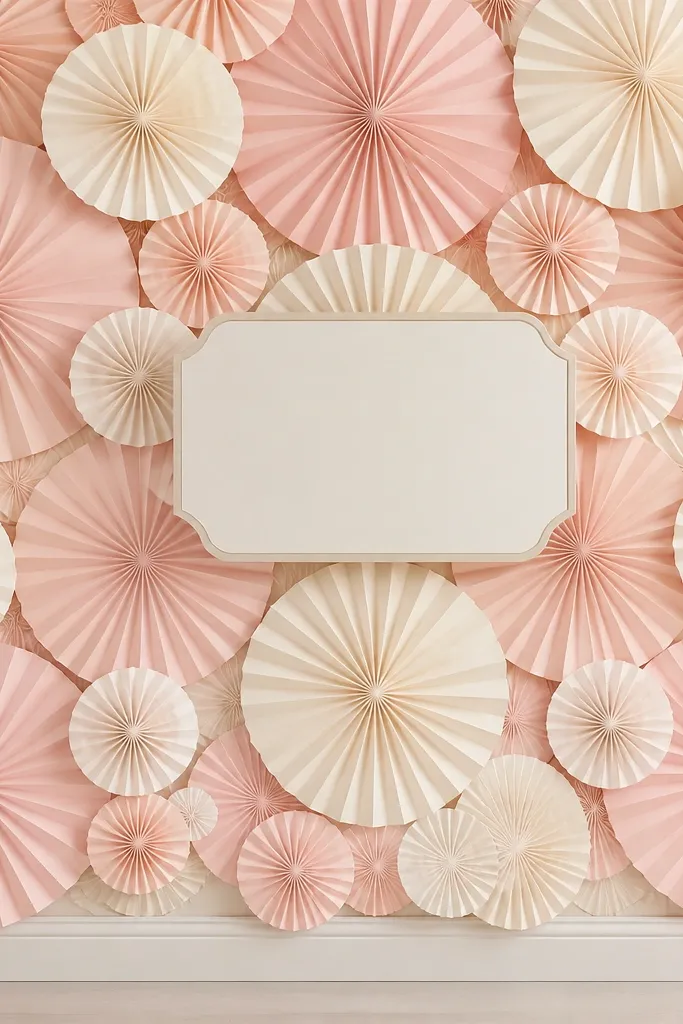
Paper fans are one of the cheapest ways to get a big photo backdrop without dealing with fragile flowers. A blush-to-cream gradient looks soft and expensive, especially when your room lighting is warm. I like larger fans in the middle and smaller ones around the edges, because it creates depth and keeps the wall from looking flat. This setup flatters almost every skin tone in photos because blush is gentle and cream brightens faces. If the bride's outfit is white or ivory, the blush gradient gives contrast without clashing.
Start by marking a center point on the wall and plan a loose rectangle, like 4 feet wide by 5 feet tall, based on your photo spot. Arrange the biggest fans behind where the bride will stand, and fill outward with medium and small fans. Keep the color order consistent: blush on the bottom and cream on the top, or the reverse - pick one direction and stick to it. Tape the fan bases using removable double-sided tape or poster putty so you can remove cleanly. Place a simple chair or small stool in front, then add a single garland or balloon at the top edge for balance.
Try thisUse matte fans if you can; glossy paper reflects light and can mess with skin tones in photos.
Common mistakeDon't use one single fan size - it looks like a craft project instead of a backdrop.
5. Mirror tray centerpiece with floating candles and pearl beads
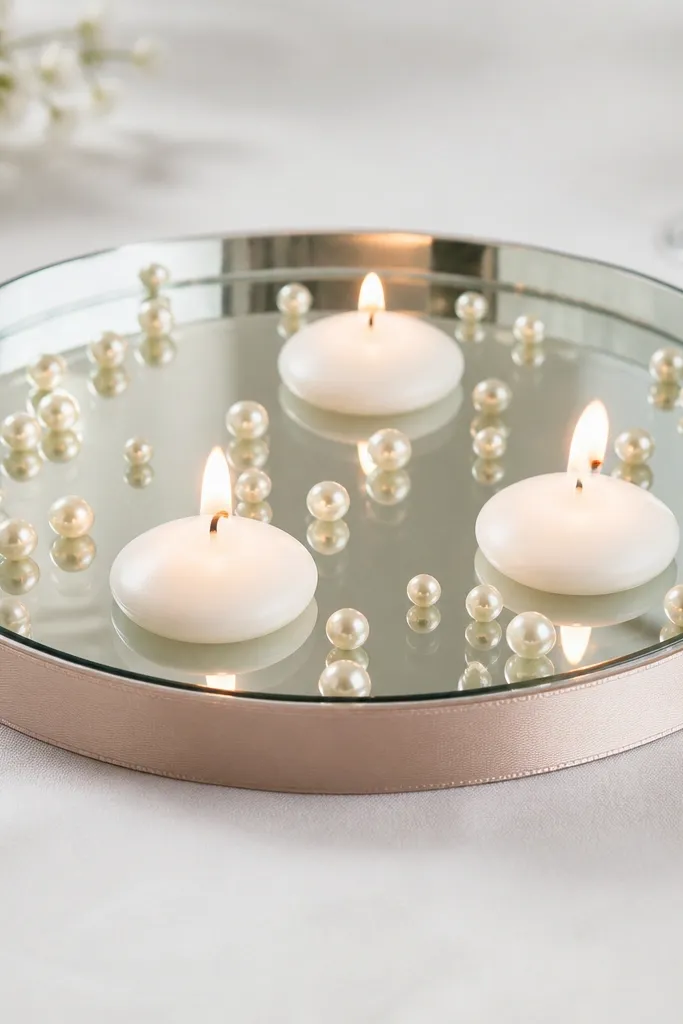
This is the kind of centerpiece that looks high-end but takes minutes to set. The mirror tray multiplies light, so even if your candles are small, the center looks full in photos. Floating candles paired with pearl beads make a bridal vibe without needing flowers. I like using clear water because it gives a clean, modern look; you can swap to faux water gel if you're worried about spills. This works for any skin tone because it creates soft highlights rather than harsh color blocks. It also fits rooms where you don't want heavy scent or pollen.
Start by wiping the mirror tray until it's streak-free, then choose a tray size that matches your table width - for a standard dining table, a 12-14 inch tray looks right. Add a thin layer of clear water, then scatter pearl beads around the edges so they don't clump in the center. Place 3 floating candles evenly spaced, with one slightly forward for a photo-friendly angle. Wrap a slim champagne ribbon around the tray base or add a satin napkin under it so the table looks dressed. Set the tray in the center of the table or offset it 2-3 inches toward the seating so it shows up in front-facing photos.
Try thisTest the candle float height by doing one dry run before the party so they don't end up too close to the tray edge.
Common mistakeSkip colored beads - pink or gold beads can look muddy under warm indoor bulbs.
6. Satin ribbon balloon weights for entryway tables
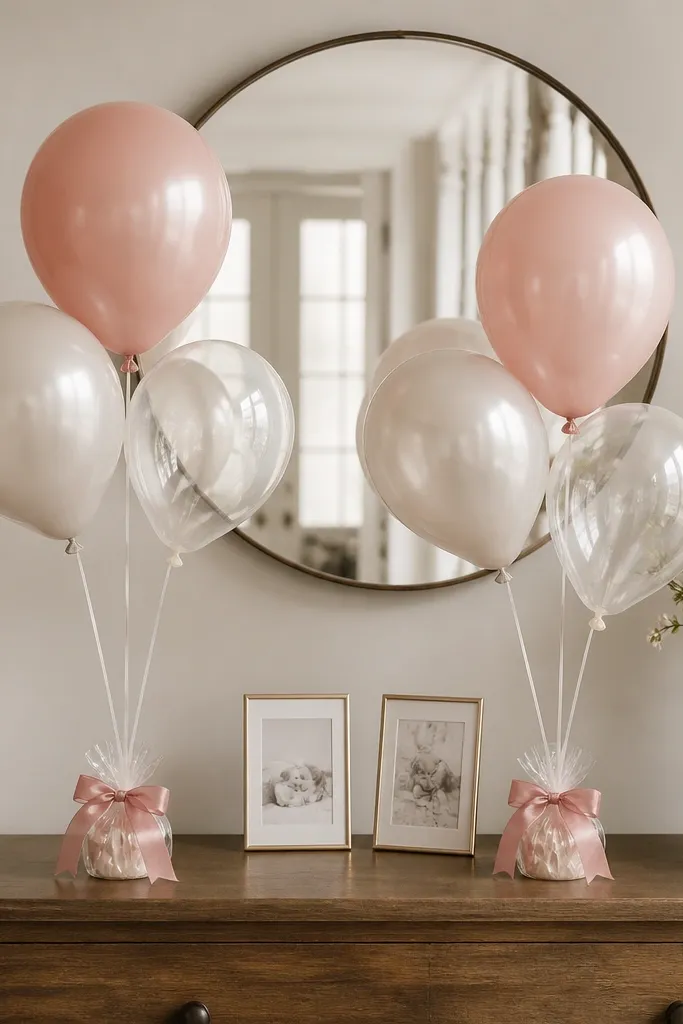
Entryway decor is where guests decide if a party feels "thought out." Balloon clusters with ribbon-wrapped weights look polished without needing a stand or a tall arrangement. I use blush satin for the ribbon because it looks bridal next to white walls and doesn't overpower darker furniture. The clear weights keep the look clean and modern, while the ribbon adds softness. This works well in smaller spaces because the decor stays compact but still reads clearly when someone walks in. It also photographs nicely because the ribbons create gentle lines that frame the entrance.
Start with a pair of small balloon clusters, each with 3 balloons - one metallic, two matte - in either blush and white or champagne and white. Add clear balloon weights that match the size of your balloons so they sit stable. Wrap the weight posts with satin ribbon and tie a neat bow; keep the bow on the front side for camera visibility. Place the clusters on a console table or dining side table that's at least waist height so the balloons don't get blocked by door frames. Add one simple object behind each cluster, like a small frame or a single candle, so the entry doesn't look empty.
Try thisUse ribbon that is at least 1 inch wide; narrow ribbon twists and looks messy fast.
Common mistakeAvoid heavy tassels or too many ribbon tails - they tangle when guests brush past.
7. Fabric banner with grommet holes and twine ties
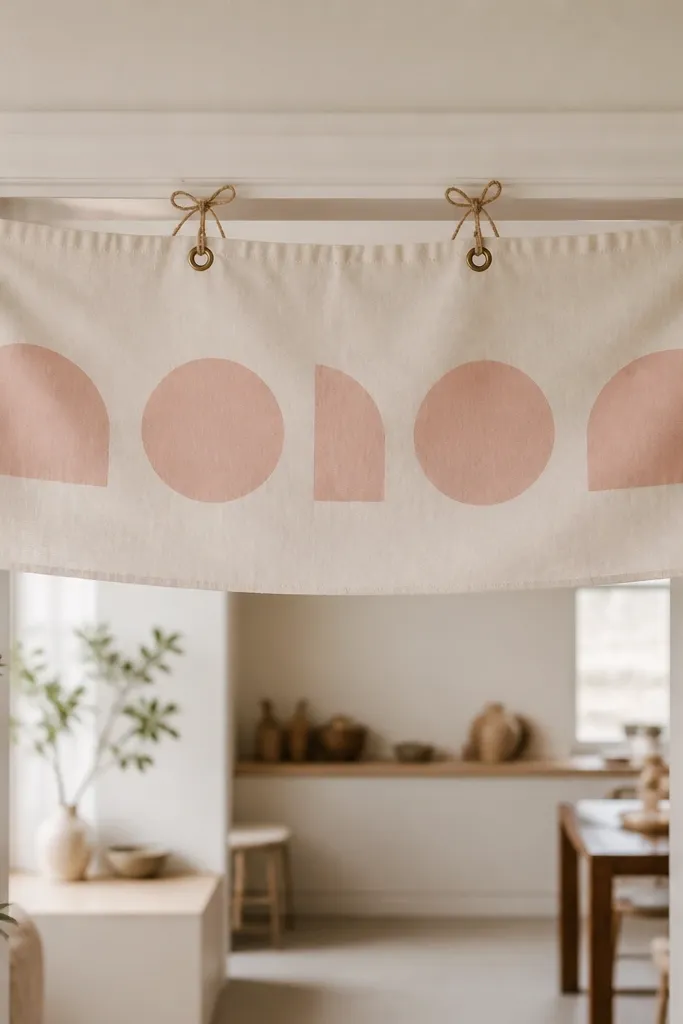
Fabric banners are low maintenance because they look good even if they're not perfectly stretched. Grommets matter - they keep the banner from sagging in the middle, and they let you adjust the height without redoing knots. Choose cream fabric with blush lettering if the room has warm tones; it reads soft, not harsh. I've found this works best for bridal parties where you want a clear message without relying on delicate paper signs. It also handles fluorescent lighting better than matte vinyl because the fabric texture reduces glare. For photos, position the banner at eye level so it frames faces instead of disappearing behind heads.
Start by measuring the span you're crossing - doorway width or wall gap - then leave 2-3 inches of slack on each side. Use a tension rod or two hooks to hang the banner; push twine through the grommets and tie tight knots at the rod or hooks. Keep the banner top line straight by adjusting the twine loops so the grommets sit evenly. Add a second small element under the banner like a mini table sign or a single balloon so it doesn't float alone. If you need it to look extra bridal, trim the bottom edge with a line of blush ribbon or faux pearl garland.
Try thisPin the banner corners temporarily with straight pins before you tie the final knots so it hangs straight the first time.
Common mistakeAvoid paper banners near doors - they curl and look tired after the first hour.
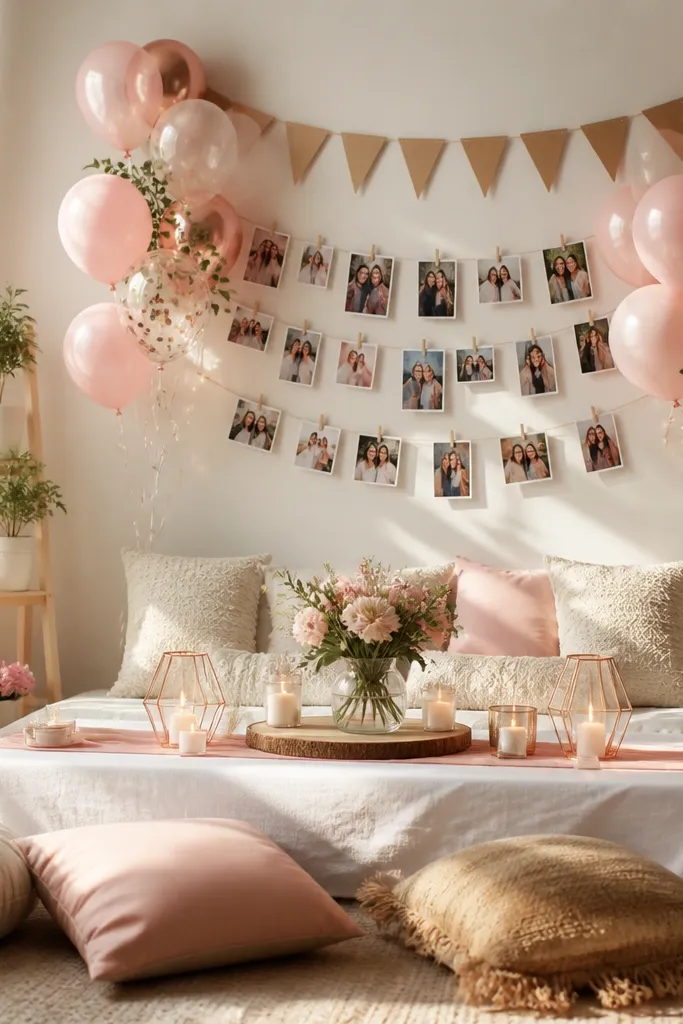
8. Unframed photo gallery wall with bride-to-be cards
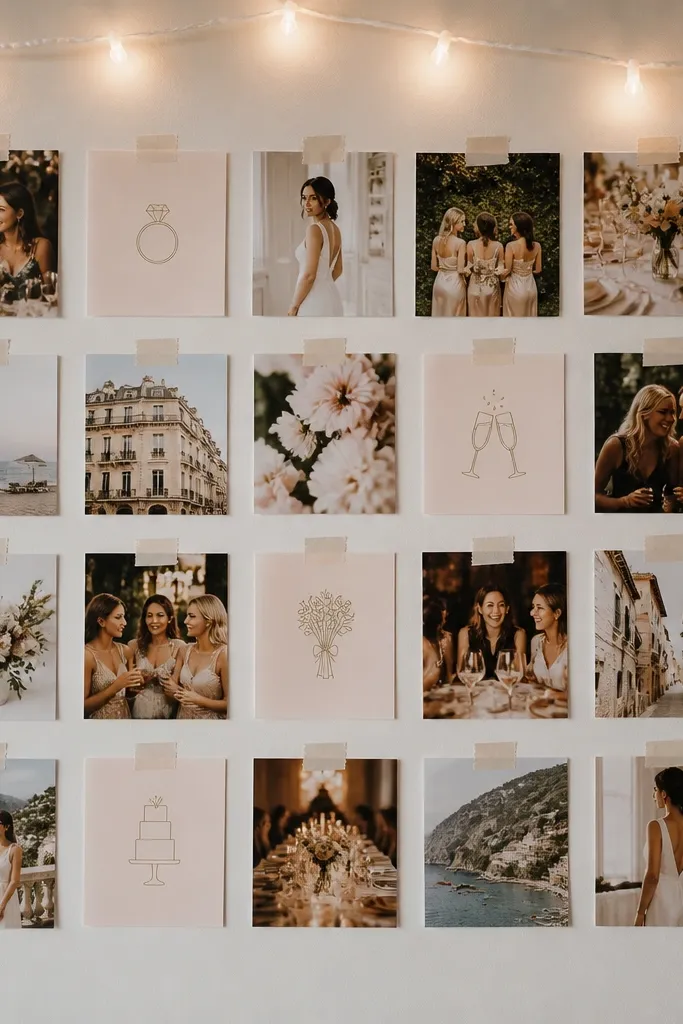
A photo wall looks personal fast, and you don't need expensive frames to make it feel intentional. I prefer unframed prints taped with removable tape because it keeps the setup quick and easy to adjust when you realize one photo is crooked. Use a consistent border color - blush or champagne - so the whole wall looks like it belongs together. This works for couples who want the party to feel like them, not like a generic template. It also flatters all skin tones in party photos because the wall background is soft and light, not a loud pattern. If the bride has a busy outfit, this kind of wall gives her a calm backdrop.
Start by choosing 10-14 photos with similar tones - warm indoor lighting or soft outdoor lighting both work, but avoid mixed harsh flash shots. Lay them out on the floor in a 4x3 or 5x3 grid, leaving small gaps between prints. Tape each print at the corners using removable tape, then add bride-to-be cards in the gaps for a clear message. Run a thin warm-white fairy light strip along the top edge only, not behind every photo, so it looks subtle. Finish by adding one larger card in the center that guests will read when they take pictures.
Try thisTake a quick phone photo of the wall from where guests will stand; that catches crooked spacing before you commit.
Common mistakeAvoid mixing black-and-white photos with color photos in the same grid - it looks like a collage instead of a wall.
9. Champagne table runner with scattered rose-gold confetti hearts
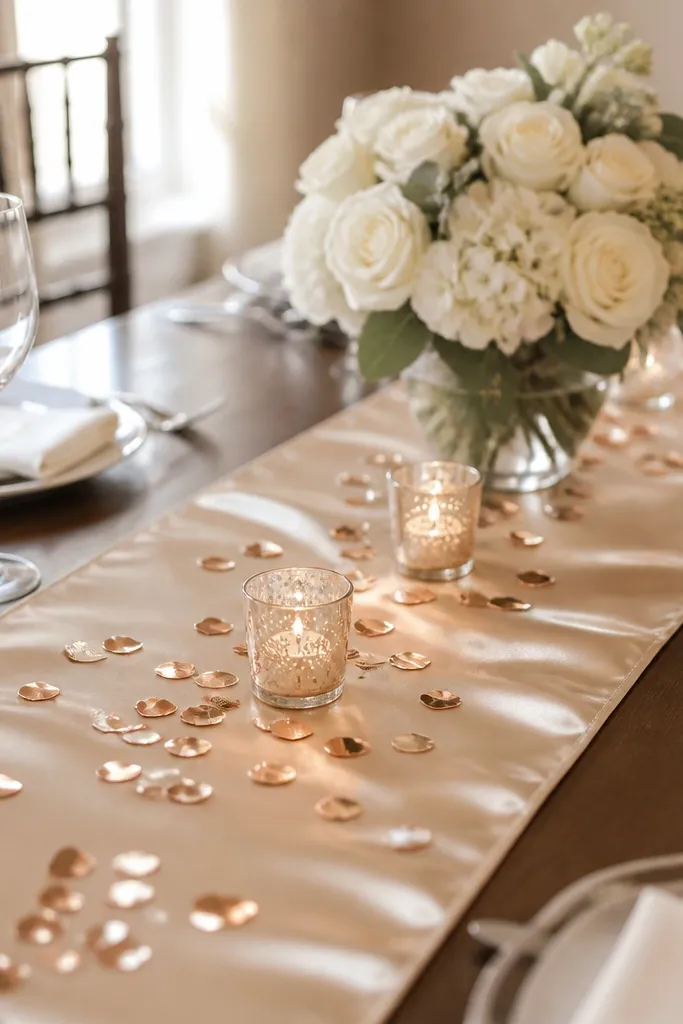
Confetti hearts sound small, but they change the whole table mood because they add sparkle without adding clutter. A champagne satin runner makes the table look dressed up in one move, and it photographs well because it reflects light in a controlled way. Rose-gold confetti is the sweet spot: it's bridal, not too loud, and it plays nicely with both warm and cool room lighting. This setup is great when you want low maintenance decor that doesn't block plates or crowd the table. It also looks good for any bride because the metallic tones sit neutrally against skin. If your centerpiece is minimal, the confetti keeps the table from looking bare.
Start by ironing or steaming the champagne runner so it lies flat; wrinkles show up in every photo. Place the runner centered on the table, then decide where the centerpiece sits so confetti avoids direct candle flames. Scatter a thin layer of rose-gold heart confetti around the centerpiece area, leaving a clear path where plates will sit. Add 2-3 small votives or bud vases spaced evenly, keeping them the same height. If you're using place cards, keep them white or blush so the confetti doesn't clash.
Try thisUse a small spoon to place confetti - it keeps coverage even and prevents a big clump.
Common mistakeAvoid heavy glitter confetti - it can shed onto food and looks messy on camera.
10. Rose-gold wire ring arch with faux greenery and linen bows
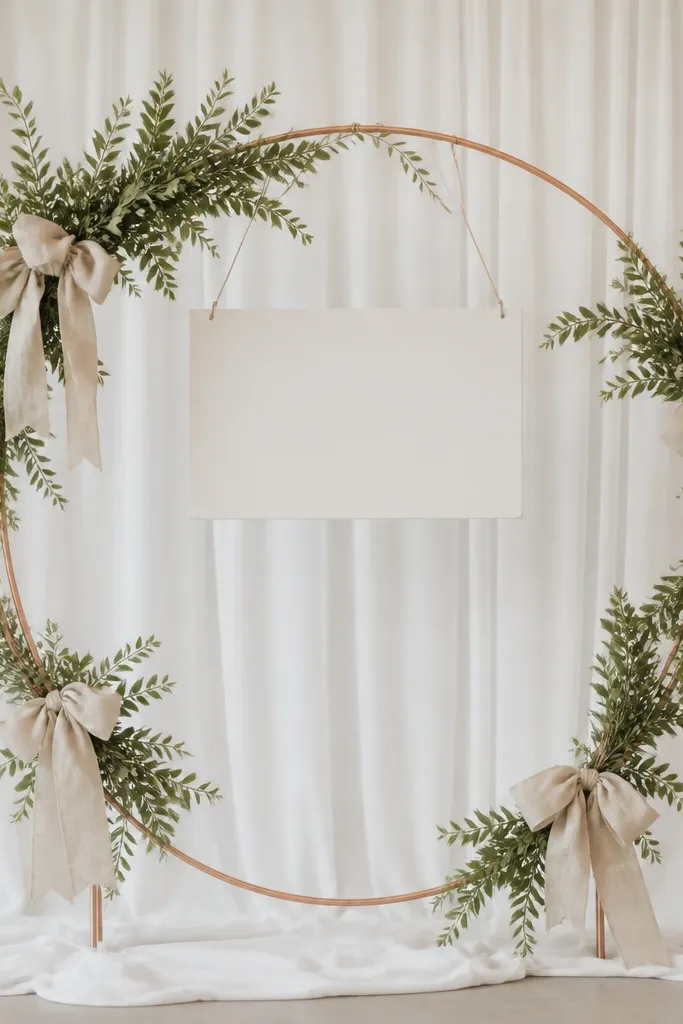
If you want a photo spot that doesn't require a carpenter, a wire ring arch is the answer. The rose-gold frame gives a soft metallic glow that looks flattering against white walls and sheer curtains. Faux greenery fills gaps quickly, and linen bows add a less-synthetic feel than shiny ribbon. This is ideal for bride-to-be events in living rooms where you need a clear "stand here" area but don't want a huge structure. It also works for different body types because you can place the arch behind the bride, framing her without forcing her to stand in front of tall objects. The greenery keeps it from looking too stiff.
Start by choosing the arch size based on your photo space; a 30-36 inch ring works in most corners. Place it near the main seating or gift table, then anchor the base with sandbags or weighted feet so it doesn't wobble. Wrap faux greenery around the ring in small clusters, then tie linen bows every 10-14 inches. Add a sheer white curtain behind the arch if you can; it makes the arch pop in photos. Hang a small sign from the top of the ring, not the front, so it doesn't block the bride's face.
Try thisUse zip ties on the underside of greenery so nothing slips during the event.
Common mistakeAvoid overstuffing - if greenery hides the ring completely, it looks bulky and harder to frame.
11. Cling-on wall decals with peel-and-stick gold "bride to be"
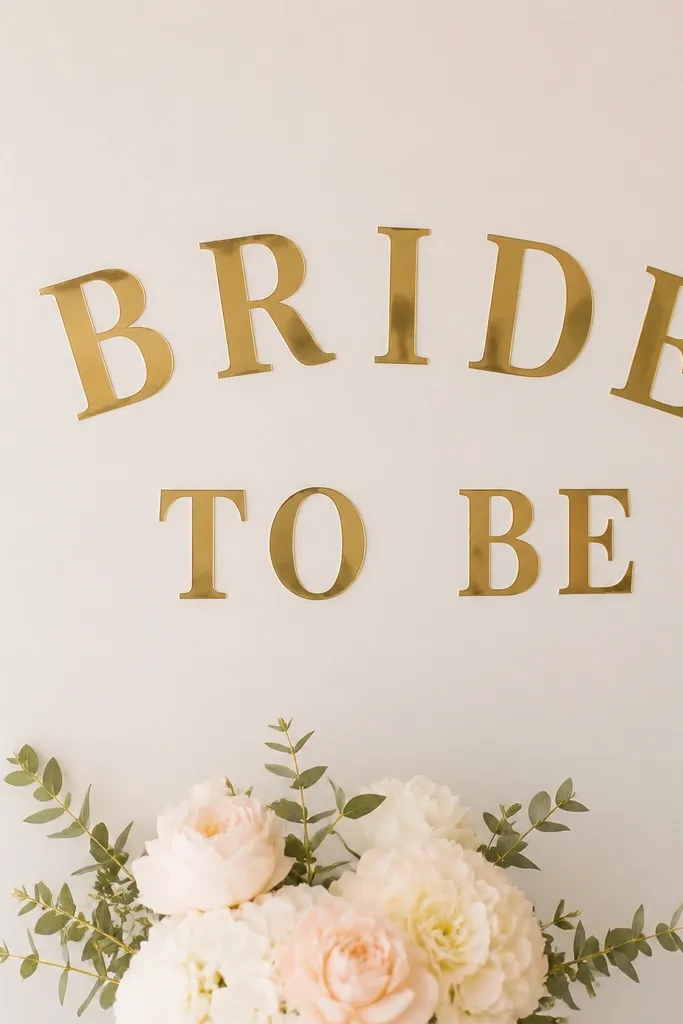
This is the kind of wall decor you can put up in 10 minutes and remove without drama. Peel-and-stick gold letters are clean and readable, and they look sharp in photos because the lines are crisp. I like adding a small faux flower cluster under the text so the wall looks styled, not empty. This works especially well in rentals where you can't drill or hammer. It also flatters the bride in portraits because the gold line sits behind her head and shoulders, creating a warm glow without clutter. If the room has busy wallpaper, use smaller decals rather than covering the entire wall.
Start by cleaning the wall with a dry microfiber cloth so dust doesn't prevent adhesion. Measure the center point and lightly mark it with painter's tape so your letters line up. Apply the letters slowly from top to bottom, smoothing each piece with a credit card to avoid bubbles. Place a small greenery and blush flower cluster directly under the text, centered with the letters. If you're adding balloons nearby, keep the colors consistent so the wall text doesn't clash with the balloon palette.
Try thisWarm the decals with a hair dryer for 10-15 seconds before pressing for better adhesion on textured walls.
Common mistakeAvoid applying over glossy paint or peeling spots - it lifts and looks uneven.
12. White pedestal with faux peonies and blush ribbon ties
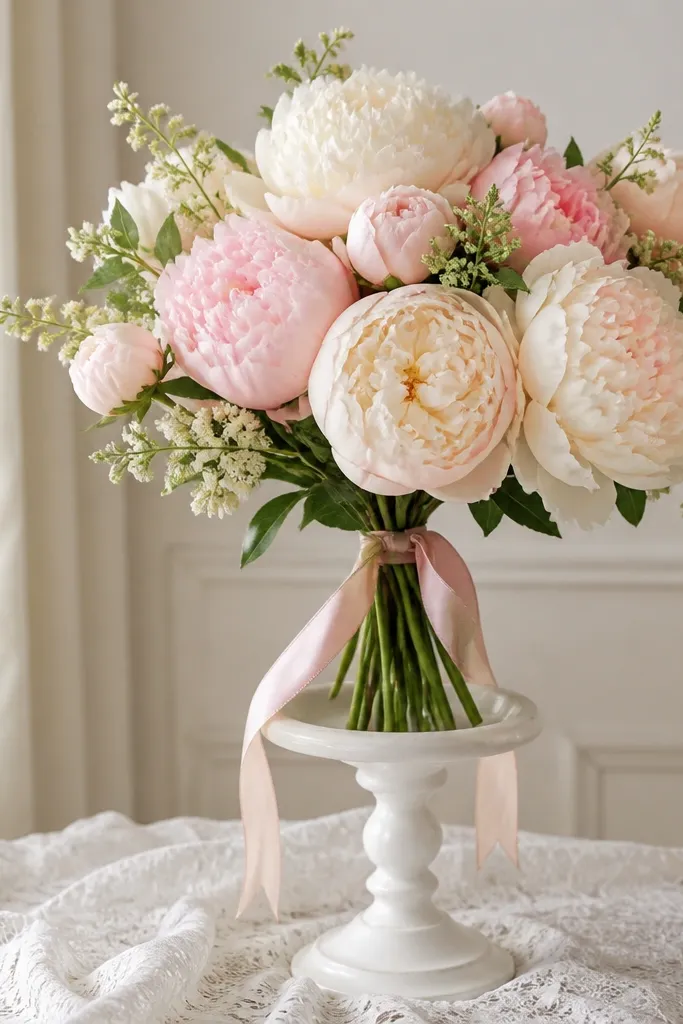
A pedestal arrangement makes the room feel styled without needing multiple small flowers everywhere. I love faux peonies because they look full and soft in a way that's hard to fake with thinner blooms. Cream and blush gives bridal sweetness without going overly pink. This works best when you have one area that needs height - like near a dessert table - because the pedestal lifts the blooms to face-level in photos. It also looks great for brides with both cool and warm undertones since the palette is neutral. The ribbon ties keep it from looking like a store bouquet sitting there.
Start by choosing a pedestal height around 24-30 inches so it's tall enough to show in photos. Add a lace cloth or a simple white table runner under it so the base looks intentional. Arrange faux peonies and a few greenery stems in a tight cluster, then wrap blush ribbon around the stems near the middle. Trim the stems so the blooms don't sag; peonies should sit above the pedestal's rim. Place a small second item nearby, like a single candle or a framed card, so guests have something to look at besides just the bouquet.
Try thisUse a thicker ribbon that holds shape - thin ribbon curls and looks messy around stems.
Common mistakeAvoid mixing too many bloom types - it turns into a craft bouquet fast.
13. Soft blush balloon garland on a curtain rod
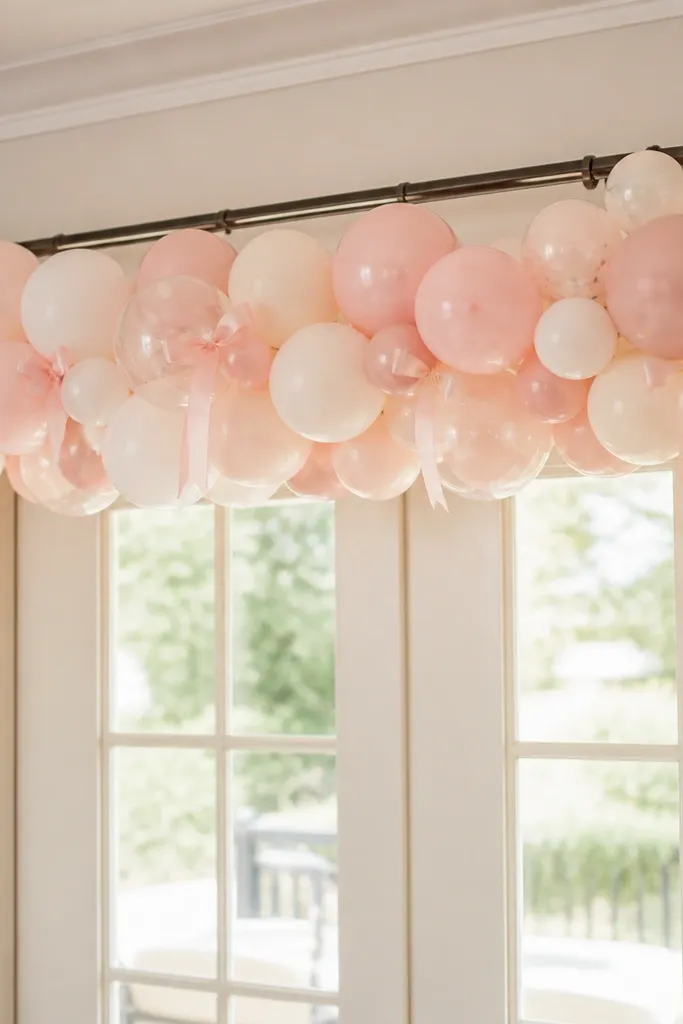
A balloon garland is low maintenance because it creates a "frame" above where people naturally look. Hanging it on a curtain rod means you don't need a full wall setup, and it works in rentals. The blush-white mix keeps it soft, while clear balloons prevent the garland from looking too heavy. Add small satin bows to keep it bridal and to add a little texture that doesn't rely on more balloons. This looks good for almost any room color because blush is forgiving - it doesn't clash with greige, beige, or light blue walls. In photos, it also gives you a flattering background behind the bride's face.
Start by measuring the rod length and plan for a balloon density that fills the span without bunching; for a 6-foot rod, I use about 18-22 balloons. Attach balloon clips or fishing line to the rod supports, then build the garland in sections so it hangs evenly. Mix sizes: place the larger balloons at eye level and smaller ones toward the ends. Add satin bows at intervals, tying them to the balloon strings so they sit flat. Keep the garland centered over the doorway or behind the main table so it reads as a deliberate frame.
Try thisUse clear balloons sparingly - even 2-3 per section makes the whole garland look lighter in pictures.
Common mistakeAvoid overfilling one spot - it looks lumpy and uneven when guests stand nearby.
14. Mini dessert table signs with acrylic holders
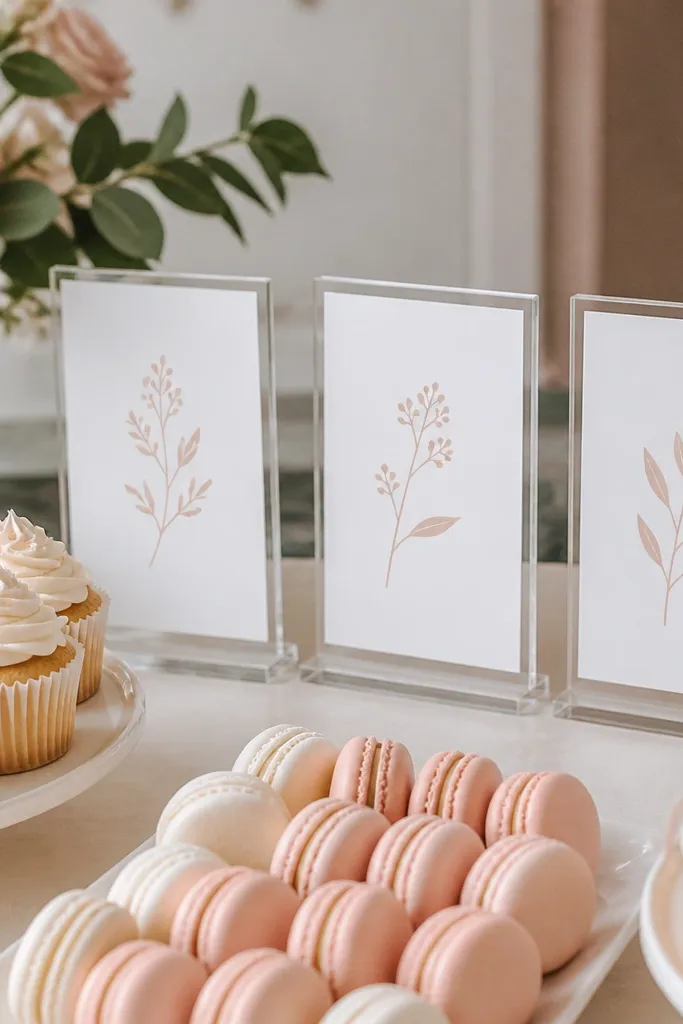
Signs are the fastest way to make a dessert table look styled, and acrylic holders make them look clean instead of taped-on. I like white cards with blush lettering because they match the bride-to-be palette without stealing attention from the food. This idea is low maintenance because you only set it once, and it stays neat even when people pick up desserts. It also helps the room feel "organized" in photos, which is what guests notice. For different skin tones, the white card background keeps the scene bright and prevents the signs from reflecting harsh colors onto faces. It works whether the event is at home or in a small venue.
Start by picking 3-5 sign categories that match what you're serving, like "Cupcakes," "Macarons," "Candy," or "Drinks." Print on thick matte cardstock or write with a fine-tip paint marker for crisp lines. Place each card into an acrylic holder so the card sits slightly above eye level for guests. Position the holders in a straight line behind the desserts, leaving space between them so it doesn't look crowded. Add one small decoration behind the signs, like a mini greenery sprig or a ribbon bow, so the sign area looks finished.
Try thisPrint with a matte finish - glossy cards catch glare and make the text unreadable in photos.
Common mistakeSkip handwritten with thick marker on cheap paper - it looks uneven and fades quickly.
15. Linen napkin ring garland across the buffet
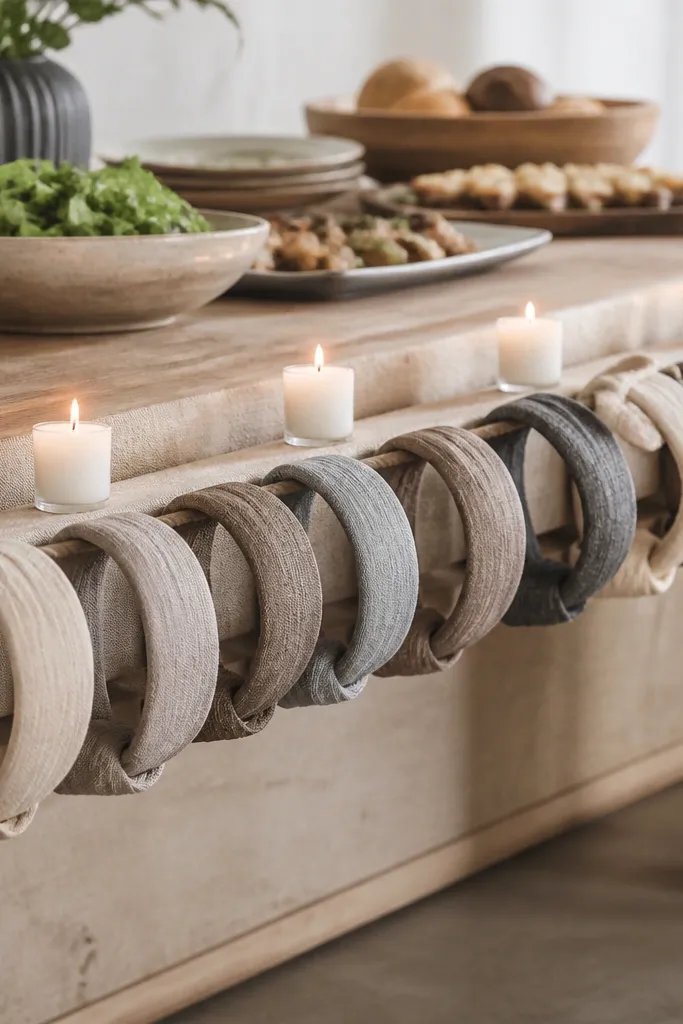
A linen napkin ring garland is a sneaky way to add detail to a buffet or sideboard without buying a bunch of new decor. The texture of linen reads expensive even when the design is simple, and it ties into wedding-style palettes well. I like using neutral linen loops in cream or natural, then adding one blush ribbon accent so it stays bridal. This works best on long surfaces because the repeated texture creates pattern without clutter. In photos, it frames the table edge and makes the setup look deliberate rather than like a random tablecloth. It's also forgiving for uneven surfaces because the loops drape lightly.
Start by laying a neutral runner or tablecloth on the buffet so the garland has a clean base. String linen napkin rings or fabric loops along twine, spacing them about 6-8 inches apart. Drape the twine across the front edge of the buffet so it hangs slightly, then tie it off at both ends. Add small items between loops - a candle, a mini vase, or a single bud - keeping them consistent in height. Finish by tying a blush ribbon knot at the center point so the eye lands there in photos.
Try thisIf your buffet front is tall, hang the garland a bit higher so it doesn't block guests' knees.
Common mistakeAvoid shiny satin loops - they reflect light and can look like party props.
16. Clear lucite cake stand with blush fruit accents
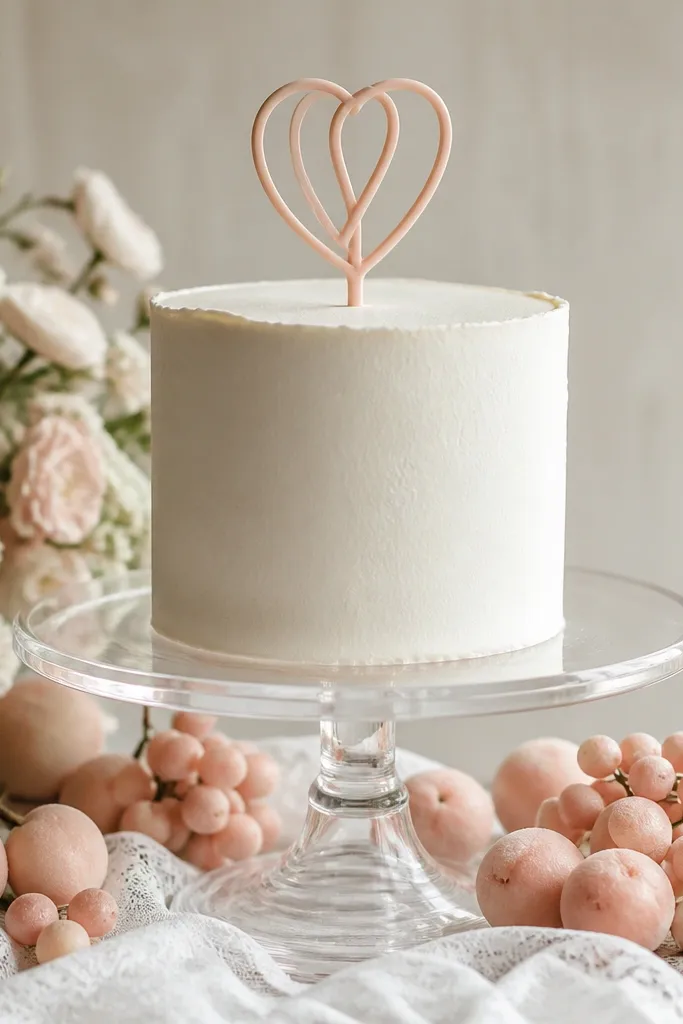
Clear lucite stands make the cake area look sleek even when the cake itself is simple. They don't visually crowd the table, which matters when you already have balloons, signs, or a backdrop. Blush fruit or blush-toned faux accents add color in a way that feels fresh rather than overly themed. This is a low maintenance setup because you're styling one area, and lucite stays clean-looking under most lighting. It also flatters the bride because the clear surface reflects gentle highlights without adding strong color casts. If you're doing a brunch-style party, this setup feels right without looking heavy.
Start by placing the lucite stand on a lace cloth or a clean white runner so the base looks soft. Add a blush-toned cake topper and keep the top decorations light so you don't block camera angles. For the base, tuck in small blush fruit picks or faux pieces around the stand, spaced evenly. Wipe the lucite with a microfiber cloth right before the party so fingerprints don't show. Pair it with a simple serving set in white or champagne and keep the rest of the table decor minimal.
Try thisUse gloves when handling lucite - one fingerprint ruins the whole "clean" look.
Common mistakeAvoid crowded toppers - if the top is busy, lucite makes it look cluttered.
17. Warm-white fairy light canopy over seating corner
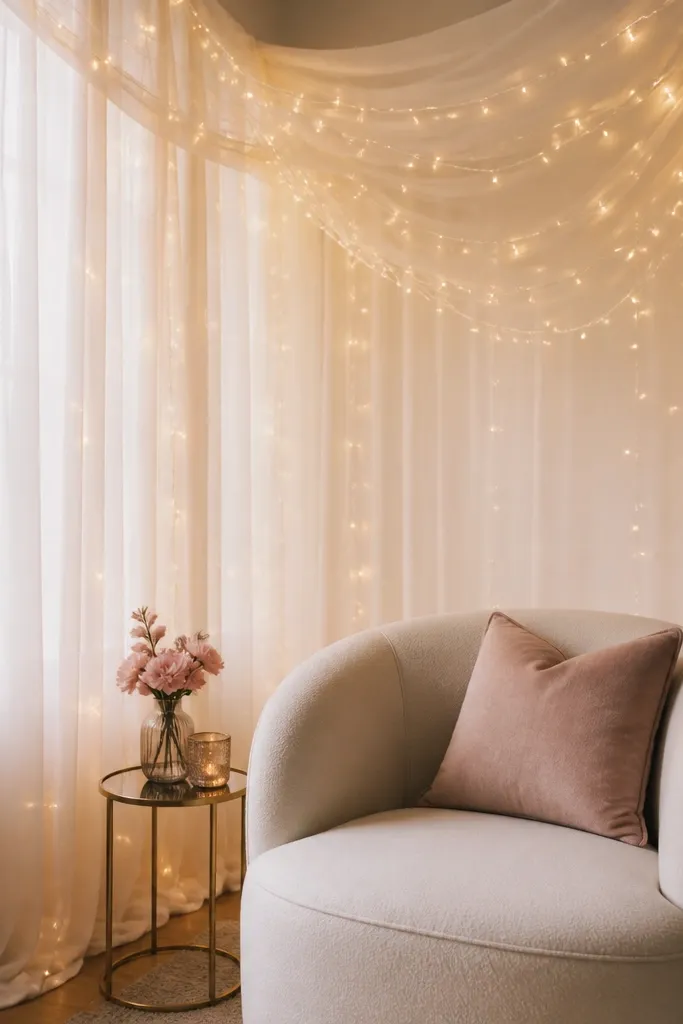
A fairy light canopy turns a normal corner into a photo magnet without heavy decor. Warm-white lights look flattering in every room because they don't cast blue tones like some LEDs. A sheer drape makes the lights feel softer and hides the wire mess you'd otherwise see. Add one blush throw pillow or a satin cushion cover and you get a bridal vibe that still feels cozy. This works especially well if your event is in the evening or if your room lighting is dim. For photos, the canopy gives a clean, glowing background that doesn't compete with the bride's outfit.
Start by choosing the seating corner and draping a sheer fabric panel from a ceiling hook or a tension wire. String warm-white fairy lights through the fabric so the wires disappear into the sheer. Keep the light density light to medium so it looks airy, not like a Christmas tree. Add a blush throw pillow and one small vase or candle on the side table so the corner reads complete. If you're using a backdrop sign, place it slightly off to the side so it doesn't block the light glow behind the bride.
Try thisUse battery fairy lights if you can - no extension cords across walkways.
Common mistakeAvoid cool-white lights - they can make skin look flat and tired.
18. Champagne sequin table overlay with white taper candles
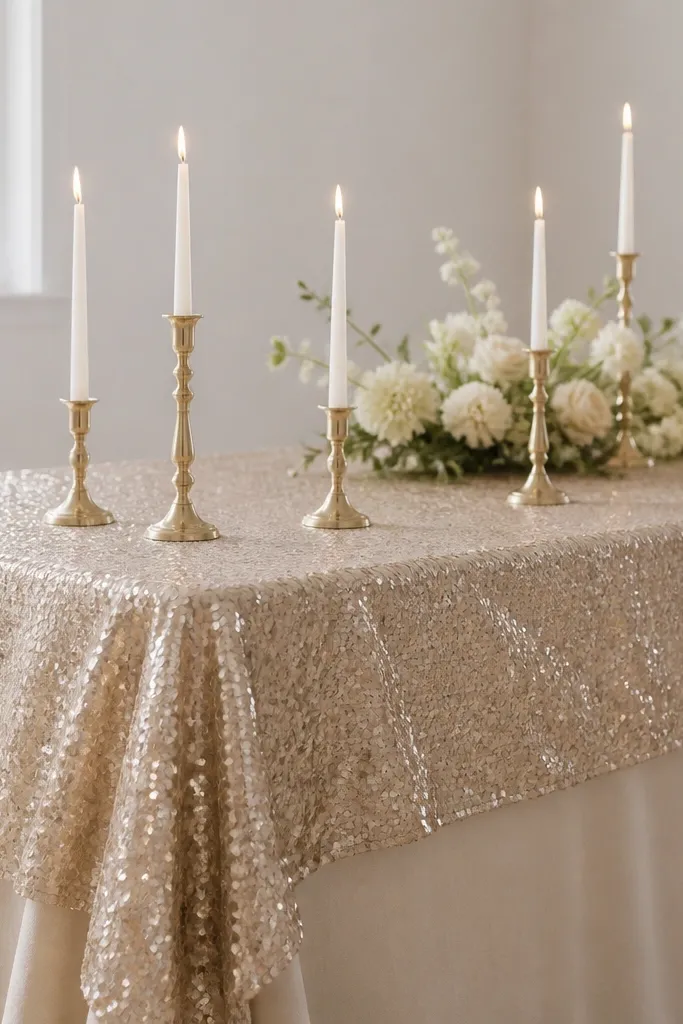
A champagne sequin overlay is the quickest route to "bridal party" energy without adding lots of separate items. The key is to keep the rest of the table clean: white taper candles, a simple runner, and one small centerpiece. The champagne tone sits closer to neutrals than silver, so it looks classy and not nightclub. It flatters most skin tones because the sparkle is warm and soft, not icy. This setup is perfect for cocktail-style events or when you want a dramatic photo table as the main focal point. It also works well if the bride's dress has shine or embroidery because the sequin mirrors that texture.
Start by measuring your table length and choosing an overlay that drops evenly on both sides, usually 10-14 inches down. Lay it over a plain tablecloth so the base is smooth and the sequins don't snag fabric underneath. Place white taper candles in straight rows, then keep centerpiece height under 10 inches so guests can talk. Add one champagne ribbon bow at the front center of the table if the overlay doesn't already have a focal seam. Wipe the overlay with a lint roller before guests arrive so stray threads don't show up in flash photos.
Try thisUse candle holders with wide bases so you don't need to adjust them constantly when people brush past.
Common mistakeAvoid mixing sequin overlay with lots of patterned plates - the table can look too busy in pictures.
19. Blush and white balloon bouquets in reusable fabric sleeves
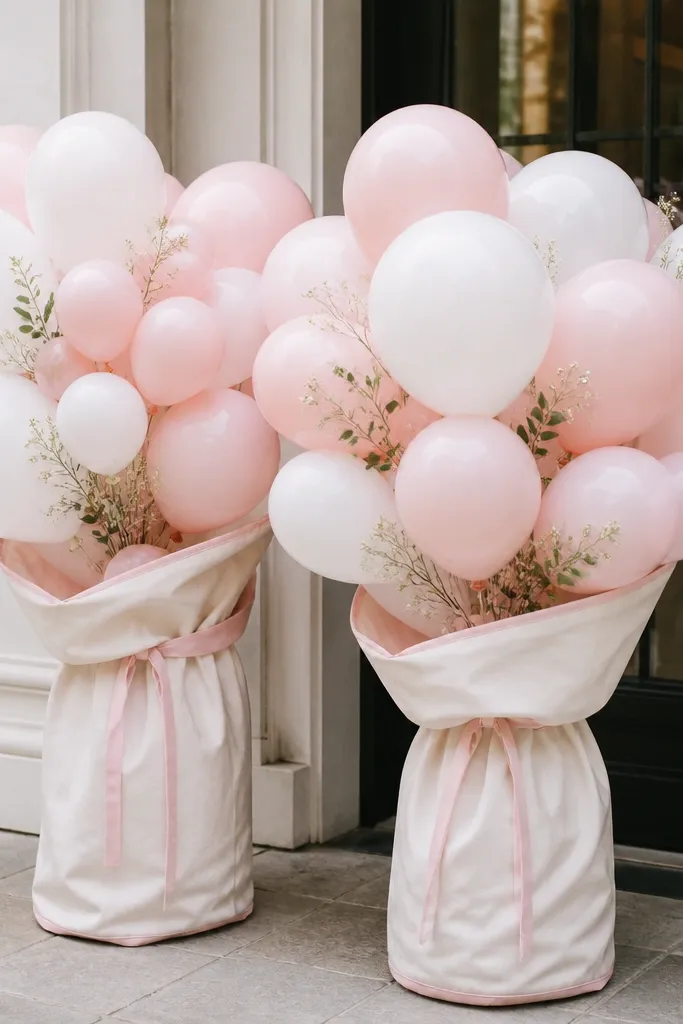
These balloon bouquets solve the "balloons look messy on the floor" problem. The fabric sleeves hide the balloon strings and knots, so the setup looks tidy even before you add table decor. I use blush and white balloons because they match the most common bridal palettes, and the colors stay flattering under both warm and cool indoor lighting. This is low maintenance because you can move the bouquets as guests arrive without rebuilding everything. It's also great for brides who want a clean, modern feel rather than a heavy theme. The sleeves also reduce scuffing on floors and make the bouquets look intentional in candid photos.
Start by selecting 2-4 balloon bouquets and choose sleeve sizes that let balloons stand fully upright without squishing. Tie bouquets with matching ribbon - blush satin works well - then insert each bouquet into its fabric sleeve. Place the bouquets in high-traffic photo areas like the entrance or beside the main seating corner. Keep a consistent height by placing the bouquets on the same side of the room and adjusting sleeve fit so balloons reach roughly eye level. Add one matching detail to each sleeve, like a small blush bow at the front seam, so they look like a set.
Try thisStore sleeves flat between events; creased fabric makes the sleeves look sloppy in photos.
Common mistakeAvoid loose sleeves that sag - they make the bouquets look like they're falling over.
20. Giant tissue paper pom-poms with removable hooks
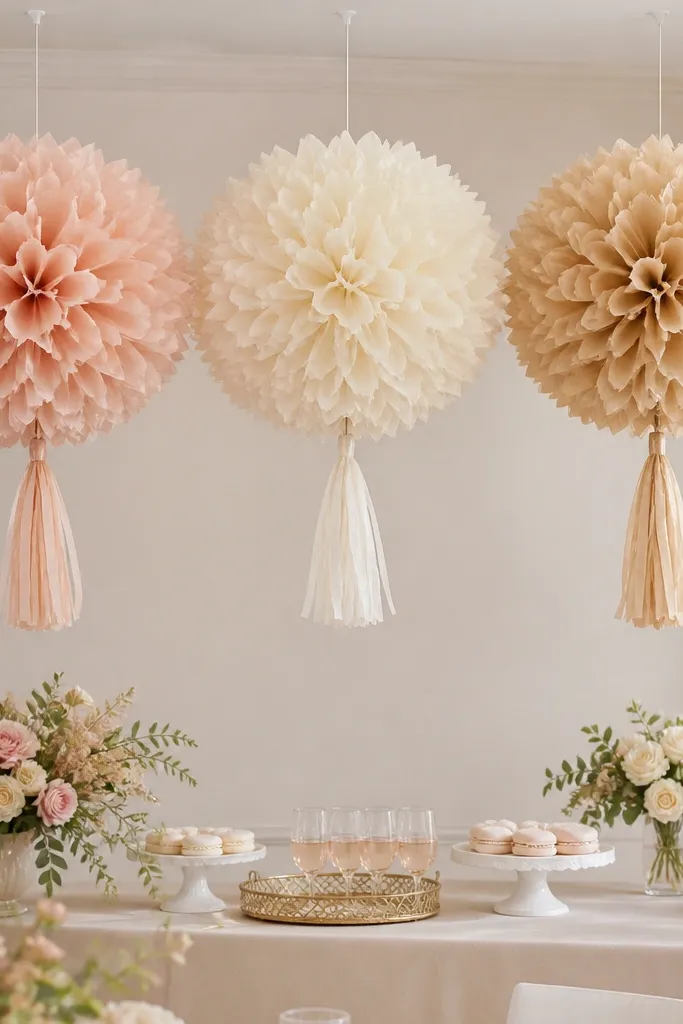
Ceiling decor is where the "wow" happens without you buying more table items. Giant tissue pom-poms look festive in photos, and they're lighter than you'd expect - you can hang them quickly with removable hooks. Choose blush, cream, and champagne so you get bridal color without loud contrast. This works best in rooms with decent ceiling height, because the pom-poms need space to bloom. It also photographs well because overhead decor frames the scene and draws the eye upward, away from clutter. If your bride-to-be event has minimal furniture, these pom-poms make the room feel styled even with few other pieces.
Start by checking ceiling height and measuring the area you want covered - aim for 2-4 pom-poms above the main seating or dessert zone. Fold and fan tissue paper pom-poms ahead of time, then attach a strong tie point at the center. Use removable hooks or ceiling clips so you don't damage paint. Hang the pom-poms at least 6-8 feet above the floor so guests don't bump them while walking. Space them evenly so the camera sees a balanced pattern, and keep the colors grouped so it doesn't look random.
Try thisPull each pom-pom open fully and fluff it in place; small adjustments make a big difference in shape.
Common mistakeAvoid tiny pom-poms - small scale looks cheap when shot from a distance.