
1. Cream linen ribbon with a single dried eucalyptus crown
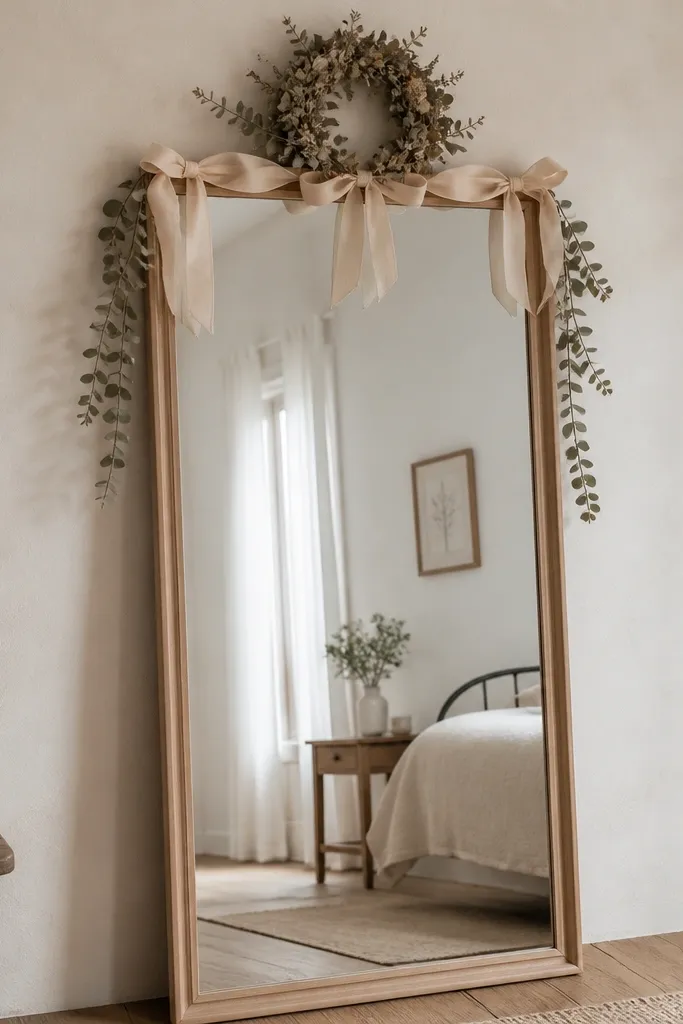
This look works because linen ribbon has a soft matte finish that doesn't fight the mirror reflection, and dried eucalyptus adds a real, smoky green tone that reads warm on camera. I use it when the wedding palette is ivory, champagne, or blush because the frame stays neutral. The eucalyptus crown at the top gives guests a clear "anchor point" for photos, so their faces land naturally in the center. It also flatters most skin tones - green undertones make warm complexions look even warmer without turning the photo yellow.
Start by tying 2-3 lengths of cream linen ribbon around the top rail, keeping the loops flat and symmetrical. Then place the dried eucalyptus crown centered on the ribbon knot so it looks like it's resting on the frame, not floating. Secure the crown with thin floral wire tucked behind the frame so you don't see it. Finally, add one tiny eucalyptus sprig at each lower corner of the frame so the look feels balanced without heavy coverage.
Try thisIf your ribbon frays, run the cut ends through a quick flame pass so it stays tidy during wind or venue movement.
Common mistakeAvoid covering the mirror surface with florals - it makes the reflection look cloudy and cheap.
2. Gold frame with blush baby's breath and a satin bow base
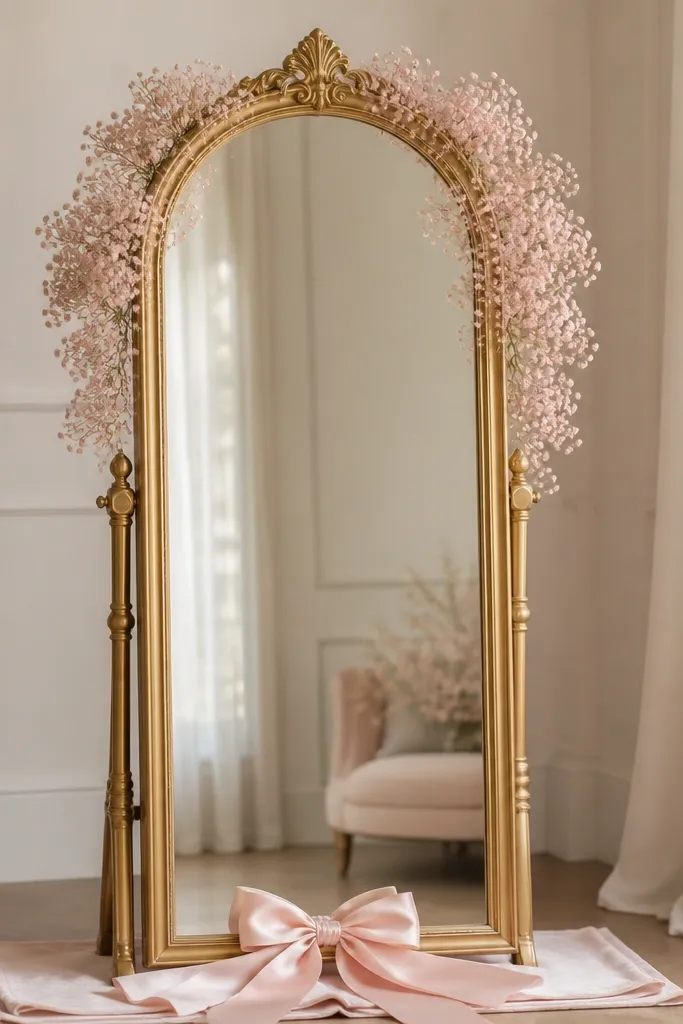
Gold frames make photos feel dressed up fast, and baby's breath fills gaps without looking bulky. The blush tone softens the gold so it doesn't look harsh, especially for indoor venues with warm bulbs. I use this for classic weddings where you want a romantic welcome without going full arch. It photographs well for people with cooler undertones too, because the blush lifts skin and the gold frame adds warmth.
Start by placing a thin blush fabric runner (about 12 inches wide) under the mirror so the base looks intentional. Then attach baby's breath clusters with floral wire around the mirror's top corners and slightly down the side rails, stopping before the middle. Add a single satin bow at the base, using a double knot and tucking the tails so they hang straight. Finish by stepping back and checking symmetry from guest eye level, not from across the room.
Try thisUse baby's breath stems with a few inches of length left - that extra stem makes anchoring easier and keeps clusters from slipping.
Common mistakeSkip chunky bows that sit too high - they block the mirror reflection and ruin the photo composition.
3. Whitewashed frame with woven macramé hanger + dried pampas plume
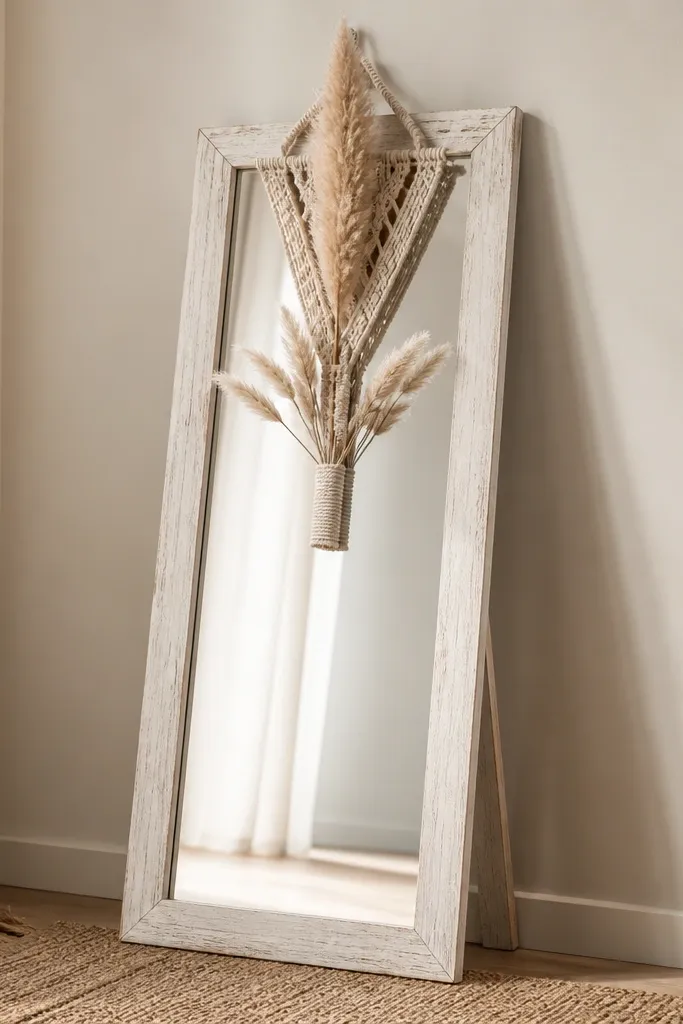
This is the "cozy but artsy" setup. A whitewashed frame keeps everything light, and macramé adds handmade texture without adding color noise. The single pampas plume gives vertical height, which makes the mirror look taller in photos and helps guests fit in frame comfortably. I've used this for fall weddings with warm neutrals where you want softness but still want a modern edge. It flatters people in darker outfits because the beige plume brightens the center of the image.
Start by securing the macramé hanger to the mirror's top using a hidden zip tie inside the frame back. Place the mirror on a non-slip mat so it holds its angle. Then insert the pampas plume into a small weighted base (like a flat floral foam puck covered with fabric) and position it centered at the mirror's top line. Finally, add two shorter plumes on either side, keeping them at least 4 inches lower than the main plume so the shape stays clean.
Try thisMist dried pampas lightly with a hair spray mist from 12 inches away to keep shedding under control.
Common mistakeDon't use too many plumes - three looks styled, five starts looking like you grabbed whatever was left at the craft store.
4. Clear acrylic mirror with warm LED fairy lights tucked behind the frame
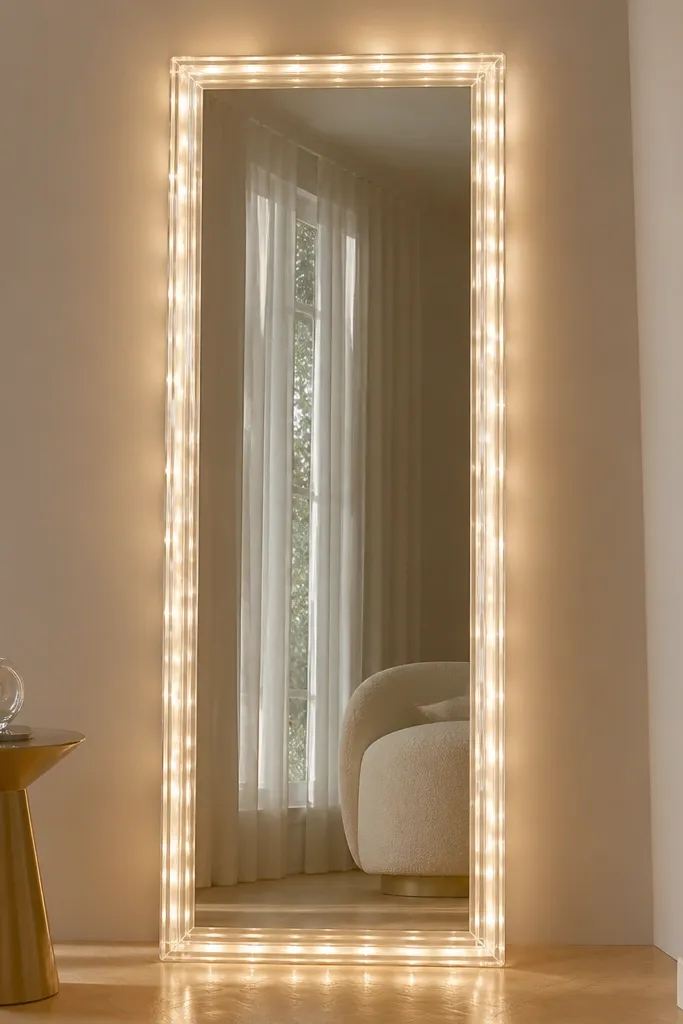
If you want a cozy welcome that works in low light, LED lighting around the frame is the fastest win. The warm white glow makes the mirror edges look intentional, and it doesn't compete with your floral choices elsewhere. I use this when the wedding already has lots of color on the tables, so the mirror stays a clean background. It flatters photos because it adds gentle highlights on faces without making everyone look washed out. The acrylic frame also makes the setup feel airy even when the room is small.
Start by choosing a mirror with a frame that has a small lip or gap where lights can tuck in. Then weave warm white fairy lights behind the frame edges, keeping the wires flat so they don't bulge. Use clear tape on the back only so you can remove everything later. Finally, place the mirror near a wall outlet or run the battery pack behind a side panel so guests don't trip over cords.
Try thisUse warm white (2700K) LEDs, not cool white - cool white makes skin look gray in evening photos.
Common mistakeAvoid bright, high-contrast lighting sources pointed directly at the mirror - it creates glare and blows out the center.
5. Dark walnut mirror with rosemary sprigs and a twine cross-wrap
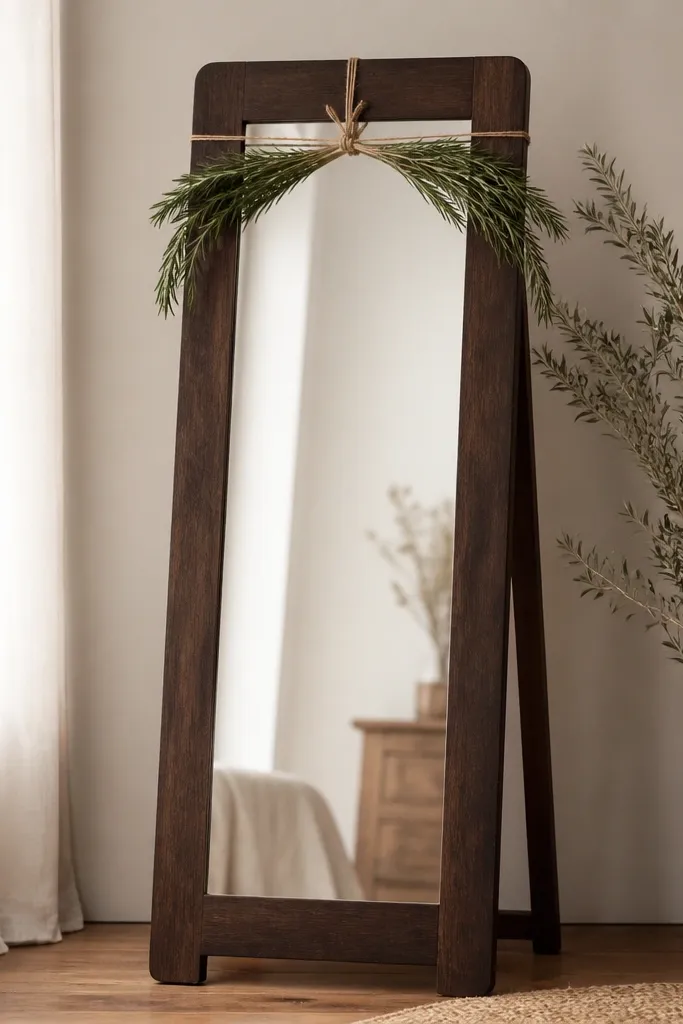
Dark walnut plus rosemary screams "cozy dinner party," and it reads incredibly well in rustic venues. Rosemary is deep green with a strong scent, and that scent makes the space feel alive even if guests don't notice the decor details. The twine cross wrap gives structure, so the design doesn't look like loose greenery. I like it for men's outfits-heavy weddings where the vibe is more grounded than pastel. It also photographs well on olive and medium-brown skin because the green doesn't turn into a muddy gray.
Start by cutting rosemary sprigs into 6-10 inch pieces so you can tie them tightly without bulk. Then wrap natural twine in an X shape across the top rail, leaving a small loop at the center. Tie rosemary bundles at each arm of the X, keeping them about 2-3 inches apart from the mirror edges. Finish by adding one sprig at each lower corner so the frame looks "held together."
Try thisSpritz rosemary with a tiny bit of water before tying - it makes stems bend without snapping.
Common mistakeDon't use thick rope - it looks bulky and hides the mirror frame lines.
6. Champagne gold mirror with pearl garland draped like a soft curtain
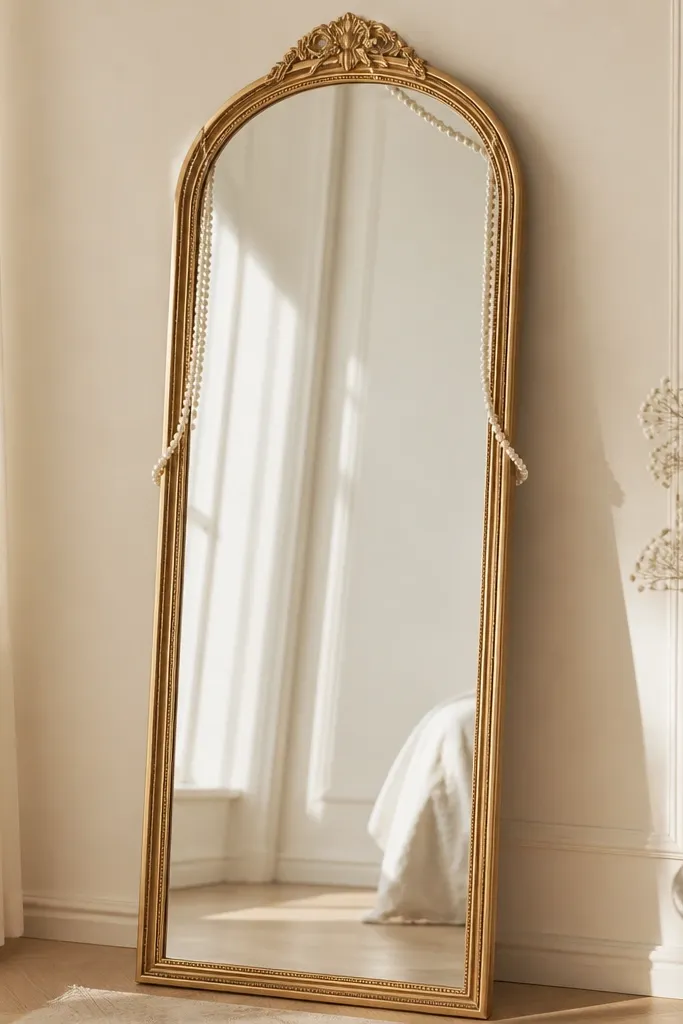
Pearls make a welcome mirror look like it belongs at a formal reception without needing a full floral install. The trick is drape shape: soft curves feel romantic, while straight lines look stiff. I use this when the wedding has champagne, blush, or soft nude tones and the dress code leans dressy. The pearls add tiny highlights that flatter face photos because they catch light in small points. Works for all skin tones since the pearls sit in a neutral warm range.
Start by testing the drape length with the garland held in place against the mirror. Then attach the top center using a hidden hook or clear tape behind the frame. Let the garland fall in two symmetrical arcs, using small pieces of clear thread or ribbon ties at the points where it needs to stay. Finally, stop the pearls around the mid-upper section and add a single pearl cluster at the base on a small satin pad.
Try thisIf pearls tangle, straighten them by hanging the strand for 10 minutes while it's still attached to its hook.
Common mistakeAvoid draping pearls all the way to the bottom - it turns the mirror into a distraction instead of a photo backdrop.
7. Rattan-framed mirror with trailing ivy vines and a woven base mat
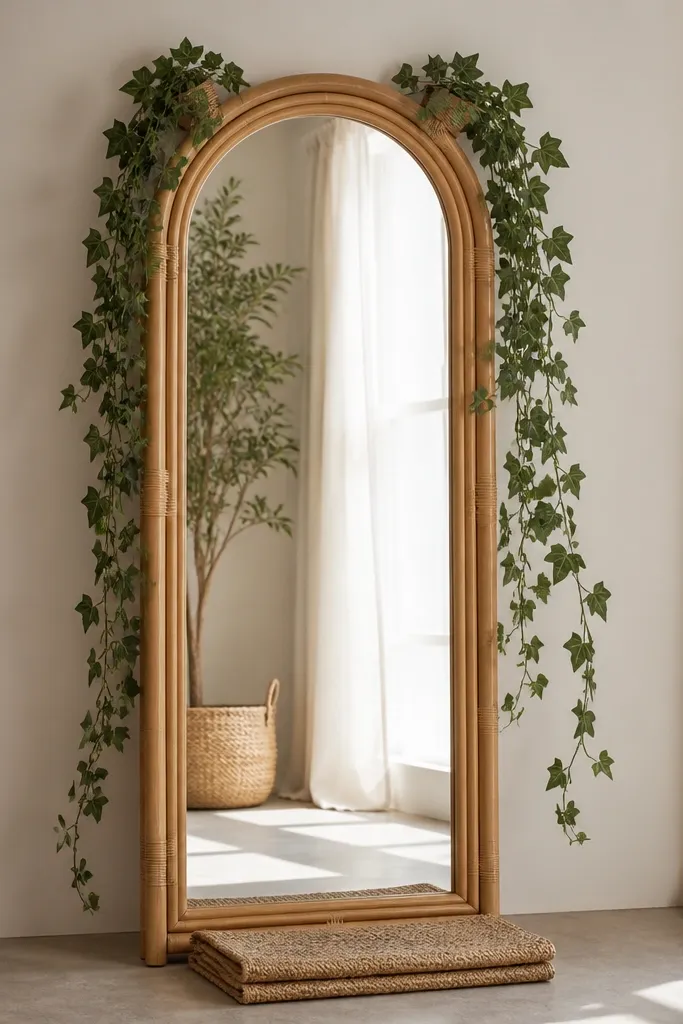
Rattan frames already look warm, and ivy adds movement without needing big volume. The trailing vines give guests a "frame-within-a-frame" effect, which makes selfies look intentional. I use this for garden weddings, especially when the venue already has greenery outside and you want the indoor welcome to match. It also helps darker outfits look softer because the vines add light texture around the mirror. For fair skin, the green helps keep photos from going overly pale in daylight.
Start by putting a jute mat under the mirror, centered and about 18-24 inches wide. Then attach ivy vine ends at the top corners of the frame using floral wire, not hot glue. Let the vines cascade down the sides, stopping around the lower third. Finish with a tiny bundle of ivy tucked at the base center to tie the sides together visually.
Try thisChoose ivy with small leaves - big leaves can read like fake plastic in photos.
Common mistakeSkip a glossy vine finish - it reflects harsh venue lights and makes the fake look obvious.
8. Ivory frame with dried wheat stalks and a rustic wooden sign clip
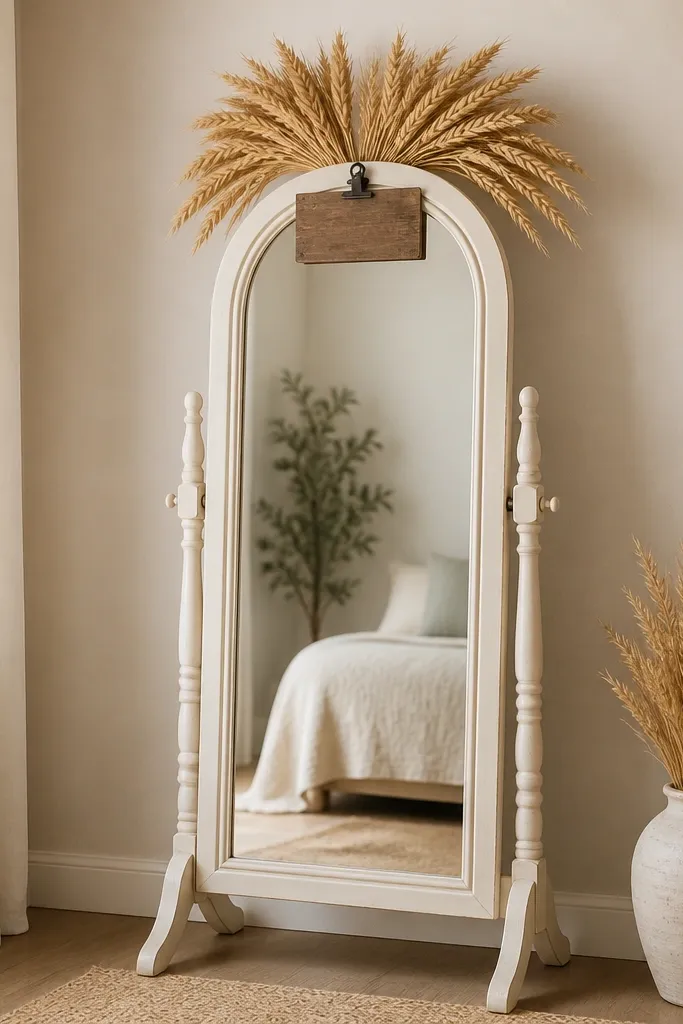
Dried wheat gives instant texture and height, and it reads cozy even in minimalist weddings. The wood sign clip adds function - guests can read the welcome message without blocking the mirror reflection. I like this for barn weddings and early autumn ceremonies where warm neutrals are the whole point. Wheat also flatters a wide range of skin tones because it's a warm beige, not a bright yellow. It makes photos feel grounded and natural.
Start by arranging wheat stalks into a fan shape, with 5-7 stalks for a medium mirror height. Tie the stalk ends with twine and then clip or wire the bundle to the top rail so it sits slightly above the mirror's center line. Place a small wooden welcome sign on a clip at the center top, keeping it lower than the wheat so it doesn't fight for attention. Finally, add a thin ribbon loop at the base of the mirror to soften the transition from floor to frame.
Try thisTrim wheat stalk bottoms so they all stand at the same angle, then tape the ends lightly to keep them from splaying.
Common mistakeAvoid oversized signs - if the sign is wider than the top rail, it looks like a craft project.
9. Black frame with white cotton blooms and a clean ribbon bow
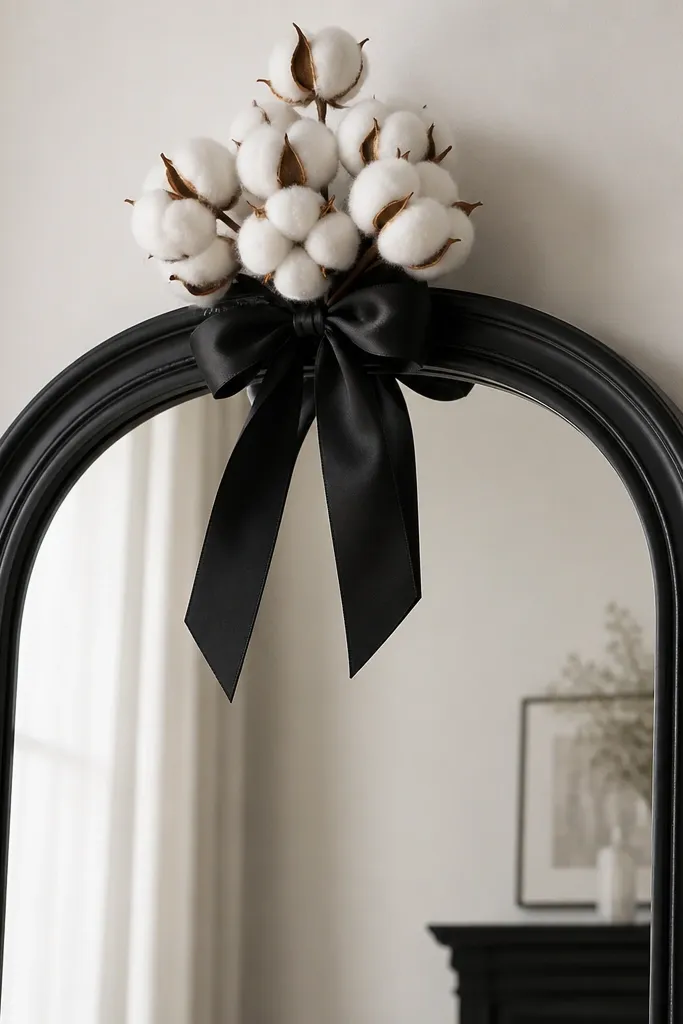
Black frames make the mirror look graphic, and white cotton blooms keep it soft. This combo is great when you want cozy without flowers everywhere. I use it for modern weddings where the color palette is black, white, and one accent like sage or dusty rose. The high contrast makes guest photos pop because the mirror edge creates a strong border around faces. It's especially flattering for deeper skin tones - the white blooms brighten the center.
Start by anchoring the cotton bloom stems behind the top rail with floral wire, keeping the cluster tight and centered. Tie a satin ribbon bow around the base of the stems so it hides the wire. Then place a narrow runner under the mirror in a neutral like cream or oatmeal. Finally, step back and check that the cluster doesn't cover the top third of the mirror - you want reflection space.
Try thisUse matte satin or grosgrain for the bow so it doesn't shine like plastic under venue lights.
Common mistakeAvoid glittery faux blooms - they catch light in the wrong way and look cheap fast.
10. Pastel ombre ribbon streamers with a small floral corner cluster
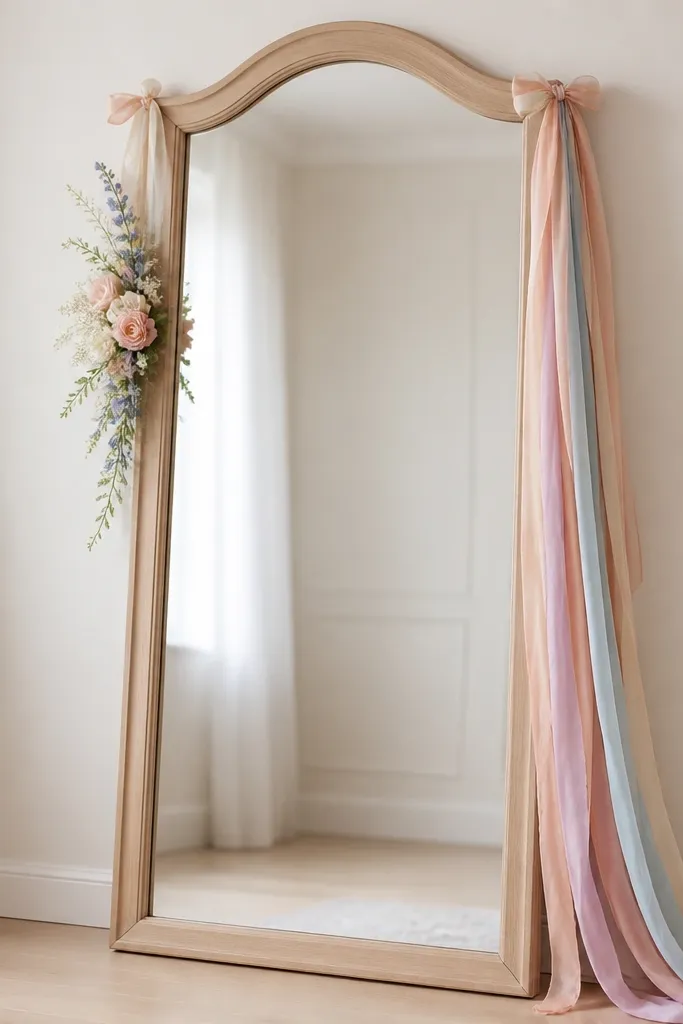
Streamers add motion and softness, and ombre ribbons make the setup feel custom without heavy decor. I use this when the wedding palette is playful - mint, peach, lavender - and the rest of the room has lots of color. Keeping the floral cluster to one corner makes the mirror look styled instead of cluttered. In photos, the streamers give a gentle diagonal line that frames guests naturally. It also flatters all body types because it guides the eye to the face rather than the outfit.
Start by cutting ribbon strips about 24-30 inches long so they fall to the lower third of the mirror. Tie two strips at each top corner with double knots, then let them hang at slight angles. Add a small corner cluster on the upper third using one floral type (like peonies or roses) and a bit of greenery, wired to the frame. Finish by making sure the floral cluster and streamers do not overlap - leave a clear gap so you can see the mirror.
Try thisUse two different lengths in each corner (one 24 inches, one 30 inches) for a natural, less symmetrical look.
Common mistakeAvoid tying all streamers straight down - straight lines look like party decorations.
11. Sage green frame with faux olive branches and a woven wreath base
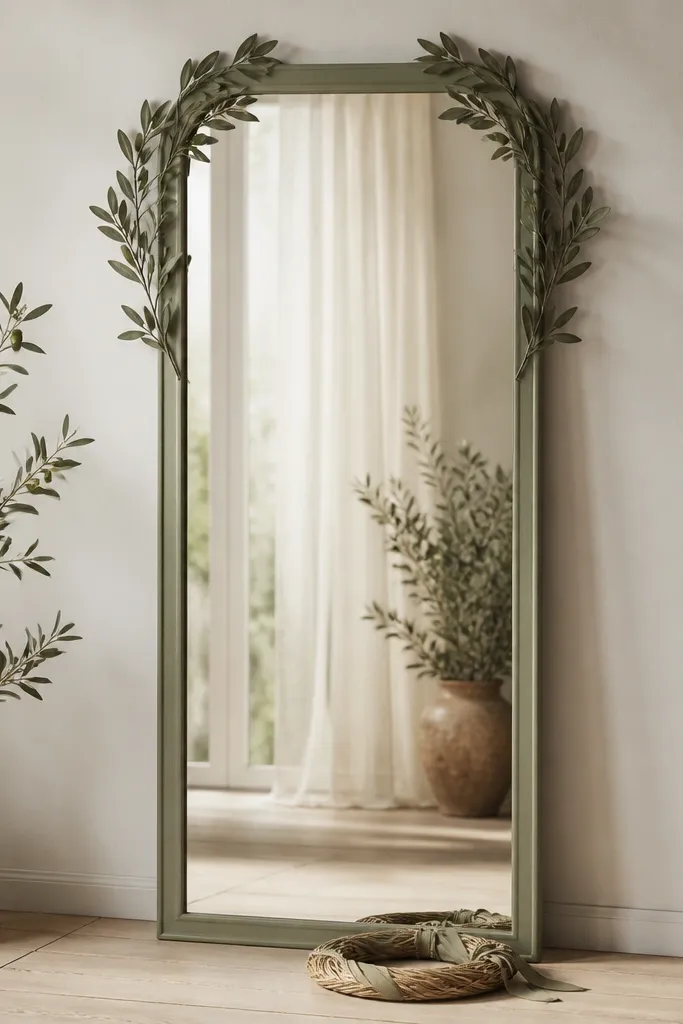
Sage green frames look calm and cozy, and olive branches add a Mediterranean softness. The woven wreath at the base gives guests a visual "home base" for photos, especially if they stand close. I use it for spring weddings where the palette is sage, cream, and warm white. Olive tone also works well with both gold and silver jewelry because it sits in the middle. The base wreath helps people feel comfortable standing in front of the mirror instead of wandering to the side.
Start by placing the woven wreath flat on the floor, centered under the mirror. Then wire the olive branches at the top corners so they curve inward slightly toward the center. Keep the branches light - you want negative space so the mirror still reflects clearly. Finally, tie a thin ribbon around the wreath and adjust the ends so they don't hang into the mirror view.
Try thisIf your mirror is tall, use two shorter olive clusters instead of one long branch to avoid sagging.
Common mistakeSkip heavy base props that touch the mirror frame - they make the arrangement look cramped.
12. White floral foam-free setup with rose stems taped to the frame edge
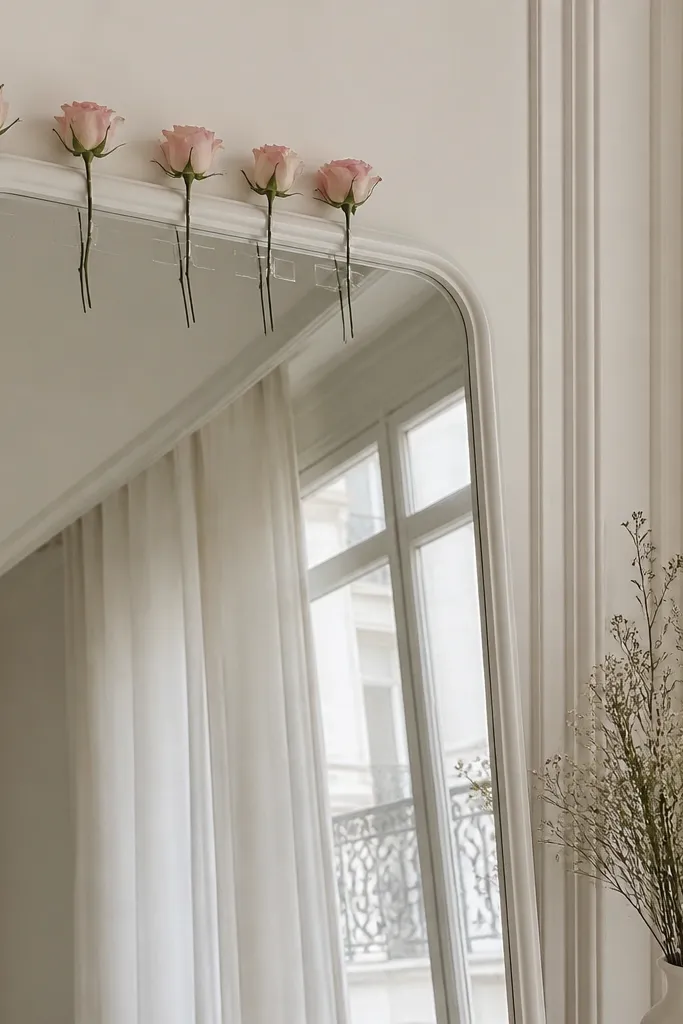
This is the setup I use when I don't want to bring floral foam into a venue. The roses give you that classic wedding look, but the frame-edge placement keeps everything tidy and light. I like it for weddings where you have access to a florist box but want to save time on installation. It photographs cleanly because the roses form a neat border, and the mirror still shows clear reflection. It also flatters guests because the roses sit high, near face level, which brightens expressions in photos.
Start by placing the mirror and marking the top edge points with painter's tape. Then attach rose stems with floral wire to the frame edge, and use clear tape only to stop stems from sliding while you wire them. Keep spacing about 3-4 inches between blooms so it doesn't look like a wall. Finally, add two small greenery leaves between roses to connect the border, then remove any tape ends that show from the front.
Try thisBring a small roll of floral tape and a spare wire tool - last-minute stem repositioning is normal.
Common mistakeAvoid pushing stems into the mirror frame gaps - it can scratch the finish.
13. Thrifted ornate frame wrapped in satin with a single calligraphy welcome card
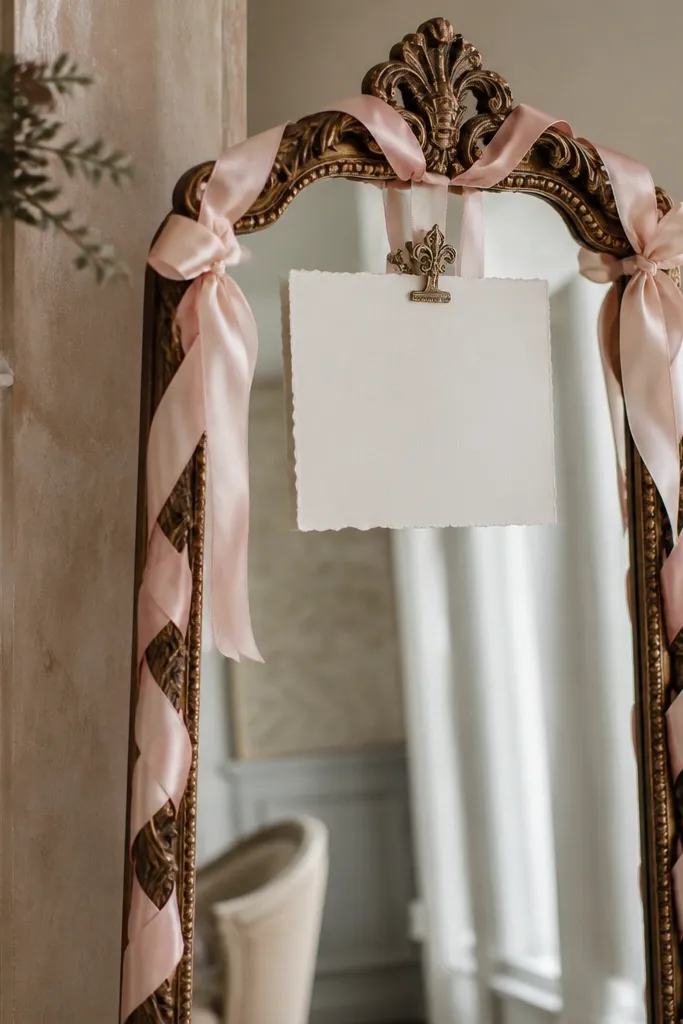
Ornate frames can look overwhelming, but satin wrap makes them feel intentional and soft. The calligraphy card adds function without adding bulk, and it keeps the message readable while still letting guests see themselves. I use this when the venue has neutral decor and you want the mirror to be the most "special" thing at the entrance. The blush satin flatters warm skin tones and makes jewelry look brighter. It also works for men's outfits because the mirror border adds structure around darker suits.
Start by cleaning the frame with a dry microfiber cloth so ribbon sticks cleanly. Then wrap blush satin around the outer edges in vertical bands, using double-sided fabric tape behind the frame so it stays hidden. Place the welcome card in a clear acrylic clip centered near the top third. Add one thin greenery sprig to the sides of the card so it connects to the frame, then trim any ribbon ends so they don't hang into the mirror view.
Try thisUse a card clip that grips the top edge - it keeps the text perfectly flat for photos.
Common mistakeAvoid hot glue on ornate frames - it can leave bumps that show in close-up shots.
14. Terracotta clay-toned frame with dried orange slices and cinnamon stick accents
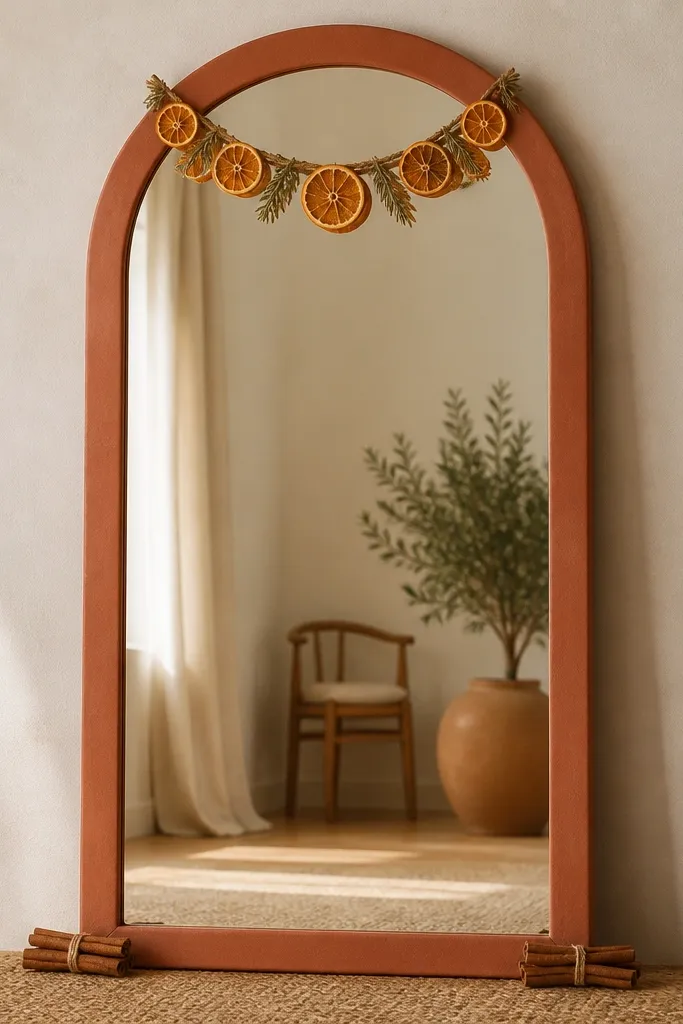
Terracotta and dried orange make a welcome mirror feel like warm cider season, even in a summer venue if your lighting is warm. The orange slices add a natural pattern that looks great on camera, and cinnamon brings a cozy scent. I use this for fall weddings, but it works for any wedding with earthy neutrals and warm metals. People with lighter skin often look great with this because the orange tone adds warmth without making faces look orange. It's also a fun setup for couples who want decor that feels edible and playful.
Start by making a small garland: tie dried orange slices to twine with tiny holes punched near the rind edge. Lay the garland across the top rail so it sits centered and slightly arched. Place cinnamon sticks at the base corners, tying each with twine and keeping them short enough that they don't block guest feet. Finally, add one mini greenery leaf between oranges so the garland doesn't look flat.
Try thisPunch holes with a small nail and hammer - it's faster than trying to force twine through the slices.
Common mistakeAvoid fresh oranges - they leak and stain floors, and the mirror base gets messy fast.
15. Monochrome silver frame with white feathers and a soft tulle ribbon loop
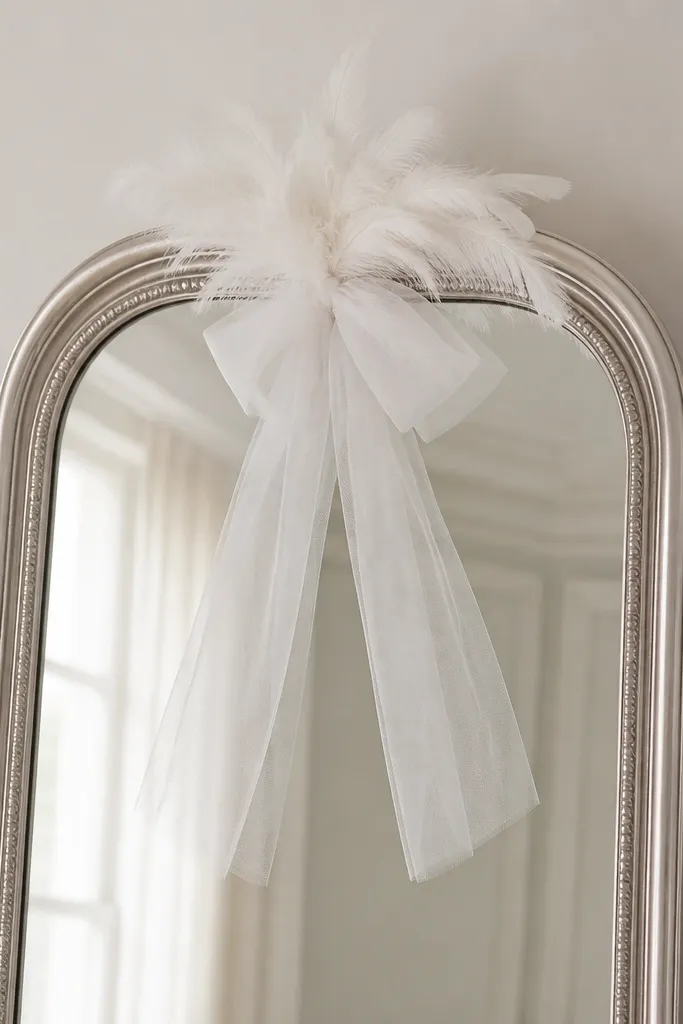
Silver frames look crisp, and feathers add a gentle texture that reads luxe without heavy florals. White feathers keep it monochrome, so the mirror stays the star and your outfits blend into the photo cleanly. I use this for winter weddings or indoor receptions where you want cozy but also a little drama. The feather cluster sits near face height, which makes expressions look softer in photos. It works well for both fair and deep skin tones because the white stays bright without adding color cast.
Start by securing a small feather cluster with floral wire to the top center of the frame, then hide the wire behind the frame edge. Tie a tulle loop below the cluster using a double knot, and trim the tails so they end around the upper third of the mirror. Add two tiny feather tips on each side if the cluster looks too narrow. Finally, place a white textured runner under the mirror so the base matches the feather softness.
Try thisUse feathers with a matte finish, not shiny - matte looks more natural in venue light.
Common mistakeSkip big feather fans - they look like costume decor and overpower the reflection.
16. Faux fur throw at the base with a minimalist greenery line on the frame
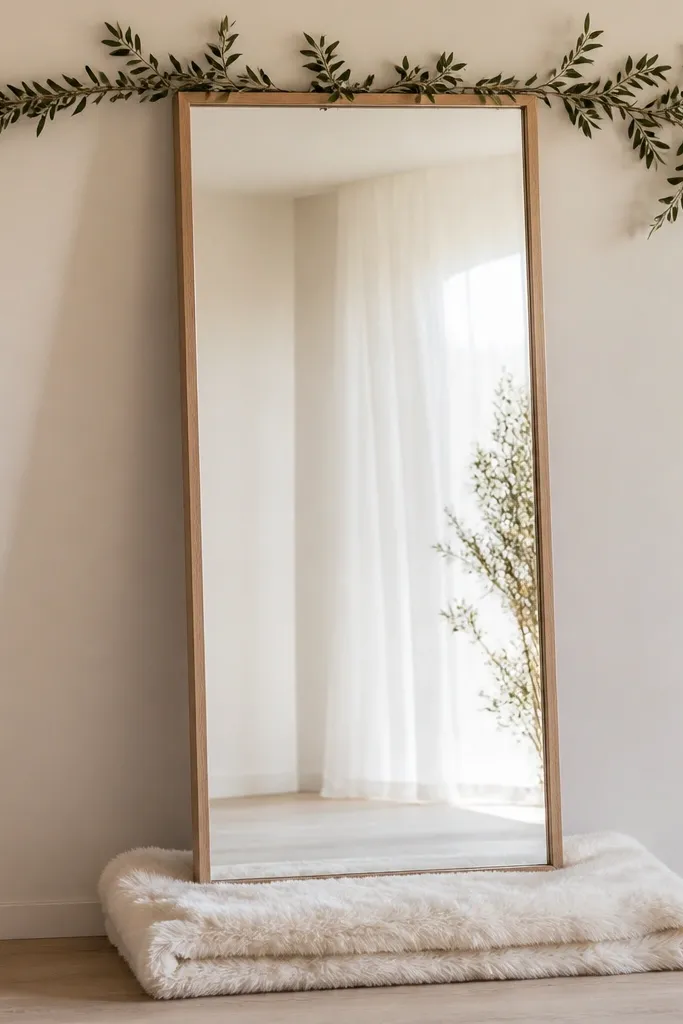
This is the cozy trick: texture at the base. A faux fur throw makes the whole welcome area feel warm and inviting, and it gives guests a soft visual anchor even if you keep the frame styling minimal. The thin greenery line keeps the mirror from looking bare while still letting the reflection do its job. I use it for winter weddings, especially when the ceremony is in a hall with neutral walls. It flatters photos because the fur catches light softly and makes skin look warmer. It also looks great for couples who want a clean, modern welcome without lots of flowers.
Start by folding the faux fur throw so it sits flat under the mirror, about 22-26 inches wide. Then attach a thin line of greenery to the top edge using floral wire, spacing sprigs about 3-5 inches apart. Don't cover the corners - leave the frame visible so the design stays light. Finally, add one small greenery sprig at the lower left and right edges to connect the top line to the base texture.
Try thisBrush the faux fur lightly with a soft comb before you place it - it removes flattened spots.
Common mistakeAvoid thick greenery waterfalls - they make the mirror look like a wreath shop display.
17. Rope frame wrap with pampas and a small lantern on the floor
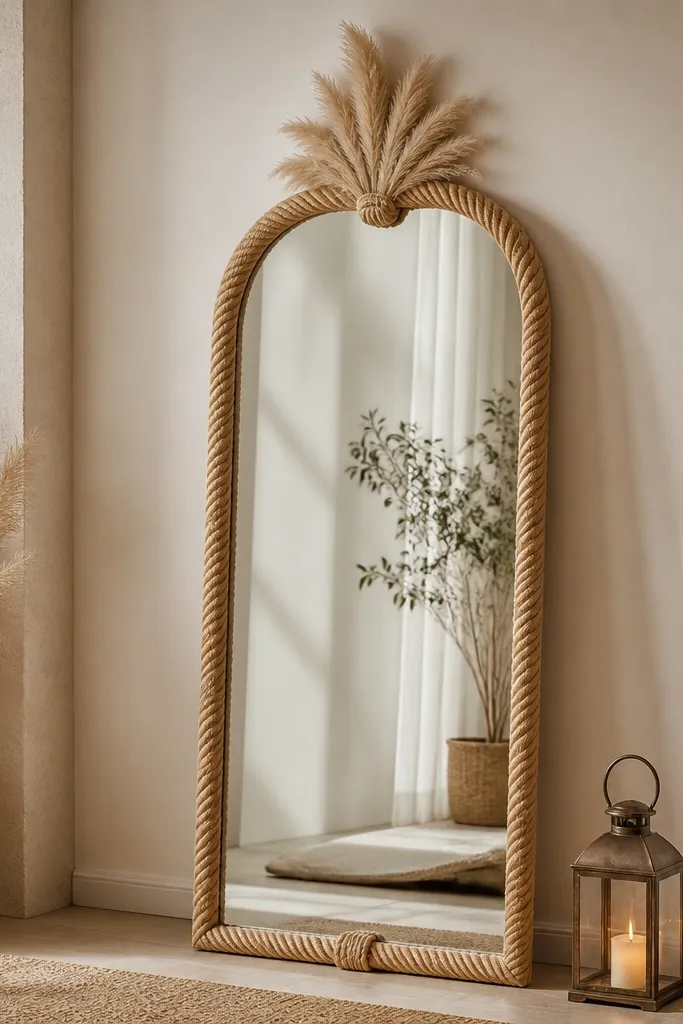
Rope wrap gives a handmade beach-to-barn vibe, and pampas adds height without making the mirror heavy. A small lantern near the base makes the welcome feel alive after sunset, and it creates an extra light source that makes the mirror glow. I use this when the wedding has natural textures like linen, jute, and wood. It photographs well because rope adds a warm outline around the mirror edge. It also flatters guests because the warm lantern light adds gentle highlights around hair and shoulders.
Start by wrapping rope around the frame edges using a strong fabric glue or hot glue on the back side only, then let it cure fully. Attach a pampas tuft at the top center with floral wire so it stands upright. Place a lantern on the floor about 10-12 inches to the side of the mirror base so it doesn't block feet or the reflection center. Finish by adding one tiny rope-tied ribbon at the bottom of the mirror frame to hide any glue spots.
Try thisUse LED candles inside the lantern - real candles add risk and soot in crowded areas.
Common mistakeAvoid lanterns directly in front of the mirror - they create glare and hide the message.
18. Blush ombre floral ring leaned behind the mirror for a halo effect
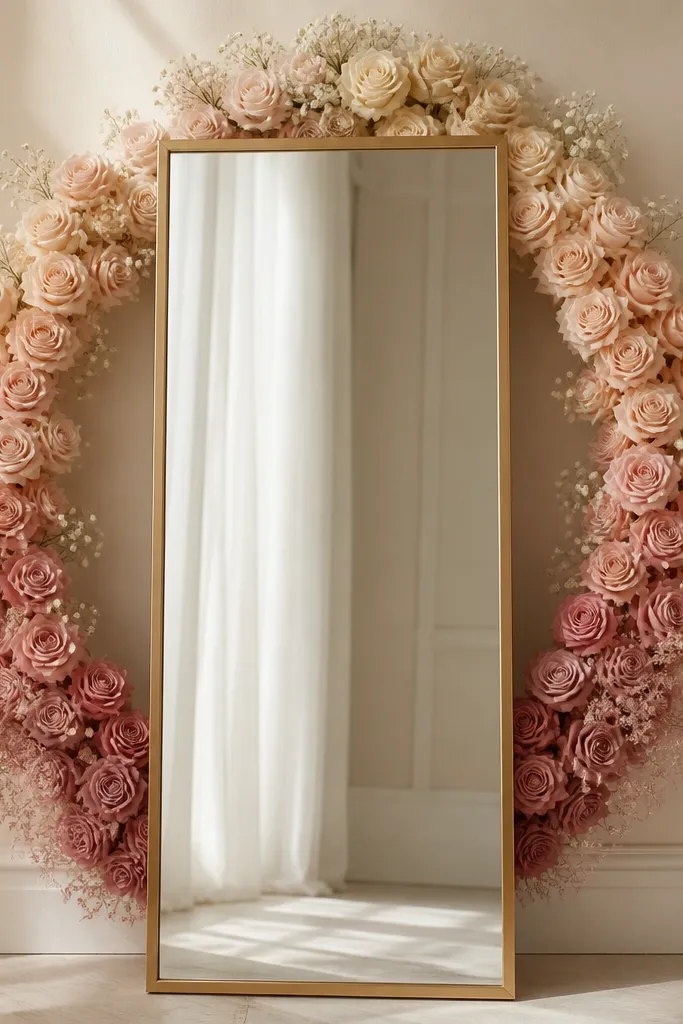
The halo effect is the reason this design looks expensive. The ring sits behind the mirror, so the florals don't cover the glass, and the reflection stays clean. Ombre blending from blush to soft cream gives a gentle gradient that flatters faces because it adds soft color near the head area. I use this for intimate weddings where the mirror is a main photo spot and you want guests to look good in every angle. It also works for both men and women outfits because the color gradient frames the upper body naturally.
Start by building a ring on a lightweight wire hoop, then attach small blossoms and greenery in an ombre pattern from inner to outer edge. Lean the ring behind the mirror so it's visible around the perimeter, keeping it about 2-3 inches away from the mirror surface. Secure the hoop with a hidden zip tie around the mirror frame back so it doesn't slide. Finally, add a small welcome card at the lower third of the mirror so it stays readable without competing with the halo.
Try thisTest the halo from the main entrance spot - if it's too high, guests will cut it out of selfies.
Common mistakeAvoid heavy flowers on the ring - a bulky ring blocks the mirror and makes it look like a wreath glued to glass.
19. Sunflower and linen combo for late-summer cozy welcome
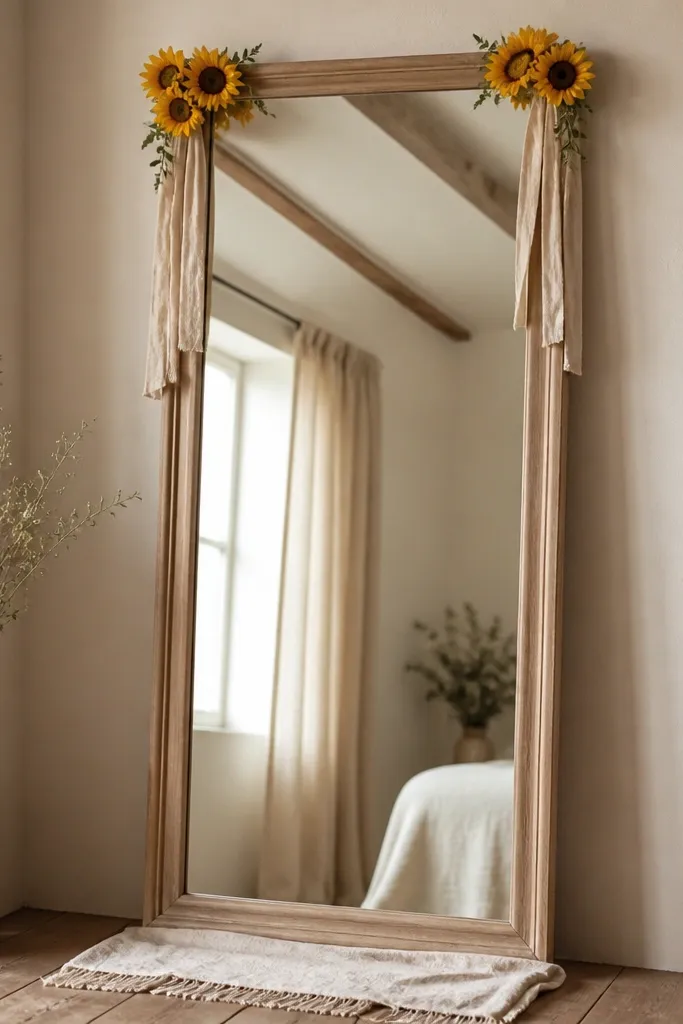
Sunflowers bring instant warmth, and linen keeps it from looking too loud. I use this for late-summer receptions where the palette is mustard, cream, and sage. The mirror placement matters here because sunflowers are bold - you want them near the frame edges so the center reflection stays calm. The result is a cozy welcome that still looks bright and cheerful in daylight photos. It flatters everyone because the warm yellow sits near the face without turning into neon.
Start by tying warm cream linen strips (about 14-18 inches long) to the top corners of the mirror frame. Then attach one small sunflower head to each side using floral wire and trim the stems so they sit just above the upper third line. Add a few sage leaves between sunflowers to soften the contrast. Place a linen runner under the mirror and center it so the base doesn't look like bare floor.
Try thisPick sunflower heads that are not fully open - they look fresher longer and don't shed as fast.
Common mistakeAvoid giant sunflower heads - they block the mirror and make the setup look top-heavy.
20. Sculptural dried palm frond with a neutral ribbon banner
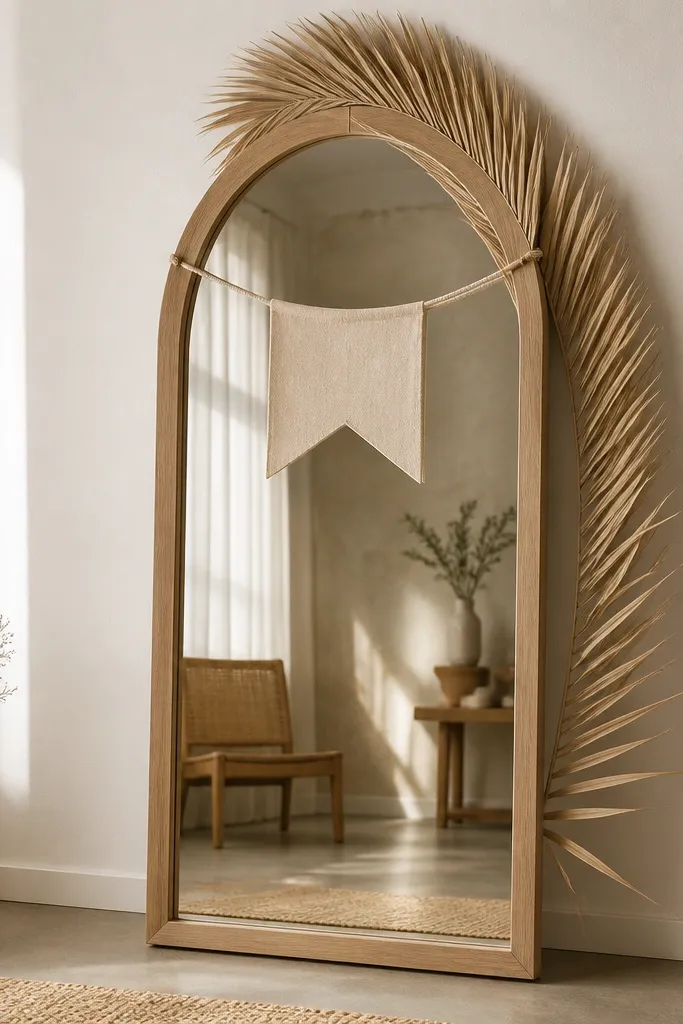
A sculptural palm frond gives you a clean, modern shape that still feels cozy because dried plants look organic and grounded. The ribbon banner keeps the welcome message visible without blocking the mirror reflection. I use this when the wedding is in a beach house or has a tropical-neutral palette like sand, cream, and muted olive. The palm frond frames faces with an S-curve, which looks flattering in photos because it brings attention upward. It also works well for men in darker suits since the neutral ribbon adds softness around the head.
Start by placing the mirror and marking where the banner should sit - I keep it 6-10 inches below the top edge. Then attach the ribbon banner using small clips or clear tape behind the frame so it stays flat. Wire the dried palm frond at the top center, then let it arc down one side only, leaving the other side clean. Finish by adding one small sprig of greenery at the opposite top corner to balance the asymmetry.
Try thisTrim the palm frond edges so the frond doesn't look ragged in close-up photos.
Common mistakeSkip multiple large fronds - two or three overlapping fronds look messy and hide the mirror.



