1. Jute + Marigold Tealight Sleeves for Guest Tables
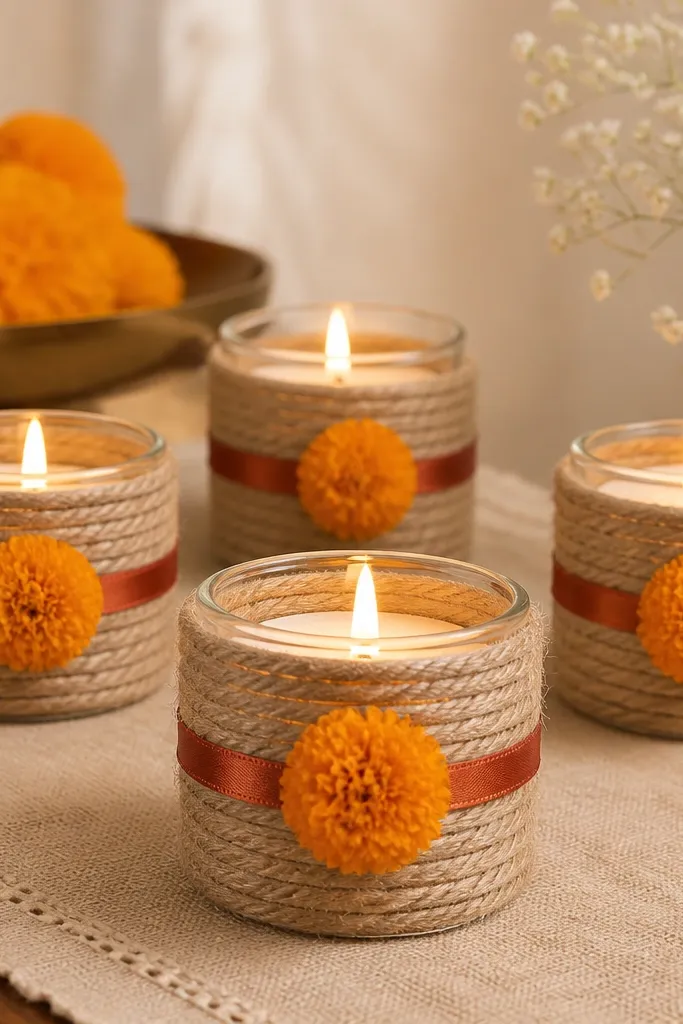
This craft makes every table look cared for without building a full centerpiece. I use jute because it has a rough texture that catches warm light and hides minor glue spots. Tie a small marigold pom-pom or faux marigold cluster on top, and add one thin rust satin strip so it looks intentional instead of rustic-only. It flatters most color palettes because jute is neutral and marigold is a classic Indian wedding warm tone. If your venue lighting is yellow, this setup looks extra cozy; if it's cooler, the satin strip still keeps the vibe warm.
Cut jute strips about 10-12 cm wide and long enough to wrap around your tealight glass (leave a 1-2 cm overlap). Wrap the jute around the tealight holder and secure with hot glue at the overlap, then tie twine around the middle like a belt. Finish the top with a marigold pom-pom using a small dot of glue and add a 6-7 cm rust satin ribbon bow. Place the tealights on a beige or cream runner so the jute texture shows up in photos. Keep spacing of 25-30 cm between holders so guests don't bump them.
Try thisUse battery tealights if kids or guests move around a lot; the glow looks the same in photos and you don't worry about wax spills.
Common mistakeAvoid glossy jute or plastic-looking "marigold" heads - they reflect light and read cheap.
2. Rust Velvet Ribbon Mandap Corner Garlands
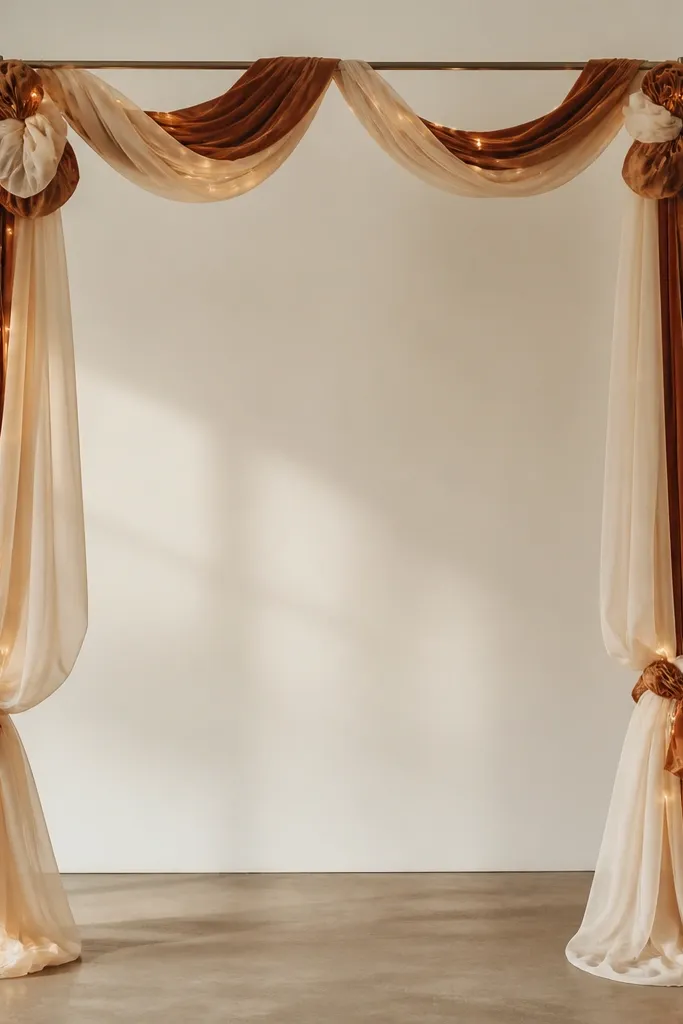
Mandap corners are where photos catch the edges, so a soft ribbon garland makes the whole setup look finished. Velvet ribbon looks lush even when you use a small amount, and rust + cream gives you that cozy Indian warmth. I like adding chiffon because it moves gently and makes the corner look less "stuck-on." This works well for both men and women outfit colors because rust and cream are easy to match to sherwani, lehenga, and even neutral suits. In warm lighting, velvet absorbs glare, so it looks expensive instead of shiny.
Cut velvet ribbon into 45-50 cm lengths and fold each piece in half to create loops. Thread the loop ends through a thin jute twine line (you can tie knots to keep spacing even) starting from the top corner anchor. Add 2-3 chiffon strips of 60 cm length between ribbon loops so there's movement. Tuck warm white fairy lights behind the garland line and secure with tape, then hang from a corner beam using zip ties covered with fabric. Make each corner garland about 60-80 cm tall so it frames the stage without blocking sightlines.
Try thisBefore hanging, stretch the velvet gently so the loops hang flat instead of curling.
Common mistakeSkip silver or icy-blue lights - they make velvet look dull in photos.
3. Cream & Saffron Paper Flower Backdrop with Shadow Layers
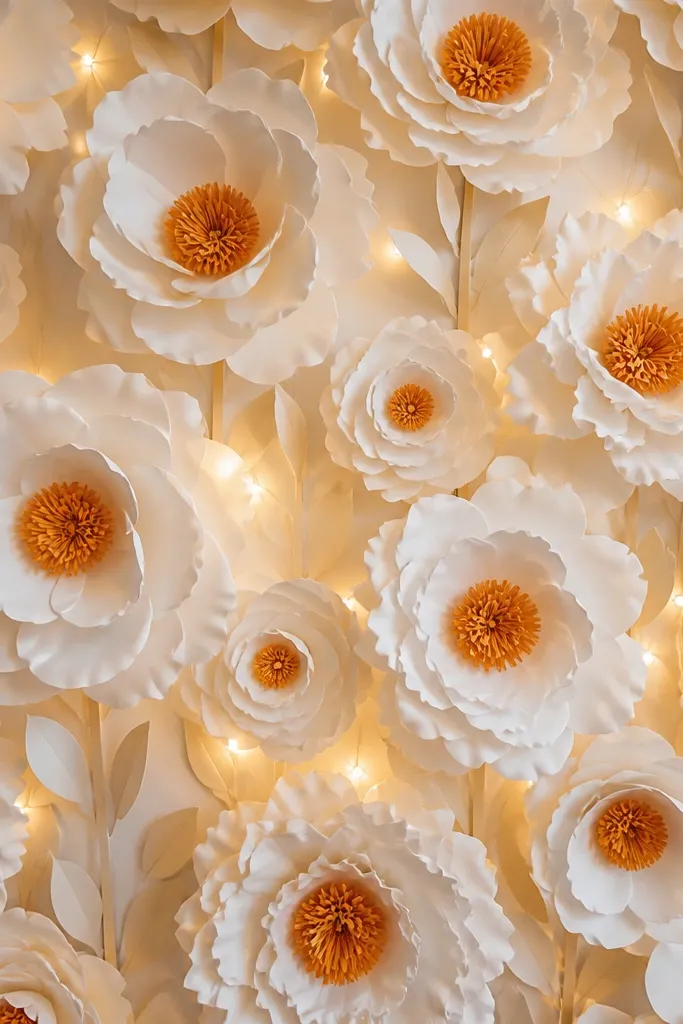
Paper flowers look cozy when they have real shadow depth. I build mine in two layers: outer petals in cream and inner petals in saffron, with centers slightly darker than the petals. The layered shading reads soft and warm, especially under warm LED lights. This is great for couples who want a photo wall but don't want bulky fabric drapes. It flatters darker skin tones because the cream petals brighten the frame, and it flatters fair skin because saffron centers add warmth instead of washing out.
Make or buy 2 sizes of flower templates: one for outer petals (about 18-22 cm) and one for inner petals (about 12-15 cm). Assemble outer petals first, then glue the inner petals slightly off-center so you get visible shadow edges. Add a center made from rolled paper strips or foam dots painted saffron-gold, then attach to a backing board. Mount the flowers on a plywood or thick chart board frame, using hot glue and small cable ties for stability. Place warm LED behind the flowers, not in front, so light creates depth.
Try thisLightly mist the petals with matte acrylic spray so they don't look shiny on camera.
Common mistakeAvoid flat single-layer paper flowers - they look like school crafts in close-ups.
4. Marigold Lanterns from Glass Jars and Paper Strips
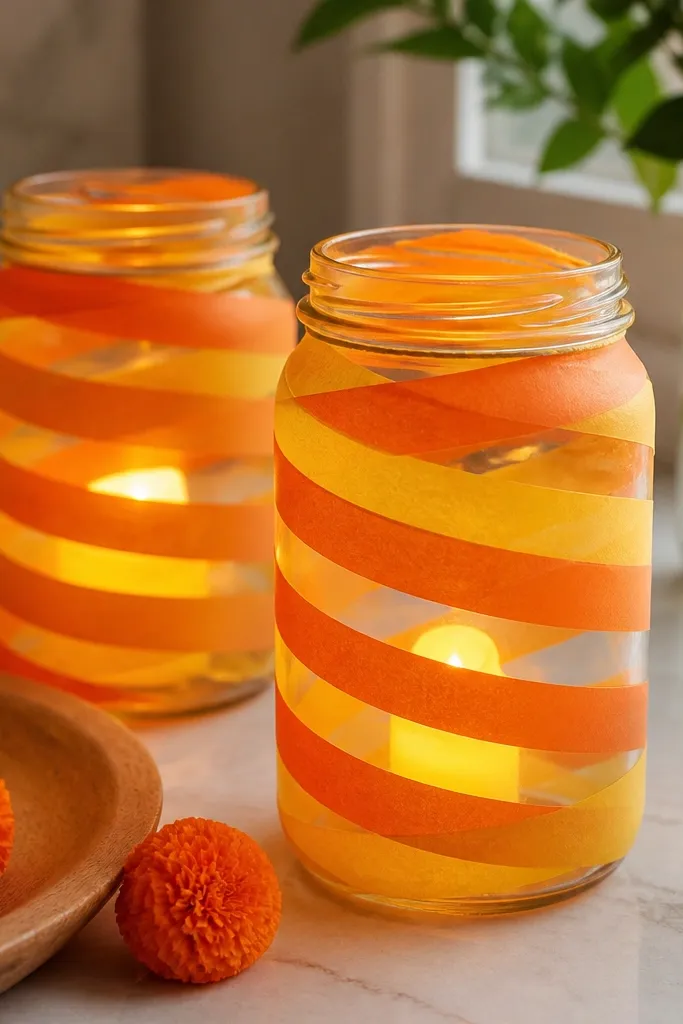
Lanterns bring cozy warmth because the light has a container and shows up from far away. Glass jars are easy to find, and spiral paper strips create a textured glow that looks handmade, not store-bought. I like using marigold-yellow and orange strips with a small cream band at the top so it matches Indian color palettes. These lanterns work for both indoor mandap corners and outdoor walkway paths. They also photograph well because the glow lines up with faces and doesn't create harsh glare.
Clean and dry glass jars, then cut paper strips about 2-2.5 cm wide and long enough to wrap around the jar height. Apply glue in small patches and wrap strips in a spiral, alternating colors every 2-3 turns. Leave a 2 cm gap at the bottom so you can insert the LED candle easily. Add a cream ribbon band around the jar neck and glue it flat. Place the finished lanterns on a table, or hang them using twine tied around the jar lid area with a knot.
Try thisUse warm white LEDs (2700K look) so the paper glow reads amber instead of bluish.
Common mistakeSkip metallic glitter paper - it reflects harsh points of light on camera.
5. Terracotta Clay Pot Mini Centerpieces with Faux Rangoli Base
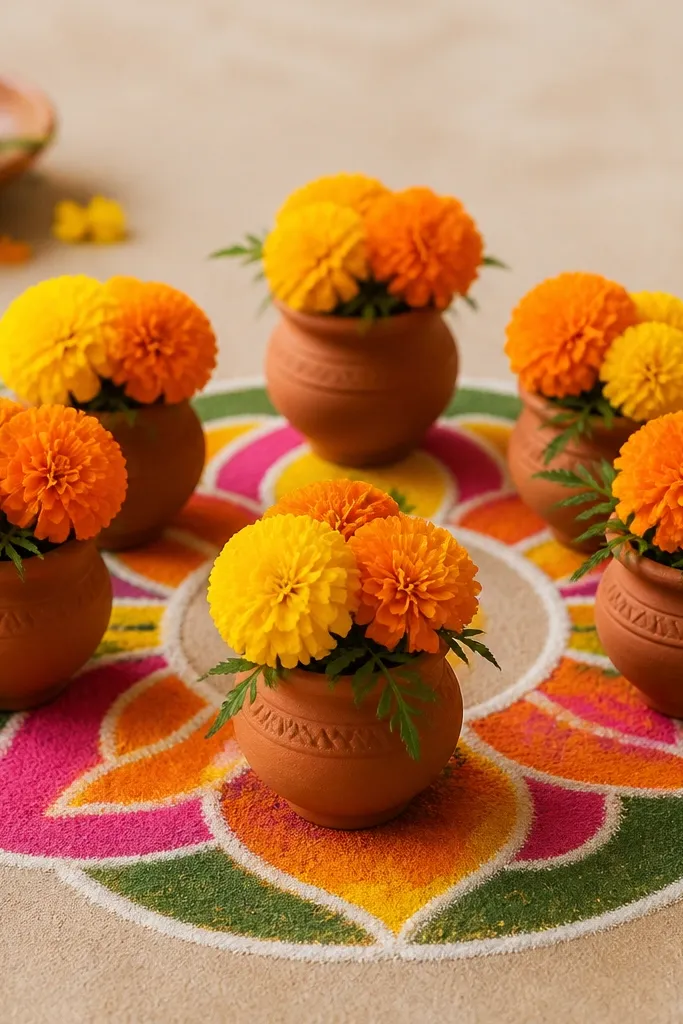
Mini clay pot centerpieces feel traditional and cozy at the same time. The pot brings a grounded, earthy warmth, and the faux rangoli base adds a festive burst without needing hours of floor rangoli. I use colored sand or colored salt for the ring pattern because it stays put and looks crisp in photos. This works for both vegetarian decor lovers and anyone who wants something that doesn't block conversation at the table. It flatters warm-toned outfits and also balances darker outfits like deep navy or black by adding earth color around the table.
Mix or buy colored sand in marigold, rust, and cream tones, then pour it into a shallow circular tray or thick cardboard cutout for the rangoli base. Spray a thin layer of matte clear adhesive on the base, then sprinkle sand in a simple concentric pattern. Place each terracotta pot in the center and fill with a small foam base covered in jute or moss-like craft sheets. Add 3-5 faux marigold stems or one live bunch if you can keep it hydrated. Keep pot height around 10-12 cm so it doesn't block place settings.
Try thisSeal the sand base with a light matte spray from a distance so it doesn't smudge during setup.
Common mistakeAvoid wet live flowers directly on sand - water stains show fast.
6. Saffron Chiffon + Fairy Light Curtain for Photo Corner
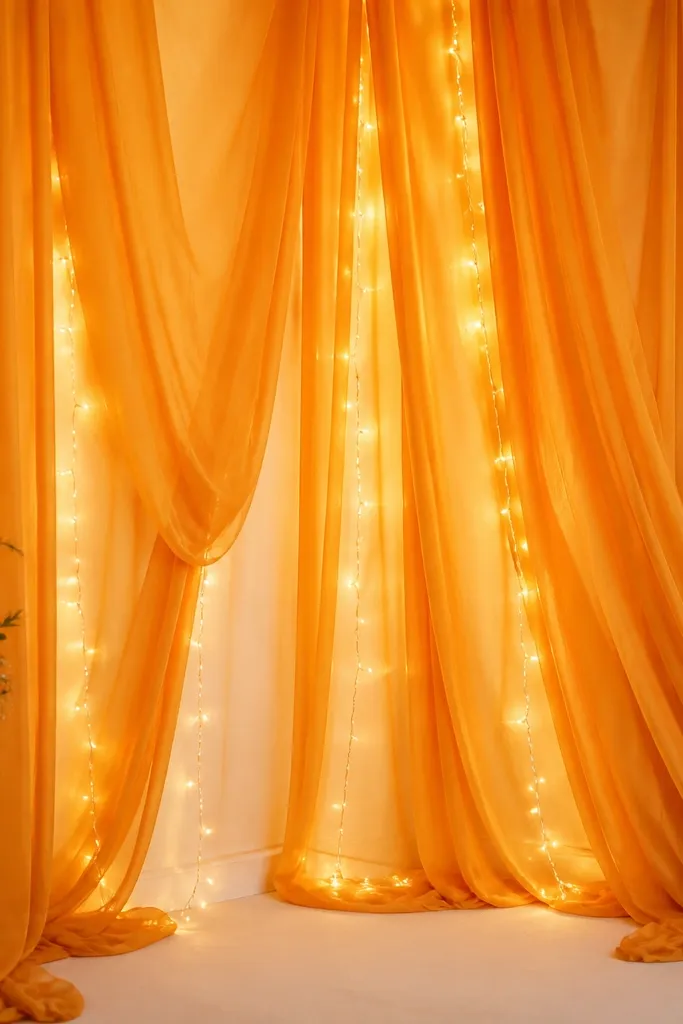
This is the craft I reach for when I want instant softness. Chiffon drapes in thin layers and the warm fairy lights look like floating glow instead of a single string line. Saffron and cream together create a welcoming warmth that works with almost any wedding color story. It's also forgiving if your wall has marks or uneven paint. For photos, it gives you a flattering background that doesn't steal attention from the couple.
Cut chiffon panels 2-2.5 meters long and about 60-70 cm wide each, then overlap them from top to bottom. Use a simple curtain rod or a tight twine line with clips so the panels fall naturally. Weave warm white fairy lights behind the chiffon, keeping the battery pack hidden at one side. Secure the bottom edges with small fabric weights or tuck them into decorative jute loops. Arrange panels so the center gap is narrower than the edges, which creates a flattering V-shape behind portraits.
Try thisSteam the chiffon after draping; it removes ripples that show up as dark lines in phone photos.
Common mistakeSkip cold LED strips - they make chiffon look grey.
7. Hand-Painted Wooden Wedding Sign on Jute Rope Frame
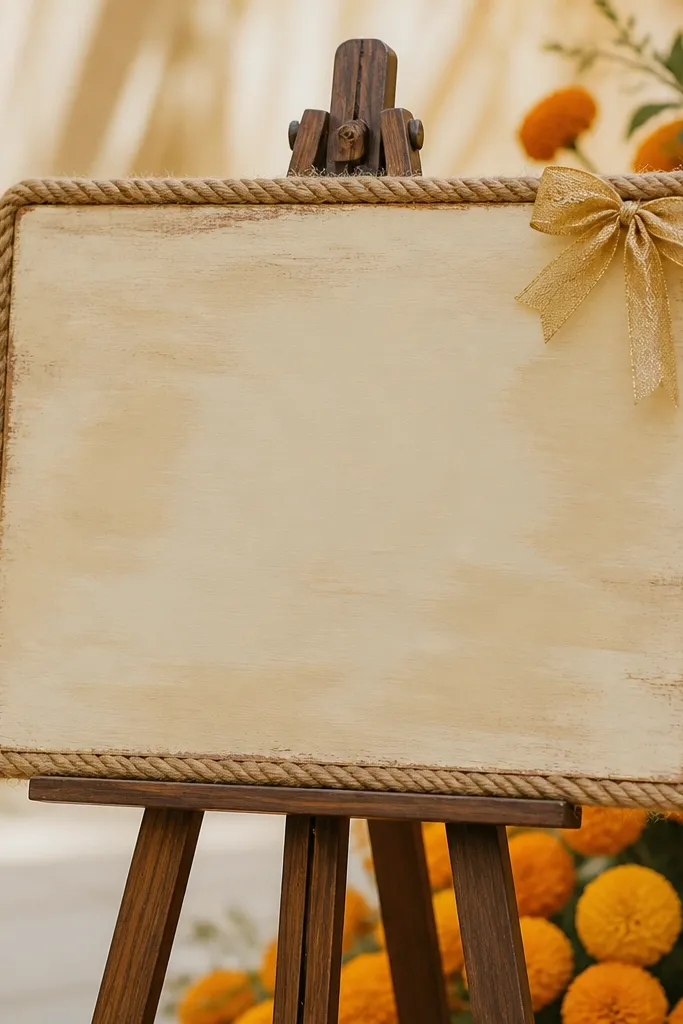
A sign gives you direction and warmth without adding clutter. I use a simple wooden board painted cream so it matches the cozy palette, then I paint letters in deep terracotta or dark chocolate. Jute rope around the edges makes the sign feel handmade and ties it to other crafts like lanterns and table sleeves. It looks good in both close-up and wide shots, especially when you add a small gold accent. If your couple has warm-toned outfits, the terracotta lettering makes their photos feel connected to the decor.
Sand a small plywood board and wipe it clean. Paint the board with two thin coats of matte cream acrylic, letting each coat dry fully. Use a fine brush or paint pen for letters in terracotta, and add a short date line in tiny chocolate script. Glue jute rope around the border with a hot glue gun, then tie a small bow at the top corner. Place the board on a stand or tripod, and add one garland strand across the bottom edge for softness.
Try thisPractice the letter spacing on paper first - uneven spacing is what makes painted signs look amateur.
Common mistakeAvoid glossy varnish - it creates glare spots in photos.
8. Tissue Paper Pom-Pom Ceiling Swags in Warm Tones
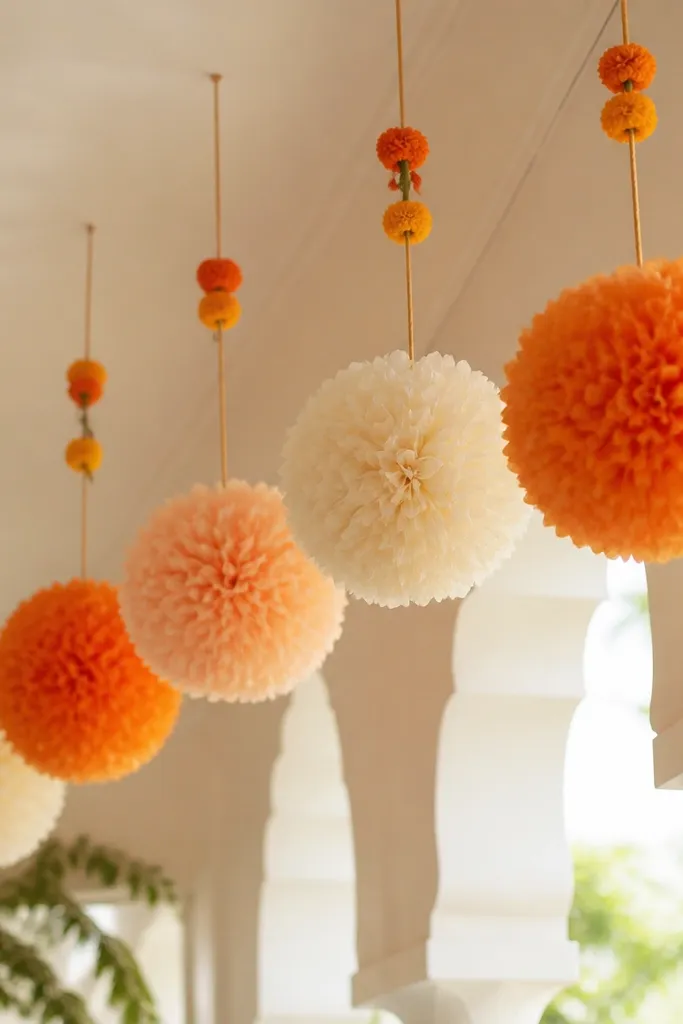
Ceiling swags fix a common problem: guests look up, but most decor only sits at eye level. Pom-poms look cozy when you use matte tissue layers and keep the color mix warm. I choose orange-marigold tones with cream so the ceiling doesn't feel heavy. This works best for halls with visible ceiling height and good ceiling lights. It also flatters everyone in photos because it adds soft overhead color without harsh shadows on faces.
Stack tissue sheets in sets of 8-10, then fold accordion-style and tie the center with string. Cut the ends into rounded or pointed shapes so it fluffs evenly. Separate layers carefully and fluff until each pom-pom is about 18-22 cm wide. Hang on fishing line or thin twine tied to ceiling points, spacing 60-80 cm apart. Add a tiny faux marigold cluster at every third pom-pom to connect it to the rest of the palette.
Try thisFluff each pom-pom right before setup so it looks full instead of compressed.
Common mistakeSkip bright neon tissue - it clashes with warm skin tones on camera.
9. Jute and Rose Gold Balloon Weight Table Clusters
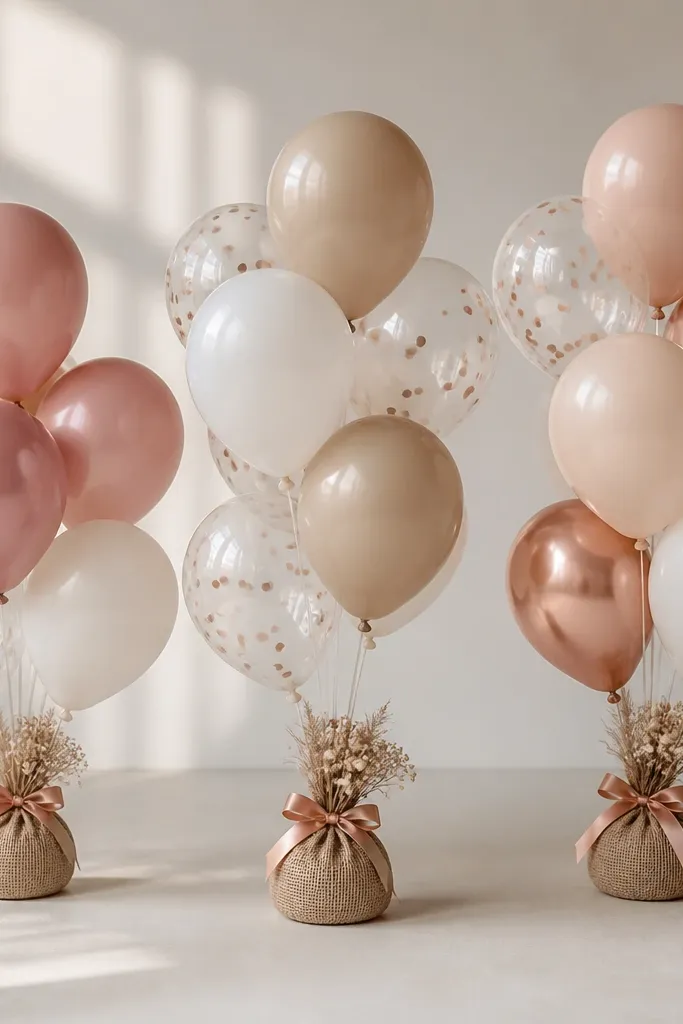
Balloon decor gets overlooked as a craft, but it's one of the fastest ways to add cozy height near tables. I wrap the weight base in jute so it looks grounded, not like a plastic stand. Rose gold ribbon gives a warm metallic sparkle without going icy. This looks great for small stages and reception corners where you need vertical interest. It also flatters darker outfits because jute neutralizes the contrast and the rose-gold catches warm light.
Buy balloon weights or heavy base discs, then wrap each base with jute twine in tight coils using hot glue. Tie a short rose-gold satin ribbon around the center and add a small dried flower bunch (like baby's breath) with glue. Inflate balloons in two sizes: one medium and one slightly smaller, then tie them to the weight using clear string. Arrange clusters in groups of 3 or 5, not random singles. Place near the entrance or behind the seating area where the balloons frame people without blocking chairs.
Try thisUse warm-toned balloons like champagne, peach, and light gold instead of pure white.
Common mistakeAvoid tying balloons with thick colored cords - they show as messy lines in photos.
10. Satin Ribbon and Pearl Photo Prop Sticks
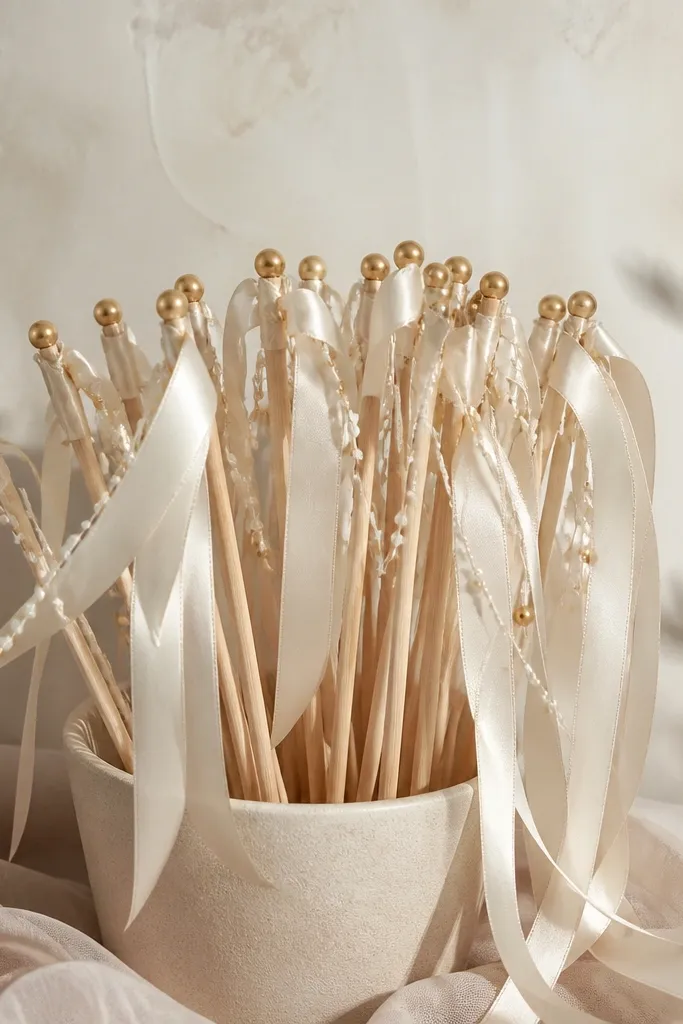
Photo props are where guests spend time, so they need to look good close-up. Satin ribbon gives that smooth, cozy look, and pearl-like beads add softness instead of loud sparkle. I make sticks in cream with champagne-gold accents so they match almost every Indian wedding palette. This works for both men and women because it doesn't look costume-like; it looks like a styled accessory. In warm lighting, pearls read creamy and the ribbon adds motion that looks great in candid photos.
Cut ribbon strips 35-45 cm long and fold a loop at one end, then glue the loop to the top of a wooden stick. Wrap the stick top with a thin strip of satin to cover the glue. Add pearl-like beads in a short vertical line using hot glue or craft wire, then tie a small gold thread knot at the top. Make 10-15 props so the booth looks full. Keep ribbon widths around 1-1.5 cm so they sit neatly and don't tangle.
Try thisLightly steam the ribbon after assembly so it hangs straight for the first photo.
Common mistakeSkip huge rhinestone stickers - they reflect harshly and ruin the cozy vibe.
11. Warm Spice Scent Sachets in Organza for Return Gifts
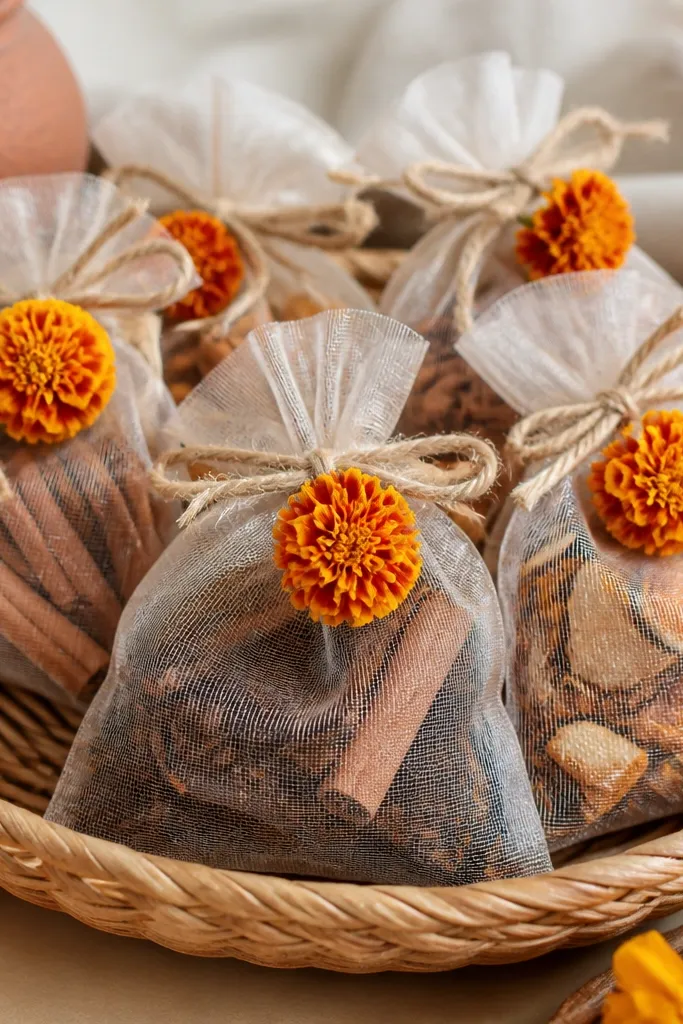
Scented sachets make the whole wedding feel warmer because people notice smell before they notice decor details. For a cozy warm wedding crafts diy vibe, I fill organza pouches with cinnamon, cloves, and dried orange peel. The colors are warm - brown spice, orange peel - and the organza keeps the look airy. These are perfect for return gifts, guest seating welcome packs, or even to tuck into bridal dupattas for photos. They work across skin tones because the colors are neutral-warm and don't stain.
Dry your orange peel slices first, then cut them into small pieces. Fill organza pouches about 7-9 cm wide with a mix: 1-2 cinnamon bits, 5-7 cloves, and a pinch of orange peel. Tie with jute twine and add a small tag made from cream card with terracotta writing. Seal the pouches loosely by knotting - don't use glue inside. Pack them in a basket lined with jute so the whole setup looks handmade. Make sure each sachet has enough spice to smell within 1-2 meters.
Try thisStore sachets in airtight boxes until the event so the scent stays strong.
Common mistakeAvoid strong essential oils - they can overpower and smell sharp instead of cozy.
12. Fabric Rose Budget Bouquets for Aisle and Mandap Edges
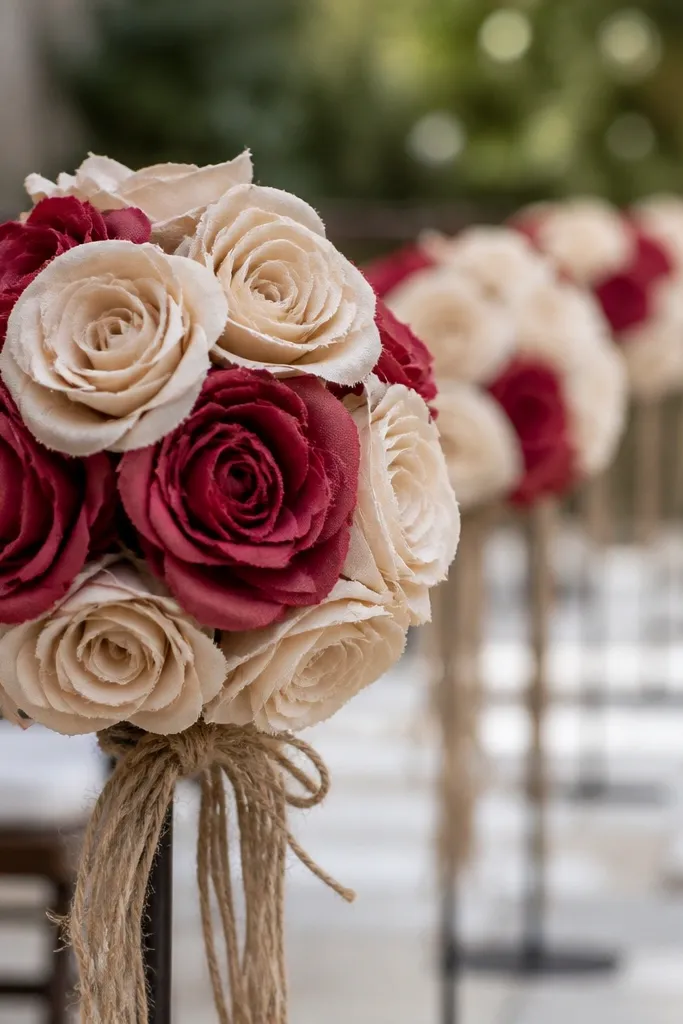
Fabric roses look soft and cozy, and they don't wilt in hot venues. I make them from satin or cotton fabric cut into petal shapes, then layer them with a simple center. Cream and deep rose is a warm combo that looks romantic without going overly pink. This works for both men and women wedding decor because it pairs with sherwani browns and lehenga reds. It also photographs well because fabric petals have texture and catch warm light without glare.
Cut petal shapes from fabric: 8-10 small petals in cream and 4-6 in deep rose. Roll each petal slightly and stitch or glue at the base to form a curve. Layer petals around a small rolled center, starting with deep rose inside and cream outside. Tie the bouquet stems with jute twine and wrap with a strip of matching fabric. Place bouquets in clusters of 3 along the aisle or attach them to mandap edge stands using zip ties covered with fabric. Keep bouquet size around 12-15 cm for a tidy look.
Try thisUse matte fabric like cotton-satin blend so petals don't look plasticky in close shots.
Common mistakeSkip glossy polyester petals - they reflect and make roses look fake.
13. Tea-Light Wicker Candle Holders with Marigold Ribbon Trim
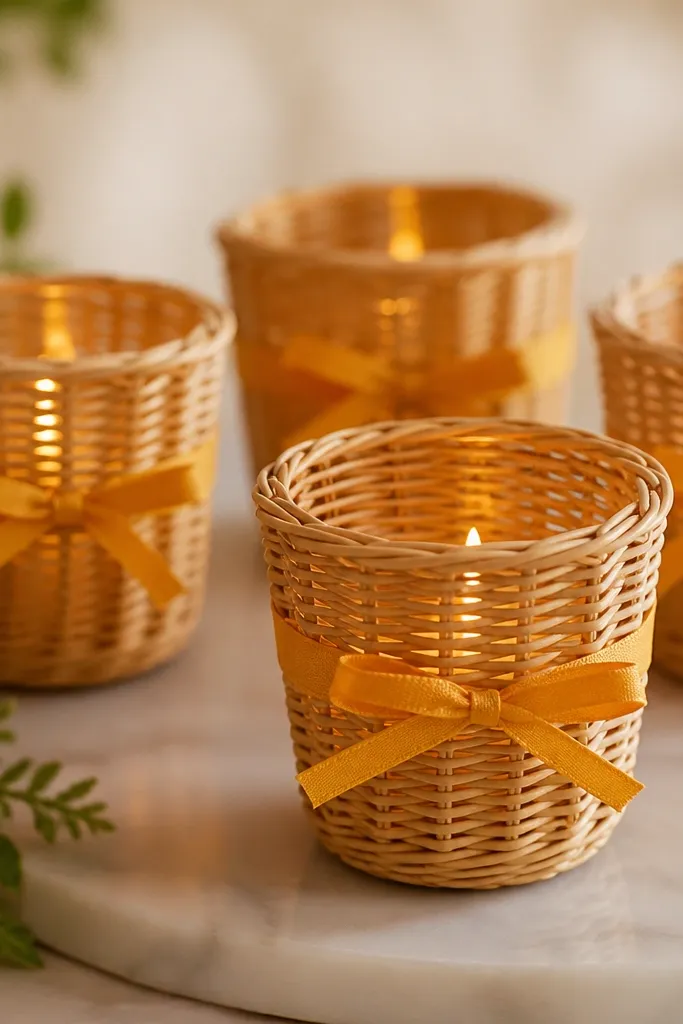
Wicker holds light in a way that feels instantly cozy. When you add marigold ribbon trim, the candle area looks festive without needing big centerpieces. I like this craft for evening receptions because candlelight reads warm and soft. It's also friendly for small spaces because wicker cups take up less area than tall decor. For photos, wicker creates a patterned glow on nearby surfaces, which makes the scene look more styled. It works for both men's and women's wedding colors because ribbon is the only strong color element.
Pick small wicker cups or even woven coasters that fit a tea light. Insert a battery tea light or real tea light if allowed by venue rules. Wrap a thin marigold-yellow ribbon band around the cup about 2-3 cm from the top and glue it in place. Add a tiny bow on one side and trim loose ends to 2-3 cm. Arrange cups in a line on a table runner, keeping 15-20 cm spacing for a clean look.
Try thisWarm up the ribbon slightly with steam so it lays flat and doesn't curl.
Common mistakeAvoid placing candles too close to fabric tablecloth edges - wax or heat can damage them.
14. Handmade Chocolate Brown Jute Runner with Gold Dot Painter's Tape
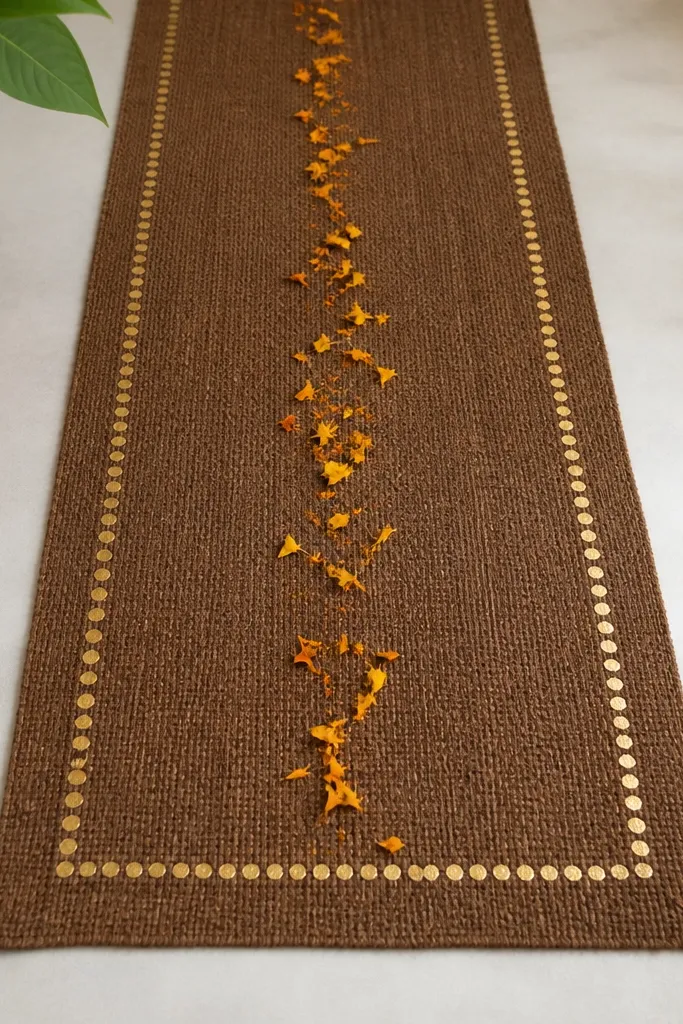
This is a simple table upgrade that looks like you spent more than you did. Jute runner gives texture and warmth, and gold dot accents add a premium finish that matches Indian metallic jewelry. I keep the base chocolate-brown because it makes marigold and cream stand out. This works for long rectangular tables and also for sweetheart seating where you want a photo-ready surface. In warm lighting, gold dot patterns look soft instead of harsh because jute is matte.
Cut jute fabric to your table length, then hem or glue the edges so it doesn't fray. Lay the runner flat and use painter's tape to create a border grid along both edges, spacing dots 3-4 cm apart. Mix gold acrylic paint with a little water for a smooth dot consistency. Dab with a foam brush or sponge and remove tape after 5-10 minutes so the edges stay crisp. Add a thin center line of marigold petals or faux petals before placing the centerpiece on top.
Try thisDo a test dot on scrap jute first - the paint soaks in and you'll adjust thickness fast.
Common mistakeDon't paint thick blobs - they crack on jute and look uneven.
15. Warm LED and Fabric Ribbon Backdrop Frame for Seating Stage
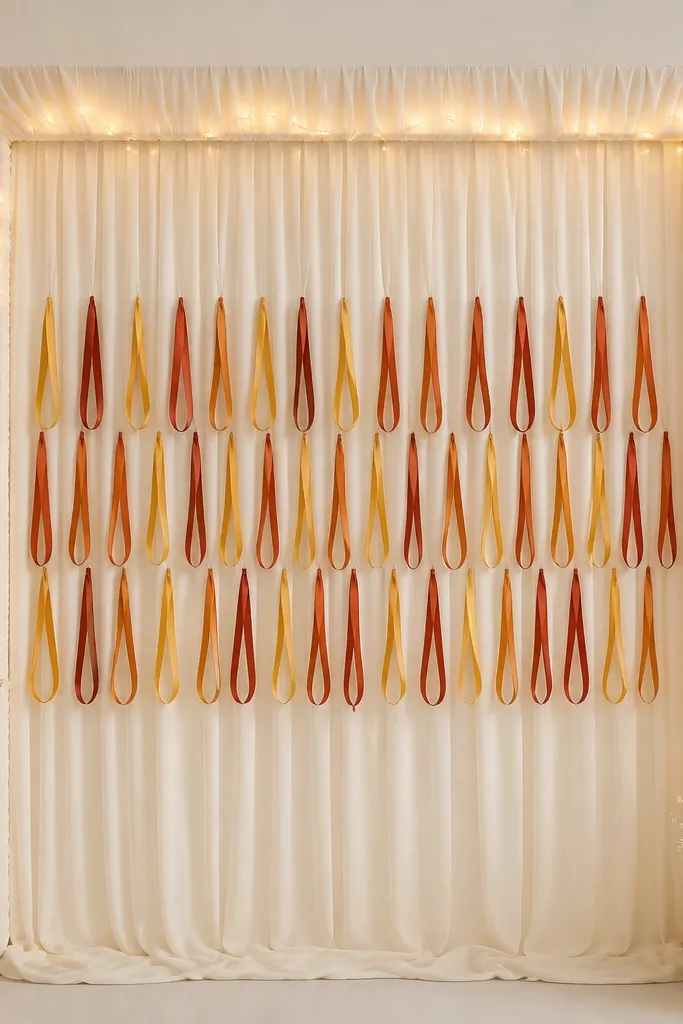
A frame backdrop makes seating areas look intentional without covering the whole wall. I use a lightweight frame and cover it with cream fabric so the LEDs glow smoothly, not as bright points. Then I attach ribbon loops in saffron and rust across the middle band. This is great for bridal entry scenes and stage photo moments. It flatters the couple because the background is light and warm, giving skin tones a healthy glow. It also works with both minimal and heavy decor, because the frame keeps everything contained.
Build or buy a simple rectangle frame and cover it with stretched cream fabric (use staples or strong glue on the back). Weave warm LED fairy lights behind the fabric, spacing them 5-8 cm apart. Create ribbon loops by tying 25-30 cm ribbon lengths into knots, then glue or tie them at the front in a single horizontal row. Add one lower layer of chiffon strips for softness, letting them hang 15-20 cm. Place the frame behind the seating area and adjust height so it sits around shoulder level in photos.
Try thisHide the battery pack behind the frame corner so the glow stays clean.
Common mistakeAvoid placing LEDs in front of fabric - it creates hot spots and makes the frame look cheap.
16. Chai-Themed Welcome Sign Board with Burlap and Chalk Paint
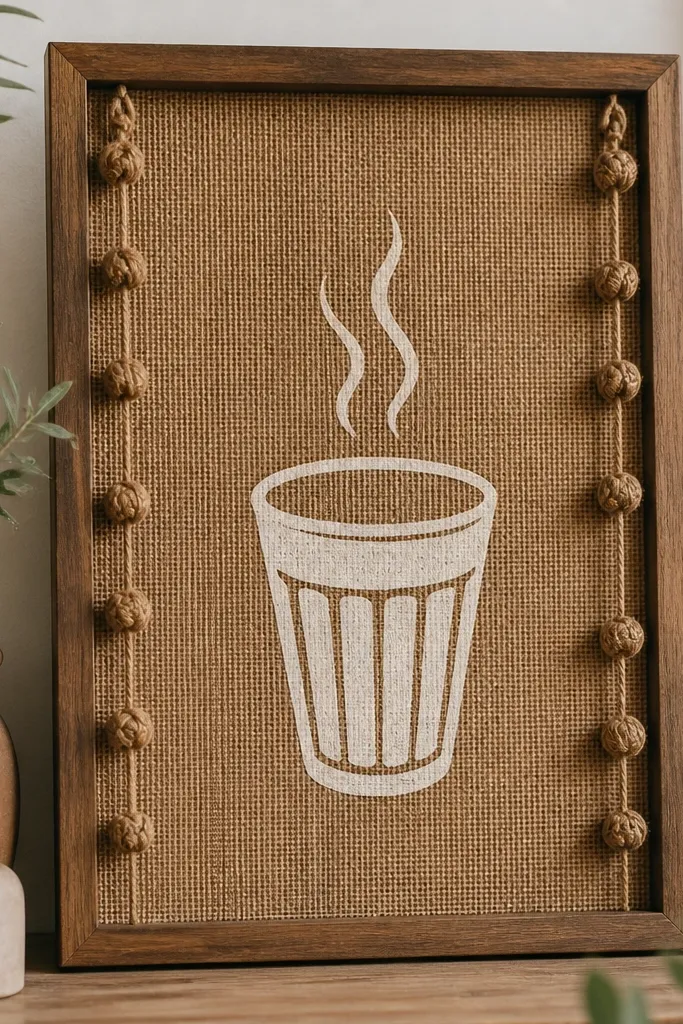
Chai theme is cozy without being childish, and it fits Indian wedding hospitality. Burlap makes the board feel warm and textured, and chalk paint gives a soft matte finish that looks good in daylight and warm indoor lights. I add a simple chai cup icon and the words in warm brown or deep maroon. This works for mehendi mornings, tea stations, and guest welcome areas. It also flatters the vibe of both traditional and modern weddings because burlap is neutral and chalk lettering is clean.
Stretch burlap over a wooden board and staple it on the back. Paint the top message area with a small cream rectangle using chalk paint so the text stands out. Write the greeting with chalk or chalk markers in deep brown, then seal lightly with matte fixative. Add jute knots on the side corners using hot glue so it looks tied-in, not stuck. Place small cups of chai-themed candies or tea sachets under the sign so it looks functional, not decorative only.
Try thisUse matte fixative sparingly; too much can darken chalk and make it look messy.
Common mistakeAvoid glossy chalk markers - they reflect and look streaky.
17. Rose Gold Foil Ganesha Style Clay Hanging Tags for Stages
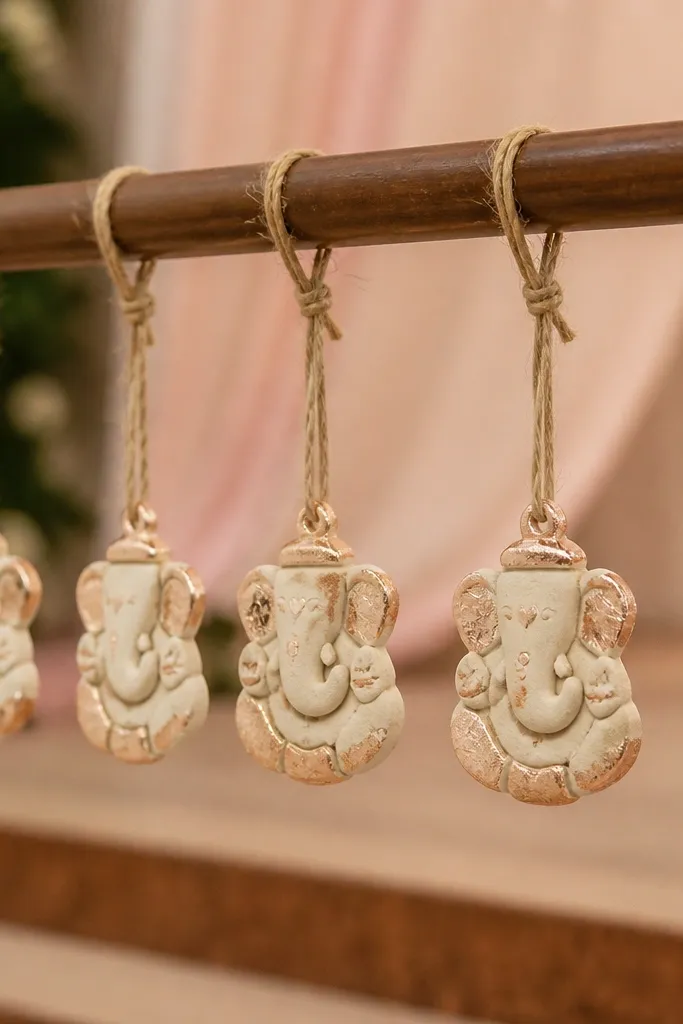
Hanging tags add movement and a warm spiritual feel without heavy religious imagery. I use air-dry clay cut into small shapes, then paint them cream and dust only the edges with rose gold foil. The rose gold looks cozy next to marigold and terracotta, and the clay has a matte surface that doesn't glare in photos. This is perfect for mandap rails, stage sides, or the edge of a photo backdrop. It flatters the scene because it frames people from above and adds tiny highlights instead of large blocks of decor.
Roll air-dry clay to about 4-5 mm thickness and cut simple shapes using a small cutter or stencil. Let them dry fully, then sand edges lightly for clean lines. Paint with matte cream acrylic and once dry, apply foil using a thin layer of foil adhesive only on raised edges. Thread each tag with jute twine and tie to stage rail in a staggered pattern. Keep spacing about 10-12 cm so tags show up in photos without looking crowded.
Try thisDust foil with a soft brush so it stays on edges and doesn't smear across flat areas.
Common mistakeAvoid thick foil coverage - it peels and looks messy after a few hours.
18. Thermal Paper Tea Light Holders with Warm Gold Edge Paint
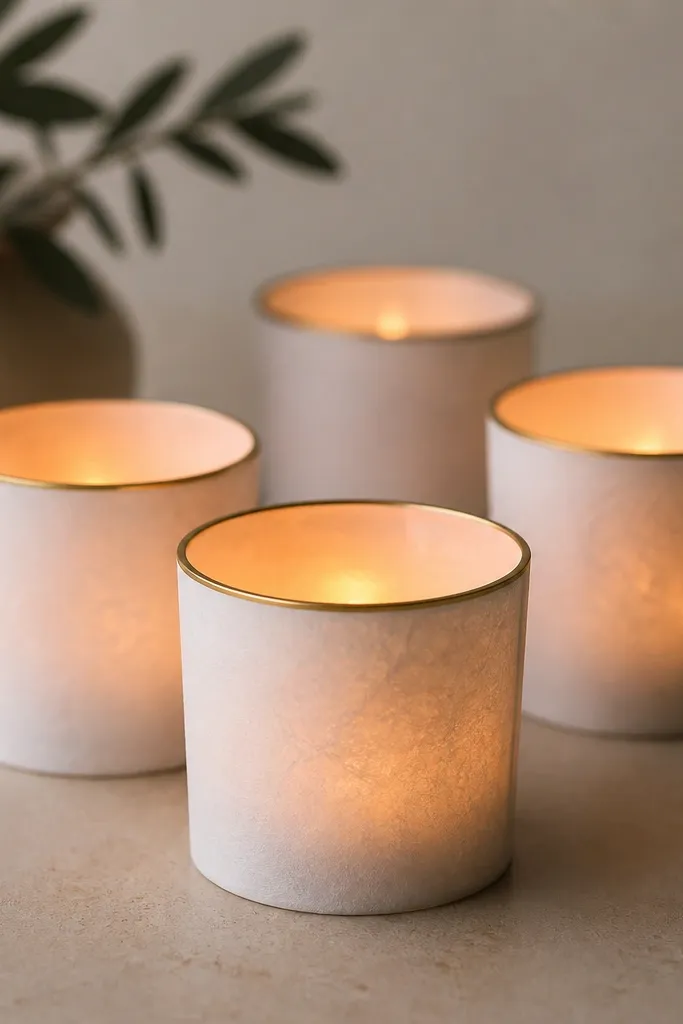
This is a craft that looks clean and cozy without needing fancy materials. Thermal paper has a soft, slightly translucent quality, so warm light spreads instead of producing a harsh point glow. I wrap each tea light in thick thermal paper and add a thin gold edge at the top so the holder looks finished. It works for both indoor and outdoor evening settings because it's lightweight and easy to place in rows. It also flatters photos because the light creates a gentle gradient behind hands and table props.
Cut thermal paper into rectangles sized to wrap around your tea light cup, leaving a 2 cm overlap for glue. Wrap the paper and secure overlap with double-sided tape or hot glue at the seam only. Fold the bottom edge inward to make a stable base, then add a thin line of gold paint around the top rim using a small brush. Insert warm LED tea lights and keep the paper slightly above the flame area if using real candles. Arrange holders on a tray lined with jute so they look like a deliberate display.
Try thisTest one holder with your exact LED first; some thermal paper types glow stronger than others.
Common mistakeSkip cheap thin paper - it tears when you wrap tightly and looks sloppy.
19. Marigold + Baby Breath Garland Bow for Chair Back Seating
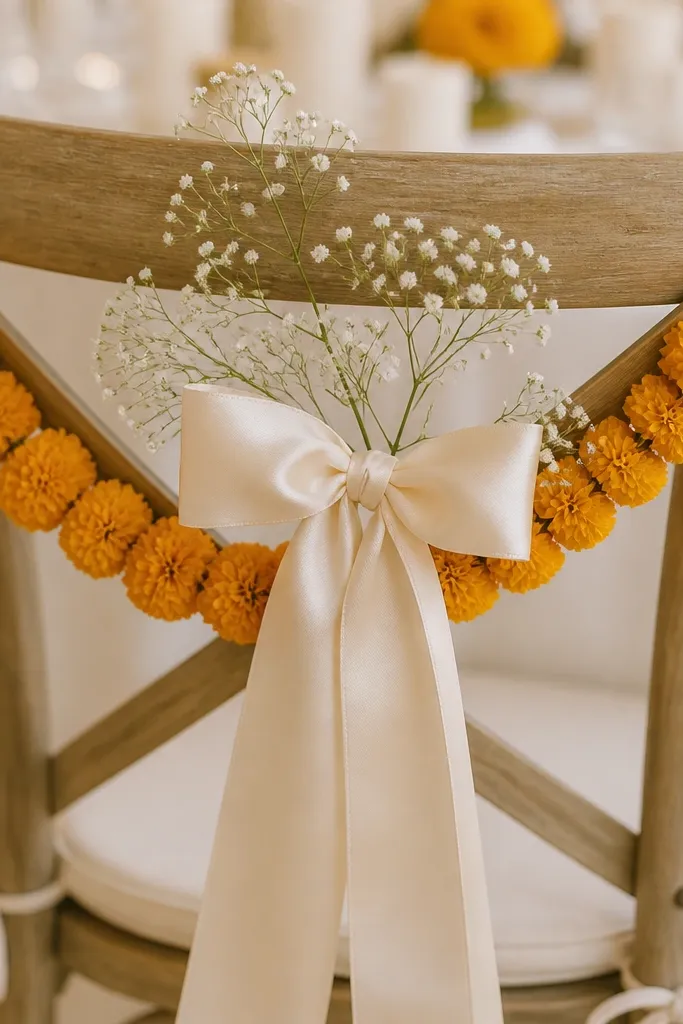
Chair backs are where guests notice small details, and it's where photos catch the seating scene. I use a mini marigold garland paired with a cream satin bow so it looks warm, not cluttered. Adding a few baby breath sprigs keeps the look airy and gives a soft contrast to bright marigold. This works for both men's and women's seating because it doesn't cover too much fabric and it stays readable in photos. It also flatters skin tones by keeping the chair decoration bright and warm behind faces.
Cut ribbon for a 25-30 cm bow and make a simple loop with two equal lengths. Tie the marigold garland onto a chair back using jute twine, placing it at the center height of the backrest. Add baby breath sprigs on both sides of the bow, then secure with thin floral tape. Glue the bow center to the twine knot so it doesn't slide. Keep the total chair decoration height around 25-35 cm so it doesn't block view lines.
Try thisUse satin ribbon at 1.5-2 cm width for a clean bow shape on chair backs.
Common mistakeAvoid big heavy garlands - they sag and look messy after 30-60 minutes.
20. Saffron and Cream Knit Knot Garland for Entrance Arch
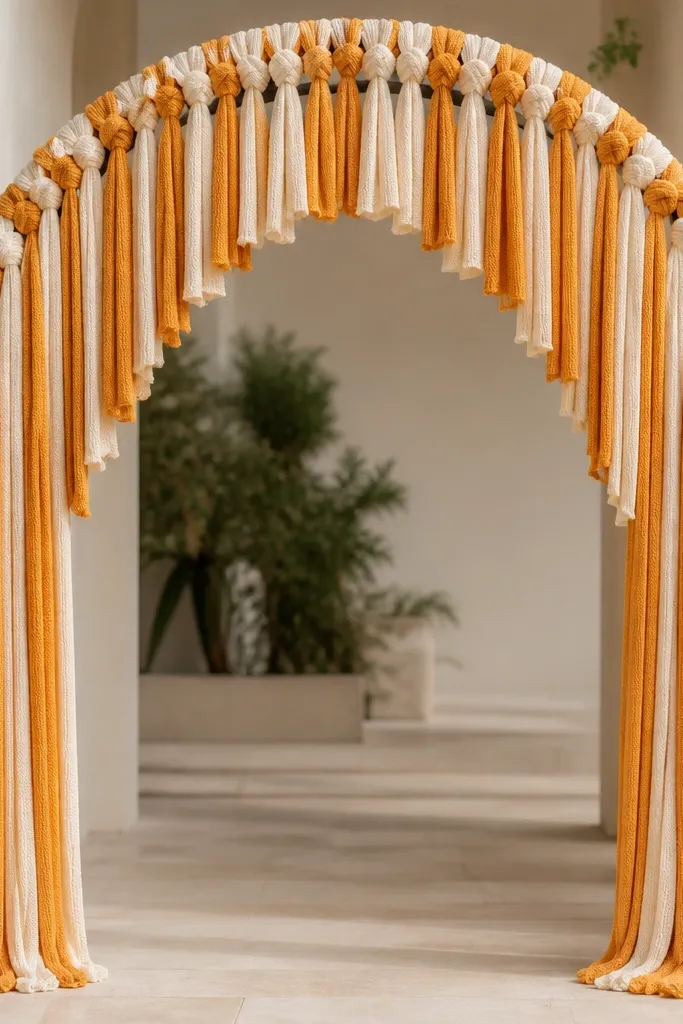
Knit knot garlands look cozy because they look soft even before you add lights. I use saffron and cream knit strips because they keep the entrance warm and photogenic without needing complicated flower making. The knots create tiny shadows that look good under warm lights and reduce the "flat" look. This works for both indoor entryways and outdoor arches with a simple frame. It also flatters the couple's outfits by giving a warm neutral background that doesn't fight with heavy embroidery.
Cut knit fabric strips into 6-8 cm wide bands and about 40-50 cm long. Tie each strip into a knot around a base twine line, alternating saffron and cream every knot. Keep knots 10-12 cm apart so the garland looks full but not bulky. Secure the base line to the entrance arch using zip ties hidden behind fabric. Add a warm LED string behind the garland so light hits the knots from the back, not from the front.
Try thisPull each knot tight and align the ends downward so the garland hangs evenly.
Common mistakeAvoid slippery satin strips - knots slide and spacing turns uneven quickly.