1. Linen-Feel Place Card Holder with Mini Dried Lavender Sleeve
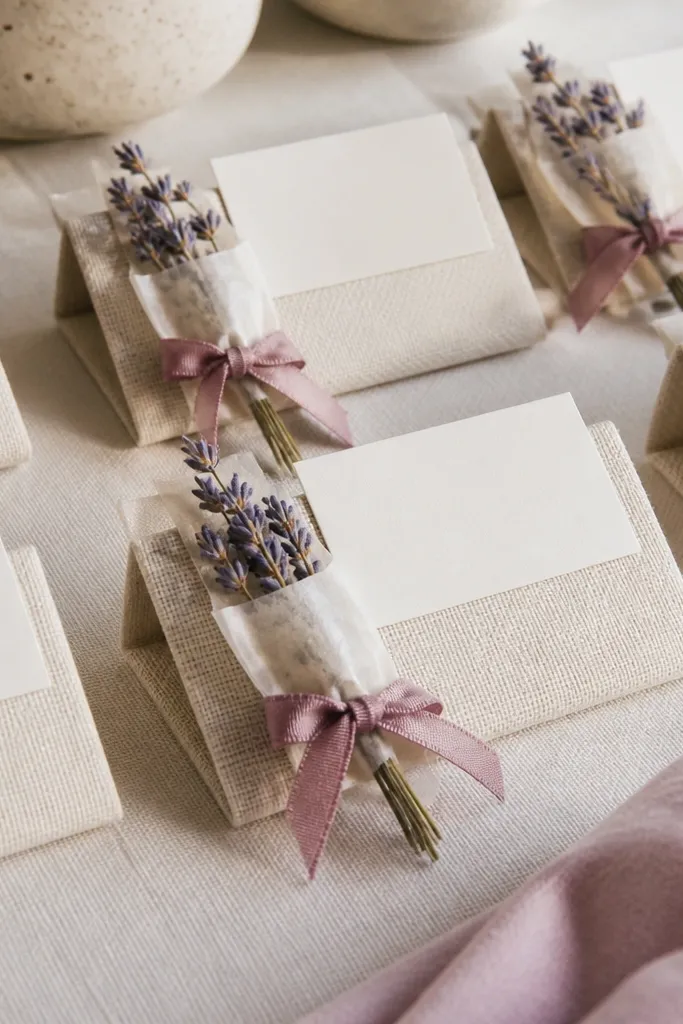
This one looks expensive because it has a soft fabric texture plus clean structure. The base is a stiff rectangle (cut from 2mm craft foam or thick cardboard) covered in linen-look fabric so the edges don't collapse. Dried lavender adds a muted purple pop without looking like cheap potpourri. It flatters most wedding palettes because cream + dusty rose + soft lavender reads romantic and calm on camera, especially in warm indoor lighting.
Start by cutting 10 cardstock rectangles at 4.5 x 2.75 inches, then glue them to 2mm craft foam for body. Wrap linen-look fabric around each piece and glue the seams to the back, keeping the front perfectly smooth. Make a sleeve from waxed paper (about 5 x 3.5 inches) and tuck in 3-5 lavender stems, then tie the sleeve with 1/4-inch dusty rose ribbon. Finally, print place cards on 220gsm cream paper, fold them into a small stand, and place them inside the holder slot so everything sits aligned.
Try thisUse a fabric glue that dries clear and gives you a few seconds to reposition; misaligned seams show up fast in close-ups.
Common mistakeSkip glossy satin ribbon - it catches harsh light and makes the whole set look like a last-minute party craft.
2. Brushed Gold Photo Frame Tag on a Small Keepsake Box
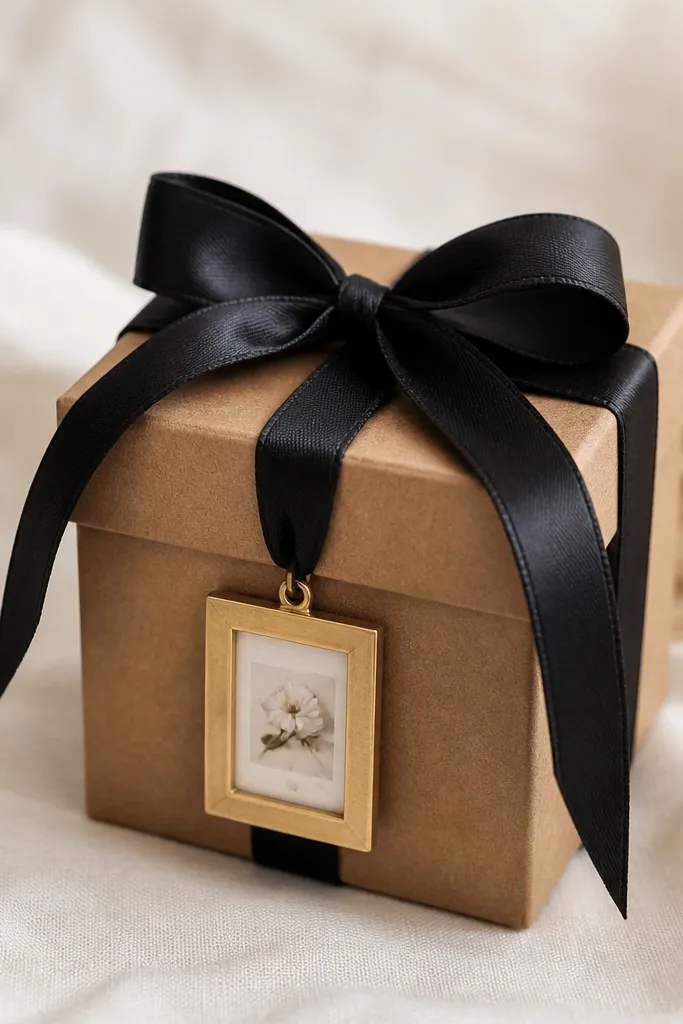
This craft looks pricey because it mixes matte kraft with brushed gold metal tone. The tiny frame tag gives that "stationery boutique" vibe, and it reads upscale even when the box is simple. I've used it for wedding welcome gifts and it looks great on tables with candles because gold details reflect softly instead of flashing. It's a strong match for black-and-cream weddings, and it also flatters darker skin tones in photos because the contrast is clean.
Start with a small hinged box (about 3 x 3 x 2.5 inches) from any craft store, then paint or seal it with a matte clear coat so kraft doesn't look patchy. Cut a 2 x 2 inch square for the tag card and print a monogram or a tiny photo crop on 250gsm cream paper. Attach a brushed gold mini photo frame tag hardware to the front using a strong adhesive or tiny brads, keeping it centered. Tie the box shut with 1/8-inch black ribbon in two loops, then finish with a tight bow and trim tails at a 45-degree angle.
Try thisAdd 5-6 grams of tissue paper filler inside so the gift feels weighty when picked up.
Common mistakeDon't use bright gold spray paint on everything - one brushed gold accent beats full-on metallic coverage.
3. Watercolor Cotton Bookmark Favors with Deckled Edges
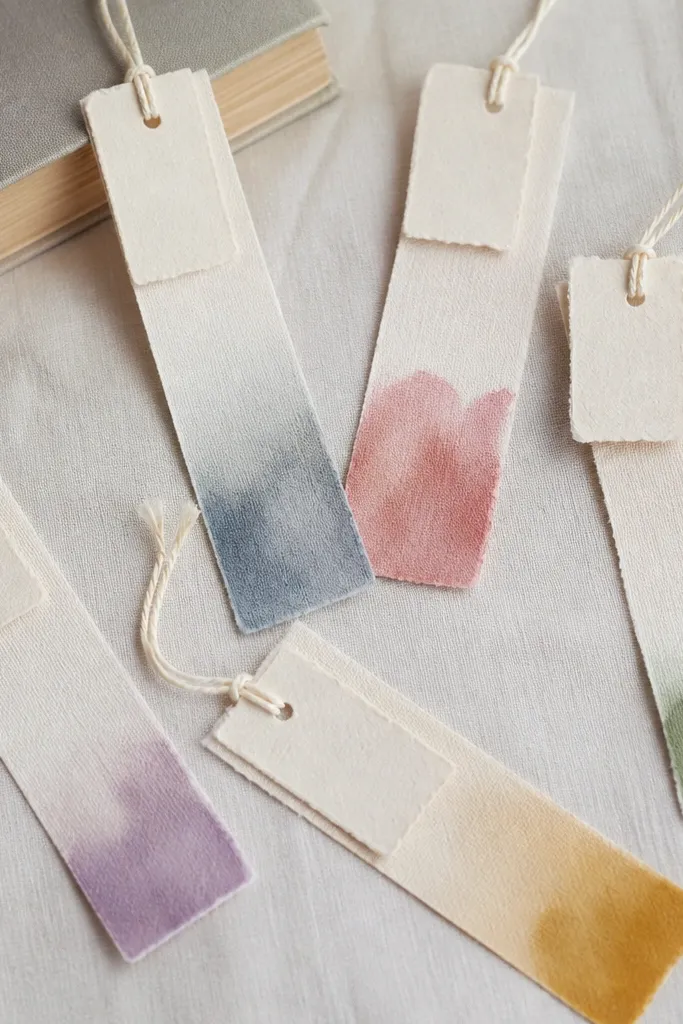
Bookmarks look fancy when the edges look handmade on purpose. Use cotton fabric (not thin felt) so the bookmark drapes slightly, and dye or paint only the bottom 1/3 for a watercolor fade. Deckled-edge paper tabs add a soft, lived-in texture that reads expensive in close-up. This is perfect for couples who want practical favors - it also fits casual and formal weddings because the color story stays gentle.
Start by cutting cotton strips at 7.5 x 2 inches and seam the top edge with a simple straight stitch (or use fabric glue with a folded hem). Dye the bottom 2.25 inches with watered-down watercolor or fabric paint in 2 tones from your palette, then let dry flat overnight. Cut deckled-edge paper tabs (about 2 x 1.25 inches) and write a short message like "For your next read" in black ink. Punch a small hole in the tab and stitch or tie it to the bookmark using 1mm ivory cotton string, then trim string tails to 1 inch.
Try thisSeal dyed cotton with a thin fabric medium spray so the color stays soft and doesn't rub off on hands.
Common mistakeSkip thick craft glitter or heavy laminating - it looks plasticky and cheap next to fabric.
4. Wax-Sealed Recipe Card Set in a Mini Kraft Envelope Stack
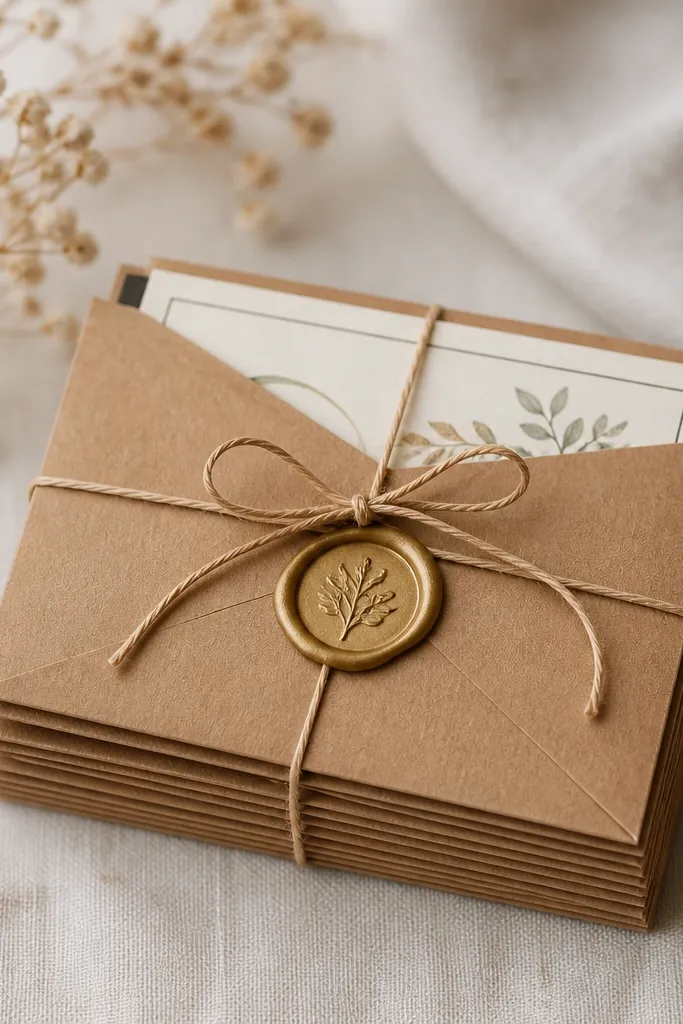
Wax seals are the fastest way to make a DIY gift feel formal. The key is to keep the design restrained: one seal, one stamp color, and thick paper. Recipe cards add a personal touch without needing fancy art skills; handwriting plus a clean layout reads high-end. This craft works especially well for couples who host dinners or love food stations, and it looks amazing under warm candlelight because wax has that soft sheen.
Start with 4x6 inch kraft envelopes cut down to about 3.75 x 2.75 inches, then print recipe cards on 250gsm ivory paper. Fold the cards in thirds so the text aligns neatly when inserted. Use a wax seal kit with a muted gold or warm bronze stamp; melt only a small amount and place it centered on the envelope flap. Tie the stack with 1/8-inch twine, then add a final label strip on the back that matches your wedding accent color.
Try thisWrite the recipe card headings with a fine-tip black marker and keep the font consistent across all cards.
Common mistakeDon't put wax seals on thin paper - the seal looks messy and drags the paper fibers.
5. Monogram Candle Wrap with Sheer Organza and Thick Label
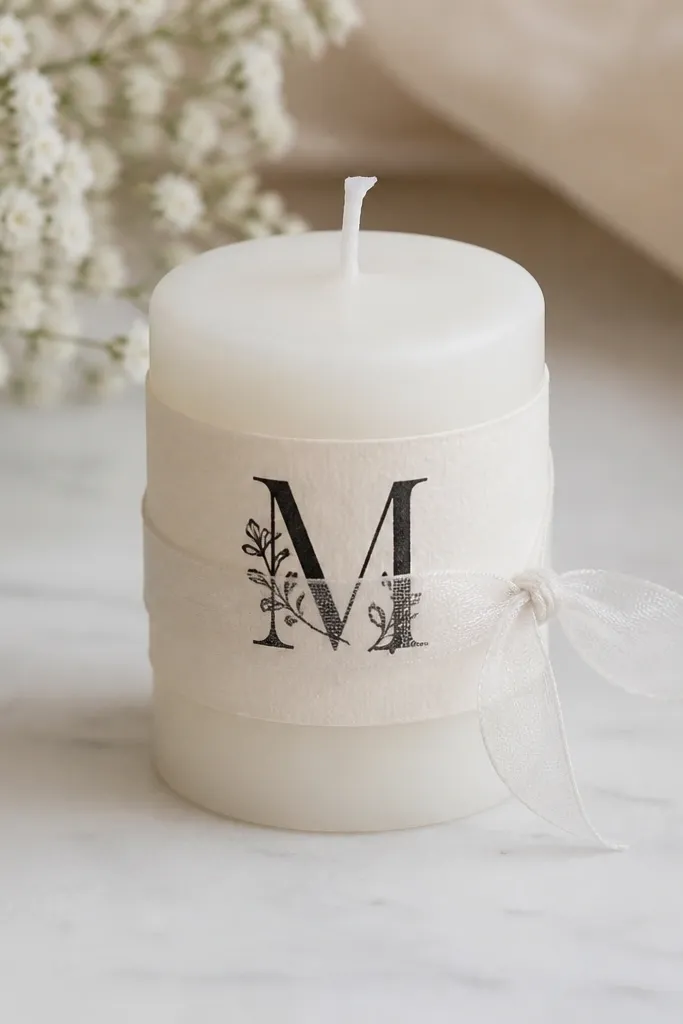
Candle wraps look expensive when the label is heavy and the fabric is airy. Use a white pillar candle (about 3 inches tall) and wrap sheer organza in a single loop so it doesn't bunch. Add a thick label (220-300gsm) with a monogram in black or deep espresso. The contrast between translucent organza and solid label gives that boutique gift feel, and it flatters skin tones in photos because the candle base stays bright.
Start by cleaning the candle surface with rubbing alcohol so the label sticks. Wrap organza around the candle twice lightly, then tie with a short length of 1/4-inch ribbon in your accent color. Print a monogram label on thick cream cardstock, then round the corners with a 1/4-inch corner punch. Wrap the label so it sits just above the ribbon knot, and secure it with double-sided tape only at the back edge. Finish by trimming organza tails to even lengths so they hang symmetrically.
Try thisUse a label size around 2.5 inches wide so the monogram stays readable in photos.
Common mistakeSkip thin tissue paper wraps - they collapse and look like party favors.
6. Pressed Flower Bookmark with Clear Resin Edge Guard
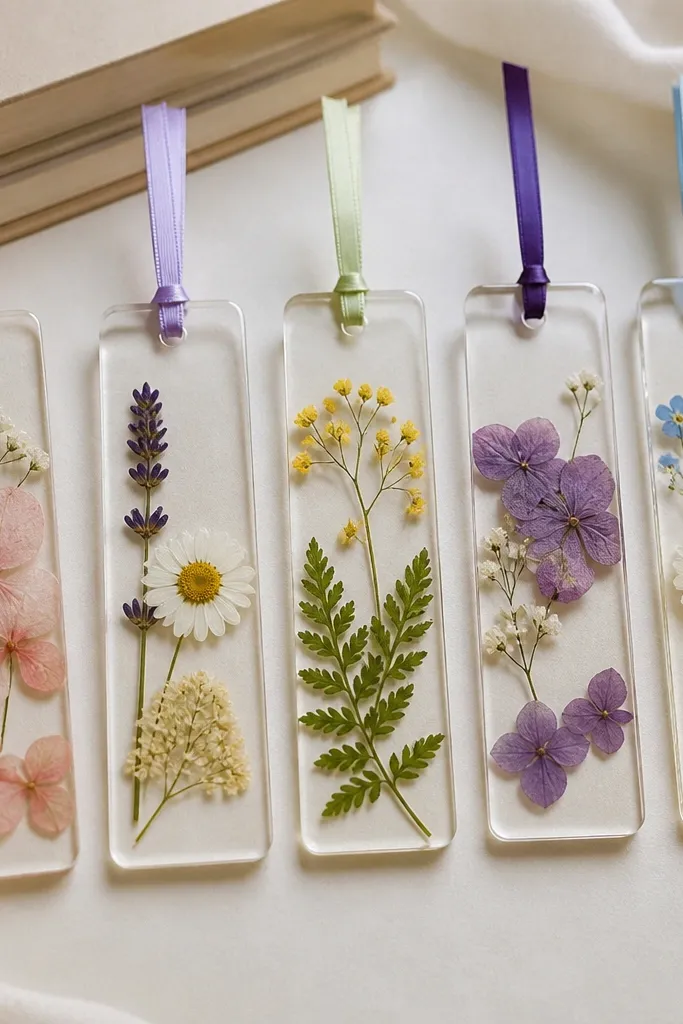
Pressed flowers look pricey when you protect the edges and keep the layout clean. The resin edge guard makes it feel like a real product, not a craft. Choose small pressed blooms in muted tones (sage green, cream, dusty rose) so they match wedding florals instead of looking like random garden picks. This is a great favor for bookish guests, and it photographs beautifully because resin catches light like glass.
Start by selecting 10-15 pressed flowers and drying them under heavy books for 2 weeks. Cut bookmark bases from 1/8-inch clear acrylic or thick cardstock (around 6 x 2 inches) and lightly sand the edges. Place flowers in a simple composition (one cluster near the bottom third), then pour a thin layer of clear resin and cure. Add a second thin resin layer if you want a deeper "glass" look, then attach a ribbon loop through the top corner using a tiny hole punch. Let everything cure fully before packaging in a clear cellophane sleeve.
Try thisKeep pressed flowers small and spaced; dense clusters look messy under resin.
Common mistakeDon't pour thick resin in one go - bubbles and uneven surfaces show up in close-up photos.
7. Two-Tone Burlap and Satin Gift Bag with Waxed Twine Handle
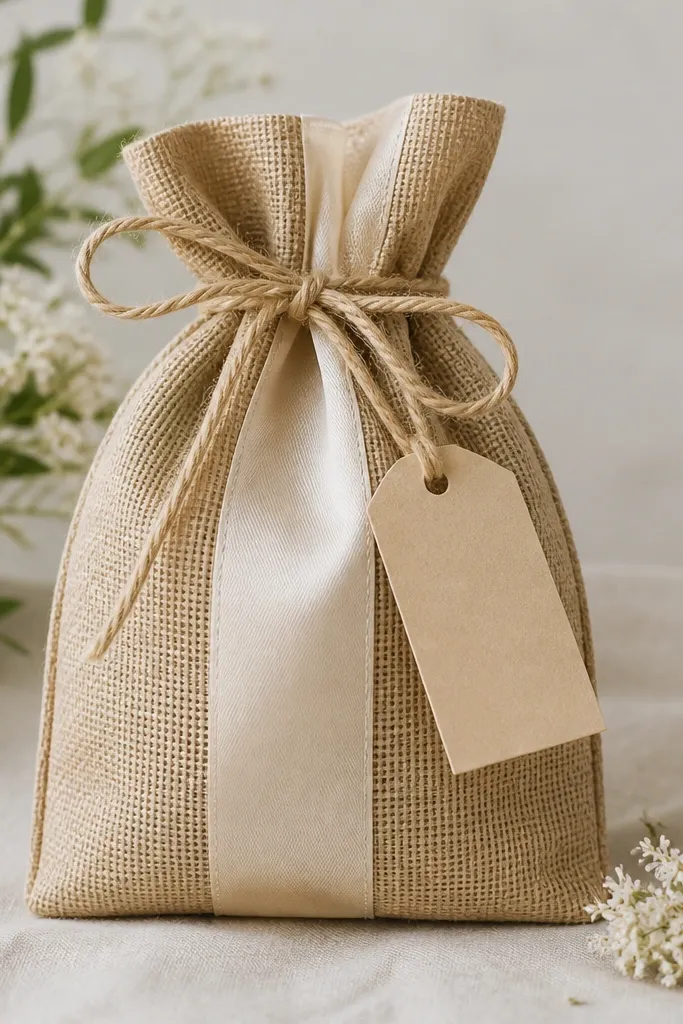
This bag looks expensive because it uses contrast intentionally: burlap gives texture, satin gives a clean highlight, and waxed twine looks old-world. The secret is structure. If the bag stands straight and the folds are crisp, it reads like a designed packaging piece. It works for rustic-chic weddings, but the cream satin stripe keeps it from looking like a barn craft.
Start with a burlap gift bag or cut burlap into a rectangle that wraps into a 5 x 3 x 8 inch bag. Add a vertical cream satin strip 1.5 inches wide to the front and sew or glue it straight. Fold the top edge inward 1 inch and stitch a channel for the twine handle. Tie waxed twine through the channel, then add a small tag made from 220gsm cardstock attached with a single twine loop. Finish by trimming the satin strip ends so they align with the burlap fold line.
Try thisIron burlap lightly with a low setting through a thin cloth so the folds look sharp.
Common mistakeSkip random lace scraps - mismatched trims look like leftover craft pile.
8. Custom Map-Print Coaster Set with Cork Backing
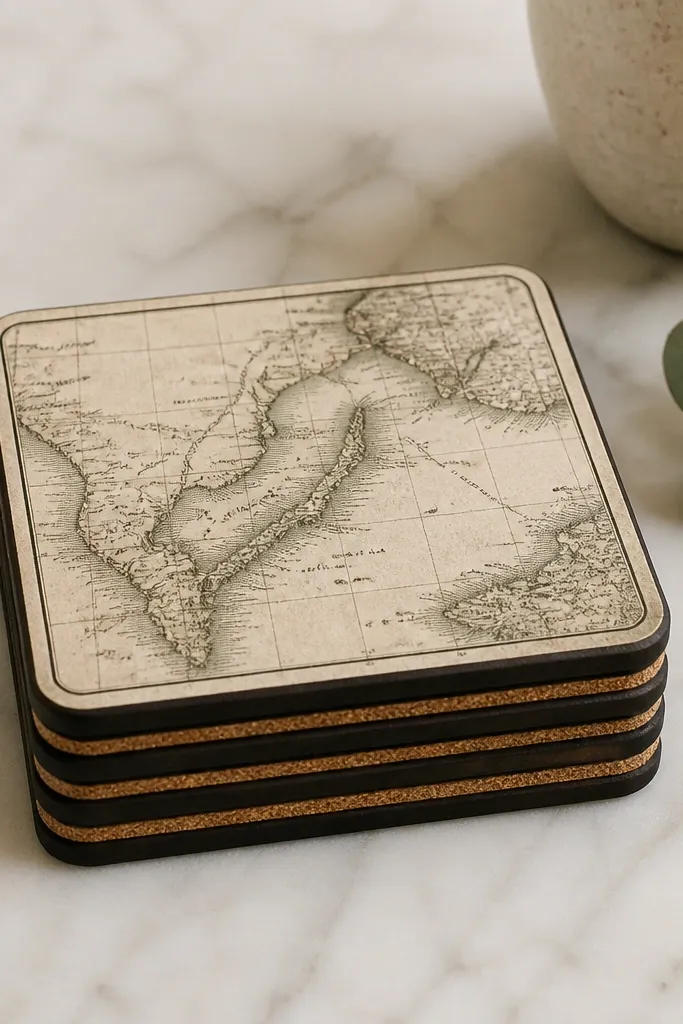
Coasters look high-end because they're practical and tidy. The map print adds story without needing hand-drawn art, and cork backing gives a premium feel under a drink. Keep the print muted and add a thin border so the edges look finished. This works for couples who want "place" gifts, and it looks good for both indoor and outdoor weddings because the background stays neutral.
Start by cutting cardstock or thin paper to 4 x 4 inches and test-fit on 4-inch cork sheets. Print map images in grayscale with a clean margin, then apply a clear decoupage medium to seal the paper onto cork. Add a thin black border using a fine marker or a printed frame so the coaster doesn't look like a sticker. Seal the top with 2-3 layers of clear varnish or mod podge, letting each layer dry 1-2 hours. Finally, stack them with felt bumpers so the surface doesn't get scratched in transit.
Try thisUse grayscale map prints instead of full-color - full color reads louder and less expensive.
Common mistakeDon't skip sealing - paper edges curl and the coaster looks homemade fast.
9. Pearl-Button Napkin Tie Bands with Mini Tag
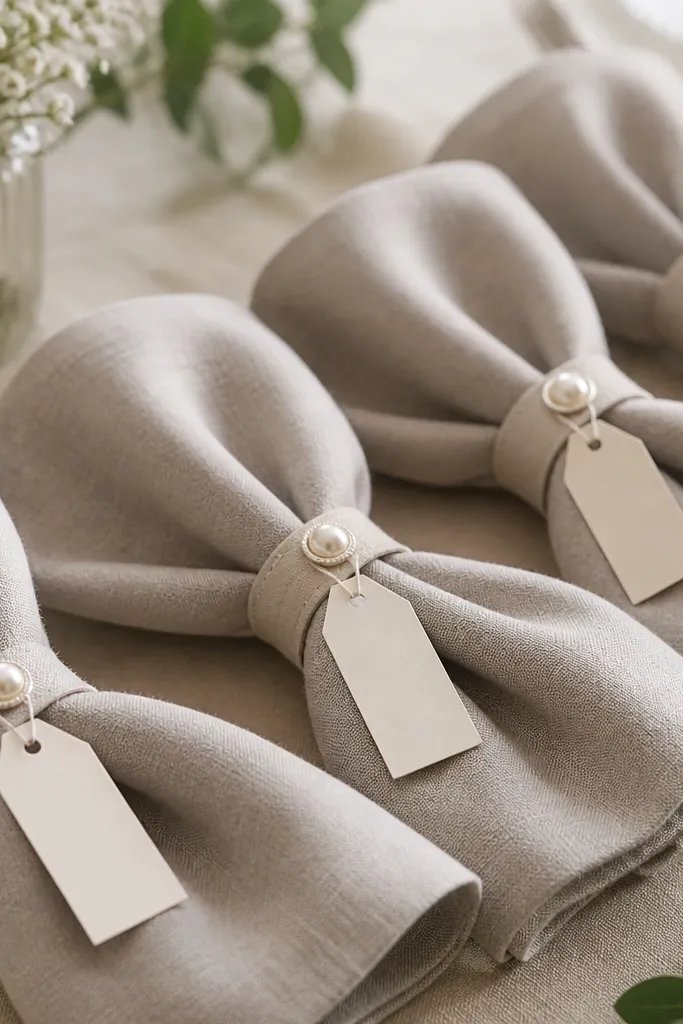
Napkin ties look like event styling when the hardware is consistent. Pearl buttons feel classic, but the expensive look comes from placement and finish - the tie band should sit evenly and hold without twisting. Linen-like napkins plus pearl detail reads formal without extra cost. This flatters photos because the neutral fabric absorbs light, and the pearl catches it in small highlights.
Start with linen-look napkins (either real linen or linen-blend) and iron them flat. Cut fabric bands from 1.25-inch wide cream cotton, wrap around the napkin fold, and secure with a hidden stitch or fabric glue at the back. Sew a small 2-hole pearl button on the front band at the midpoint. Attach a mini tag (1.5 x 2 inches) on the side with a short piece of twine, and print the same font on all tags. Tie the napkin bundle closed by threading a thin ribbon loop through the button and pulling snug.
Try thisMatch the tag font to your place cards or menus so it feels like one set.
Common mistakeDon't use mismatched button sizes - one size across all favors looks intentional.
10. Thick Cardstock Menu-Style Gift Tags with Foil Accent
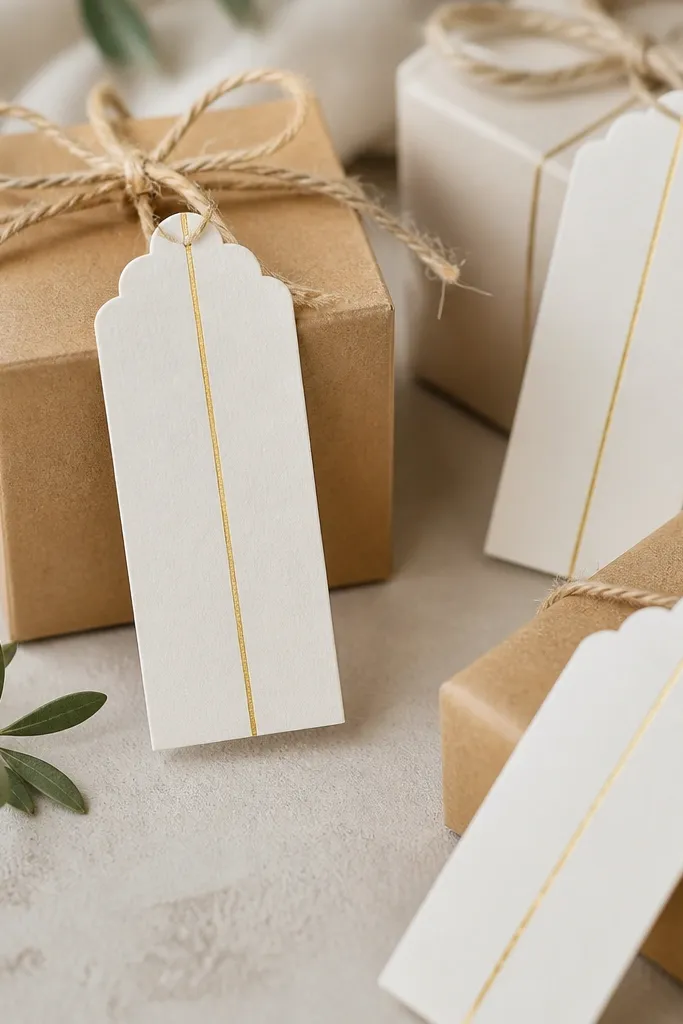
These tags make any DIY gift look finished because they replace the cheap-looking "random label" problem. Menu-style tags have structure: rounded corners, aligned text, and one foil accent line. Foil reads upscale because it reflects in a controlled way, not like glitter. This works for nearly every wedding craft in this list since tags are the finishing layer guests notice first.
Start with 220-300gsm cream cardstock and cut tags at 3 x 2 inches. Round corners using a consistent corner punch so all tags match. Print titles in black ink using a simple sans-serif font, then add a single thin gold foil line using a foil pen or a strip of gold washi tape placed straight with tweezers. Punch a hole at the top center and thread 6-inch twine through. Attach tags so they hang flat, not twisted, by securing the twine ends behind the gift.
Try thisPrint on thick cardstock even if you're using a plain printer - thin paper kills the expensive look.
Common mistakeSkip mixed fonts and multi-color text; one clean title reads more premium than a busy tag.
11. Hand-Poured Soy Wax Favor in a Clear Glass Mini Jar
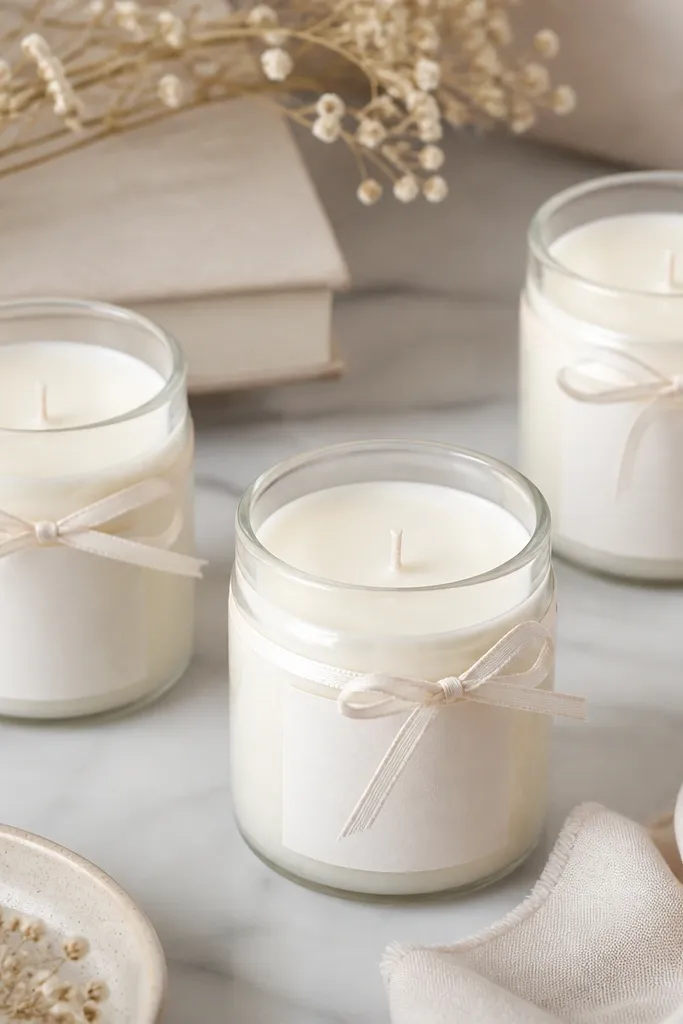
A mini jar candle looks like something guests would buy at a local shop. The expensive part is the pour finish: smooth top, centered wick, and a label that looks like product packaging. Use soy wax in white or soft ivory for a clean look under warm wedding lights. This favor works for both men and women because the scent options can be neutral and the design stays minimal.
Start by melting soy wax and pouring into clear jars (about 3.5 oz each). Add fragrance oil at the recommended temperature for soy wax and stir slowly to avoid bubbles. Center the wick using a wick sticker, then pour and let it cool undisturbed for at least 6 hours. Trim wick to 1/4 inch after curing. Label the jar with a thick cream cardstock rectangle (2 x 1.25 inches) and seal the label with a thin layer of matte clear tape so it doesn't peel.
Try thisSkim any wax bubbles with a spoon after the pour sets for 10-15 minutes, then smooth the surface gently.
Common mistakeDon't use cheap plastic labels or tiny font - it reads like a school project.
12. Ribbon-Wrapped Champagne Bottle Mini Vase (No Heat Needed)
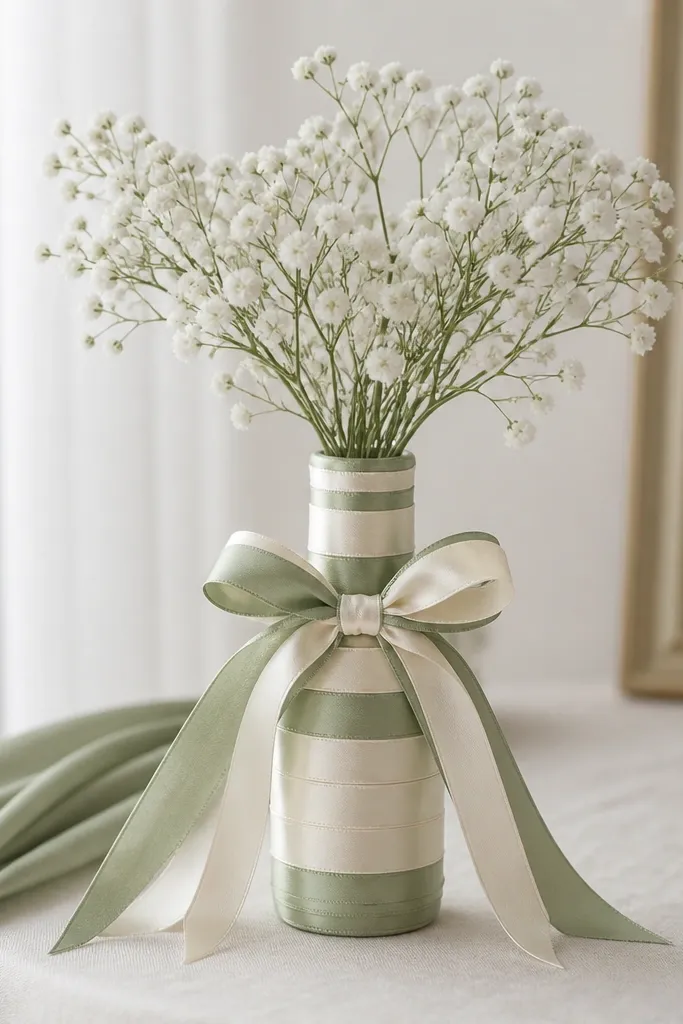
This looks expensive because it turns an everyday bottle into styled decor. Ribbons create vertical lines, and the bottle shape gives it height like a store display. Use two ribbon widths only: one 1/4-inch accent and one 5/8-inch main ribbon, both in colors from your palette. It flatters the table because the bottle reads clean and tall, and the soft florals inside keep it romantic without being bulky.
Start by cleaning a small bottle (like a mini champagne or sparkling juice bottle) and removing the label. Wrap a thin strip of double-sided tape vertically where the main ribbon will sit, then apply the 5/8-inch ribbon in smooth, straight turns around the bottle. Layer the 1/4-inch ribbon on top in a diagonal or vertical stripe pattern, keeping spacing even. Add a neat bow at the neck and hide the bow tail ends under one loop. Fill with a short stem bouquet (baby's breath or small white stock), using a tiny water tube or a spoonful of floral foam insert so stems don't slump.
Try thisKeep ribbon tension consistent so the wrap doesn't pucker - puckers show in every photo.
Common mistakeSkip too many ribbon colors; three colors max reads intentional.
13. Satin + Pearl Hair Tie Favors in a Clear Sleeve
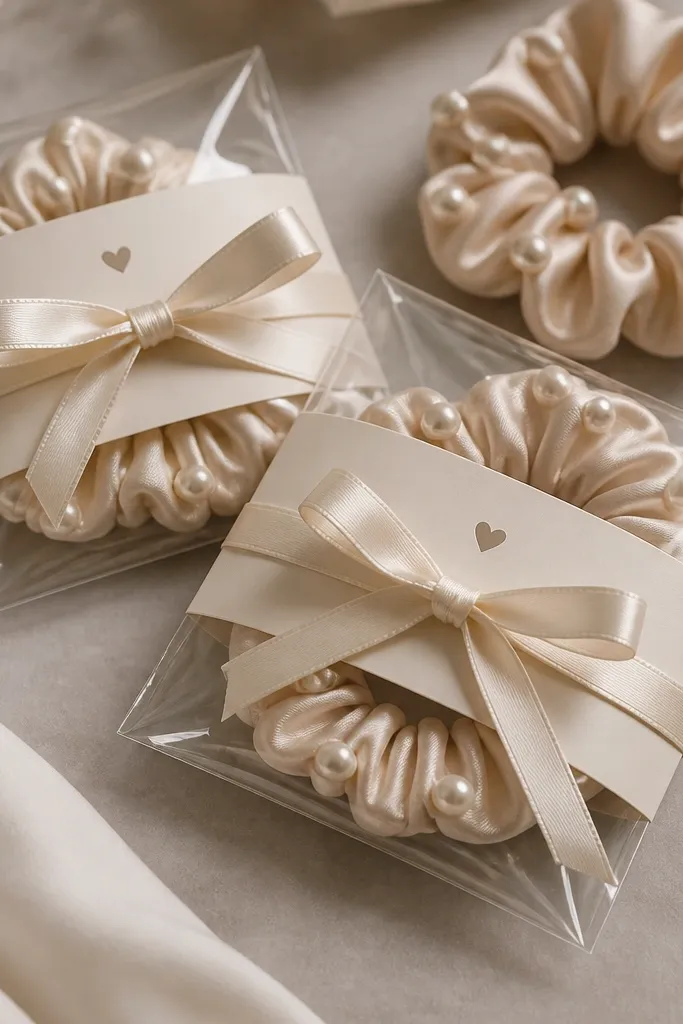
Hair tie favors look like luxury when they're presented like a product. The pearl detail makes it feel bridal, and a clear sleeve keeps it clean and glossy. The key is the label: thick cardstock, minimal text, and centered placement. This is a great wedding gift because it's useful, and it fits most guest styles - especially for women who wear their hair up for the ceremony and reception.
Start by choosing satin hair ties in a neutral base (ivory or soft blush) and add a small pearl cluster to the center knot using needle and thread. Slide each hair tie into a clear sleeve and flatten the top edge with a heat sealer or tape strip. Print labels on 250gsm cardstock at 2 x 1.5 inches with a simple phrase like "Emergency hair helper" or the couple's initials. Wrap the label around the sleeve front so it sits flat, then attach a tiny ribbon bow using 1/8-inch ribbon. Store in a box so sleeves stay wrinkle-free until day-of.
Try thisUse matte labels with a satin ribbon - glossy label stock looks cheap under flash.
Common mistakeDon't use flimsy cellophane - it wrinkles and ruins the neat retail look.
14. Seamless Macramé Candle Holder with Thick Cord
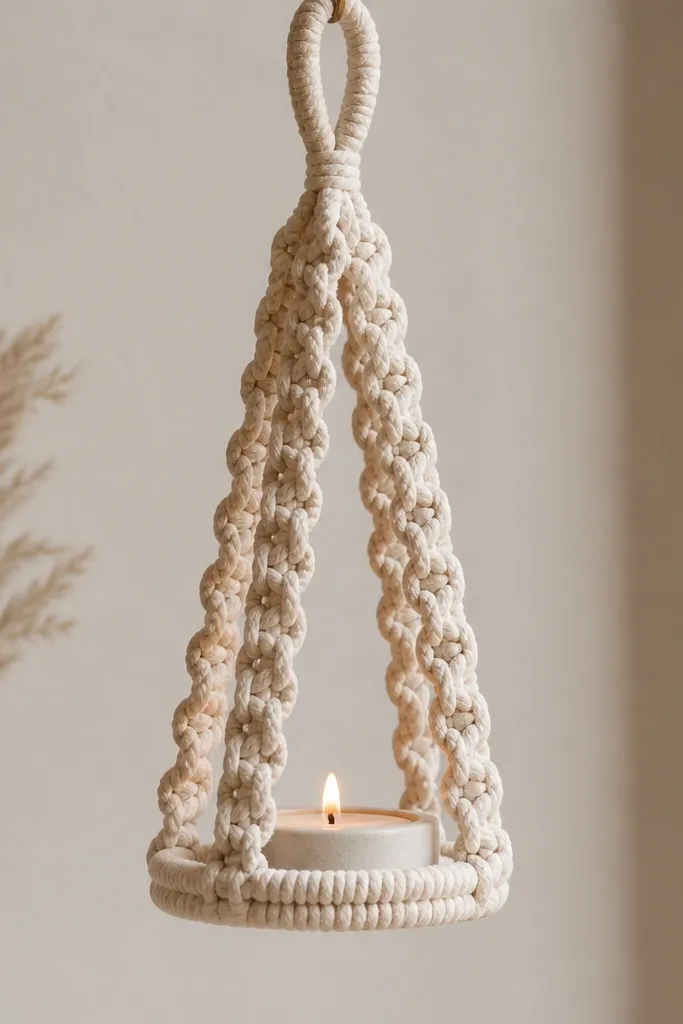
Macramé looks pricey when the cord is thick and the knot spacing is even. Use a natural cotton cord around 4-5mm so the strands look substantial and don't disappear in photos. A simple candle holder shape reads modern wedding decor, especially with white or ivory candles. This works for outdoor ceremonies and airy indoor spaces because it adds texture without taking up table surface.
Start by cutting 8 cords at equal lengths (about 3 feet each depending on your candle height). Gather the cords and tie a top knot, then create a consistent lark's head loop around a small metal ring. Tie square knots in rows, keeping the tension firm and spacing uniform. For the candle base, make a bottom loop with a straight knot line so it hangs balanced. Place a tea light or small candle, then trim cord ends cleanly and secure with a tiny dab of clear fabric glue.
Try thisMeasure knot spacing with a ruler for the first two rows, then keep your hands at the same distance for the rest.
Common mistakeSkip thin rope - thin macramé looks like a craft kit instead of decor.
15. Acrylic Place Card Stand with Frosted Ribbon Base
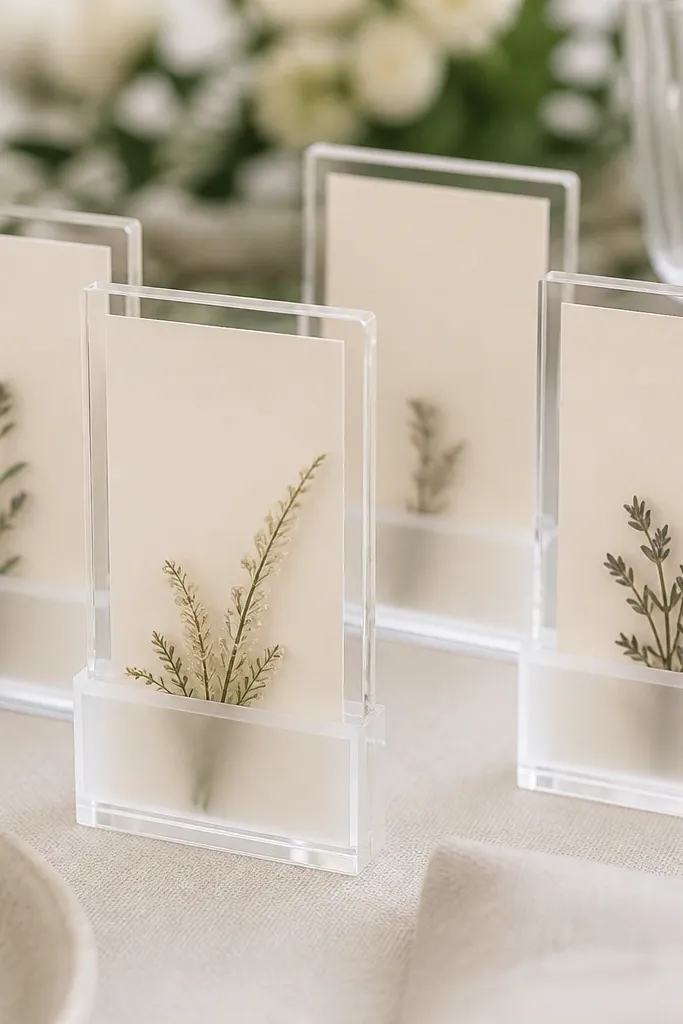
Acrylic stands look expensive because they're clean, modern, and hard to fake with paper alone. The frosted ribbon base softens the look so it doesn't feel showroom-cold. Add a tiny dried herb accent like rosemary or eucalyptus for a subtle green note that matches floral arrangements. This is a great choice for couples who want a contemporary wedding look that still feels warm.
Start by buying clear acrylic place card stands or making simple acrylic inserts with pre-cut slots. Print place cards on 250gsm ivory paper and trim to fit the stand width. Tie a frosted ribbon strip (width 1/4-3/8 inch) around the bottom of the stand and secure with double-sided tape at the back. Tuck a small dried herb piece under the ribbon at the front edge so it peeks out. Keep the herb color muted and small so it doesn't overpower your table setting.
Try thisUse black ink for the place cards; dark text holds up better against clear acrylic in flash photos.
Common mistakeDon't use neon ribbons - acrylic makes bright colors look harsh.
16. Mini Macaron Soap Favor with Color-Matched Label Strip
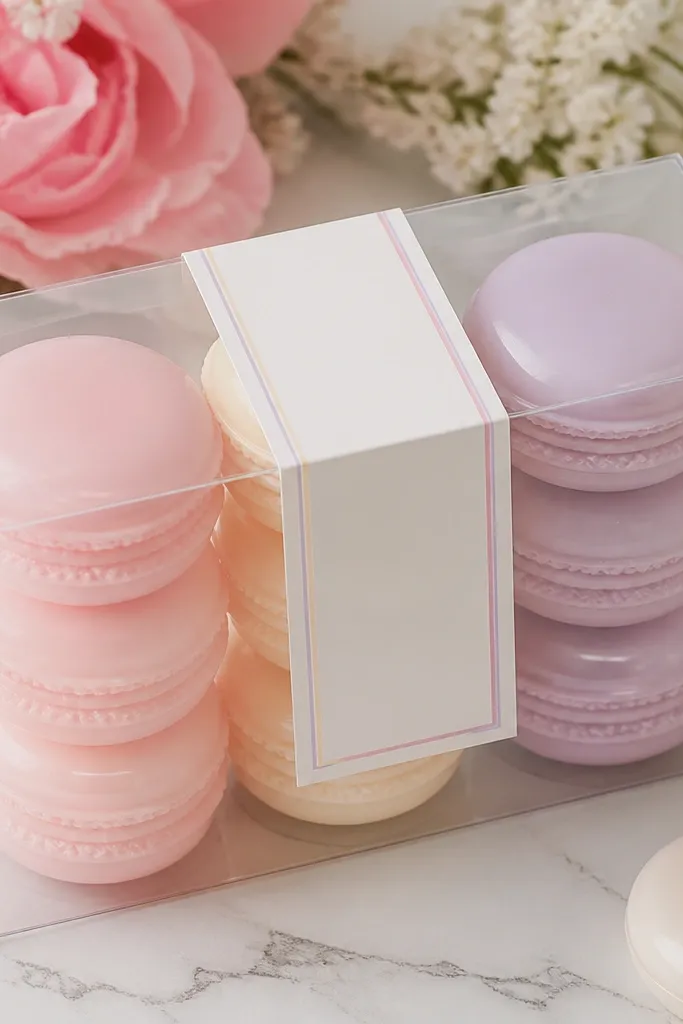
Edible-looking favors can look cheap fast, but macaron-shaped soaps look intentional when the finish is clean and the packaging is simple. Pastel colors like soft pink, pale mint, and buttercream feel bridal and photogenic. The label strip ties the whole thing to your wedding palette and makes it look like a real product. This gift works well for both day and night weddings because the glossy soap surface catches light softly.
Start by pouring or buying macaron-shaped soap bases in 3 colors that match your palette. If you're making them, use silicone macaron molds and keep the soap surface smooth by popping bubbles with a toothpick before it sets. Let soaps cure overnight, then place 2-3 soaps in a clear square box. Print a thin label strip (1 x 3 inches) on 200-220gsm paper with your guest name or a short message, then wrap the strip around the box edge so it's straight. Tie a single ribbon around the box using 1/4-inch satin in your accent color and keep it centered.
Try thisAdd a small piece of tissue paper under the soaps so they don't slide and scrape during transport.
Common mistakeAvoid glitter soaps - they look messy and uneven compared to the smooth macaron shells.
17. Tucked-In Fabric Monogram Napkin Rings with Button Closure
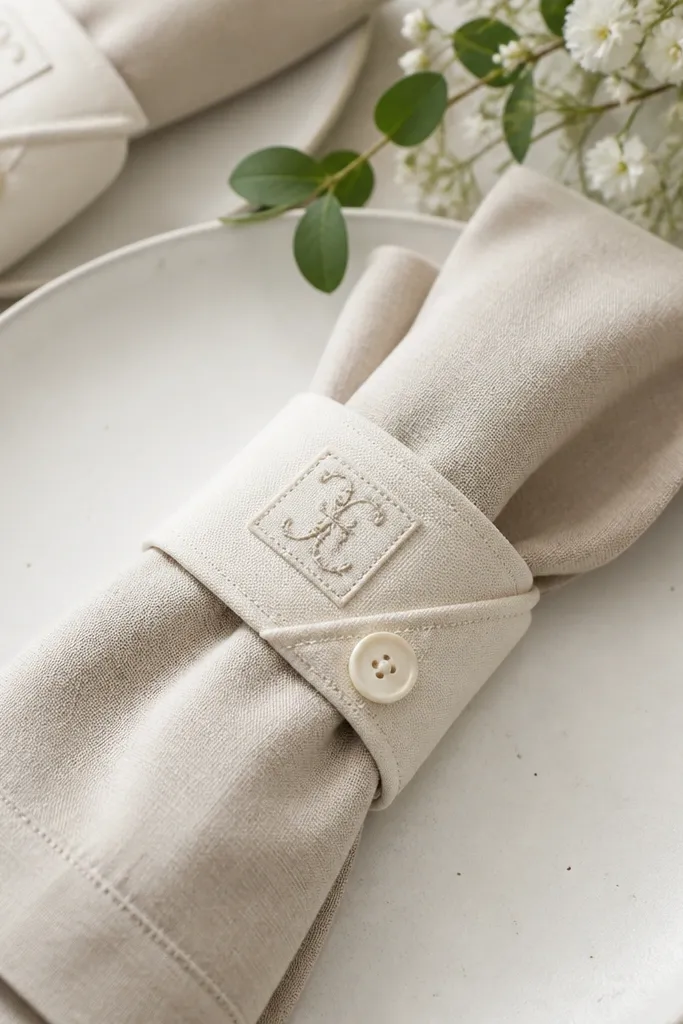
Napkin rings are small, but they look expensive because they're touchable and visible during the meal. Fabric rings with a stitched monogram patch look like custom linens, especially when they close with a single button. Choose cream cotton and a patch in your accent color so the monogram reads clearly without looking loud. This works for weddings where guests actually see place settings up close, like plated dinners.
Start with 1.5-inch wide strips of cotton, fold them into rings (about 3.25 inches inner circumference for standard napkins), and press the seam. Stitch the monogram patch onto the front section using contrasting thread in black or deep brown. Close the ring with a tiny button and thread loop so it snaps shut cleanly. Slide rings onto folded napkins and adjust the seam so it hides at the back. Package extras in a zip bag with tissue so the rings stay crisp.
Try thisUse a patch size around 1.25 inches wide; too big looks costume-like on a napkin.
Common mistakeSkip iron-on vinyl patches - they peel and look uneven after handling.
18. Mini Terracotta Planters with Woven Jute Tie and Seed Packet
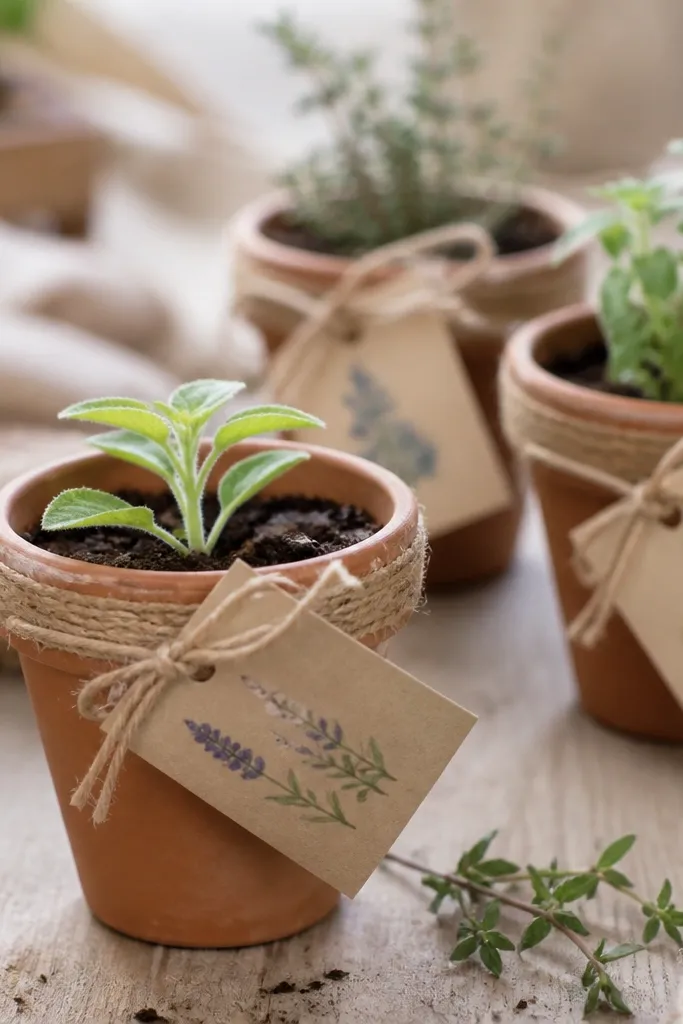
Terracotta planters feel expensive when the styling is tight and the materials look real. Jute ties look natural and warm, and the seed packet adds a practical "take-home" element. Choose one plant type per batch (like a small herb or succulents) so the set looks cohesive. This favor works for outdoor weddings and rustic-chic indoor spaces because the earthy tones read calm and intentional on camera.
Start by prepping terracotta mini pots about 3 inches wide and rinse off dust. Add potting mix leaving a 1/2-inch space at the top, then plant a tiny succulent or herb cutting. Tie woven jute around the pot rim in one tight loop, then knot at the front. Attach a seed packet using 6 inches of twine tied through a hole punch in the packet corner. Water lightly and let the pots settle for 2 hours before packaging so the soil doesn't leak.
Try thisSeal your seed packet with a clear matte tape strip along the top so it doesn't get soggy from condensation.
Common mistakeDon't use fake plants - they look flat and reduce the "real gift" feel.
19. Gold-Thread Initial Ornaments from Felt Circles
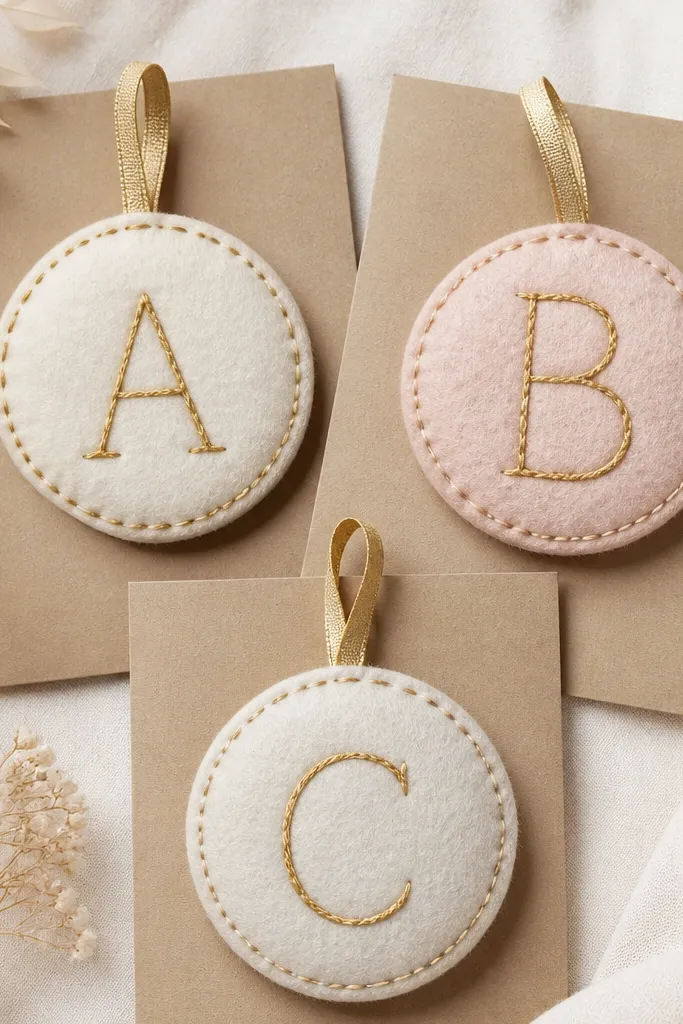
Felt ornaments look expensive when the stitching looks steady and the thread is metallic in a controlled way. Felt hides small mistakes, but the gold-thread initial brings that formal, holiday-style elegance that translates to weddings. Pick one neutral felt color and one accent felt color so the set looks planned. This works well for winter weddings and for couples who like a cozy, soft aesthetic.
Cut felt circles at 3 inches diameter and stack two layers per ornament. Trace initials onto the top felt lightly, then stitch over using gold embroidery thread with a backstitch so the letters look crisp. Add a small loop made from gold ribbon at the top before you glue or stitch the layers together. Glue only the edges so the inside stays clean and flat. Mount each ornament on a kraft backing card with a thin white label strip for the wedding date.
Try thisUse a needle size that matches your thread thickness; fraying happens when the needle is too big for metallic thread.
Common mistakeDon't use cheap glitter thread - it sheds and looks rough against felt.
20. Clear Acrylic Welcome Gift Stamp with Textured Foam Backing
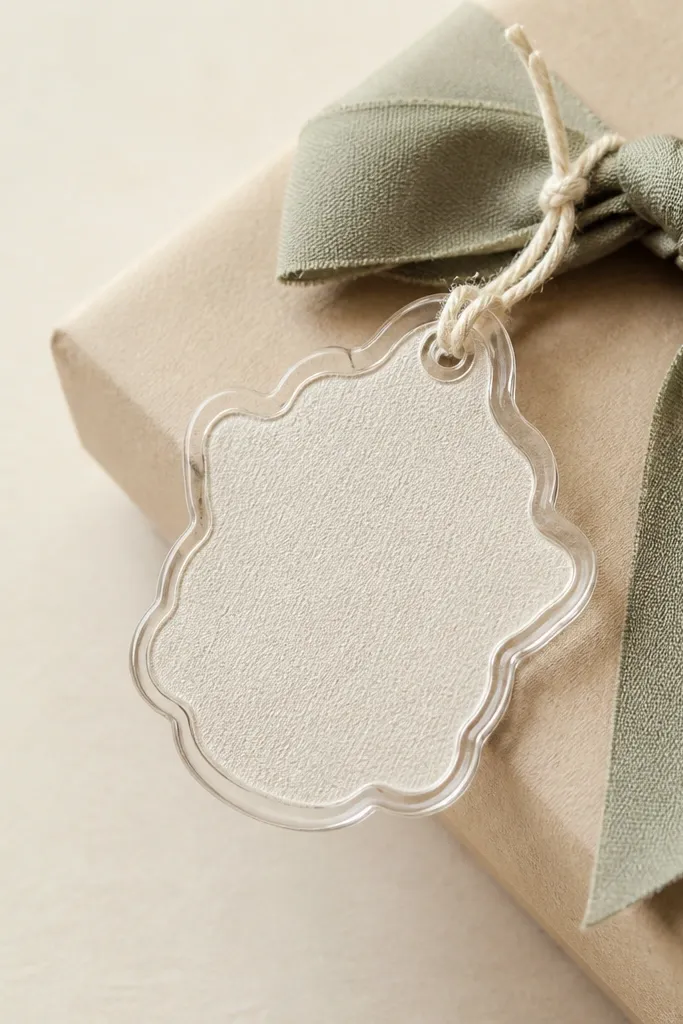
This is the craft I use when I want the gift to look like it came from an event designer. The clear acrylic gives a modern, premium look, and a textured foam backing keeps it from feeling flimsy. Add minimal engraved text or printed vinyl lettering so the design stays clean. It flatters most wedding styles because it's neutral and modern, and it looks sharp in photos because acrylic edges catch light.
Start by cutting a textured foam backing (about 3 x 2 inches) and cover it with matte cream cardstock for a clean surface. Attach clear acrylic (pre-cut piece or small panel) on top using strong adhesive at the corners only. Add lettering by using vinyl letters or engraved plate text, then place the text centered. Tie the gift to the acrylic piece with a thin ribbon loop so it hangs flat. Finish by adding a small date label printed on 220gsm paper and secured with double-sided tape behind the acrylic edge.
Try thisKeep the acrylic piece size under 3 inches - large acrylic looks bulky and can feel cheap if it scratches easily.
Common mistakeAvoid messy adhesive blobs; they show through clear acrylic instantly.