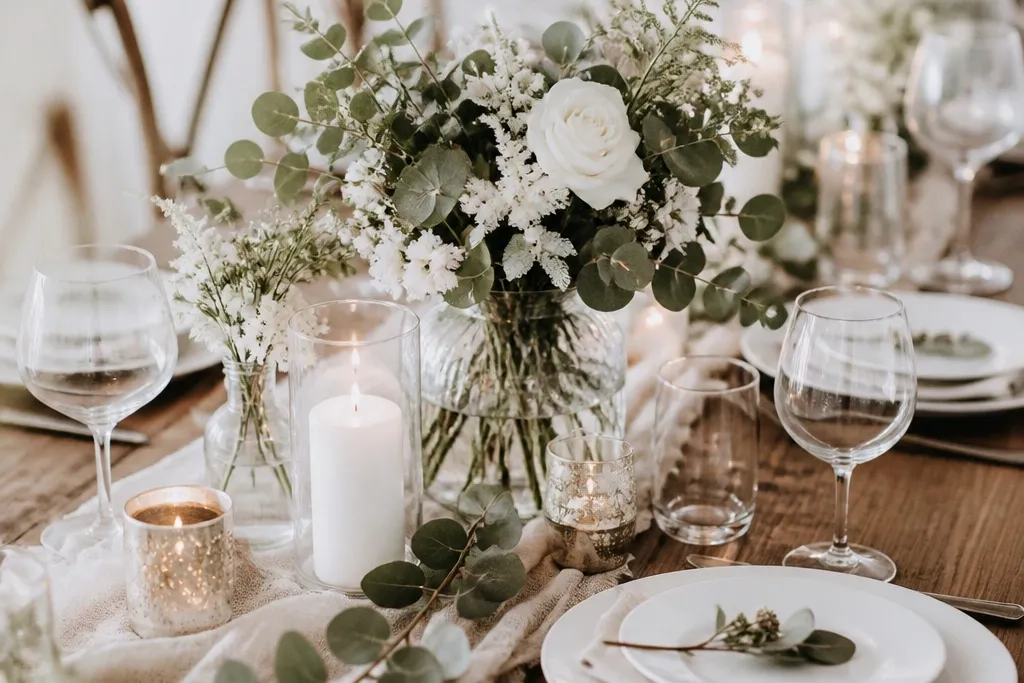
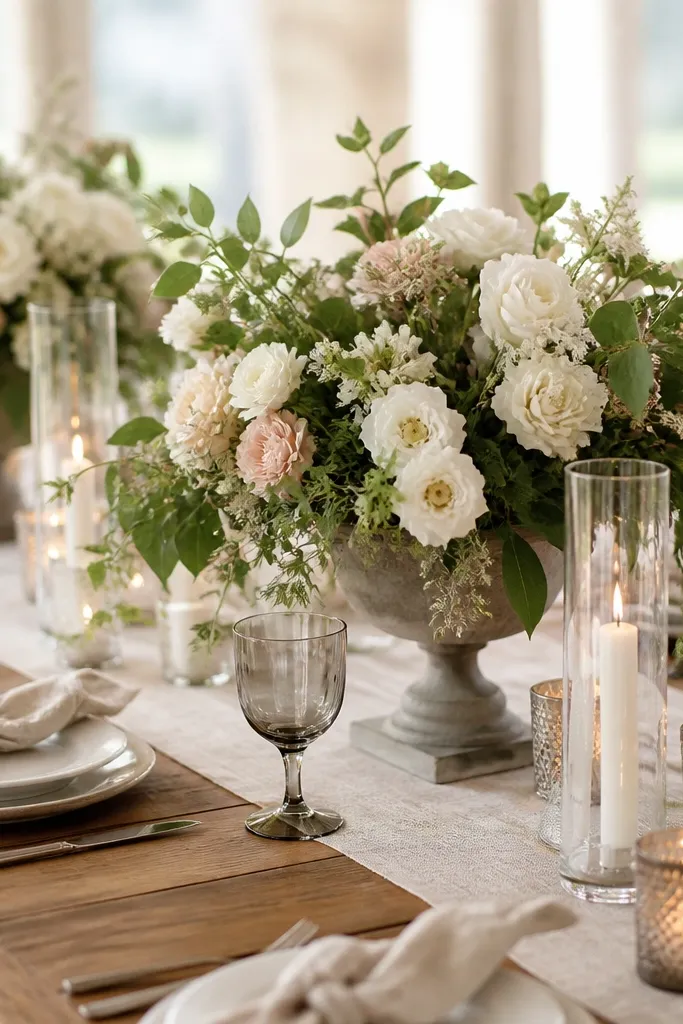
1. Smoked Glass + Cream Roses in a Low Brass Ring
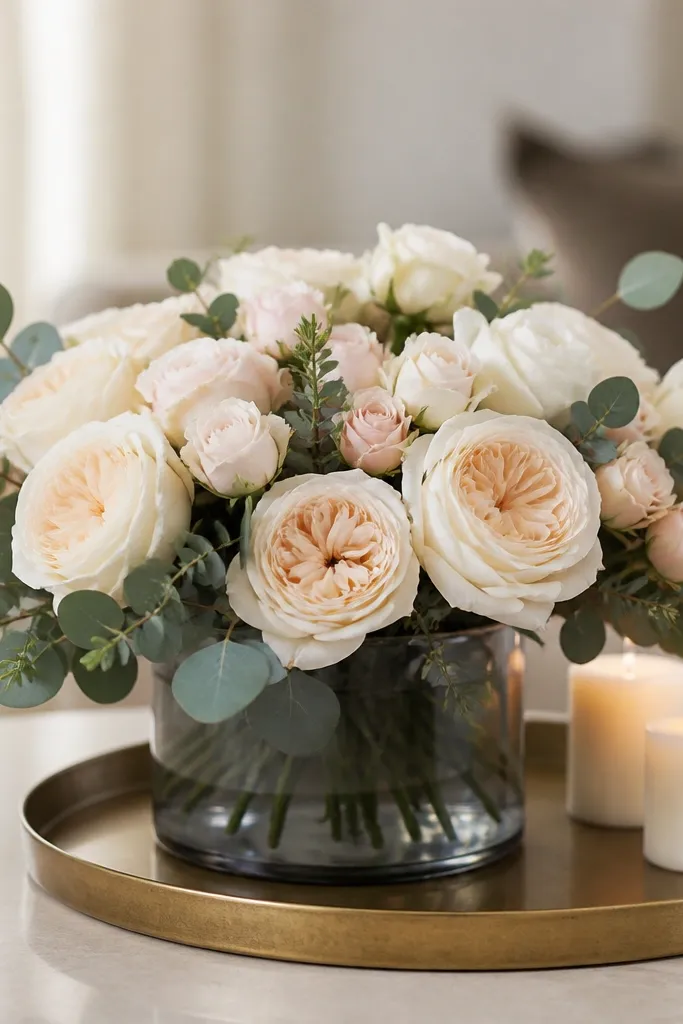
This centerpiece looks expensive because smoked glass and brass photograph like jewelry. I like cream roses because they hide imperfections in the petals and keep the palette soft against rustic wood tables. The arrangement stays low, so guests can talk, but the smoked vase adds depth so it doesn't look like a simple bouquet. It's flattering for most skin tones in photos because the creams and grays balance cool and warm hues. The styling principle is contrast: matte greenery against glossy glass plus a warm metal base.
Start with a smoked glass cylinder vase (about 8-10 inches tall) and a round brass tray that's 12-14 inches wide. Fill the tray edge-to-edge with a thin layer of moss or shredded paper filler, then place the vase in the center. Add eucalyptus first - tuck 6-10 stems around the vase like a frame - then place 3-5 cream rose heads at staggered heights. Finish with a ribbon loop in ivory satin around the tray handle or a short cluster of tiny white candles on the tray corners. Keep everything within 14 inches wide so it doesn't crowd place cards.
Try thisIf your roses look too white, mix in two blush buds so the centerpiece catches warm light from candles.
Common mistakeDon't use clear glass with a cheap plastic filler; the smoked look is what makes it feel "finished."
2. Weathered Wood Box with Seeded Eucalyptus and Rust Ribbons
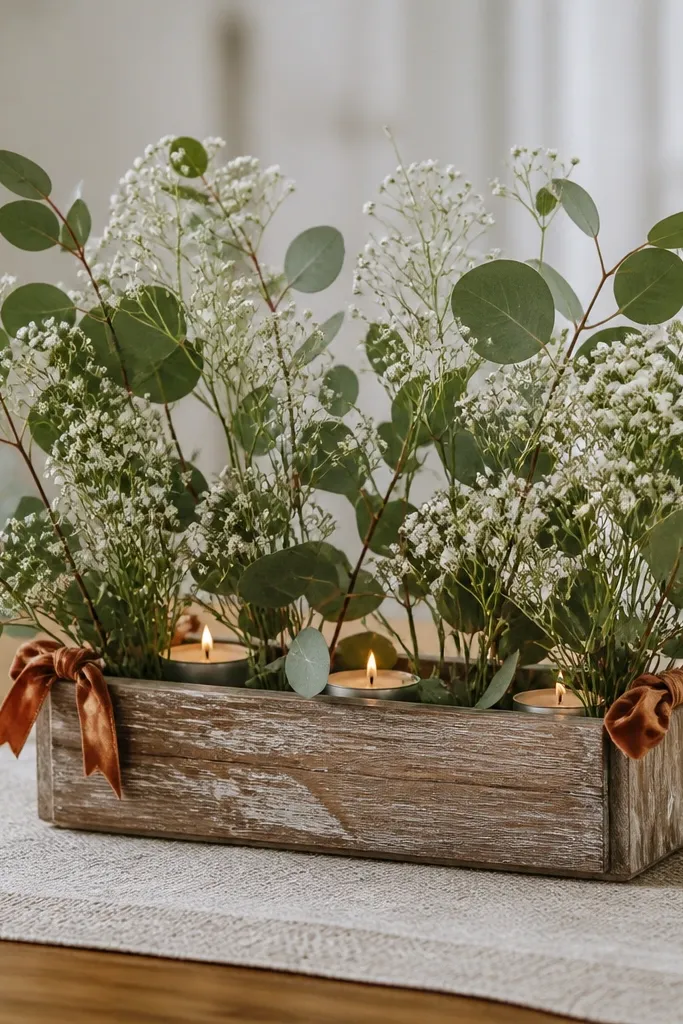
A weathered wood box instantly reads rustic, but it looks expensive when you keep the florals controlled. Seeded eucalyptus gives you texture and motion without adding extra colors. The rust ribbon ties the whole palette together and adds a warm, photographic pop that matches barn wood and terracotta tableware. This works especially well on tables with neutral linens because the florals become the focal point. The styling principle is "contained chaos" - the box keeps the arrangement tidy while the stems look organic.
Choose a wood box about 16-18 inches long and 6-7 inches wide, with a slightly raised edge. Line the bottom with floral foam or a water-holding insert, then cover foam with moss so you don't see the green. Place seeded eucalyptus in a grid: 3 stems across the back, 4 stems along the sides, and a few shorter sprigs in the center. Add white filler flowers sparingly - think 5-7 blooms total - then tuck the stems so they look like they spill out, not stand up. Tie rust ribbon bows around the box corners and set 2-3 tea lights in small holders inside the box base.
Try thisUse wired ribbon so you can angle the ends slightly upward; it looks more styled in photos than loose bows.
Common mistakeSkip burlap wraps across the whole box; too much burlap makes it look like craft-store decor.
3. Terracotta Urn with Dried Hydrangea and Wheat Heads
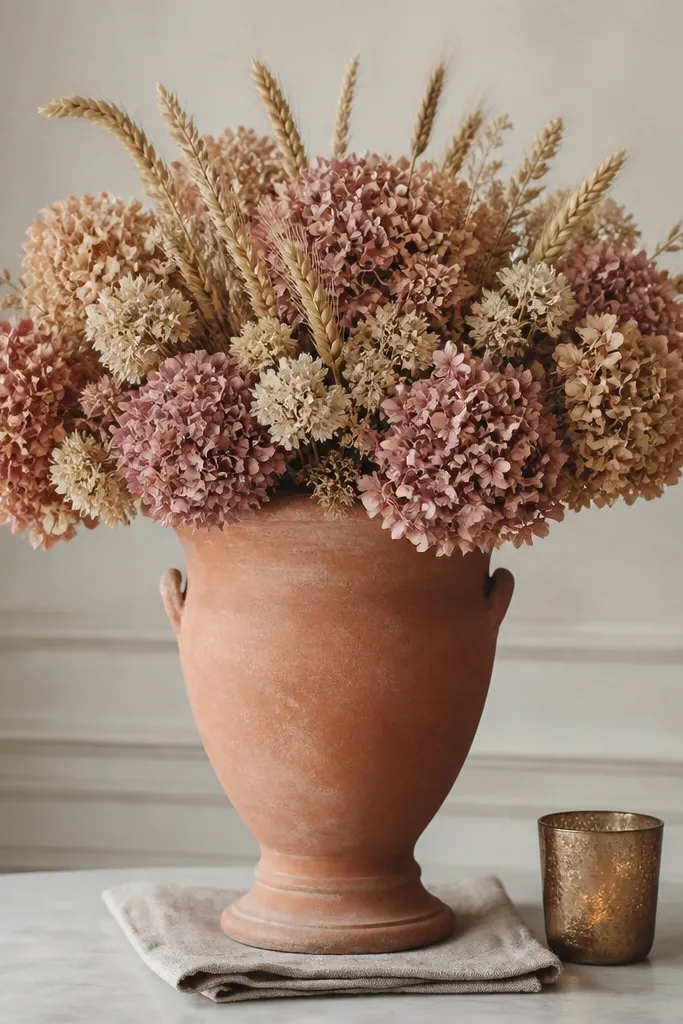
Dried hydrangea and wheat heads look expensive when the urn is weighty and the colors are muted. Terracotta warms up the whole table, and the dried blooms hold their shape in photos longer than fresh florals. This centerpiece suits outdoor ceremonies and fall weddings because it looks natural against wood, stone, and neutral backdrops. It also flatters people with warm undertones because terracotta and dusty rose sit close to skin colors in a flattering way. The styling principle is tonal layering: build depth using one warm base color and two dried shades.
Pick a terracotta urn or ceramic vase about 12-16 inches tall with a matte finish. Place it on a folded oatmeal linen square, about 14-16 inches wide, so the linen frames the urn. Insert dried hydrangea heads first: 3 large blooms in a triangle, then smaller stems to fill gaps. Add wheat heads last - 2-3 stalks should rise above the hydrangea by 3-5 inches for height. Finish with one brass votive candle on the linen side, not in the urn, so the glow hits the dried petals.
Try thisMist the dried hydrangea lightly with a hair-spray-style setting spray to reduce flyaways during setup.
Common mistakeDon't pack dried stems too tightly; it makes them look like a wreath jammed into a vase.
4. Tall Candle Trio in Antique Holders with Linen Runner
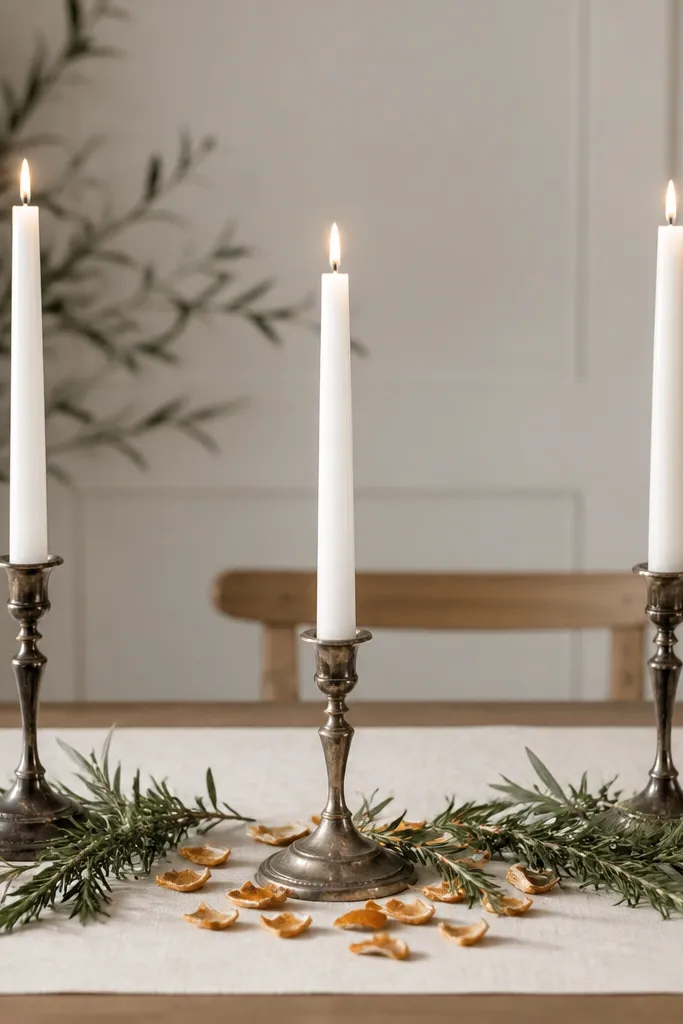
Candles can look luxe in rustic settings when they're tall, matched, and grounded with greenery. I like a trio because it creates symmetry without feeling stiff. White tapers give a clean highlight against warm wood, and antique metal holders add patina that looks collected over time. This centerpiece flatters tables with darker centerpieces because the white candles pull the eye upward. The styling principle is vertical rhythm: build height with candles and then soften the base with organic sprigs.
Lay down a cream linen runner that's 14-18 inches wide across the table center. Place three candle holders spaced evenly - center one plus left and right positions - so the total width matches your runner. Add rosemary sprigs and a few olive leaves at the holder bases, then scatter 4-6 dried orange peel pieces around the center to add warm texture. Keep the candles the same height (around 10-12 inches) and trim wicks so flames look tidy. If you're using real candles, test your spacing so nothing drips onto the linen.
Try thisWrap a thin strip of kraft paper around the candle holder base to hide any uneven holder edges.
Common mistakeSkip short candles; anything under 8 inches looks like party decor next to rustic dinnerware.
5. Cream Tablecloth + Green Moss Bowl with White Anemones
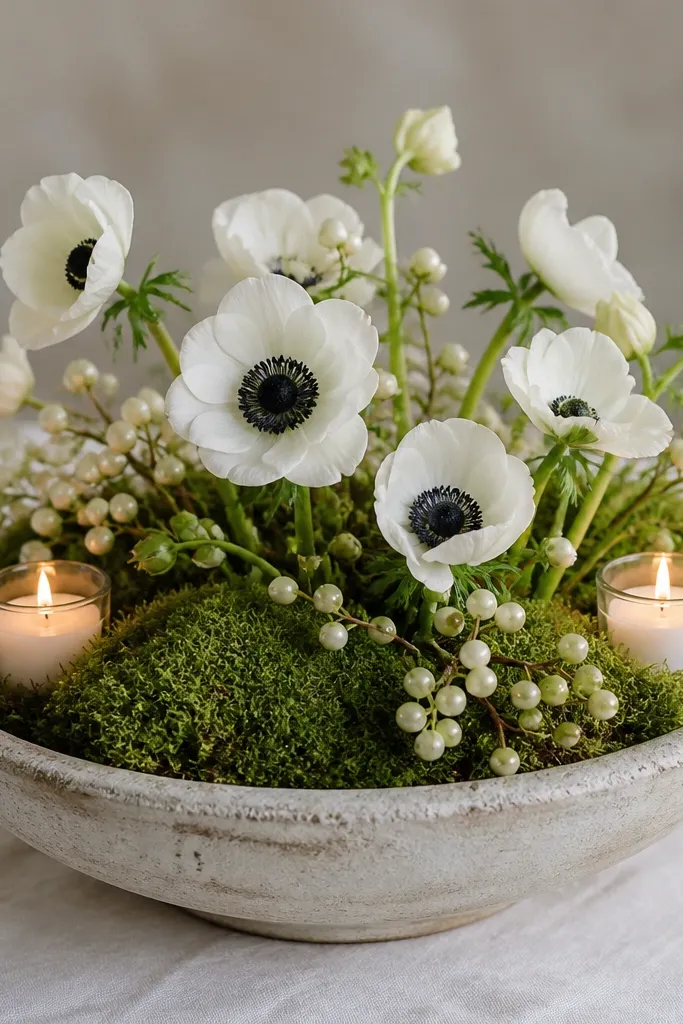
This is one of my go-to "looks expensive" centerpieces because moss makes everything feel styled and intentional. The bowl format looks high-end in overhead photos, and white flowers keep the palette crisp. Moss also creates a natural cushion that hides foam and makes the arrangement look full without extra stems. It flatters most guests in photos because the white blooms reflect warm candlelight cleanly. The styling principle is concealment: hide mechanics (foam, wiring) under moss so only the botanical beauty shows.
Use a shallow ceramic bowl about 14-16 inches wide and 3-4 inches deep. Line with floral foam or use a moss bed thick enough to anchor stems; cover foam completely with moss. Place 6-9 white anemone-style blooms at the center and slightly off-center for a natural curve. Add 2-3 clusters of small berries (white or pale cream) for tiny texture points. Nestle two votive candles into the moss on opposite sides, keeping the flames at least 2 inches away from petals.
Try thisPress the moss down with your fingers so it looks like a single surface, not scattered tufts.
Common mistakeDon't leave foam peeking through at the rim; it reads cheap fast in close-up photos.
6. Blackened Steel Tray with Sage Green + Cream Wildflowers
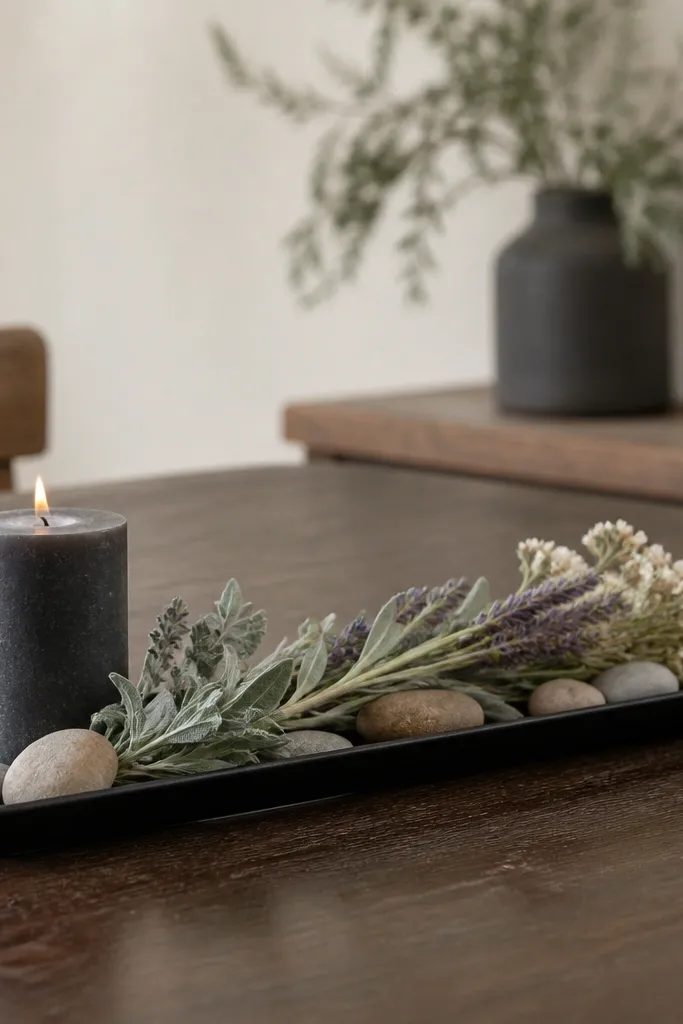
Blackened steel is the secret ingredient that makes rustic decor feel modern and pricey. The tray keeps everything in line, so your wildflower look doesn't turn into chaos. Sage green and cream are a classic combo that reads calm and expensive, especially under warm lighting. This works well for couples who want rustic but not overly country. The styling principle is a grounded base: stones + metal + controlled plant palette give it structure.
Grab a matte black tray about 18-22 inches long and 6-8 inches wide. Add a thin layer of river stones across the bottom, then place a low floral frog or a foam insert hidden under moss. Build greenery first with 8-12 sage stems, placing the tallest in the center and shorter toward the ends. Add cream wildflower clusters in 3 main spots so you have visible groupings, not one scattered sprinkle. Finish with a small black pillar candle in the center back and a few dried lavender sprigs for a soft purple accent.
Try thisKeep lavender to 6-10 stems; too much purple makes it look like a craft market basket.
Common mistakeSkip shiny gold trays; they look costume-y against rustic wood in daylight.
7. Antique Teacups Stacked on a Wood Pedestal with Mini Blooms
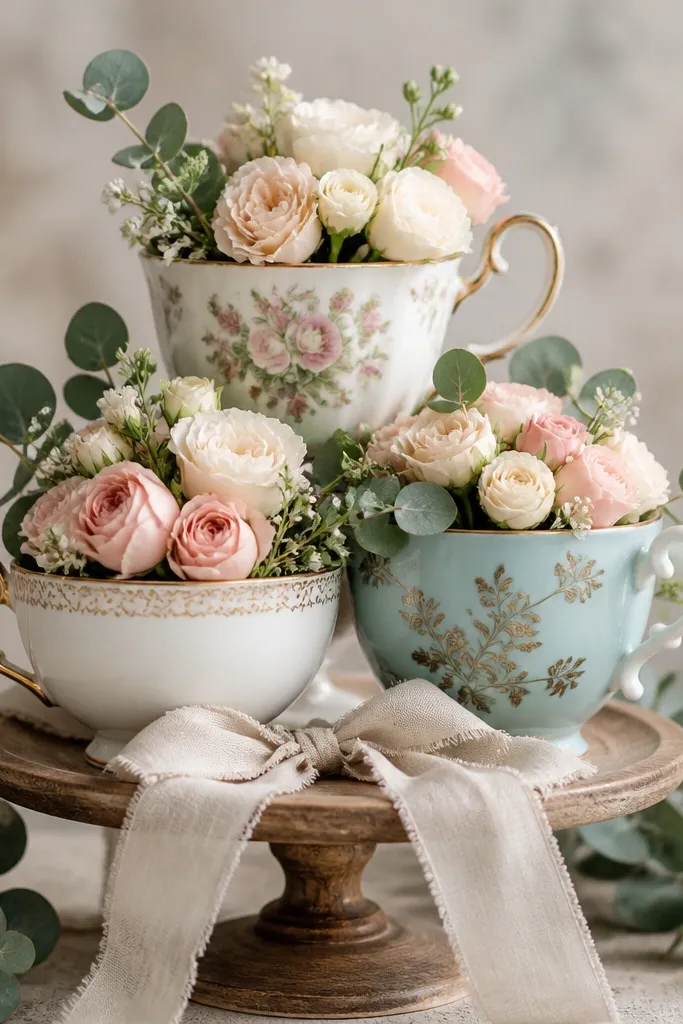
If you want rustic decor that reads upscale without tall centerpieces, teacups do the job. Mismatched cups look collected when they share one color family - ivory glaze, soft cream, or antique white. The mini blooms keep the look delicate, and eucalyptus adds that expensive "garden" texture. This is flattering for close-up table shots because the flowers sit at eye level. The styling principle is scale control: small vessels, small bouquets, no giant filler.
Find a wood pedestal cake stand about 10-12 inches wide and set it on a folded linen square. Place a teacup stack on top: two cups on the sides and one cup centered, or stack three cups with stability if the handles allow. Fill each cup with a tiny oasis insert or floral foam, then cover with moss. Add eucalyptus leaves first, then 3-4 mini blooms per cup (cream and blush look best). Keep the height under 10 inches so it doesn't block guests. Tie a small linen bow at the base of the pedestal or around a napkin ring.
Try thisWash and dry teacups well, then wipe with a dry cloth right before the event so they look clean on camera.
Common mistakeDon't use bright patterned cups; the patterns fight the rustic palette.
8. Birch Log Base with Glass Bud Vials and White Baby's Breath
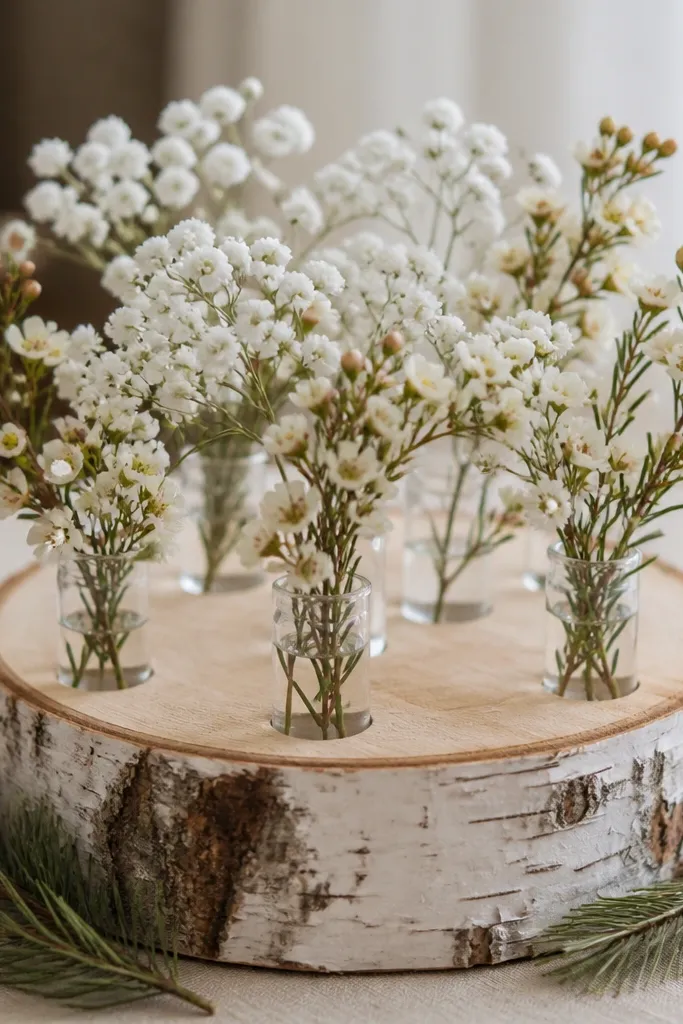
Birch log bases look expensive because the wood grain and texture read handcrafted. The glass bud vials keep it clean and photogenic, unlike a single big vase that can look messy. White baby's breath creates a soft fog effect that photographs beautifully and covers small gaps between vials. This centerpiece works for winter weddings and woodland themes, and it looks good against dark tablecloths too. The styling principle is micro-structure: multiple small containers create order while the florals stay airy.
Start with a birch log slice about 10-12 inches wide and 2-3 inches thick. Drill 4-7 shallow holes in a gentle arc pattern, then insert bud vials or small glass bottles. Add a thin layer of moss in each hole for grip, then fill vials with water and floral foam or a wet floral insert. Place baby's breath and tiny cream blooms so each vial has a visible top bloom, then add pine sprigs around the edges of the log. Put the log slice on a dark green or charcoal runner to make the birch pop.
Try thisUse a non-slip mat under the log slice so it doesn't wobble when guests bump the table.
Common mistakeSkip fake "wood" bases; painted faux birch looks flat and cheap next to real greenery.
9. Rust Velvet Ribbon Wrap on a Tall Linen-Covered Vase
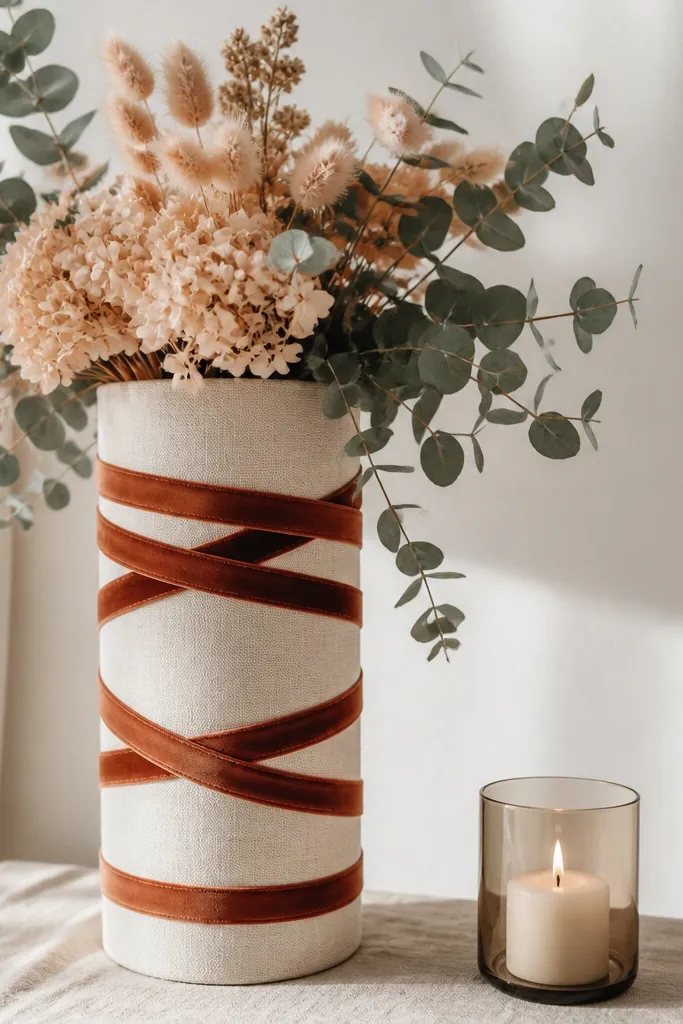
This one looks expensive because it adds fabric drama without adding clutter. Linen on the vase softens the shape and makes the floral arrangement feel styled, not thrown in a container. Rust velvet ribbon reads rich in warm light and photographs like a finishing touch. It's especially flattering for tables with neutral centerpieces or minimalist tableware because the fabric becomes the focal point. The styling principle is a "one-piece outfit" look: dress the container first, then add a simple floral top.
Use a plain tall vase (9-12 inches) and cover it with a linen sleeve or wrap linen fabric around and secure with double-sided tape at the back. Tie rust velvet ribbon in two bands spaced about 4 inches apart, then finish with a short knot or small bow. Add eucalyptus and peach dried flowers at the top - 2-3 eucalyptus stems angled outward and 4-6 dried blooms clustered near the center. Place a single glass candle holder next to the vase on the runner so the velvet catches candle glow. Keep the floral height under 14 inches so it stays table-friendly.
Try thisHeat-set your ribbon ends with a lighter carefully or use ribbon end caps so it doesn't fray during the event.
Common mistakeDon't use shiny satin ribbon; velvet reads richer and hides wrinkles better.
10. Olive Branch Wreath Centerpiece in a Farmhouse Ring Tray
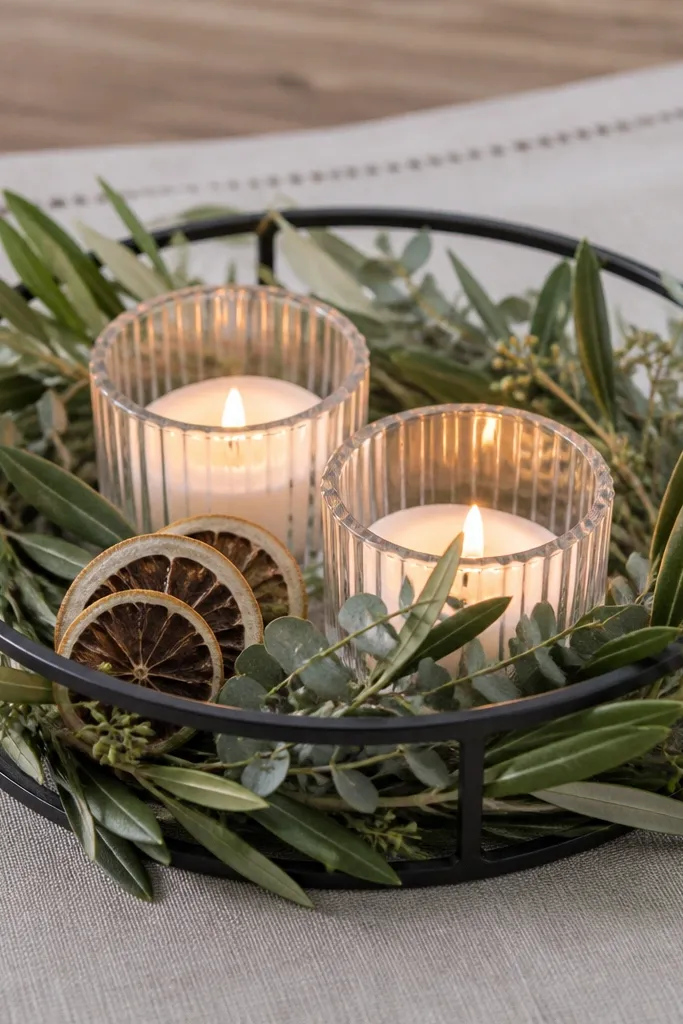
Ring trays make centerpieces look intentional because they create a clear silhouette. Olive branch wreaths add a Mediterranean-leaning rustic vibe that feels elevated, especially with seeded eucalyptus in the mix. Glass candle holders keep the glow controlled, and dried citrus adds a subtle warm texture without introducing bright colors. This works great for long tables because the ring shape doesn't block views like tall arrangements. The styling principle is frame-and-focus: the ring frames the candles and keeps everything within a perfect circle.
Pick a round ring tray about 16-18 inches across with a flat interior. Build a wreath using olive branches and seeded eucalyptus; wire the wreath lightly so it holds its circle. Place the wreath in the center of the tray and tuck 2-3 extra eucalyptus sprigs behind it so it looks thick. Add two low candles in glass holders on opposite sides within the ring, then tuck dried citrus slices near the front edge. Set the tray on a linen placemat or runner and keep the total height under 12 inches.
Try thisIf the wreath looks thin, add a second layer of eucalyptus on the inside edge only - it fills without expanding the footprint.
Common mistakeDon't add random flowers; keep it to olive, eucalyptus, citrus, and candles.
11. Walnut-Color Planter with Cream Peonies and Soft Pearls
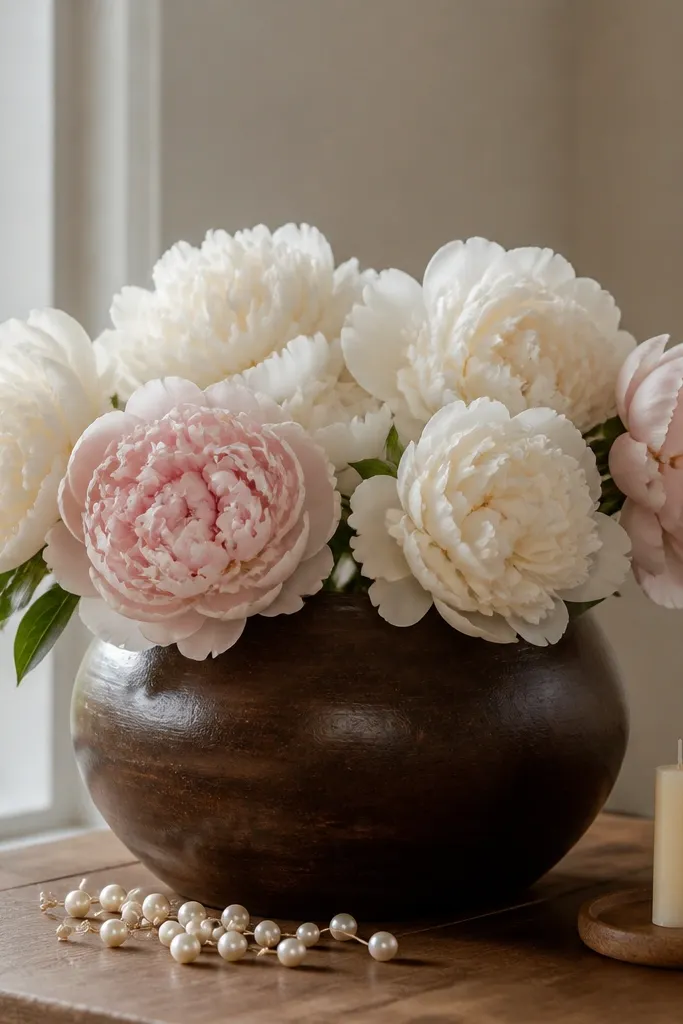
Cream peonies look high-end even if you use silk, because peony shapes are forgiving and full. The walnut planter makes the creamy blooms feel richer, and the pearl accents add a subtle "bridal" touch that reads expensive in photos. This centerpiece fits spring weddings and also works for rustic glam when your venue has wood beams and neutral draping. It's flattering across skin tones because cream reflects light and pearls add a soft highlight. The styling principle is contrast of tone: dark base + light petals + small reflective details.
Choose a walnut-toned planter about 10-12 inches wide and 8-10 inches tall with a matte finish. Add floral foam or a wet insert, then cover with moss or shredded paper filler so the base looks natural. Place 5-7 cream peony heads in a gentle mound, rotating the blooms so you see petals from the front. Tuck blush blossoms only in the back and sides so the center stays cream-forward. Sprinkle a few pearl-like picks at the base and along the inner edge, then place two short taper candles on a wooden coaster next to the planter. Keep the candle height under 10 inches so it stays balanced.
Try thisIf your peonies are silk, rub a tiny bit of antistatic cloth on the petals so they don't look shiny under overhead lighting.
Common mistakeSkip too many pearl picks; 6-10 total looks intentional, 30 looks like craft glue.
12. Sage and Oat Dried Floral Bundle in a Ceramic Cloche
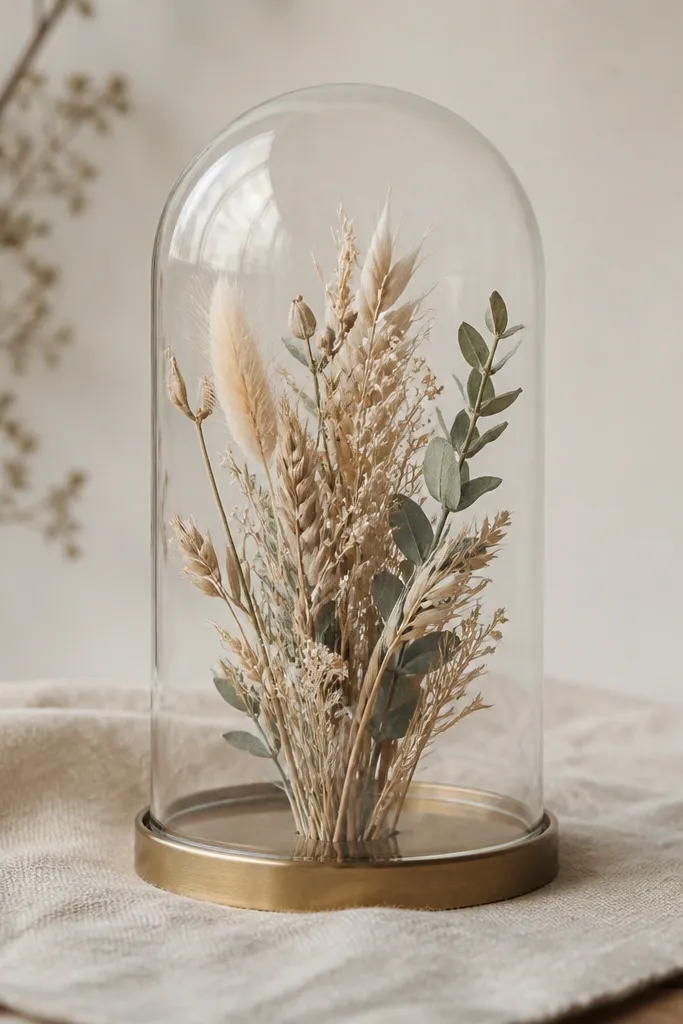
Dried florals under a cloche look designer because they create a contained "still life" effect. Sage and oat tones feel calm and expensive, and the glass dome gives you clean lines in photos. This is a great option when you want rustic decor but you don't want to deal with fresh-water arrangements. It also works well on guest tables because the height stays controlled. The styling principle is framing: the cloche makes the centerpiece look styled even if the wedding table setup is simple.
Start with a ceramic or glass cloche about 10-12 inches tall. Build a dried bundle using sage stems, oat-colored grasses, and a few dried hydrangea heads, then secure with floral wire. Place the bundle on a small base (candle-safe insert) on top of an oatmeal linen square. Set the cloche over the bundle and check clearance so stems don't touch the glass and smear. Add one brass element - a small brass ring tray under the linen or a single brass votive next to the cloche. Keep everything within a 14-inch footprint so it looks centered, not crowded.
Try thisDust the glass cloche with a microfiber cloth right before you set it; fingerprints show up in overhead shots.
Common mistakeDon't use a cloche that's too small; crushed stems look sloppy.
13. Rattan Charger + Greenery-Heavy Center Bowl with Honey Candle
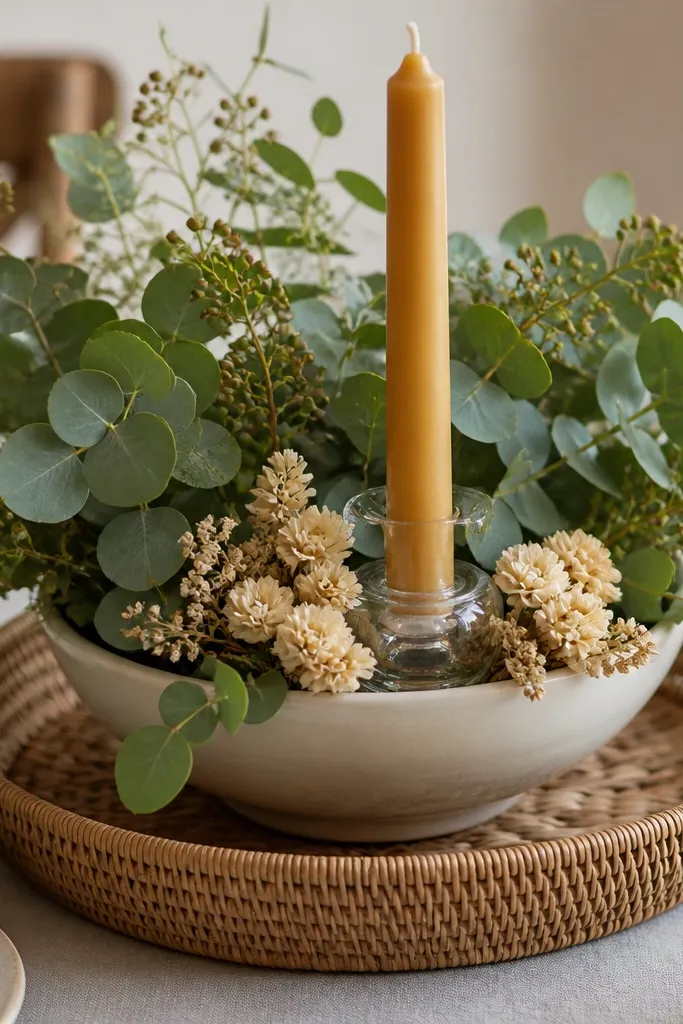
Rattan chargers make centerpieces look expensive because they add a warm, woven texture that feels handmade. When you pair that with a heavy greenery bowl, you get volume without needing lots of individual blooms. The honey taper candle adds glow and a warm color temperature that flatters skin tones in photos. This centerpiece works beautifully for rustic venues because it matches wood, wicker, and neutral linens. The styling principle is volume first: let greenery do the heavy lifting, then add a single warm accent candle.
Place a rattan charger about 14-16 inches wide in the center of the table. Set a ceramic bowl on top of it, then anchor the bowl with moss or foam so it doesn't slide. Fill the bowl with seeded eucalyptus and eucalyptus in a dense layer, covering the rim completely. Insert a honey-colored taper in a glass holder near the front so the flame reads through the greenery. Add 6-8 cream dried flower buds spaced around the candle, not scattered everywhere. Make sure the total height is under 14 inches so it stays conversation-friendly.
Try thisTuck the ends of the greenery down into the bowl so the bouquet looks full from every angle.
Common mistakeDon't use a thin, watery candle look; use a real taper or a thick pillar-style candle for a clean silhouette.
14. Cream Linen Wrap with Small Mason Jars and Rusty Flower Stems
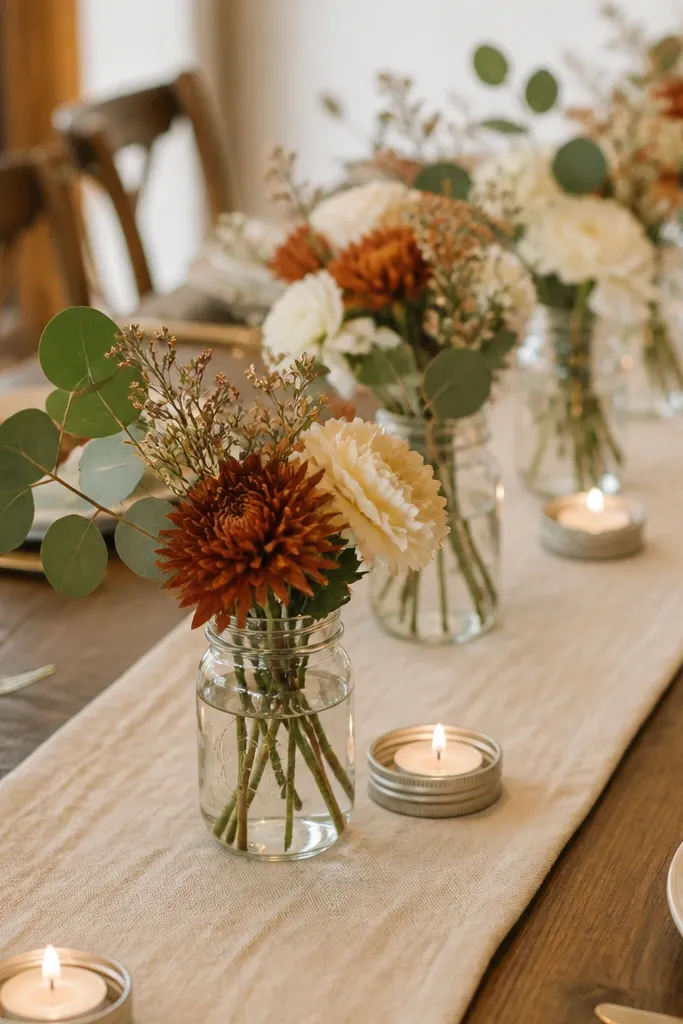
Mason jars get a bad reputation for looking country - until you style them like a system. This setup looks expensive because the jars are lined, the linen wrap gives softness, and each jar contains a purposeful bundle rather than random scraps. Rusty stems pull the rustic theme forward, while cream blooms keep it bridal. It suits long dinner tables and buffet lines because it creates a clear visual line without towering obstructions. The styling principle is repetition with variation: same jar shape, different stem colors in a controlled order.
Cut or fold a cream linen runner so it sits under the jars and extends about 6 inches on each end. Line 5-7 small mason jars (half-pint to pint size) along the runner, spaced 2-3 inches apart. Fill each jar with water and floral foam or wet inserts, then place eucalyptus stems first so every jar has a green base. Add one rust-toned stem cluster per jar and one cream bloom stem where needed, keeping the tallest jar in the middle. Use mason jar lids as mini candle holders with tea lights for a warm glow. Center the whole row so it aligns with the table's center point.
Try thisLabel the jar sizes with a quick photo before the wedding so you don't swap jars and ruin the height plan.
Common mistakeDon't mix jar heights randomly; keep the jar rim heights consistent across the row.
15. Antique Brass Candelabra Base with Mixed Green Bud Vases
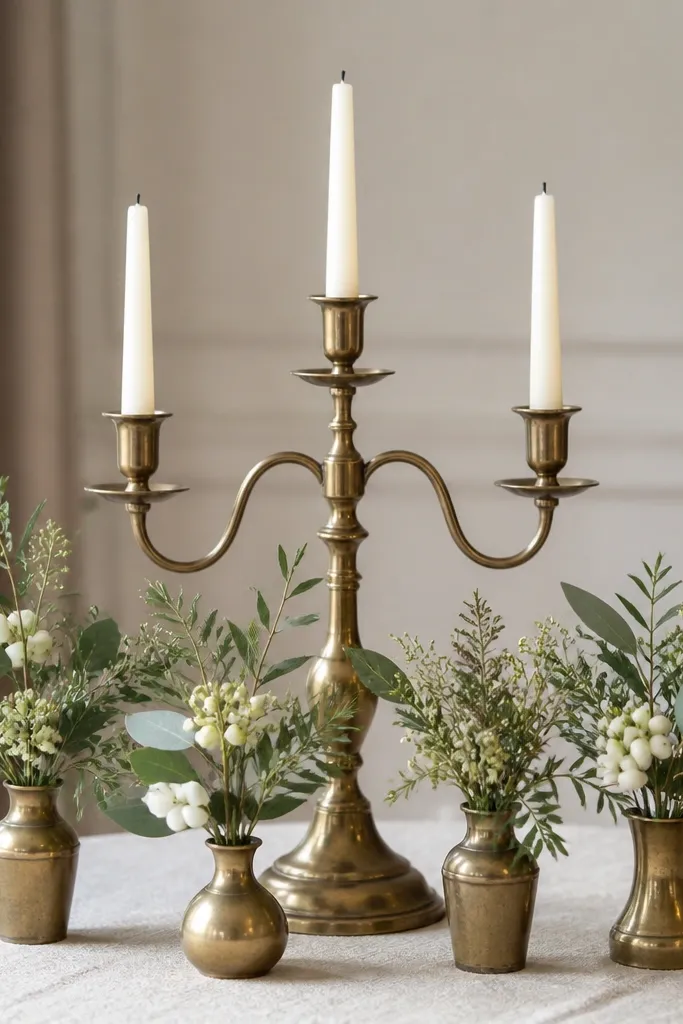
Candelabras feel formal, and that's why they read expensive even in rustic settings. The trick is to avoid over-decorating the arms - keep the candles and then surround the base with small bud vases for organic texture. Mixed greens and cream berries add a gentle contrast that looks lush without becoming colorful clutter. This centerpiece flatters people because it draws the eye upward and keeps table-level sight lines open. The styling principle is vertical elegance plus grounded botanicals.
Use a brass candelabra base (3-arm style) with a stable footprint about 10-12 inches wide. Place it on a circular wood charger or a thick linen round. Add bud vases around the base - 4-6 small vases - filled with water and floral foam covered with moss. Populate bud vases with mixed greens like eucalyptus plus ruscus, and tuck in 2-3 cream berry stems across the group. Put 3 short white candles into the arms and keep them the same height. Arrange the bud vases so they form a gentle circle around the candelabra, not a straight line.
Try thisUse LED candles first for test photos; you can swap to real ones later without rearranging everything.
Common mistakeDon't add heavy flowers to every bud vase; the greens should dominate.
16. Long Runner of Dried Lavender and Olive with a Single Center Vase
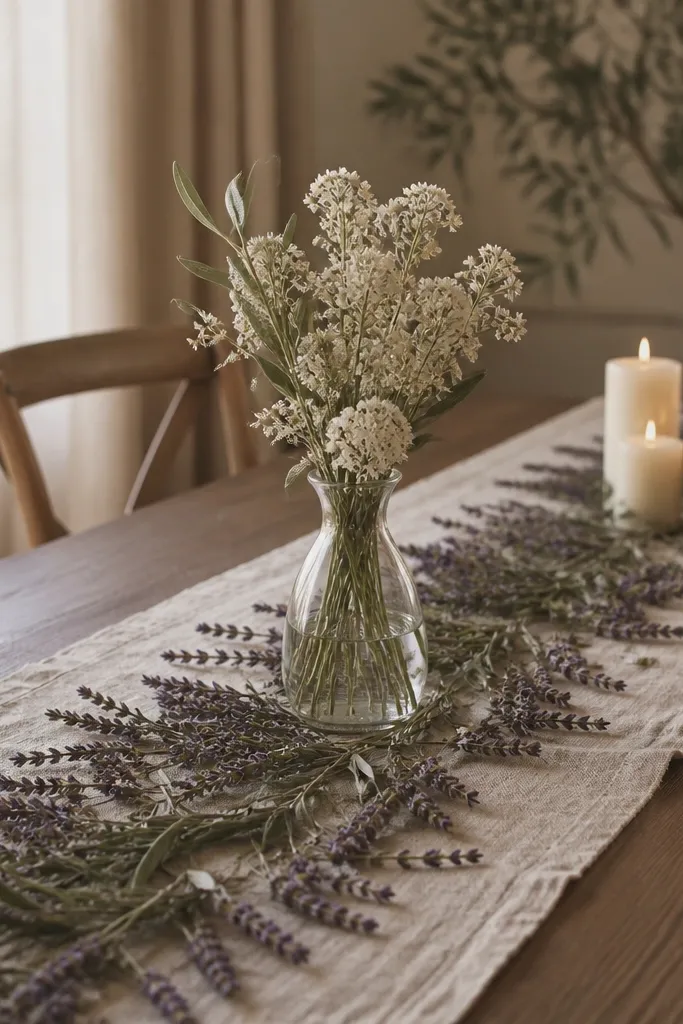
This looks expensive because it uses negative space well. Instead of a big centerpiece blob, you create a scented-looking runner with dried lavender and olive that frames a single elegant vase. The clear glass keeps the floral silhouettes clean, and the muted lavender gives a subtle color without turning the table purple. This works for couples who want rustic but also want a "styled editorial" feel. The styling principle is one focal point, surrounded by texture.
Start with a linen runner in cream or oat, about 16-18 inches wide. Lay dried lavender sprigs along the length in two lines so you can still see the linen between them. Tuck olive sprigs between lavender lines, keeping them low and mostly flat. Place one clear glass vase at the exact center, about 10-12 inches tall, and fill it with cream wildflowers plus 3-4 sage stems. Add a small candle cluster at one end only - two tea lights in glass holders - so the runner doesn't feel busy. Check the width from guest height: the lavender should not spill into place cards.
Try thisUse lavender sprigs with stems still attached; loose buds look like litter on tables.
Common mistakeSkip bright colored dried flowers; they fight the rustic palette and look cheap in daylight.
17. Terracotta and Cream Stacked Vases with Faux "Florals" That Look Real
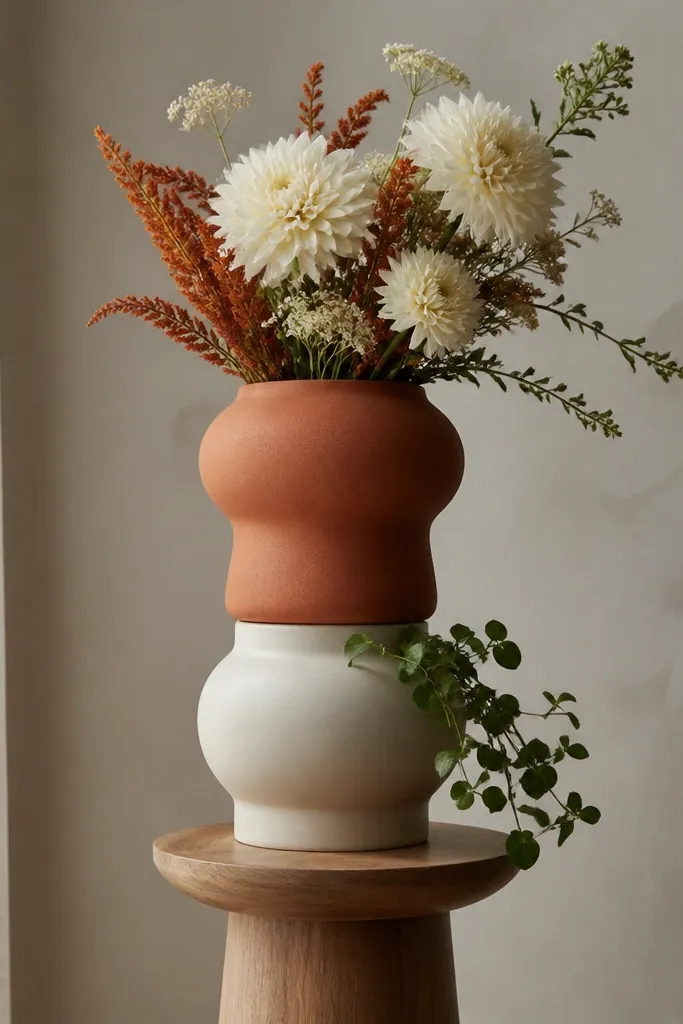
Stacked vases look expensive because they create sculptural height and depth without needing a huge bouquet. Terracotta plus cream is a natural rustic combo, and the stacked shape reads intentional in photos. I've used high-quality faux florals here because the shapes stay perfect and you avoid wilting right before dinner. It's especially flattering for tall guests and long tables because the centerpiece sits above the table clutter. The styling principle is sculptural layering: vary vessel heights and keep the floral palette limited to two tones.
Choose a wooden riser about 10-12 inches wide. Place a terracotta vase at the bottom (8-10 inches tall) and a cream vase on top (12-16 inches tall), making sure the neck opening fits the stems. Insert foam in the top vase and cover with moss so you don't see the mechanics. Add creamy blooms in a vertical line, then tuck rust stems at the edges so they curve outward. For the bottom vase, add only greenery so it frames the upper arrangement. Keep the total height around 18-22 inches so it reads tall without blocking faces.
Try thisWhen using faux stems, bend the stems slightly by hand so petal heads tilt toward the camera.
Common mistakeDon't mix matte faux leaves with glossy real leaves; the texture mismatch shows instantly.
18. Rustic Market Basket with Cream Blooms and a Single Green Vine
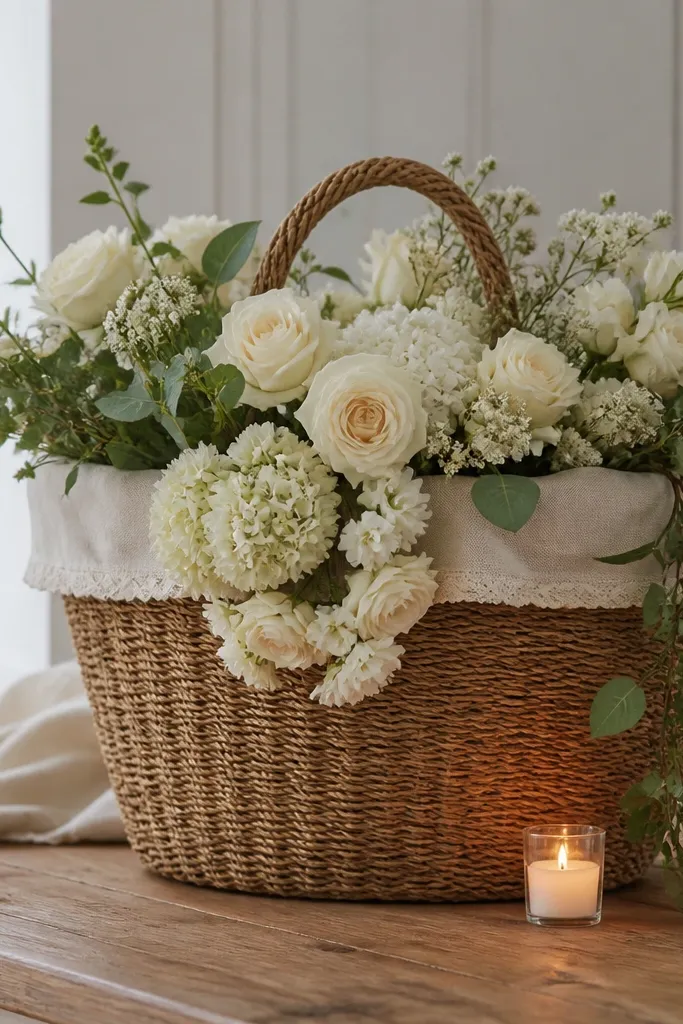
A market basket centerpiece looks expensive when it's lined neatly and kept to one floral "spill" direction. Cream blooms in the basket look more bridal than wild colorful mixes, and a single draping vine adds movement that looks styled, not accidental. This is a great pick for casual barn weddings because it feels handmade and relaxed while still looking intentional in photos. It also flatters darker table linens because the cream lining brightens everything. The styling principle is one dominant spill: let flowers cascade in one place and keep the rest clean.
Choose a woven basket about 14-16 inches wide and 6-8 inches deep. Line it with cream fabric and secure the fabric with hidden clips so it doesn't wrinkle at the rim. Add floral foam or a water-holding insert in the center, then cover with moss. Place cream blooms so they spill over the front edge only - aim for 3-5 heads visible along the curve. Add one long green vine (like trailing eucalyptus or a similar drape) that hangs down the left side, then tuck it behind blooms on the right so it looks balanced. Put a small candle in a glass holder near the basket base where the vine can catch the light.
Try thisTrim the vine length after you place the basket; drape it to the exact height you want, then cut.
Common mistakeDon't overfill the basket; if the rim bulges with stems, it looks like a florist mistake.
19. Charcoal Stoneware Jug with Cream Calla Lilies and Fern Tips
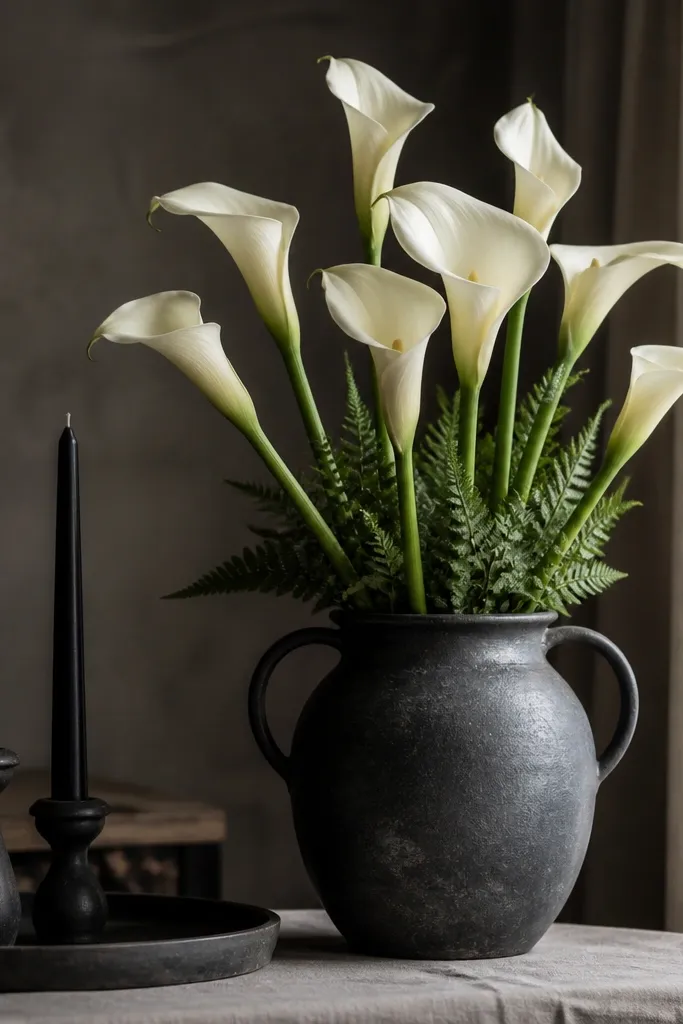
Charcoal stoneware and cream calla lilies look expensive because the contrast is clean and the lines are crisp. Callas have a sleek shape that photographs like high-end event styling, even when you keep the centerpiece small. Fern tips add a delicate rustic texture without adding extra color chaos. This centerpiece suits modern rustic weddings and also looks great on tables with black flatware or charcoal napkins. The styling principle is line and negative space: smooth vase shape + strong flower silhouettes.
Pick a charcoal stoneware jug about 10-12 inches tall with a slightly wide opening. Place it on a stoneware plate or a dark runner so it reads intentional. Fill the jug with water and floral foam covered in moss, then place 3-5 calla lilies, keeping their top tips rising to about 14-16 inches total height. Add fern fronds only at the base and sides, 4-6 fronds total, so the greenery frames without filling the space. Add two black taper candles on a plate near the jug, not behind it, so the candlelight reaches the callas. Keep the arrangement width under 12 inches.
Try thisCut calla stems at an angle and change water right before the ceremony; they hold posture longer.
Common mistakeSkip busy mixes of many flower types; callas want a quiet companion.
20. Clear Acrylic Vase with Floating Paraffin Candle Spheres
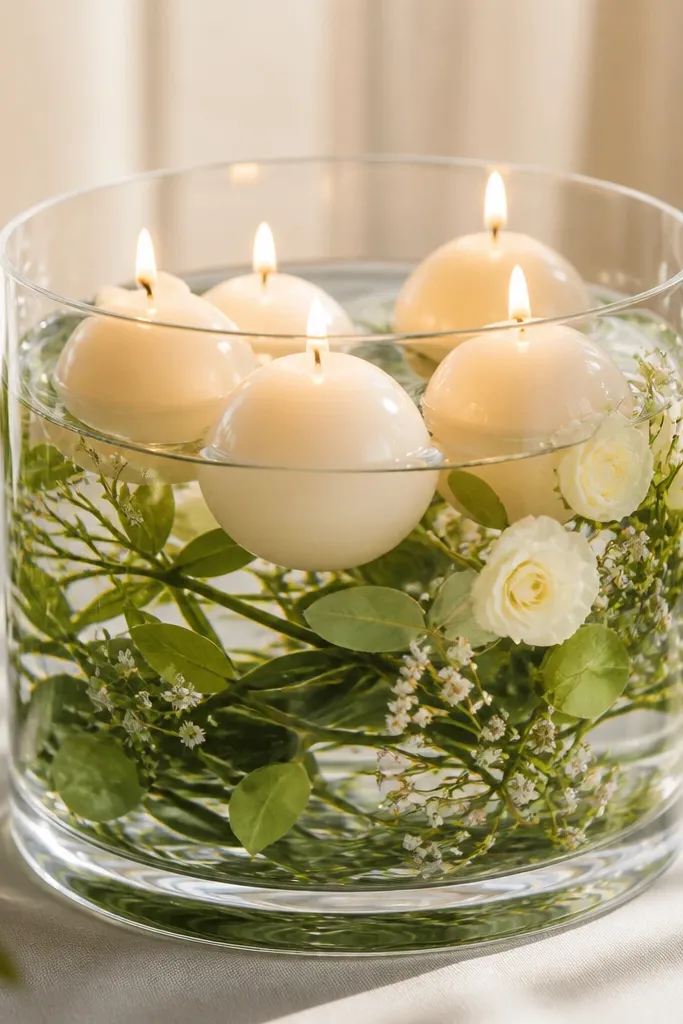
This looks expensive because the candles feel like a special effect, not a basic decoration. Clear acrylic and floating candle spheres create a clean, modern rustic look that still fits wood and linen settings. The greenery stays visible through the water, so the centerpiece looks lush without needing a big bouquet. It's also great for evening weddings because the glow fills the vase and reads beautifully in photos. The styling principle is "light as decor" - use the candles as the highlight and keep florals secondary.
Use a clear acrylic vase or tall clear container about 14-16 inches tall and 6-8 inches wide. Fill with water and add a handful of eucalyptus leaves and tiny cream blossoms tucked against the inside wall. Place 4-6 floating candle spheres on top of the water, spacing them evenly so the glow looks balanced. Add 2-3 floating greenery sprigs near the spheres so they don't look like separate props. Set the vase on a tray with a linen liner to catch any condensation. Keep the bouquet height controlled so the spheres stay near the top third of the vase.
Try thisDo a test with plain water first; floating spheres drift more on a full vase than a partially filled one.
Common mistakeDon't use cloudy water filler; it makes the centerpiece look dirty in close-up shots.