1. Blush satin sheets + handwritten vow cards on the bed
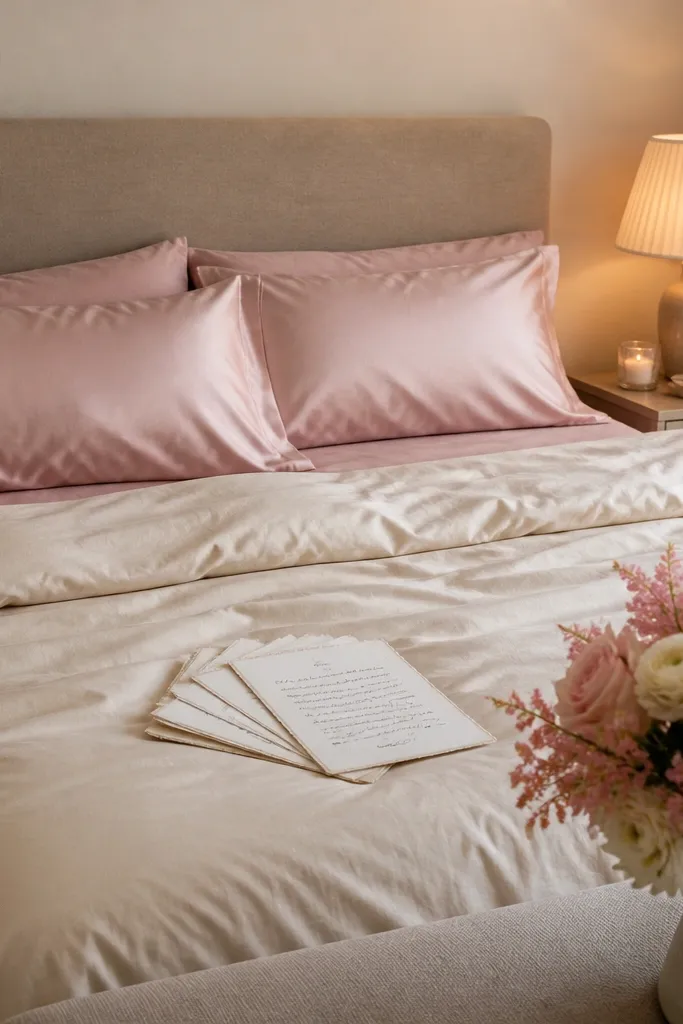
Use blush satin and cream linen because satin catches lamplight without looking shiny in a harsh way. The soft rose tone flatters most skin - especially if your partner wears warm undertones - and it looks romantic without turning into a cliché red-heart setup. Put the vow cards where your hands will rest, not where the camera will see them from a messy angle. This works best for intimate, quiet proposals where you want close-up photos of faces and hands, not a wide scene. I like this for couples who are comfortable sitting on the bed and reading instead of standing and posing.
Start by stripping the bed to one main base: cream duvet cover, blush satin sheet layer, and two blush or cream pillowcases. Add one texture item - a knit throw folded at the bed's side - so the frame has depth. Write 6-10 vow cards on thick off-white paper (not lined notebook pages), then place them in a straight stack near the center of the bed. Light a single candle or use a warm lamp and turn off overhead lights so the satin glows from the side. Finally, have the photographer position at about eye level from the doorway and also at a higher angle from the hallway for variety.
Try thisUse a felt-tip pen with smooth ink so the lettering stays crisp on camera; test one card under the lamp before you commit.
Common mistakeAvoid busy patterns on the bedding - florals and loud stripes fight with the vow cards in photos.
2. Cream linen table runner with a candle ladder
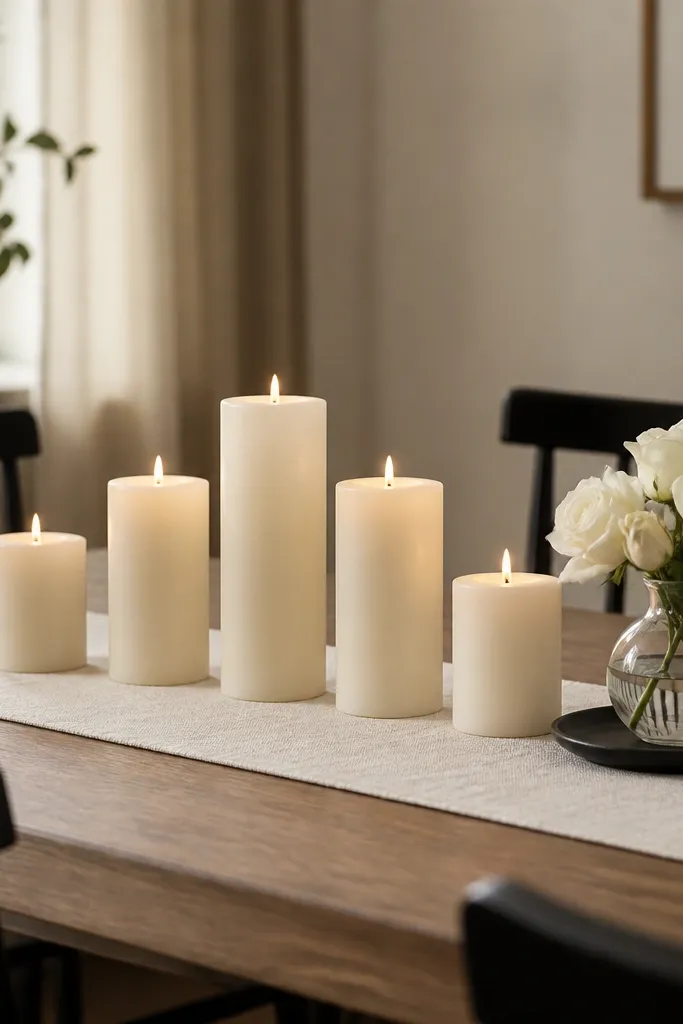
Cream linen and pillar candles look expensive because the contrast is simple: soft fabric against warm flame. The candle ladder gives the camera a clear line that pulls the eye toward the center where you'll stand or sit. This is flattering for couples dressed in navy, charcoal, or black because the table reads like a "stage." It also photographs well because the runner creates a clean baseline and the candles create warm highlights on skin. I use this when I want the proposal to feel classy without needing big decor.
Lay a cream linen runner centered on the table, pulled taut with no wrinkles at the camera side. Place a dark dinner plate or small tray at the center and set the engagement ring box on it, then form your candle ladder: place one tall candle in the middle, then two medium candles each side, then two short candles at the far ends. Add one small bud vase with 3-5 white roses or baby's breath right behind the ring tray so it doesn't block your faces. Turn off overhead lights and keep the lamp on in the next room for a gentle fill. Have your partner sit facing the runner and stand so the ring box sits at chest height in the frame.
Try thisUse flameless candles if you'll be recording video for a long time - the look stays consistent and you avoid smoke drifting into the shot.
Common mistakeDon't scatter candles randomly; random heights make the image feel chaotic and the ring loses focus.
3. Window light proposal with a sheer curtain frame
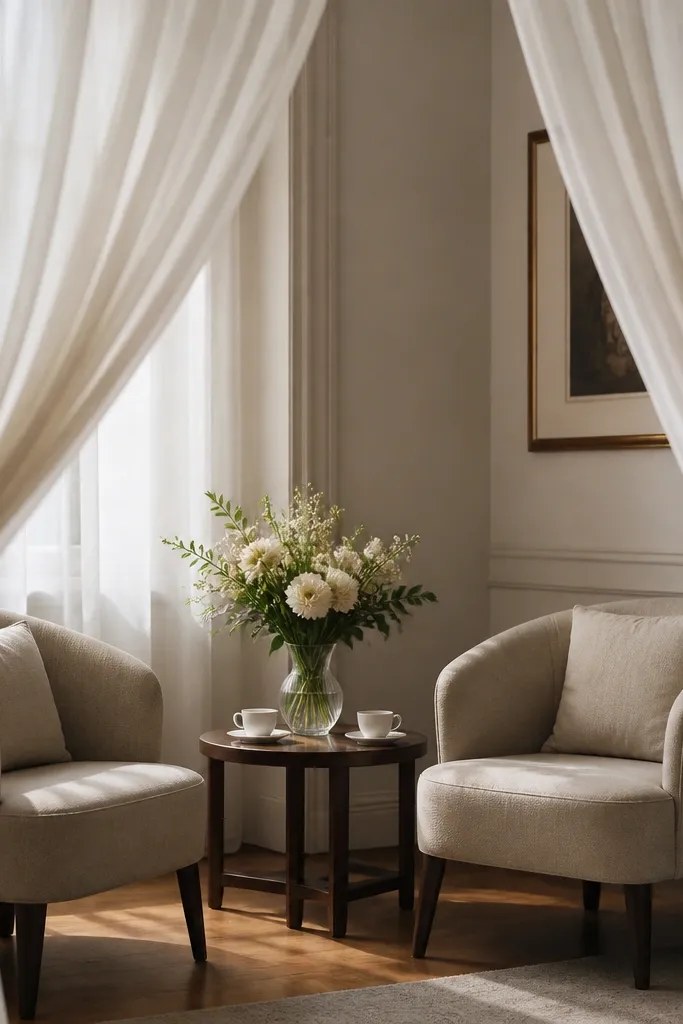
Sheer curtains turn window light into a soft, flattering glow that wraps around your faces. It's the easiest way to get "editorial" lighting at home without buying any gear. This setup is especially good for people who look pale under indoor light, because the window gives natural warmth and keeps skin texture looking real. It also works if your living room has messy walls, since the curtain creates a clean visual border. I've used this for proposals at apartments where the only good light is the one window.
Start by moving one chair to within 2-3 feet of the window so the curtain sits behind you. Open the sheer curtain just enough that it frames the space, leaving your faces in the brighter center. Place a small glass vase with flowers on a side table directly beside the chair so it's visible but not blocking. Set two simple cups or small bowls on the table to give the scene a lived-in, cozy look. Turn off all overhead lights and take a test photo from where your phone will sit on a tripod or stack of books.
Try thisUse a plain wall behind you if possible; the curtain frame already gives "design," so you don't need extra decor competing in the background.
Common mistakeAvoid heavy blackout curtains - they kill the soft glow and make the photos look flat.
4. Fresh eucalyptus + white taper candles on a bookshelf
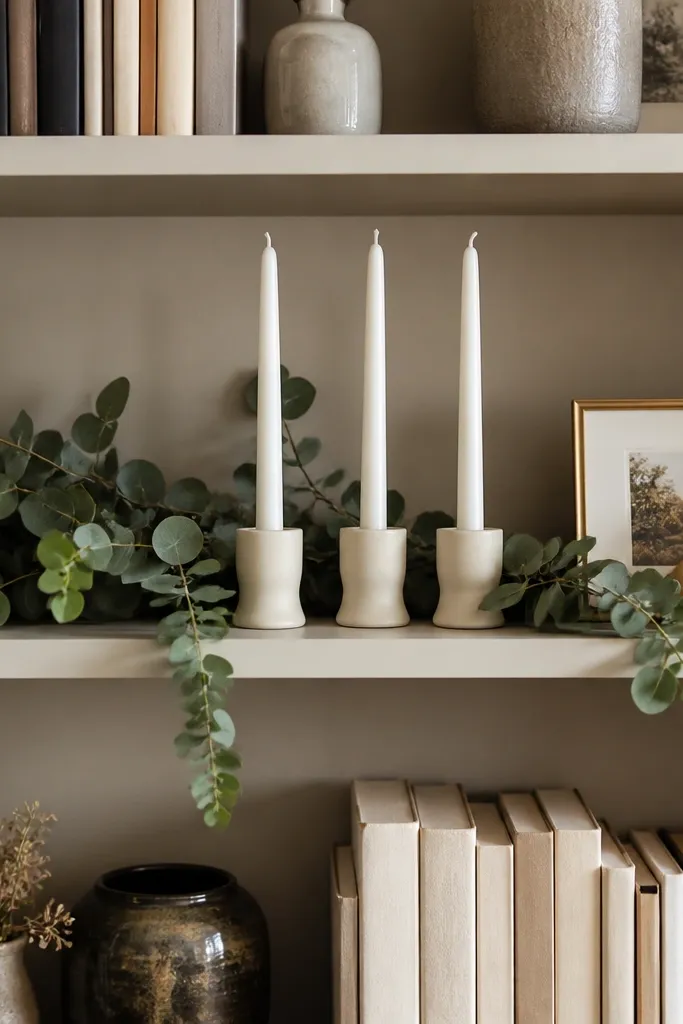
Eucalyptus adds a realistic green texture that reads well on camera, even if the rest of your home decor is mixed. White taper candles make the scene feel intentional and tidy, especially when your background is otherwise busy. This works best for couples who want a "home ceremony" vibe - standing close, speaking quietly, and taking photos at the shelf height. It flatters darker outfits like black jeans, deep green sweaters, and navy dresses because the whites and greens brighten the frame. I like it for proposals that happen in one spot, not a scavenger hunt.
Pick one bookshelf shelf and clear everything off it except three items: a garland, candles, and one photo frame. Drape eucalyptus garland across the shelf so it forms a soft arc, then tuck the ends under so it doesn't look like it's floating. Place three taper candles in matte holders with equal spacing, then add the ring box on a small gold tray at the center. Tie a 10-inch gold ribbon around the frame (or use a gold paper strip) so there's a second warm accent. Light the candles 10 minutes before the proposal so the flame stabilizes, then take photos from 6-8 feet away for a clean whole-shot.
Try thisMist eucalyptus lightly with water 15 minutes before so it looks fresh and not dry in close-ups.
Common mistakeAvoid glossy candle holders; they create harsh reflections that blow out highlights on phones.
5. Rose petals + a single dark velvet throw backdrop
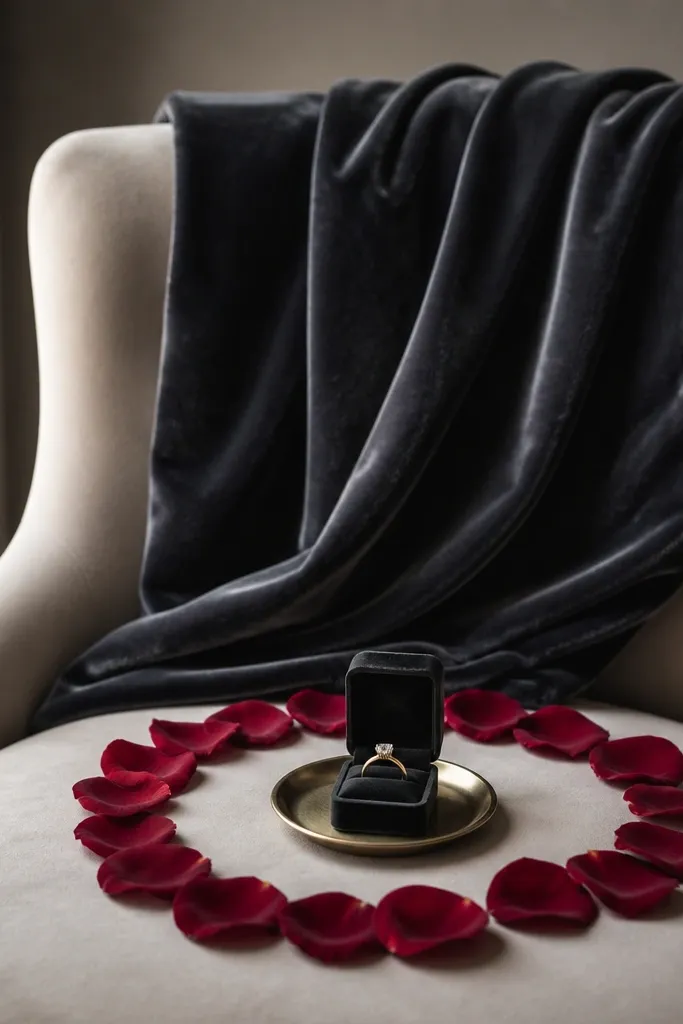
Rose petals alone look messy fast, but velvet gives them structure. A dark charcoal velvet throw makes your skin look warmer and your eyes look brighter because the background absorbs light instead of reflecting it. This is a strong choice for couples in jewel tones - emerald, burgundy, cobalt - because the contrast feels cinematic. It also photographs well for close portraits because the texture is readable and the petals create tiny highlights that look romantic rather than chaotic. I use this when I want "intimate and dramatic" without turning the room into a theme park.
Drape the velvet throw smoothly over the chair back so it's taut and fills the background behind where your faces will be. Place a gold or brass tray on the seat and put the ring box centered on it. Scatter petals in a tight circle around the tray - about 30-40 petals - so it looks intentional. Keep the rest of the chair clean; one neat chair is easier to photograph than a whole-floor petal mess. Turn off overhead lights and use one warm lamp beside the chair, then take a test shot from slightly above to see petal distribution.
Try thisUse petals from fresh roses if you can; they look thicker and more dimensional than dried craft petals.
Common mistakeAvoid carpet-level petal scattering; it turns into random confetti in photos.
6. A "love letter" hallway path with warm fairy lights
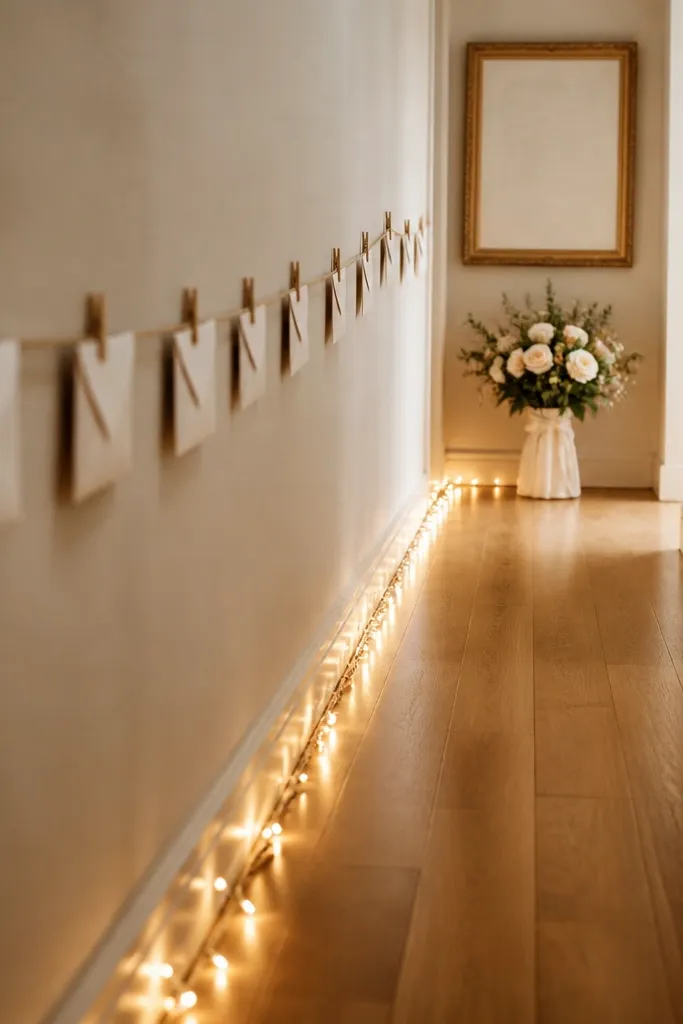
A hallway path gives you a built-in camera movement story. Warm fairy lights add a soft glow without looking like a Christmas tree if you keep the strand thickness slim and the color warm white. This setup suits playful couples who like a moment of anticipation before the actual proposal. It also works for photos because the lights create depth lines down the hallway, so your faces don't disappear into a flat background. I've done this in narrow apartments where the only "decor" is the corridor.
Start by cleaning the hallway floor and clearing the last 6 feet so the camera has open space. Hang 8-12 small envelopes along the wall with clothespins at about shoulder height, leaving the floor clear. Write each letter on cream paper and put a tiny clue or word inside, then put the ring clue in the final envelope. Place a bouquet and a small framed photo at the end of the path so that's your final stop. Turn off overhead lights, leave the fairy lights on warm mode, and set your phone on a tripod at the starting point for a consistent shot.
Try thisUse warm white fairy lights labeled 2700K if you buy online; cool blue lights make skin look tired.
Common mistakeAvoid too many envelopes; 8-12 is enough for a full moment without cluttering the frame.
7. Matcha + cream picnic proposal on the living room rug
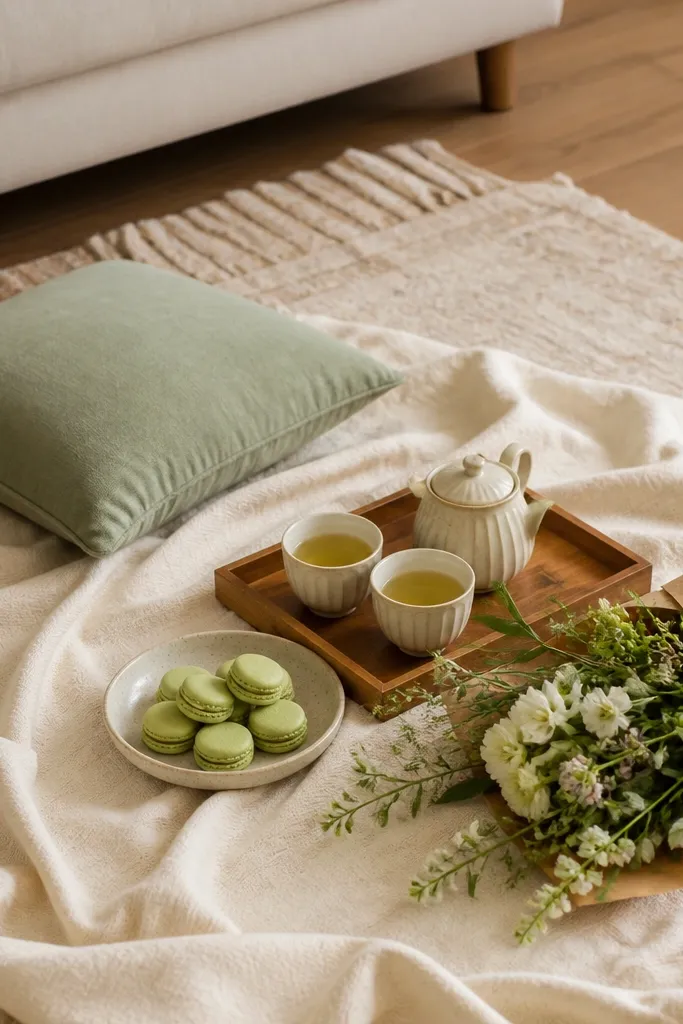
This is one of my favorite "at home" looks because it's aesthetic and functional. Cream blankets make faces look soft, and matcha green adds a calm, modern tone that photographs cleanly. It flatters people with warm skin tones and also looks great on cool undertones because green sits nicely beside both. The picnic format gives you natural poses: sitting close, passing a cup, laughing. It works best for couples who don't want a formal setup and want their proposal to feel like a cozy date.
Lay a cream blanket on the rug and smooth it flat so you don't get wrinkles under your elbows. Add one small wooden tray with two cups and a small bowl of snacks (macarons, strawberries, or tea biscuits). Wrap a bouquet in kraft paper with a thin green ribbon and place it on the tray edge so it stays in frame. Keep the ring box on a folded napkin at the front of the tray so it's easy to reveal. Dim overhead lights and use one lamp near the rug for warm side lighting.
Try thisMatch your outfit to the palette: cream, beige, soft green, or white shirt - avoid bright neon for photos.
Common mistakeAvoid mixing too many snack colors; one green accent plus creams looks intentional.
8. Monogrammed napkin rings with a faux restaurant setting
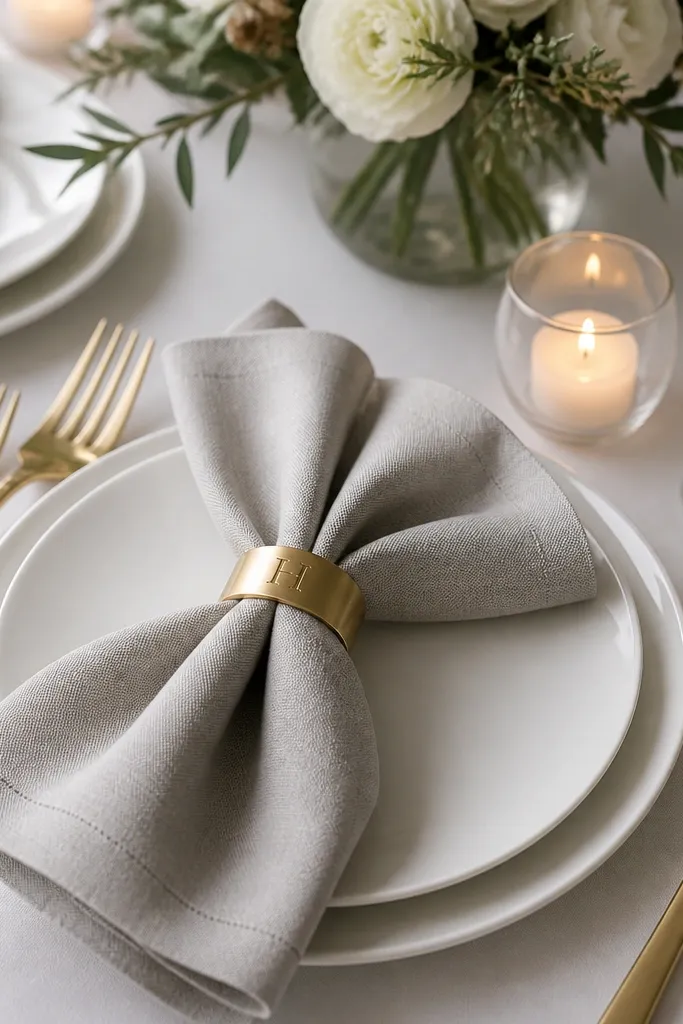
A faux restaurant setup makes the proposal feel like you planned an event without leaving the house. Monogram napkin rings add a personal touch that reads clearly in close photos. White plates keep the scene bright and clean, while linen napkins add texture so the frame doesn't look like a cafeteria. This works for both casual and dressy couples because the base is neutral; you can dress it up with a suit jacket or a satin dress. I like this when you want a "sit down and be romantic" moment with clear staging.
Set the table with white plates and a light gray or beige linen napkin, folded into a clean rectangle or classic triangle. Put a gold napkin ring on each napkin and add a small sprig of greenery under the ring if you want a subtle organic detail. Place a single candle in a glass holder in the center and keep the ring box on a small plate beside it. Add one simple glass per person and keep the rest of the table uncluttered. Turn off overhead lights and let one warm lamp light the table from the side.
Try thisFold napkins the same way on both sides; asymmetry makes photos look messy even if you feel romantic.
Common mistakeSkip plastic tablecloths; they wrinkle and catch light in a way that looks cheap.
9. Framed photo grid with a ring box hidden behind the last frame
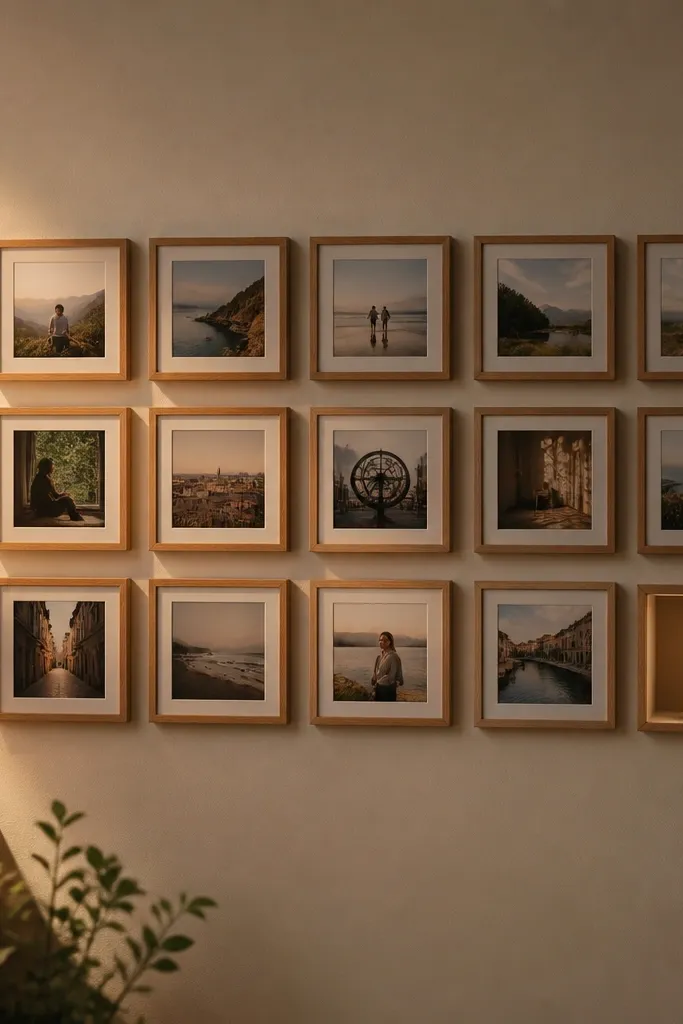
Photo grids work because they tell a story without clutter. When you hide the ring behind the last frame, you get a reveal moment that looks intentional and feels personal. This setup flatters couples who already have photos printed and want to make them part of the proposal. It also photographs well because frames create strong geometry - your faces sit in front of a clean, organized background. I use this for couples who like sentimental, quiet energy.
Print 8-10 photos in a consistent size, then place them in matching frames. Arrange them in a 3x3 grid with one empty spot or one frame that you can open from the side. Put the ring box behind the last frame - wrap it in tissue so it doesn't rattle - then tape the back so it stays secure until the reveal. Choose warm side lighting from a floor lamp so the wall isn't flat. Practice opening the frame without shaking the whole grid, and stand where the camera catches both your faces and the grid.
Try thisUse the same photo finish for all prints (matte or glossy), or the grid looks uneven in close shots.
Common mistakeAvoid mixing frame styles; different colors and thicknesses make the wall look DIY.
10. Candlelit bath proposal with a towel "arch" and rose oil
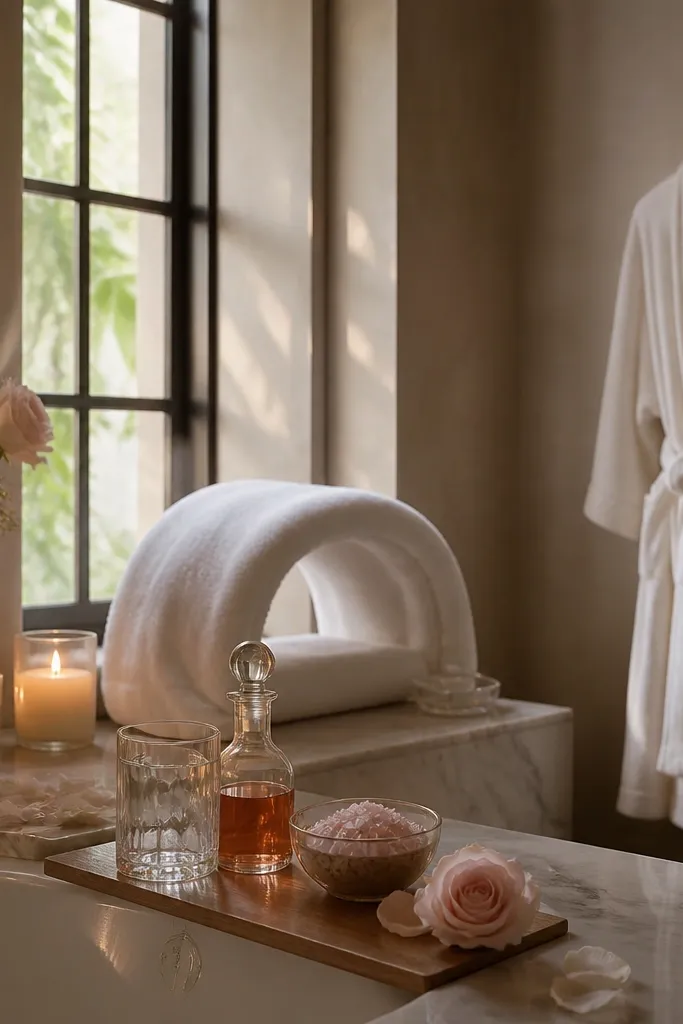
If you want something intimate and low-effort, a bath proposal is hard to beat. The key is to make the scene look styled, not chaotic: a tidy towel arch behind you and candles placed low enough to create a warm glow. This flatters skin because bathroom lighting is usually warm and close-range photos show faces clearly. It works best for couples who are comfortable with a quieter, private vibe and who don't mind a few minutes of prep. I've done this with both casual and dressed-up outfits, and the robe always photographs better than jeans and a hoodie.
Start by cleaning the counter and setting a small tray with bath salts, a bottle of rose oil, and two glasses. Roll two towels tightly and fold them into an arch behind the spot where you'll stand or sit; keep the arch centered. Place 3-5 candles on the counter away from water splashes, and keep the bathroom fan off so the flame doesn't flicker too hard. Put the ring box inside a small waterproof dish or wrap it in plastic first, then place it on the tray. Take photos with the camera at shoulder height so you capture the arch and your faces.
Try thisWarm the bathroom towels with a space heater or dryer for 10 minutes before - it makes the whole moment feel luxurious in photos and in real life.
Common mistakeAvoid heavy perfume sprays; the scent can linger in a way that distracts from the moment.
11. Champagne bucket with gold ribbon + mirror selfie moment
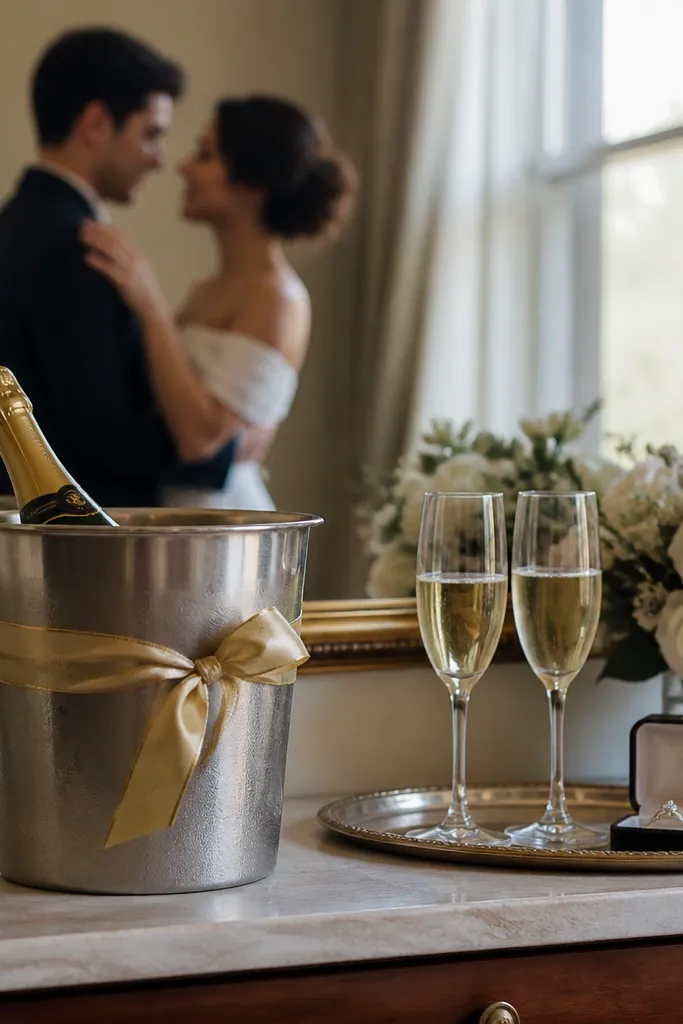
This one is for couples who like a little glam and don't mind being photographed. A champagne bucket with gold ribbon brings that "date night" feeling, and the mirror gives you a second angle without needing a second person to shoot. It flatters outfits because reflective surfaces catch warm light and make skin look smoother in photos. Use it when you want your proposal to feel like an event even though it's in your home. I've seen this setup work especially well for proposals in bedrooms or dining rooms with one good mirror.
Place a small champagne bucket or metal pail on a table and wrap it with a gold ribbon so the ribbon forms a vertical line in the frame. Put two champagne flutes nearby, then set a bouquet in a vase on the opposite side to balance the composition. Place the ring box on a tray near the mirror edge so it's visible in the reflection. Turn on one warm lamp and angle it so it lights your faces, not the ceiling. Stand in front of the mirror with your partner slightly turned and keep the ring reveal at the same height each time you practice.
Try thisUse gold-toned jewelry if you can; matching metals show up cleanly in mirror shots.
Common mistakeAvoid clutter on the mirror ledge; reflections multiply mess.
12. A "constellation" string-light wall with a star map reveal
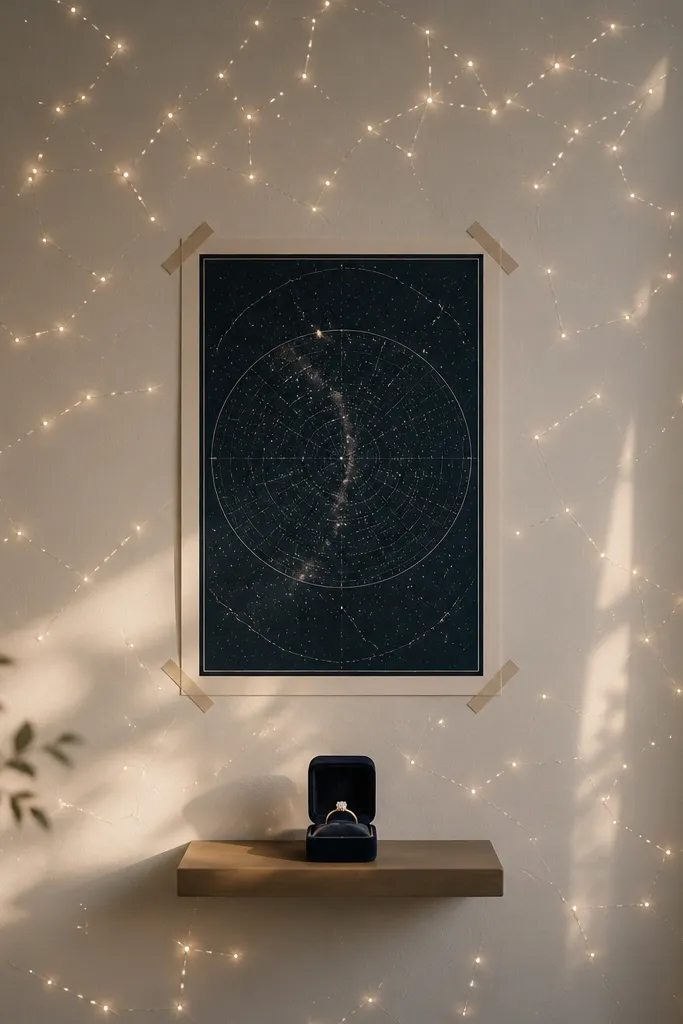
Tiny warm lights make a wall feel like a night sky, and it photographs beautifully because each point becomes a small highlight around your faces. Add a star map print and you get a story - it feels intentional, not random decor. This works for couples who like nerdy romance or who have a "first trip" memory connected to a place. It also flatters the whole scene because dark backgrounds make skin and hair stand out. I do this when the room has plain walls and you want one dramatic focal point.
Choose one wall and clear it so you have clean negative space. Hang warm micro fairy lights or pin lights in a constellation pattern (keep it simple: 25-40 lights total) and tape the wire neatly along the edges. Print a star map in a dark frame and place it at eye level, then center the ring box on a small shelf or tray directly below the map. Turn off overhead lights and use the wall lights as the main illumination. For photos, have your partner stand 2-3 feet away so the lights don't overpower the face.
Try thisUse warm white lights, not cool; cool lights make eyes look harsh on camera.
Common mistakeAvoid covering the entire wall - a dense wall turns into a glow blob instead of a constellation.
13. A velvet ring pillow on a coffee table with dried flowers
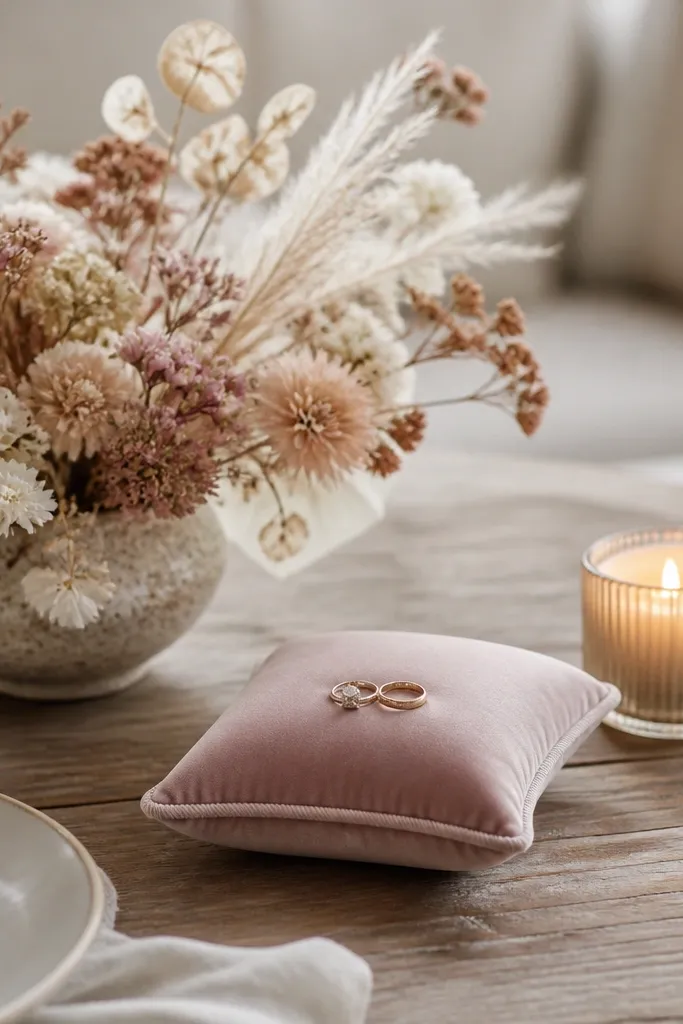
Dried flowers look good in home light because they have soft edges and don't reflect glare like fresh petals sometimes do. A velvet ring pillow gives you that clean, photo-ready focal point. This setup works for couples who want a classic proposal vibe without relying on fresh florals. It flatters neutral outfits and also makes darker outfits look richer because velvet absorbs light. I like it for living rooms where you already have a rug and couch, since the coffee table becomes the "set."
Place a low tray or small board on the coffee table and center the velvet ring pillow on it. Add dried flowers in a shallow vase so the stems don't block your hands, then place one candle next to the tray with a little negative space around it. Keep the rest of the table empty - no extra mugs or remotes in frame. Turn on one warm lamp and dim everything else. Take photos from the couch side so the ring pillow sits in the lower third of the frame.
Try thisDust off dried flowers with a soft brush before styling; loose bits look like lint on camera.
Common mistakeAvoid bright neon candles or dyed flowers; they fight with skin tones.
14. Kitchen counter reveal with a "flour heart" and ring in a jar
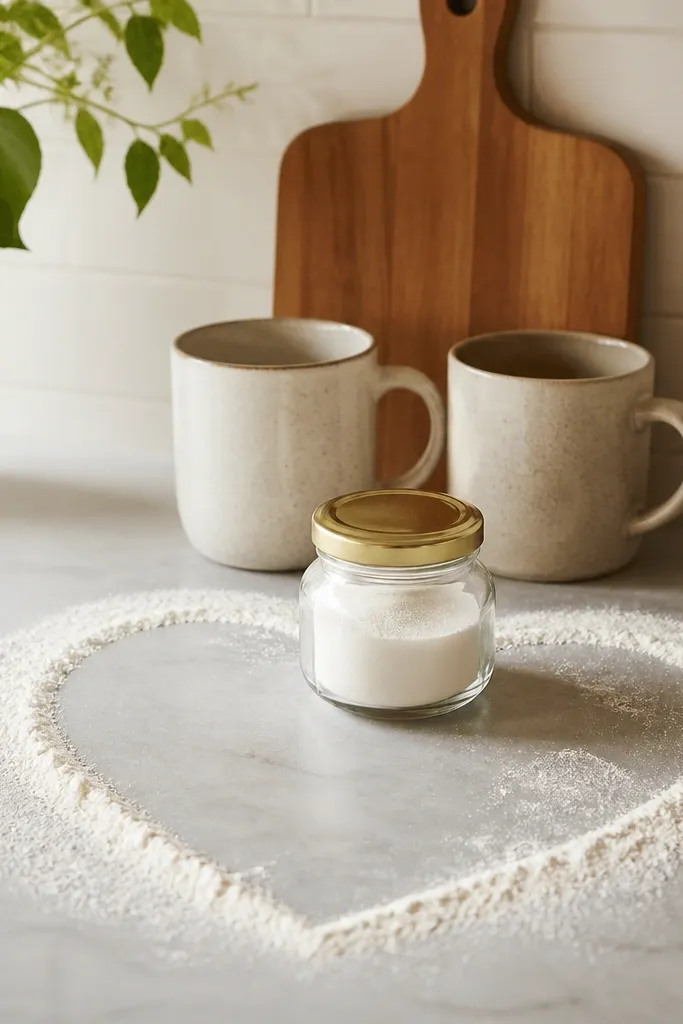
This is the one I use when the couple is playful and the proposal should feel like them. Flour hearts are visual, easy, and they read clearly in overhead shots. Put the ring in a jar so the reveal feels like a "found treasure" moment without hiding it under random objects. It photographs well because the kitchen counter is usually light and clean, and overhead angles make the heart shape obvious. I love it for couples who bake together or who don't want a big staged decor moment.
Clear a section of the counter and wipe it with a damp cloth, then dry fully. Dust flour and use a stencil or freehand to draw a heart about 6-8 inches wide, then lightly tap out excess around the edges. Put the ring box inside a small glass jar with a gold lid and set the jar centered on the heart. Style around it with two ceramic mugs and one wooden cutting board so the frame looks lived-in, not empty. Turn off overhead lights if they cast harsh shadows and use one lamp above the counter for even illumination.
Try thisPractice the flour heart once without the ring so you know how long it takes to draw clean lines.
Common mistakeAvoid cluttered countertops; the heart looks messy if there are too many items in frame.
15. A ring reveal inside a bouquet wrapped in kraft and white ribbon
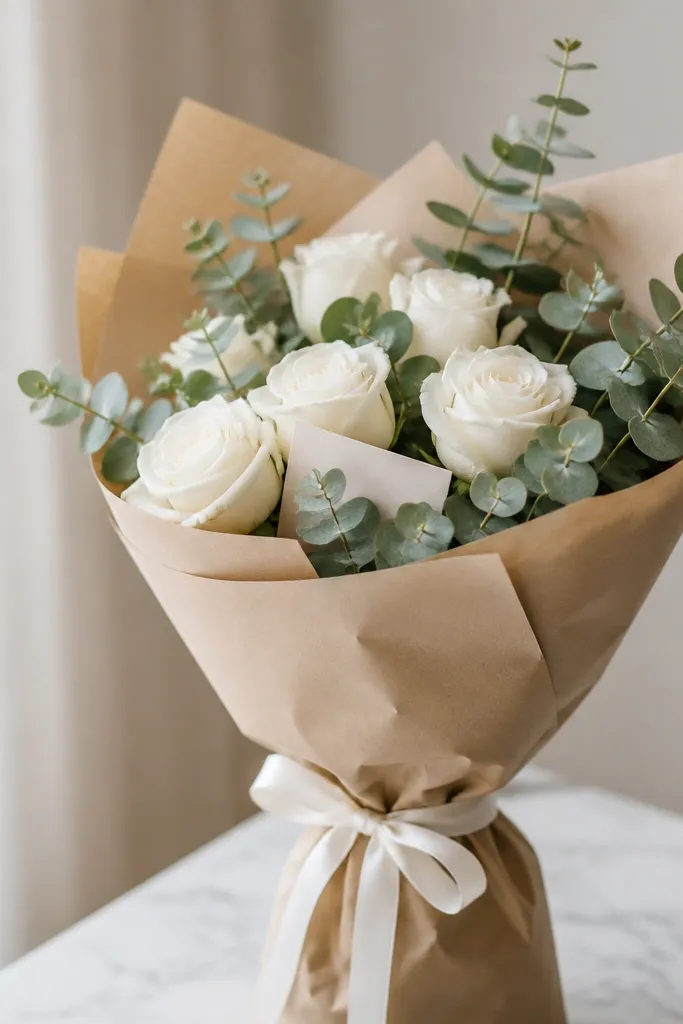
This is classic for a reason: it looks beautiful and it feels personal. Kraft paper and white ribbon give a warm, neutral look that photographs well against almost any home wall color. The bouquet becomes the focal point so your faces can stay relaxed while the reveal happens naturally. This suits couples who like a "give her/him the flowers" moment and want the proposal to feel gentle rather than performative. I've done it with both formal outfits and casual sweaters; the bouquet ties everything together.
Buy a bouquet with white blooms and a little green filler like eucalyptus or ruscus. Wrap the bouquet in kraft paper, then tie it with white ribbon in two places: one near the stems, one near the middle wrap. Make a small opening in the wrap near the center seam and hide the ring box inside with a tissue barrier so it doesn't scratch the petals. Write a short note and tuck it into the opening so it's visible. Stand by a blank wall or curtain and have your partner face the camera while you hold the bouquet just below chin height.
Try thisChoose blooms with sturdy stems; flimsy stems shift and can expose the ring box early.
Common mistakeAvoid shiny wrapping paper; it reflects overhead light and can blow out photos.
16. Sage green curtain-drape photo corner with a single balloon
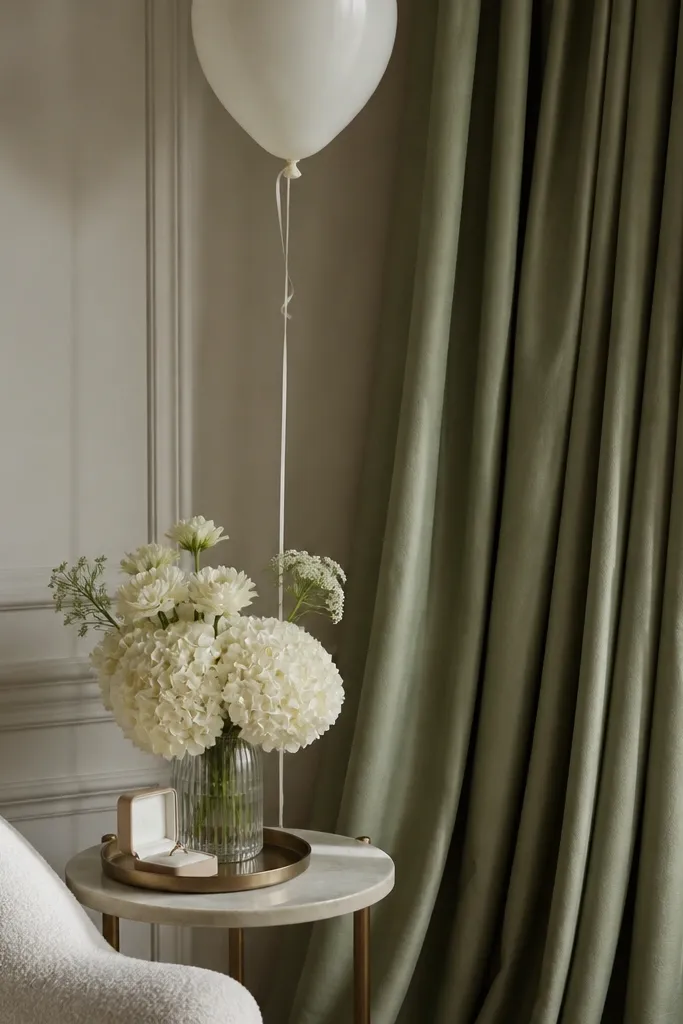
A draped curtain corner is an instant photo backdrop because it creates folds and depth. Sage green is a flattering calming color and it looks good with both warm and cool skin tones. Keeping it simple with one balloon gives you a playful accent without turning the room into a party. This setup works best for proposals in living rooms where you want one "design moment" and then the rest of the room can stay normal. I like it for couples who want a clean, modern aesthetic rather than a romantic clutter look.
Hang a sage green fabric panel or curtain from a tension rod, letting it fall in soft folds behind where you'll stand. Place a side table in front with a vase of cream flowers and a small tray holding the ring box. Inflate one white balloon with a neutral string and tie it near the curtain top so it's visible but not blocking faces. Turn off overhead lights and use a lamp to light the curtain from the side. Take a test photo from 5 feet away to confirm the folds create a smooth background, then do the proposal with the camera at eye level.
Try thisUse a fabric with weight (like cotton or linen blend), not thin voile; heavy fabric looks expensive in photos.
Common mistakeAvoid multiple balloons or themed characters; one balloon reads intentional, many look messy.
17. A "map of us" poster on the wall with pushpins and string
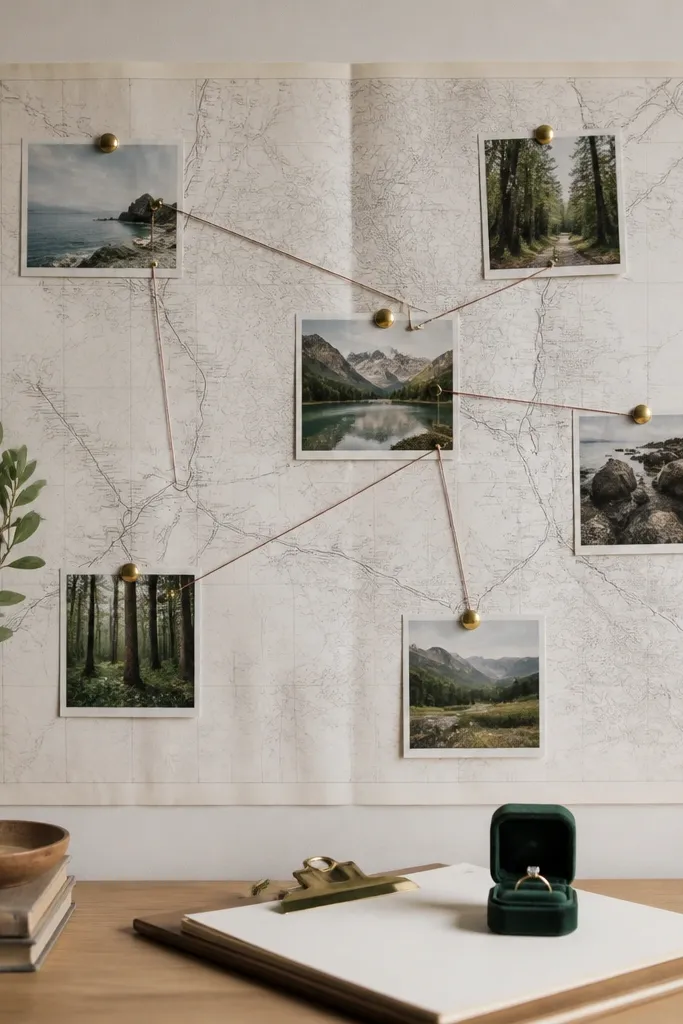
A map-of-us poster looks thoughtful because it turns your relationship story into something visual. Pushpins and string create texture and a lived-in feel, and the poster gives you a clean background that doesn't compete with your outfits. This works for couples who have traveled together or who want a "timeline" vibe without reading long letters. It photographs well because the wall is flat and the pins create tiny highlights that show up clearly on phones. I use this when I want the proposal to feel like a personal project.
Print or draw a simple line map or even a blank outline of your city on thick paper, then tape it to the wall at eye level. Pin 6-10 photos along the areas you want to mark, using brass pushpins for a warm metallic look. Run thin string between pins to show the story path, and keep the string lines neat and mostly straight. Place the ring box on a clipboard or small board directly below the poster so you can reveal it without reaching across the wall. Use one lamp to light from the side and take photos at a slight angle so the string has dimension.
Try thisChoose photos with similar color grading (all warm or all cool) so the map doesn't look patchy.
Common mistakeAvoid using too many different paper colors; it makes the poster look like a collage instead of a designed moment.
18. Floating lanterns on the balcony with a warm playlist vibe
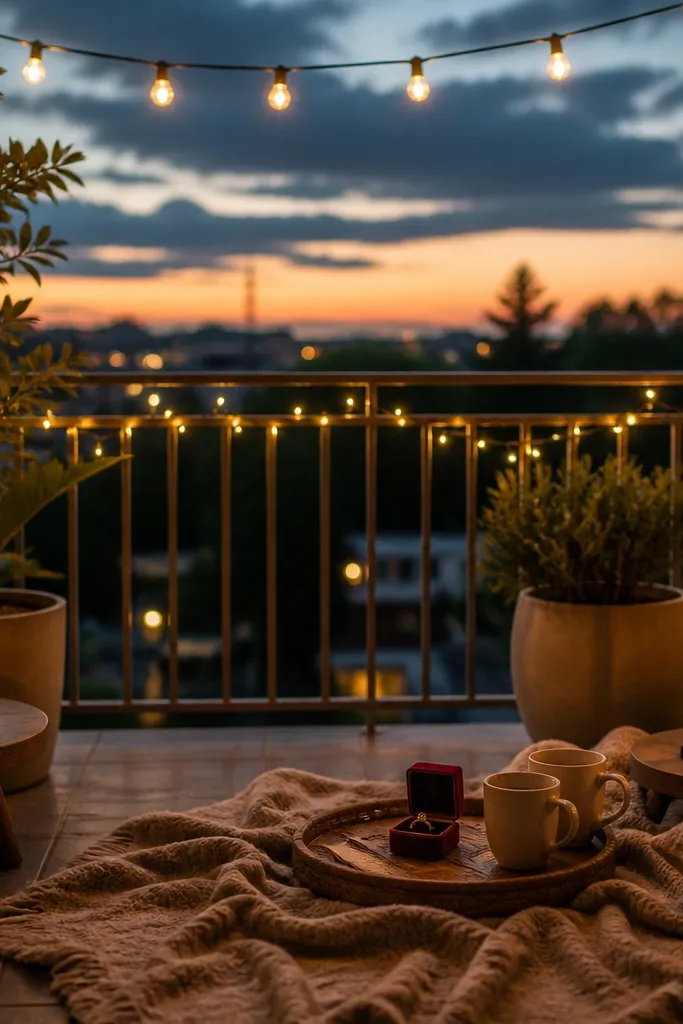
If you have even a small balcony, it changes the whole feel because you get natural depth and fewer indoor shadows. Warm lanterns and sheer lights create a soft, flattering glow that makes faces look calm instead of harsh. This setup suits couples who like a slightly outdoorsy vibe but still want it intimate. It also photographs well because the lights create separation between you and the background. I've done this on narrow balconies where the key is arranging everything so you're not blocked by railings in the frame.
Clear the balcony floor and place a low table near the railing line where the camera will point. Lay a blanket on the floor with two cushions so you have a comfortable spot for the proposal and photos. Put two warm lanterns on the tables and hang sheer patio lights overhead if you have them; keep the lights warm white. Set the ring box on a small tray next to two mugs, then keep the rest of the balcony empty. Take a test photo at night with your phone set to portrait mode off, then adjust position so your faces are brighter than the lights behind you.
Try thisUse a blanket that matches your palette (cream, tan, or deep green) so the frame looks intentional even when the balcony is small.
Common mistakeAvoid cool blue LED bulbs; they make skin look sickly under balcony night lighting.
19. Satin robe proposal with a "ring on the lap" reveal
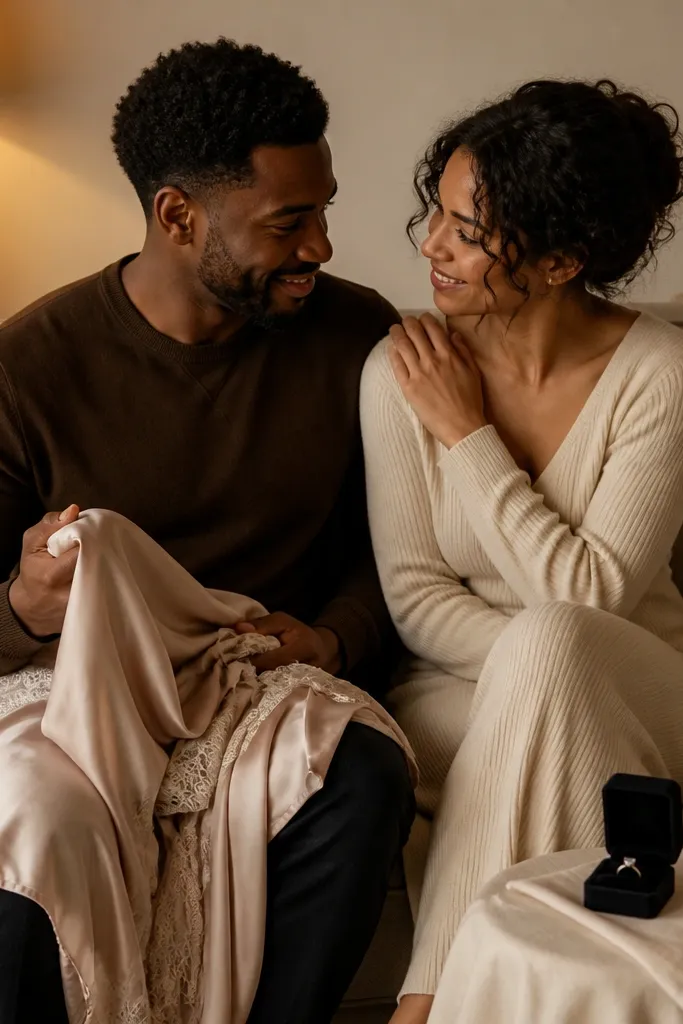
Satin robes look great because they move and catch light softly, not sharply. The "ring on the lap" reveal is intimate and it keeps both of your hands in the frame, which makes photos feel natural instead of staged. This works for couples who want a low-energy proposal - sit, talk, laugh, then reveal. It flatters most body types because robes drape and hide lumps or awkward posture while you pose. I like it for proposals that happen after dinner when you're already dressed down and comfortable.
Choose one satin robe in a color that matches your outfit palette - champagne, blush, or deep navy. Sit on the couch with your partner angled slightly toward the camera and place a small satin cloth on your lap or on the coffee table. Put the ring box centered on the cloth so it's easy to reveal without searching. Turn off overhead lights and keep one warm lamp near the couch for side lighting. Take photos from the couch arm side at about 45 degrees so you capture both faces and the robe texture without blocking with pillows.
Try thisIron the robe lightly or hang it in the bathroom steam for 10 minutes so it looks smooth on camera.
Common mistakeAvoid patterned robes with big prints; they compete with your faces and make the scene look busy.
20. Bathroom steam + towel origami ring reveal
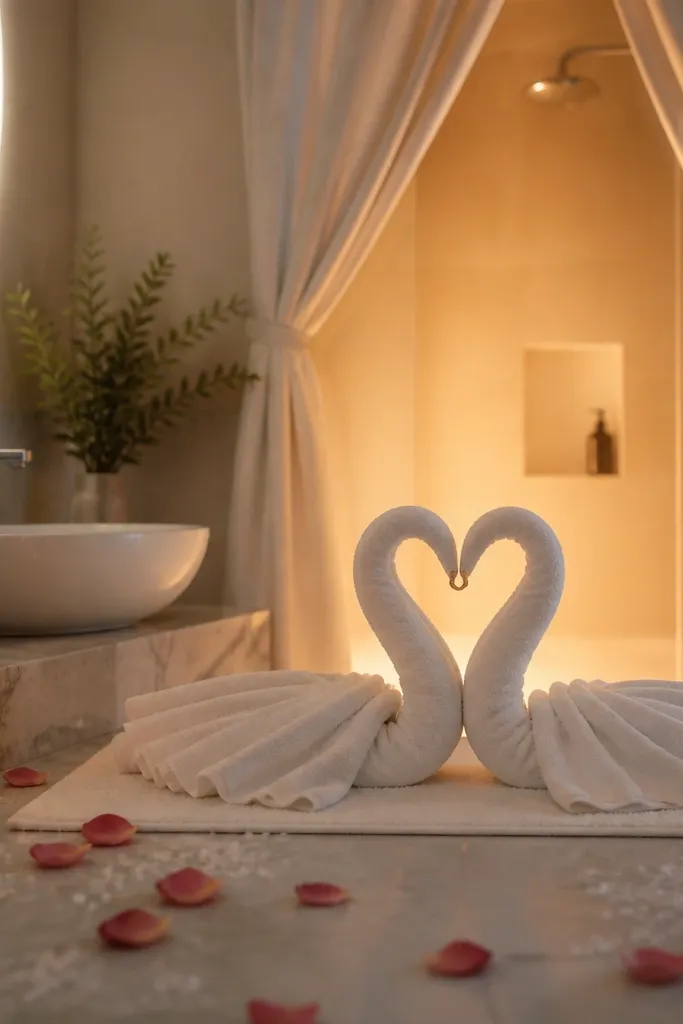
This proposal works because the bathroom feels private and slow. Steam makes everything look softer on camera and in person, and the towel swans look fancy even though you can fold them in minutes. The ring landing in a swan beak gives a clear "wait, that's there" moment without needing a big setup. I've done this with a simple white towel set and it still looks expensive because the whites catch the mirror light and the steam hides clutter in the background.
Start by clearing the bathroom counter and placing one small candle on a heat-safe tray, plus a few rose petals and a pinch of sea-salt crystals near it. Fold two hand towels into swans (or one swan if you're short on time) using a quick swan tutorial you follow once, then repeat the same fold every time. Put the ring in the swan "beak" area and set the swans on a bathmat where you'll be standing when you ask them to look. Run hot water in the shower for 3-5 minutes right before you call them in, then keep the bathroom door closed so the steam builds. Turn on the mirror light, dim the overhead if you have it, and take one quick photo before you speak so the steam doesn't fade.
Try thisUse a gold ring box insert or a tiny piece of double-sided tape under the ring so it doesn't slide in the towel fold.
Common mistakeSkip the heavy perfume oils - steam can make strong scents feel sharp fast and it can distract from the moment.